CAPILLARY REPLACEMENT PROCEDURE
CAPILLARY REPLACEMENT PROCEDURE
CAPILLARY REPLACEMENT PROCEDURE

You also want an ePaper? Increase the reach of your titles
YUMPU automatically turns print PDFs into web optimized ePapers that Google loves.
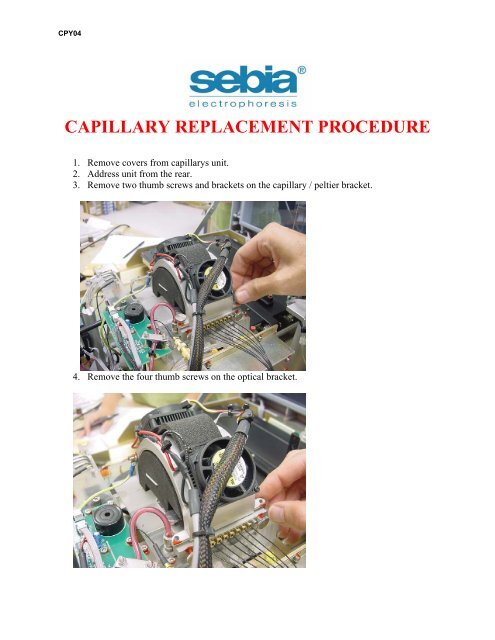
CPY04<br />
<strong>CAPILLARY</strong> <strong>REPLACEMENT</strong> <strong>PROCEDURE</strong><br />
1. Remove covers from capillarys unit.<br />
2. Address unit from the rear.<br />
3. Remove two thumb screws and brackets on the capillary / peltier bracket.<br />
4. Remove the four thumb screws on the optical bracket.
5. Remove bracket and set to side.<br />
6. Mark the left most capillary and fiber optic bracket.<br />
7. Remove foam insert.
8. Remove optical fiber bracket.<br />
9. Set optical fibers and bracket on side of unit.<br />
10. Remove defective capillary.<br />
11. Install new capillary in bracket.
12. Reinstall optical fiber brackets and thumb screws.<br />
13. Reinstall foam guard under capillaries and attach sides to foam.<br />
14. Reinstall capillary/peltier bracket.
15. Reinstall thumbscrews and brackets.<br />
16. Tighten all thumb screws and inspect unit.<br />
17. Reinstall covers.<br />
18. Test unit and check CCD Calibration Data.