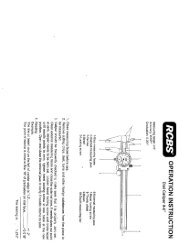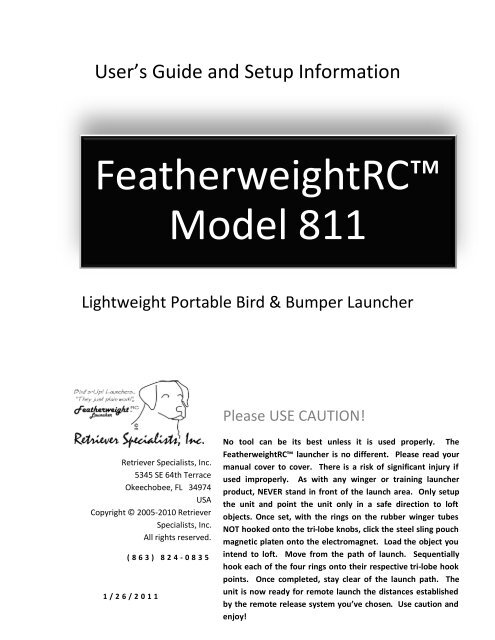
Model 811
Featherweight RC Model 811 User's Guide
Featherweight RC Model 811 User's Guide
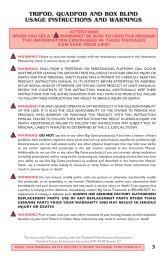
- No tags were found...

You also want an ePaper? Increase the reach of your titles
YUMPU automatically turns print PDFs into web optimized ePapers that Google loves.
User’s Guide and Setup Information<br />
FeatherweightRC<br />
<strong>Model</strong> <strong>811</strong><br />
Lightweight Portable Bird & Bumper Launcher<br />
Please USE CAUTION!<br />
Retriever Specialists, Inc.<br />
5345 SE 64th Terrace<br />
Okeechobee, FL 34974<br />
USA<br />
Copyright © 2005-2010 Retriever<br />
Specialists, Inc.<br />
All rights reserved.<br />
( 8 6 3 ) 8 2 4 - 0 8 3 5<br />
1 / 2 6 / 2 0 1 1<br />
No tool can be its best unless it is used properly. The<br />
FeatherweightRC launcher is no different. Please read your<br />
manual cover to cover. There is a risk of significant injury if<br />
used improperly. As with any winger or training launcher<br />
product, NEVER stand in front of the launch area. Only setup<br />
the unit and point the unit only in a safe direction to loft<br />
objects. Once set, with the rings on the rubber winger tubes<br />
NOT hooked onto the tri-lobe knobs, click the steel sling pouch<br />
magnetic platen onto the electromagnet. Load the object you<br />
intend to loft. Move from the path of launch. Sequentially<br />
hook each of the four rings onto their respective tri-lobe hook<br />
points. Once completed, stay clear of the launch path. The<br />
unit is now ready for remote launch the distances established<br />
by the remote release system you’ve chosen. Use caution and<br />
enjoy!
Retriever Specialists, Inc. FeatherweightRC <strong>Model</strong> <strong>811</strong> © 2005-2011<br />
Contents<br />
Thank you ................................................................................................................................................... 7<br />
Description of apparatus ............................................................................................................................ 7<br />
Specifications .............................................................................................................................................. 8<br />
Contents of package(s) ............................................................................................................................... 9<br />
In the Tube… ........................................................................................................................................... 9<br />
In the Cube… ........................................................................................................................................... 9<br />
1. FUSE Fuseholder ........................................................................................................................... 10<br />
2. Electromagnet ............................................................................................................................... 10<br />
3. On/off-charge switch located on the rear top center of the launcher base. This is a 2 position<br />
switch, with “ON” having the top of the switch toggled flush toward panel. For “OFF & CHARGE”<br />
having the bottom of the switch toggled inward, flush toward panel. Pictures follow… ................. 10<br />
........................................................ 10<br />
Page | 2<br />
3/24/2011 RRS/RLS ©2005-2011 Retriever Specialists, Inc.
Retriever Specialists, Inc. FeatherweightRC <strong>Model</strong> <strong>811</strong> © 2005-2011<br />
Rear of Launcher Launcher ON Off & Charge.......................................................................... 10<br />
4. SYSTEM ON Lamp .......................................................................................................................... 10<br />
13. 14V MAX CPP Jack ..................................................................................................................... 10<br />
FWrc <strong>811</strong> Components .......................................................................................................................... 11<br />
1. Poly Bag Contents (Items 2. and 3. as follows) .............................................................................. 11<br />
2. Sling Assembly .............................................................................................................................. 11<br />
2a. Sling Pouch, Plastic Plate, Magnetic Plate ................................................................................... 11<br />
3. Loose Pieces in re-closable poly bag ............................................................................................. 11<br />
3a. Riser Arm Collars (4) 5/8” ........................................................................................................... 11<br />
3b. Riser Arm Collar Tri-Lobe Knob Screws ...................................................................................... 11<br />
3c. Extra Tubing Beads and Bead Tool ............................................................................................. 11<br />
.......................................................................................................................................................... 12<br />
2b. Attached, (4) Rubber Tubes and Pulley Mount Assemblies........................................................ 12<br />
4. Main Unit ...................................................................................................................................... 12<br />
...................... 12<br />
Page | 3<br />
3/24/2011 RRS/RLS ©2005-2011 Retriever Specialists, Inc.
Retriever Specialists, Inc. FeatherweightRC <strong>Model</strong> <strong>811</strong> © 2005-2011<br />
5. Pulley Mount Assembly ................................................................................................................. 13<br />
5a. Pulley .......................................................................................................................................... 13<br />
5b. Clevis Pin (Pulley Axle) and Hairpin Clip ..................................................................................... 13<br />
5c. Pulley Mount Body ..................................................................................................................... 13<br />
5d. Pulley Mount Attachment Knob ................................................................................................. 13<br />
..... 13<br />
6. Stand / Handle Assembly .............................................................................................................. 13<br />
7a. Stand Blades ............................................................................................................................... 13<br />
7b. Stand Handles ............................................................................................................................ 13<br />
7c. Stand Knobs (Holding blades to main unit) ................................................................................ 13<br />
Page | 4<br />
3/24/2011 RRS/RLS ©2005-2011 Retriever Specialists, Inc.
Retriever Specialists, Inc. FeatherweightRC <strong>Model</strong> <strong>811</strong> © 2005-2011<br />
..................................... 14<br />
7. Drawstring Pouch .......................................................................................................................... 14<br />
8. Battery Charger ............................................................................................................................. 15<br />
.......................................................................................................... 15<br />
First time assembly set-up ........................................................................................................................ 15<br />
Using the launcher .................................................................................................................................... 15<br />
Set the launcher in a reasonable position. ............................................................................................ 16<br />
Tension Adjustment Collar Settings ...................................................................................................... 16<br />
Channel Selection ................................................................................................................................. 17<br />
Lock, Load and Cock… Play sound and Launch!.................................................................................... 17<br />
Apply tension using tension rings on sling assembly ............................................................................ 17<br />
Subsequent Lock, Load and Cock… ....................................................................................................... 18<br />
Optional Loudspeaker Installation and Use .......................................................................................... 18<br />
Optional Hold-A-Bird pouch .................................................................................................................. 18<br />
Throw angle adjustment ........................................................................................................................... 19<br />
Page | 5<br />
3/24/2011 RRS/RLS ©2005-2011 Retriever Specialists, Inc.
Retriever Specialists, Inc. FeatherweightRC <strong>Model</strong> <strong>811</strong> © 2005-2011<br />
Company Information ............................................................................................................................... 19<br />
Warranty ................................................................................................................................................... 20<br />
Mechanical Components .................................................................................................................. 20<br />
Electronic Components ..................................................................................................................... 20<br />
Contact Us ................................................................................................................................................ 20<br />
POLARITY REVERSING JUMPER<br />
For those that are using Tri-Tronics remote release systems, you must use this polarity reversing jumper<br />
between the cord from the launcher and the control.<br />
For those using Dogtra, you can simply run the cord from the launcher directly into the remote receiver.<br />
Page | 6<br />
3/24/2011 RRS/RLS ©2005-2011 Retriever Specialists, Inc.
Retriever Specialists, Inc. FeatherweightRC <strong>Model</strong> <strong>811</strong> © 2005-2011<br />
Safety First!<br />
To prevent injury to persons loading or setting up any launching device, always stand at the side or in<br />
the rear of the unit. Read and become familiar with the operation and function, care and proper use<br />
of the device before attempting to use it for the first time.<br />
Thank you<br />
Thank you for your buying the most advanced launcher available today. All of us at Retriever Specialists,<br />
Inc., want to insure you that exhaustive precautions have been taken to provide you with a high quality,<br />
safe and easy to use training device for you and your companion.<br />
Description of apparatus<br />
<strong>Model</strong> <strong>811</strong>FWrc<br />
The <strong>Model</strong> <strong>811</strong>FWrc is a training and testing device which lofts objects (bumpers, training decoys,<br />
mallards, etc.) for the purpose of ‘throwing marks’ for retriever training. This product has been<br />
developed to address the need for safe, consistent, rugged, reliable training tools. It hits the mark.<br />
With volume controlled sound, the failsafe launch system and consistent throws in an ultra-light and<br />
small package, this launcher out does any other winger product on the market today.<br />
The proprietary Safe-n-Silent release system is the most reliable system available of any launcher on<br />
the market. The Safe-n-Silent release system virtually never fails to respond and release making the<br />
<strong>Model</strong> <strong>811</strong>FWrc the most consistent launcher available. The <strong>Model</strong> <strong>811</strong>FWrc produces consistently<br />
repeatable throws.<br />
The base of the <strong>811</strong>FWrc is a steel 2 piece unit that is powder coated for extreme durability. The<br />
fiberglass riser arms, aluminum pulley holders and rubber tubes are rugged and produce excellent loft<br />
and throw distances for retriever training.<br />
The payload pouch is 14” square denier nylon Cordura® with 2” nylon webbing sewn diagonally and<br />
along each side with a center stitch for a secure hold. The Pro models include bird holding straps.<br />
The power for the unit is provided by an advanced spill-proof glass matt sealed lead-acid rechargeable<br />
12 volt battery. The battery is rated for 8 Amp Hours. Meaning, one can draw an amp per hour for 8<br />
hours before the battery voltage drops below usable charge status.<br />
The <strong>Model</strong> <strong>811</strong>FWrc draws about 400mA while on and brief excursions of 1A for a few seconds while<br />
the external sound amplifier is active. The amplifiers are only active during sound playback.<br />
The unit will provide several hours of use on a full charge.<br />
Page | 7<br />
3/24/2011 RRS/RLS ©2005-2011 Retriever Specialists, Inc.
Retriever Specialists, Inc. FeatherweightRC <strong>Model</strong> <strong>811</strong> © 2005-2011<br />
The antenna is an integral part of one of the launch arms and is vertically raised to 40”. There is a plug<br />
in connector at the base of the antenna arm which plugs into the main body of the <strong>Model</strong> <strong>811</strong>FWrc<br />
launcher.<br />
You will notice that the unit contains a circuit that monitors the battery condition and when it needs to<br />
be charged, the indicator for “Charge Required” will illuminate red. It is highly advised that you do<br />
recharge at that point so you have reliable hold power and continued good reception range.<br />
For remote release capability, every <strong>Model</strong> <strong>811</strong>FWrc requires a system to be added.<br />
available from Retriever Specialists or several other retailers.<br />
These are<br />
There is a nylon carry bag for the arms, rubber tubes and the pouch, plus storage of the improved carry<br />
handle and stands, that has a shoulder strap for ease of carrying, and prevention of the loss of small<br />
parts that might drop off.<br />
The stands serve for stability while loading, tensioning and launching. Then, the center foam rubber grip<br />
serves as a carry handle.<br />
Specifications<br />
<br />
<br />
<br />
<br />
<br />
<br />
<br />
<br />
<br />
<br />
<br />
<br />
<br />
<br />
New denier nylon carry pouch for sling apparatus with shoulder strap.<br />
Extremely lightweight, net weight is under 16 pounds.<br />
Retriever Specialists' Safe-n-Silent release system uses NO SERVOS, MOTORS, SOLENOIDS, METAL<br />
SPRING ARMS or the like.<br />
Maintenance free Safe-n-Silent hold and release system is all electric and is electronically controlled...<br />
and there are NO MOVING MECHANICAL PARTS. When triggered the electric holding force releases.<br />
Tested and held a full load under full force for 30 hours+ straight starting with a full charge, using no<br />
latches or mechanical fastening.<br />
Black powder-coated baked finish over a special anti-corrosion base.<br />
Improved battery protection and hold downs.<br />
Rugged Invista Cordura® Denier sling pouch, weatherproof vinyl polyurethane, grommeted corners.<br />
Throw Height: 25 to 35 feet high, adjustable depending on tension setting (Pro model enhanced)<br />
Throw Distance - 22 to 28-Yards (Pro model enhanced)<br />
Battery: 7aH spill proof rechargeable AGM / SLA battery.<br />
Charger: Rapid 2-stage charger system. Quick recharge and trickle mode. (Pro model enhanced)<br />
Sturdy removable stand / handle.<br />
Arms: 40 or 48-Inch fiberglass arms, dependent upon model, with visible orange roller pulleys.<br />
Page | 8<br />
3/24/2011 RRS/RLS ©2005-2011 Retriever Specialists, Inc.
Retriever Specialists, Inc. FeatherweightRC <strong>Model</strong> <strong>811</strong> © 2005-2011<br />
<br />
High strength replaceable winger rubbers.<br />
Contents of package(s)<br />
In the Tube…<br />
(4) Fiberglass Riser Arms<br />
(2) Stand Blades<br />
(1) Stand Handle<br />
In the Cube…<br />
(1) FWrc <strong>Model</strong> <strong>811</strong> Main Body<br />
(1) Sling Pouch Assembly in the re-closable poly bag.<br />
Sling Pouch Assembly includes…<br />
(1) Payload Pouch with Plastic Upper plate and Magnetic Lower Plate<br />
(4) Sling Rubbers with beads and Tension Hook Rings<br />
(4) Pulley Mounts with Pulley, Pin, Clip and Screw Knob (to affix mount to riser arm)<br />
(1) Bead Tool & extra beads (for inserting tube beads when replacing winger rubber tubes).<br />
(1) Carry Bag, with Drawstring and Shoulder Strap<br />
(1) Dual rate battery charge<br />
Page | 9<br />
3/24/2011 RRS/RLS ©2005-2011 Retriever Specialists, Inc.
Retriever Specialists, Inc. FeatherweightRC <strong>Model</strong> <strong>811</strong> © 2005-2011<br />
1. FUSE Fuseholder<br />
This is a twist in fuse holder and takes either a small coin or screwdriver to remove the fuse<br />
holding center part. The fuse is a 3AG glass fuse available most places that sell automotive type fuses.<br />
If you need to replace a blown fuse, try to determine the cause of the fuse failure. If there are no<br />
obvious defects that should cause a fuse to fail, proceed to change the fuse. To do so, push the plunger<br />
down and in slightly, then turn to the left while depressed (approximately ¼ turn). The center plunger<br />
will pop out with the fuse. Inspect the fuse cartridge and replace if blown. Use no more than a 3A fuse.<br />
2. Electromagnet<br />
The heart of the launcher, RSI’s Safe-n-Silent hold and release system. This specially<br />
engineered electromagnet holds the steel pouch plate which is affixed to the bottom of the pouch until<br />
power to the electromagnet is interrupted. Pushing a LAUNCH button will interrupt the power when<br />
pressed, releasing the hold to launch the payload sling on all regional FWrc units set on that channel.<br />
3. On/off-charge switch located on the rear top center of the launcher base. This is a 2 position<br />
switch, with “ON” having the top of the switch toggled flush toward panel. For “OFF & CHARGE” having<br />
the bottom of the switch toggled inward, flush toward panel. Pictures follow…<br />
Rear of Launcher<br />
Off & Charge<br />
Launcher ON<br />
4. SYSTEM ON Lamp<br />
This bright green lamp indicates the system is on and has power. If you toggle the power up<br />
(on) to operate the device, the green ON lamp will be lit. If it is not, there is an issue with power to the<br />
device. If this happens, check for a completely discharged battery or a blown fuse.<br />
13. 14V MAX CPP Jack<br />
This is the jack for the plug on the battery charger cable. Plug the charger into this jack. Plug<br />
the charger into a standard 120VAC USA wall outlet to charge the battery that is inside the unit. The<br />
battery charger is a dual rate charger and charges at higher rates until the battery is full, then changes to<br />
a trickle charge and maintains the battery at full charge. Leaving the charger connected insures that the<br />
battery is always at full capacity. IT IS HIGHLY RECOMMENDED TO KEEP THE TRICKLE ON DURING YOUR<br />
UNITS SHELF TIME BETWEEN USES. This WILL prolong battery life. Batteries may last up to 2-years if<br />
maintained. Life expectancy for batteries that are discharged and not recharged within 24-hours of<br />
Page | 10<br />
3/24/2011 RRS/RLS ©2005-2011 Retriever Specialists, Inc.
Retriever Specialists, Inc. FeatherweightRC <strong>Model</strong> <strong>811</strong> © 2005-2011<br />
depletion will have ability greatly reduced, to 16 to 18 months, at best. RSI battery warranty is for 1-<br />
year after the initial purchase date.<br />
FWrc <strong>811</strong> Components<br />
1. Poly Bag Contents (Items 2. and 3. as follows)<br />
Open the re-closable poly bag and identify these items:<br />
2. Sling Assembly<br />
2a. Sling Pouch, Plastic Plate, Magnetic Plate<br />
3. Loose Pieces in re-closable poly bag<br />
3a. Riser Arm Collars (4) 5/8”<br />
3b. Riser Arm Collar Tri-Lobe Knob Screws<br />
3c. Extra Tubing Beads and Bead Tool<br />
(Pictured above)<br />
Page | 11<br />
3/24/2011 RRS/RLS ©2005-2011 Retriever Specialists, Inc.
Retriever Specialists, Inc. FeatherweightRC <strong>Model</strong> <strong>811</strong> © 2005-2011<br />
2b. Attached, (4) Rubber Tubes and Pulley Mount Assemblies<br />
4. Main Unit<br />
(Pictured above)<br />
Page | 12<br />
3/24/2011 RRS/RLS ©2005-2011 Retriever Specialists, Inc.
Retriever Specialists, Inc. FeatherweightRC <strong>Model</strong> <strong>811</strong> © 2005-2011<br />
5. Pulley Mount Assembly<br />
5a. Pulley<br />
5b. Clevis Pin (Pulley Axle) and Hairpin Clip<br />
5c. Pulley Mount Body<br />
5d. Pulley Mount Attachment Knob<br />
6. Stand / Handle Assembly<br />
7a. Stand Blades<br />
7b. Stand Handles<br />
7c. Stand Knobs (Holding blades to main unit)<br />
Page | 13<br />
3/24/2011 RRS/RLS ©2005-2011 Retriever Specialists, Inc.
Retriever Specialists, Inc. FeatherweightRC <strong>Model</strong> <strong>811</strong> © 2005-2011<br />
7. Drawstring Pouch<br />
Page | 14<br />
3/24/2011 RRS/RLS ©2005-2011 Retriever Specialists, Inc.
Retriever Specialists, Inc. FeatherweightRC <strong>Model</strong> <strong>811</strong> © 2005-2011<br />
8. Battery Charger<br />
First time assembly set-up<br />
When you first assemble your unit, you will affix the pulley mounts to the riser arms. This is known as<br />
the sling assembly. Drop your sling assembly along with the stand handle and stand blades in the pouch<br />
to store them. When done using the launcher, unplug the antenna; slide the riser arms out of the base<br />
and the arms with sling pouch intact. The stand/handle and stand blades will remain on the launcher<br />
until you reach the area where you want to store them, usually your vehicle. Loosen up 2 hand knobs<br />
for each leg, when you reach your vehicle and the stand / handle parts will come right off and fit right<br />
into the carry bag for storage.<br />
Pulley Mount Caution<br />
Caution needs to be exercised when assembling the pulley mounts to the ends of the rods. It is<br />
important to align two of the items that are on the rod, the pulley mounts and the hand knob that is<br />
used to hook the 2” ring over when tensioning the winger rubber tubes. This is especially critical for the<br />
rod with the antenna affixed to it. To set this up, when you drop the pulley mount onto the rod, be sure<br />
that the pulley is positioned so that the rubber tube is going straight down to the corner of the pouch,<br />
before tightening the hand knob that secures the pulley mount to the rod. Then make sure that the<br />
hand knob is straight below the pulley slot and the rubber tube. This prevents the rod from turning in<br />
the base when you launch and damaging the antenna plug.<br />
Using the launcher<br />
Field setup is very simple and requires NO special hides (that can attract a dog’s attention). The<br />
Featherweight is so small and since using it requires that no one remain in the area, the unit almost<br />
disappears in the scrub and grass when it is in use. So, carry the unit to the desired location, set it up,<br />
point it in the direction you want to launch the birds or bumpers, Lock, Load and Cock… and you’re<br />
ready for sound playback and consistent launches for hours. See the following illustrations and<br />
instructions for using the Featherweight launchers.<br />
Page | 15<br />
3/24/2011 RRS/RLS ©2005-2011 Retriever Specialists, Inc.
Retriever Specialists, Inc. FeatherweightRC <strong>Model</strong> <strong>811</strong> © 2005-2011<br />
Set the launcher in a reasonable position.<br />
You can count on throws 25-30 feet high and 22-28 yards out. Setup is very simple and requires NO<br />
special hides to attract a dog’s attention. Carry the unit to the desired location, set it on the ground, and<br />
aim it in the direction you want to launch the birds or bumpers. (Pro model enhanced distances).<br />
Install the Sling Assembly<br />
To install the sling assembly, insert the 4 fiberglass rods (known as the riser. The 4 riser arms are<br />
inserted into their respective corners<br />
Tension Adjustment Collar<br />
Settings<br />
Page | 16<br />
3/24/2011 RRS/RLS ©2005-2011 Retriever Specialists, Inc.
Retriever Specialists, Inc. FeatherweightRC <strong>Model</strong> <strong>811</strong> © 2005-2011<br />
Set all four tension adjustment collars (the steel rings with the tri-lobe knobs) at the same distance<br />
above the main unit. Affixing collars mid-way from face of unit to pulley mounts is a good start point.<br />
Note: It is possible to set the tension collars very high and achieve only very short throws. It is also<br />
possible to set the collars too low and over power the magnet’s ability to hold. We do not recommend<br />
setting the tension collars lower than 4 inches above the top of main unit. Setting the collar positions<br />
higher will result in less taught tension and therefore shorter throws. Conversely, setting the collars<br />
lower, nearer the main unit will allow more tension and<br />
result in longer, higher throws.<br />
Be sure that the tension collar knobs point outward and<br />
away from the center. This will allow you to cinch the<br />
rubber tubes down and hook the rings on the tri-lobe knobs<br />
after the pouch is affixed on the magnet with the payload<br />
in place. This is easily achieved by making sure the tri-lobe<br />
knob is in line with the tube exiting the pulley mount above<br />
(that sits on top of the riser arm) is aligned with the knob.<br />
This should allow for a straight path for the tube to roll over<br />
the pulley and straight down so it can hook over the tri-lobe knob.<br />
Channel Selection<br />
Set the rotary switch to the letter you wish to use to launch this particular launcher. If you are only<br />
setting up one unit, any letter will do, typically you would select A or 1.<br />
(Subsequent units will be set-up in your training spread and each additional unit will be set to a different<br />
letter. Typically, users set the units in positions that correspond with the order that they intend to<br />
launch in, i.e. A first, then B and so on.<br />
Lock, Load and Cock… Play sound and Launch!<br />
With power on and channel set, push the pouch down until the magnet grips the steel plate and holds<br />
it. The 4 screws that protrude from the steel plate<br />
on your sling pouch must straddle the magnet to<br />
insure proper alignment of the plate so that the<br />
complete magnet face is in use for maximum hold.<br />
Now it’s locked.<br />
Set the item you intend to launch in the sling pouch<br />
taking care that the load is centered and nothing is<br />
dangling out as best you can. Now it’s loaded.<br />
Apply tension using tension rings on sling<br />
assembly<br />
Once the launch item is in the pouch, one at a time, pull the rings on each of the 4 rubber tubes down to<br />
hook them over the 3 lobe knobs, each on its own riser arm rod. Now it’s Cocked.<br />
Page | 17<br />
3/24/2011 RRS/RLS ©2005-2011 Retriever Specialists, Inc.
Retriever Specialists, Inc. FeatherweightRC <strong>Model</strong> <strong>811</strong> © 2005-2011<br />
Subsequent Lock, Load and Cock…<br />
Unhook the rings after each launch, and then repeat the steps to consistently repeat sounds and throws.<br />
This photo shows the Hold-A-Bird pouch (Pro model).<br />
Optional Loudspeaker Installation and Use<br />
Mount speaker on any arm EXCEPT the antenna arm, making sure not to place the speaker or the<br />
speaker wire in the path of the pouch travel or near the pouch area. See the picture below for<br />
recommended placement of the speaker wire. Plug in the yellow RCA connector into the yellow jack on<br />
the face of the base labeled NONE. Connecting the speaker automatically drives the horn speaker via<br />
volume controlled setting, as well as the internal speakers which have a fixed volume level.<br />
Optional Hold-A-Bird pouch<br />
Place bird into pouch and use straps to hold bird in pouch. Cross straps on top of bird and attach the<br />
straps onto the top portion of the pouch hook and loop areas. Only use about ½” long area of each<br />
strap to hold the bird in. Too much hook and loop attachment may cause bird to remain in pouch when<br />
launched. Trial with an imitation bird such as the Dokken® or Avery® True Bird will assist in<br />
determining the amount of Velcro hook-and-loop contact required for your needs.<br />
Page | 18<br />
3/24/2011 RRS/RLS ©2005-2011 Retriever Specialists, Inc.
Retriever Specialists, Inc. FeatherweightRC <strong>Model</strong> <strong>811</strong> © 2005-2011<br />
Throw angle adjustment<br />
Throw angle adjustment is accomplished by setting the knobs and stand blades as<br />
shown in this photo. Left knob in notch and right knob on top of stand blade.<br />
Company Information<br />
Retriever Specialists, Inc. (RSI) products are aggressively addressing the need for improved safety and<br />
performance of devices used in the world of training and testing hunting dogs.<br />
Robert and Alice Steiner have been involved in the training of Retrievers for over 30 years. They are<br />
founding members of the Hunting Retriever Club, Inc. (HRC), as they have been members since 1984.<br />
Both of the Steiner's have titled retrievers in the HRC to the title of Hunting Retriever Champion. Bob<br />
Steiner has also titled in AKC hunt tests and has qualified for the Master National.<br />
The name of their very successful retriever training and kennels business was Marshland Kennels, in<br />
Chelsea and Pleasant Lake Michigan. The Steiner's have since retired that business to pursue and found<br />
Retriever Specialists, Inc. in 2005 at Lake Okeechobee, Florida.<br />
Bob Steiner has been a licensed Finished & Upland Judge in HRC and has judged hunts across the<br />
country, including two of the Grand Hunting Retriever series tests.<br />
Recognizing the need for safe, reliable, repeatable throws for training as well as testing, Retriever<br />
Specialists, Inc. has been developing it’s launcher, first, the Birds-Up! Slinger, a robust launch system,<br />
which was the first system to feature the Safe-n-Silent hold and release system. Then, RSI introduced<br />
the SlingerRC launcher, with the famous low profile, at the time, the most consistent launcher for use<br />
in training on marks. The improvement came by way of digital controls. RSI introduced another first with<br />
built in electronic remote control.<br />
Page | 19<br />
3/24/2011 RRS/RLS ©2005-2011 Retriever Specialists, Inc.
Retriever Specialists, Inc. FeatherweightRC <strong>Model</strong> <strong>811</strong> © 2005-2011<br />
In 2007, RSI introduced the FWrc. This wonderfully light little launcher has taken the training launcher<br />
market by storm. The <strong>811</strong>FWrc features all the capability of the Slinger, now in a system that weighs<br />
a mere 16 pounds and sets-up in just seconds.<br />
After years of perfecting, Retriever Specialists’ retired the Slinger and SlingerRC series. Now, the<br />
FWrc is the trainer’s choice across the country. RSI sponsors HRC events and hunt test series where<br />
convenience and lightweight are important, but where consistency, safety, reliability and performance<br />
are also paramount. These so-called "mini-wingers" launch consistent throws all day long, never tire,<br />
never throw short or long… They just sling birds and bumpers consistently, quietly, safely and tirelessly.<br />
Warranty<br />
Mechanical Components<br />
The Birds-Up <strong>811</strong>FWrc is warranted against defects in material or workmanship for a period of 6<br />
months from date of purchase. Retriever Specialists, Inc. will repair or replace defective parts upon<br />
return, prepaid to us at our address supplied, unless instructed otherwise. Retriever Specialists, Inc.<br />
shall not be obligated to any other warranty, expressed or implied.<br />
There are wear components. The Sling Assembly rubber tubes will wear out. Check them frequently for<br />
splits, cracks, abrasions. Replace tubes as needed. Tube wear is not a covered component.<br />
Replacement tubes are available through the website.<br />
Electronic Components<br />
The internal SLA battery is warranted for a period of one year. The battery in the main unit will also<br />
last longer and perform best if stored with the unit plugged into the wall charger unit, whenever they<br />
are not in use. The 3-stage charger has a trickle charge mode so that once a battery is recharged; the<br />
unit will maintain a full charge without overcharging.<br />
Contact Us<br />
Retriever Specialists, Inc.<br />
5345 SE 64 th Terrace<br />
Okeechobee, FL 34974 USA<br />
Phones –Land Line (863) 824-0835<br />
Cell (863) 634-5023<br />
sales@retrieverspecialists.com<br />
www.birds-up.com<br />
Page | 20<br />
3/24/2011 RRS/RLS ©2005-2011 Retriever Specialists, Inc.