Floors & Ceilings
SRS Ulimate Acoustic Solutions for Floors and Ceilings - Sound ...
SRS Ulimate Acoustic Solutions for Floors and Ceilings - Sound ...

You also want an ePaper? Increase the reach of your titles
YUMPU automatically turns print PDFs into web optimized ePapers that Google loves.
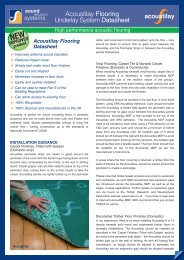
Installation Guide<br />
Maxi dropped ceiling - beneath existing<br />
plasterboard ceilings<br />
ACOUSTIC<br />
DATA 10<br />
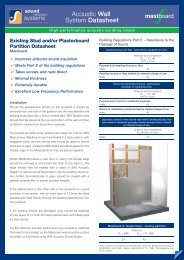
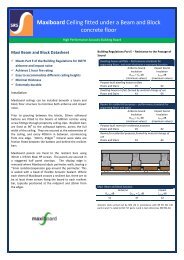
It is also possible to achieve the Building Regulations Part E by<br />
installing a Maxiboard ceiling beneath an existing Lath and Plaster<br />
or Plasterboard ceiling. Softwood battens are fitted through the<br />
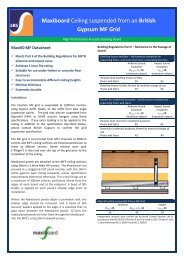
existing ceiling, to the joists at 600mm centres. SRS Resilient<br />
Bars are then fixed at 90° to the softwood battens, across the full<br />
width of ceiling. They are secured at the extremities of the ceiling<br />
and at 400mm centres in between, commencing from one edge.<br />
50mm 45kg/m 3 mineral fibre slabs are friction fitted between the<br />
battens and behind the resilient bars.<br />
Maxiboard panels are fixed to the resilient bars using 3.9mm x<br />
30mm Maxi HP screws. Fixing must be to the resilient bar alone<br />
and not through into the timber battens. The Maxiboards are<br />
secured in a staggered half panel overlap. The shiplap edge is<br />
removed where the Maxiboard abuts other surfaces, and SRS<br />
Acoustic Sealant is applied to all cut edges. There are to be three<br />
screws along each short edge of the Maxiboard panel, positioned<br />
20mm from the edges and at the midpoint. A bead of SRS Gripfix<br />
is applied to each panel’s shiplap edge prior to installation.<br />
Please see ‘Finishing and Plastering’ section on page 25 for<br />
finishing details.<br />
Maxi dropped ceiling<br />
beneath existing plasterboard<br />
16