
Create successful ePaper yourself
Turn your PDF publications into a flip-book with our unique Google optimized e-Paper software.
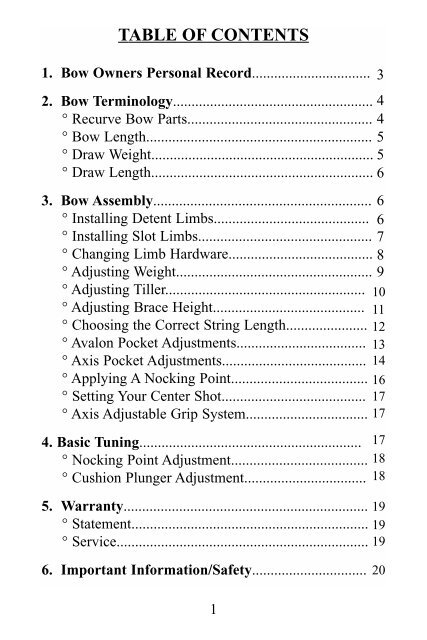
<strong>TABLE</strong> <strong>OF</strong> <strong>CONTENTS</strong><br />
1. Bow Owners Personal Record................................ 3<br />
2. Bow Terminology...................................................... 4<br />
° Recurve Bow Parts.................................................. 4<br />
° Bow Length............................................................. 5<br />
° Draw Weight............................................................ 5<br />
° Draw Length............................................................ 6<br />
3. Bow Assembly...........................................................<br />
° Installing Detent Limbs..........................................<br />
° Installing Slot Limbs...............................................<br />
° Changing Limb Hardware.......................................<br />
° Adjusting Weight.....................................................<br />
° Adjusting Tiller......................................................<br />
° Adjusting Brace Height.........................................<br />
° Choosing the Correct String Length......................<br />
° Avalon Pocket Adjustments...................................<br />
° Axis Pocket Adjustments.......................................<br />
° Applying A Nocking Point.....................................<br />
° Setting Your Center Shot.......................................<br />
° Axis Adjustable Grip System.................................<br />
4. Basic Tuning............................................................ 17<br />
° Nocking Point Adjustment..................................... 18<br />
° Cushion Plunger Adjustment................................. 18<br />
5. Warranty.................................................................. 19<br />
° Statement................................................................ 19<br />
° Service.................................................................... 19<br />
6. Important Information/Safety............................... 20<br />
1<br />
6<br />
6<br />
7<br />
8<br />
9<br />
10<br />
11<br />
12<br />
13<br />
14<br />
16<br />
17<br />
17
Congratulations! You have just purchased the world’s finest<br />
recurve bow. Hoyt’s recurve bows have been designed for the<br />
serious recurve archer. Hoyt bows have brought home more<br />
Olympic and World medals than any other bow in the world.<br />
With your new Hoyt bow you get the support of a company<br />
which has been making bows for almost 70 years. From well<br />
crafted limbs to precise risers, we are sure you will be happy<br />
with your new purchase. And, Hoyt USA backs you up with the<br />
most comprehensive warranty program in the industry.<br />
The following information provides helpful instruction on the<br />
various parts and components of your new bow as well as a helpful<br />
guide to getting your bow set-up and ready to shoot.<br />
Hoyt USA<br />
543 N. Neil Armstrong Road<br />
Salt Lake City, UT. 84116<br />
(801) 363-2990 phone<br />
(801) 537-1470 Fax<br />
www.hoytusa.com<br />
2
BOW OWNER’S PERSONAL RECORD<br />
Hoyt Bow Model________________________________<br />
Limb Type_____________________________________<br />
Length ______________ Weight _____________ #<br />
Purchased From_________________________________<br />
Purchase Date__________________________________<br />
Important Note: Save your sales receipt. The receipt is your<br />
proof of date-of-purchase. Proof of date-of-purchase is required<br />
should your bow ever need warranty service.<br />
The following space is reserved for your sales receipt. Please<br />
attach it for safe keeping.<br />
IMPORTANT!<br />
Staple or tape your<br />
sales receipt here<br />
for safekeeping.<br />
3
RECURVE BOW TERMINOLOGY<br />
Understanding recurve bow terminology and measuring techniques<br />
is very important in setting up your new bow. Please<br />
familiarize yourself with the following terms and measurements.<br />
Refer to them as needed.<br />
“Back” Side of Bow<br />
“Face” or “Front”<br />
Side of Bow<br />
4
Bow Length<br />
Bow length is the distance from the tip of the top limb to the tip<br />
of the bottom limb of a strung bow. Depending on which riser<br />
length and limb length you choose, you can tailor your bow to<br />
your specific needs. Refer to the following chart to determine<br />
your bow length.<br />
Riser Length Long Limbs Medium Limbs Short Limbs<br />
Short Riser (23") 68" 66" 64"<br />
Long Riser (25") 70" 68" 66"<br />
The recommended bow lengths are usually determined by your<br />
draw length. The following chart suggests the best match for<br />
draw length to bow length.<br />
Draw Length Bow Length<br />
up to 27"64"<br />
24 - 29"66"<br />
27" - 31" 68"<br />
29" and up 70"<br />
Draw Weight<br />
To determine the weight on your Hoyt bow, refer to the limb<br />
specifications located on the bottom limb. The numbers are read<br />
horizontally. Example: a 25" riser with a long limb produces a<br />
70" bow with a draw<br />
weight of 34 pounds at a<br />
28" draw length. If these<br />
limbs are used on a 23"<br />
riser, the combination<br />
would produce a 68"<br />
bow with a draw weight<br />
of 36 pounds at a 28"<br />
draw length.<br />
5
Hoyt limbs are available in marked weights from 22# to 50# in<br />
two pound increments. The weight marked on the lower limb is<br />
measured at a 28” standard A.M.O. (Archery Manufacturers and<br />
Merchants Organization) draw length. A.M.O. draw length is<br />
measured at 26 1/4” to the throat of the bow grip plus 1 3/4”.<br />
This produces an industry standard by which recurve bows are<br />
measured.<br />
Note: Your draw weight will change due to draw length. Add or<br />
subtract approximately two pounds for each inch your draw<br />
length is over or under the 28” standard.<br />
BOW ASSEMBLY<br />
Installing Detent Limbs (Standard Risers)<br />
Install one limb in each pocket (the limb noting specifications is<br />
the bottom limb). Carefully insert the limb bushing into the<br />
dovetail groove in the pocket. Push the limb forward until the<br />
detent button engages. You should hear a “click” indicating the<br />
limb is fully seated.<br />
6
Standard Hoyt Dovetail<br />
Limb Butt<br />
Pocket<br />
Installing Slot Limbs (Axis Riser)<br />
The Axis pocket system is designed specifically for limbs containing<br />
the slot system. It is not compatible with a traditional<br />
detent limb system. To attach the limb using a slot system pocket,<br />
snap the butt of the limb into the pocket. Then, pull the limb<br />
slightly away from the riser. While looking from above, into the<br />
pocket, screw the thumb screw through the riser until the tip is<br />
visible inside the pocket. Then align the tip of the thumb screw<br />
with the slot in the limb. Do not screw thumb screw in limb yet.<br />
Next, firmly snap limb back into pocket. The limb will bottom<br />
out on the alignment dowel. An<br />
approx. 1/16” gap will appear<br />
between the limb and pocket<br />
itself. At this time begin screwing<br />
thumb screw into limb slot<br />
until finger tight. The thumb<br />
screw should screw in without<br />
extra force. If extra force is<br />
needed adjust the alignment<br />
until the thumb screw screws<br />
into the slot easily. You may<br />
want to snug up the thumb screw<br />
after stringing the bow.<br />
7
Changing the Limb Hardware<br />
All Hoyt limbs are shipped with the standard dovetail detent system<br />
installed (Step #1). This configuration is used on the Hoyt<br />
GM, Elan and Avalon Plus risers as well as many other manufacturer’s<br />
models. In order to use the limbs on a hard lock pocket system<br />
(i.e. Axis), Hoyt provides a convenient, quick-change system.<br />
To remove the detent system (Step #2), turn the cap screw counter-clockwise<br />
to loosen. Once the cap is removed, pull the dovetail,<br />
detent and spring from the limb. You may wish to keep<br />
these in a safe place for future use.<br />
To install the slot system (Step #3), insert the slot cylinder where<br />
the detent system was previously. Replace the cap and securely<br />
tighten to ensure a solid fit.<br />
With the slot system installed (Step #4), your limbs can be shot<br />
with the Axis riser. To change the limbs back to the detent system,<br />
just follow the above instructions in reverse. Be sure to<br />
include the detent and the spring when changing back to the<br />
detent system.<br />
Step #1 Step #2<br />
Dovetail<br />
Cap<br />
Detent<br />
Spring<br />
Step #3<br />
Step #4<br />
Slot System<br />
Cap<br />
Note: If your limbs were purchased prior to the 2000 product year, you will need<br />
to purchase a limb conversion kit for your limbs in order to shoot the limbs with<br />
the hard lock system.<br />
8
Adjusting Weight and Tiller<br />
Hoyt bows are equipped with a unique limb weight/tiller adjustment<br />
system. The limb weight/tiller adjustment bolt is used to<br />
adjust bow weight and limb balance (tiller).<br />
Weight<br />
The weight on most Hoyt bows<br />
is adjustable in a range of<br />
approximately 10%.<br />
Warning: Do not adjust weight on any<br />
adjustable bow beyond the limit shown in<br />
the drawing above. The weight/tiller bolt<br />
should never go above flush with the riser.<br />
Standard Hoyt Dovetail<br />
If you are using the traditional<br />
detent system, adjust weight by<br />
loosening the weight/tiller locking screw. Do this by using one<br />
of the allen wrenches<br />
provided to hold the<br />
weight/tiller adjustment<br />
bolt in place, and the<br />
other wrench to loosen<br />
the weight/tiller locking<br />
screw. Once the locking<br />
screw is loose, you can<br />
adjust the weight/tiller<br />
adjustment bolt to the<br />
desired weight. Turning<br />
the weight/tiller adjustment<br />
bolt clockwise will increase bow weight. Turning the same<br />
bolt counter-clockwise will decrease bow weight. Be sure to<br />
lock down the weight/tiller locking screw before shooting the<br />
bow.<br />
If using the hard lock system like that used on the Axis, follow<br />
the directions for the detent system above, but be sure to loosen<br />
the thumb screw and alignment locking screw (Do not remove,<br />
just loosen.) before adjusting the weight/tiller bolt.<br />
9
Then, adjust the weight up and<br />
down with the weight/tiller bolt<br />
Alignment Locking Screw<br />
until the weight is where you<br />
desire. Then simply tighten the<br />
weight/tiller locking screw, alignment<br />
locking screw and thumb Screw<br />
Thumb<br />
screw finger tight, and you are<br />
ready to shoot.<br />
WARNING: ALWAYS loosen<br />
the thumb screw and alignment locking screw when adjusting<br />
weight or tiller on the Axis riser. Failure to comply will<br />
cause damage to the pocket. NOTE: To loosen the thumb<br />
screw after shooting, you may use a coin in the screw slot.<br />
Tiller<br />
Tiller is the difference in draw weight between the upper<br />
and lower limbs. This is easily measured by noting the<br />
difference in distance between the top limb butt to the<br />
string, and the lower limb butt to the string. To set<br />
tiller, measure the distance from the base of the limb<br />
pockets to the bow string on both the top and bottom<br />
bow limbs. The main function of tiller is to<br />
allow the archer to more easily and comfortably<br />
aim during the draw and release of the shot. When<br />
initially putting your bow together, we recommend<br />
you begin with 1/8”-1/4” positive tiller. (Bottom<br />
measurement 1/8”-1/4” less than top measurement.)<br />
Top<br />
Tiller<br />
Brace<br />
Height<br />
Tiller can then be adjusted to fit each individual. If<br />
you find your sight moving up as you are drawing,<br />
increase the bottom limb poundage slightly, or<br />
decrease the top limb poundage. If the sight is moving<br />
down as you draw, make the opposite adjustments.<br />
To adjust the tiller without affecting bow<br />
Bottom<br />
Tiller<br />
10
weight, adjust both the top and the bottom weight/tiller adjustment<br />
bolts in equal but opposite directions. NOTE: A tiller<br />
adjustment will move the nocking point position.<br />
Adjusting Brace Height (“Fistmele”)<br />
Brace height, or “fistmele” is the perpendicular distance from the<br />
bowstring to the pivot point of the handle. This height is an<br />
important aspect of tuning. The following chart gives you the<br />
recommended brace height range for your Hoyt recurve bow.<br />
The FX Limb has a unique design requiring different brace<br />
height and string lengths than traditionally used.<br />
Brace Height Range Chart (Standard Limbs)<br />
Riser Length Long Limbs Medium Limb Short Limbs<br />
Short Riser (23") 8 1/2 - 9 1/4” 8 1/4 - 9” 8 - 8 3/4”<br />
21.5 - 23.5 cm 21 - 22.8 cm 20.5 - 22 cm<br />
Long Riser (25") 8 3/4 - 9 1/2” 8 1/2 - 9 1/4” 8 1/4 - 9”<br />
22 - 24 cm 21.5 - 23.5 cm 21 - 22.8 cm<br />
FX Brace Height Range Chart<br />
Riser Length Long Limbs Medium Limb Short Limbs<br />
Short Riser (23") 8 1/4 - 8 3/4” 8 - 8 1/2” 7 3/4 - 8 1/4”<br />
21 - 22 cm 20.5 - 21.5 cm 20 - 21 cm<br />
Long Riser (25") 8 1/2 - 9” 8 1/4 - 8 3/4” 8 - 8 1/2”<br />
21.5 - 22.8 cm 21 - 22 cm 20.5 - 21.5 cm<br />
Slight adjustments can be made to the string to adjust brace<br />
11
height. Adding twists will increase the brace height while<br />
removing twist will decrease the brace height. If there are no<br />
twists in the string at the brace height you want, a longer string<br />
will be needed. Generally, Hoyt does not recommend more than<br />
30 or less than five twists in a string. Optimum brace height is<br />
one that gives a smooth bow action, good arrow flight, tight<br />
grouping and a quiet shot.<br />
Choosing the Correct String Length<br />
Depending on the length of your riser/limb combination, A.M.O.<br />
recommends the following string lengths. String length is<br />
approximately three inches shorter than the bow length.<br />
String Length Recommendations<br />
Riser Length Long Limbs Medium Limbs Short Limbs<br />
Short Riser (23”) 65” 63” 61”<br />
165cm 160 cm 155 cm<br />
Long Riser (25”) 67“ 65” 63”<br />
170 cm 165 cm 160 cm<br />
FX String Length Recommendations<br />
Riser Length Long Limbs Medium Limbs Short Limbs<br />
Short Riser (23”) 65 3/4” 63 3/4” 61 3/4”<br />
167 cm 162 cm 157 cm<br />
Long Riser (25”) 67 3/4 “ 65 3/4” 63 3/4”<br />
172 cm 167 cm 162 cm<br />
12
Aligning Your Pocket Adjustments (Select models)<br />
An adjustable pocket system allows you to adjust the limb pockets<br />
to achieve perfect limb/riser alignment. This allows archers<br />
to more easily determine centershot, but has little effect on<br />
shootability. The limb pockets are set at the factory and<br />
should therefore be very close if not exact. Need for adjustment<br />
should be very minor, if at all. If the pocket needs some<br />
adjusting, first string the riser and limbs only. Check the limb<br />
alignment of both the top and bottom limbs by viewing down the<br />
bowstring from end to end on the face of the bow. While looking<br />
down the string line, check the location of the tip you are<br />
holding to the face of the limb in your hand. The limb tip should<br />
be reasonably close to the center of the limb.<br />
Condition A<br />
Condition B<br />
Need to adjust<br />
limb tip to the<br />
right.<br />
Need to adjust<br />
limb tip to the<br />
left.<br />
Adjusting Your Avalon Plus<br />
Adjusting a Limb Tip to the Right: (Condition A)<br />
Viewing from the rear or bowstring side (the face), loosen the<br />
Lock Down Screw, then loosen the right Pocket Adjustment<br />
Screw by turning it counter-clockwise and tighten the opposite<br />
(left) Pocket Adjustment Screw by turning it clockwise. Make<br />
adjustments in small increments (1/8 to 1/4 turn at a time). Be<br />
sure to tighten the lock down screw before shooting. After each<br />
adjustment, draw the bow a couple of times to allow the string to<br />
seat before checking again.<br />
13
Adjusting a Limb Tip to the Left: (Condition B)<br />
Viewing from the bowstring<br />
side (the riser<br />
face), loosen the lock<br />
down screw, then loosen<br />
the left pocket adjustment<br />
screw by turning it<br />
counter-clockwise and<br />
tighten the opposite<br />
(right) pocket adjustment<br />
screw by turning in<br />
clockwise. After each<br />
adjustment, draw the<br />
bow a couple of times to<br />
allow the string to seat before checking again. Make adjustments<br />
in small increments (1/8 to 1/4 turn at a time). Be sure to tighten<br />
the lock down screw before shooting. After each adjustment,<br />
draw the bow a couple of times to allow the string to seat before<br />
checking again. Warning: Do not over tighten the adjustment<br />
screws! They only need to be snug to the riser.<br />
Adjusting the Hard Lock Pocket System<br />
(Axis type system)<br />
The Axis type hard lock limb locking system is the most<br />
advanced pocket alignment and weight adjustment system available<br />
today. It features a positive locking limb alignment system<br />
that maintains its settings in all conditions. You can adjust your<br />
limb alignment to make it perfectly compatible to the riser simply<br />
by removing or adding the supplied brass washers to the<br />
alignment dowel.<br />
To adjust your pocket follow these directions:<br />
1. With the bow unstrung and limbs removed from the riser,<br />
unscrew the thumb screw and washer completely out of the<br />
14
Riser<br />
Axis Hard lock System<br />
Locking Screw<br />
(Opposite Side of<br />
Sight Window)<br />
Alignment Dowel<br />
(Sight Window Side)<br />
Washer<br />
Alignment Washers<br />
Thumb Screw<br />
alignment dowel.<br />
2. Unscrew the alignment locking screw and remove the alignment<br />
cap and washers. Pull the alignment dowel and washers<br />
out from the sight window<br />
side of the pocket. (Do not<br />
lose any parts !).<br />
Adding washers to the dowel moves your limb<br />
tip to the right, as removing them moves the<br />
tip to the left. Refer to page 13 for alignment.<br />
15<br />
3. (Refer to the limb visual<br />
on page 13) If your limb is<br />
showing Condition A: Simply ADD washers to the SIGHT WIN-<br />
DOW SIDE (MAXIMUM <strong>OF</strong> 4) of the alignment dowel. If<br />
your limb is showing Condition B: REMOVE WASHERS from<br />
the sight window side of the dowel. Limit your adjustments to<br />
one washer at a time. You can store any unused washers between<br />
the riser and alignment cap because the washers on the alignment<br />
cap (non-sight window) side of the pocket do not affect the<br />
alignment.<br />
4. To reassemble the pocket, first insert the alignment dowel and<br />
washers in the riser (be sure to always put the alignment dowel
in on the sight window side of the riser). Place the washers,<br />
alignment cap and alignment locking screw in the dowel but do<br />
not completely tighten. Be sure washers are not caught on<br />
threads of alignment locking screw. They must be flat against<br />
dowel shoulder. Looking from above, into the pocket, align and<br />
screw the thumb screw into the slot in the alignment dowel.<br />
Snap the limb into the pocket and pull the limb slightly away<br />
from the riser. Then, turn the thumb screw in only<br />
about two or three turns until you can just see the tip<br />
through the alignment dowel. Then rotate the dowel<br />
using the thumb screw as a lever until the limb slot<br />
aligns with the tip of the thumb screw. After you<br />
achieve alignment, snap the limb back against the<br />
thumb screw and flush with the pocket. If properly<br />
aligned, the thumb screw should engage the limb easily<br />
without binding. Tighten the thumb screw finger<br />
snug and finish by securely tightening the dowel<br />
locking screw with the supplied allen wrench.<br />
After the limb tips are adjusted, align the string down<br />
the center of the limbs, riser and stabilizer. Move<br />
both the top and bottom pocket adjustments the same<br />
amount in the same direction, as you have already set<br />
them for the center of each limb. Continue to make<br />
adjustments until the string runs down the center of<br />
all three alignment points.<br />
Applying a Nocking Point<br />
A nocking point marks the exact position of the arrow on the<br />
bowstring for each shot. To apply your nocking point, slip an<br />
adjustable nock set on the center serving, and slide it into position.<br />
Initially, set the nocking point at approximately 3/8" above<br />
the level point of the rest. Close the nock set with nocking pliers<br />
so it is firm, but do not over tighten the nock set as it could<br />
break your serving.<br />
16
Setting Your Center Shot<br />
The final step before shooting is to position your center<br />
shot. The objective is to position the arrow slightly<br />
offset of the power stroke of the bowstring. To do<br />
that, begin by nocking an arrow and placing it on the<br />
arrow rest. Do not draw the bow, but position yourself<br />
behind the string side of the bow, looking down the<br />
arrow. Align the string down the center of the limbs<br />
and riser and check to see the position of the arrow tip<br />
relative to this line. Adjust the plunger or arrow rest until the<br />
inside edge of the arrow shaft aligns with this line.<br />
Axis Adjustable Grip Section<br />
Hoyt’s Axis grip is designed with an adjustable gip section that<br />
can be laterally adjusted to the archer’s preference. Two positions<br />
are selectable, center (traditional, recommended) and 1/8”<br />
inside center. The grip is shipped from the<br />
factory in the traditional center position. To<br />
change the position of the grip, simply<br />
remove the two button head screws on both<br />
sides of the grip with the supplied wrench,<br />
and remove the grip section. To move the<br />
grip to the 1/8” inside position remove the<br />
composite shims and place them opposite of<br />
the sight window side of the grip. One shim<br />
on each side of the grip will return the grip to<br />
the traditional center alignment.<br />
Tuning<br />
Tuning is the process of adjusting your bow to optimize its accuracy.<br />
Optimum tuning matches the arrow to the bow, to achieve<br />
the best arrow flight and grouping. The following is a simple<br />
tuning process that can be done the first time you set-up your<br />
bow. Re-tuning is suggested after any change in arrow size or<br />
17<br />
Grip Section<br />
Shims<br />
Shims need to be placed<br />
opposite of sight window<br />
on the grip for the 1/8”<br />
inside position.
change in components.<br />
To tune your bow, have on hand three fletched arrows and three<br />
bare shafts (arrows without fletching), all identical and straight.<br />
From about 15 to 20 yards, shoot your fletched arrows at a target<br />
(aiming at the same place on all shots). Follow the three<br />
fletched arrows with three bare shafts and note where the group<br />
of the bare shafts impact compared to the fletched arrows.<br />
Nocking Point/Cushion Plunger Adjustments<br />
The first consideration is your nocking point position. If the bare<br />
shafts are grouping below the fletched shafts, lower the nocking<br />
point. If the bare shafts are grouping above, move the nocking<br />
point up. Be sure to only move in small increments (never more<br />
that a 1/16” at a time). Each time the nocking point is moved it<br />
will affect your sight setting, so you will need to reset your sights<br />
after each move. Continue to make adjustments until the two<br />
groups of arrows impact at the same height.<br />
Next, work on the left/right impact. For right handed shooters,<br />
if the bare shafts hit to the right of the fletched shafts, increase<br />
the spring tension on the cushion plunger or decrease bow<br />
weight. Should the bare shafts hit to the left of the fletched<br />
arrows, loosen the spring tension or increase bow weight. With<br />
each change in spring tension or bow weight, re-adjust the sight<br />
before shooting the bare shafts.<br />
Note: Left handed shooters need to reverse these instructions!<br />
For advanced methods, see your local dealer an additional source<br />
of detailed information is the Easton Arrow Tuning and<br />
Maintenance Guide, available for a nominal fee from Easton<br />
Technical Products, 5040 W. Harold Gatty Drive, Salt Lake City,<br />
UT 84116 (801) 539-1400.<br />
18
Warranty<br />
Hoyt USA recurve bows are backed by a solid two year limited<br />
warranty. For the first year from date of purchase, Hoyt recurve<br />
bows are fully warranted against factory defects in materials and<br />
workmanship. For the second year from date of purchase, all<br />
warranty repairs or replacements on Hoyt recurve bows will be<br />
made at a charge of 50% of manufacturers suggested retail price.<br />
A copy of your retail sales receipt, establishing date of purchase<br />
is required for all warranty service.<br />
There are no other warranties, expressed or implied, that extend<br />
beyond those written here. No agent, employee or representative<br />
of Hoyt or its dealers has the authority to bind Hoyt to any agreement<br />
not herein stated. Buyer agrees that the sole and exclusive<br />
remedies for breach on any warranty concerning Hoyt bows<br />
shall be repair or replacement of defective parts. Hoyt shall not<br />
be liable for injury or property other than the bows themselves.<br />
Warranty Service<br />
To obtain warranty service, you should return to the Hoyt Dealer<br />
where you purchased your Hoyt bow. The dealer can help you<br />
determine if Hoyt factory service is required or if the repair can<br />
be completed by the dealer. If the bow must be returned to the<br />
factory, the bow owner is responsible for the return postage to<br />
Hoyt. Hoyt, in turn, will pay the postage for reshipping the<br />
repaired bow.<br />
Hoyt bows requiring Hoyt factory warranty service should be<br />
sent to:<br />
Hoyt USA<br />
543 N. Neil Armstrong Road<br />
Salt Lake City, UT 84116-2887<br />
19
Note: Before any bow is returned to the Hoyt factory for warranty<br />
service, a Hoyt Return Authorization Number must be<br />
obtained by calling Hoyt USA at (801) 363-2990.<br />
Any bow returned must have the following:<br />
° Must be sent postage paid.<br />
° Must include a copy of the dated sales receipt.<br />
° Must include a short note explaining the nature of the problem.<br />
° Must include a Hoyt Return Authorization number.<br />
° Should not include accessories unless otherwise instructed<br />
when the Return Authorization Number is obtained.<br />
IMPORTANT INFORMATION<br />
1. Never Dry Fire Your Bow. Dry fire means to draw and release<br />
your bow without an arrow. Shooting without an arrow, which<br />
absorbs most of the bow’s stored energy, could cause severe<br />
damage to the bow and possible injury.<br />
2. Never Expose Your Bow to Extreme Heat or Prolonged<br />
Moisture. Excessive heat, such as could be experienced on a<br />
sunny day inside of a closed vehicle, could cause limb failure.<br />
Prolonged storage in a hot, dry attic or damp basement could<br />
also be damaging and will void your warranty.<br />
3. Carefully Inspect Your Bow Before And During Each<br />
Shooting Session. Carefully note condition of bowstring, limbs<br />
and riser before you shoot. Frayed bowstrings should be<br />
replaced. Damaged or suspect limbs should be reported to the<br />
dealer where you purchased your bow.<br />
4. Inspect All Arrows. Before Shooting, inspect your arrows for<br />
defects. Replace cracked nocks and loose fletch and discard<br />
fractured or dented arrows.<br />
WARNING: This bow is a deadly weapon. Always abide by all<br />
safety advisements. Children should be supervised by an adult.<br />
20