Vibratory Compaction Procedure - Asphalt Academy
Vibratory Compaction Procedure - Asphalt Academy
Vibratory Compaction Procedure - Asphalt Academy
- No tags were found...

You also want an ePaper? Increase the reach of your titles
YUMPU automatically turns print PDFs into web optimized ePapers that Google loves.
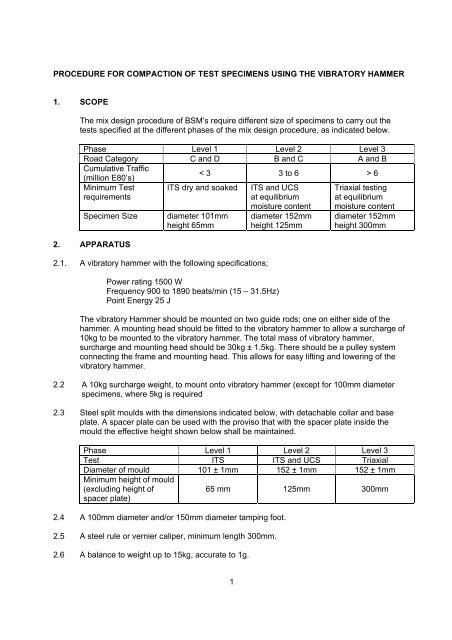
PROCEDURE FOR COMPACTION OF TEST SPECIMENS USING THE VIBRATORY HAMMER<br />
1. SCOPE<br />
The mix design procedure of BSM’s require different size of specimens to carry out the<br />
tests specified at the different phases of the mix design procedure, as indicated below.<br />
Phase Level 1 Level 2 Level 3<br />
Road Category C and D B and C A and B<br />
Cumulative Traffic<br />
< 3 3 to 6 > 6<br />
(million E80’s)<br />
Minimum Test<br />
requirements<br />
Specimen Size<br />
2. APPARATUS<br />
ITS dry and soaked<br />
diameter 101mm<br />
height 65mm<br />
2.1. A vibratory hammer with the following specifications;<br />
Power rating 1500 W<br />
Frequency 900 to 1890 beats/min (15 – 31.5Hz)<br />
Point Energy 25 J<br />
ITS and UCS<br />
at equilibrium<br />
moisture content<br />
diameter 152mm<br />
height 125mm<br />
Triaxial testing<br />
at equilibrium<br />
moisture content<br />
diameter 152mm<br />
height 300mm<br />
The vibratory Hammer should be mounted on two guide rods; one on either side of the<br />
hammer. A mounting head should be fitted to the vibratory hammer to allow a surcharge of<br />
10kg to be mounted to the vibratory hammer. The total mass of vibratory hammer,<br />
surcharge and mounting head should be 30kg ± 1.5kg. There should be a pulley system<br />
connecting the frame and mounting head. This allows for easy lifting and lowering of the<br />
vibratory hammer.<br />
2.2 A 10kg surcharge weight, to mount onto vibratory hammer (except for 100mm diameter<br />
specimens, where 5kg is required<br />
2.3 Steel split moulds with the dimensions indicated below, with detachable collar and base<br />
plate. A spacer plate can be used with the proviso that with the spacer plate inside the<br />
mould the effective height shown below shall be maintained.<br />
Phase Level 1 Level 2 Level 3<br />
Test ITS ITS and UCS Triaxial<br />
Diameter of mould 101 ± 1mm 152 ± 1mm 152 ± 1mm<br />
Minimum height of mould<br />
(excluding height of<br />
spacer plate)<br />
65 mm 125mm 300mm<br />
2.4 A 100mm diameter and/or 150mm diameter tamping foot.<br />
2.5 A steel rule or vernier caliper, minimum length 300mm.<br />
2.6 A balance to weight up to 15kg, accurate to 1g.<br />
1
2.7 A balance to weigh up to 2kg, accurate to 0.1g.<br />
2.8 Suitable air-tight containers, approximately capacity 15 to 20 litres.<br />
2.9 A mixing basin, approximately 500mm in diameter.<br />
2.10 A mixing trowel.<br />
2.11 A chisel or spatula, approximate length 200mm.<br />
2.12 Suitable containers to hold 1kg of material for moisture content determination.<br />
2.13 A force draft drying oven, thermostatically controlled and capable of maintaining a<br />
temperature of 105 to 110 o C.<br />
2.14 A 1000 ml measuring cylinder.<br />
2.15 Filter paper, 100mm and/or 150mm in diameter.<br />
2.16 Lubricating grease or non-stick spray.<br />
2.17 A sample extruder to remove sample from the mould, if split mould is not used.<br />
2.18 Material Scoop (90mm Ф x 85mm h)<br />
2.19 Suitable marker e.g. permanent marker<br />
2.20 Adjustable spanner to fasten and loosen surcharge load to the vibratory hammer.<br />
3. SAMPLE PREPARATION<br />
Samples shall be blended and reconstituted as outlined in Appendix A2. The following<br />
minimum sizes of samples are required.<br />
Phase Level 1 Level 2 Level 3<br />
Test ITS ITS and UCS Triaxial<br />
Minimum mass of<br />
sample required per<br />
bitumen content<br />
10kg per or as per<br />
mixer manufacturers<br />
recommendations<br />
30kg per or as per<br />
mixer manufacturers<br />
recommendations<br />
Minimum number of<br />
specimens per<br />
bitumen content<br />
60kg per or as per<br />
mixer manufacturers<br />
recommendations<br />
6 4 4<br />
All prepared samples to be placed in air-tight containers. Determine the hygroscopic<br />
moisture of the air-dried blended material (See Equation 1).<br />
2
4. Mixing<br />
4.1 BSM-Emulsion Stabilised Material<br />
The cement or lime, if required, is added to the air-dried material and mixed thoroughly. The<br />
optimum fluid content (OFC) is added to each sample but the emulsion content is varied<br />
such that samples are tested at a minimum of 4 residual bitumen contents at intervals of<br />
0.25%. The following ranges of residual bitumen are recommended for the following<br />
material types;<br />
Material<br />
Reclaimed <strong>Asphalt</strong><br />
Pavement (RAP)<br />
Graded Crushed<br />
Rock<br />
Granular Material or<br />
Blends<br />
Granular Material or<br />
Blends<br />
Grading Modulus<br />
CBR @ 100%<br />
modified AASHTO<br />
Residual Bitumen<br />
Range<br />
n/a n/a 1.75 – 2.50<br />
> 2.0 > 80 2.25 – 3.00<br />
> 2.0 > 45 2.50 – 3.25<br />
< 2.0 > 20<br />
2.50 – 4.00<br />
(0.5% increments)<br />
Add the water (See Equation 2) to the material and mix thoroughly and allow to stand in an<br />
air-tight container for 15 to 30 minutes. Add the emulsion (See Equation 3) and again mix<br />
thoroughly. Allow this emulsion treated material to stand for 40 to 60 minutes to allow<br />
breaking of the bitumen emulsion prior to compaction. All 4 samples can be prepared in this<br />
manner at least 15 minutes apart to allow for compaction time. Care should be taken to<br />
prevent loss of moisture when the materials are left to stand and during compaction.<br />
4.2 BSM – Foamed Bitumen Stabilised Material<br />
The air-dried material is placed into the mixer of the foamed bitumen laboratory unit. The<br />
cement or lime, if required, is added to the air-dried material and mixed thoroughly. Water is<br />
added to the material to bring the material to 60% of the OMC determined by vibratory<br />
hammer compaction for the treated material (added water + hygroscopic water) and mixed<br />
thoroughly. The mixed material should be completely moist with no dry material evident.<br />
The foamed bitumen is added at 0.25% increments for at least 4 samples within the<br />
residual bitumen range recommended in Subsection 4.1.<br />
Place the foamed bitumen laboratory unit in position to spray the foamed bitumen into the<br />
moist material in the mixer. Set the laboratory unit to spray the required amount of foamed<br />
bitumen, start the mixer and inject the foamed bitumen into the mixer. Mix the foamed<br />
bitumen treated material for 30 seconds or until thoroughly mixed. Add the outstanding<br />
amount of water (remaining 40% of OMC) to bring the moisture content of the material to<br />
the OMC determined by vibratory hammer compaction.<br />
<strong>Compaction</strong> can be started after mixing of all the samples and care should be taken to<br />
prevent loss of moisture when materials are left to stand and during compaction.<br />
3
5. PREPARATION OF SPECIMENS<br />
5.1 Preparing the vibratory hammer<br />
Fix the mounting head and appropriate tamping foot to the vibratory hammer and fit<br />
hammer onto guide rods. Place 10kg surcharge weight onto mounting head and fasten<br />
tightly. Using the pulley system raise the vibratory to the maximum height it can be raised or<br />
to an adequate height that will allow operator to work safely beneath the vibratory hammer.<br />
5.2 Preparing the mould<br />
Clean the mould, collar and base plate. Lubricate the inside mould wall with a very light<br />
application of lubricating grease or non-stick spray. This allows for easy removal of the<br />
compacted sample and easy cleaning of the mould thereafter.<br />
Fix the mould to the base of the compaction frame directly below the foot piece of the<br />
vibratory hammer. Place a sheet of circular filter paper at the bottom of the mould. Lower<br />
the vibratory hammer into the mould, checking that the vibratory hammer is perpendicular to<br />
the base of the mould i.e. the tamping foot is flat on the base with no point of the foot<br />
raised. Allow the vibratory hammer to rest in the mould with no material present. Where the<br />
lower end of sleeve of the mounting head rests on the guide rod, mark that position clearly<br />
on the vertical guide using the suitable marker (non-erasable).<br />
5.3 <strong>Compaction</strong><br />
The prepared material should be mixed immediately prior to compaction and be compacted<br />
at a temperature between 22 and 25 o C.<br />
The number of layers for each type of specimen required is shown below.<br />
Phase Level 1 Level 2 Level 3<br />
Test ITS ITS UCS Triaxial<br />
Sample diameter (mm) 101 152 152 152<br />
Sample height (mm) 65 95 125 300<br />
Approximate volume of compacted<br />
specimen – Vcs in Eq 4 (cm 3 )<br />
520 1725 2270 5445<br />
Surcharge on Hammer 5kg 10kg 10kg 10kg<br />
Number of layers 1 2 2 5<br />
<strong>Compaction</strong> time per layer (secs)<br />
BSM-emulsion<br />
BSM-foam<br />
(per side)<br />
10<br />
10<br />
Tamping foot diameter (mm) 100 150 150 150<br />
The approximate quantity of material required for each layer will be the total quantity of<br />
material based on the maximum dry density, the optimum moisture content and volume of<br />
compacted specimen (See Equation 4). The quantity of material for each layer will be the<br />
total quantity of material divided by the number of layers. For multi-layer specimens slight<br />
adjustments might be necessary for consecutive layers to achieve the recommended<br />
height.<br />
4<br />
15<br />
25<br />
15<br />
25<br />
15<br />
25
Material is placed in the mould using a material scoop. Use the chisel to work the material<br />
around in order to evenly distribute the material in the mould without segregating the<br />
sample. Ensure that the material is as level as possible before lowering the vibratory<br />
hammer until the foot piece comes to rest on the material. The operator should ensure that<br />
the tamping foot is kept clean and no material build-up is formed on the tamping face.<br />
After compaction of the layer, raise the vibratory hammer and secure. Measure the<br />
compacted thickness of the layer.<br />
For 2 and 5 layer specimens, if necessary, adjust for the amount of material to be added for<br />
the next layers such that the final compacted thickness is achieved. Using the chisel, scarify<br />
the entire surface area of the top of the compacted layer to a maximum depth of 10mm.<br />
Add the required amount of material and ensure the material is level as possible. For the<br />
final layer, place a sheet of circular filter paper on top of the material, lower vibratory<br />
hammer and compact.<br />
After final compaction, prior to raising the vibratory, measure the distance from the initial<br />
position of rest of the lower end of the sleeve of the mounting head (without material in<br />
mould) to the final position of the lower end of the sleeve of the mounting head (after final<br />
compaction). This distance represents the final height of the compacted specimen and<br />
should be checked by measuring the samples after removal from the mould.<br />
Compact the additional specimens for each bitumen content in the same manner.<br />
5.4 Determination of moisture content<br />
Two representative samples (± 1000g) are taken at different times during the compaction of<br />
all required specimens and placed in a suitable container for determination of moisture<br />
content.<br />
The moist samples are weighed immediately to the nearest 0.1g and placed in an oven a<br />
105 to 110 o C. The moisture content is determined to the nearest 0.1 percent.<br />
5.5 Determination of the mass of compacted material<br />
Raise the vibratory hammer and remove the collar. Remove the mould with the compacted<br />
material from the base plate and extract sample carefully from the mould. If sample is<br />
extruded from mould, the sample shall not distort during extrusion. The compacted material<br />
can now be weighed. This is the wet mass of the compacted specimen.<br />
6. CALCULATIONS<br />
6.1 Determine the moisture content of the sample using equation 1<br />
a − b<br />
MC = x 100 [Equation 1]<br />
b − c<br />
where MC = moisture content expressed as a percentage of the dry sample [%]<br />
a = mass container and wet material [g]<br />
b = mass of container and dry material [g]<br />
c = mass of container only [g]<br />
5
6.2 Determine the quantity of water for BSM-emulsion using equation 2<br />
Ma OFC - MCh - Pem<br />
Qw = x<br />
[Equation 2]<br />
100 + MCh 100<br />
where Qe = Quantity of emulsion [g]<br />
Ma = mass of air-dried sample [g]<br />
MCh = hygroscopic moisture of sample [%]<br />
OFC = Optimum Fluid Content [%]<br />
Pem = emulsion required [%]<br />
Prb x 100<br />
Pem =<br />
Eb<br />
where Prb = residual bitumen required [%] and<br />
Eb = residual bitumen content in emulsion (eg 60%) [%]<br />
6.3 Determine the quantity of emulsion using equation 3<br />
Ma Prb x 100<br />
Qe = x<br />
[Equation 3]<br />
100 + MCh Eb<br />
6.4 Determine the total quantity of material for compacted specimen using equation 4<br />
Dden x Vcs 100 + OMC<br />
TMQ = x<br />
[Equation 4]<br />
1000 100<br />
where TMQ = total material quantity [g]<br />
Dden = maximum dry density [kg/m 3 ]<br />
Vcs = volume of compacted specimen (See Section 6) [cm 3 ]<br />
OMC = optimum moisture content [%]<br />
for emulsion treated samples OMC = OFC – residual bitumen content<br />
6.5 Determine the dry density of the compacted sample using equation 5<br />
Mw 100<br />
Dd = x x 1000<br />
[Equation 5]<br />
100 + MCt Vol<br />
where Dd = Dry density of compacted sample [kg/m 3 ]<br />
Mw = mass of wet compacted sample [g]<br />
MCt = moisture content of compacted sample [%]<br />
6
7. REPORTING<br />
All specimens shall be clearly marked for easy identification, then cured and tested as<br />
necessary.<br />
For each specimen the following shall be reported;<br />
• The date of moulding;<br />
• The dry density to the nearest 1 kg/m 3 ;<br />
• The moulding moisture content to the nearest 0.1%;<br />
• The final height of the specimen to the nearest 0.1mm;<br />
• The diameter of the specimen to the nearest 0.1mm.<br />
This information shall be included with the final strength test results of the specimens.<br />
7