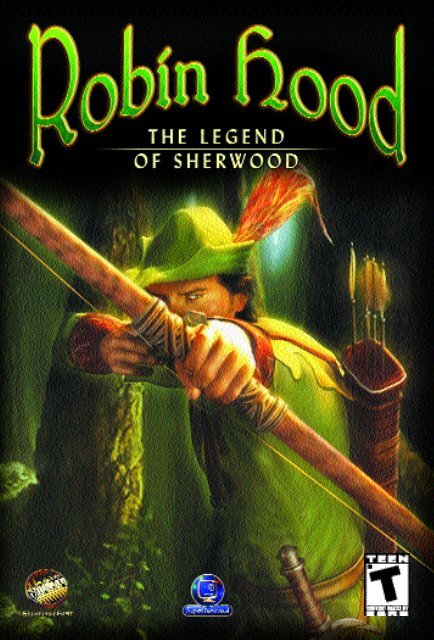
Robin Hood.pdf - Strategy First
Robin Hood.pdf - Strategy First
Robin Hood.pdf - Strategy First
- No tags were found...
You also want an ePaper? Increase the reach of your titles
YUMPU automatically turns print PDFs into web optimized ePapers that Google loves.
TECHNICAL SUPPORT<br />
Should you experience a technical problem concerning the<br />
operation of this product, please contact our technical<br />
support staff. Before you call, please read the README.TXT<br />
file on the ROBIN HOOD CD to see any last minute<br />
recommendations pertinent to your problem. Also, check out<br />
the Support page on our web site listed below. When you call,<br />
please be at your computer and have the following<br />
information available:<br />
• Computer make and model • Windows version<br />
• Total system RAM • Total Hard Drive space<br />
• Video card make and model.<br />
PHONE: (514) 844-2433, Mon.-Fri. 9am-6pm<br />
FAX: (514) 844-4337, Attn: Support<br />
INTERNET E-MAIL: For prompt technical support via<br />
email,please fill out our online form at<br />
http://www.strategyfirst.com/Support/ContactForm.asp.<br />
For any other technical support questions or concerns,<br />
contact us at support@strategyfirst.com.<br />
STRATEGY FIRST WEB SITE: http://www.strategyfirst.com<br />
SYSTEM REQUIREMENTS<br />
• Windows 98/ME/2000/XP • Pentium II 233 MHz<br />
• 64 MB RAM • 900 MB Hard Disk Space<br />
• Video Card with 4MB RAM (3D acceleration not required)<br />
• DirectX 8.1 • DirectX Compatible Sound Card • 4x CD-ROM<br />
1
Table of Contents<br />
INTRODUCTION 3<br />
1 INSTALLATION AND GETTING STARTED 3<br />
1.1 INSTALLING THE GAME 3<br />
1.2 GETTING STARTED 4<br />
1.3 UNINSTALLING THE GAME 4<br />
2 THE GAME MENUS 4<br />
2.1 MAIN MENU 4<br />
2.2 LOAD MENU 5<br />
2.3 PLAYER MENU 6<br />
2.4 ESCAPE MENU 6<br />
2.5 SAVE MENU 6<br />
2.6 OPTIONS MENU 7<br />
3 THE GAME 7<br />
3.1 PLANNING A CAMPAIGN 7<br />
3.2 THE MISSIONS 8<br />
3.3 THE INTERFACE 9<br />
3.4 SHERWOOD FOREST 10<br />
3.5 SELECTING AND MOVING AN ACTIVE CHARACTER 14<br />
3.6 INFORMATION AND BONUSES 16<br />
3.7 INDIVIDUAL MISSIONS 18<br />
3.8 WHAT YOU NEED TO KNOW TO PLAY A MISSION 21<br />
4 THE CHARACTERS 23<br />
4.1 ROBIN AND HIS MERRY MEN 23<br />
4.2 ENEMIES 25<br />
4.3 ROBIN’S ALLIES 28<br />
4.4 PRINCIPAL ENEMIES 28<br />
CHARACTER ACTIONS 29<br />
4.5 CHARACTER ACTIONS 29<br />
4.6 COMBAT MODE 30<br />
4.7 CONTEXT-BASED ACTIONS 40<br />
4.8 QUICK-ACTIONS 40<br />
5 CREDITS 42<br />
LICENSE AGREEMENT AND LIMITED WARRANTY 46<br />
2
INTRODUCTION<br />
Are you familiar with the legend of <strong>Robin</strong> <strong>Hood</strong>?<br />
Well, at that time, King Richard the Lion-Heart had<br />
gathered together the finest knights in the land and sailed<br />
for the Holy Land to fight the infidels. In his absence, he left<br />
his brother Prince John in charge of the Kingdom. Then, as<br />
he returned from the Crusades, King Richard was taken<br />
prisoner by Duke Leopold, who demanded an enormous<br />
ransom in exchange for the King’s freedom…<br />
A young companion of the King’s during the Crusades, <strong>Robin</strong><br />
of Locksley, decided to return to England to raise the sum<br />
necessary to pay the ransom. But on his return, <strong>Robin</strong><br />
discovered that a disreputable individual, the Sheriff of<br />
Nottingham, had seized control of his land and possessions in<br />
his absence. And that wasn’t all: he was tormenting the local<br />
population by imposing heavy taxes on them…<br />
At this point, we are close to the real beginnings of the famous<br />
legend of <strong>Robin</strong> <strong>Hood</strong>, kind-hearted thief and friend to the<br />
people. From the depths of Sherwood Forest you will have to<br />
find companions to help you organize your missions and<br />
defend those who can’t defend themselves, all the while<br />
sparing as many enemies as possible… Will you manage to<br />
overcome all these obstacles and raise the ransom to free King<br />
Richard?<br />
1 INSTALLATION AND GETTING STARTED<br />
1.1 INSTALLING THE GAME<br />
Insert the <strong>Robin</strong> <strong>Hood</strong> – The Legend of Sherwood CD into your<br />
computer’s CD or DVD drive. If ‘Autorun’ is turned on, the<br />
installation wizard will appear automatically once the CD is<br />
inserted. Select ‘Install <strong>Robin</strong> <strong>Hood</strong>’ to start the installation<br />
process.<br />
If installation does not begin automatically, double click on<br />
your CD-Rom drive’s icon and then double click on the file<br />
named Setup.exe.<br />
3
Follow the instructions which appear on the screen to<br />
complete installation.<br />
If DirectX 8.1 is not installed on your computer, you will be<br />
asked to install it (the game requires DirectX 8.1 to function).<br />
1.2 GETTING STARTED<br />
Once <strong>Robin</strong> <strong>Hood</strong> – The Legend of Sherwood has been<br />
installed, you can either double click on the <strong>Robin</strong> <strong>Hood</strong> – The<br />
Legend of Sherwood desktop icon or go to Start, Programs,<br />
<strong>Strategy</strong> <strong>First</strong> \ <strong>Robin</strong> <strong>Hood</strong> – The Legend of Sherwood to<br />
launch the game.<br />
1.3 UNINSTALLING THE GAME<br />
To uninstall <strong>Robin</strong> <strong>Hood</strong> – The Legend of Sherwood, go to Start,<br />
Programs, <strong>Strategy</strong> <strong>First</strong> \ <strong>Robin</strong> <strong>Hood</strong> and click on ‘Uninstall<br />
<strong>Robin</strong> <strong>Hood</strong> – The Legend of Sherwood’.<br />
2 THE GAME MENUS<br />
2.1 MAIN MENU<br />
When playing for the first time, the game will offer to create a<br />
player profile. Enter your name and select a difficulty level.<br />
Confirm with the blue ’tick’ button.<br />
If not playing for the first time, you will be brought straight to<br />
the Main Menu when you launch the game.<br />
Money collected<br />
Score<br />
Number of lives saved<br />
Progress %<br />
Game time<br />
4
If playing for the first time, all the above will be set to zero.<br />
PLAY!<br />
If you only created one player profile, you can launch the<br />
game instantly with ‘Play!’.<br />
If several player profiles have been created, you will first<br />
have to ‘select player’. If you don’t select a profile, the last<br />
one saved will be loaded by default.<br />
The mission in progress at the last save will then be loaded.<br />
LOAD<br />
Once you have played and saved the game at least once, this<br />
menu will allow you to load a named save or a ‘quicksave’.<br />
Select Player<br />
Select the player profile you want from the list.<br />
Show Movies<br />
View the game’s movie scenes.<br />
2.2 LOAD MENU<br />
This menu can be accessed from either the MAIN menu or the<br />
ESCAPE menu.<br />
To load a saved game, select the one you want from the list<br />
of saved games corresponding to your player profile.<br />
Click on the one you want and confirm by clicking on LOAD.<br />
5
2.3 PLAYER MENU<br />
SELECT<br />
Select the player profile you<br />
want from the list. Confirm by<br />
clicking on SELECT.<br />
NEW<br />
Select this option if you want to<br />
c reate a new player pro f i l e .<br />
Enter a name and the new<br />
profile will be added to the list.<br />
2.4 ESCAPE MENU<br />
You can pause the game and access this menu by hitting ESC.<br />
This menu also serves to<br />
remind you of the primary and<br />
secondary objectives of the<br />
mission in progress.<br />
2.5 SAVE MENU<br />
Enter the name you want to<br />
give the saved game and<br />
click on SAVE to confirm.<br />
You can also use shortcut<br />
keys to perform quicksaves<br />
and quickloads.<br />
6
F1 is the default key for quicksave and F5 the default key<br />
for quickload. You can change these settings in the<br />
SHORTCUTS section of the OPTIONS menu.<br />
Using these shortcuts, you can bypass the Save and Load<br />
menus. Quicksave creates a file called simply ‘QuickSave’.<br />
A subsequent quicksave will not erase the first one, but will<br />
cause it to be renamed ‘ExQuickSave’.<br />
2.6 OPTIONS MENU<br />
The SHORTCUTS option lists<br />
all the shortcuts available<br />
when playing <strong>Robin</strong> <strong>Hood</strong>.<br />
You can play with the default<br />
shortcut settings (DEFAULT 1<br />
& DEFAULT 2).<br />
You can also customize the shortcuts used. To do this, select<br />
the ‘User Defined’ option. Click on the control you want to<br />
customize and type in your new shortcut.<br />
If you make a mistake, RIGHT click with your mouse to cancel it.<br />
Your changes will be saved once you hit ‘OK’ to quit the menu.<br />
3 THE GAME<br />
3.1 PLANNING A CAMPAIGN<br />
Select ‘PLAY!’ from the MAIN menu. The first mission is played<br />
with <strong>Robin</strong> <strong>Hood</strong> on his own. Once it’s completed, the second<br />
mission will launch automatically.<br />
When the second mission is completed, you will be able to<br />
enter Sherwood Forest. This becomes <strong>Robin</strong>’s headquarters<br />
and from now on all missions will be launched from here.<br />
7
When you’re in Sherwood, a ‘MAP’ (in the top right of the<br />
screen) lets you select your next mission. You will often be<br />
able to choose between several different missions.<br />
Once you have selected the mission to play, you have to choose<br />
your team. Then simply bring them to the top-right of the<br />
forest and the mission will start.<br />
Once the mission has been successfully completed, your team<br />
will return to Sherwood where you can start preparing for the<br />
next mission.<br />
3.2 THE MISSIONS<br />
A mission is a game phase in which a group of Merry Men (up<br />
to 5 characters, sometimes less for certain missions) must<br />
reach a given location in order to accomplish certain<br />
objectives.<br />
At the start of each mission, a message will appear<br />
on-screen describing its objective.<br />
Stay alert, as these objectives may be modified or new<br />
objectives may appear in the course of a mission!<br />
These changes will be displayed on the screen, so make sure<br />
you read all the messages that appear.<br />
8
If you can’t remember the mission’s objectives, simply use<br />
the ESC menu to pause the game and review the objectives.<br />
Once you have accomplished the mission’s objectives, a<br />
message will let you know that you’ve won. You can then<br />
either quit the mission or remain where you are in order to<br />
accomplish some secondary objectives (find money,<br />
interrogate characters, etc.).<br />
If you choose to continue, a Seal will appear on the top right<br />
of the screen. Simply click on it to quit the mission at any<br />
time.<br />
A mission will be considered lost if one of your team’s main<br />
characters is killed by the enemy.<br />
In some missions, especially those in which <strong>Robin</strong> is setting<br />
an ambush for the Sheriff’s men, a Seal will be displayed on<br />
the top right from the very start. This means that if the<br />
ambush backfires on <strong>Robin</strong> and his men, you can click on the<br />
Seal if you want to retreat! The mission will be lost, but at<br />
least your men will still be alive…<br />
3.3 THE INTERFACE<br />
Mini-map<br />
• Click on the ‘Map Scroll’ to reveal a MINI-MAP showing the<br />
area in which the mission is taking place. Click on any point<br />
on this map to view that point up close.<br />
•You can close the MINI-MAP by right-clicking with your<br />
mouse.<br />
• The MINI-MAP provides you with the following information:<br />
a green dot indicates the location of one of the Merry Men,<br />
a blue dot indicates a civilian, a red dot an enemy, a purple<br />
dot a personality. A grey dot indicates the presence of a<br />
character who could be either friend or foe. Yellow crosses<br />
indicate an object which can be collected by the Merry Men.<br />
9
Game inform a t i o n :<br />
Money: sum of<br />
money earned by<br />
<strong>Robin</strong> and his men.<br />
Clover: number of<br />
Clovers gathered by<br />
the team.<br />
Change<br />
viewing angle<br />
The area where the<br />
mission is taking<br />
place is often much<br />
l a rger than what<br />
appears<br />
s c re e n .<br />
on the<br />
Z o o m<br />
T h e re are thre e<br />
d i ff e rent zoom levels:<br />
n o rmal, near and<br />
distant. To switch<br />
between them, you<br />
can either use your<br />
mouse wheel or click<br />
on the ‘To w e r s ’.<br />
Game zone<br />
The place where our heroes must carry out their<br />
mission. This is where they must find their enemies,<br />
move about, fight, collect gold, etc.<br />
Hero portraits<br />
Crouch<br />
Make the selected characters less<br />
visible by clicking on the ‘CROUCH’<br />
icon on the bottom left of the<br />
portraits.<br />
Health meter<br />
Shows remaining health.<br />
Each hero’s special abilities appear under their portrait.<br />
3.4 SHERWOOD FOREST<br />
Sherwood Forest is the headquarters of <strong>Robin</strong> <strong>Hood</strong> and the Merry<br />
Men, and can be entered after completion of the second mission.<br />
In Sherwood, you can recruit new Merry Men, prepare your<br />
team for a mission, set your men to work making items<br />
needed for missions, etc.<br />
10
3.4.1 New recruits<br />
During certain important missions (aside from simple<br />
ambushes), <strong>Robin</strong> will have the opportunity to show that he<br />
can behave as befits a hero. At the end of the mission, and<br />
depending on how he has conducted himself, <strong>Robin</strong> will<br />
receive a message informing him that he has just recruited<br />
some new Merry Men! These will then join him in Sherwood<br />
where he can send them on missions or put them to work in<br />
one of his workshops.<br />
These new recruits are downtrodden peasants who have<br />
decided to join <strong>Robin</strong> in his battle against the oppressor.<br />
They aren’t particularly fond of violence, which is why <strong>Robin</strong><br />
will get more recruits the more he spares enemy s o l d i e r s ’<br />
lives. <strong>Robin</strong> must behave like a hero .<br />
Equally, they will desert the team if too many men are lost<br />
during the missions.<br />
Avoid killing too many enemies and new companions will<br />
flock to you!<br />
11
3.4.2 Selecting characters in Sherwood<br />
If you select more than five characters, two arrows on the<br />
character bar will allow you to scroll between the different<br />
characters.<br />
If no character is selected, a button in the middle of the<br />
character bar lets you select all the characters with one click.<br />
3.4.3 The workshops<br />
The workshops are located in <strong>Robin</strong>’s headquarters in<br />
Sherwood.<br />
Most of them produce a specific type of object. When you<br />
return from a successfully completed mission, a certain<br />
number of objects will have been constructed, depending on<br />
the number of men assigned to the task. All you have to do is<br />
go and collect them!<br />
Every time you return from a mission, a parchment near the<br />
tree in the middle of the forest will let you know how many<br />
objects each workshop produced.<br />
The central characters all have special skills for pro d u c i n g<br />
certain types of objects. If assigned to the right workshop, they<br />
will increase the team’s output. For example, if <strong>Robin</strong> stays in<br />
the arrow workshop, he will increase its pro d u c t i o n .<br />
3.4.4 Experience<br />
Other workshops can be used by the<br />
characters for resting and feeding (the<br />
‘feast’ workshop), training at arc h e r y<br />
(the ‘archery’ workshop) and training in<br />
hand to hand combat (the ‘combat’<br />
workshop). The more they train, the<br />
m o re they gain experience.<br />
The Merry Men have varying degrees of ability at archery<br />
and combat. To find out a character’s abilities in these two<br />
fields, place the cursor over him when you’re in Sherwood.<br />
12
A small parchment will appear showing one or more sword<br />
icons and one or more bow icons (if the character can use<br />
a bow and arrows). The greater the number of swords and<br />
bows, the greater the character’s abilities.<br />
Characters gain experience (and so increase their number<br />
of swords and bows) by fighting or firing at an enemy. They<br />
can also gain experience by training in the workshops of<br />
Sherwood Forest.<br />
3.4.5 Selecting a mission<br />
To select a new mission, you must click on the ‘MAP’ icon (on<br />
the top right of the screen) while in Sherwood Forest.<br />
A map showing Sherwood Forest and<br />
the surrounding area will then appear.<br />
Highlighted arrows and castles indicate<br />
locations where you can send<br />
your men on missions.<br />
Place the mouse pointer over these locations to view a brief<br />
mission description.<br />
Click on the location to receive a more detailed mission<br />
description. You can either accept the mission or close the<br />
parchment in order to study the description of a different<br />
mission.<br />
Once you have selected a mission, you will return to<br />
Sherwood. A red seal will appear (on the top right of the<br />
13
screen) as well as a series of boxes representing character<br />
portraits or action icons.<br />
You now have to select a team to send on your chosen mission.<br />
The icons at the top of the screen indicate the maximum<br />
number of characters you can send on the mission as well as<br />
the abilities which at least one member of your team must<br />
possess.<br />
If a portrait appears at the top of the screen, this means that<br />
that character must be included in your team.<br />
Give the characters you want to send on the mission the order<br />
to gather on the path leading out of Sherwood Forest (on the<br />
top right of the screen).<br />
As the characters take their positions, the boxes will fill with<br />
their portraits. If the characters have the required abilities,<br />
then the boxes will be colored green.<br />
You can send your team on its way more quickly by clicking the<br />
‘SEND’ icon (on the top right of the screen).<br />
Once you have gathered a team with all the required abilities,<br />
you can click on the blue seal which will appear: your mission<br />
is now under way…<br />
3.5 SELECTING AND MOVING AN ACTIVE CHARACTER<br />
3.5.1 Selecting an active character<br />
The name and face of each team member taking part in the<br />
mission will be displayed on the bottom of the screen, as a<br />
PORTRAIT. In order to select a character to give him orders,<br />
simply click on his portrait, or on the character himself (only<br />
a selected character can receive orders).<br />
If you double-click on a PORTRAIT, then the view of the<br />
game area will center on that character.<br />
14
You can select several characters at a time. There are two<br />
means of doing this:<br />
• Hold down the LEFT SHIFT KEY (default setting) while<br />
you click on the portraits of the characters you want to select.<br />
• Click on the map and hold down the LEFT mouse<br />
button. Now all you have to do is draw a ‘box’ on the<br />
screen with the mouse: when you release the button, all<br />
the characters inside the box will be selected.<br />
Once a character is selected, a green circle appears around<br />
his feet and his PORTRAIT scrolls to show the actions he is<br />
capable of.<br />
Once a character receives an order, he will try to carry it out,<br />
even if he is no longer selected. You can therefore give a first<br />
character an order and then select a second character to give<br />
him an order.<br />
Be careful, though: if you give a selected character a new<br />
order before he has completed the first one, he will try to carry<br />
out the new order and forget about the first one. However, you<br />
can use the ‘Quick Actions’ to give a character an order that<br />
he won’t carry out straight away.<br />
3.5.2 Moving<br />
Once a character is selected, you can order him to walk by<br />
clicking on his destination. Double-click on his destination to<br />
make him run there (watch out though, running makes a lot<br />
of noise).<br />
Certain locations are inaccessible to given characters. If the<br />
cursor changes to a cross when placed over a section of the<br />
game zone, then the selected character can’t go there!<br />
Crouching:<br />
Characters are less visible when crouching, but they move<br />
more slowly. To make a character get up, click on the ‘Stand<br />
up’ icon.<br />
15
Climbing:<br />
Some characters are capable of climbing ivy-covered walls. If<br />
the selected character can do so, the cursor will change to a<br />
double vertical arrow when placed over such a wall. Simply<br />
click on the wall and the character will go over to<br />
it and start climbing. You can also click directly on a<br />
building’s roof: if there is a way up, and if the character can<br />
climb, then he’ll find the way himself!<br />
Jumping:<br />
Some characters are capable of jumping, but only in certain<br />
locations. If placed over such a location, the cursor will change<br />
to a curved arrow and a blue line indicating the jump’s<br />
trajectory will appear! Simply click on the jump’s destination<br />
and the character will hop over by himself!<br />
Doors and Buildings:<br />
The cursor will change to a ‘DOOR’ when placed over doors.<br />
Click on the door and the selected character(s) will enter the<br />
building. Be careful though: it may be full of enemies!<br />
NB: To cancel an order, either movement or action, right-click the<br />
selected character with your mouse or else give him a new order.<br />
You may want to move your characters to an area of the map<br />
which is hidden by a wall or other obstacle. To do this, hold<br />
down the LEFT SHIFT key and move the cursor over the area<br />
you want to go to. If your characters can reach it, the cursor<br />
will change to an outlined yellow cross.<br />
3.6 INFORMATION AND BONUSES<br />
3.6.1 Parchements<br />
In the game zone, you will come across scrolls of parchment<br />
on the ground. All characters can pick these up.<br />
These parchments provide information once picked up. This<br />
may consist of information important to the mission, or<br />
giving the location of an object, or reveal the exact nature of<br />
the silhouettes in the game zone.<br />
16
There are three types of parchment.<br />
• Those tied with a red ribbon generally disappear after<br />
being read. These are the most common.<br />
• Those tied with a blue ribbon don’t disappear after<br />
being read. You can reread them later if you wish. These<br />
are generally ‘tutorial’ parchments, explaining certain<br />
aspects of the game.<br />
• Those with no ribbon are parchments which you have<br />
already read or which contain information which you<br />
already know. There is therefore no point in going out of<br />
your way to read them…<br />
3.6.2 Beggars<br />
<strong>Robin</strong> (or the other principal characters) can meet beggars in<br />
most towns. These beggars know many things and can be<br />
persuaded to share them with you in exchange for small sums<br />
of money.<br />
Just click on a beggar with one of the Merry Men to buy<br />
information from him – providing you have money to give him!<br />
The information purchased will appear in the form of a<br />
parchment somewhere in the game zone. The mini map will<br />
then be displayed to show you where the parchment appeared.<br />
Some information is so important that the beggars won’t want<br />
to tell you unless you pay them several times. But don’t worry,<br />
the beggars are honest: they’ll tell you if they have no more<br />
information to give you!<br />
3.6.3 Speaking to characters<br />
Some characters – mostly civilians – have something to reveal<br />
to <strong>Robin</strong> or his men. They’re easy to recognize: they have a<br />
‘DIALOGUE:(!)’ icon over their heads. Just click on them to<br />
start the dialogue.<br />
17
Sometimes circumstances will cause dialogues to be played,<br />
as when <strong>Robin</strong> spies on his enemies. When a dialogue is<br />
playing, you can skip directly to the end by clicking on the<br />
red seal at the bottom of the dialogue parchment!<br />
3.6.4 Clovers<br />
In the course of his adventures, <strong>Robin</strong> will receive Clovers as<br />
rewards for his heroism and good deeds (the number of<br />
Clovers earned appears in the top left corner of the screen).<br />
These Clovers bring good luck to <strong>Robin</strong> and his men.<br />
For example, if one of the Merry Men receives a fatal<br />
blow – and if you have a Clover in reserve – then the character<br />
won’t die but will fall down wounded instead. His opponents<br />
will stand around him, guarding him, but he’ll still be alive<br />
(you’ll see stars spinning around his head).<br />
Once all danger has been cleared away from around him, you<br />
can click on the Clover which appeared over his portrait. He’ll<br />
then come back to life – in poor health, admittedly, but alive!<br />
But be careful: the wounded man needs to have at least one<br />
active comrade remaining in the mission, otherwise you won’t<br />
be able to revive him and you’ll lose the mission.<br />
3.7 INDIVIDUAL MISSIONS<br />
3.7.1 Ambush Missions<br />
In some missions, you’ll often be able to see large targets in<br />
the trees. These are for setting off traps.<br />
Whenever one of your characters hits the target with an<br />
arrow, he’ll set off the corresponding trap. These can include<br />
catching enemies in a net or sending a signal to Merry Men<br />
hiding in the forest.<br />
In the latter case, the Merry Men will attack of their own<br />
accord once the signal is given. But they’ll also retreat once<br />
they’ve defeated an enemy.<br />
18
Other traps include hidden holes in the ground for catching<br />
enemies, unstable boulders that can be pushed onto<br />
enemy soldiers, etc.<br />
3.7.2 Strategic Missions<br />
There are two types of strategic missions: defensive missions<br />
and attacking missions.<br />
At a certain stage in the campaign, <strong>Robin</strong> will have to help<br />
his allies in the war against the Sheriff of Nottingham.<br />
The objective is to earn a certain number of Shields<br />
(as indicated in the mission description).<br />
Each Shield corresponds to a strategic advantage controlled<br />
by the enemy.<br />
• Defensive Missions<br />
Some strategic missions consist of defending a castle held by<br />
<strong>Robin</strong>’s allies.<br />
<strong>Robin</strong>’s only way of helping his allies is to send re i n f o rcements to<br />
defend the castle.<br />
The instructions for defensive missions will include three<br />
empty Coat of Arms which must be filled by Shields.<br />
The three buttons beneath the window read ‘BUY A SHIELD’,<br />
‘SEND MERRY MEN’ and ‘ATTACK AN ENEMY CONVOY’.<br />
These are three ways of earning a SHIELD.<br />
• Attacking Missions<br />
19
These missions consist of helping <strong>Robin</strong>’s allies lay siege to<br />
an enemy castle.<br />
In these missions, it isn’t enough to intercept a few convoys<br />
or send a few men out foraging. Instead, you have to infiltrate<br />
the enemy castle in order to prepare the way for the siege!<br />
While preparing for his mission, <strong>Robin</strong> can get up to 6 Shields<br />
(of the 12 needed) by:<br />
• Giving money to his allies so they can better defend<br />
themselves (‘BUY A COAT OF ARMS’)<br />
• Sending his men out spying (‘SEND MERRY MEN’). You<br />
must select a group of men in Sherwood and set them on<br />
the path out of the forest. Each group of five men will<br />
earn you a Shield. However, you can’t send any main<br />
characters out on spying missions<br />
• Stealing money during an ambush (‘ATTACK AN ENEMY<br />
CONVOY’)<br />
Your team will still need to earn 6 Shields ‘on the field of battle’<br />
(the ‘INFILTRATE THE CASTLE’ button).<br />
When you infiltrate the castle, you’ll find your enemies on<br />
the verge of attacking – it’s all or nothing now!<br />
Inside the castle, you’ll be able to earn Shields by, for<br />
example, opening a drawbridge or capturing the enemy’s<br />
general, etc.<br />
20
Objectives which will earn you Shields, will have a spinning<br />
Shield icon beside them.<br />
3.8 WHAT YOU NEED TO KNOW TO PLAY A MISSION<br />
3.8.1 Silhouettes<br />
At the start of a mission, <strong>Robin</strong> and his men know nothing<br />
about their enemies’ defences. That is why the characters<br />
visible in the game zone appear as a black silhouette.<br />
In order to find out whether a silhouette is hiding a friend,<br />
enemy soldier or a civilian, one of your men will have to get<br />
close to it, or find out in a different manner (from a beggar,<br />
for example), or use certain special abilities.<br />
3.8.2 Objects<br />
Objects are always visible (unless they can only be used<br />
under certain conditions, in which case they will only appear<br />
on the game zone once those conditions have been fulfilled).<br />
Objects are easy to recognize, as they rotate in position.<br />
Only a character capable of carrying out the action<br />
corresponding to the object will be able to pick it up. Be<br />
careful: characters can only carry a limited number of each<br />
type of object!<br />
3.8.3 Displaying an enemy’s Field of Vision<br />
Soldiers and civilians can’t see everything happening around<br />
them. In fact, they can only see people and things that come<br />
into their FIELD OF VISION.<br />
To display a character’s field of vision, just click on the ‘Eye’<br />
(on the top right of the screen) or use the keyboard shortcut<br />
(default setting: hold ALT down). This will turn the cursor<br />
into a question mark. Move the cursor over a character to<br />
display his FIELD OF VISION.<br />
21
But first of all you have to know who the character is: the<br />
FIELD OF VISION won’t be displayed if the character still<br />
appears as a silhouette…<br />
To get rid of the ‘question mark’ cursor, just right-click with<br />
your mouse.<br />
To hide a character’s field of vision, right-click on the ‘Eye’<br />
icon (top right of the screen) or right-click on the game zone<br />
while holding ALT down.<br />
If one of your men or an object such as a corpse passes<br />
through a character’s field of vision, there is a good chance<br />
they’ll be seen which could cause the character to raise the<br />
alarm, so make sure you aren’t seen!<br />
You can only display one character’s field of vision at a time.<br />
3.8.4 Emoticons<br />
Emoticons are little symbols which appear over civilians’ and<br />
soldiers’ heads and which indicate how they’re feeling. This<br />
way, you can observe several people’s reactions at once.<br />
Question mark:<br />
The soldier has noticed something, but hasn’t figured out<br />
what.<br />
Exclamation mark:<br />
The soldier has just been alarmed by something.<br />
Sun:<br />
The character has just seen something which interests him.<br />
He will undoubtedly head for the object in question (such as<br />
a purse of money, for example).<br />
Storm cloud:<br />
The character has just seen or been subjected to something<br />
which has made him angry (such as being stung by a wasp,<br />
for example).<br />
22
Rain cloud:<br />
The character has seen something which doesn’t interest<br />
him.<br />
Z:<br />
The character is sleeping. He can’t see anything, but loud<br />
noises will wake him up!<br />
Spiral:<br />
The character is drunk, he is slower and less alert than<br />
normal.<br />
3.8.5 Hidden characters<br />
In some missions, your characters start out by being hidden<br />
under a pile of leaves or under a cloak which hides their face.<br />
In this case, a small portrait of the character will appear over<br />
his hiding place.<br />
Hidden characters won’t be noticed by your enemies as long<br />
as they haven’t been given any orders.<br />
4 THE CHARACTERS<br />
4.1 ROBIN AND HIS MERRY MEN<br />
ROBIN HOOD<br />
Our hero, <strong>Robin</strong> of Locksley, has just returned<br />
from the Crusades where he fought beside the<br />
valiant King Richard the Lion-Heart. However, he<br />
discovers that the King has not yet returned: the<br />
Kingdom is in the hands of the King’s brother,<br />
Prince John, and it would seem that he is<br />
incapable of maintaining order. Indeed, when<br />
<strong>Robin</strong>’s father died while he was away, the Sheriff<br />
of Nottingham took over <strong>Robin</strong>’s land, by claiming<br />
that he was dead too!<br />
The Sheriff is also terrorizing the local population by<br />
imposing heavy taxes on poor villagers. <strong>Robin</strong> decides to<br />
reclaim his rightful due and free the people from the<br />
23
tyrannical Sheriff by defeating him. But the Sheriff is only a<br />
pawn…<br />
STUTELEY<br />
This grumpy craftsman is an old friend of <strong>Robin</strong>’s<br />
family and an enemy of the Sheriff.<br />
Shrewd and good with his hands, Stuteley is skilled<br />
at building traps that are useful in attacking the<br />
Sheriff’s convoys. Stuteley is well organized and<br />
f a r-sighted: it was he who set up the secre t<br />
headquarters in Sherwood.<br />
MAID MARIAN<br />
This charming young lady is a childhood friend of<br />
<strong>Robin</strong>’s… He is still in love with her, but hasn’t heard<br />
from her in a long time. What will she think when she<br />
learns that <strong>Robin</strong> has become a brigand?<br />
WILL SCARLET<br />
One of <strong>Robin</strong>’s nephews, Will Scarlet has a bad<br />
reputation: he is said to be brutal and violent.<br />
Scarlet loves fighting and is always looking for<br />
trouble… some say that he dresses in red so that<br />
nobody will notice the blood stains on his clothes.<br />
LITTLE JOHN<br />
Big and strong, Little John is a real force of nature.<br />
A woodcutter in a small village on the edge of<br />
Sherwood Forest, he wants to join <strong>Robin</strong>’s group but<br />
hasn’t yet had the chance to meet him…<br />
24
FRIAR TUCK<br />
This portly monk is Maid Marian’s confessor.<br />
Although his first encounter with <strong>Robin</strong> was<br />
somewhat… brutal, he eventually decided to<br />
work for him as a spy in return for the occasional<br />
feast.<br />
MO U S TA C H I O E D ME R RY, AG G R E S S I V E ME R RY A N D ST R O N G<br />
ME R RY<br />
These are three types of minor characters who fight<br />
alongside <strong>Robin</strong>. They can all accomplish the same actions.<br />
4.2 ENEMIES<br />
There are different types of soldiers, all with different types of<br />
weapons. They wear different colored uniforms which serve to<br />
indicate their experience. For example, a black lancer is much<br />
more deadly than a blue lancer. Here is a list of the different<br />
colors and their meanings:<br />
Blue:<br />
Yellow:<br />
Orange:<br />
Red:<br />
Black:<br />
Green:<br />
an inexperienced soldier who barely knows<br />
how to fight.<br />
a low-ranking soldier with very little<br />
experience.<br />
this soldier is well trained and fights with<br />
skill and cunning.<br />
a highly skilled veteran. Very dangerous.<br />
an elite soldier. Extremely competent,<br />
efficient and dangerous. Avoid them until<br />
you’re sure you’re ready!<br />
These are soldiers fighting for Ranulph<br />
and Godwin. The first time you encounter<br />
them, you will have to fight them… but<br />
don’t kill them, as they will soon become<br />
your allies.<br />
You will find a list of different actions or stimuli the soldiers<br />
are susceptible to on page 37.<br />
25
LANCERS<br />
Lancers are low level soldiers, generally they are simple<br />
peasants who have been forcefully recruited by the Sheriff of<br />
Nottingham. They fight with long spears, which makes it hard<br />
for their opponents to get close to them. Luckily, they aren’t<br />
particularly tough.<br />
HALBERDIERS<br />
Like the lancers, they also fight with a long weapon. But these<br />
are real fighters, and often stand guard outside castle gates.<br />
They rarely leave their post, preferring to send other soldiers<br />
to see what is going on.<br />
SWORDSMEN<br />
The best lancers go on to become swordsmen. They are more<br />
‘professional’ than the lancers, and use a short weapon as well<br />
as a large shield which they use to protect themselves from<br />
enemy arrows – or to protect a comrade, usually an archer.<br />
ARCHERS<br />
Archers aren’t much good at close quarters combat but can be<br />
deadly at a distance. They are cowardly and delicate. But be<br />
careful when they’re fighting alongside swordsmen, as these<br />
will use their shields to protect the archers…<br />
CROSSBOWMEN<br />
Like the archers, they attack from a distance but are much<br />
more courageous and deadly. Their crossbows make them<br />
particularly dangerous. Their chain mail armor also provides<br />
them with good protection against blows.<br />
OFFICERS<br />
Officers are good fighters, but are especially valued for their<br />
tactical abilities. They know how to organize their troops in<br />
battle, and can also prevent their men from succumbing to<br />
26
the temptation of gold and beer. Officers prefer sending<br />
their men into battle to attacking themselves but, should<br />
they decide to wade in, they can be fearsome. They are very<br />
tough and are hard to knock out. However, it is a good idea<br />
to get rid of them first as this weakens their troops.<br />
KNIGHTS<br />
Knights are noblemen who take part in battle. Decked out in<br />
armor and carrying a long double-handed sword, knights<br />
are fierce fighters. Too proud to fight a lowly bandit when<br />
there are others to take care of him, they will wait until you<br />
have gotten rid of the other troops before attacking you…<br />
Their armor provides them with excellent protection against<br />
arrows and they are very tough and VERY dangerous…<br />
CAVALRYMEN<br />
Having exchanged their sword for a heavy flail they lost<br />
nothing in the process: heavy armor, lethal weapon. They are<br />
very quick and deadly when they charge. Arrows bounce off<br />
them and the only way of hurting them is to use a blunt<br />
weapon such as a staff, mace or flail (swords can’t penetrate<br />
their armor).<br />
CIVILIANS<br />
You will encounter many civilians in the towns around<br />
Sherwood. Many of these are poor, honest folk who support<br />
<strong>Robin</strong>’s cause: you have nothing to fear from them, they won’t<br />
raise the alarm and sometimes will even send your pursuers<br />
off in the wrong direction.<br />
Others are the Sheriff’s allies: corrupt merchants, greedy<br />
nobles, castle spies… they won’t hesitate in raising the alarm<br />
and you need to be ready to avoid them or knock them out…<br />
but don’t kill them!<br />
27
4.3 ROBIN’S ALLIES<br />
GODWIN<br />
Godwin is <strong>Robin</strong>’s godfather. At the request of <strong>Robin</strong>’s father,<br />
Godwin shaped our young hero into a valiant knight. He<br />
taught <strong>Robin</strong> all he knew about sword fighting and archery<br />
before sending him off to the Crusades to prove himself.<br />
Godwin is a warrior who loves life but who can also fly into<br />
f i e rce rages. He trains continually for battle in his castle in<br />
Lincoln (he is in very good shape for his age). <strong>Robin</strong> would like<br />
to meet up with him in Lincoln in order to enlist his help in<br />
fighting the Sheriff, but a surprise is waiting for him there …<br />
RANULPH<br />
Ranulph is a career soldier and a noble knight. He is extremely<br />
battle-hardened and is much appreciated by the King, who<br />
gave him the fief of Leicester. <strong>Robin</strong> has never met him, but he<br />
would undoubtedly make a heavyweight ally! However, <strong>Robin</strong><br />
will first have to convince him to become a brigand’s friend…<br />
4.4 PRINCIPAL ENEMIES<br />
Some enemies are immune to anything your characters can<br />
throw at them, including swords and arrows. Only <strong>Robin</strong><br />
himself can take on these enemies by dueling with them. But<br />
be careful, they won’t be easy to beat!<br />
THE SHERIFF OF NOTTINGHAM<br />
C h a rged with “maintaining order in the area aro u n d<br />
Nottingham”, the Sheriff is a greedy individual who abuses<br />
his power and gets rich off the backs of the region’s poor. He<br />
took over <strong>Robin</strong>’s land and some say that he had a hand in<br />
the death of <strong>Robin</strong>’s father. He is a powerful warrior and a<br />
cunning opponent.<br />
28
PRINCE JOHN<br />
Prince John is the brother of Richard the Lion-Heart.<br />
He was made regent of the Kingdom in Richard’s absence<br />
but has the reputation of being weak-willed. The Kingdom<br />
would seem to be falling into chaos. But perh a p s<br />
appearances can be deceiving…<br />
WILLIAM LONGCHAMP<br />
Of Norman origin, William is Prince John’s right-hand man.<br />
Cunning, competent and a skilled politician, he serves the<br />
Prince with dedication and employs the services of many<br />
skillful spies.<br />
He is an astute political opponent but is also a skilled<br />
swordsman and a hardened warrior…<br />
GUY OF GUISBOURNE<br />
This outstanding warrior is a member of Prince John’s court.<br />
He has a violent temper and recently fell in love with Maid<br />
Marian – and is pre p a red to do anything it takes to marry her…<br />
SCATHLOCK<br />
Scathlock terrorizes the region around his castle in Derby.<br />
This great general has a reputation for being cruel and<br />
bloodthirsty and is feared by his peasants. He is a personal<br />
friend of the Sheriff of Nottingham and a loyal servant of<br />
Prince John.<br />
CHARACTER ACTIONS<br />
4.5 CHARACTER ACTIONS<br />
Under each character’s portrait, you will see the icons<br />
representing the actions they are capable of. By clicking on<br />
one of the icons, you can order a character to carry out an<br />
action by directing him towards a target.<br />
You can deselect an action by RIGHT clicking over an empty are a .<br />
29
As long as an action is selected, you can’t give any other<br />
orders to a character. Remember to cancel the first order<br />
before giving any more!<br />
However, once an action has been selected, you can click on<br />
a section of the map while holding down CTRL (default<br />
setting). The character will then head for the area in question<br />
and, once he reaches it, will resume the selected action. For<br />
example, if <strong>Robin</strong> is aiming at a group of enemy soldiers with<br />
his bow, you can use CTRL to correct his position.<br />
Some actions require that the character use objects (such as<br />
a purse, a wasps’ nest, etc.). In this case, a number will appear<br />
on the character’s portrait, below the action icon. This<br />
represents the number of objects the character has at his<br />
disposal. If he has none, the icon will be shaded grey and he<br />
won’t be able to carry out the action. He will have to find more<br />
objects before he can carry out the action again.<br />
When an action requiring objects has been selected, it is<br />
possible to place ammunition on the ground without setting off<br />
the action. Just RIGHT click on the action icon to put down an<br />
object or double RIGHT click to put down five at a time. This<br />
will be especially useful if several of your characters can do the<br />
same action but are lacking ammunition: the character with<br />
the most ammo can then share it with the others.<br />
You will need to confirm certain actions. Generally, these are<br />
actions where you are sending the character off in a given<br />
direction. Once the action has been selected, the cursor will<br />
take the shape ‘OK’. Move the cursor about to point the<br />
character in the right direction and then simply click to<br />
confirm the action.<br />
4.6 COMBAT MODE<br />
Sooner or later, you’re going to have to fight. Whether one of<br />
your characters starts the battle (by clicking on an enemy)<br />
or whether an enemy spots one of your men and attacks, it’s<br />
too late for stealth…<br />
30
Unselected characters know how to fight by themselves,<br />
without help from you, but they will be much more effective<br />
if you take control.<br />
In combat (when they have a red circle around their feet),<br />
characters can perform a series of different attacks. You<br />
can decide which attack they’ll use with the LEFT mouse<br />
button. Now hold the button down: a colored line will appear<br />
on the screen as you move the mouse around. Draw the<br />
figures below with your mouse to make your character the<br />
perform specific attacks.<br />
Icon Action Characters Object Require d<br />
Fight Everybody None<br />
Archery <strong>Robin</strong> <strong>Hood</strong> Arrows<br />
Maid Marian<br />
Moustachioed Merry<br />
Knockout<br />
Punch<br />
<strong>Robin</strong> <strong>Hood</strong><br />
Little John<br />
Throw Purse <strong>Robin</strong> <strong>Hood</strong> Purse, £50<br />
Give Money Main Characters £50<br />
to Beggars<br />
Search<br />
Climb<br />
Jump<br />
Activate<br />
Mechanism<br />
<strong>Robin</strong> <strong>Hood</strong><br />
Maid Marian<br />
<strong>Robin</strong> <strong>Hood</strong><br />
Will Scarlet<br />
Stuteley<br />
Aggressive Merry<br />
<strong>Robin</strong> <strong>Hood</strong><br />
Little John<br />
Will Scarlet<br />
Moustachioed Merry<br />
Everybody<br />
Catapult Will Scarlet Stones<br />
31
Shield<br />
Finish Off<br />
Enemy<br />
Whistle<br />
Give Someone<br />
a Leg-up<br />
Transport<br />
Revive<br />
Will Scarlet<br />
Moustachioed Merry<br />
Will Scarlet<br />
Aggressive Merry<br />
Little John<br />
Strong Merry<br />
Little John<br />
Little John<br />
Strong Merry<br />
Little John<br />
Maid Marian<br />
Aggressive Merry<br />
Throw Wasps Friar Tuck Wasps<br />
Put Down Friar Tuck Beer<br />
a Beer<br />
Eat Friar Tuck Leg of Lamb<br />
Strong Merry<br />
Tie Someone Up<br />
Pick Lock<br />
Spy<br />
Stuteley<br />
Friar Tuck<br />
Moustachioed Merry<br />
Stuteley<br />
Friar Tuck<br />
Aggressive Merry<br />
Maid Marian<br />
Heal Maid Marian Medicinal Herbs<br />
Aggressive Merry<br />
Throw Net Stuteley Net<br />
Throw Appple Stuteley Apples<br />
Aggressive Merry<br />
Set Off trap<br />
Little John<br />
Strong Merry<br />
32
List and descriptions of different attacks (from the point of<br />
view of the character fighting):<br />
• Quick forward jab: Click on your opponent or draw a<br />
straight line backwards<br />
• Slow powerful forward blow: Draw a line forwards<br />
• Attack left: Draw a line to the left<br />
• Attack right: Draw a line to the right<br />
• Semi-circular blow to the left: Draw a counter-clockwise<br />
semi-circle<br />
• S e m i - c i rcular blow to the right: Draw a clockwise<br />
s e m i - c i rc l e<br />
• Circular blow to the left: Draw a counter-clockwise circle<br />
• Circular blow to the right: Draw a clockwise circle<br />
• Coup de grâce: Draw an infinity sign (∞). This is a very<br />
slow but very powerful attack…<br />
You can also block your opponent’s attacks: RIGHT click with<br />
your mouse to assume a defensive position. Watch out<br />
though, your character won’t stay in this position forever!<br />
Energy<br />
In the case of prolonged combat, your characters are in danger<br />
not only of being wounded, but of growing tired: every time a<br />
character completes a special attack, he loses energy.<br />
During battle, your selected characters’ energy appears as a<br />
small red gauge underneath them. Certain attacks require<br />
more energy than others.<br />
When his energy levels reach zero, a character will be<br />
completely worn out and in need of rest to regain his energy –<br />
he will stop fighting and you’ll see stars spinning around his<br />
head.<br />
Be careful, during this ‘rest break’, your character will be very<br />
vulnerable as he won’t be able to attack or defend himself!<br />
But your opponents will also need to rest occasionally – a<br />
good opportunity to deliver a crippling blow…<br />
33
Treatments<br />
There are several ways of treating wounded characters.<br />
• Characters who can EAT can use a leg of lamb to heal<br />
themselves.<br />
• The HEAL action lets a character heal himself or a<br />
comrade in exchange for a MEDICINAL HERB.<br />
• A wounded character can be placed in the ‘FEAST<br />
workshop’ in Sherwood. He will regain part of his<br />
health while you undertake the next mission.<br />
Health<br />
Every character, be they friend or foe, has a certain number of<br />
life points.<br />
• Each time a character is wounded, he loses life points.<br />
The amount he loses depends on the seriousness of the<br />
blow.<br />
• When a character has no more life points, he dies…<br />
• Whenever a character is wounded, a number appears<br />
briefly over his head, indicating the number of life points<br />
he has just lost.<br />
• You can always check your characters’ health levels by<br />
looking at the top half of their portraits: if the character<br />
is wounded, the scroll will start to ‘burn’ and blacken.<br />
The greater your character’s injuries, the more the<br />
scroll will be burnt.<br />
•A blow can put a character out of action without<br />
killing him. This is often the case with weapons<br />
such as the staff or mace: a character wounded by these<br />
will probably be knocked out but not killed.<br />
•Characters remain knocked out until the stars<br />
above their head disappear or until someone<br />
revives them (use the revive action on your characters<br />
– your enemies will revive their own wounded).<br />
34
• Every character has their own type of weapon and these<br />
vary in power and effectiveness. Some characters can<br />
fight better than others and some use weapons which<br />
knock others out more easily.<br />
• Your chances of knocking someone out are greater if his<br />
health is already low…<br />
Objects<br />
Beer<br />
Purse<br />
Net<br />
Arrows<br />
Medicinal Herbs<br />
Leg of lamb<br />
Wasps<br />
Stones<br />
Apples<br />
Money<br />
Coat of Arms<br />
Scroll<br />
Clover<br />
Actions<br />
Put down a beer<br />
Put down a purse<br />
Throw net<br />
Archery<br />
Heal<br />
Eat<br />
Throw Wasps<br />
Catapult<br />
Throw apple<br />
Pick up<br />
Pick up<br />
Pick up<br />
Pick up<br />
35
Actions Default 1 Default 2<br />
Zoom in Num + Num +<br />
Zoom Out Num - Num -<br />
Scroll up Up Arrow Up Arrow<br />
Scroll down Down Arrow Down Arrow<br />
Scroll left Left Arrow Left Arrow<br />
Scroll right Right Arrow Right Arrow<br />
Open/Close Minimap ; Num *<br />
Select first character 1 Num 1<br />
Select second character 2 Num 2<br />
Select third character 3 Num 3<br />
Select fourth character 4 Num 4<br />
Select fifth character 5 Num 5<br />
Select all q Num 6<br />
Unselect all d Num 0<br />
Crouch down c Next Page<br />
Get up s Prev. Page<br />
Go behind house (key + click) Left Shift Right Shift<br />
Display outlines Caps Lock Caps Lock<br />
QuickAction 1 g Num 7<br />
QuickAction 2 h Num 8<br />
QuickAction 3 j Num 9<br />
Move during action (key + click) Left Ctrl Right Ctrl<br />
Save QuickAction a Return<br />
Start QuickActions Space Space<br />
Clear QuickActions Backspace Backspace<br />
Diplay field of vision Alt Alt<br />
Quick Savegame F1 F1<br />
Quick Load F5 F5<br />
36
When a character dies<br />
Whenever a character dies, his portrait becomes inaccessible<br />
and he can no longer be selected.<br />
If one of your principal heroes is killed and you have no<br />
Clovers, then you lose the game…<br />
If one of your minor characters dies, an icon representing an<br />
arrow with a parchment wrapped around it will appear over<br />
his portrait (providing you have more characters of the same<br />
type available in Sherwood).<br />
Just click on the icon to summon a replacement from<br />
Sherwood. Be careful though, the new arrival may well turn up<br />
in a dangerous part of the forest!<br />
4.7 CONTEXT-BASED ACTIONS<br />
A context-based action is one which is not indicated on a character’s<br />
portrait. These can only be performed on certain targets<br />
and in certain circumstances.<br />
Whenever such an action is possible for a selected character,<br />
the cursor will change whenever it passes over a valid target.<br />
• Pick up object<br />
• Search<br />
• Tie someone up<br />
• Finish off an unconscious enemy<br />
• Transport<br />
• Revive<br />
• Activate mechanism<br />
• Knock over boulders or tree trunks<br />
• Pick locks<br />
4.8 QUICK-ACTIONS<br />
You can give orders to your characters in advance and have<br />
them carry them out on your signal. These are called Quick<br />
Actions.<br />
40
• To program a Quick Action, select the character you<br />
want to give an order to and click on the ‘DRAW UP A<br />
PLAN’ icon (bottom right of the screen). A question<br />
mark icon will appear over the character’s portrait.<br />
• Inform the character of the order you wish to give him,<br />
as you would in normal play (double-click on a location<br />
to make him run there, select a purse to throw it, etc.).<br />
He won’t carry out the action but the icon over his<br />
portrait will change to represent the order he has been<br />
given.<br />
• To launch a Quick Action, just click on the icon above<br />
the character’s portrait. He will then carry out the<br />
programmed order, assuming he can.<br />
• You can program up to three Quick Actions per<br />
character, and each one will correspond to an icon above<br />
his portrait.<br />
• Click on the ‘BUGLE’ icon (on the bottom right of the<br />
screen) or press the SPACE BAR to order every character<br />
with programmed Quick Actions to carry out the first one<br />
on their list.<br />
• To erase a Quick Action from a character’s memory, just<br />
right click on the icon of the Quick Action in question.<br />
41
5 CREDITS<br />
Spellbound Studios<br />
Producer & CEO<br />
Armin Gessert<br />
Creative Director<br />
Jean-Marc Haessig<br />
Technical Director<br />
Stéphane Becker<br />
Project Manager<br />
Andreas Speer<br />
Game Design<br />
Jean-Marc Haessig<br />
Martin Kuppe<br />
Lead Programmer<br />
Arno Wienholtz<br />
Game Engine<br />
Stéphane Becker<br />
Guillaume Brocker<br />
Arno Wienholtz<br />
Sound Engine<br />
Yann Gouverneur<br />
Artificial Intelligence<br />
Martin Kuppe<br />
Level Editor<br />
Stéphane Becker<br />
Yann Gouverneur<br />
Mickaël Parisot<br />
Additional Programmer<br />
Martin Mayer<br />
Lead Artist<br />
Jean-Michel Stenger<br />
Background Artists<br />
Fanny Buecher<br />
Izabelle Gadbled<br />
Myriam Haessig<br />
Serge Mandon<br />
Additional Artists<br />
Yoann Bourreau<br />
Background Composer<br />
Serge Mandon<br />
Background Animation<br />
Myriam Haessig<br />
Eric Urocki<br />
Character Creation<br />
& Animation<br />
Jean-Michel Stenger<br />
Fabrice Weiss<br />
Editor Supervisor<br />
Eric Urocki<br />
Editors<br />
Yoann Bourreau<br />
Myriam Haessig<br />
Eric Urocki<br />
Lead Mission<br />
Designer<br />
Elise Coste<br />
Mission-Designer<br />
Martin Kuppe<br />
Vincent Lalyman<br />
Mickaël Parisot<br />
Jean-Michel Stenger<br />
Ingame Music<br />
Tapio “Shao Lee” Muley<br />
Cutscene Music<br />
Michael Anarp<br />
Sound FX<br />
Yoann Bourreau<br />
Yann Gouverneur<br />
Fabrice Weiss<br />
Internal Testing<br />
Sascha Gessert<br />
Stéphane Rousseau<br />
Günay Yeniavci<br />
42
The Spellbound-Team<br />
Dialogs & Manual Text<br />
Vincent Lalyman<br />
Localization<br />
Management<br />
Guillaume Brocker<br />
Vincent Lalyman<br />
Céline Païva<br />
Localisation<br />
Alex Lepoureau<br />
Fanny Jacob<br />
<strong>Strategy</strong> <strong>First</strong><br />
Third Party<br />
Producer<br />
Susannah Skerl<br />
Executive Producer<br />
Adam Phillips<br />
Marketing<br />
Director of Marketing<br />
Steve Milburn<br />
Product Manager<br />
Prokopios ‘Pro’ Sotos<br />
Fiona Costello<br />
Assistant Product<br />
Manager<br />
Ryan Bastien<br />
Director of<br />
Communications<br />
Christina Ginger<br />
Packaging and Design<br />
Philippe Brindamour<br />
Julie Binette<br />
Anne Lalonde<br />
Web Design<br />
Hugo Trépanier<br />
Serge Mongeau<br />
PR Associate<br />
Kelly Ekins<br />
Junior PR Associate<br />
Michelle Packwood<br />
Marketing Associate<br />
Raluca State<br />
Quality Assurance<br />
Quality Assurance<br />
Manager<br />
Phillip DeRosa<br />
43
Lead Tester:<br />
Eric Tougas<br />
Team<br />
Michel Chouinard<br />
Allison Skerl<br />
Yan Favreau-Lippé<br />
Ludovic Pinard<br />
Guillaume Bourbonniere<br />
Sylvain Schmidtt<br />
Dave Mallet<br />
Phillip DeRosa<br />
Customer Support<br />
Danny Kodais<br />
Emanuel Protopapas<br />
Administration<br />
President<br />
Don McFatridge<br />
Senior V.P.<br />
Brian Clarke<br />
V.P. Business Development<br />
Steve Wall<br />
V.P. Creative Development<br />
Richard Therrien<br />
V.P. Product Development<br />
Chuck Kroegel<br />
V.P. Systems<br />
Dave Hill<br />
Director of Product<br />
Development<br />
Jamie McNeely<br />
Distribution Infogrames<br />
I n c .<br />
Senior V.P.<br />
Wim Stocks<br />
V.P. Third Party/Value/Affiliates<br />
Ezra Chen<br />
Senior Buyer<br />
Gardnor Wong<br />
Product Line Liaison<br />
Brian McCreary<br />
Wanadoo Edition<br />
Editorial and Production<br />
Vincent Berlioz<br />
Edouard Lussan<br />
David Hartley<br />
Jacques Simian<br />
Anne Dévouassoux<br />
Tests<br />
Denis Bourdain<br />
Jacques Chatenet<br />
Johann Steinberg<br />
Antony Arrivé<br />
Emmanuel Colombier<br />
Fabrice Escartin<br />
Hugues Miraux<br />
Didier Schwaller<br />
Charles Seydoux<br />
Alexandre Treille<br />
Marketing<br />
Frédéric Dumas<br />
Aline Gugliermina<br />
Florence Baccard<br />
Franck Lalane<br />
Caroline Maillols<br />
Thomas Otton<br />
Manuela Roch<br />
Jon Bailey<br />
Gonzalo Gil Casares<br />
Krister Malm<br />
Markus Malti<br />
Paolo Gelain<br />
44
Public Relations<br />
Inès Pauly<br />
Tiphaine Locqueneux<br />
International Sales<br />
Olivier Pierre<br />
Marie-Josée Limacher<br />
Alexis Gresoviac<br />
Chizuko Mori<br />
Christelle Chandavoine<br />
Arnaud Doudard<br />
Corinne Lebon<br />
Jaqui Lepoureau<br />
Irène Toporkoff-Mayer<br />
Marie-Christine Vaz<br />
Sales France<br />
Olivier Bonnafoux<br />
Loic Mastengue<br />
Ghislaine Flerchinger<br />
Boris Christophe<br />
Walter Finck<br />
Cédric Leroy<br />
Stéphane Marlot<br />
Philippe Pierquin<br />
Marie Queiroz<br />
Dominique Sorin<br />
Carol Thévenin<br />
Sales Administration<br />
Caroline de Villoutreys<br />
Fatiha Baha<br />
Ilse Richard<br />
Manufacturing Manager<br />
René Tov<br />
Uses Bink Video.<br />
Copyright (C) 1997-2002 by RAD Game Tools, Inc<br />
45
LICENSE AGREEMENT AND LIMITED WARRANTY<br />
46
w w w . s t r a t e g y f i r s t . c o m<br />
w w w . r o b i n h o o d - g a m e . c o m


