Manuel utilisateur - Kubota
Manuel utilisateur - Kubota
Manuel utilisateur - Kubota
- No tags were found...

You also want an ePaper? Increase the reach of your titles
YUMPU automatically turns print PDFs into web optimized ePapers that Google loves.
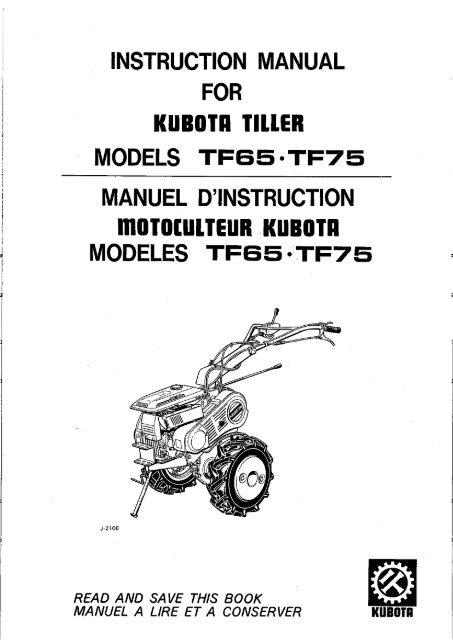
INSTRUCTION MANUEL<br />
FOR<br />
KUBOTR TILLER<br />
MODELS TF65 "TF75<br />
MANUEL D'INSTRUCTION<br />
MOTOCULTEUR KUBOTR<br />
MODELES TF65 " TF75<br />
J-2108<br />
READ AND SAVE THIS BOOK<br />
MANUEL A LIRE ET A CONSERVER<br />
KUBOTR
<strong>Kubota</strong>, Ltd. is . . . Since its inception in 1890, <strong>Kubota</strong>, Ltd . has grown to rank<br />
as one of the major firms in Japan . To achieve this<br />
status, the company has through the years diversified the<br />
range of its products and services to a remarkable extent,<br />
until today, 19 plants and 16,000 employees produce<br />
over 1,000 different items, large and small .<br />
All these products, and all the services which accompany<br />
them, however, are unified by one central commitment .<br />
<strong>Kubota</strong> makes products which, taken on a national scale,<br />
are basic necessities . Products which are indispensable .<br />
Products intended to help individuals and nations fulfill the<br />
potential inherent in their environment . For <strong>Kubota</strong> is the<br />
basic necessities giant . This potential includes water supply,<br />
food from the soit and from the sea, industrial development,<br />
architecture and construction, transportation .<br />
Thousands of people depend on <strong>Kubota</strong>'s know-how,<br />
technology, experience and customer service . You too can<br />
depend on <strong>Kubota</strong> .<br />
<strong>Kubota</strong> Makes all Kinds<br />
of Agricultural<br />
Machinery for Seeding<br />
to Harvesting.<br />
Radiator-Cooled Diesel Engines<br />
Air-Cooled Gasoline Engines e Power Tillers<br />
Garden & Lawn Tractor a Farm Tractors 0 Power Sprayers<br />
Power Mist Blower & Dusters a Brush Cutters<br />
Dairy Machines a Sprinklers 0 Rain Guns e Pumps<br />
0 Others
Contents<br />
Table des matières<br />
Safety Precaution . . . . . . . . . . . . . . . . . 1 Consignes de sécurité . . . . . . . . . . . . . . . 1<br />
Part Names . . . . . . . . . . . . . . . . . . . . . . 4 Nomenclature . . . . . . . . . . . . . . . . . . . . 4<br />
Pre-operation servicing . . . . . . . . . . . . . . 5 Préparation avant Emploi . . . . . . . . . . . . 5<br />
1 . Transmission case oil . . . . . . . . . . . . 5 1 . Huile pour le carter de transmission . . 5<br />
2 . Engine crank case oil . . . . . . . . . . . . 5 2. Huile moteur . . . . . . . . . . . . . . . . . 5<br />
3. Fuel supply . . . . . . . . . . . . . . . . . . 5 3 . Alimentation en carburant . . . . . . . . 5<br />
4. Lubrication of external parts . . . . . . . 6 4. Lubrification de pièces externes . . . . . 6<br />
5 . Check the following before 5. Avant la mise en marche vérifier . . . . . 6<br />
starting the engine . . . . . . . . . . . . . . 6 6. Rodage . . . . . . . . . . . . . . . . . . . . . 6<br />
6 . Break-in . . . . . . . . . . . . . . . . . . . . . 6 Mise en marche du moteur . . . . . . . . . . . 7<br />
Starting the engine . . . . . . . . . . . . . . . . . 7 1 . Demarrage du moteur . . . . . . . . . .. . . 7<br />
1 . Starting the engine . . . . . . . . . . . . . . 7 2. Arrêt du moteur . . . . . . . . . . . . . . . 8<br />
2. Engine stopping . . . . . . . . . . . . . . . 8 Utilisation . . . . . . . . . . . . . . . . . . . . . . 9<br />
Operation . . . . . . . . . . . . . . 9 1 . Réglage de la hauteur<br />
1 . Adjusting handle height . . . . . . . . . . 9 des mancherons . . . . . . . . . . . . . . . . 9<br />
2 . Swiveling the handle . . . . . . . . . . . . 9 2 . Pivotage des mancherons . . . . . . . . . . 9<br />
3 . Reversing the handle . . . . . . . . . . . . 10 3. Mancherons en position inversée . . . . . 10<br />
4. Speed & Direction selection . . . . . . . . 12 4. Sélection dé vitesse<br />
5 . Start & Stop (Engage- Disengage) . . . . 13 et de marche AV/AR . . . . . . . . . . . . 12<br />
6. Turning . . . . . . . . . . . . . . . . . . . . . 14 5. Démarrage & Arrêt<br />
Maintenance . . . . . . . . . . . . . . . . . . . . . 15 (Embrayage-Debrayage) . . . . . . . . . 13<br />
1 . Maintenance . . . . . . . . . . . . . . . . . . 15 6. Pour tourner . . . . . . . . . . . . . . . . . . 14<br />
2 . Adjusting the main clutch . . . . . . . . . 16 Entretien . . . . . . . . . . . . . . . . . . . . . . . 15<br />
3 . Adjusting the steering clutches . . . . . . 17 1 . Entretien . . . . . . . . . . . . . . . . . . . . 15<br />
4 . Adjusting & cleaning 2 . Réglage d'embrayage . . . . . . . . . . . . 16<br />
the ignition plug . . . . . . . . . . . . . . . 18 3. Réglage du déclabotage. . . . . . . . . . . 17<br />
5. Cleaning the air cleaner. . . . . . . . . . . 19 4. Réglage et nettoyage de la bougie . . . . 18<br />
6. Cleaning the fuel filter . . . . . . . . . . . 19 5 . Nettoyage du filtre à air . . . . . . . . . . 19<br />
Long storage. . . . . . . . . . . . . . . . . . . . . 20 6. Nettoyage du filtre à carburant . . . . . 19<br />
Specif ications . . . . . . . . . . . . . . . . . . . . 21 Stockage . . . . . . . . . . . . . . . . . . . . . . . 20<br />
Caractéristiques . . . . . . . . . . . . . . . . . . . 22
Safet<br />
nsi nes de s<br />
To operate your Tiller safety without accident,<br />
be sure to read the instructions below carefully .<br />
e Preparation<br />
Operator<br />
1) Those who are pregnant and/or drunk<br />
shoud not operate the machine .<br />
2) Be sure to wear tight clothes to prevent<br />
them from being caught by the machine ;<br />
long hair should be pinned up or kept under<br />
a hat.<br />
3) When letting someone else use your machine,<br />
explain how to handle it carefully, and<br />
have him/her read the Instruction Manual<br />
thoroughly .<br />
Working place<br />
1) Refrain from operating the machine where<br />
there is danger of f ire .<br />
2) As exhaust fumes are poisonous, avoid<br />
operating the machine in a pooly ventilated<br />
place .<br />
Equipment<br />
1) Check to see that the ignition plugs are<br />
installed properly .<br />
2) Check to see that the safeguards are properly<br />
installed .<br />
3) Check to see that the machine is well<br />
balanced when an attachement is connected .<br />
Refueling<br />
1) Be sure to stop the engine before refueling .<br />
2) Keep the engine away from flame or heat .<br />
3) Wipe fuel off clean if it should be spilt .<br />
Starting the engine<br />
1) Do not start the engine on a bumpy road or<br />
gradients .<br />
2) Keep the clutch lever at the disengaged position<br />
and the speed change lever at neutral<br />
when starting the engine .<br />
Merci de lire attentivement les consignes<br />
ciaprès : le bon fonctionnement de votre motoculteur,<br />
et, partant, la satisfaction que vous en<br />
tirerez, en dépendent étroitement, votre<br />
sécurité aussi .<br />
e Préparation<br />
Opérateur<br />
1) Notez qu'il est dangereux d'utiliser cet<br />
appareil en certaines circonstances : état<br />
d'ébriété, femmes enceintes, etc . . .<br />
2) Evitez les vêtements amples et flottants<br />
toujours pour une question de sécurité .<br />
3) Ne confiez pas votre appareil à un <strong>utilisateur</strong><br />
non averti .<br />
Lieu d'utilisation<br />
1) On évitera les lieux à risque d'incendie .<br />
2) Dans un lieu fermé ou mal aéré, attention<br />
aux gaz d'échappement, toujours toxiques .<br />
Equipements<br />
1) Vérifier le bon positionnement et l'état de la<br />
bougie d'allumage .<br />
2) Contrôler la bonne mise en place des carters<br />
de protection .,<br />
3) Vérifier l'équilibrage de l'ensemble lorsque le<br />
motoculteur est équipé d'un accessoire (il<br />
existe des contrepoids en option) .<br />
Carburant<br />
1) Toujours arrêter le moteur avant de faire le<br />
plein de carburant .<br />
2) S'éloigner de tout risque d'incendie .<br />
3) Essuyer soigneusement l'essence qui aurait<br />
pu s'écouler au dehors .<br />
Mise en marche<br />
1) Eviter de lancer, le moteur quand l'appareil<br />
est en pente, ou posé sur un sol trop irrégulier<br />
.<br />
2) Avant le démarrage, bien vérifier que l'appareil<br />
est débrayé, et que le levier de vitesses<br />
est au neutre .
a Operation<br />
Human<br />
1) Keep people away from the rotor when it is<br />
in operation ; especially when turning the<br />
machine right or left .<br />
2) Do not get tao close to the muffler or some<br />
other heated or rotating parts .<br />
3) Do not let others get too close to the<br />
machine .<br />
4) When working with another tiller ; let 'the<br />
operator know what you are going to do .<br />
Machine<br />
1) Stop the engine immediately if something<br />
abnormal is observed with the machine .<br />
2) Before leaving the machine, be sure to stop<br />
the engine and take the machiné te, a flat<br />
place .<br />
Traveling<br />
1) Observe ail traffic regulations when travelling<br />
on the public road .<br />
2) Be careful when travelling on gradients,<br />
bumpy or soft roads, so as not to tip over<br />
the machine .<br />
3) On gradients, run the tiller at low speed ;<br />
refrain from disengaging the clutch or putting<br />
the speed changeJever in neutral .<br />
Maintenance<br />
Cleaning, checking and servicing<br />
1) Maintain the machine whenever operation is<br />
over .<br />
2) Stop the engine and wait until it completely<br />
cools clown, before starting the machine<br />
maintenance.<br />
3) Clean machine parts with the proper tools.<br />
Do not do anything by hand when a tool is<br />
called for .<br />
4) Stop the machine on a flat place before<br />
beginning maintenance.<br />
5) Be sure to read the Owner's Manual for<br />
checking, servicing and cleaning.<br />
6) After cleaning, checking and servicing the<br />
machine, be sure to refit the safeguards.<br />
Attac hm ents<br />
1) Stop the engine when connecting an attachment<br />
.<br />
2) Connect attachments to the tiller only on<br />
flat and safe places .<br />
® Commande<br />
Fonctionnement<br />
1) Les spectateurs éventuels se tiendront à<br />
distance lorsque l'appareil fonctionne, surtout<br />
lors des virages .<br />
2) Se méfier du pot d'échappement brûlant, et<br />
de tous les organes en rotation .<br />
3) Veiller aux distances de sécurité si plusieurs<br />
machines travaillent simultanément sur le<br />
même terrain .<br />
4) Lorsqu'un autre cultivateur est utilisé en<br />
même temps, faire l'opérateur savoir ce que<br />
vous ferez .<br />
Appareil<br />
1) Stopper le moteur si l'on décèle la moindre<br />
anomalie dans le fonctionnement .<br />
2) Ne pas abandonner le motoculteur avec le<br />
moteur en marche . Stationner sur un endroit<br />
plat.<br />
Transport<br />
1) En cas de transport manuel sur une voie<br />
publique, observer les . règlements habituels<br />
de circulation .<br />
2) Attention à ne pas renverser l'appareil en<br />
circulant sur soil irrégulier ou en pente .<br />
3) Sur une pente, utiliser le rapport le plus lent :<br />
ne pas débrayer, ne pas mettre le levier de<br />
vitesses au neutre .<br />
e Entretien<br />
Nettoyage, vérification, et entretien<br />
1) Ces opérations sont à effectuer après chaque<br />
période de travail.<br />
2) Pour ce faire, attendre que le groupe moteur<br />
soit refroidi .<br />
3) Procéder au nettoyage et à l'entretien en<br />
utilisant les outils adéquats . Lorsqu'un outil<br />
est requis, ne pas tenter d'agir à la main .<br />
4) Stationner sur un sol plat .<br />
5) Lisez soigneusement le manuel avant toute<br />
opération .<br />
6) Après toute opération, pensez à remettre en<br />
place les capots de protection .<br />
Montage d'accessoires<br />
1) Toujours arrêter le moteur pour monter un<br />
accessoire ou un outil sur le motoculteur .<br />
2) Choisir un endroit plat et sûr pour procéder<br />
au montage .
® Transportation<br />
Tiller loading/unloading<br />
1) Stop the engine when loading or unloading<br />
the tiller .<br />
2) Be extremely careful not to upset or drop<br />
the tiller.<br />
e Transport<br />
Chargement et enlèvement de motoculteur<br />
1) Si vous soulevez la machine, veillez toujours<br />
à stopper le moteur.<br />
2) Et faites attention à ne pas le basculer, et à<br />
fortiori, le laisser tomber .<br />
e Storage<br />
1) Store the tiller in a safe place .<br />
Stockage<br />
1) Rangez votre . motoculteur en lieu sûr, à<br />
l'abri de toute manipulation ou utilisation<br />
intempestive .
Part Names<br />
'Nomenclature<br />
No.<br />
Part Names<br />
No.<br />
Nomenclature<br />
1 Main clutch lever<br />
2 Handle swing lever<br />
3 Adjusting lever (Handle height)<br />
4 P.T.O. shaft<br />
5 Air cleaner<br />
6 Inspection and oil level plug<br />
7 Engine stop switch<br />
8 Choke lever<br />
9 Starting grip<br />
10 Axle (Hexagon)<br />
11 Fuel tank cap<br />
12 Exhaust muffler<br />
13 Engine oil drain<br />
14 Engine oil intake plug & dipstick<br />
15 Accelerating lever<br />
16 Speed change lever<br />
17 Belt cover<br />
18 Steering clutch lever<br />
19 Stand<br />
1 Levier d'embrayage<br />
2 Levier de pivotement des<br />
mancherons<br />
3 Levier de réglage (Réglage<br />
vertical des mancherons)<br />
4 Arbre de prise de force<br />
5 Filtre à air<br />
6 Orifice de niveau d'huile<br />
7 Bouton d'arrêt-moteur<br />
8 Levier de starter<br />
9 Poignée du lanceur<br />
10 Sortie 6 pans<br />
11 Bouchon de réservoir<br />
12 Pot d'échappement<br />
13 Vis de vidange d'huile moteur<br />
14 Orifice de remplissage d'huile moteur<br />
15 Levier d'accélérateur<br />
16 Levier de changement de vitesses<br />
17 Cache courroie<br />
18 Levier de déclabotage<br />
19 Béquille
e-operation servicing<br />
Préparation avant Emploi<br />
1 . TRANSMISSION CASE OIL<br />
3.3R of gear oil (SAE 80 or 90) .<br />
1 . HUILE POUR LE CARTER DE<br />
TRANSMISSION<br />
3,3 litres d'huile (SAE 80 ou 90) pour transmission<br />
.<br />
Transmission case<br />
oil intake plug<br />
Inspection & oil<br />
level plug<br />
Orifice d'huile de<br />
la boite de<br />
transmission<br />
Orifice de niveau<br />
d'huile<br />
2 . ENGINS CRANK CASE OIL<br />
Keep the body horizontal . 0.6 Q of SC grade<br />
engine oil, SAE30 (use SAE20 in the winter) .<br />
2 . HUILE , MOTEUR,<br />
Maintenir le motoculteur horizontal 0,6 litre<br />
d'huile moteut éatégorie SC, SAE30 (utiliser<br />
SAE20 en hiver) .<br />
11 ) Engine oit intake<br />
plug & dipstick<br />
1~ Orifice de remplissage<br />
d'huile moteur<br />
3 . FUEL SUPPLY<br />
3.8 2 of regular gasoline . (Two star grade) .<br />
QCAUTION~<br />
Be sure when supplying fuel that the strainer is<br />
at the fuel tank cap .<br />
3 : ALIMENTATION EN CARBURANT<br />
3,8 litres d'essence ordinaire (jamais de super) .<br />
QATTENTION~<br />
Pour le remplissage de carburant, ne pas enlever<br />
le filtre .<br />
Fuel tank cap<br />
Bouchon de réservoir
4 . LUBRICATION,OF EXTERNAL<br />
PARTS<br />
(2) Lightly oil or grease exposed cables &<br />
operating controls .<br />
4 . LUBRIFICATION DE, PIECES<br />
EXTERNES<br />
(1) - Lubricate periodically the tension -pulley (1) Lubrifier l'axe de<br />
support shaft with engine,oil . SC grade tension avec de<br />
engine oil, SAE30- (use SAE20 in the<br />
moteur 'catégorie<br />
winter) . SAE20 en hiver) .<br />
bras de la poulie de<br />
l'huile moteur. Huile<br />
SC, SAE30- (utiliser<br />
(2) Huiler ou graisser légèrement les parties<br />
extérieures des cables de commande .<br />
Tension pulley<br />
support shaft<br />
10 Axé de bras de la<br />
poulie dé tension<br />
5 . CHECK THE FOLLOWING BEFORE<br />
STARTING TUE ENGINE<br />
(1) Examine the engine & transmission case for (1)<br />
ci[leaks & the fuel tank & carburettorfor<br />
fuel leaks .<br />
(2) Damaged or exposed electric wires . (2)<br />
(3) Replace ail safety guards . (3)<br />
(4) Missing axle set pins or loose blade bolts . (4)<br />
(5) Dirty air cleaner element .<br />
5 . AVANT LA' MISE EN MARCHE<br />
`<br />
VERIFIER<br />
Fuites d'huile ou d'essence de carter de<br />
moteur, transmission, réservoir à carburant<br />
et carburateur .<br />
Fils électriques endommagés ou mis à nu .<br />
Remettre en place les capots de sécurité .<br />
Vérifier si la goupille de calage des axes<br />
moteur est bien en place, et vérifier le<br />
serrage des boulons .<br />
(5) Vérifier l'état du- filtre à air .<br />
6 . BREAK-IN<br />
For the first three to five hours of operation,<br />
avoid running the engine .a t high<br />
<br />
speeds or with<br />
i<br />
heavy loads .<br />
6 . RODAGE<br />
Votre machine doit être rôdée pendant 3 à 5<br />
heures .
1 . STARTING TUE ENGINE<br />
(1) Check to see that the main ciutch lever is<br />
in "OFF" and the main speed change lever<br />
is in neutral .<br />
(2) Open the fuel cock .<br />
1 . DÉMARRAGE DU MOTEUR<br />
(1) Vérifier que le motoculteur est débrayé, et<br />
le levier de changement de vitesses en position<br />
"neutre" .<br />
(2) Ouvrir le robinet de carburant .<br />
(:Ù Fuel cock<br />
A) OPEN<br />
© CL OSE<br />
Robinet de<br />
carburant<br />
OUVERT<br />
© FERME<br />
(3) Push the accelerating lever midway between I (3) Tourner légèrement la levier d'accélérateur .<br />
"FAST" and "SLOW" .<br />
Accelerating lever<br />
SLOW<br />
© FAST<br />
Levier<br />
d'accélérateur<br />
LENT '<br />
© RAPIDE<br />
(4) Set the choke lever at "CLOSE" .<br />
QCAUTI f<br />
It is not necessary to operate the choke if<br />
the,engine is warm enough .<br />
(4) En cas de démarrage à froid, le starter doit<br />
être fermé :"<br />
QATTENTION~<br />
II n'est pas Nécessaire d'amener le levier de<br />
starter lorsque le moteur est assez chaud .<br />
Choke lever<br />
O CLOSE<br />
Levier de starter<br />
FERME<br />
(5) Pull the recoil starter grip a little to engage<br />
the drive dog . Then, pull it to your side .<br />
QCAUTIONI<br />
The starter cord will return by itself .<br />
Allow it to return slowly .<br />
(5) Tirer la poignée du lanceur jusqu'au déclic<br />
puis tirer à fond énergiquement (le rappel<br />
de la corde est automatique) .<br />
QATTENTIffl . .,<br />
Le, cordon du lanceur rentrera de lui-même .<br />
Le faire rentrer doucement .
(6) Gradually return the choke laver to<br />
"OPEN" by taking engine condition into<br />
consideration .<br />
(7) Warm up the engine for a few minutes,<br />
then start operation .<br />
QCAUTI f<br />
" Set the choke lever to the CHOKE position<br />
when the engine is cold, and to the run position<br />
when it is warm .<br />
" If the starter is pulled repeatedly with the<br />
choke closed, overchoking might occur,<br />
causing the ignition plug to become wet and<br />
making engine starting difficult .<br />
Whenever overchoking occurs, open the<br />
choke lever and open the acceleratorfully ;<br />
using the recoil starter, turn the engine over<br />
several times to clear out excess fuel . .<br />
(6) Quand le moteur a démarré, ouvrir le<br />
starter progressivement .<br />
(7) Avant de commencer à travailler, faire<br />
tourner le moteur 2 à 3 minutes .<br />
QATTENTI f<br />
Moteur froid : levier de starter sur "starter" .<br />
" Moteur chaud : levier de starter en position<br />
normale .<br />
" Des tentatives répétées de lancement du<br />
moteur en position "starter" risquent de<br />
noyer la bougie, rendant le démarrage<br />
impossible .<br />
Dans ce cas :<br />
1) fermer le robinet d'essence<br />
2) fermer le starter<br />
3) accélérer à fond<br />
4) faire tourner le moteur à<br />
plusieurs reprises à l'aide du lanceur à main,<br />
afin d'évacuer l'excès de carburant .<br />
2 . ENGINE STOPPING<br />
2 . ARRET OU MOTEUR<br />
(1) Position the accelerating lever to slow posi- (1) Tourner la manette d'accélérateur au<br />
tion . minimum .<br />
(2) Depress the engine stop switch . (2) Appuyer sur le bouton d'arrêt-moteur .<br />
1~ Engine stop switch<br />
1~ Bouton d'arrêt-moteur<br />
(3) Close the fuel cock .<br />
QCAUTI f<br />
® If you fail to close the fuel cock, fuel may<br />
overflow, flooding the engine and making<br />
starting difficult next time .<br />
(3) Fermer le robinet de carburant .<br />
QATTENTION~<br />
" Le robinet laissé ouvert provoquerait un<br />
excès d'alimentation en carburant, ce qui<br />
rendrait le prochain démarrage difficile .
per<br />
1 . ADJUSTING HANDLE HEIGHT<br />
Loosen the adjusting lever, and adjust the<br />
handle height, according to the type of job and<br />
the height of the operator .<br />
Utilisation<br />
1 . REGLAGE DE LA HAUTEUR DES<br />
MANCHERONS<br />
En desserrant le levier de réglage, positionner<br />
les mancherons à la hauter désirée, suivant le<br />
type de travail et la taille de l'opérateur .<br />
1~ Adjusting lever<br />
(Handle height)<br />
O HIGH<br />
© LOW<br />
1~ Levier de réglage<br />
(Réglage vertical)<br />
des mancherons)<br />
(A HAUT<br />
© BAS<br />
2 . SINIVELING THE HANDLE<br />
(1) Lifting the handle swing lever allows the<br />
handle to change position to the right or<br />
left .<br />
2 .' PIVOTAGE DES MANCHERONS `<br />
(1) Rotation dés mancherons : un levier permet<br />
de positionner les mancherons à droite ou à<br />
gauche .<br />
1Û Handle swing lever<br />
1~ Levier de pivotement<br />
des mancherons<br />
(2) Lift the base of the speed change lever, and (2) Tirer la base du levier dé changement de<br />
set the handle to the desired position .<br />
vitesses vers le haut et la fixer à la' position<br />
désirée .<br />
1~ Speed change lever<br />
Levier de changement<br />
de vitesses
10<br />
QCAUTION~<br />
If the handle is to be kept in the tenter position<br />
for a long time, fix-it,there,by,tightening the<br />
handle lock bolt which is Jound in thé accessory<br />
box .<br />
QATTENTIONj '<br />
En cas d'une longue utilisation, mancherons<br />
en position normale, les bloquer avec un boulon<br />
de fixation (ce boulon se trouve dans la trousse<br />
à outils) .<br />
1J<br />
Handle lock boit<br />
Boulon de fixation<br />
REVERSING THE HANOLE<br />
Put the speed changé lever in neutral .<br />
QCAUTI f<br />
The handle cannot be swiveled if the<br />
speed change lever is put in either the 3rd,<br />
4th, 5th or 5th gear . Be sure'to set the<br />
lever in neutral before reversing the handle .<br />
Detach the wire`bands holding the wires to<br />
thé handle .<br />
3 . MANCHERONS EN POSITION<br />
INVERSEE<br />
(1) Levier de changement de vitesses en<br />
position neutre .<br />
QATTENTION]<br />
Le retournement n'est pas possible si le<br />
levier de changement de vitesses est engagé<br />
en 3ème, 4ème, 5ème ou 6ème .<br />
(2) Détacher les tables des mancherons .<br />
I~ Wire bands<br />
Bandes des câbles<br />
(3) Remove the steering clutch wires from the<br />
steering clutch levers .<br />
(4), While lifting the handle swing lever, turn<br />
the handle 180° clockwise .<br />
(3) Détacher entr'eux les câbles de déclabctage<br />
et les poignées de déclabotage .<br />
(4) Faire fonctionner le levier de pivotement<br />
puis tourner de 180 ° vers la DROITE .<br />
Steering clutch<br />
wires<br />
Handle swing<br />
lever<br />
O TURN<br />
Câbles de déclabotage<br />
Levier de pivotement<br />
PIVOTER
(5) Turn the speed change lever by lifting its (5) Tirer la base du levier de changement de<br />
base .<br />
vitesses vers le haut et la fixer à la position<br />
désirée .<br />
Speed change lever<br />
TURN<br />
Levier de changement<br />
de vitesses<br />
W PIVOTER<br />
(6) Attach the steering clutch wires correctly<br />
to the respective levers .<br />
QCAUTION~<br />
It is necessary to reverse the positions of<br />
the right and left steering -clutch wires,<br />
opposite to the normal handle positions .<br />
(7) Gather the wires, and fix them to the<br />
handle with the wiré bands .<br />
QCAUTIOND<br />
With the handle in the reversed position,<br />
the 3rd, 4th, 5th and 6th speeds cannot be<br />
obtained .<br />
(6) Remonter les câbles de déclabotage sur les<br />
poignées de déclabotage .<br />
QATTENTIONJ<br />
Dans le cas d'inversement des mancherons,<br />
le câble de déclabotage droit doit être<br />
remonté sur la poignée gauche et inversement.<br />
(7) Attacher les câbles sur les mancherons .<br />
QATTENTION~<br />
En position mancherons inversés, pour la<br />
sécurité le motoculteur ne peut pas fonctionner<br />
en Sème, 4ème, 5ème et 6ème<br />
vitesse .<br />
10 Wire bands<br />
Il~<br />
Bandes des câbles
1 2<br />
4 . SPEED & DIRECTION' SELECTION 4 . SELECTION DE VITESSE ET DE<br />
MARCHE AV/AR<br />
Position of No . of<br />
handle speeds Main clutch Speed change lever<br />
Position<br />
des -<br />
Levier<br />
Levier de changement<br />
mancherons Vitesses d'embrayage de vitesses<br />
In "SLOW"<br />
v<br />
)u<br />
En vitesse lente<br />
5 3<br />
Normal<br />
Y<br />
R1<br />
ni 1 AR1<br />
N<br />
m c<br />
c<br />
Normale `°<br />
In "FAST"<br />
;, En vitesse rapide<br />
co<br />
5 4<br />
3 2 jffl R2<br />
AR2<br />
N<br />
m - In "SLOW"<br />
En vitesse lente<br />
Reversed R 1<br />
,. AR1<br />
I nversée<br />
d<br />
N<br />
N<br />
I<br />
C<br />
;, In "FAST"' -<br />
N<br />
N En vitesse rapide<br />
. o .><br />
c N<br />
UAA<br />
3<br />
N<br />
112 2<br />
AR2 N<br />
N<br />
1<br />
01 Main clutch lever OD Levier d'embrayage<br />
O FAST DA RAPIDE<br />
© SLOW © LENTE<br />
© OUT © DERRAYAGE<br />
® Speed change lever OP Levier de changement de vitesses
1 3<br />
(1) By combining the speed change lever and<br />
the main clutch lever, six forward and two<br />
reverse speeds can be achieved . Employ the<br />
desired one according to your requirements<br />
.<br />
QCAUTION~<br />
® If you have difficulty putting the speed<br />
change lever in the desired position, do<br />
not force it, but slip the clutch once and<br />
then try it again .<br />
® Be sure to operate the main clutch lever<br />
slowly when working on a slope or confined<br />
area or backing up the tiller .<br />
Otherwise the handle may jerk upwards .<br />
(2) Move the accelerating, lever for the desired<br />
speed .<br />
En manoeuvrant le levier d'embrayage et le<br />
levier de changement de vitesses, vous<br />
pouvez obtenir 6 vitesses avant, et 2 vitesses<br />
arrière .<br />
QATTENTI f<br />
® En cas de difficultés pour passer les<br />
vitesses, engager une nouvelle fois l'embrayage<br />
et recommencera<br />
S'assurer de manipuler le levier d'embrayage<br />
principal lentement lors de conduite<br />
sur une pente ou en lieu limité ou<br />
au moment de conduire le motoculeur<br />
en marche arrière . Sinon, les mancherons<br />
pourraient subir des saccades vers<br />
le haut .<br />
Réglez les gaz à volonté .<br />
1~ Accelerating lever<br />
(A SLOW<br />
© FAST<br />
1~ Manette d'accélérateur<br />
WA SLOW (Lent)<br />
© FAST (Rapide)<br />
5 . START & STOP<br />
(ENGAGE- DISENGAGE)<br />
For starting, shift the main clutch lever to the<br />
position "IN" .<br />
For stopping, shift the main clutch lever to the<br />
position "OUT" .<br />
5 . DEMARRAGE & ARRET<br />
(EMBRAYAGE-OEBRAYAGE)<br />
Pour mettre en marche, déplacer le levier<br />
d'embrayage (en position ) "MARCHE" .<br />
Pour débrayer déplacer le levier d'embrayage en<br />
position "ARRET" .<br />
1(~ Main clutch lever<br />
(~ OUT<br />
© IN<br />
i~ Levier d'embrayage<br />
ARRET<br />
© MARCHE<br />
QCAUTIONl<br />
Engage the main clutch slowly . Operating it<br />
too quickly may cause tiller to move forward<br />
suddenly .<br />
QATTENTIONJ<br />
Pour un travail en pente ou dans un endroit très<br />
étroit, en marche arrière utiliser l'embrayage<br />
avec précaution .
1 4<br />
6 . TURNING<br />
Ta turn the tractor ta the right or left, use the<br />
steering clutch levers . Squeeze the right steering<br />
clutch lever ta turn ta the right;squeeze the<br />
left one ta turn ta the left .<br />
QCALITION] .<br />
It is very dangerous ta touch the steering clutch<br />
levers when the tractor is travelling on a slope<br />
or drawing an Implement .<br />
6 . POUR :TOURNER<br />
Pour, tourner à . droite ou à gauche, utiliser les<br />
déclabotages ., Pour tourner à droite, actionner<br />
le déclabotage droit, pour tourner à gauche, le<br />
déclabotage gauche .<br />
QATTENTI f<br />
II est très dangereux d'actionner les déclabotages<br />
lorsque le motoculteur est en marche sur<br />
un terrain en pente ou lorsqu'il remorque .<br />
Right steering clutch lever<br />
Left steering clutch lever,<br />
Déclabotage droit<br />
Déclabotage gauche
intenanc<br />
r ti<br />
1 5<br />
1 . MAINTENANCE<br />
1 . ENTRETIEN<br />
(1) Allow about a ten-hour running-in . And<br />
avoid hard use during this period .<br />
(2) Change oil as specified below . It is recommended<br />
to drain oil immediately after use .<br />
(1) Roder le moteur pendant une dizaine<br />
d'heures en évitant les surcharges .<br />
(2) Renouveler l'huile comme spécifié cidessous,<br />
il est préférable de faire la vidange<br />
d'huile juste après usagé (moteur chaud) .<br />
Location<br />
First<br />
change<br />
Second and<br />
thereafter<br />
Grade of oil<br />
Q'ty<br />
c ankcase<br />
20 hours<br />
500 hours<br />
SC grade engine oil,<br />
SAE30 (use SAE20 0.62<br />
in the winter)<br />
Transmission<br />
Every Gear oil SAE<br />
case<br />
50 hours<br />
100 hou rs 80 or 90<br />
3 .32<br />
Organes<br />
Premier<br />
renouvellement<br />
Deuxième<br />
renouvellement<br />
et suivants<br />
Type d'huile<br />
Quantité<br />
Huile moteur<br />
Carter de 20 heures<br />
Toutes les catégorie SC,<br />
moteur 50 heures SAE30 (utiliser<br />
SAE20 en hiver)<br />
0,62<br />
Carter de<br />
transmis-<br />
Sion<br />
50 heures<br />
Toutes les Huile engrenage<br />
100 heures SAE 80 ou 90<br />
3,32<br />
1~ Engine oil drain plug l) Orifice de vidange d'huile moteur<br />
~2 Gear oil drain plug 0 Orifice de vidange d'huile pour engrenage<br />
® Oil draining<br />
To eliminate ail foreign matter in the case at<br />
the same time, drain oil while it is still warm<br />
after use .<br />
e Vidange<br />
Incliner le moteur légèrement vers l'avant et<br />
vidanger . Faire cette opération lorsque le<br />
moteur est encore chaud, pour une meilleure<br />
vidange .
16<br />
2 . ADJUSTING TUE MAIN CLUTCR<br />
If, with the main clutch lever,engâged, the V--<br />
velt slips, failing to transmit power to the<br />
wheels, or if the lever is difficult to engage<br />
owing to an excessively tight belt, correct thé<br />
belt tightness by adjusting the tension pulley by<br />
means of the wire adjuster .<br />
(1) Tighten the lock nut on the Tghtener after<br />
adjustment . The proprr belt play, when<br />
pressed at the cënter lightly by hand<br />
(about 1 .5 kg of pressure), is about 1 .0 cm<br />
with the clutch engaged .<br />
If boit slips Lengthen adjuster .<br />
If main clutch lever<br />
operation is heavy .<br />
Proper belt tension<br />
ghorten adjuster .<br />
With main clutch'engaged .<br />
a deflection of 1 .0 cm is<br />
achieved when pressing<br />
with a-finger belt midway<br />
between pullerys .<br />
2 . REGLAGE D'EMBRAYAGE<br />
Dans le cas où la courroie patine, ou si le levier<br />
d'embrayage est trop dur, régler avec le tendeur<br />
sur le câble d'embrayage . .<br />
(1) Après avoir réglé le tendeur, resserrer<br />
l'écrou de verrouillage sur le tendeur .<br />
Lorsque vous appuyez légèrement à la mian<br />
(environ 1,5 kg de pression) sur le centre<br />
de la courroie, le jeu propre sera environ,<br />
1,0 cm avec l'embrayage engagé .<br />
Si la courroie patine Allonger le tendeur .<br />
Si l'opération du<br />
levier d'embrayage Raccourcir le tendeur .<br />
principal est lourde .<br />
Tension la courroie<br />
Avec l'embrayage principal<br />
engagé, la courroie<br />
devra présenter une<br />
déflexion de 1,0 cm, en<br />
étant pressée du doigt au<br />
milieu des deux poulies .<br />
0 Tightener<br />
2~ Lock nuts<br />
1) Tendeur<br />
02 Ecrou de verrouillage
1 7<br />
(2) When the belt cannot be tightened properly<br />
in the way listed above, or when a<br />
new belt is user, loosen the four engine<br />
bolts, and set the distance indicated by the<br />
arrow in the figure about 3.5 cm by repositioning<br />
the angine .<br />
This adjustment is carrier out with the<br />
clutch dis-engager .<br />
(2) Quand la courroie s'est allongée ou quand<br />
une courroie est utilisée, desserer les 4<br />
boulons de fixation du moteur et ensuite<br />
déplacer le moteur légèrement vers l'avant<br />
ou en arrière . Régler la distance de la<br />
courroie à environ 3,5 cm.<br />
Cet adjustment doit être exécuté avec<br />
l'embrayage dégagé .<br />
Engine bolts (4)<br />
Boulons de. fixation du moteur (4)<br />
QCAUTION~<br />
Before reniovihg the belt cover, always stop<br />
the angine .<br />
QCAUTI f<br />
(1) After adjusting the belt tension and tightening<br />
the bolts, disengage the main clutch,<br />
start the angine, and check to see'that the<br />
belt turns with the clutch engaged, and it<br />
stops with the clutch disengaged .<br />
(2) Be sure to return the belt cover after belt<br />
adjustment and/or replacement .<br />
QATTENTIONJ'<br />
Avant d'enlever le' couvre-courroie, arrêter le<br />
moteur (impératif!) .<br />
QATTENTIONI<br />
(1) Après réglage, vérifier que l'embrayage<br />
fonctionne en, plaçant le levier de changement<br />
de vitesses en position neutre .<br />
(2) Après réglage, remettre le capot .<br />
3 . ADJUSTING THE STEERING<br />
CLUTCHES<br />
If-the steering clutch can not disengage completely<br />
even when the lever is squeezer, or if it<br />
cannot engage even when it is released, adjust<br />
the clutch by loosening the lock nut of the<br />
adjuster .<br />
3 . REGLAGE DU DECLABOTAGE<br />
Si le clabot,des roues droite ou gauche se<br />
dégage avec difficulté ou s'engage mal, régler la<br />
longueur du, râble par le tendeur situé à son<br />
extrémité .<br />
Steering<br />
difficult clutch<br />
to disengage . _engthen compl wire adjuster .<br />
Steering cl utch<br />
difficult to engage . Shorten wire adjuster .<br />
Proper belt tension<br />
With steering clutch en-<br />
steerring clutchel verach<br />
should have a play of<br />
1 to 3 mm .<br />
Patinage des courroies . Allonger le tendeur .<br />
Levier d'embrayage<br />
trop dur . Raccourcir le tendeur .<br />
Règlage correct<br />
des courroies .<br />
En position "embrayé"<br />
appuyer 1 à 3 mm<br />
avec le doigt sur le<br />
courroie .
1 8<br />
For a perfect adjustment;'màke sure the steering<br />
clutch is , properly engaged'and âdjust the<br />
free play of the lever to between' 1 ^' 3 mm .<br />
After completing' the adjustment, `tighten the<br />
Îock nutsecurèly .<br />
Pour que le réglage soit parfait, ajuster pour<br />
obtenir un jeu de 1 à 3 mm . Le réglage termine,<br />
bloquer le contre-écrou .<br />
1~ Tightener<br />
0 Lock nut<br />
1~ Tendeur<br />
e2 Contre-écrou<br />
4 . AOJUSTING & CLEANING<br />
THE IGNITION PLUG<br />
Remove the screw holding the tank caver, and<br />
the caver . Dismount the plug with the ignition<br />
plug wrench (provided), and clean it .<br />
See the following for electrode clearance :<br />
4 . REGLAGE ET NETTOYAGE<br />
DE LA BOUGIE<br />
Démonter le couvercle sur le réservoir de<br />
carburant, et démonter la bougie avec la clé à<br />
bougie .<br />
Ecartement des électrodes de la bougie :<br />
0.6 - 0.7 mm<br />
Ignition plug<br />
QCAUTION~<br />
(1) Use ignition plug wrench to remove the<br />
ignition plug . When reassembling, first<br />
screw the plug in by hand so as not to<br />
damage the thread, and then tighten i't<br />
firmly with the tool .<br />
(2) Check and adjust the ignition plug every<br />
six months .<br />
1~ Bougie<br />
QATTENTIONJ<br />
(1) Vous servir de la clé de bougie fournie avec<br />
le motoculteur pour ôter la bougie. Pour la<br />
remettre en place, la revisser d'abord à la<br />
main de manière à ne pas en endommager<br />
le pas et ensuite la resserrer fermement<br />
avec l'outil .<br />
(2) Vérifier et régler la bougie d'allumage tous<br />
les six mois .
1 9<br />
5 . CLEANING TUE AIR CLEANER<br />
5 . NETTOYAGE OU FILTRE A AIR<br />
(1) Release the fastener of thé air cleaner, and (1)<br />
take out the element to clean it .<br />
(2) Clean the element at intervals of 50 to 60<br />
working hours . (2)<br />
(3) Whenever using in a dusty place, be sure to<br />
clean the element after each use . (3)<br />
(4) Change elements after cleaning the old one<br />
six times or after one year, whichever<br />
earl ier .<br />
(5) Detach the air cleaner element . (4)<br />
(6) Cleaning the element .<br />
1) Remove dry dust by lightly tapping the (5)<br />
end plate, (6)<br />
2) Remove soot and oily matter by cleaning<br />
with a neutral detergent, rinsing and<br />
drying the element completely in the<br />
air .<br />
(7) If the dirt eject hole is clogged, clean it<br />
with water . (7)<br />
Pour nettoyer l'élément filtrant, enlever la<br />
cuve du filtre à air en déverrouillant les<br />
fermoirs .<br />
Nettoyer l'élément filtrant toutes les 50 à<br />
60 heures de travail .<br />
Toutes les fois que le motoculteur est<br />
utilisé en lieux poussiéreux, ne pas<br />
manquer de nettoyer proprement l'élément<br />
après chaque usage .<br />
Remplacer l'élément filtrant après 6<br />
nettoyages ou au minimum annuellement .<br />
Détacher le filtre à air .<br />
Nettoyer le filtre à air .<br />
1) Enlever des poussières sèches en tapotant<br />
la plaque d'extrémité .<br />
2) Enlever des suies et matières huileuses<br />
au moyen de détergent neutre, rincer et<br />
sécher le filtre à l'air .<br />
Si la sortie de saletés est bouché nettoyer-la<br />
avec l'eau .<br />
0 Element<br />
® Sponge<br />
U Fastener<br />
Elément intérieur<br />
Éponge<br />
Fermoir<br />
6 . CLEANING THE FUEL FILTRR<br />
If the fuel filter is clogged with water or dirt,<br />
dismount the filter pot and clean it well .<br />
QCAUTIONJ<br />
Refit the filter pot in place to prevent fuel<br />
leaks .<br />
6 . NETTOYAGE' DU FILTRE A<br />
CARBURANT'<br />
Nettoyage du filtre à carburant et de la cuvette<br />
à sédiment : le filtre bouché causerait des.<br />
anomalies à la machine . : Détacher et nettoyer<br />
la cuvette à sédiment et le filtre à carburant<br />
avec de l'essence, une fois par mois.<br />
QATTENTIONl<br />
Faire attention à bien placer la rondelle<br />
d'étanchéité de la cuvette .<br />
Fuel filter<br />
Q) Filterpot<br />
Filtre à carburant<br />
e Couvercle de filtre
20<br />
Long Storage<br />
Stockage<br />
(1) After washing the tiller body with water,<br />
wipe water off completely and lübricate<br />
wire and sliding parts .<br />
(2) Drain the fuel tank . Loosen the drain screw<br />
in the bottom of. the carburetor, and drain<br />
it, too .<br />
QCAUTIONI<br />
If fuel is left in the machine for a long<br />
time, it may evaporate in the fuel tank and<br />
carburetor, making the next engine start<br />
difficult . To remove 'gasolihe' from the<br />
carburetor, loosen the drain screw indicated<br />
by the arrow ; ~ employ a pipe for<br />
complete fuel removalj from the fuel tank .<br />
(1) Après avoir nettoyé le motoculteur avec de<br />
l'eau, le sécher soigneusement, et graisser<br />
les câbles et les parties mobiles .<br />
(2) Vidanger le réservoir d'essence, ainsi que la<br />
cuve du carburateur (desserrer le vis de<br />
vidange) .<br />
QATTENTIONj<br />
® Après réglage, vérifier que l'embrayage<br />
fonctionne en plaçant le levier de<br />
changement de vitesses en position<br />
neutre .<br />
s Après réglage, remettre le capot :<br />
Vis de vidange<br />
(3) Keep the main clutch lever in the "OFF"<br />
position .<br />
(4) Clean the air cleaner element completely .<br />
(5) Slowly pull the starter grip until resistance<br />
is felt (where the cylinder is :in the compresse(<br />
state) to prevent humidity, from<br />
entering the cylinder insidé,` making the<br />
next engine start difficult .<br />
(6) Store the machine in a place' free from<br />
humidity and dust .<br />
(3) Débrayer le motoculteur .<br />
(4) Nettoyer le filtre élément .<br />
(5) II est préférable de stocker la machine en<br />
position "soupapes fermées" . Pour ceci,<br />
tirer la poignée de rappel de lanceur lentement,<br />
et arrêter en position compression .<br />
(6) Lieu de stockage sans trop de poussières, ni<br />
humidité .
eci ic i n<br />
Model narre TF65 TF75<br />
m<br />
H<br />
c Overall length<br />
Overall width<br />
Overall height<br />
(from wheel axle)<br />
Weight (without tires)<br />
167 cm<br />
61 cm<br />
88 cm<br />
85 kg<br />
Model GS200-2TS GS230-2TS<br />
Type<br />
Air-cooled, 4-cycle, single-cylinder, vertical, gasoline engine<br />
Total displacement 201 cm 3 226 cm 3<br />
Fuel<br />
Leaded or unleaded automotive gasoline<br />
(Regular gasoline)<br />
w<br />
Fuel tank capacity 3.8Q<br />
Lubrication oil<br />
0.6 Q of SC grade engine cil, SAE30 (Use SAE20 in the winter)<br />
Ignition system<br />
Ignition plug<br />
Starting system<br />
Main clutch<br />
Transistor ignition<br />
NGK B-4H or Denso W14F-U<br />
Recoil,system<br />
Tension clutch type<br />
Lubricating oil 3.3 Q of SAE 80 or 90<br />
ô .<br />
d Forward °<br />
6<br />
z °- ' Reverse 2<br />
° Axle shaft<br />
F1 0.211/s ( 12.3 rpm) F1 0.18,r/s ( ,10.9 rpm)<br />
F2 0.39 r/s ( 23.5 rpm) F2 0.35 r/s ( 20 .9 rpm)<br />
F3- 0.57 r/s ( 34.4 rpm), F3 0.51 r/s ( 30.6 rpm)<br />
F4 1 .09 r/s ( 65 .7 rpm) F4 0.97 r/s ( 58.3 rpm)<br />
F5 1 .17 r/s ( 70.3 rpm) F5 1 .04 r/s ( 62.5 rpm)<br />
F6 2.24 r/s (134,1 rpm) F6 1 .98 r/s (119 .1 rpm)<br />
R1 0.18 r/s .( 11 .0 rpm) R1 0.16r/s( 9.8 rpm)<br />
R2 0.35 r/s ( 21 .1 rpm) R2 0.31 r/s ( 18.7 rpm)<br />
PTO shaft L 12.68 r/s (,761 rpm) L 11 .27 r/s ( 676 rpm)<br />
H 24.18 r/s (1451 rpm) . H 21 .50 r/s (1290 rpm)
22<br />
Nom de modèle TF65 TF75<br />
O<br />
C<br />
Longueur hors tout<br />
Largeur hors tout<br />
167 cm<br />
61 cm<br />
.ô Hauteur hors tout<br />
(Par l'axe de roue)<br />
88<br />
cm<br />
Poids (sans pneus)<br />
85 kg<br />
Modèle GS200-2TS GS230-2TS<br />
Type - Refroidissement par air, 4 temps, moteur à essence<br />
Cylindrée totale 201 cm 3 226 cm 3<br />
Carburant<br />
Capacité du réservoir<br />
2<br />
c' à carburant<br />
Huile de graissage<br />
Système d'allumage<br />
Bougies<br />
Système dé démarrage<br />
Embrayage principal<br />
Lubrifiant du carter<br />
de boîte de vitesses<br />
Essence avec plomb ou essence sans plomb pour automobiles<br />
(Essence ordinaire)<br />
3,8 Q "<br />
0,6 Q d'huile moteur catégorie SC, SAE30 (utiliser SAE20 en hiver)<br />
Système d'allumage électronique<br />
NGK B-4H ou Denso W14F-U<br />
Démarreur à enroulement automatique<br />
Par tension de courroie<br />
3,3 Q d'huile SAE 80 ou 90<br />
N<br />
Marche avant 6<br />
E-o d<br />
Marche arrière 2<br />
E<br />
Axe<br />
AV1 1,28 rad/s ( 12,3 tr/m) AV1 1,14 rad/s ( 10,9 tr/m)<br />
AV2 2,46 rad/s ( 23,5 tr/m) AV2 2,19 rad/s ( 20,9 tr/m)<br />
AV3 3,60 rad/s ( 34,4 tr/m) AV3 3,20 rad/s ( 30,6 tr/m)<br />
AV4 6,88 rad/s ( 65,7 tr/m) AV4 6,10 rad/s ( 58,3 tr/m)<br />
AV5 7,36 rad/s ( 70,3 tr/m) AV5 6,54 rad/s ( 62,5 tr/m)<br />
AV6 14,04 rad/s (134,1 tr/m) AV6 12,47 rad/s (119,1 tr/m)<br />
AR1 1,15 rad/s ( 11,0 tr/m) AR1 1,03 rad/s ( 9,8 tr/m)<br />
AR2 2,21 rad/s ( 21,1 tr/m) AR2 1,96 rad/s ( 18,7 tr/m)<br />
Arbre de prise de force L 79,69 rad/s ( 761 tr/m) L 70,79 rad/s ( 676 tr/m)<br />
H 151,95 rad/s (1451 tr/m) H 135,08 rad/s (1290 tr/m)
Qui est KUBOTA Ltd.?<br />
Créée en 1890, <strong>Kubota</strong> Itd est devenue l'une des entreprises<br />
japonaises de premier rang . Très diversifiée, elle dispose de<br />
19 usines occupant 16000 collaborateurs, et produit plus de<br />
1000 articles différents .<br />
Toutes ces fabrications <strong>Kubota</strong>, ainsi que le service aprèsvente<br />
qui en découle, ont cependant une caractéristique<br />
commune : ce sont des produits fondamentaux, des biens<br />
d'équipement de base . Au Japon, <strong>Kubota</strong> est surnommé<br />
"le géant des produits fondamentaux", ses sphères d'activité<br />
englobent l'approvisionnement en eau, l'aide à la<br />
production de denrées alimentaires tirées du sol ou de la<br />
mer, le développement industriel, l'architecture et la<br />
construction, les transports; De par le monde, des centaines<br />
de milliers d'<strong>utilisateur</strong>s font confiance à la technologie et<br />
au savoir de <strong>Kubota</strong>, à son expérience et à son service aprèsvente<br />
. Comme vous-même .<br />
KUBOTA fabrique une<br />
gamme complète de<br />
machines agricoles, pouvant<br />
faire face à toutes<br />
les tâches : depuis les<br />
semailles jusqu'à la récolte<br />
.<br />
Diésels à refroidissement par eau<br />
Moteurs à essence à refroidissement par air<br />
Matériel de préparation du sol<br />
Tondeuse autoportee 0 Tracteurs agricoles<br />
Pulvérisateurp pour poudres, granulés, ou liquides<br />
Débroussailleuses a Matériel de laiterie<br />
Matériel d'arrosage a Pompes 0 Matériel divers
KUBOTR<br />
U .S .A . : KUBOTA TRACTOR CORPORATION<br />
550 West Artesia Blvd ., Compton, CA 90220, U.S .A .<br />
Telephone : (213)537-2531<br />
Western Division : 1530 East Shaw Ave ., Suite 118 Fresno, CA 93710<br />
Telephone :(209)222-5226<br />
Central Division : 13780 Benchmark Drive Farmers Branch, TX 75234<br />
Telephone :(214)241-5900<br />
Northern Division : 438 McCormick Blvd ., Columbus, OH 43213<br />
Telephone :(614)868-1278<br />
Southeast Division : 1025 NorthBrook Parkway, Suwanee, GA 30174<br />
Telephone :(404)995-8855<br />
Engins Division : 125 East Commerce Dr. Schaumburg, IL 60173<br />
Telephone :(312)884-0212<br />
Canada : KUBOTA TRACTOR CANADA LTD .<br />
1495 Denison Street, Markham, Ontario, ,L3R 5H1, Canada<br />
Telephone :(416)475-1090<br />
Western Division : 2620, Viscount Way, Richmond B.C ., V6V 1N1 Canada<br />
Telephone :(604)270-9286<br />
France : S.A . KUBOTA EUROPE<br />
19-25, rue Jules Vercruysse BP88-Z .I ., 95101<br />
Argenteuil Cedex, France<br />
West Germany : KUBOTA (DEUTSCHLAND) GmbH<br />
Boschring 21/23, 6073 Egelsbach, West Germany<br />
U. K. : KUBOTA (U .K .) LTD .<br />
Dormer Road, Thame Oxfordshire, OX9 3UN U .K .<br />
Australia : KUBOTA TRACTOR (AUSTRALIA) PTY ., LTD .<br />
347 Settlement Road, Thomastown, Victoria, 3074, Australia<br />
Malaysia : KUBOTA AGRICULTURAL MACHINERY SDN. BHD .<br />
P.O . Box 69 Jalan Pahat, Shah Alam, Selangor, Malaysia<br />
Philippines : KUBOTA-MARSTEEL MACHINERY CO ., INC .<br />
2nd Floor, P.B . Gonzales Bldg ., 1186 Quezon Ave . Quezon City<br />
Metro Manila, Philippines<br />
Taiwan : SHIN TAIWAN AGRICULTURAL MACHINERY CO ., LTD .<br />
282, Su-Chiuen 2nd Road, Kaohsiung, Taiwan, R.O .C .<br />
Brazil : KUBOTA-TEKKO DO BRAZIL INDt1STRIA E COMÉRCIO LTDA .<br />
AV. Fagundes De Oliveira 900, Piraporinha-Dladema, Süo Paulo, Brazil<br />
Iran : IRAN KUBOTA INDUSTRIAL WORKS, LTD .<br />
Mobarezan Ave ., No.82, Alimoseo St ., Teheran, Iran<br />
Indonesia : P.T . KUBOTA INDONESIA<br />
JL . Setyabudi 279, Semarang, Indonesia<br />
Thailand : THE SIAM KUBOTA DIESEL CO ., LTD .<br />
1 Siam Cement Road, Bangsue, Bangkok 10800, Thailand<br />
Egypt<br />
: KUBOTA LTD., CAIRO LIAISON OFFICE<br />
21, EL Batal Ahmed Abdel Aziz St . Agouza Flat 7, 1st-Floor,<br />
Cairo, Egypt<br />
Japon : KUBOTA, LTD.<br />
Farm & Industriel Machinery International Operations Headquarters<br />
2-47, Shikitsuhigashi 1-chome, Naniwa-ku, Osaka 556-91 Japan<br />
PRINTED IN JAPON<br />
IMPRIME AU JAPON<br />
w "Ila ô~~-17'%~~~<br />
Code No. 62761-6521-1