portable automatic ice maker hzb-12/a hzb-12/sa - Lomax
portable automatic ice maker hzb-12/a hzb-12/sa - Lomax
portable automatic ice maker hzb-12/a hzb-12/sa - Lomax

Create successful ePaper yourself
Turn your PDF publications into a flip-book with our unique Google optimized e-Paper software.
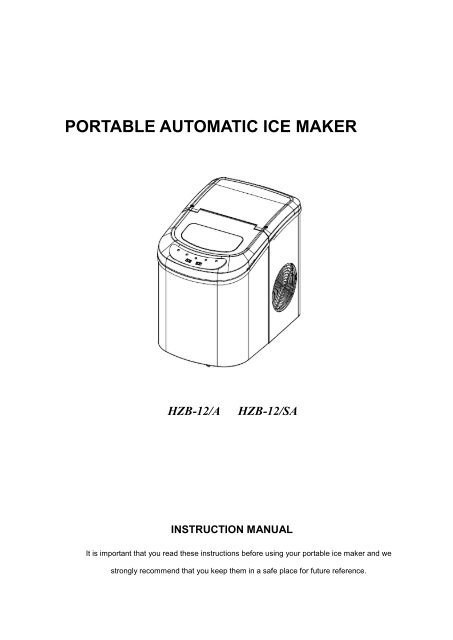
PORTABLE AUTOMATIC ICE MAKER<br />
HZB-<strong>12</strong>/A HZB-<strong>12</strong>/SA<br />
INSTRUCTION MANUAL<br />
It is important that you read these instructions before using your <strong>portable</strong> <strong>ice</strong> <strong>maker</strong> and we<br />
strongly recommend that you keep them in a <strong>sa</strong>fe place for future reference.
TABLE OF CONTENTS<br />
IMPORTANT SAFETY INSTRUCTIONS………………………………………………. ….2<br />
PREPARING YOUR ICE MAKER FOR USE<br />
IMPORTANT SAFETY TIPS………………………………………………………………………3<br />
GETTING TO KNOW YOUR UNIT………………………………………………………….4<br />
OPERATING PROCEDURES & MAINTENANCE<br />
UNPACKING YOUR ICE MAKER………………….……………………………………………..6<br />
CONNECTING YOUR ICE MAKER……………….……….……………………………………..6<br />
CLEANING AND MAINTAINING YOUR ICE MAKER….………………………………………….6<br />
USING YOUR ICE MAKER……………….……..…………………………………………..7<br />
TROUBLESHOOTING…………………………….……………………………………………..7<br />
TECHNICAL PARAMETERS & CIRCUIT DIAGRAM……………………..….………....8<br />
EXPLOSIVE DRAWINGS……………………………………………………………………9<br />
WARRANTY INFORMATION……………………………………………………………….10<br />
1
TABLE IMPORTANT OF CONTENTS SAFETY INSTRUCTIONS<br />
Your <strong>sa</strong>fety and the <strong>sa</strong>fety of others are very important.<br />
We have provided many important <strong>sa</strong>fety mes<strong>sa</strong>ges manual and your appliance.<br />
Always read and obey all <strong>sa</strong>fety mas<strong>sa</strong>ges.<br />
This is the <strong>sa</strong>fety alert symbol:<br />
!<br />
!<br />
All <strong>sa</strong>fety mes<strong>sa</strong>ges will follow the <strong>sa</strong>fety alert symbol and the word “DANGER” or “WARNING”.<br />
These words mean:<br />
DANGER<br />
WARNING<br />
You can be killed or seriously injured if you don’t immediate follow instructions.<br />
All <strong>sa</strong>fety mes<strong>sa</strong>ges will tell you what the potential hazard is, tell you how to reduce the chance<br />
of injury, and tell you what can happen if the instructions are not followed.<br />
!<br />
2
PREPARING YOUR ICE MAKER FOR USE<br />
When using electrical appliances, basic <strong>sa</strong>fety precautions should be followed to reduce the<br />
risk of fire, electric shock, and injury to persons or property. Read all instructions before using<br />
any appliance.<br />
� Do not operate this,or any other appliance with a damaged cord.<br />
If the supply cord is damaged, it must be replaced by the manufacturer or its serv<strong>ice</strong> agent<br />
or a similarly qualified person in order to avoid a hazard.<br />
This <strong>ice</strong>-<strong>maker</strong> must be positioned so that the plug is accessible .<br />
Connect to properly polarized outlets only. No other appliance should be plugged into the<br />
<strong>sa</strong>me outlet. Be sure that the plug is fully inserted into the receptacle.<br />
� Do not run the power cord over carpeting or other heat insulators. Do not cover the cord.<br />
Keep cord away from traffic areas, and do not submerge in water.<br />
� We do not recommend the use of an extension cord, as it may overheat and become a risk<br />
of fire. If you must use an extension cord, use No. 0.75mm 2 minimum size and rated no<br />
less than 16A/250V~ with a plug.<br />
� Unplug the <strong>ice</strong> <strong>maker</strong> before cleaning or making any repairs or servicing.<br />
� Exercise caution and use reasonable supervision when appliance is used near children.<br />
� Do not use your <strong>ice</strong>-<strong>maker</strong> outdoors. Place the <strong>ice</strong>-<strong>maker</strong> away from direct sunlight and<br />
make sure that there is at least 10mm of space between the back of your unit and wall.<br />
Keep a minimum distance of 10mm on each side of your unit free.<br />
� Do not use other liquid to make the <strong>ice</strong>-cube other than water.<br />
� Do not clean your <strong>ice</strong> <strong>maker</strong> with flammable fluids. The fumes can create a fire hazard or<br />
explosion.<br />
� Do not tip over.<br />
� If the <strong>ice</strong> <strong>maker</strong> is brought in from outside in wintertime, give it a few hours to warm up to<br />
room temperature before plugging it in.<br />
� This appliance is not intended for use by persons (including children) with reduced<br />
physical, sensory or mental capabilities, or lack of experience and knowledge, unless they<br />
have been given supervision or instruction concerning use of the appliance by a person<br />
responsible for their <strong>sa</strong>fety.<br />
� Children should be supervised to ensure that they do not play with the appliance.<br />
● Please according to local regulations regarding dispo<strong>sa</strong>l of the appliance for its flammable<br />
3
lowing gas. Before you scrap the appliance, please take off the doors to prevent children<br />
trapped.<br />
WARNING: This appliance must be earthed.<br />
IMPORTANT:<br />
The wires in this mains lead are colored in accordance with the following code:<br />
Green or Green with a strip yellow: Grounding<br />
Blue: Neutral<br />
Brown: Live<br />
To avoid a hazard due to instability of the appliance, it must be placed at an even or flat<br />
surface.<br />
4
GETTING TO KNOW YOUR UNIT<br />
General instrucion<br />
1. Ice scoop.<br />
2. Ice full sensor<br />
3. Ice basket<br />
4. Top cover with transparent window<br />
5. Air outlet<br />
6. Water drain cap: at front btm side of the unit.<br />
7. MAXIMUM WATER LEVEL: ▲<br />
Remove the <strong>ice</strong> basket, you can see the water level mark.<br />
5
Postion of control panel & function<br />
Control Panel: Easy to use, visible functions touch display setting.<br />
A. Selected <strong>ice</strong> size displaying: Small and Large.<br />
B. Power indicator<br />
C. Ice-Full indicator<br />
D .Water shortage indicator<br />
E. Button to turn on/off the unit.<br />
F. Button to select <strong>ice</strong> cube size.<br />
6
OPERATING PROCEDURES & MAINTENANCE<br />
UNPACKING YOUR ICE MAKER<br />
1. Remove the exterior and interior packaging. Check if <strong>ice</strong> basket and <strong>ice</strong> scoop inside. If any<br />
parts are missing, please contact our customer serv<strong>ice</strong>.<br />
2. Remove the tapes for fixing <strong>ice</strong> shovel, <strong>ice</strong> basket & <strong>ice</strong> scoop. Clean the tank & <strong>ice</strong> basket.<br />
3. Put the <strong>ice</strong> <strong>maker</strong> on a level & flat counter top without direct sunlight and other sources of<br />
heat (i.e.: stove, furnace, radiator). Maker sure that there is at least 10cm gap between the<br />
back & LH/RH sides with the wall.<br />
4. Allow one hour for the refrigerant fluid to settle before plugging the <strong>ice</strong> <strong>maker</strong> in.<br />
5. The appliance must be positioned so that the plug is accessible.<br />
WARNING: fill with potable water only. Only use drinking water.<br />
CONNECTING YOUR ICE MAKER<br />
DANGER<br />
* Improper use of the grounded plug can result in the risk of electrical shock. If the<br />
power cord is damaged please call our customer serv<strong>ice</strong>.<br />
1. This unit should be properly grounded for your <strong>sa</strong>fety. The power cord of this appliance is<br />
equipped with a grounding plug which mates with standard grounding wall outlets to<br />
minimize the possibility of electric shock.<br />
2. Plug your appliance into an exclusive, properly installed, grounding wall outlet. Do not<br />
under any circumstances, damage the grounding means of the plug under any<br />
circumstances. Any questions concerning power and/or grounding should be directed<br />
toward a certified electrician.<br />
3. This appliance requires a standard 220-240Volt, 50Hz electrical outlet with good grounding<br />
means.<br />
CLEANING AND MAINTAINING YOUR ICE MAKER<br />
Before using your <strong>ice</strong> <strong>maker</strong>, it is strongly recommended to clean it thoroughly.<br />
1. Take out the <strong>ice</strong> basket.<br />
2. Clean the interior with diluted detergent, warm water and a soft cloth.<br />
3. Then use the water to rinse the inside parts, and drain out the water by unplugging the<br />
drain cap on front bottom side.<br />
4. The outside of the <strong>ice</strong> <strong>maker</strong> should be cleaned regularly with a mild detergent solution and<br />
warm water.<br />
5. Dry the interior and exterior with a clean soft cloth.<br />
6. When the machine is not to be used for a long time, drain water completely & dry the<br />
interior.<br />
!<br />
7
USING YOUR ICE MAKER<br />
1. Open the cover, remove the <strong>ice</strong> basket and pour water into tank.<br />
Keep water level below the MAXIMUM water level mark.<br />
2. Press “ON/OFF” button on the control panel to begin the <strong>ice</strong> making cycle.<br />
3. Select the <strong>ice</strong> cube size by pressing the “SELECT” button. If the room temperature is lower<br />
than 15℃, it is recommended to select small <strong>ice</strong> cube in order to avoid <strong>ice</strong> sticking together.<br />
4. The <strong>ice</strong> making cycle lasts approx. 6 to 13 minutes, depending on seletion of <strong>ice</strong> cube size<br />
and the room temperature. The recommended room temperature is 10℃ to 43℃<br />
5. If water pump can’t inject water, the <strong>ice</strong> <strong>maker</strong> will stop <strong>automatic</strong>ally, and the “Add Water”<br />
indicator will be on.Press “ON/OFF” button, fill water up to the max. water level mark and<br />
press “ON/OFF” button again to turn on the unit again.Allow the refrigerant liquid inside the<br />
compressor at least 3 minutes to settle before restarting.<br />
6. The unit stops when the <strong>ice</strong> basket is full and the “Ice Full” indicator will be on. Warning:<br />
Direct sunlight or sunlight reflection may cause infared sensor malfunction. If the<br />
unit doesn’t stop even <strong>ice</strong> cubes obstruct sensor, move the unit where no sunlight.<br />
TROUBLESHOOTING<br />
7. Change water in the water reservoir every 24 hours to ensure a reasonable hygiene level.<br />
If unit isn’t to be used, drain all the water and dry the tank.<br />
8
PROBLEM POSSIBLE CAUSE SOLUTION:<br />
“Add Water” indicator is<br />
on.<br />
TECHNINCAL PARAMETERS & CIRCUIT DIAGRAM<br />
Lack of Water.<br />
“Ice Full” indicator is on. Ice is full in basket.<br />
Ice cubes stick together.<br />
Ice making cycle is normal<br />
but no <strong>ice</strong> formed.<br />
The <strong>ice</strong> making cycle is too<br />
long.<br />
Water temperature in inner<br />
tank is too low.<br />
Room temperature or<br />
water temperature in inner<br />
tank is too high.<br />
Refrigerant in cooling<br />
system leaks.<br />
Pipe in the cooling system<br />
is blocked.<br />
Model HZB-<strong>12</strong>/A HZB-<strong>12</strong>/SA<br />
Protection Type I I<br />
Climate Type SN/N/ST/T SN/N/ST/T<br />
Power 220-240V/50Hz 220-240V/50Hz<br />
Ice Making Current 0.7A 0.7A<br />
Ice Harvest Current 1.2A 1.2A<br />
Refrigerant R134a/62g R134a/62g<br />
Net Weight 9.2Kg 9.3kg<br />
Vesicant C5H10 C5H10<br />
Enclosure Plastic Stainless<br />
9<br />
Stop the <strong>ice</strong> <strong>maker</strong>, fill water, and<br />
press “ON/OFF” button again to<br />
restart the unit.<br />
Remove <strong>ice</strong> from <strong>ice</strong> basket.<br />
Continuous press “Select”<br />
button 5 seconds, the unit<br />
could make <strong>ice</strong> 10 cycles even<br />
“Ice” indicator is on.<br />
Stop the <strong>ice</strong> <strong>maker</strong>, and restart it<br />
when the <strong>ice</strong> blocks melt. Select<br />
the small size <strong>ice</strong> cube selection.<br />
Replace the water. Temperature<br />
of water recommended at 8-32℃<br />
The room temperature should be<br />
10-43 ℃ , water temperature<br />
should be 8-32℃<br />
Verify by a qualified technician.<br />
Verify by a qualified technician.
EXPLOSIVE DRAWINGS
1. Power cord 2. Back panel 3. Plate inforce<br />
4. Magnetism valve 5. Evaporator 6. Control box cover<br />
7. Main PCB 8. Control box 9. Ice making box<br />
10. Micro switch 11. Inner tank bracket, LH <strong>12</strong>. Cam<br />
13. Ice scoop link 14. Ice scoop 15. Back btm panel<br />
16. Back top panel 17. Clear window 18. Displaying PCB<br />
19. Touch pad 20. Front top panel 21. Front btm panel<br />
22. Ice basket 23. Foaming asm 24. Water filter<br />
25. Inner tank brackt, RH 26. Sychronuous motor 27. Stainless wire<br />
28. Condenser 29. DC Fan motor 30. Filter dryer<br />
31. Copper tube filter 32. Silicon plug drain 33. Nylon plug drain<br />
34. Silicon sealing pump 35. DC water pump 36. Compressor<br />
37. Plate bottom 38. Rubber foot 39. Air grille<br />
Warranty Information<br />
– WARNING: Keep ventilation openings, in the appliance enclosure or in the built-in structure,<br />
1
clear of obstruction.<br />
– WARNING: Do not damage the refrigerant circuit.<br />
The manufacturer provides warranty in accordance with the legislation of the customer's own<br />
country of residence, with a minimum of 1 year (Germany: 2 years), starting from the date on<br />
which the appliance is sold to the end user.<br />
The warranty only covers defects in material or workmanship.<br />
The repairs under warranty may only be carried out by an authorized serv<strong>ice</strong> centre. When<br />
making a claim under the warranty, the original bill of purchase (with purchase date) must be<br />
submitted.<br />
The warranty will not apply in cases of:<br />
- Normal wear and tear<br />
- Incorrect use, e.g. overloading of the appliance, use of non-approved accessories<br />
- Use of force, damage caused by external influences<br />
- Damage caused by non-observance of the user manual, e.g. connection to an unsuitable<br />
mains supply or non-compliance with the installation instructions<br />
- Partially or completely dismantled appliances<br />
2