Create successful ePaper yourself
Turn your PDF publications into a flip-book with our unique Google optimized e-Paper software.
<strong>RipNAS</strong> <strong>USER</strong> <strong>MANUAL</strong><br />
for S320, S640, S500, S1000, statement and Z500<br />
<strong>RipNAS</strong> combines and perfects Audio CD ripping, Network Attached Storage and Media<br />
Streaming in one easy to use small box. Audio CDs are ripped to a lossless audio format<br />
stored securely.<br />
Audio files are shared for streaming through the network to a multitude of available Network<br />
audio players. Windows Home Server (WHS) is the OS of choice, offering complete home<br />
backup for Windows PCs.<br />
The following audio streaming services are built into <strong>RipNAS</strong>:<br />
• SqueezeCenter – Logitech Duet / Transporter / Boom, etc,<br />
• SMB / CIFS – network shares (Sonos, etc),<br />
• iTunes DAAP Apple – play through iTunes installed on PCs,<br />
• Asset UPnP (DLNA compatible devices) – 100’s of devices<br />
Discs supplied with <strong>RipNAS</strong><br />
• Set Audio Encoder CD: 3x CDs to switch audio formats used by <strong>RipNAS</strong>, without the<br />
need of configuring through a PC. Choices are: FLAC (default), Apple Lossless or<br />
FLAC & mp3 (high quality Fraunhofer 320kbps mp3 files are written to<br />
\\<strong>RipNAS</strong>\Public\mp3). Insert a ‘Set Audio Encoder to…’ into <strong>RipNAS</strong> and wait for it to<br />
be ejected, subsequent discs ripped will be in the format chosen.<br />
• RESCUE CD Set: 1 Boot-CD, 1 DVD with latest software image<br />
<strong>RipNAS</strong> is a trademark of Illustrate, iTunes is a trademark of Apple,Windows Home Server a trademark of<br />
Microsoft, Sonos is a trademark from Sonos, Duet, SqueezeCenter, Transporter, Boom, SB2, SB3 are<br />
trademarks of Logitech<br />
DS is a trademark of Linn<br />
<strong>RipNAS</strong> is marked with the above symbol to indicate at the end of the equipments life time, you must<br />
dispose of it separately at an appropriate collection point (local recycling center) and not place with<br />
normal domestic unsorted waste. This will benefit the environment for all. [EU Directive 2002/96/EC<br />
and EN50419]<br />
[1]
Table of Contents<br />
1.<strong>RipNAS</strong>: Ten Minute Setup Guide......................................................................................................................3<br />
2.Ripping Audio CDs.............................................................................................................................................4<br />
2.1.Ejecting a CD .............................................................................................................................................4<br />
2.2.Secure Ripping...........................................................................................................................................4<br />
3.Doing more with <strong>RipNAS</strong>...................................................................................................................................5<br />
3.1.Remote-Access to the <strong>RipNAS</strong>...................................................................................................................5<br />
3.2.web browser access...................................................................................................................................5<br />
3.3.Daily USB backup.......................................................................................................................................6<br />
3.4.Editing Metadata.......................................................................................................................................6<br />
3.5.Remote help and support..........................................................................................................................7<br />
3.6.Progress control, silent mode and audio file formats................................................................................7<br />
4.Changing settings with Windows Home Server (WHS).....................................................................................8<br />
4.1.WHS Preconfigured Accounts....................................................................................................................8<br />
4.2.WHS Connector.........................................................................................................................................8<br />
4.3.Restoring Individual Files.........................................................................................................................10<br />
4.4.Restoring a Complete PC.........................................................................................................................10<br />
4.5.Network...................................................................................................................................................11<br />
4.6.Settings (button)......................................................................................................................................11<br />
5.Restoring <strong>RipNAS</strong>.............................................................................................................................................12<br />
6.<strong>RipNAS</strong> & Squeezeboxes’ (Logitech Duet, Transporter, Boom, SB3, SB2, etc.).................................................13<br />
7.<strong>RipNAS</strong> & Sonos...............................................................................................................................................14<br />
8.<strong>RipNAS</strong> & iTunes..............................................................................................................................................14<br />
9.Asset UPnP (DLNA compatible devices)...........................................................................................................15<br />
[2]
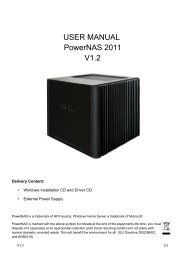
1. <strong>RipNAS</strong>: Ten Minute Setup Guide<br />
<strong>RipNAS</strong> is configured ready to rip right out of the box:<br />
• Unpack <strong>RipNAS</strong>: consider where <strong>RipNAS</strong> will be placed. Being a passive cooled<br />
system (no fans) ideally do not place <strong>RipNAS</strong> in an enclosed cabinet, in direct sunlight<br />
and never near sources of water. Ensure the vents on the top are left<br />
uncovered, it is normal for the sides of <strong>RipNAS</strong> to get warm to the touch when<br />
<strong>RipNAS</strong> is working hard,<br />
• Connecting <strong>RipNAS</strong> to your Network: <strong>RipNAS</strong> requires a wired connection to your<br />
wireless or broadband router, A Typical setup might be:<br />
• Plug <strong>RipNAS</strong> into the mains: connect the mains power ‘brick’ to <strong>RipNAS</strong> before<br />
switching on at the mains. <strong>RipNAS</strong> only requires a mains & network connection, no<br />
keyboard, mouse or screen required. Tap the <strong>RipNAS</strong> On / Off switch at the back to<br />
power on,<br />
• Check <strong>RipNAS</strong> is operating: after switching on the blue power light should illuminate<br />
on the front, occasionally the yellow hard drive activity light will flash, also the network<br />
lights on the back (yellow) should illuminate to show a good Ethernet connection.<br />
<strong>RipNAS</strong> takes approximately 60 seconds to startup.<br />
Should you wish to switch off <strong>RipNAS</strong>, tap the On / Off button on the back and wait for the<br />
power lights to extinguish. <strong>RipNAS</strong> is designed as a server for 24 / 7 operation with low<br />
power usage (approximately 20 Watts when idle for the base model).<br />
[3]
2. Ripping Audio CDs<br />
<strong>RipNAS</strong> is preconfigured ripping to FLAC, a popular lossless format. FLAC is the format of<br />
choice for Sonos and Logitech devices. UPnP devices: view the <strong>RipNAS</strong> & UPnP (DLNA)<br />
section later on.<br />
Ripping is as simple as inserting an audio CD (silver side facing down) and waiting<br />
approximately 3-4 minutes for ripping to complete, once complete the CD is ejected.<br />
Metadata is retrieved from 4 internet databases: AMG, GD3, MusicBrainz and freedb, using a<br />
system called PerfectMeta where errors from single providers are corrected. Should no<br />
metadata be available for a CD (perhaps is obscure, or new), <strong>RipNAS</strong> will reject the CD<br />
without ripping (can take up to 30 seconds), if the CD is re-inserted a 2 nd time it would be<br />
ripped and tracks titled as ‘Unknown Artist #1 – Track 1’ etc.<br />
Ripped audio tracks are automatically saved to the Music share to be streamed by devices<br />
on the network.<br />
2.1.Ejecting a CD<br />
i) Click on the CD EJECT icon on the <strong>RipNAS</strong> desktop<br />
ii) From WHS Console, click the Eject CD button,<br />
iii) Shut down <strong>RipNAS</strong> (tap On / Off button) and when restarts <strong>RipNAS</strong> will auto-eject CD<br />
on startup.<br />
iv) Some models like Z500 have a hole in the front, where you can put a pin into it to eject<br />
the CD<br />
2.2.Secure Ripping<br />
Secure ripping is available on ‘Secure <strong>RipNAS</strong> Models’ and is enabled by default. When<br />
secure ripping is active tracks with unrecoverable errors are separated into a different folder<br />
(Music\_InSecure) and the disc will appear in the With Errors section (of the Windows Home<br />
Server Console, covered later). If the disc is present in AccurateRip's database, ripping can<br />
proceed in a single pass (burst). Discs not in the database will take twice as long to rip as the<br />
2 nd rip verifies the track.<br />
Should a disc have errors, we recommend:<br />
• Give the disc a light clean,<br />
• The disc can be re-ripped in <strong>RipNAS</strong> after a different CD is first ripped (otherwise it is<br />
rejected as a duplicate),<br />
• If the errors can now be corrected (from cleaning), the tracks with errors will be<br />
removed from the _InSecure folder and stored in the correct [artist]\ folder.<br />
[4]
3. Doing more with <strong>RipNAS</strong><br />
3.1.Remote-Access to the <strong>RipNAS</strong><br />
You have 3 different methods to access the <strong>RipNAS</strong> from another PC:<br />
1. with WHS Console: the WHS console needs to be installed on your PC.<br />
2. Access with remote desktop: this works only with VISTA, WIN7 or XP Professional<br />
PCs<br />
3. Accessing Audio Files / Folders on <strong>RipNAS</strong><br />
4. Access via Webbrowser: this is the quickest method to access to the <strong>RipNAS</strong>. All<br />
devices (Windows PC, Apple, iPhone) who have network access and an internet<br />
explorer can do that.<br />
To access the <strong>RipNAS</strong> with Webbrowser or Remote Desktop should be done only by<br />
professional users, because you can easily destroy WHS and then you need to reload<br />
manufactory settings.<br />
To access the <strong>RipNAS</strong> with WHS console is recommended, since you can see only settings,<br />
which you are allowed to change. WHS console also takes over the backup of your PC.<br />
3.2. Connecting through WHS Connector<br />
Windows based PCs connect to <strong>RipNAS</strong> through Connector to:<br />
• View ripping status & configure ripping parameters (such as encoder),<br />
• Windows PC backups nightly to <strong>RipNAS</strong>,<br />
• Report any issues facing the <strong>RipNAS</strong> system (such as a failing hard disk drive),<br />
WHS Connector is installed on a PC by inserting the <strong>RipNAS</strong><br />
Connector disc (Apple users see Remote Desktop section) and follow the onscreen instructions. After<br />
installing WHS onto a PC an icon is placed in the tray area of Windows:<br />
Right clicking on this icon allows access to the connector.<br />
On connection specify password as: ripnas=[serial] (ie ripnas=123456)<br />
[5]
3.3. Connecting by Remote Desktop<br />
Remote desktop is preinstalled on most Windows PCs (start >> Programs >> Accessories >> Remote<br />
Desktop Connection), Apple users install remote desktop using the Connector Disc (detailed later).<br />
Type the computer name as ripnas (mac users: ripnas.local or ripnas.localdomain), if presented with<br />
a domain entry box type: ripnas<br />
On connection specify the username: Administrator pass: ripnas=[serial] (ie ripnas=123456),<br />
Once connected the <strong>RipNAS</strong> desktop is shown, open Windows Home Server Console (blue icon) to<br />
access settings and view <strong>RipNAS</strong> status.<br />
Installing Apple Remote Desktop Connector<br />
1. Insert <strong>RipNAS</strong> RESCUE#2 Disc, open CD drive and Double-click the RDC200_ALL1.dmg file to mount the Remote<br />
Desktop Connection volume.<br />
2. On the Desktop, open the Remote Desktop Connection volume.<br />
3. Copy the Remote Desktop Connection folder from the Remote Desktop Connection volume to your hard disk.<br />
4. If the Remote Desktop Connection folder was copied to your hard disk successfully, you can move the Remote<br />
Desktop Connection volume, the .dmg file, and the original file you downloaded (if present) to the Trash.<br />
5. To complete the installation, run the program by opening the Remote Desktop Connection folder that you copied<br />
to your hard disk, and then double-click Remote Desktop Connection.<br />
3.4. Accessing Audio Files / Folders on <strong>RipNAS</strong><br />
<strong>RipNAS</strong> shares the folder \\ripnas\music it is possible to access audio tracks on <strong>RipNAS</strong> directly<br />
through this folder, delete, edit ID Tags or copying downloaded tracks from your PC to <strong>RipNAS</strong>. It is<br />
recommended that occasionally a complete backup of all audio on <strong>RipNAS</strong> is taken, connect a USB<br />
drive to your PC and copy the audio across the network. This folder is password protected, it can be<br />
accessed through user: sonos password: sonos<br />
[6]
3.5. Web Browser access<br />
Type into the web browser:<br />
http://ripnas:5800/ note that<br />
your firewall must have port<br />
5800 allowed for the web<br />
browser and Java script be<br />
enabled. On connection<br />
type the password as<br />
ripnas and click the Send<br />
Ctl+Alt+Del button to log<br />
into <strong>RipNAS</strong> as username:<br />
Administrator pw: ripnas,<br />
once connected the <strong>RipNAS</strong><br />
desktop is shown, open<br />
Windows Home Server<br />
Console to access settings<br />
and view <strong>RipNAS</strong> status.<br />
[7]
3.6.Daily USB backup<br />
The USB backup software detects automatically, if a USB drive is connected and copies the<br />
latest music files on a daily basis. This way the external drive is updated every day.<br />
Alternatively:<br />
A simple way to backup <strong>RipNAS</strong> is to connect a USB HDD of equal or larger size to the<br />
<strong>RipNAS</strong> to a PC on the network, and access <strong>RipNAS</strong> through \\ripnas\music (see<br />
above). Select all the audio folders (press Control + A), copy (Control + C), then browse<br />
to the USB HDD and paste the audio folders (Control + V). Once copying has taken<br />
place, remove the USB HDD to a safe location.<br />
It is also possible to connect a USB HDD to <strong>RipNAS</strong> (self powered only) and<br />
backup through the WHS Console, see http://bit.ly/5RVqRu for more details.<br />
3.7.Editing Metadata<br />
Whilst ripping it is possible for tracks to be miss-labelled, or be labelled as Unknown<br />
Artist – Unknown Track on occasion, manual tagging is required to correct the tags.<br />
There are different ways of editing ID Tags, from <strong>RipNAS</strong> its self (through Remote<br />
Desktop), or by using a PC on the network. To correct from the <strong>RipNAS</strong>, open a Remote<br />
Desktop Connection (covered later in manual), when presented with the <strong>RipNAS</strong><br />
desktop double click the Music Share icon, locate the offending track(s), right click on<br />
one and select Edit ID-Tag and correct the tag.<br />
It is also possible to correct tags using a computer on the network, open the network<br />
share \\ripnas\music (when asked for a user name and password type user: sonos<br />
password: sonos ). The audio tracks can be accessed by your preferred ID Tag editor<br />
(such as mp3tag (http://mp3tag.de/) or dBpoweramp)<br />
You have different methods of editing the metadata:<br />
1. remote access to <strong>RipNAS</strong> with Web-Browser or Remote Desktop<br />
→ open explorer,<br />
→ go to shared folders/music<br />
→ click on your music files with the right mouse button<br />
→ edit metadata<br />
[8]
2. connect the music folder of the <strong>RipNAS</strong> to your PC:<br />
→ search in your network neibourhood for the <strong>RipNAS</strong>, click on <strong>RipNAS</strong><br />
→ connect with <strong>RipNAS</strong> (login: sonos / password: sonos)<br />
→ mount the music folder to your PC<br />
→ install a metadata editor like MP3 tag<br />
→ edit the metadata and covers from your local PC<br />
3. remote access to <strong>RipNAS</strong> with Web-Browser or Remote Desktop<br />
→ double click on the desktop item “edit metadata”<br />
→ install the freeware M3 tag<br />
→ now you can edit metadata and covers<br />
With the provided link to mp3 tag<br />
you can install it and edit metadata<br />
and covers after ripping.<br />
[9]
3.8. Remote help and support<br />
With Team Viewer you can ask any friend to logon over the internet into the <strong>RipNAS</strong> and help<br />
you to configure.<br />
3.9. Progress control, silent mode and audio file formats<br />
With the WHS<br />
console you<br />
can change<br />
audio file<br />
formats, switch<br />
to silent mode<br />
or just watch<br />
the progress<br />
during ripping.<br />
[10]
4. Changing settings with Windows Home Server (WHS)<br />
<strong>RipNAS</strong> runs Windows Home<br />
Server, which includes<br />
additional benefits:<br />
• Backup home PCs (XP<br />
& Vista) automatically<br />
daily to <strong>RipNAS</strong>,<br />
• Control <strong>RipNAS</strong> through<br />
Windows Home Server<br />
Connector using PCs on<br />
the Network,<br />
• Server strength OS,<br />
secure & automatically<br />
updated<br />
4.1.WHS Preconfigured Accounts<br />
<strong>RipNAS</strong> is supplied with the account preconfigured:<br />
User: Administrator Pass: ripnas=[serial] (example ripnas=123456)<br />
Where [serial] is replaced with the serial number of your machine. The full password is<br />
shown on a label underneath the <strong>RipNAS</strong> below the WHS COA sticker. The username and<br />
password are required when performing various actions with WHS (such as installing<br />
Connector onto a PC, etc).<br />
4.2.WHS Connector<br />
Windows Home Server connector allows ordinary PCs on the network (running Vista & XP)<br />
to connect to <strong>RipNAS</strong> and perform:<br />
• Complete system backup nightly to <strong>RipNAS</strong>,<br />
• View ripping status & configure ripping parameters (such as encoder used),<br />
• Configure WHS settings,<br />
• WHS will report any issues facing the <strong>RipNAS</strong> system (such as a failing hard disk<br />
drive),<br />
[11]
WHS Connector is installed on a PC by inserting the <strong>RipNAS</strong> Connector disc and following<br />
the onscreen instructions, by default the PC is configured to back up overnight, waking the<br />
PC as required from Sleep or Hibernate to backup. After installing WHS onto a PC an icon is<br />
placed in the tray area of Windows:<br />
Right clicking on this icon allows access to the connector, such as opening the Windows<br />
Home Server console:<br />
Specify the Administrators password to access the Connector and the WHS Console will<br />
display:<br />
The ripping status is shown at the top (CD drive ripping speed is shown in [ ] brackets i.e.<br />
x22). Ripping Mode allows for silent ripping at x4 speed which renders the drive in-audible,<br />
but takes longer to rip.<br />
When secure mode is active (model permitting), each disc has an accuracy report appended<br />
after the album name, such as:<br />
• All (xx) Accurate: all tracks were verified as 100% without error using AccurateRip,<br />
• All (xx) Secure: the disc was not present in AccurateRip, instead the drives c2<br />
pointers and re-rip are used to check the track was error free,<br />
• xx Accurate, xx Insecure: some tracks had unrecoverable errors, see the shared<br />
folder Music\_InSecure for tracks with errors, if the disc is cleaned and re-ripped (a<br />
[12]
different CD would have to be ripped in-between) then there is a chance the errors<br />
can be recovered on a 2nd rip and the tracks would move from _InSecure to the<br />
correct [artist]\ folder.<br />
Clicking View Log can be useful to see a detailed ripping report and help diagnose issues.<br />
This tab shows which computers backup to <strong>RipNAS</strong>, manual backups can be triggered, and<br />
individual files from a backup can be restored.<br />
4.3.Network<br />
Shows as green if everything is running without issues, amber when there is something<br />
which needs attention and red to indicate an urgent review is required.<br />
4.4.Settings (button)<br />
Settings allow access to all configuration options of WHS and <strong>RipNAS</strong>. <strong>RipNAS</strong> has the<br />
following settings:<br />
Encoder (audio format) can be chosen, clicking Settings allows for fine control within the<br />
selected encoder. <strong>RipNAS</strong> comes preinstalled with the following encoders: FLAC, Wave,<br />
mp3, WMA (Lossless), Apple Lossless. In addition any supported dBpoweramp encoder can<br />
be installed. Also present is [Multi-Encoder] which allows two audio-formats to be encoded at<br />
the same time (for example a FLAC lossless archive along with an mp3 collection for use in a<br />
portable mp3 player).<br />
DSP Effects & Actions each time audio is taken from a CD it is run through DSP effects, by<br />
default these effects are used:<br />
[13]
ReplayGain - calculates a volume loudness which supported players (such as<br />
Logitech Duet) can use to level the volume.<br />
Move Destination File on Error [secure models only] - detects a rip is not secure and<br />
moves the affected file to \_Insecure<br />
<strong>RipNAS</strong> - Update (Squeezecenter...) - informs SqueezeCenter that there are newly<br />
ripped audio files for instant indexing. It is safe to use this effect even if<br />
SqueezeCenter is not installed.<br />
One DSP effect of interest is the HDCD effect which will decode the HDCD information found<br />
on HDCD discs from 16 bit to 24 bit (20 bits used). Be aware though that Sonos currently<br />
cannot play 24 bit files.<br />
Rip Path should be left as default so the files are shared onto the network. Naming allows<br />
customization of the final naming and folder creation within the Music Folder, the default<br />
naming save audio tracks to: \[artist]\[album]\[artist] - [track] - [title]<br />
or for compilation CDs: Various Artists\[album]\[track] [artist] - [title]<br />
Ripping Mode switches between Burst and Secure ripping modes, where secure allows the<br />
detection and possible recovery of errors [Secure <strong>RipNAS</strong> models only].<br />
Audio CD Ripping Engine allows the automatic ripping of audio CDs to be temporally<br />
disabled, perhaps the <strong>RipNAS</strong> is used for other disc type purposes (where if <strong>RipNAS</strong> Ripping<br />
engine is enabled any disc inserted which is not an audio CD is ejected).<br />
Squeezebox & iTunes (Firefly), or Asset UPnP can be configured and disabled if required. If<br />
either of these services are not required (ie have a Sonos) then it is prudent to disable the<br />
unused services.<br />
5. Restoring <strong>RipNAS</strong><br />
It is possible to restore <strong>RipNAS</strong>, should the need arise (HDD is replaced, or <strong>RipNAS</strong> stops<br />
functioning. There are 2 types of restore: system restore (where any ripped audio or files in<br />
all shared folders are left untouched), or a factory reset where all drives are cleared (noting<br />
that the drives are quick formatted – it would be possible to recover the files using correct<br />
tools). More on www.hfx.at/ripnas/rescue<br />
To perform a restore (both System and factory):<br />
• Shut down <strong>RipNAS</strong>,<br />
• Put the RESCUE Disk#1 into the drive, after menue will show up, where you can<br />
choose whether you want a system or factory reset.<br />
• Put in the RESCUE Disk#1 with the latest software image.<br />
• After loading the latest image, you need to activate Windows again.<br />
[14]
6. <strong>RipNAS</strong> & Squeezeboxes’<br />
(Logitech Duet, Transporter, Boom, SB3, SB2, etc.)<br />
<strong>RipNAS</strong> comes pre-configured with SqueezeCenter (media streamer for Logitech devices)<br />
running. These type-of devices work best with the default FLAC lossless encoder.<br />
The following guide details setting up a Duet with <strong>RipNAS</strong>. Connect <strong>RipNAS</strong> to your Wireless<br />
home router and switch <strong>RipNAS</strong> on & your Duet:<br />
From the duet controller (after first switch on or factory reset):<br />
Choose Language >> Select Wireless Region >> Choose Your Wireless Router (entering any<br />
passwords to access wireless router).<br />
If <strong>RipNAS</strong> is also connected to your wireless router<br />
it will appear under Choose Player as<br />
Squeezebox. Your Duet is now ready to play audio<br />
from the <strong>RipNAS</strong>.<br />
Trouble shooting: From the Duet Controller look<br />
under Settings >> Music Source, if the <strong>RipNAS</strong> is<br />
recognized then it will appear in the Music Source<br />
List.<br />
You can also make changes within Logitech<br />
squeezecenter control.<br />
[15]
7. <strong>RipNAS</strong> & Sonos<br />
Sonos is fully compatible with the default <strong>RipNAS</strong> FLAC lossless codec, and connects to<br />
media streamers through network shares. Sonos & <strong>RipNAS</strong> connections:<br />
To add <strong>RipNAS</strong> as a music source from the Sonos Controller:<br />
Music Menu >> System Settings >> Music Library Management >> Music Library Setup >><br />
Add New >> Enter New, select each field and select type:<br />
Path: \\ripnas\music<br />
User Name: sonos<br />
Password: sonos<br />
Press round Ok button once the password is entered. Sonos should display it is going to<br />
index music, click Ok, then select Music >> Music Library.<br />
8. <strong>RipNAS</strong> & iTunes<br />
<strong>RipNAS</strong> is able to stream audio to iTunes installed onto PCs & Apple MACs on your<br />
home network, from within iTunes select <strong>RipNAS</strong> (Firefly). Firefly will allow iTunes to<br />
play the FLAC audio tracks on a <strong>RipNAS</strong>.<br />
If using an iPod, set <strong>RipNAS</strong> to create FLAC and mp3 (with the audio format command<br />
disc), then copy the mp3 music over from \\<strong>RipNAS</strong>\Public\mp3 to your PC and add to<br />
[16]
iTunes, which will then synchronize the mp3s to the iPod. Use these account details to<br />
access the folder: User: Administrator Pass: ripnas=[serial] (ex. Ripnas=123456)<br />
9. Asset UPnP (DLNA compatible devices)<br />
<strong>RipNAS</strong> includes Asset UPnP, UPnP (DLNA) is a connection protocol for sharing audio<br />
between otherwise unrelated devices. Asset features:<br />
• Album Art support,<br />
• Customizable browse tree with advanced search facilities (Album by Release,<br />
Style, Composer, Conductor...),<br />
• Configurable Wave / LPCM decoding (often called transcoding) for devices which<br />
cannot play specific audio types,<br />
• ReplayGain can be applied to decoded Wave / LPCM stream, matching volume<br />
levels across tracks,<br />
• Internet Radio.<br />
Asset is accessed through Control Point software (such as Kinsky Desktop on the PC, or<br />
Konductor/PlugPlayer/Songbook on the iPod), or is accessed directly from the device<br />
(such as XBox, PS3). Asset will appear with the name Asset UPnP: <strong>RipNAS</strong>, after<br />
selection the device will either read all the tracks automatically from Asset (such as<br />
Windows Media Player), or present Asset UPnP's browse menu where artists, albums<br />
& tracks can be searched. At the top of many listings are [A to Z], selecting this allows<br />
the quick listing of an item based on its first letter. [Album] is also presented when<br />
browsing Artists; this switches the view to Album rather than listing all the individual<br />
tracks from an artist.<br />
Asset features Internet Radio and dynamic playlists (such as newest tracks, most<br />
played Albums or a random selection).<br />
For many devices (such as Linn DS) FLAC is the audio codec of choice, others such as the PS3 cannot<br />
play FLAC, it is possible to set Asset to stream in a format (such as LPCM for the PS3) on demand, see<br />
the section configuring Asset.<br />
[17]
<strong>RipNAS</strong> comes complete with its own UPnP server – Asset UPnP. UPnP simply put is a<br />
connection protocol for sharing audio (and Video, etc) between otherwise unrelated devices.<br />
Asset features:<br />
• Album Art support,<br />
• Customizable browse tree with advanced search facilities (Album by Release, Style,<br />
Composer, Conductor...),<br />
• Configurable Wave / LPCM decoding (often called transcoding) for devices which<br />
cannot play specific audio types,<br />
• ReplayGain can be applied to decoded Wave / LPCM stream, volume matching<br />
across tracks for devices which have no support,<br />
Browsing with Asset<br />
Asset is accessed directly from the device (such as XBox, PS3) or through Control Point<br />
software running on a PC or even hand-held Controllers, Asset will appear with the name<br />
Asset UPnP: [Computer Name]. After selection the device will either read all the tracks<br />
automatically from Asset (such as Windows Media Player), or present Asset UPnP's browse<br />
menu where artists / albums / tracks can be searched. At the top of many listings are [A to<br />
Z], selecting this allows the quick listing of an item based on its first letter. [Album] is also<br />
presented when browsing Artists; this switches the view to Album rather than listing all the<br />
individual tracks from an artist.<br />
From Windows Home Server Asset can be configured:<br />
Asset can be switched On, Off or Restarted. Asset watches the Music share for changes<br />
and updates automatically, it is also possible to force a rescan of the library with Rescan<br />
Library (Refresh All rescans the whole library from scratch).<br />
[18]