REFLECT
View File - universaldental.com.pk
View File - universaldental.com.pk
- No tags were found...

You also want an ePaper? Increase the reach of your titles
YUMPU automatically turns print PDFs into web optimized ePapers that Google loves.
<strong>REFLECT</strong><br />
d e n t a l p e o p l e f o r d e n t a l p e o p l e 0 1 / 0 9<br />
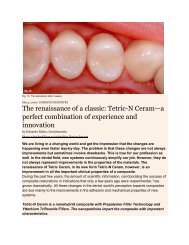
Nano-technology in the anterior region<br />
Creating aesthetic direct anterior restorations with a nano-optimized composite<br />
Cementation – a decisive factor<br />
Cementation – one of the most sensitive working steps<br />
Material combination in post build-ups<br />
A case study on the combination of metal and ceramic materials
04<br />
Dental medicine<br />
Nano-technology<br />
in the anterior region<br />
Creating aesthetic direct anterior restorations with a nano-optimized composite<br />
Dr Arun Rajpara, Valsad/India<br />
Today, aesthetic dentistry is facing major challenges.<br />
When deciding on the feasibility of a case, clinicians<br />
need to take all physiological aspects into consid -<br />
eration. However, patient satisfaction is also increas -<br />
ingly being looked to as an indicator of positive outcomes<br />
and restorative quality and the patient is<br />
regarded as both a supporter and critic.<br />
A holistic treatment approach is required in order to achieve<br />
a result that mimics natural aesthetics and meets patient<br />
expectations. Not only the smile line needs to be taken<br />
into account, but also the contours of the gingiva and the<br />
incisal edges. From treatment planning to the actual fabrication<br />
of the restoration, composite restoratives offer a<br />
wide array of options and procedures to choose from,<br />
allowing dentists to achieve the desired results.<br />
Since the advent of the acid-etch bonding technique,<br />
which was introduced in 1955, clinicians have seen a revolution<br />
occur in composite materials science and technology.<br />
The development of hydrophilic dentin bonding agents<br />
has opened up a whole new range of restorative possibil -<br />
ities. Modern composite/adhesive systems offer significant<br />
advantages over traditional systems as they allow minimally<br />
invasive preparation techniques to be applied.<br />
Consequently, sound tooth structure can be preserved.<br />
The objective of this article is to present the clinical application<br />
of the new Tetric N-Ceram/Flow/Bond in clinical<br />
cases. The rationale behind the clinical technique and<br />
intricate application methods are discussed.<br />
Clinical case<br />
A 16-year-old male patient presented to our surgery with<br />
large cervical and proximal carious lesions in all upper and<br />
lower anterior teeth (Figs 1 and 2). All these defects were<br />
surrounded by white hypo-calcified enamel lesions. The<br />
defects had been restored in the past but the restorations<br />
had failed over time. Clinically, chronic gingival inflammation<br />
and gingival hyperplasia with occasional bleeding in<br />
the marginal areas was observed.<br />
Fig 1 Initial situation with carious lesions in the maxillary and<br />
mandibular anterior teeth and inflammation of surrounding gingival<br />
tissues, compromising the aesthetics of the patient’s smile<br />
Fig 2 Close-up view of the maxillary incisors<br />
After proper evaluation, it was decided that good gingival<br />
health and contour had to be established first. After<br />
thorough prophylaxis treatment under local anesthesia,<br />
deep gingival scaling and gingival re-contouring was performed.<br />
The patient was instructed in proper brushing<br />
and plaque control measures with Cervitec Gel ® at home<br />
to re-establish gingival health.<br />
Reasonable gingival health was achieved after about ten<br />
days, so that the restorative treatment could be started.<br />
After gingival retraction, the carious tissue was completely<br />
excavated with high-speed diamond burs and slow-speed<br />
round burs. The soft, hypo-calcified enamel was also
05<br />
Fig 3 Tooth preparation included the application of a shorter<br />
bevel at the DE junction and a long bevel on the facial aspect.<br />
Fig 4 Application of Total Etch etchant gel<br />
Fig 5 A hydrophilic single-component adhesive (Tetric N-Bond)<br />
was applied to the etched surfaces.<br />
Fig 6 The first increment that was placed was Tetric N-Ceram,<br />
shade A3.5 Dentin. It was lightly spread onto the short and<br />
long bevel using contouring instruments and artist brushes.<br />
Fig 7 Subsequently, increments of Tetric N-Ceram A2 Enamel<br />
and A1 Enamel were placed with the OptraSculpt instrument.<br />
removed. A flame-shaped, high-speed diamond bur and<br />
coarse polishing discs were used to prepare the margins<br />
in the cervical region and to extend the preparation to the<br />
complete labial surface of the tooth. However, the labial<br />
enamel layer was only reduced by approx. 0.8 to<br />
1 mm in order to preserve some of the natural enamel. A<br />
short bevel was applied along the cervical preparation<br />
margins as well as at the DE junction of Class III cavities.<br />
All the preparations were thoroughly rinsed with water<br />
(Fig 3).<br />
Restorative technique<br />
The treatment plan involved the restoration of the carious<br />
lesions (Class V and Class III) using a direct restorative<br />
technique with Tetric N-Ceram composite material.<br />
Following shade selection, the two maxillary central incisors<br />
were chosen as the first teeth to be restored. The<br />
prepared surfaces were etched with 37 percent phosphoric<br />
acid gel (Total Etch) for 15 seconds (Fig 4). In order<br />
to protect the surfaces of the adjacent teeth, they were<br />
covered with Teflon tape. The teeth were rinsed and air<br />
dried, but not to the point of desiccation.<br />
Next, the bonding agent Tetric N-Bond was applied to the<br />
enamel and dentin surfaces (Fig 5). After about 20<br />
seconds, the bonding agent was gently air-dried and light<br />
cured for 10 seconds using the bluephase ® C8 LED light in<br />
the LOP mode. Exposed dentin in deep proximal and cervical<br />
cavities was coated with a thin layer of flowable composite<br />
(Tetric N-Flow). The composite was spread with a<br />
thin brush and subsequently light-cured for 20 seconds<br />
with the bluephase C8 curing light in the SOF mode.<br />
Tetric N-Ceram composite (shade A3.5 Dentin) was placed<br />
in the proximal as well as the cervical region to replace<br />
the natural dentin (Fig 6). The layer was also extended to<br />
include the short bevel in order to mask the transition<br />
between the enamel and dentin. Then the composite was<br />
light-polymerized for 20 seconds using the bluephase C8<br />
LED light in the SOF mode. On top of the dentin layer,<br />
Tetric N-Ceram A2 Enamel was placed. After proper contouring<br />
(Fig 7), the layer was light-cured for 20 seconds.<br />
Shade A1 Enamel was applied from the middle to the<br />
incisal third, adapted with OptraSculpt ® and light-cured<br />
for 20 seconds. Following this, a layer of highly translucent<br />
Tetric N-Ceram T was placed in the middle third and spread<br />
thinly on the entire labial surface. The incisal surface was<br />
also covered with this material using a disposable brush. A<br />
sable brush was used to adjust the anatomical contours<br />
and smooth the surface. Then the composite layer was<br />
cured for 20 seconds. Finally, the entire restoration was
06<br />
Fig 8 Finishing with Astropol HP (pink) silicone rubber cups<br />
Fig 9 Close-up view of the restored maxillary incisors showing<br />
the life-like anatomy and surface texture<br />
light-cured for 10 seconds each from the labial, palatal<br />
and proximal aspect using the bluephase C8 LED light in<br />
the high power mode (HIP mode).<br />
After having completed the two central incisors, the<br />
remaining lateral incisors and canines were restored using<br />
the same technique. The same approach was chosen for<br />
the restoration of the mandibular anterior teeth.<br />
As in this case the gingival health was comparatively poor<br />
initially (because of the presence of caries and heavy<br />
plaque accumulation), the final finishing and polishing<br />
steps to establish the secondary anatomy were post poned<br />
until the next appointment scheduled for the following<br />
week. By deferring this step, clinicians are given the opportunity<br />
to re-check the restoration margins and modify<br />
them if needed. Dental photography is an essential tool<br />
for the clinician to judge the final outcome and achieve<br />
highly aesthetic restorative results! In this case, a few deficiencies<br />
were noticed on the photographs that were taken<br />
after shaping the primary anatomy during the first session.<br />
Based on the patient’s requirements a few modifications<br />
were made by adding more composite on the mesial side<br />
of right central incisor and in other areas.<br />
Finishing and Polishing<br />
After the modifications had been carried out, the secon d -<br />
ary anatomy (marginal ridges, developmental grooves,<br />
lobes, the cingulum, etc.) was accentuated with 12 fluted<br />
carbide and diamond finishing burs. The proximal, incisal<br />
and facial surfaces were contoured with aluminum oxide<br />
discs and finishing strips. For finishing, finishing burs, diamonds<br />
and Astropol ® rubber wheels and points were used.<br />
The Astropol finishing and polishing system consists of rubber<br />
points, cups and discs impregnated with either silicon<br />
dioxide or silicon dioxide and fine diamond particles.<br />
In a first step, Astropol F (grey) instruments were used in<br />
a slow-speed handpiece and with water cooling to re -<br />
move excess and achieve a smooth surface. Then the<br />
Astropol P polishers (green) were employed in the same<br />
way. They impart a very delicate surface finish to composite<br />
restorations and can be used to establish the secondary<br />
anatomy and surface texture. The third step involved the<br />
use of the micro-fine Astropol HP (pink) high gloss polish -<br />
ers (Fig 8). Polishing was done without exerting any<br />
pressure. Astrobrush was used at slow speed and without<br />
any pressure to impart the restorations with a high luster<br />
while maintaining the surface texture and anatomy previously<br />
created (Fig 9). This procedure was repeated after<br />
having modified the restoration according to the requirements<br />
of the patient.<br />
Conclusion<br />
When fabricated properly, composite restorations can be<br />
long lasting and beautiful, appearing as real as nature<br />
intended. State-of-the-art composite materials such as<br />
Tetric N-Ceram with their variety of shades, mechanical<br />
strength and good polishability allow clinicians to close<br />
gaps, transform spaces and enhance colours without<br />
having to remove a large amount of tooth structure. In<br />
the complex restorative case presented, which involved<br />
cervical and proximal caries, poor gingival health and<br />
poor overall aesthetics, a methodological approach was<br />
used. An incremental technique with composite resin was<br />
applied to create highly aesthetic restorations which<br />
mimic nature and blend in seamlessly with the surround -<br />
ing dentition. The young patient was very happy with the<br />
final outcome!<br />
He received Cervitec Gel and tips and tricks on how to<br />
maintain the current oral hygiene status to keep the final<br />
restorations in good condition for as long as possible. ❑<br />
Contact address:<br />
Dr Arun Rajpara<br />
Soham Dental<br />
Center for Cosmetic & Advanced Dentistry<br />
Opp. Lal School, Halar Road,<br />
Valsad – 396001/India<br />
arunrajpara@gmail.com