Praying Mantis for Diffuse Reflectance UV-Vis-NIR Spectra
Praying Mantis instructions
Praying Mantis instructions
- No tags were found...

You also want an ePaper? Increase the reach of your titles
YUMPU automatically turns print PDFs into web optimized ePapers that Google loves.
Updated 3/15/2011<br />
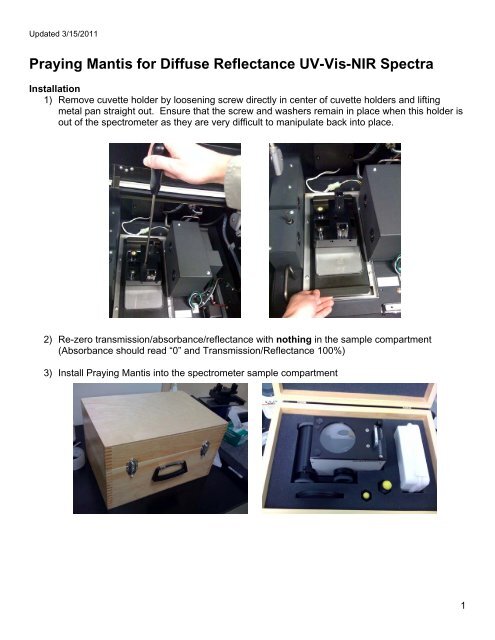
<strong>Praying</strong> <strong>Mantis</strong> <strong>for</strong> <strong>Diffuse</strong> <strong>Reflectance</strong> <strong>UV</strong>-<strong>Vis</strong>-<strong>NIR</strong> <strong>Spectra</strong><br />
Installation<br />
1) Remove cuvette holder by loosening screw directly in center of cuvette holders and lifting<br />
metal pan straight out. Ensure that the screw and washers remain in place when this holder is<br />
out of the spectrometer as they are very difficult to manipulate back into place.<br />
2) Re-zero transmission/absorbance/reflectance with nothing in the sample compartment<br />
(Absorbance should read “0” and Transmission/<strong>Reflectance</strong> 100%)<br />
3) Install <strong>Praying</strong> <strong>Mantis</strong> into the spectrometer sample compartment<br />
1
Updated 3/15/2011<br />
4) Transmission/Absorbance/<strong>Reflectance</strong> readings will significantly change once the <strong>Praying</strong><br />
<strong>Mantis</strong> is installed (Transmission/<strong>Reflectance</strong> will go down; Absorbance will go up)<br />
Measurement setup<br />
1) In method, under general tab, select “liquid” <strong>for</strong> system<br />
2) In the instrument tab, choose desired measurement type (by default, the <strong>Praying</strong> <strong>Mantis</strong><br />
measures REFLECTANCE and the signal will be converted into transmittance/absorbance/etc.<br />
by the detector)<br />
3) Select “User2” <strong>for</strong> baseline<br />
4) Choose a slow scan speed in the <strong>NIR</strong> (150 nm/min or slower) because the <strong>Praying</strong> <strong>Mantis</strong><br />
creates a weaker signal in the <strong>NIR</strong><br />
Preparing your sample<br />
1) Samples will have better spectra if they are ground to ~50 microns or smaller; visible<br />
crystallinity decreases diffuse reflectance signal<br />
2) Fill the desired sample cup COMPLETELY FULL; with the micro sampling cup, failure to do so<br />
could result in the beam hitting the rim of the cup instead of your sample.<br />
3) Flatten the top by pressing with a flat spatula or with a razor blade<br />
4) Remove any excess powder that is not inside the sample cup in order to keep the inside of the<br />
sample compartment clean<br />
Acquiring spectra<br />
1) Insert the angled mirror into the sampling position (flat mirror goes in first) <strong>for</strong> baseline<br />
measurement; baseline accounts <strong>for</strong> the reflectance contributions from the mirrors inside the<br />
<strong>Praying</strong> <strong>Mantis</strong>.<br />
2) Adjust height with micrometer until signal is at its maximum. Take baseline. **Take the<br />
baseline using the largest scan range you plan to measure; leave the lamp/detector transition<br />
wavelengths the same throughout your measurements.**<br />
3) Remove the mirror and insert into the <strong>Praying</strong> <strong>Mantis</strong> sample compartment with the dimple in<br />
the sample cup facing outwards **Do not spill your powder inside the <strong>Praying</strong> <strong>Mantis</strong>!**<br />
4) Adjust the height of the sampling cup with the micrometer screw until you achieve the<br />
maximum signal possible<br />
5) After data is collected, remove sample holder and all particulates from <strong>Praying</strong> <strong>Mantis</strong><br />
6) Remove <strong>Praying</strong> <strong>Mantis</strong> when finished and place gently into storage case; replace cuvette<br />
holder; clean and return sampling cups to storage box<br />
2