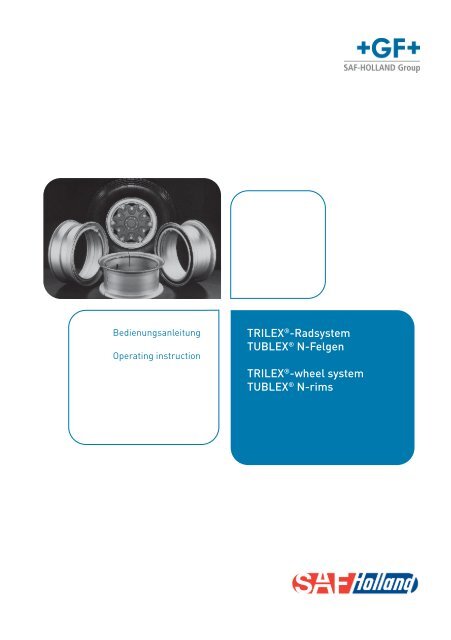
TRILEX -Radsystem TUBLEX N-Felgen TRILEX -wheel system TUBLEX N-rims
TRILEX®-Radsystem TUBLEX® N-Felgen TRILEX ... - saf-holland
TRILEX®-Radsystem TUBLEX® N-Felgen TRILEX ... - saf-holland
- No tags were found...

You also want an ePaper? Increase the reach of your titles
YUMPU automatically turns print PDFs into web optimized ePapers that Google loves.
Bedienungsanleitung<br />
Operating instruction<br />
<strong>TRILEX</strong> ® -<strong>Rad<strong>system</strong></strong><br />
<strong>TUBLEX</strong> ® N-<strong>Felgen</strong><br />
<strong>TRILEX</strong> ® -<strong>wheel</strong> <strong>system</strong><br />
<strong>TUBLEX</strong> ® N-<strong>rims</strong>
DEUTSCH<br />
<strong>TRILEX</strong> ®<br />
Betrieb – Montage – Wartung<br />
DEUTSCH<br />
Inhaltsverzeichnis<br />
ENGLISH<br />
Erklärung der verwendeten<br />
Sicherheitssymbole 4<br />
1. Allgemeine Sicherheitshinweise<br />
1.1 Sorgfaltspflicht des Betreibers 5<br />
7. Demontage der <strong>Felgen</strong> mit Reifen vom Radstern<br />
7.1 Einfachbereiftes <strong>TRILEX</strong> ® -Rad 19<br />
7.2 Doppeltbereiftes <strong>TRILEX</strong> ® -Rad 19<br />
8. <strong>TRILEX</strong> ® -Radkranz mit Doppelklemmung 20<br />
ENGLISH<br />
2. Produktbeschreibung<br />
2.1 Merkmale des <strong>TRILEX</strong> ® -Speichenrades 7<br />
9. Werkzeuge für Montage und Demontage<br />
im <strong>TRILEX</strong> ® -System 21<br />
3. Bestandteile des <strong>TRILEX</strong> ® -Rades<br />
3.1 Einfaches <strong>TRILEX</strong> ® -Rad 9<br />
3.2 Doppeltes <strong>TRILEX</strong> ® -Rad 10<br />
10. Zusatzinformationen 23<br />
4. Montage / Demontage <strong>TRILEX</strong> ® -Felge<br />
4.1 Montage 11<br />
4.2 Demontage 13<br />
5. Montage / Demontage <strong>TUBLEX</strong> ® -Felge<br />
5.1 Montage 14<br />
5.2 Demontage 15<br />
6. Montage der <strong>TRILEX</strong> ® -Felge<br />
mit Reifen auf dem Radstern<br />
6.1 Allgemeines 16<br />
6.2 Einfaches <strong>TRILEX</strong> ® -Rad 17<br />
6.3 Doppeltes <strong>TRILEX</strong> ® -Rad 17<br />
2 3
DEUTSCH<br />
Erklärung der verwendeten<br />
Sicherheitssymbole<br />
1 Allgemeine<br />
Sicherheitshinweise<br />
DEUTSCH<br />
ENGLISH<br />
Gefahr<br />
In der vorliegenden Betriebsanleitung werden die folgenden<br />
Sicherheitssymbole verwendet. Diese Symbole<br />
sollen den Leser vor allem auf den Text des nebenstehenden<br />
Sicherheitshinweises aufmerksam machen.<br />
Dieses Symbol weist darauf hin, dass Gefahren für<br />
Leben und Gesundheit von Personen bestehen.<br />
1.1 Sorgfaltspflicht des Betreibers<br />
Das <strong>TRILEX</strong> ® -Rad wurde unter Berücksichtigung einer<br />
Gefährdungsanalyse und nach sorgfältiger Auswahl<br />
der einzuhaltenden harmonisierten Normen,<br />
sowie weiterer technischer Spezifikationen konstruiert<br />
und gebaut. Es entspricht damit dem Stand der<br />
Technik und gewährleistet ein Höchstmaß an Sicherheit.<br />
ENGLISH<br />
Achtung<br />
Hinweis<br />
Dieses Symbol weist darauf hin, dass Gefahren für<br />
Maschine, Material oder Umwelt bestehen.<br />
Dieses Symbol kennzeichnet Informationen, die<br />
zum besseren Verständnis der Maschinenabläufe<br />
beitragen.<br />
Diese Sicherheit kann in der betrieblichen Praxis jedoch<br />
nur dann erreicht werden, wenn alle dafür erforderlichen<br />
Maßnahmen getroffen werden. Es unterliegt<br />
der Sorgfaltspflicht des Betreibers des Fahrzeuges,<br />
diese Maßnahmen zu planen und ihre Ausführung<br />
zu kontrollieren.<br />
Der Betreiber muss insbesondere sicherstellen, dass:<br />
• das <strong>TRILEX</strong> ® -Rad nur bestimmungsgemäß verwendet<br />
wird (vergleiche hierzu Kapitel 2.1 «Produktbeschreibung»)<br />
• und nur in einwandfreiem, funktionstüchtigem Zustand<br />
betrieben wird und besonders die Sicherheitseinrichtungen<br />
regelmäßig auf ihre Funktionstüchtigkeit<br />
überprüft werden<br />
• erforderliche persönliche Schutzausrüstungen für<br />
das Bedienungs-, Wartungs- und Reparaturpersonal<br />
zur Verfügung stehen und benutzt werden<br />
• die Betriebsanleitung stets in einem leserlichen<br />
Zustand und vollständig am Einsatzort zur Verfügung<br />
steht<br />
• das Personal regelmäßig in allen zutreffenden Fragen<br />
von Arbeitssicherheit und Umweltschutz unterwiesen<br />
wird, sowie die Betriebsanleitung und insbesondere<br />
die darin enthaltenen Sicherheitshinweise<br />
kennt<br />
• alle an dem Rad angebrachten Sicherheits- und<br />
Warnhinweise nicht entfernt werden und leserlich<br />
bleiben<br />
4 5
DEUTSCH<br />
ENGLISH<br />
Diese Betriebsanleitung ist im Fahrzeug<br />
aufzubewahren. Es muss gewährleistet<br />
sein, dass sämtliches Personal, die Tätigkeiten<br />
am Fahrzeug auszuführen haben,<br />
Hinweis<br />
die Betriebsanleitung jederzeit einsehen<br />
können. Ergänzend zur Betriebsanleitung sind auch<br />
Betriebsanweisungen im Sinne des Arbeitsschutzgesetzes<br />
und der Arbeitsmittelbenutzungsverordnung<br />
bereitzustellen.<br />
Alle Sicherheitshinweis-Schilder und Bedienhinweis-<br />
Schilder des Rades sind immer in einem gut lesbaren<br />
Zustand zu halten. Beschädigte oder unlesbaren gewordene<br />
Schilder sind umgehend zu erneuern.<br />
2 Produktbeschreibung<br />
2.1 Merkmale des <strong>TRILEX</strong> ® -Speichenrades<br />
<strong>TRILEX</strong> ® -<strong>Felgen</strong> lassen sich einfach montieren und<br />
demontieren, da das <strong>Felgen</strong>profil im Querschnitt unterteilt<br />
ist.<br />
<strong>TRILEX</strong> ® -<strong>Felgen</strong>-Segmente gleicher <strong>Felgen</strong>grössen<br />
sind untereinander austauschbar. Deshalb ist bei Beschädigungen<br />
nur das entsprechende Segment auszuwechseln.<br />
<strong>TRILEX</strong> ® -Räder gewährleisten bei fachgerechte Montage<br />
durch ihre Zentrierung einen schlagfreien Lauf<br />
von <strong>Felgen</strong> und Reifen.<br />
DEUTSCH<br />
ENGLISH<br />
<strong>TRILEX</strong> ® -Räder ermöglichen die Verspannung der<br />
Felge am größtmöglichen Durchmesser: Deshalb sind<br />
nur 6, 8 oder bei Doppelklemmung 12 Schrauben erforderlich.<br />
<strong>TRILEX</strong> ® -Räder ermöglichen durch ihre Formgebung<br />
eine Belüftung der Bremsen und <strong>Felgen</strong>.<br />
Der <strong>TRILEX</strong> ® -Radstern ist aus hochwertigem Werkstoff<br />
gefertigt und durch seine Formgebung höhen<br />
Beanspruchungen gewachsen. Zusammen mit der<br />
<strong>TRILEX</strong> ® -Felge bildet er eine Einheit von höhere<br />
Lebensdauer.<br />
Hinweis<br />
Achtung<br />
Man verwende aus Sicherheitsgründen<br />
nur <strong>TRILEX</strong> ® -Original-Ersatzteile mit dem<br />
Zeichen «<strong>TRILEX</strong> ® »<br />
Zur bestimmungsgemäßen Verwendung<br />
gehört auch das Lesen dieser Betriebsanleitung,<br />
sowie das Einhalten aller darin<br />
enthaltenen Hinweise – insbesondere<br />
der Sicherheitshinweise. Ferner gehört<br />
dazu, dass auch alle Inspektions- und<br />
6 7
DEUTSCH<br />
Achtung<br />
Wartungsarbeiten in den vorgeschriebenen<br />
Zeitintervallen durchgeführt werden.<br />
Wird das <strong>TRILEX</strong> ® -Rad nicht dieser Bestimmung<br />
gemäß verwendet, ist kein sicherer<br />
Betrieb gewährleistet.<br />
3 Bestandteile des<br />
<strong>TRILEX</strong> ® -Rades<br />
3.1 Einfachbereiftes <strong>TRILEX</strong> ® -Rad<br />
DEUTSCH<br />
ENGLISH<br />
Für alle Personen- und Sachschäden, die aus nicht bestimmungsgemäßer<br />
Verwendung entstehen, ist nicht<br />
der Hersteller, sondern der Betreiber des Fahrzeuges<br />
verantwortlich!<br />
ENGLISH<br />
Funktionsprinzip<br />
1 Radstern oder Radkranz<br />
1 Satz <strong>TRILEX</strong> ® -<strong>Felgen</strong> (3 Teile)<br />
6 <strong>TRILEX</strong> ® -Schrauben mit Bundmuttern<br />
und Vorsteckfedern<br />
6 Klemmplatten<br />
(Es ist auch eine Variante in einer 8 oder 12 Loch<br />
Klemmung möglich)<br />
Auf allen Bestandteilen sind Teilenummern angebracht,<br />
die bei Ersatzteil-Bestellungen anzugeben<br />
sind. Bei den <strong>TRILEX</strong> ® -Radsternen und Radkränzen<br />
ist die Teilenummer auf der Innen- oder Außenseite<br />
eingegossen.<br />
8 9
DEUTSCH<br />
ENGLISH<br />
3.2 Doppeltbereiftes <strong>TRILEX</strong> ® -Rad<br />
4 Montage / Demontage<br />
<strong>TRILEX</strong> ® -Felge<br />
4.1 Montage der <strong>TRILEX</strong> ® -Felge<br />
Reifenwulste und Wulstband mit Reifenmontagepaste<br />
einstreichen. Damit wird die Montage und eine spätere<br />
Demontage erleichtert und ein Festkleben des Reifens<br />
an der Felge verhindert.<br />
In der Reifenauflagefläche angerostete <strong>Felgen</strong> reinigen<br />
und mit Rostschutzfarbe (Zinkstaubfarbe) bestreichen.<br />
DEUTSCH<br />
ENGLISH<br />
1 Radstern<br />
2 Satz <strong>TRILEX</strong> ® -<strong>Felgen</strong> (6Teile)<br />
1 Zwischenring<br />
6 <strong>TRILEX</strong> ® -Schrauben mit Bundmuttern und<br />
Vorsteckfedern, eventuell U-Scheiben<br />
6 Klemmschuhe<br />
(Es ist auch eine Variante in einer 8 Loch Klemmung<br />
möglich)<br />
Allgemein<br />
Für vereinzelte Spezialkonstruktionen werden<br />
Sonderausführungen von Zubehörteilen verwendet.<br />
Hinweis<br />
Ventilsegment schräg einlegen.<br />
Ventil mit der mit Pfeil bezeichneten<br />
Seite im Schlitz anliegen lassen. Der<br />
<strong>Felgen</strong>boden muss über die ganze Segmentlänge<br />
an den Reifenwulsten anlie-<br />
Achtung<br />
gen. Runderneuerte Reifen, an welchen<br />
in der Regel die Wulstbreite groß ist, eventuell zusammendrücken.<br />
Hinweis<br />
Zweites Segment vor das Ventilsegment<br />
stellen; somit ist Platz vorhanden für das<br />
dritte Segment.<br />
Drittes Segment einlegen und an das Ventilsegment<br />
anschließen.<br />
Das vor dem Ventilsegment stehende<br />
Segment in Schließstellung schieben.<br />
Hinweis<br />
10 11
DEUTSCH<br />
ENGLISH<br />
Achtung<br />
Kontrolle der Ventillage!<br />
Die Felge mit dem Doppelhebel<br />
(659 800 008) unter gleichmäßigem Zug<br />
entlang des <strong>Felgen</strong>horns schließen. (Hebel<br />
Hinweis<br />
nicht nach aufwärts ziehen!)<br />
Für Montagen unterwegs kann auch der<br />
Schließhebel (659 800 006) durch Aufstecken des Öffnungshebels<br />
(659 800 007) verwendet werden.<br />
Wichtiger Montagehinweis<br />
Um ein funktionsrichtiges Anliegen der<br />
Felge auf dem Radstern sicherzustellen,<br />
Achtung sollte bei der <strong>Felgen</strong>montage darauf geachtet<br />
werden, dass die Reifen mit einem<br />
Befüllungsdruck von 1 – 3,5 bar vorbefüllt sind. Während<br />
der Vorbefüllung ist darauf zu achten, dass die<br />
<strong>Felgen</strong>stöße in der achsialen Richtung keinen Überstand<br />
aufweisen. Im Falle des Auftretens sind Überstände<br />
mit einem Gummihammer zu egalisieren.<br />
Reifen, die einen höheren Befüllungsdruck haben,<br />
können beim Montieren auf Radkränzen oder Radsternen<br />
zu Montageproblemen führen. Die Anlage<br />
der <strong>Felgen</strong>füße ist dann nicht gewährleistet. Es kann<br />
dadurch zu <strong>Felgen</strong>drehern auf den Radsternen und<br />
Radkränzen kommen.<br />
DEUTSCH<br />
ENGLISH<br />
Das Ventil muss im montierten Zustand der Felge in<br />
der Mitte der Ventilnute sein.<br />
4.2 Demontage der <strong>TRILEX</strong> ® -Felge<br />
Doppelhebel (659 800 008)<br />
Achtung<br />
Die Luft im Reifen vollständig ablassen!<br />
Vor dem Öffnen der Felge ist es ratsam,<br />
die Reifenwulste vom <strong>Felgen</strong>horn abzudrücken<br />
bzw. zu lösen!<br />
Felge mit Doppelhebel (659 800 008) öffnen.<br />
(Abb. siehe Seite 12)<br />
Schließhebel (659 800 006)<br />
Hinweis<br />
Bei Anwendung des <strong>TRILEX</strong> ® -Demontagegerätes<br />
(659 801 006) ist die Demontage<br />
einfach und rasch möglich.<br />
(Verwendung nur bei 20“ und 24“ <strong>Felgen</strong>)<br />
Öffnungshebel (659 800 007)<br />
<strong>TRILEX</strong> ® -Demontagegerät (659 801 006)<br />
12 13
DEUTSCH<br />
ENGLISH<br />
5 Montage / Demontage<br />
<strong>TUBLEX</strong> ® -Felge<br />
5.1 Montage der <strong>TUBLEX</strong> ® -Felge<br />
Hinweis<br />
Reifen und Felge mit Reifenmontagepaste<br />
gut einschmieren. Kurze Seite der <strong>Felgen</strong>schulter<br />
nach oben! Reifen von Hand gegenüber<br />
dem Ventil ins Tiefbett drücken und so<br />
weit als möglich übers <strong>Felgen</strong>horn ziehen.<br />
5.2 Demontage der <strong>TUBLEX</strong> ® -Felge<br />
Hinweis<br />
Kurze Seite der <strong>Felgen</strong>schulter nach oben.<br />
Riefenwulst von <strong>Felgen</strong>horn abdrücken.<br />
Beide gebogenen Hebelenden zwei Handbreiten<br />
von einander beim Ventil zwischen<br />
Reifen und Felge einschieben.<br />
Notwendiges Werkzeug:<br />
2 zweiseitige Hebel 659 800 000<br />
DEUTSCH<br />
ENGLISH<br />
Notwendiges Werkzeug:<br />
2 zweiseitige Hebel 659 800 00<br />
Reifenmontagepaste 659 144 002<br />
Hinweis<br />
Reifen gegenüber den Hebeln ins Tiefbett<br />
drücken und unter gleichmäßigem Ziehen<br />
der Hebel den Reifenwulst übers Horn<br />
ziehen.<br />
Reifenwulst mittels geradem Hebelende<br />
übers <strong>Felgen</strong>horn drücken.<br />
Hinweis<br />
Zweiten Reifenwulst gegenüber dem Ventil<br />
einseitig ins Tiefbett drücken.<br />
Hinweis<br />
Hebel mit Spatenstich erneut an der Übergangsstelle<br />
(siehe Pfeil) vom bereits ausgehobenen<br />
Wulst einschieben und den<br />
restlichen Wulst übers <strong>Felgen</strong>horn ziehen.<br />
Ggf. den Vorgang solange wiederholen, bis<br />
der gesamte Wulst über das <strong>Felgen</strong>horn<br />
gezogen ist.<br />
Hinweis<br />
Reifenwulst mittels gebogenen<br />
Hebelenden übers <strong>Felgen</strong>horn drücken.<br />
Hinweis<br />
Reifen aufstellen, asymmetrisch lange Seite<br />
der <strong>Felgen</strong>schulter auf den Bediener zuweisend.<br />
Gerade Hebelenden so weit zwischen<br />
Reifenwulst und <strong>Felgen</strong>horn schieben,<br />
bis die Anschläge des Hebels am Horn<br />
anstehen.<br />
Hinweis<br />
Reifen abkippen und durch Wippen der Hebel<br />
Felge abdrücken.<br />
Hinweis<br />
14 15
DEUTSCH<br />
ENGLISH<br />
6 Montage der <strong>Felgen</strong> mit<br />
Reifen auf den Radstern<br />
6.1 Allgemeines<br />
Achtung<br />
Hinweis<br />
Achtung<br />
Sämtliche Teile wie Speichenköpfe, <strong>Felgen</strong>füße,<br />
Schrauben und Klemmteile reinigen.<br />
Um eine einwandfreie Verspannung<br />
und Zentrierung der Felge zu erreichen,<br />
dürfen Speichenköpfe und <strong>Felgen</strong>füße<br />
nicht mit Farbe überstrichen werden.<br />
Das zulässige Anzugsmoment der Muttern<br />
im <strong>TRILEX</strong> ® -<strong>Rad<strong>system</strong></strong>:<br />
• 270 – 300 Nm für M 18 Schrauben<br />
• 320 – 360 Nm für M 20 Schrauben<br />
Die Muttern der Befestigungsschrauben<br />
sind immer der Reihe nach in 3 – 4 Umgängen,<br />
also nie über Kreuz anzuziehen.<br />
Bei Verwendung des Schlagschraubers ist<br />
das vorgeschriebene Drehmoment (wie<br />
angegeben) einzuhalten.<br />
6.2 Einfaches <strong>TRILEX</strong> ® -Rad<br />
Es ist darauf zu achten, ob die Bremstrommel,<br />
Aussparungen für das Ventil<br />
hat! Beim Auflegen der Felge darauf achten,<br />
dass sich das Ventil mit beiden An-<br />
Achtung<br />
schlägen zwischen 2 Speichenköpfen befindet.<br />
Obere und untere Klemmplatte zuerst montieren<br />
(nur handfest mit Mutter sichern). Nun die übrigen<br />
Klemmplatten ansetzen und Muttern der Reihe<br />
nach (nicht über Kreuz), in 3 – 4 Umgängen anziehen.<br />
Das angegebene Anzugsmoment für die jeweiligen<br />
Schrauben beachten!<br />
Gefahr<br />
Nach einer kurzen Probefahrt (ca. 5 –<br />
10 km) sowie nach weiteren ca. 100 km<br />
müßen die Muttern auf das vorgeschriebene<br />
Anzugsmoment überprüft werden, gegebenenfalls<br />
die Muttern auf Anzugsmoment<br />
nachziehen!<br />
6.3 Doppeltes <strong>TRILEX</strong> ® -Rad<br />
Montage des inneren Rades.<br />
DEUTSCH<br />
ENGLISH<br />
Gefahr<br />
Nach einer kurzen Probefahrt (ca. 5 –<br />
10 km) sowie nach weiteren ca. 100 km<br />
müssen die Muttern auf das vorgeschriebene<br />
Anzugsmoment überprüft werden,<br />
gegebenenfalls die Muttern auf Anzugsmoment<br />
nachziehen.<br />
Achtung<br />
Auf eventuelle Aussparungen<br />
für das Ventil achten!<br />
Hinweis<br />
Es ist darauf zu achten, dass die Endbefüllung<br />
des Reifen mit Luftdruck erst nach<br />
korrektem und abgeschlossenem Montageablauf<br />
durchzuführen ist. (Der Befülldruck<br />
ist Reifenhersteller abhängig.)<br />
Der Zwischenring wird nun aufgeschoben.<br />
16 17
DEUTSCH<br />
Hinweis<br />
Die Zentriernocken des Zwischenrings<br />
auf dem Speichenkopf zwischen den Speichen<br />
ausrichten.<br />
7 Demontage der <strong>Felgen</strong> mit<br />
Reifen vom Radstern<br />
7.1 Einfachbereiftes <strong>TRILEX</strong> ® -Rad<br />
DEUTSCH<br />
ENGLISH<br />
Die äußere Felge kann nun montiert werden.<br />
Hinweis<br />
Die oberen beiden Klemmschuhe zuerst<br />
montieren, nur handfest mit Mutter anziehen.<br />
Die restlichen Klemmschuhe ansetzen.<br />
Hinweis<br />
Muttern lösen und abschrauben, Klemmplatten<br />
entfernen und <strong>Felgen</strong> abheben.<br />
ENGLISH<br />
Achtung<br />
Gefahr<br />
Nun die übrigen Klemmplatten ansetzen<br />
und Muttern der Reihe nach, (nicht über<br />
Kreuz) in 3 – 4 Umgängen anziehen.<br />
Das angegebene Anzugsmoment für die<br />
jeweiligen Schrauben beachten!<br />
Auch für die Doppelbereifung gilt:<br />
Nach einer kurzen Probefahrt (ca. 5 –<br />
10 km) sowie nach weiteren ca. 100 km<br />
müssen die Muttern auf das vorgeschriebene<br />
Anzugsmoment überprüft werden,<br />
gegebenenfalls die Muttern auf Anzugsmoment<br />
nachziehen!<br />
7.2 Doppeltbereiftes <strong>TRILEX</strong> ® -Rad<br />
Gefahr<br />
Die Muttern einige Umgänge lösen, keinenfalls<br />
ganz von der Schraube lösen!<br />
Klemmplatten mit dem Haken des Öffnungshebels<br />
(659 800 007) abdrücken.<br />
Öffnungshebel (659 800 007)<br />
Hinweis<br />
Nun die Muttern und Klemmschuhe ganz<br />
lösen bzw. ausbauen. Äußere Felge, Zwischenring<br />
und innere Felge vom Radstern<br />
abheben.<br />
18 19
DEUTSCH<br />
8 <strong>TRILEX</strong> ® -Radkranz<br />
mit Doppelklemmung 24“<br />
9 <strong>TRILEX</strong> ® -Werkzeuge für<br />
Montage und Demontage<br />
DEUTSCH<br />
ENGLISH<br />
Hinweis<br />
Erhöhter Bremsdruck (über 10 bar) auf<br />
der Vorderachse! Hierfür wird der Radkranz<br />
mit der Doppelklemmung empfohlen.<br />
Werkzeuge für die Montage der <strong>TRILEX</strong> ® -<strong>Felgen</strong><br />
ENGLISH<br />
Teile für eine Vorderachse<br />
• 2 Radkränze<br />
• 12 Klemmplatten<br />
• 24 <strong>TRILEX</strong>-Schrauben<br />
• 24 Bundmuttern<br />
• 24 Vorsteckfedern<br />
• 2 Sätze <strong>TRILEX</strong> <strong>Felgen</strong><br />
Schließhebel (Bestell Nr. 659 800 006)<br />
Öffnungshebel (Bestell Nr. 659 800 007)<br />
Hinweis<br />
Auch bei der Doppelklemmung gilt:<br />
Beim Anzug der Muttern in den einzelnen<br />
Umläufen ist mit der ersten Mutter (in der<br />
Klemmplatte) rechts neben dem Ventil zu<br />
beginnen.<br />
Doppelhebel (Bestell Nr. 659 800 008)<br />
Bei der Demontage ist das gleiche Vorgehen wie bei<br />
der Einfachklemmung zu beachten.<br />
<strong>TRILEX</strong> ® -Demontagegerät (Bestell Nr. 659 801 006)<br />
Für die Pflege von Reifen und <strong>Felgen</strong><br />
Montagepaste (à 5 kg) (Bestell Nr. 659 801 006)<br />
20 21
DEUTSCH<br />
Werkzeug für den Zusammenbau<br />
von Radstern und Felge<br />
10 Zusatzinformationen<br />
DEUTSCH<br />
Haben Sie noch Fragen oder Wünsche?<br />
Wir helfen Ihnen gerne weiter.<br />
ENGLISH<br />
Mutterwinde (Bestell Nr. 659 800 021)<br />
Unsere Firmenanschrift<br />
Georg Fischer Verkehrstechnik GmbH<br />
Julius-Bührer-Str. 12<br />
78224 Singen<br />
Deutschland<br />
ENGLISH<br />
Unseren zentralen Kundendienst erreichen Sie unter<br />
Tel. +49 (0) 7731 886 0<br />
Fax +49 (0) 7731 886 704<br />
Hier hilft man Ihnen auch schnell, den richtigen<br />
Spezialisten für Ihre Frage zu finden.<br />
Steckschlüssel (Bestell Nr. 659 800 038)<br />
Besuchen Sie uns im Internet unter<br />
www.vkt.georgfischer.com<br />
Dorn (Bestell Nr. 659 800 039)<br />
Hier finden Sie aktuelle Informationen zu unseren<br />
Produkten. Außerdem können Sie online unsere<br />
Ersatzteillisten und technischen Daten abrufen.<br />
<strong>TUBLEX</strong> ® -Montage- und Demontage-Hebel<br />
<strong>TUBLEX</strong> ® -Montage- und (Bestell Nr. 659 800 021)<br />
Demontage-Hebel<br />
22 23
DEUTSCH<br />
<strong>TRILEX</strong> ®<br />
Operation – Assembly –<br />
Maintenance<br />
DEUTSCH<br />
Table of contents<br />
ENGLISH<br />
Safety symbol description 26<br />
1. General safety information<br />
1.1 User responsibility 27<br />
7. Disassembly of <strong>rims</strong> with<br />
tyres from the <strong>wheel</strong>spider<br />
7.1 <strong>TRILEX</strong> ® <strong>wheel</strong> with single tyre 41<br />
7.2 <strong>TRILEX</strong> ® <strong>wheel</strong> with twin tyres 41<br />
ENGLISH<br />
2. Product description<br />
2.1 Features of the <strong>TRILEX</strong> ® spoked <strong>wheel</strong> 29<br />
3. Elements of the <strong>TRILEX</strong> ® <strong>wheel</strong><br />
3.1 Single <strong>TRILEX</strong> ® <strong>wheel</strong> 31<br />
3.2 Double <strong>TRILEX</strong> ® <strong>wheel</strong> 32<br />
8. <strong>TRILEX</strong> ® <strong>wheel</strong> rim with double clamp 42<br />
9. Tools for assembly and disassembly<br />
in the <strong>TRILEX</strong> ® <strong>system</strong> 43<br />
10. Additional information 45<br />
4. Assembly / disassembly of <strong>TRILEX</strong> ® <strong>rims</strong><br />
4.1 Assembly 33<br />
4.2 Disassembly 35<br />
5. Assembly / disassembly of <strong>TUBLEX</strong> ® <strong>rims</strong><br />
5.1 Assembly 36<br />
5.2 Disassembly 37<br />
6. Assembly of <strong>TRILEX</strong> ® rim<br />
with tyre on the <strong>wheel</strong>spider<br />
6.1 General information 38<br />
6.2 Single <strong>TRILEX</strong> ® <strong>wheel</strong> 39<br />
6.3 Double <strong>TRILEX</strong> ® <strong>wheel</strong> 39<br />
24 25
DEUTSCH<br />
Safety symbol description<br />
1 General safety information<br />
DEUTSCH<br />
ENGLISH<br />
The following safety symbols appear in this operating<br />
manual. These symbols are used to make the user<br />
aware of relevant safety information.<br />
This symbol warns of dangers to health and safety of<br />
personnel.<br />
1.1 User responsibility<br />
The <strong>TRILEX</strong> ® <strong>wheel</strong> has been designed and constructed<br />
according to a careful selection of norms, consideration<br />
of dangers and further technical specifications.<br />
It thus complies with modern technological<br />
standards and provides the highest levels of safety.<br />
ENGLISH<br />
Danger<br />
Caution<br />
Note<br />
This symbol warns of dangers to machine parts, materials<br />
or the environment.<br />
This symbol shows information that clarifies machine<br />
operations.<br />
This high level of safety can only be achieved during<br />
regular operation if all the measures required for it<br />
have been taken. The vehicle operator is responsible<br />
for planning these measures and ensuring that they<br />
are carried out correctly.<br />
The operator must especially ensure that the following<br />
requirements are met:<br />
• The <strong>TRILEX</strong> ® <strong>wheel</strong> may only be used as intended<br />
(refer to Chapter 2.1 «Product description»)<br />
• The <strong>wheel</strong> may only be used in a fully functional<br />
and technically flawless state. The functioning of<br />
the safety equipment must be inspected on a regular<br />
basis<br />
• The necessary safety equipment must be provided<br />
for operating, servicing and repair personnel and<br />
used correctly<br />
• The operating manual must remain at the usage<br />
site at all times and be complete and fully legible<br />
• Personnel must be regularly trained in all aspects<br />
of work safety and environmental protection and<br />
must be aware of the safety information contained<br />
within the operating manual<br />
• All safety and warning notices on the <strong>wheel</strong> must<br />
remain in place and be fully legible<br />
26 27
DEUTSCH<br />
ENGLISH<br />
This operating manual must be kept in the<br />
vehicle. It must be ensured that all personnel<br />
who work with the vehicle can access<br />
Note the operating manual at all times. In addition<br />
to the operating manual, other material<br />
concerning labour protection laws and regulations<br />
for equipment use should be provided.<br />
All safety information and operating signs on the<br />
<strong>wheel</strong> must always be kept in a fully legible condition.<br />
Damaged or illegible signs must be replaced immediately.<br />
2 Product description<br />
2.1 Features of the <strong>TRILEX</strong> ® spoked <strong>wheel</strong><br />
<strong>TRILEX</strong> ® <strong>rims</strong> can be easily mounted and disassembled<br />
since the rim profile is divided cross-sectionally.<br />
<strong>TRILEX</strong> ® rim segments of the same rim size can be<br />
exchanged with one another. In the event of damage,<br />
only the corresponding segment must then be replaced.<br />
DEUTSCH<br />
ENGLISH<br />
The centring of <strong>TRILEX</strong> ® <strong>wheel</strong>s guarantee zero runout<br />
of <strong>rims</strong> and tyres when professionally mounted.<br />
<strong>TRILEX</strong> ® <strong>wheel</strong>s enable tensioning of the <strong>rims</strong> at the<br />
greatest possible diameter: Therefore only 6, 8 or 12<br />
(for double clamps) screws are required.<br />
The profiling of <strong>TRILEX</strong> ® <strong>wheel</strong>s enables ventilation of<br />
the brakes and <strong>rims</strong>.<br />
The <strong>TRILEX</strong> ® <strong>wheel</strong>spider is manufactured of the<br />
highest quality material and its profiling enables it<br />
to meet the highest demands. Together with the<br />
<strong>TRILEX</strong> ® rim, it forms a single unit of long service life.<br />
Note<br />
For reasons of safety, only <strong>TRILEX</strong> ® original<br />
spare parts with the «<strong>TRILEX</strong> ® »<br />
trademark should be used.<br />
Caution<br />
Proper use includes with it the reading<br />
of this operating manual, including all<br />
operating and safety instructions. All<br />
inspection and maintenance work must<br />
also be carried out at the specified time<br />
intervals.<br />
28 29
DEUTSCH<br />
ENGLISH<br />
Caution<br />
If the <strong>TRILEX</strong> ® <strong>wheel</strong> is not used as<br />
described, safe operation cannot be<br />
guaranteed.<br />
The vehicle operator, not the manufacturer,<br />
is responsible for all injuries and material<br />
damage resulting from improper use.<br />
3 Elements of the<br />
<strong>TRILEX</strong> ® <strong>wheel</strong><br />
3.1 <strong>TRILEX</strong> ® <strong>wheel</strong> with single tyre<br />
DEUTSCH<br />
ENGLISH<br />
Functioning principle<br />
1 <strong>wheel</strong>spider or rim<br />
1 <strong>TRILEX</strong> ® rim kit (3 pieces)<br />
6 <strong>TRILEX</strong> ® screws with flanged nuts<br />
and spring clips<br />
6 clamping plates (A version with 8 or<br />
12 clamping holes is also available)<br />
All components are identified with parts numbers,<br />
which must be specified when placing spare parts<br />
orders. On <strong>TRILEX</strong> ® <strong>wheel</strong>spiders and <strong>rims</strong>, the part<br />
numbers have been ingrained on the inner or outer<br />
side.<br />
30 31
DEUTSCH<br />
ENGLISH<br />
3.2 <strong>TRILEX</strong> ® <strong>wheel</strong> with twin tyres<br />
4 Assembly / disassembly<br />
of <strong>TRILEX</strong> ® <strong>rims</strong><br />
4.1 Assembly of <strong>TRILEX</strong> ® <strong>rims</strong><br />
Coat tyre beads and bead chafer strip with tyre mounting<br />
paste. This facilitates the mounting and later removal<br />
and prevents the tyre from adhering tightly to<br />
the rim. Clean any rusted <strong>rims</strong> in the tyre contact area<br />
and coat with rust protection paint (zinc-rich paint).<br />
DEUTSCH<br />
ENGLISH<br />
Insert the valve segments at an angle.<br />
1 <strong>wheel</strong>spider<br />
2 <strong>TRILEX</strong> ® rim kit (6 pieces)<br />
1 spacing ring<br />
6 <strong>TRILEX</strong> ® screws with flanged nuts and spring clips,<br />
U-washers if used<br />
6 clamps (A version with 8 clamping holes is also<br />
available)<br />
General information<br />
For individual custom designs, special versions of<br />
accessory parts are used.<br />
Note<br />
Caution<br />
Lay the valve with the arrow-indicated<br />
side in the slot. The rim base must lay<br />
against the tyre beads over the entire<br />
segment length. For retreaded tyres,<br />
which usually have a large bead width,<br />
press together if necessary.<br />
Note<br />
Place the second segment in front of the<br />
valve segment so that there is room for<br />
the third segment.<br />
Insert the third segment and connect to<br />
the valve segment.<br />
Note<br />
Push the segment in front of the valve<br />
segment into the closure position.<br />
32 33
DEUTSCH<br />
ENGLISH<br />
Caution<br />
Note<br />
Check the position of the valve!<br />
Using uniform pressure along the rim<br />
flange, close the rim with the double lever<br />
(659 800 008). (Do not pull the lever upward!)<br />
For assembly in transit, the closing<br />
lever (659 800 006) can also be used by inserting<br />
the opening lever (659 800 007).<br />
Important note on assembly<br />
In order to ensure a functionally correct<br />
placement of the rim on the <strong>wheel</strong>spider,<br />
Caution care should be taken during the mounting<br />
of the rim that the tyres are pre-filled<br />
to a pressure of from 1 to 3.5 bar. During pre-filling, it<br />
should be ensured that the rim joints do not show any<br />
overlap in the axial direction. If this occurs, the protrusions<br />
should be made flat with a rubber hammer. Tyres<br />
with a higher filling pressure can cause mounting<br />
problems on the <strong>wheel</strong> <strong>rims</strong> or <strong>wheel</strong>spiders. Secure<br />
attachment of the rim toes is then not ensured. Twisting<br />
on the <strong>wheel</strong>spiders or <strong>rims</strong> can thereby occur.<br />
DEUTSCH<br />
ENGLISH<br />
When the rim is mounted, the valve must lie in the<br />
centre of the valve slot.<br />
4.2 Disassembly of <strong>TRILEX</strong> ® <strong>rims</strong><br />
Caution<br />
Fully deflate the tyres.<br />
Before opening the rim, pressing or releasing<br />
the tyre beads from the rim flange<br />
is recommended.<br />
Double lever (659 800 008)<br />
Open rim with double lever (659 800 008).<br />
(Fig. on page 34)<br />
Closing lever (659 800 006)<br />
Note<br />
Using the <strong>TRILEX</strong> ® disassembly device<br />
(659 801 006) enables you to perform the<br />
disassembly simply and quickly.<br />
(Use only for 20“ and 24“ <strong>rims</strong>)<br />
Opening lever (659 800 007)<br />
<strong>TRILEX</strong> ® disassembly device (659 801 006)<br />
34 35
DEUTSCH<br />
ENGLISH<br />
5 Assembly / disassembly of<br />
<strong>TUBLEX</strong> ® <strong>rims</strong><br />
5.1 Assembly of <strong>TUBLEX</strong> ® <strong>rims</strong><br />
Note<br />
Brush tyre and rim liberally with tyre<br />
mounting paste. The short side of the rim<br />
shoulder should be on top. Press the tyre<br />
manually into the drop centre at the point<br />
opposite the valve and pull it as far as possible<br />
over the rim flange.<br />
Required tools:<br />
2 two-sided levers 659 800 00<br />
Tyre mounting paste 659 144 002<br />
5.2 Disassembly of <strong>TUBLEX</strong> ® <strong>rims</strong><br />
Note<br />
Note<br />
The short side of the rim shoulder should<br />
be on top. Unseat the tyre bead from the<br />
rim flange. Push both bent lever ends between<br />
tyre and rim two hand widths apart<br />
at the valve.<br />
Required tools:<br />
2 two-sided levers 659 800 000<br />
Press the tyre into the drop centre at the<br />
point opposite the levers and pull the tyre<br />
bead over the flange with a uniform pulling<br />
of both levers.<br />
DEUTSCH<br />
ENGLISH<br />
Note<br />
Unseat the tyre bead over the rim flange<br />
using the straight lever end.<br />
Note<br />
Insert the lever again into the junction (see<br />
arrow) of the already lifted bead and pull<br />
the rest of the bead over the rim flange.<br />
Repeat the process as necessary until the<br />
entire bead is pulled over the rim flange.<br />
Note<br />
Press the second tyre bead opposite the<br />
valve into the drop centre on one side.<br />
Note<br />
Align tyre with the asymmetrically longer<br />
side of the rim shoulder pointing toward<br />
you. Insert the straight lever ends as far in<br />
between tyre bead and rim flange until the<br />
ends of the lever are against the flange.<br />
Note<br />
Press the tyre bead over the rim flange<br />
using the bent lever ends.<br />
Tilt the tyre and free the rim by rocking the<br />
levers.<br />
Note<br />
36 37
DEUTSCH<br />
ENGLISH<br />
6 Assembly of rim with<br />
tyres on the <strong>wheel</strong>spider<br />
6.1 General information<br />
Caution<br />
Note<br />
Clean all components such as spoke<br />
heads, rim toes, screws and clamping<br />
parts. To achieve a technically flawless<br />
tensioning and centring of the rim, the<br />
spoke heads and rim toes should not be<br />
coated with paint.<br />
Permitted tightening torque of the nuts in<br />
the <strong>TRILEX</strong> ® <strong>wheel</strong> <strong>system</strong>:<br />
• 270 – 300 Nm for M 18 screws<br />
• 320 – 360 Nm for M 20 screws<br />
6.2 Single <strong>TRILEX</strong> ® <strong>wheel</strong><br />
Check that the brake drums have holes for<br />
the valve. When seating the rim, the valve<br />
must lie with both ends between 2 spoke<br />
Caution heads. Mount the upper and lower clamping<br />
plates first (secure them with nuts only<br />
until hand-tight). Then fit the remaining clamping<br />
plates and tighten the nuts in sequential order (not<br />
crosswise) in 3 to 4 passes. Observe the tightening<br />
torque specified for the respective screws.<br />
Danger<br />
After a brief test run (approx. 5 – 10 km),<br />
as well as after a further 100 km, the nuts<br />
must be inspected for proper torque and<br />
tightened if necessary.<br />
DEUTSCH<br />
ENGLISH<br />
Caution<br />
Danger<br />
The nuts of the fastening screws should<br />
always be tightened sequentially (never<br />
crosswise) in 3 to 4 passes.<br />
When using an impact wrench, the prescribed<br />
torque is to be observed as specified.<br />
After a brief test run (approx. 5 – 10 km),<br />
as well as after a further 100 km, the nuts<br />
must be inspected for proper torque and<br />
tightened if necessary.<br />
6.3 Double <strong>TRILEX</strong> ® <strong>wheel</strong><br />
Mounting the inner <strong>wheel</strong>.<br />
Check for holes for the valve.<br />
Caution<br />
The spacing ring is inserted.<br />
Note<br />
Note that the final filling of the tyres with<br />
compressed air is to be performed only<br />
after the assembly process has been<br />
properly completed. (The filling pressure<br />
depends on the tyre manufacturer.)<br />
38 39
DEUTSCH<br />
Note<br />
Align the lugs of the spacing ring with the<br />
spoke head between the spokes.<br />
7 Disassembly of <strong>rims</strong> with tyres<br />
from the <strong>wheel</strong>spider<br />
7.1 <strong>TRILEX</strong> ® <strong>wheel</strong> with single tyre<br />
DEUTSCH<br />
ENGLISH<br />
The outer rim can then be mounted.<br />
Note<br />
Mount the upper two clamps first and<br />
tighten with nuts until only hand-tight.<br />
Insert the remaining clamps.<br />
Note<br />
Release and unscrew nuts, remove<br />
clamping plates and lift up <strong>rims</strong>.<br />
ENGLISH<br />
Caution<br />
Danger<br />
Then fit the remaining clamping plates<br />
and tighten the nuts in sequential order<br />
(not crosswise) in 3 to 4 passes.<br />
Observe the tightening torque specified<br />
for the respective screws.<br />
The following also applies to twin tyres:<br />
After a brief test run (approx. 5 – 10 km),<br />
as well as after a further 100 km, the nuts<br />
must be inspected for proper torque and<br />
tightened if necessary.<br />
7.2 <strong>TRILEX</strong> ® <strong>wheel</strong> with twin tyres<br />
Danger<br />
Release the nuts gradually over several<br />
passes; never completely remove from<br />
the screw. Unseat the clamping plates<br />
with the hook of the opening lever<br />
(659 800 007).<br />
Opening lever (659 800 007)<br />
Note<br />
Completely release or disassemble<br />
the nuts and clamps. Lift the outer rim,<br />
spacing ring and inner rim from the<br />
<strong>wheel</strong>spider.<br />
40 41
DEUTSCH<br />
8 <strong>TRILEX</strong> ® <strong>wheel</strong> rim with<br />
24” double clamp<br />
9 <strong>TRILEX</strong> ® tools for assembly<br />
and disassembly<br />
DEUTSCH<br />
ENGLISH<br />
Note<br />
Increased braking pressure (over 10 bar)<br />
on the front axle! A <strong>wheel</strong> rim with double<br />
clamp is recommended for this.<br />
Tools for mounting <strong>TRILEX</strong> ® <strong>rims</strong><br />
ENGLISH<br />
Parts for one front axle<br />
• 2 <strong>wheel</strong> <strong>rims</strong><br />
• 12 clamping plates<br />
• 24 <strong>TRILEX</strong> ® screws<br />
• 24 flanged nuts<br />
• 24 spring clips<br />
• 2 <strong>TRILEX</strong> rim kits<br />
Closing lever (order no. 659 800 006)<br />
Opening lever (order no. 659 800 007)<br />
Note<br />
Also applies to double clamps:<br />
When tightening the nuts in individual<br />
passes, always start with the first nut (in<br />
the clamping plate) on the right next to<br />
the valve.<br />
Double lever (order no. 659 800 008)<br />
For disassembly, the same procedure is performed as<br />
with single clamps.<br />
<strong>TRILEX</strong> ® disassembly device (order no. 659 801 006)<br />
For the care of tyres and <strong>rims</strong><br />
Mounting paste (5 kg) (order no. 659 801 006)<br />
42 43
DEUTSCH<br />
Tools for assembling <strong>wheel</strong>spider and rim<br />
10 Additional information<br />
DEUTSCH<br />
Have you any further questions or requests?<br />
We would gladly be of assistance.<br />
ENGLISH<br />
Nut winch (order no. 659 800 021)<br />
Our company address<br />
Georg Fischer Verkehrstechnik GmbH<br />
Julius-Bührer-Str. 12<br />
78224 Singen<br />
Germany<br />
ENGLISH<br />
You can reach our customer service department under<br />
Tel. +49 (0) 7731 886 0<br />
Fax +49 (0) 7731 886 704<br />
Socket wrench (order no. 659 800 038)<br />
You will be quickly directed to the appropriate<br />
specialist for your question.<br />
Visit us online<br />
www.vkt.georgfischer.com<br />
Mandrel (order no. 659 800 039)<br />
You can find the latest news on our products here on our<br />
web page. You can also access our spare parts list and<br />
further technical data online.<br />
<strong>TUBLEX</strong> ® assembly and disassembly lever<br />
<strong>TUBLEX</strong>® assembly and (order no. 659 800 021)<br />
disassembly lever<br />
44 45
Diese Druckschrift enthält keine Garantiezusagen,<br />
sondern soll lediglich technische Informationen<br />
vermitteln. Wir verweisen auf unsere<br />
Verkaufsbedingungen.<br />
This publication contains no warranty declarations,<br />
but is intended solely to provide technical<br />
information. We refer to our conditions of sale.<br />
659 120 414<br />
04.07<br />
Si 733<br />
Georg Fischer<br />
Verkehrstechnik GmbH<br />
Postfach<br />
78221 Singen<br />
Deutschland<br />
Tel. +49 (0) 7731 886 0<br />
Fax +49 (0) 7731 886 704<br />
info.vkt@georgfischer.com<br />
www.vkt.georgfischer.com