You also want an ePaper? Increase the reach of your titles
YUMPU automatically turns print PDFs into web optimized ePapers that Google loves.
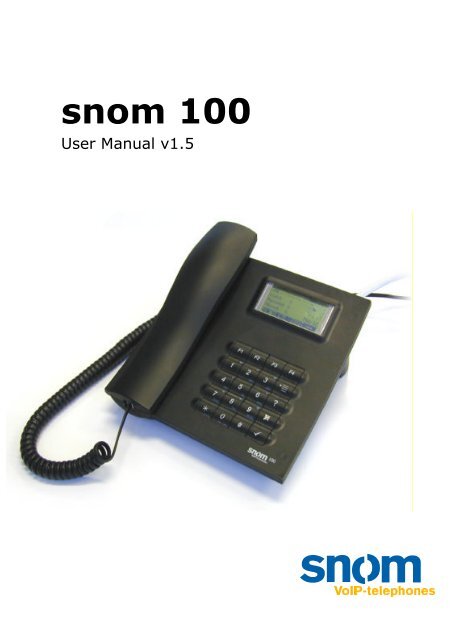
<strong>snom</strong> <strong>100</strong><br />
User Manual v1.5
Foreword<br />
Congratulation to the purchase of your <strong>snom</strong> <strong>100</strong><br />
Voice over IP telephone!<br />
Telephony is part of our every day life. Over a period<br />
of over <strong>100</strong> years a communication form has evolved<br />
and which we feel cannot be dismissed. In spite of the<br />
new technology base of the <strong>snom</strong> <strong>100</strong> most of its look<br />
and feel will be very familiar and intuitive to you.<br />
On the other hand, the world of the Internet opens a<br />
whole range of new possibilities. A lot of users are<br />
deploy browsers and own one or more email accounts.<br />
They will find it easy to control the phone via its web<br />
interface or to make a call to “sip:john@domain.de“<br />
for example.<br />
We are confident that the developments in the<br />
computer industry will follow suit in the telecom world.<br />
VoIP is not only about transporting speech in data<br />
networks – it is about interoperability and breaking up<br />
a vertical market as well as streamlining business<br />
processes by seamlessly integrating the telephone into<br />
the computer networks and applications. With its<br />
technical flexibility, our commitment to all open and<br />
relevant standards and our cooperation with other<br />
vendors of the VoIP industry, the <strong>snom</strong> <strong>100</strong><br />
represents a safe investment in the future.<br />
Now, we wish you pleasurable experience in the VoIP<br />
world.<br />
<strong>snom</strong> technology AG<br />
The current version of this user manual can be<br />
obtained from:<br />
http://www.<strong>snom</strong>.de/download/man_<strong>snom</strong><strong>100</strong>e.pdf<br />
2
Content<br />
Foreword....................................................................... 2<br />
Installation .................................................................... 5<br />
Delivery Content ......................................................... 6<br />
Safety Notes .............................................................. 6<br />
Power supply .......................................................... 6<br />
Setting up the Phone ............................................... 6<br />
Cleaning................................................................. 7<br />
Connecting the phone.................................................. 7<br />
Dial Pad ..................................................................... 8<br />
Initialization ............................................................. 10<br />
Booting ................................................................ 10<br />
Selecting the language........................................... 11<br />
Registration .......................................................... 12<br />
Basic Functions ............................................................ 17<br />
Idle State................................................................. 18<br />
Dialing..................................................................... 18<br />
Dialing a phone number (E164)............................... 19<br />
Dialing a H.323/SIP Address ................................... 20<br />
Dialing an IP Address ............................................. 20<br />
Terminating a call ..................................................... 21<br />
Accepting a Call ........................................................ 22<br />
Denying/Blocking a Call ............................................. 22<br />
Adjusting the Volume ................................................ 22<br />
Main Menu ............................................................... 23<br />
Help Function ........................................................... 24<br />
Advanced Functions ...................................................... 26<br />
Hold and Resume...................................................... 27<br />
Toggling between calls............................................... 27<br />
Transfer................................................................... 27<br />
Direct Transfer ...................................................... 27<br />
Call Divert................................................................ 28<br />
Diverting all calls................................................... 28<br />
Divert when Busy .................................................. 28<br />
Divert when not answered ...................................... 28<br />
DTMF Tones ............................................................. 29<br />
Adjusting the Volume ................................................ 29<br />
Ring Tones............................................................... 30<br />
3
About ......................................................................31<br />
Call Register.................................................................32<br />
Phone Book ..............................................................33<br />
Adding an entry.....................................................33<br />
Editing an entry.....................................................34<br />
Call Lists ..................................................................36<br />
Speed Dial................................................................36<br />
Dialing..................................................................37<br />
Editing speed dial entries ........................................38<br />
Deny List..................................................................39<br />
Browsing ..............................................................39<br />
Adding a number ...................................................39<br />
Removing a number...............................................40<br />
List Views.................................................................40<br />
Modifying the view .................................................41<br />
Sort Criteria ..........................................................41<br />
Settings via the Phone ...............................................44<br />
Settings via Browser..................................................46<br />
Parameters...............................................................47<br />
Base ....................................................................47<br />
Advanced..............................................................48<br />
Network................................................................49<br />
H.323...................................................................50<br />
SIP ......................................................................52<br />
Call Divert.............................................................52<br />
Administration..............................................................54<br />
Flash Updates ...........................................................55<br />
Setting the Network Identity.......................................56<br />
Installing DHCP .....................................................56<br />
Settings via the Phone ...............................................60<br />
Parameters ...........................................................61<br />
Usage...................................................................63<br />
Appendix .....................................................................65<br />
Technical Data ..........................................................66<br />
Standard Conformance ..............................................67<br />
Glossary ......................................................................68<br />
4
Installation<br />
5
Delivery Content<br />
Please check whether the delivery contains the<br />
following parts:<br />
� The base unit with display and dial pad<br />
� The handset<br />
� The handset cable<br />
� The power supply (optional)<br />
Safety Notes<br />
!<br />
Power supply<br />
Please observe the following safety<br />
advice. It is important to observe it in<br />
order guarantee safe and reliable<br />
operation of the device.<br />
You have two possibilities to provide the <strong>snom</strong> <strong>100</strong><br />
with power:<br />
� Power feeding over the network cable<br />
(PowerLAN)<br />
� An external power supply<br />
If you want to use an external power supply then<br />
please only use the supplied part. Other power<br />
supplies may cause damage to the phone, effect the<br />
behavior or induce noise.<br />
Setting up the Phone<br />
Please setup the <strong>snom</strong> <strong>100</strong> only on even and<br />
horizontal surfaces, enabling the rubber pads to<br />
ensure a secure placement. Do not place the <strong>snom</strong><br />
<strong>100</strong> on carpets or other materials that contain fibers<br />
that can block the air vents and cause overheating.<br />
6
Cleaning<br />
To clean the <strong>snom</strong> <strong>100</strong> use a slightly moist and<br />
antistatic cloth. Please try to avoid cleaning liquids<br />
since they might damage the surface or internal<br />
electronics of the phone.<br />
Connecting the phone<br />
First connect one end of the handset cable to handset<br />
and then to the jack on the left side of the phone (see<br />
illustration).<br />
Now, plug in the Ethernet (network) cable into the<br />
RJ45 connector on the rear side of the phone as<br />
shown below and the other end into the network side<br />
to establish a data link.<br />
In case you are using an external power supply,<br />
please insert the plug of the power supply into the<br />
connector next to the data line and hook up the casing<br />
into the mains.<br />
7
If you want to use a headset, it can be connected to<br />
the audio jacks on the backside of the <strong>snom</strong> <strong>100</strong>. The<br />
outermost connector is for the microphone.<br />
Dial Pad<br />
The numeric key block with the keys 0 to 9, * and #<br />
are used to enter digits and letters. Depending on the<br />
operating mode, different actions can be performed<br />
(see the table below):<br />
� Entry of digits only (e.g. when dialing a phone<br />
number),<br />
� Typing in letters and digits by pressing the<br />
keys repeatedly similar to a cellular phone,<br />
� Or navigate in selection lists. The keys have<br />
arrows printed on them indicating the<br />
direction similar to a numeric block on a<br />
computer keyboard.<br />
The various meaning of the keys in different<br />
operations modes is displayed in the lower right hand<br />
8
corner with a symbol. A “123” indicates the numeric,<br />
“abc” the lower case and “ABC” the upper case mode.<br />
The function keys F1 to F4 are context sensitive, i.e.<br />
they change their behavior according to the mode of<br />
the phone.<br />
The menu key is used to call up the main menu.<br />
Context help texts can be activated with the help key<br />
. The Cancel is used to abort actions or cancel<br />
inputs. The Enter/Ok key confirms actions,<br />
selections and inputs.<br />
9
The keys of the numeric block in different operating<br />
modes:<br />
Key Digits Lower case Upper case<br />
0 0 0(SPC)_ 0(SPC)_<br />
1 1 1.,?!@-<br />
():;&*#+[]<br />
2 2 2abcä 2ABCÄ<br />
3 3 3def 3DEF<br />
4 4 4ghi 4GHI<br />
5 5 5jkl 5JKL<br />
6 6 6mnoö 6MNOÖ<br />
7 7 7pqrsß$ 7PQRS$<br />
8 8 8tuvü 8TUVÜ<br />
9 9 9wxyz 9WXYZ<br />
# # # #<br />
10<br />
1.,?!@-<br />
():;&*#+[]<br />
* Toggles upper and lower case<br />
Initialization<br />
Booting<br />
If your network administrator or Internet service<br />
provider prepared your phone, you will see how the<br />
phone connects up to the network and maybe<br />
conducts a software update. After it has booted it<br />
enters the normal operation mode. When this state<br />
has been reached a clock is displayed on the right<br />
hand side of the display.<br />
In case the phone does not reach the operation mode<br />
you should consult your network administrator or<br />
Internet service provider or refer to the chapter<br />
“Administration”.
Selecting the language<br />
The language is set to English by default. In, order to<br />
change it for instance to German, press the menu key<br />
and go to the submenu „Settings“ with or<br />
and press Enter to select this menu entry.<br />
Select „Base“ and press Enter.<br />
Then go to „Language“<br />
and set it to „Deutsch“.<br />
11
Press Enter to activate your selection.<br />
Registration<br />
In order to be able to make calls, the phone normally<br />
has to register with „Gatekeeper“ (H.323) or a<br />
„Registrar“ (SIP). You can obtain the Internet address<br />
or name of the server from your network<br />
administrator or Internet service provider. The<br />
registration is similar to the configuration of an email<br />
address:<br />
TIP<br />
VoIP has two competing signaling standards to<br />
establish and tear down calls. „H.323“ is based<br />
on a telecom protocols and is the older<br />
standard. „SIP“ (Session Initiation Protocol) is<br />
based on Internet standards and is similar to<br />
Email and WWW. The <strong>snom</strong> <strong>100</strong> supports both<br />
protocols. Please ask your company or<br />
Internet service provider which protocol you<br />
are using.<br />
12
Most of the Gatekeeper can be found automatically by<br />
the <strong>snom</strong> <strong>100</strong>. Thus, you only need to enter your<br />
phone number. Go to the menu Settings/Base/Identity<br />
and set the phone number.<br />
� If you want to set the gatekeeper address<br />
then go to the “Settings” menu (as described<br />
above) and then to „H.323“. Select „GK/GW-<br />
Address“ and type in the address.<br />
13
� When using the phone in a SIP environment,<br />
go to the sub menu „Settings/SIP/Registrar“<br />
and set the address of the registrar (e.g.<br />
proxy.sipproxy.com). Also program the<br />
address of the SIP proxy. Normally, this will<br />
be identical to the address of the registrar.<br />
14
Basic Functions<br />
17
Idle State<br />
In the idle state the phone will display<br />
� The time and date,<br />
� The number of dialed, received and missed<br />
calls,<br />
� The registration state<br />
Continuous lines under the registration symbol<br />
indicate a successful registration with the specified<br />
gatekeeper or registrar. Dashed lines (see example)<br />
signal that the phone is not registered, i.e. it did not<br />
get a reply. An exclamation mark denotes that the<br />
registration was denied.<br />
Dialing<br />
There are two methods to begin a call from the idle<br />
state <strong>snom</strong> <strong>100</strong>. Either you can start dialing with<br />
handset resting in the cradle and then pick it up. Or<br />
pick up the handset and then dial the number.<br />
You might have to press Enter if block dialing is<br />
enabled (see “Settings”).<br />
18
The <strong>snom</strong> <strong>100</strong> shows the current communication<br />
status in the display.<br />
Dialing a phone number (E164)<br />
A telephone number in the common sense is dialed as<br />
one expect with the numeric pad.<br />
TIP<br />
E.164 numbers<br />
E.164 is the standard that define normal<br />
phone numbers. They may contain digits<br />
from 0-9, * and #. H.323 differentiates<br />
between these numbers and “H.323<br />
addresses“ which may contain alphanumeric<br />
characters. Several Gatekeeper<br />
implementations do not differentiate E.164<br />
numbers and H.323 addresses. In case you<br />
encounter problems then try to specify the<br />
number as a H.323 address.<br />
19
Key mapping:<br />
Moves the cursor left.<br />
Moves the cursor right.<br />
Deletes the character left of the cursor.<br />
Clears the buffer.<br />
Enter Dials the number.<br />
Cancel Aborts the dialing.<br />
Dialing a H.323/SIP Address<br />
Pressing # will induce the H.323 dial mode and the<br />
respective entry mask will appear.<br />
The H.323 address can then be entered via the<br />
numeric block.<br />
Key mapping:<br />
Moves the cursor left.<br />
Moves the cursor right.<br />
Deletes the character left of the cursor.<br />
Clears the buffer.<br />
Enter Dials the H.323 if entered correctly.<br />
Cancel Aborts the dialing of the H.323 address.<br />
Dialing an IP Address<br />
Pressing * will induce the IP dial mode and the<br />
respective entry mask will appear.<br />
20
The H.323 address can then be entered via the<br />
numeric block.<br />
Key mapping:<br />
Moves the cursor left.<br />
Moves the cursor right.<br />
Deletes the character left of the cursor.<br />
Clears the buffer.<br />
# Jumps to the next sub field.<br />
Enter Dials the H.323 if entered correctly.<br />
Cancel Aborts the dialing of the H.323 address.<br />
Terminating a call<br />
You can end a call by setting the handset on its cradle,<br />
pressing the hook switch or Cancel. The <strong>snom</strong> <strong>100</strong> will<br />
terminate the call and return to the idle state.<br />
TIP<br />
Dialing an IP Address<br />
When calling an IP address the called phone<br />
or computer cannot determine which user<br />
you want to reach. In SIP mode it is<br />
assumed that „anonymous“ is being called<br />
and with H.323 no assumptions are made.<br />
This works with a lot of phones and<br />
applications. Therefore, you should only use<br />
this method in exceptions and in addition<br />
the entry of IP addresses is rather<br />
cumbersome.<br />
21
Accepting a Call<br />
When your <strong>snom</strong> <strong>100</strong> is called it rings and displays the<br />
following contents.<br />
Picking up the handset or pressing Enter will accept<br />
the call. The <strong>snom</strong> <strong>100</strong> now established the call.<br />
Denying/Blocking a Call<br />
When the <strong>snom</strong> <strong>100</strong> signals an incoming call, you<br />
have the possibility to deny the call with .<br />
If you decide to press , the caller will be placed<br />
on the deny list and always automatically denied.<br />
Adjusting the Volume<br />
While conducting a call, you can use invoke the<br />
volume control.<br />
22
Key mapping:<br />
,4,8 Reduces the volume in single steps.<br />
,2,6 Increases the volume in single steps.<br />
9 Reduces the volume in steps of 10.<br />
3 Increases the volume in steps of 10.<br />
#,7 Maximum Volume<br />
*,1 Minimum Volume<br />
F3 Sets the volume to the original value.<br />
Enter Sets the volume and returns.<br />
Cancel Returns without setting the volume.<br />
Main Menu<br />
By pressing the menu key in the idle state the<br />
main menu is activated. The following submenus are<br />
available: Phonebook, Call List, Deny List, Tones,<br />
Settings and About.<br />
Key mapping:<br />
Moves the cursor down by one.<br />
Moves the cursor up by one.<br />
Enter Enters the submenu.<br />
23
Cancel Returns to the idle state.<br />
Help Function<br />
The <strong>snom</strong> <strong>100</strong> offers a context sensitive help.<br />
Press the help key and an appropriate help text<br />
depending on the state of the phone is displayed.<br />
24
Advanced Functions<br />
26
Hold and Resume<br />
Starting State: A call is in progress.<br />
Pressing the R key puts the call on hold, i.e. the<br />
speech is set to mute. (Neither party can hear each<br />
other.)<br />
Another press on the R key resumes the call.<br />
Toggling between calls<br />
Starting state: a call is on hold and another is being<br />
conducted.<br />
Now press the R key to toggle between the calls, i.e.<br />
the previous call is taken up again and the current one<br />
put on hold.<br />
Transfer<br />
Direct Transfer<br />
Starting state: a call is being done.<br />
After pressing the transfer key you are able to<br />
dial a number.<br />
27
As soon as you press ENTER the <strong>snom</strong> <strong>100</strong> will<br />
attempt to transfer the other party to that number.<br />
Call Divert<br />
All kinds of call diverts can be set, changed and<br />
deactivated in the „Settings/Call Divert“ menu.<br />
Diverting all calls<br />
By activating the option „Settings/Call Divert/All Calls“<br />
every incoming call is diverted immediately to the<br />
number set in „Settings/Call Divert/Phone Number”<br />
without the phone ringing.<br />
To disable this feature just set the „Settings/Call<br />
Divert/Cancel All“ to “off”.<br />
Divert when Busy<br />
By activating the option „Settings/Call Divert/When<br />
Busy“ every incoming call is diverted to the number<br />
set in „Settings/Call Divert/Phone Number” if another<br />
call is already in progress.<br />
Divert when not answered<br />
You can set the number of seconds in „Settings/Call<br />
Divert/When No Answer“ after which every incoming<br />
call is diverted to the number set in „Settings/Call<br />
Divert/Phone Number” if the call is not answered.<br />
Setting this value to 0 deactivates this feature.<br />
28
Note: Immediate call diversion is set in „Settings/Call<br />
Divert/All Calls“<br />
DTMF Tones<br />
During a call, e.g. with a voice mail system, pressing<br />
the digits, * or # will generate and send DTMF tones<br />
to the other party.<br />
Adjusting the Volume<br />
Via the menu „Settings/Tones“ the following window is<br />
activated.<br />
Here the volume of the load speaker in the casing, in<br />
the handset or both can be adjusted. Select one of the<br />
three choices and you will see a display exactly the<br />
same or similar to the one below.<br />
The current ring tone is played back in the selected<br />
volume and can be used to find the desired setting.<br />
Key mapping:<br />
29
,4,8<br />
Reduces the volume in single steps.<br />
,2,6 Increases the volume in single steps.<br />
9 Reduces the volume in steps of 10.<br />
3 Increases the volume in steps of 10.<br />
#,7 Maximum Volume<br />
*,1 Minimum Volume<br />
F3 Sets the volume to the original value.<br />
Enter Sets the volume and returns.<br />
Cancel Returns without setting the volume.<br />
Ring Tones<br />
Via the menu „Settings/Tones“ the following window is<br />
activated.<br />
Select the submenu „Ringer Selection“. Here the ring<br />
tones can be set.<br />
30
The current ring tone is played back and can be used<br />
to find the desired settings.<br />
Key mapping:<br />
Moves the cursor to next ring tone.<br />
Moves the cursor to the previous ring<br />
tone.<br />
Enter Activates the selection and returns.<br />
Cancel Returns without changing the ring tone.<br />
About<br />
Via the menu „Settings/About“ the following window is<br />
activated.<br />
It indicates the software version that the <strong>snom</strong> <strong>100</strong> is<br />
currently using.<br />
31
Call Register<br />
32
Phone Book<br />
The <strong>snom</strong> <strong>100</strong> contains an internal phone book which<br />
can be reached from the idle state of the phone by<br />
pressing the phone book key . The entries of the<br />
phone book are displayed in a list whereby three<br />
entries are shown simultaneously.<br />
Key mapping:<br />
Moves the cursor down by one.<br />
Moves the cursor up by one.<br />
Enters the edit mode for the selected<br />
entry.<br />
Dials the number of the selected entry.<br />
You can also press Enter or pick up the<br />
handset to dial the number.<br />
Enter Dials the number of the selected entry.<br />
Cancel Returns to the idle state.<br />
Adding an entry<br />
In order to add a new entry, go to the end of the list<br />
on to the line . Then enter the phone<br />
number, last name, first name, abbreviation and<br />
comment and confirm each item by pressing Enter.<br />
33
The title of the window indicates which input is<br />
expected to be made. Pressing Cancel aborts the new<br />
entry.<br />
Key mapping:<br />
Moves the cursor left.<br />
Moves the cursor right.<br />
Deletes the character left of the cursor.<br />
Clears the buffer.<br />
Enter Accepts the entry.<br />
Cancel Cancels the entry.<br />
Editing an entry<br />
After pressing the edit key on the entry to be<br />
modified the phone number, last name, first name,<br />
abbreviation and comment will be brought up in<br />
sequence. Confirm each item by pressing Enter.<br />
34
The title of the window indicates which input is<br />
expected to be made. Enter accepts the data and<br />
pressing Cancel aborts the entry.<br />
Key mapping:<br />
Moves the cursor left.<br />
Moves the cursor right.<br />
Deletes the character left of the cursor.<br />
Clears the buffer.<br />
Enter Accepts the entry.<br />
Cancel Aborts the entry process.<br />
35
Call Lists<br />
The <strong>snom</strong> <strong>100</strong> keeps lists of received and dialed calls<br />
that can be accessed by pressing the call list key<br />
from the idle state.<br />
Each line represents one call and three calls can be<br />
displayed simultaneously. The first characters indicate<br />
the direction of the call. ('->') represents an incoming<br />
and ('
Dialing<br />
Speed dialing is initiated with the speed dial key<br />
in the idle state followed by a digit 0-9, * or #. In this<br />
way, 12 speed dial numbers can be called up without<br />
having to see the display.<br />
The mapping can be checked by pressing the speed<br />
dial key in the idle state.<br />
One entry is displayed at a time. The list view of<br />
numbers can be brought up by pressing .<br />
Key mapping:<br />
Moves the cursor down by one.<br />
Moves the cursor up by one.<br />
Displays the speed dial numbers in a list.<br />
37
Dials the number of the selected entry.<br />
You can also press Enter or pick up the<br />
handset to dial the number.<br />
Enter Dials the number of the selected entry.<br />
Cancel Returns to the idle state.<br />
Editing speed dial entries<br />
From the speed dial list mode (see "Dialing" above)<br />
pressing the edit key brings up the phone<br />
number of the selected entry.<br />
It can then be edited and committed with Enter.<br />
Cancel aborts the changes on the selected entry.<br />
Key mapping:<br />
Moves the cursor left.<br />
Moves the cursor right.<br />
Deletes the character left of the cursor.<br />
Clears the edit buffer.<br />
Enter Accepts the entry.<br />
Cancel Aborts the changes.<br />
38
Deny List<br />
The <strong>snom</strong> <strong>100</strong> offers you the possibility to put<br />
numbers on deny list in order to avoid being<br />
disturbed.<br />
Browsing<br />
Via the submenu “Settings/Deny List” you can reach<br />
the deny list view. Here the deny numbers are<br />
displayed in sequence whereby three numbers are<br />
displayed simultaneously.<br />
Moves the cursor down by one.<br />
Moves the cursor up by one.<br />
Deletes the selected entry.<br />
Enters the edit mode of the selected<br />
entry.<br />
Enter Enters the edit mode of the selected<br />
entry.<br />
Cancel Returns to the idle state.<br />
Adding a number<br />
When you are being called you can press the deny list<br />
key which will not only abort the call but also<br />
add the number to the deny list.<br />
In addition, and number can be added in the deny list<br />
by selecting in the deny list directly.<br />
39
After the number has been entered it is added to the<br />
deny list.<br />
Key mapping:<br />
Moves the cursor left.<br />
Moves the cursor right.<br />
Deletes the character left of the cursor.<br />
Clears the edit buffer.<br />
Enter Accepts the entry.<br />
Cancel Aborts the changes.<br />
Removing a number<br />
Removing a number from the deny list is possible by<br />
using the Clear key in the deny list view.<br />
List Views<br />
The views of all the lists described in the previous<br />
sections can be adjusted according to your preference.<br />
When you are in a list you can enter the option menu<br />
by pressing the menu button.<br />
40
Modifying the view<br />
Select the entry „View Mode“ and go to one of the<br />
submenus.<br />
They describe which view modes are available and can<br />
be set. Select your choice and press Enter and the list<br />
will be displayed accordingly.<br />
Sort Criteria<br />
Select the entry „Sort Criteria“ and go to one of the<br />
submenus.<br />
They describe which sort criteria are available and can<br />
be set. Select your choice and press Enter and the list<br />
41
will be sorted accordingly.<br />
42
Settings<br />
43
The settings can be set in two different ways:<br />
� Via the phone<br />
� With a browser on a PC<br />
Settings via the Phone<br />
Press the menu key in the idle state of the phone.<br />
With the function keys (F1) and (F2) you can navigate<br />
up and down in the menu. Scroll to the submenu<br />
“Settings” and press Enter.<br />
You are now in the Settings menu and it has the<br />
following submenus:<br />
� Base<br />
� Advanced<br />
� Network<br />
� H.323<br />
� SIP<br />
� Call Divert<br />
� Mailbox<br />
Please use the keys and to scroll within in<br />
the Settings menu. By pressing the Enter key you can<br />
enter the selected submenu.<br />
Now the list of settings of the selected submenu is<br />
displayed. Please use the and to scroll<br />
within in the list. By pressing Enter the value of the<br />
setting can be viewed or modified.<br />
Some entries cannot be set to any value. Instead they<br />
offer an enumerated list of which a value has to be<br />
selected. Again, please use the and to<br />
scroll within in the list to set the desired value. The<br />
44
value is committed by pressing Enter. If you decide<br />
not to change the value then press Cancel.<br />
Other settings necessitate the editing of numbers or<br />
strings. This can be done with the dial pad of the<br />
phone. Digits are entered directly via the keys and<br />
letters can be called up by pressing a key repeatedly.<br />
You can toggle between lower case letters ("a") and<br />
upper case letters ("A") with the (*) key.<br />
Key mapping:<br />
Moves the cursor left.<br />
Moves the cursor right.<br />
Deletes the character left of the cursor.<br />
Clears the edit buffer.<br />
Enter Accepts the entry.<br />
Cancel Aborts the changes.<br />
45
Settings via Browser<br />
You may prefer to use a browser to configure the<br />
settings, which normally is easier – provided you have<br />
access to one.<br />
� Call up the browser.<br />
� Enter the IP address of the phone as the URL<br />
(e.g. 192.168.0.<strong>100</strong>). If you do not know the<br />
IP address please ask your network<br />
administrator.<br />
� You will find a selection menu on the left side<br />
(Home / Dial / Settings / Manual /<br />
Maintenance / Contact).<br />
� Click on the menu point Settings.<br />
� Now you should see a navigation bar with<br />
submenus appear in gray area.<br />
� Just click on the desired submenu (e.g. Base)<br />
and the current settings of this submenu are<br />
displayed.<br />
You can now modify the values by using the mouse<br />
and keyboard. Just click on the SAVE button, which<br />
you will find in the lower section of the gray area, to<br />
46
store the changes made. If you want to discard the<br />
changes then do NOT press SAVE.<br />
Parameters<br />
Base<br />
Language<br />
Your phone is able to display all texts in different<br />
languages. Just press the menu key in the idle state<br />
and select the submenu “Settings/Base/Language” or<br />
the equivalent if you currently have another language<br />
set.<br />
Date<br />
In case your phone is not able to get the date from<br />
the “Time Server”, you can set the date here. Just<br />
press the menu key in the idle state and select the<br />
submenu “Settings/Base/Date”.<br />
Time<br />
In case your phone is not able to get the time from<br />
the “Time Server”, you can set the time here. Just<br />
press the menu key in the idle state and select the<br />
submenu “Settings/Base/Time”.<br />
User Name<br />
Enter your name (e.g. John Smith). In the H.323<br />
mode this is equivalent to the H.323 address. Just<br />
press the menu key in the idle state and select the<br />
submenu “Settings/Base/User Name”.<br />
Phone Identity<br />
Enter the phone number here with which the <strong>snom</strong><br />
<strong>100</strong> registers itself with the H.323 gatekeeper ore<br />
registrar depending on the phone type. Just press the<br />
menu key in the idle state and select the submenu<br />
“Settings/Base/Phone Identity”.<br />
47
Advanced<br />
Ring Tone<br />
The ring tone is the alerting signal when an incoming<br />
call is detected. Here the ring tone of the phone can<br />
be turned on or off (the phone is mute) or it only<br />
responds to certain callers (see the VIP flag in the<br />
phone book chapter). Press the menu key in the idle<br />
state and select the submenu “Settings / Advanced /<br />
Ring Tone”:<br />
� All: all incoming calls are signaled.<br />
� Off: no incoming call is signaled.<br />
Call Waiting<br />
Normally, when then phone is engaged, another party<br />
calling would be given a busy signal.<br />
Alternatively, the phone can be set to indicate an<br />
additional call, which is waiting to be accepted. You<br />
will hear the other party you are calling but<br />
additionally you can hear a “knocking sound”. You can<br />
now decide whether to interrupt the current call and<br />
to accept the waiting call or reject it. The calling party<br />
receives an alerting tone as long as he is not rejected.<br />
Press the menu key in the idle state and select the<br />
submenu “Settings / Advanced / Call Waiting”:<br />
� Off: „Call Waiting“ is disabled.<br />
� On: „Call Waiting“ is enabled.<br />
Silence Suppression<br />
Silence suppression is use in order to save bandwidth<br />
on the network between speech pauses. Nothing<br />
needs to be transmitted while no words are being<br />
exchanged. The other end will not hear anything<br />
during a speech pause not even background noises.<br />
Press the menu key in the idle state and select the<br />
submenu “Settings / Advanced / Silence Suppression”:<br />
� Off: data is transmitted during speech pauses.<br />
� On: data is NOT transmitted during speech<br />
pauses.<br />
48
Comfort Noise<br />
If you have „Silence Suppression“ enabled then no<br />
data is transmitted during speech pauses. The other<br />
party will normally not hear anything in this moment.<br />
This absolute silence is unusual for a user and it may<br />
lead him to believe that the line is interrupted or that<br />
the phone is dysfunctional. To give him an audio<br />
feedback you can activate “Comfort Noise”. The phone<br />
will then generate a background noise when it does<br />
not receive any audio data.<br />
Press the menu key in the idle state and select the<br />
submenu “Settings / Advanced / Comfort Noise”:<br />
� Off: no background noise is generated during<br />
speech pauses.<br />
� On: background noise is generated during<br />
speech pauses.<br />
Block Dialing<br />
When trying to establish a connection every digit<br />
dialed is transferred immediately. In the block-dialing<br />
mode the digits are collected and not sent until Enter<br />
is pressed or the handset is picked up. This pertains<br />
only to E.164 numbers.<br />
Press the menu key in the idle state and select the<br />
submenu “Settings / Advanced / Block Dialing”:<br />
� On: the digits are not sent until Enter is<br />
pressed or the handset is picked up.<br />
� Off: every digit is transferred immediately.<br />
Network<br />
PSTN Gateway<br />
The identification of a destination in an IP network is<br />
done by an IP address. In a telecom network<br />
destinations are referenced through phone numbers.<br />
In order for the VoIP phone to address destinations in<br />
a telecom network a PSTN gateway is needed. Here<br />
the IP address of your gateway can be entered (e.g.<br />
192.168.0.251).<br />
49
Press the menu key in the idle state and select the<br />
submenu “Settings / Network / PSTN Gateway”.<br />
Priority<br />
When speech and data is transmitted in one network,<br />
it makes sense to give speech priority over data to<br />
ensure good voice quality. You can set the priority of<br />
the speech data on your phone. Please ask your<br />
network administrator which value should be set.<br />
Press the menu key in the idle state and select the<br />
submenu “Settings / Network / Priority”.<br />
Packet Size<br />
The VoIP phone converts speech to digital values that<br />
are grouped into the payload of IP packets. Please ask<br />
your system administrator which value should be set<br />
within your network.<br />
Press the menu key in the idle state and select the<br />
submenu “Settings / Network / Packet Size”.<br />
IP Proxy Address<br />
Here the IP Address of the Proxy can be set. Please<br />
ask your system administrator which value should be<br />
set within your network.<br />
Press the menu key in the idle state and select the<br />
submenu “Settings / Network / IP Proxy Address”.<br />
IP Port Offset<br />
Here the IP Port Offset of the Proxy can be set. Please<br />
ask your system administrator which value should be<br />
set within your network.<br />
Press the menu key in the idle state and select the<br />
submenu “Settings / Network / IP Port Offset”.<br />
H.323<br />
GK-GW Mode<br />
The VoIP phone can be used with a gatekeeper,<br />
gateway or without them. Please ask your system<br />
50
administrator which value should be set within your<br />
network.<br />
Press the menu key in the idle state and select the<br />
submenu “Settings / Network / GK-GW Mode”:<br />
� Gatekeeper: The phone is in gatekeeper<br />
mode. Set the IP address of the gatekeeper in<br />
“Settings / Network / GK-GW Address”.<br />
� None: The phone is used without a gatekeeper<br />
and without a gateway.<br />
� Auto: The phone is in gatekeeper mode but it<br />
uses a multicast to automatically detect it.<br />
� Gateway: The phone is in gateway mode. Set<br />
the IP address of the gateway in “Settings /<br />
H.323 / GK-GW Address”.<br />
GK-GW Address<br />
Whether the phone is set to gatekeeper or gateway<br />
mode (see "GK-GW Mode") here the IP address is set.<br />
Press the menu key in the idle state and select the<br />
submenu “Settings / H.323 / GK-GW Address”.<br />
Fast Connect<br />
When setting up a call H.323 normally first sets up the<br />
connection and then begins to negotiate the codecs.<br />
With terminals a long way apart the beginning of the<br />
call could be lost. In order to avoid this “Fast Start”<br />
was invented, i.e. the codecs supported are sent<br />
immediately so no further time after the call<br />
established is lost. Unfortunately, some terminals<br />
cannot handle fast start correctly. While normally this<br />
parameter should be set to “on”, it should be set to<br />
“off” if you encounter problems to setup a connection.<br />
Press the menu key in the idle state and select the<br />
submenu “Settings / H.323 / Fast Start”.<br />
� On: „Fast Start“ is enabled.<br />
� Off: „Fast Start“ is disabled.<br />
51
SIP<br />
Registrar Server<br />
Here the name or IP address of the registrar is set, if<br />
one is used. Please ask your system administrator<br />
which value should be set within your network.<br />
Press the menu key in the idle state and select the<br />
submenu “Settings / SIP / Registrar”.<br />
Proxy Server<br />
Here the name or IP address of the proxy server is<br />
set, if one is used. Please ask your system<br />
administrator which value should be set within your<br />
network.<br />
Press the menu key in the idle state and select the<br />
submenu “Settings / SIP / Proxy Server”.<br />
Call Divert<br />
You can have all incoming calls diverted to a different<br />
number. This can be useful for example, if you are<br />
working in another office and still want to be<br />
reachable.<br />
Divert all Calls<br />
Press the menu key in the idle state and select the<br />
submenu “Settings / Call Divert / All Calls”.<br />
� On: All calls are diverted to the number<br />
specified in „Phone Number“.<br />
� Off: Depending on other call divert settings,<br />
calls are diverted or not.<br />
Divert when not answered<br />
Here the number of seconds is set after which a call is<br />
diverted when the call is not answered. The call is<br />
diverted to the number specified in “Phone Number”.<br />
Press the menu key in the idle state and select the<br />
submenu “Settings / Call Divert / When no Answer”.<br />
� 0: call divert is disabled.<br />
52
� 1-n: After 1-n seconds the call is diverted if<br />
the call is not answered.<br />
Divert when busy<br />
When a call is in progress, another call would be<br />
rejected and get a busy indication. The phone can be<br />
set in such a way that the second caller is diverted to<br />
another number or a voice mailbox.<br />
The call is diverted to the number specified in “Phone<br />
Number”.<br />
Press the menu key in the idle state and select the<br />
submenu “Settings / Call Divert / When Busy”.<br />
� On: when the phone is busy the call is<br />
diverted to the number specified in “Phone<br />
Number”.<br />
� Off: no call divert when busy.<br />
Cancel all Diverts<br />
Here all call diverts can be cancelled. Press the menu<br />
key in the idle state and select the submenu “Settings<br />
/ Call Divert / Cancel all Diverts”.<br />
Phone Number<br />
Here the number to which the calls should be diverted<br />
is specified.<br />
Press the menu key in the idle state and select the<br />
submenu “Settings / Call Divert / Phone Number”.<br />
53
Administration<br />
54
!<br />
This chapter is meant for people that<br />
want to install the phone in a VoIP<br />
network. It has to be ensured that the<br />
necessary rights and skills exist to<br />
perform this task.<br />
Flash Updates<br />
The <strong>snom</strong> <strong>100</strong> possesses an internal flash memory in<br />
which necessary information and programs are stored<br />
for the phones operation. The flash is divided into<br />
three parts:<br />
� Boot loader: This section boots the phone and<br />
searches for flash updates. This sector should<br />
never be written.<br />
� Operating and File System: here the Linux and<br />
the initial ram disk is located.<br />
� Settings: in this section the settings are<br />
saved.<br />
In order to make flash updates as easy as possible<br />
and to increase the reliability of the phones, they test<br />
whether the network provides a new image.<br />
Via a BOOTP broadcast the <strong>snom</strong> <strong>100</strong> tries to<br />
determine a TFTP server. On this server first the file<br />
with the name „<strong>snom</strong><strong>100</strong>-xx-xx-xx.bin“ and then the<br />
file „<strong>snom</strong><strong>100</strong>.bin“ is searched. Whereby the xx-xx-xx<br />
represents the last the bytes of the MAC address. In<br />
case the BOOTP server specifies a filename then this is<br />
checked first!<br />
TIP<br />
Testing a flash update<br />
If you want to determine whether a flash<br />
update makes sense then you should select<br />
one or a few phones on which you want to<br />
try out the update. Copy the file to be<br />
updated onto the TFTP server from which<br />
the phones will retrieve the file. Save the<br />
image with the filename <strong>snom</strong><strong>100</strong>-xx-xxxx.bin<br />
whereby xx-xx-xx represents the last<br />
three bytes of the MAC address of the test<br />
phones.<br />
55
� If no BOOTP server responds then the TFTP<br />
server is contacted that was specified in the<br />
phone settings (see below).<br />
� If no file is found within a certain time then<br />
the image in the flash is booted.<br />
� If the TFTP server responds and sends a file<br />
then it is downloaded and compared with the<br />
flash image. If they differ then the flash is<br />
updated.<br />
After the update, the image is booted.<br />
Setting the Network Identity<br />
The phone needs to have a network identity to be able<br />
to communicate. These values are the IP address and<br />
the network mask. A few other base settings are<br />
needed to make easy and comfortable configuring of<br />
the phone over network possible. There are basically<br />
two methods to set the basic settings:<br />
� DHCP (Dynamic Host Configuration Protocol).<br />
With this protocol a server provides the<br />
settings and local settings of the phone are<br />
overridden.<br />
� Phone Configuration. Here the settings are<br />
entered via the dial pad and stored in the<br />
flash.<br />
DHCP is the better choice if a network of phones<br />
should be centrally configured. This is especially useful<br />
for bigger networks in which a large number of phones<br />
can be managed efficiently. Manual configuration<br />
should only be used in smaller networks where the<br />
setting up of a DHCP server is too cumbersome.<br />
Installing DHCP<br />
Windows 2000<br />
Ensure that you have installed DHCP on the server.<br />
You can verify this by going to Start, Configuration,<br />
System Settings, Administration, Server<br />
56
Configuration, Network, DHCP and follow the<br />
instructions of the wizard. Invoke the DHCP manager.<br />
The <strong>snom</strong> <strong>100</strong> behaves like a normal PC running<br />
under Linux. Most of the DHCP parameters can thus<br />
be set, as this would be normally done. The vendor<br />
specific options in the DHCP option field 43 are set in<br />
an ASCII string that contains the format<br />
Option1=Value1:Option2=Value2: etc (This string can<br />
be edited comfortably when clicking on to the ASCII<br />
field on the right side). Please ensure that your input<br />
starts with the first character on the left.<br />
57
The following options have an influence on the <strong>snom</strong><br />
<strong>100</strong>:<br />
Option Typical Value<br />
002 Time Offset 7200<br />
003 Router 192.168.0.1<br />
004 Time Server 192.168.0.9<br />
005 Name Server 192.168.0.9<br />
006 DNS Server 192.168.0.9, 174.129.1.129<br />
012 Hostname Telefon123<br />
015 DNS Domain<br />
Name<br />
intern.<strong>snom</strong>.de<br />
017 Root Directory /tftpboot/disk<br />
043 LCServer1,<br />
LCSserver2<br />
066 TFTP Server 192.168.0.9<br />
067 Update Image <strong>snom</strong><strong>100</strong>.bin<br />
lcserver1=192.168.0.12:lcserver2=192.168.0.34<br />
58
Make sure that BOOTP and DHCP are activated in case<br />
you want to utilize them.<br />
BOOTP is similar to DHCP only useful for the<br />
administration of larger networks. It is only needed<br />
when the administrator want to avoid setting the TFTP<br />
addresses manually on each phone.<br />
Windows does not offer a TFTP-Server. It has to be<br />
obtained from another provider to make a flash<br />
update possible on a Windows system.<br />
59
Linux<br />
The DCHP settings are set in the file /etc/dhcpd.conf<br />
when using Linux (see dhcpd(8)). A sample dhcp.conf<br />
file for three phones with the serial numbers 1, 2, 3<br />
could look like the following:<br />
# dhcpd.conf<br />
option domain-name "intern.<strong>snom</strong>.de";<br />
option domain-name-servers 192.168.0.9;<br />
option time-offset 7200;<br />
option time-servers 192.168.0.9;<br />
option root-path "/tftpboot/disk";<br />
option ntp-servers 192.168.0.9;<br />
option tftp-server-name "192.168.0.9";<br />
#filename "<strong>snom</strong><strong>100</strong>.bin";<br />
deny bootp; # BOOTP ist ausgeschaltet !<br />
#allow bootp;<br />
option subnet-mask 255.255.255.0;<br />
default-lease-time 600;<br />
max-lease-time 7200;<br />
subnet 192.168.0.0 netmask 255.255.255.0 {<br />
range 192.168.0.50 192.168.0.99;<br />
option broadcast-address 192.168.0.255;<br />
option routers 192.168.0.1;<br />
}<br />
host <strong>snom</strong>1 { hardware ethernet 00:04:13:00:00:01;<br />
fixed-address <strong>snom</strong>1; }<br />
host <strong>snom</strong>2 { hardware ethernet 00:04:13:00:00:02;<br />
fixed-address <strong>snom</strong>2; }<br />
host <strong>snom</strong>3 { hardware ethernet 00:04:13:00:00:03;<br />
fixed-address <strong>snom</strong>3; }<br />
Settings via the Phone<br />
IF you do not have access to a DHCP server or do not<br />
want to use one then the settings can be entered<br />
directly into the phone.<br />
60
Press the Cancel key as soon as you see the text<br />
„Please press Cancel for Setup“. If the phone does not<br />
have enough information to boot it will go to the<br />
configuration mode automatically.<br />
Parameters<br />
The following parameters can be set directly on the<br />
phone:<br />
Factory Settings<br />
Setting this value to „on“ can set all entries to the<br />
factory defaults.<br />
DHCP<br />
This parameter determines whether DHCP is used or<br />
not. In case you are selecting DHCP you do not need<br />
to set the other fields since the DHCP will provide all<br />
values – provided you have set it up correctly (see<br />
above). Please note a flash update without BOOTP is<br />
only possible with DHCP mode deactivated.<br />
IP Address<br />
This field contains the IP address of your phone.<br />
Net mask<br />
Here the net mask of the phone is set (e.g.<br />
255.255.255.0). Ask your network administrator if you<br />
are not sure how to set this value.<br />
Phone Name<br />
Here the phone name can be set (e.g. tel1234). The<br />
default is <strong>snom</strong><strong>100</strong>-xx-xx-xx.<br />
IP Gateway<br />
This is the gateway to which IP packets are sent if<br />
they cannot be sent directly to the IP destination. This<br />
field has nothing to do with H.323 gateway or SIP<br />
proxy – these settings are found in the chapter<br />
„Settings”.<br />
61
LCServer 1. LCServer 2<br />
The phones can connect to application servers that<br />
contain the signaling stacks and GUI. There are two<br />
entries to increase the reliability. Please use the value<br />
127.0.0.1 if the local (no server) phone software<br />
should be used. This parameter is very useful if<br />
software version are needed that can debug H.323<br />
traces which would not fit on to the phone.<br />
By specifying a second server the reliability can be<br />
increased significantly.<br />
DNS Domain<br />
The DNS domain is programmed here and used by the<br />
resolver (e.g. <strong>snom</strong>.com).<br />
DNS Server 1, DNS Server 2<br />
Specify the primary and secondary DNS server in this<br />
field (e.g. 192.168.0.9)<br />
TFTP server<br />
Store the IP address of the TFTP server here. The<br />
phone can use it to save files on it and the phones<br />
retrieve the flash updates from here.<br />
TIP<br />
TFTP<br />
TFTP is a trivial file transport protocol. It is<br />
based on UDP and has a very simple<br />
message format. Since it is very easy to<br />
implement a lot of hardware vendors use it<br />
to load configuration files.<br />
The <strong>snom</strong> <strong>100</strong> uses it to load flash updates<br />
and to save settings. Ensure that the <strong>snom</strong><br />
<strong>100</strong> has access to a TFTP server to utilize its<br />
whole potential.<br />
62
UTC Offset (s)<br />
Indicates how many seconds the local time zone<br />
varies from UTC (e.g. 7200). Positive values indicate a<br />
destination east of Greenwich.<br />
Time Server<br />
This is the IP address of the timeserver. The phone<br />
uses the SNTP protocol to set the time.<br />
Boot Server<br />
This is the server that booted the phone.<br />
NFS Server<br />
This is a special entry for developers that are using a<br />
kernel that mounts NFS.<br />
NFS Root Directory<br />
This is the root directory that the phone should mount<br />
via NFS (developer version only). The default value is<br />
“/tftpboot/disk”.<br />
Phone Type<br />
The value of this field determines whether the <strong>snom</strong><br />
<strong>100</strong> is going to use SIP or H.323. If you prefer H.323<br />
then set the value to "<strong>snom</strong><strong>100</strong>-H323". Selecting<br />
„<strong>snom</strong><strong>100</strong>-SIP“ sets SIP mode.<br />
Usage<br />
You can use the dial pad of the phone to modify the<br />
settings. Digits can be entered directly by pressing the<br />
keys and letters by doing so repeatedly. A symbol on<br />
the lower right hand corner indicates whether digits<br />
("0"), lower case letters ("a") or upper case letters<br />
("A") can be entered. You can toggle these modes by<br />
pressing * (asterisk).<br />
63
Key mapping:<br />
Key Number Lower Case Upper Case<br />
0 0 (SPC)_@ (SPC)_@<br />
1 1 1.-/: 1.-/:<br />
2 2 abc2 ABC2<br />
3 3 def3 DEF3<br />
4 4 ghi4 GHI4<br />
5 5 jkl5 KJKL5<br />
6 6 mno6 MNO6<br />
7 7 pqrs7 PQRS7<br />
8 8 tuv8 TUV8<br />
9 9 wxyz9 WXYZ9<br />
# # #<br />
Navigating from one parameter to the next is possible<br />
via ("Next") and to the previous parameter via<br />
("Prev") which are mapped onto the function keys.<br />
The phone verifies the value of the parameter and<br />
only allows switching after the plausibility test is<br />
passed. To erase the last character press F3 ("|
Appendix<br />
65
Technical Data<br />
Display: 128 x 64 Pixel (SW)<br />
Keyboard: 20 alphanumeric keys<br />
Size: 18,5 x 17 x 7 cm<br />
Weight: 550 g (incl. handset)<br />
Handset: 130 g, headset (optional)<br />
LAN: 10/<strong>100</strong> MBit (auto sense, Power<br />
over LAN)<br />
Protocols: SIP (timer, refer), H.323 (H.225,<br />
H.245, H.450) and LPCP<br />
Codecs: G.711 (A-law and U-law), GSM,<br />
G.729A (optional)<br />
QoS: TOS class 5<br />
Administration: http, tftp, dhcp, bootp<br />
Remote access: telnet, ftp (optional using NFS)<br />
Miscellaneous: DNS, NFS (for developers) and SNTP<br />
Operating Sys.: Linux (Version 2.4.3)<br />
CPU: MPC855T, 4 MB Flash and 16 MB<br />
RAM<br />
66
Standard Conformance<br />
Name and Address of Manufacturer<br />
<strong>snom</strong> technology AG<br />
Pascalstraße 10<br />
10587 Berlin<br />
The <strong>snom</strong> technology AG assures that the<br />
product<br />
Type: VoIP Phone<br />
Model: <strong>snom</strong> <strong>100</strong><br />
conforms with the following standards<br />
EMC standard 89/336/EWG incl. all appendices<br />
Low voltage standard 73 / 23 / EWG<br />
Safety Standards<br />
EN 60950 1992 incl. all appendices<br />
Electromagnetic Standards<br />
EN 55022 / 9.98 Class B<br />
EN 55024 / 9.98<br />
EN 6<strong>100</strong>0-3-2/1995+A1/1998+A2/1998+A14 /2000<br />
EN 6<strong>100</strong>0-3-3/1.95<br />
Place, Date Dr. Christian Stredicke<br />
Berlin, 15.05.2001 Vorstand (MD)<br />
67
Glossary<br />
Accepting a Call 22<br />
Administration 54<br />
Updates 55<br />
Advanced 48<br />
Block Dialing 49<br />
Call Waiting 48<br />
Comfort Noise 49<br />
Ring Tone 48<br />
Silence Suppression 48<br />
Advanced Functions 26<br />
Appendix 65<br />
Base 47<br />
Date 47<br />
Language 47<br />
Phone Identity 47<br />
Time 47<br />
User Name 47<br />
Base Unit 6<br />
Basic Functions 17<br />
Blocking a Call 22<br />
Boot File<br />
Name 58<br />
Boot Loader 55<br />
Boot Server 63<br />
Booting 10<br />
Call<br />
Divert 28<br />
Toggling 27<br />
Transfer 27<br />
Call Divert 52<br />
All Calls 52<br />
Cancel All 53<br />
Phone Number 53<br />
When Busy 53<br />
When not Answered 52<br />
Call Lists 36<br />
Call Register 32<br />
68<br />
Cleaning 7<br />
Conformance<br />
Standards 67<br />
Connecting the phone 7<br />
Date<br />
Display 18<br />
Delivery Content 6<br />
Deny List 39<br />
Adding 39<br />
Browsing 39<br />
Removing 40<br />
Denying a Call 22<br />
DHCP 56<br />
disabling 61<br />
Linux 60<br />
Windows 2000 56<br />
dhcpd.conf 60<br />
Dial Pad 8<br />
Dialing 18<br />
H.323 Address 20<br />
IP Address 20, 21<br />
Phone number 19<br />
SIP Address 20<br />
Direct Transfer 27<br />
Divert<br />
All Calls 28<br />
When Busy 28<br />
When not Answered 28<br />
DNS<br />
Domain 62<br />
Domain Name 58<br />
Server 58, 62<br />
DTMF Tones 29<br />
E164 19<br />
Factory Settings 61<br />
File system<br />
Flash 55
Flash<br />
Testing 55<br />
Updates 55<br />
Foreword 2<br />
Gatekeeper 12<br />
Gateway<br />
Internet 61<br />
H.323 12, 51<br />
Fast Connect 51<br />
GK-GW Address 51<br />
GK-GW Mode 51<br />
Handset 6<br />
Handset cable 6<br />
Help Function 24<br />
Help key See Keys See<br />
Keys<br />
Hold and Resume 27<br />
Hostname 58, 61<br />
Idle State 18<br />
Initialization 10<br />
Installation 5<br />
IP Address 61<br />
Language<br />
Setting 11<br />
LCServer 58, 62<br />
Linux<br />
DHCP 60<br />
List Views 40<br />
Modifying 41<br />
Sort Criteria 41<br />
Main Menu 9, 23<br />
Name<br />
Phone 61<br />
Net mask 61<br />
Network 49<br />
IP Port Offset 50<br />
IP Proxy Address 50<br />
Packet Size 50<br />
Priority 50<br />
PSTN Gateway 49<br />
69<br />
Network Identity<br />
Setting 56<br />
NFS Root Directory 58,<br />
63<br />
NFS Server 63<br />
Phone Book 33<br />
Phone Book<br />
Adding an entry 33<br />
Editing an entry 34<br />
Phone Type<br />
SIP/H.323 63<br />
Power supply 6<br />
PowerLAN 6<br />
Registrar 12<br />
Registration 12<br />
Ring Tones 30<br />
Safety Notes 6<br />
Setting Parameters 47<br />
Setting up the Phone 6<br />
Settings 43<br />
Flash 55<br />
Via Browser 46<br />
Via Phone 44<br />
SIP 12, 52<br />
Proxy Server 52<br />
Registrar Server 52<br />
Speed Dial 36<br />
Speed Dial<br />
Dialing 37<br />
Editing 38<br />
Standards 67<br />
Technical Data 66<br />
Terminating a Call 21<br />
TFTP<br />
Server 62<br />
Time Offset 58<br />
Time Server 58, 63<br />
UTC Offset 63<br />
Version<br />
Software 31
Volume<br />
Adjusting 22, 29<br />
70<br />
Windows 2000<br />
DHCP 56
© 2001 <strong>snom</strong> technology AG<br />
<strong>snom</strong> technology Aktiengesellschaft · Pascalstr. 10 · D-10587 Berlin<br />
phone: +49 30 3990783-0 · mailto:info@<strong>snom</strong>.de · http://www.<strong>snom</strong>.de


