GV-DVR System V2
GV-DVR System V2 GV-DVR System V2
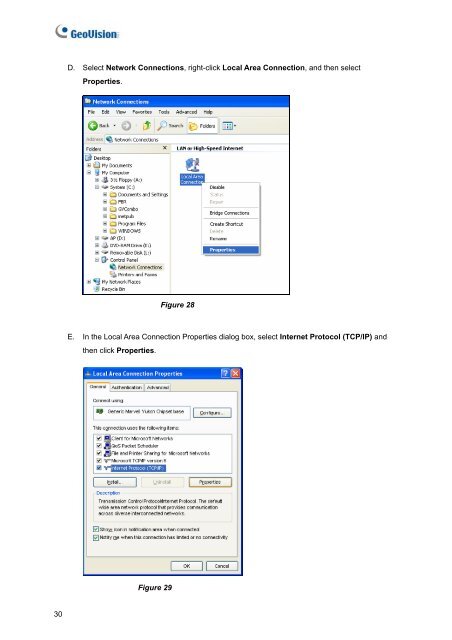
D. Select Network Connections, right-click Local Area Connection, and then selectProperties.Figure 28E. In the Local Area Connection Properties dialog box, select Internet Protocol (TCP/IP) andthen click Properties.Figure 2930
5TroubleshootingF. Select Use the following IP address, and type the IP info in the fields.Figure 302. Replace the router or server that can assign the IP addresses through DHCP in a LAN.GV-DVR V2 won’t turn on.If your GV-DVR V2 won’t turn on or you don't hear a startup sound or any fan or drive noise, try thesesteps:1. Make sure that you switch on the AC power on the rear panel.OffOnFigure 312. Make sure that the power cord is properly connected to both the GV-DVR V2 and power outlet. Ifyou are using a power strip, make sure that the strip is powered on.3. If the problem persists, consult your dealer.31
- Page 1 and 2: GV-DVR System V2User’s Manual
- Page 3: User’s Manual for GV-DVR System V
- Page 7: Safety InstructionsObserve these sa
- Page 11 and 12: 1Introduction1.3 OptionsOptional de
- Page 13 and 14: 2Overview2.2 Rear ViewFigure 21 RS-
- Page 15 and 16: 3Getting Started3.2 Turning on the
- Page 17 and 18: 3Getting Started5. Configure a stat
- Page 19 and 20: 3Getting StartedTo modify the defau
- Page 21 and 22: 3Getting Started3.5 Recovery DVDIf
- Page 23 and 24: 3Getting Started3.6 Updating GV-DVR
- Page 25 and 26: 4DVR Health Analysis2. Select Backu
- Page 27 and 28: 4DVR Health Analysis4.3 Information
- Page 29 and 30: 4DVR Health Analysis4.4 Health Anal
- Page 31: 5TroubleshootingThe Main System can
- Page 35 and 36: 5TroubleshootingC. Click the Tools
- Page 37 and 38: SpecificationsSpecificationsSystemM
- Page 39 and 40: SpecificationsRemote Client Softwar
- Page 41 and 42: Warranty PolicyWarranty PolicyWarra
- Page 43: Warranty PolicyWhen you call or e-m
- Page 46: Bar Code:Shipment Date:GeoVision, I
D. Select Network Connections, right-click Local Area Connection, and then selectProperties.Figure 28E. In the Local Area Connection Properties dialog box, select Internet Protocol (TCP/IP) andthen click Properties.Figure 2930


