AIC 2007
Narrowband Imaging: Things That Make a Difference - Advanced ...
Narrowband Imaging: Things That Make a Difference - Advanced ...

Create successful ePaper yourself
Turn your PDF publications into a flip-book with our unique Google optimized e-Paper software.
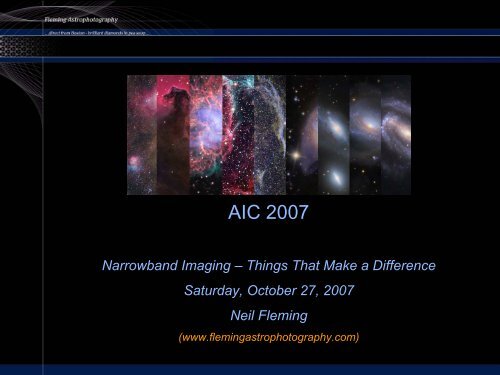
<strong>AIC</strong> <strong>2007</strong>Narrowband Imaging – Things That Make a DifferenceSaturday, October 27, <strong>2007</strong>Neil Fleming(www.flemingastrophotography.com)
Imaging from Boston – Why Even Try!?!?
What is Narrowband Imaging, Anyhow?‣ Most CCD imaging is done with a black andwhite camera, and you use color filters toemulate the RGB results so you can obtain acolor image:‣ The wavelengths captured are across theentire visible spectrum
What Does RGB From Boston Look Like?‣ Light pollution typically causes horriblegradients‣ Here is a sample of astack of 3-8 minuteexposures:‣ A little processing inPhotoshop helps, but still,not great results‣ Bright objects are better
Try Narrowband Filters Instead‣ Narrowband filters let through only the tiniest bandpassof light, light that is associated with emission lines innebulae. Typically 3 to 13 nm in width:• Doubly oxidized oxygen (OIII) has its main emission line at500.7 nm• Hydrogen-alpha (Ha) emission wavelength is 656.3 nm• Sulfur (SII) emits at 672 nm
NGC6992 – The “Veil Nebula”
IC1396 – The “Elephant Trunk Nebula”
DWB-111 – The “Propeller Nebula”
Processing Workflow: Image Capture‣ Go “deep”• Go for a greater sub duration and overall exposure time thanfor RGB imaging• Instead of 3-8, to perhaps 10 minute subs, I shoot at least 30minute subs• I get 18-40 hours of usable data for an object‣ Get lotsa data• I aim for at least 12 subs per channel, more if possible,especially depending on the object• This allows for both depth, and enough subs in the stack to doefficient data rejection of outliers (satellites, airplanes, andcosmic ray hits)‣ Gather ample calibration frames:• ~30 bias, 25-30 darks, 1,000,000 ADU of flats (~30 for me)• I get automated dawn flats
Processing Workflow: CCDStack‣ Prepare calibration masters bias/darks/flats:• Use some sort of sigma rejection or clip min/max,don't use “mean”• This eliminates the impact of outliers like cosmic rayhits (all three types) and stars (for the flats)• Bias-subtract your flats when you create your flatmaster to accommodate differing temperatures‣ Subexposure processing• Load the individual subexposures (subs)• I start with Ha data• Calibrate them (apply your darks, flats, and bias iftime or RMS scaling)• Check “DDP” and “apply to all”
Uncalibrated Sub
The Same Calibrated and DDP’d Sub:
Processing Workflow: CCDStack (continued…)‣ Subexposure processing (continued…)• Rotate all of the subs to the same orientation• Carefully evaluate your data!• CCDInspector for contrast, aspect ratio, and FWHMevaluation• “Mark I eyeball” as a second step, especially if your data isundersampled, for gradients and star aspect ratio• “Good” / “Marginal” / “Bad”• I discard the “Bad” subs, and keep the “Good” alongwith a few of the “Marginal”• The larger the stack of “good” subs, the more of the“marginal” I can include
Bad, Marginal, GoodBadMarginalGood
“All” Versus “Best” Plus a Few “Marginal” (Combined)All subsSelected subs
Rejection of Large Blooms‣ If working with an object that imposes large blooms, I will take shortersubs to include with the longer subs so as to get to the real data:‣ I “impute” the bloomson the shorterexposures, and “Set toMissingVal” (maketransparent) the bloomsof the longer exposures‣ See:http://www.flemingastrophotography.com/ic443.htmlfor a full write-up onthis approach
Processing Workflow: CCDStack (continued…)‣ Registration• I image the same object over multiple nights• Sometimes I see a little offset or a slight extrarotation• So for speed sake, I do a “dual pass” at registration• The first pass is a “Star Snap” with two fairly bright,isolated, closely-spaced stars, selected as theregistration stars• This gets the registration, “close”:
First Pass at Registration
First Pass at Registration
Processing Workflow: CCDStack (continued…)‣ Registration (continued…)• The first pass was not perfect, just close:• The second pass at registration is my “fine” pass• I use “Star Snap” again, this time with 3-4 mediumsmall,widely-spaced, stars to tune up theregistration:
Second Pass at Registration
Processing Workflow: CCDStack (continued…)‣ Registration (continued…)• Much better!:First Pass:Second Pass:
Processing Workflow: CCDStack (continued…)‣ Registration (continued…)• Alterations to the images for alignment purposes donot take place until you “Apply” the change, so feelfree to tweak to your heart’s content• I find that I prefer the “Quadratic B-Spline” algorithmto apply the registration‣ “Normalize” your stack of subs• Normalization utilizes techniques to assess theweighting contribution that each individualsubexposure should contribute to the final combine:
Processing Workflow: CCDStack (continued…)‣ Normalization
Processing Workflow: CCDStack (continued…)‣ Data Rejection• CCDStack allows you to “reject” poor data like satellite trails,cosmic ray hits, and airplane trails independently of thecombine method!• You do not have to rely on mean, median, etc., to get rid of thesepests!• Options include:• STD Sigma• Poisson Sigma• Linear Factor• Clip Min/Max• Each of these methods will throw out the “outliers” andaverage the remaining pixel values‣ I often use the “Poisson Sigma” reject, with 1.5 to 2standard deviations (sigma multiplier)‣ Larger stacks can take tighter tolerances
Rejected Data – a “Good” Subexposure
Rejected Data – a “Marginal” Subexposure
Processing Workflow: CCDStack (continued…)‣ Combine: Do a “Mean” combine‣ Noise removal in CCDStack (Hot/Cold Pixels)• You need to play with this each time• I try not to let the upper limit get higherthan the medium-to-faint stars, elsethey will get “rejected” too• “Impute” at 0.2 pixels
Processing Workflow: CCDStack (continued…)‣ Deconvolution• I prefer the “Positive Constraint” algorithm• Choose a medium star on a dark backgroundOriginalDeconvolved
Ha is All Done…
Processing Workflow: CCDStack (continued…)‣ Now do the OIII and the SII (if you have it) viasimilar processing steps‣ After calibration and rotation, when I startregistration, I re-load the Ha master and usethat one to register the OIII and SII subs‣ This allows for only one “destructive”registration step to be applied, not two!‣ I then do a final tweak with DDP to maximizethe presentation of the object‣ You now have your Ha, OIII, and SII “masters”‣ Color time!
Processing Workflow: CCDStack (continued…)‣ One approach is to do the initial colorcombine inCCDStack,MaxIM,etc.:
Processing Workflow: CCDStack (continued…)‣ For narrowband work, unlike RGB, I prefer to"optimize" each channel in Photoshop (PS) before thecolor combine‣ This helps to maximize the contribution from each dataset, especially the OIII and SII‣ So, at this point, I will save the FITS as a "scaled TIF"from CCDStack• This squeezes or translates the umpteen million data valuesinto the 16-bit color space‣ I open each TIF in PS, and closely examine thehistogram to make sure I have not clipped the data ateither end• I find the scaling process in CCDStack will usually clip just a biton the dark end of the histogram• So, I will go back into CCDStack, lower the dark value cutoff abit, and re-save the scaled TIF until I am satisfied
Before and After DDP and Clipping Adjustments
Processing Workflow: Photoshop‣ To "optimize" each channel in Photoshop (PS)before the color combine, I generally do:• A “contrast curve” adjustment layer• Noise reduction layer with an inverted layer mask• Local contrast enhancement layer, created withNoel Carboni’s Photoshop actions• Shadow/Highlight adjustment layer (in PS-CS2 orhigher)
Contrast Curve
Noise Reduction With an Inverted Layer Mask‣ Do your favorite noise reduction process step:• Noise reduction in PS• NeatImage• Noise Ninja, etc.‣ I do this on a separate layer in PS because Iwill use a mask later• I find that noise reduction is less necessary in thebrighter areas of an image than the dark areas• I use an inverted layer mask because that gives methe finest representation of the bright and darkareas of the image, as well as excellent control ofhow much de-noising to apply!
Noise Reduction With an Inverted Layer Mask‣ I do my noise reduction on that separate layer‣ Select the noise reduction layer‣ CTL+A to select the contents of the layer‣ CTL+C to copy those contents‣ “Layer / Layer Mask / Reveal All” adds in thelayer mask‣ I click on the little chain link to unlink the maskfrom the layer• This allows for adjustments to the layer mask to notbe irretrievably linked to the layer contents
Noise Reduction With an Inverted Layer Mask‣ I then ATL/Click on the layer mask• This selects the layer in such a fashion that you canwork with it as an image in itself!‣ CTL+V to copy the noise-reduced layer ontothe layer mask‣ CTL+I to invert the image on the layer mask• The areas that were dark are now light, and viceversa‣ I then do “Image / Adjustments / Levels” todarken the image overall, to ensure that thebrighter areas of the source image receive lessemphasis than the darker areas
Noise Reduction With an Inverted Layer Mask‣ Now we have an “inverted layer mask” thatallows the noise reduction layer to impact theimage more efficiently
Original, De-Noised, And De-Noised with a MaskOriginal – Too noisyDe-Noised – Too muchMasked – Just right
Processing Workflow: Photoshop (continued…)‣ Local Contrast Enhancement with NoelCarboni’s Photoshop Actions• This works to increase the contrast in the mid-rangeof the image:
Processing Workflow: Photoshop (continued…)‣ A little taste of a “Shadow/Highlight”adjustment, then I am done the pre-combinework:Original Ha dataFinal, after tweaking
Processing Workflow: Photoshop (continued…)‣ Same process for OIII and SII:
Processing Workflow: Photoshop (continued…)‣ Color combine; early in CCDStack vs. later in PS:
Photoshop: Color Enhancements‣ Perhaps a bit of a “Channel Mixer” adjustmentlayer (I may add a bit of the Ha to the bluechannel, to reflect the H-beta component):
Photoshop: Color Enhancements (continued…)‣ A “Selective Color” adjustment layer in thiscase, to reduce the overall yellow cast incertain colors and to reduce the magenta stars:
Photoshop: Color Enhancements (continued…)‣ Curves adjustment layers – to makethe reds redder and the blues bluer• I sometimes work by selecting a colorrange to pick up the desired reds or blues
Photoshop: Color Enhancements (continued…)‣ So…color adjustments; before and after:
Photoshop: Another LCE Tweak‣ Another subtle go at LCE, this time with apositive layer mask:
Photoshop: Remove the Magenta in the Stars‣ I select the star cores, and work outwards byexpanding and feathering the selection‣ I then apply a “Hue/Saturation” adjustmentlayer to reduce the magenta cast
Photoshop: Process the RGB Stars‣ Collect RGB data, align to the original Ha data toavoid the second, destructive, alignment process
Photoshop: Now add in the RGB Stars‣ Bring in the scaled TIF, prepare a mask for justthe stars, and change the blend mode to “color”
Photoshop: Sharpen to Taste‣ PS sharpening, NIK Sharpener Pro, others…
Works Better on Undersampled Data
Photoshop: Crop for Presentation…Voila!
“Dumbledore” Version
Summary‣ Get lotsa data:• Shoot at least 30 minute subs• Aim for at least 12 subs per channel‣ Gather ample calibration frames:• ~30 bias, 25-30 darks, 1,000,000 ADU of flats• Use some sort of sigma rejection or clip min/max,don't use “mean”‣ Carefully evaluate your data, reject the “bad”‣ For extensive blooming, take two sets of data:• Impute the blooms in the short-exposure subs• Make the blooms transparent in the long-exposuresubs
Summary (continued…)‣ Apply advanced data rejection techniquesindependently of the “combine” step• Poisson Sigma rejection, Clip Min/Max‣ After combining, do one final run at “hot/cold”pixel rejection‣ Use DDP and Deconvolution‣ For subsequent data sets, always register tothe initial master that you produced‣ Ensure that you do not clip the data as yousave your masters as scaled TIFs and importinto Photoshop
Summary (continued…)‣ Do your color combine in Photoshop, after youhave optimized the presentation of theindividual channel data‣ Use an “inverted layer mask” to carefullycontrol the noise reduction applied‣ For mid-tone contrast enhancements, I like the“Local Contrast Enhancement” action fromNoel Carboni‣ For handling extremes in the image, I like the“Shadow/Highlight” adjustment in PS
Summary (continued…)‣ Color adjustments in adjustment layers:• Channel Mixer• Selective Color• Curves (in concert with masks) to bring up the redsand blues‣ Reduce the magenta in the stars by selectingthe stars and working out, in combination witha Hue/Saturation adjustment layer‣ If you have time, collect RGB data to be usedfor RGB-colored stars• Bring in via “color” mode, not “normal”
Questions?Narrowband Imaging – Things That Make a DifferenceSaturday, October 27, <strong>2007</strong>Neil Fleming(www.flemingastrophotography.com)