TruVision DVR 30.pdf
Chapter 4: Basic operationTurning on the TVR 30Before turning the TVR 30 power on, connect at least one monitor to the main videoout or the VGA interface. Otherwise, you will not be able to see the user interface andoperate the device. Use the power switch on the back panel to turn on the unit.Live modeThe TVR 30 automatically enters into live mode once powered on. Live mode refers tothe mode in which the TVR 30 displays live video from cameras. The TVR 30 on-screendisplay presents information such as the camera title, the current operating mode,and the date and time information as shown in Figure 9 below.Figure 9: On screen display121. Camera title2. Mouse toolbar24 TruVision DVR 30 User Manual
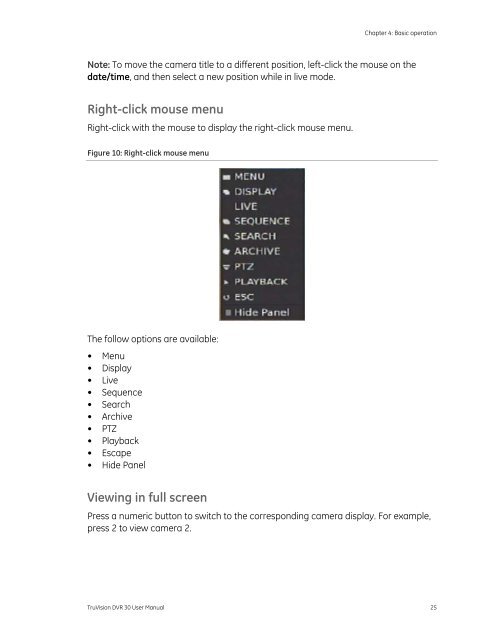
Chapter 4: Basic operationNote: To move the camera title to a different position, left-click the mouse on thedate/time, and then select a new position while in live mode.Right-click mouse menuRight-click with the mouse to display the right-click mouse menu.Figure 10: Right-click mouse menuThe follow options are available:• Menu• Display• Live• Sequence• Search• Archive• PTZ• Playback• Escape• Hide PanelViewing in full screenPress a numeric button to switch to the corresponding camera display. For example,press 2 to view camera 2.TruVision DVR 30 User Manual 25
- Page 1 and 2: TruVision DVR 30 User ManualP/N 106
- Page 3 and 4: ContentChapter 1 Product introducti
- Page 5 and 6: Chapter 1Product introductionSummar
- Page 7 and 8: Chapter 2InstallationSummaryThis ch
- Page 9 and 10: Chapter 2: Installation• USB mous
- Page 11 and 12: PowerLink/Act100FD/Col1 2 3 4 5 6 7
- Page 13 and 14: Chapter 3Operating instructionsSumm
- Page 15 and 16: Chapter 3: Operating instructionsYo
- Page 17 and 18: Chapter 3: Operating instructionsMo
- Page 19 and 20: Chapter 3: Operating instructionsIc
- Page 21 and 22: Chapter 3: Operating instructionsOp
- Page 23 and 24: Chapter 3: Operating instructionsSa
- Page 25: Chapter 3: Operating instructionsTr
- Page 30 and 31: Chapter 4: Basic operationViewing i
- Page 32 and 33: Chapter 4: Basic operationNote: The
- Page 34 and 35: Chapter 4: Basic operation6. You ca
- Page 36 and 37: Chapter 4: Basic operationClick on
- Page 38 and 39: Chapter 4: Basic operationPlayback
- Page 40 and 41: Chapter 4: Basic operation3. Click
- Page 42 and 43: Chapter 4: Basic operationUsing the
- Page 45 and 46: Chapter 5Using the Web browserSumma
- Page 47 and 48: Chapter 5: Using the Web browserIte
- Page 49 and 50: Chapter 5: Using the Web browserSea
- Page 51 and 52: Chapter 5: Using the Web browserFig
- Page 53 and 54: Chapter 6Advanced setupSummaryThis
- Page 55 and 56: Chapter 6: Advanced setupManaging u
- Page 57 and 58: Chapter 6: Advanced setup9. Select
- Page 59 and 60: Chapter 6: Advanced setupclick Copy
- Page 61 and 62: Chapter 6: Advanced setup• None
- Page 63 and 64: Chapter 6: Advanced setupFigure 26:
- Page 65 and 66: Chapter 6: Advanced setupNote: The
- Page 67 and 68: Chapter 6: Advanced setupFigure 30:
- Page 69 and 70: Chapter 6: Advanced setupFigure 31:
- Page 71 and 72: Chapter 6: Advanced setupFigure 33:
- Page 73 and 74: Chapter 6: Advanced setupTo access
- Page 75 and 76: Chapter 6: Advanced setupPOS transa
- Page 77 and 78: Chapter 7System settingsSummaryThis
Chapter 4: Basic operationNote: To move the camera title to a different position, left-click the mouse on thedate/time, and then select a new position while in live mode.Right-click mouse menuRight-click with the mouse to display the right-click mouse menu.Figure 10: Right-click mouse menuThe follow options are available:• Menu• Display• Live• Sequence• Search• Archive• PTZ• Playback• Escape• Hide PanelViewing in full screenPress a numeric button to switch to the corresponding camera display. For example,press 2 to view camera 2.<strong>TruVision</strong> <strong>DVR</strong> 30 User Manual 25


