TDL-0050B-B - Laundry Nation
TDL-0050B-B - Laundry Nation
TDL-0050B-B - Laundry Nation

You also want an ePaper? Increase the reach of your titles
YUMPU automatically turns print PDFs into web optimized ePapers that Google loves.
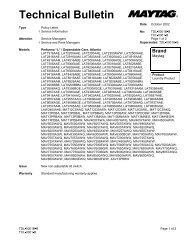
Technical BulletinTypeAttentionModelsIssuePolicy Letter√ Service InformationService Managers√ Service and Parts ManagersAAV1200AGW, AAV1200AJW, AAV1200AKW, AAV1200ARW,AAV1200AWW, AAV2200AGW, AAV2200AJW, AAV4200AGW,ALW221RJW,CAV1000AWW, CAV2000AGW, CAV2000AJW,CAV2000AKW, CAV2000AWQ, CAV2000AWW, CAV4000AWW,CW5000W, CW6000Q, CW6000W, CW7500Q, CW7500W, DLW231RAW,HAV1200ARW, HAV1200AWQ, HAV1200AWW, HAV2360AWW,HAV2460AWW, HAV2557AWW, HAV2558AWW, HAV3460AWW,HAV4200AKW, HAV4200ATW, HAV4200AWW, HAV4657AWW,JAV4200AWQ, LNC6760B71, LNC6762B01, LNC6762B71, LNC6764A71,LNC6766B71, MAV2200AJW, NAV3200AWW, NAV4200AGW,NAV4200AKW, PAV1200AWW, PAV2200AAW, PAV2200AGW,PAV2300AGW, PAV2300AWW,PAV2360AWW, PAV3200AAW,PAV3200AGW, PAV3240AWW, PAV3300AGW,PAV3300AKW,PAV3300AWW, PAV3360AWW, PAV4960AWW, PAV5000AWQ,PAV5000AWW, PAV5057AWW, PAV5058AWW, PAV5157AWW,PAV5158AWW, PAVT234AWW, PAVT244AWW, PAVT344AWW,PAVT444AWWWash basket leans to one side, generally to the right as you face the washerduring spin cycle.Date: September 2005No: <strong>TDL</strong>-<strong>0050B</strong>-BI<strong>TDL</strong>-0020A-BPage 1 of 4Supersedes <strong>TDL</strong>-0050A-BI<strong>TDL</strong>-0020-BBrandAdmiralAmanaCrosleyJenn-AirMagic ChefMaytagMaytag PerformaProduct<strong>Laundry</strong>WarrantyActionStandard product manufacturing warranty applies.Replace original base with Kit 12002701. The replacement of the base, new snubber,and six springs (included in the Kit) will reduce tub lean to an acceptable level.NOTE: Some tub lean is normal.1. Disconnect power supply to unit.2. Tilt washer and remove belt from underside of base.3. Remove back cover to access and remove drain hose clamps.NOTE: There will be water remaining in the hose from the last cycle.© 2005 Maytag Services
4. Remove three screws attaching drain pump to base.5. Lift top cover by inserting a plastic putty knife between top cover and front panel. Press the locking clip torelease the top cover. Repeat for both sides. Remove front panel by removing screws, one on each side ofthe top edge of front panel.6. Remove motor ground wire, motor shield, and motor wire harness connector.Page 2 of 4 © 2005 Maytag Services <strong>TDL</strong>-<strong>0050B</strong>-B9/30/2005 I<strong>TDL</strong>-0020A-B
7. Remove pressure switch hose from outer tub. Remove screws from sides and rear of unit around bottom,connecting cabinet to base. Remove cabinet from base and set aside. Be sure to lay down a protective padbefore removing tub and transmission assembly from base. Remove tub springs using the spring removaltool; be careful not to let tub and transmission assembly tip over.8. Be sure to lay down a protective pad before removing tub and transmission assembly from base. Removetub and transmission assembly, turn over and lay on protective pad.9. Remove dust cap, retaining ring, washer, cam, and pulley from bottom of transmission.PulleyCamWasherRetaining ringDust cap10. Remove stator from transmission using Brake Removal Tool 12002012, refer to Service Manual fordisassembly procedures. Remove old snubber from transmission.11. Be sure to wash hands to remove any dirt or grease before handling new snubber. Clean new snubber withalcohol before installing. Install new snubber. Insure snubber is centered.Snubber<strong>TDL</strong>-<strong>0050B</strong>-B © 2005 Maytag Services Page 3 of 4I<strong>TDL</strong>-0020A-B 9/30/2005
12. Reinstall stator by locating the dimple on the stator, and tightening the screw next to the dimple first. Nexttighten the screw 180 degrees across from the dimple. Install and tighten remaining screws. Reinstall pulley,cam, washer, retaining ring, and dust cap.StaterDimple13. Turn new base upside down and apply grease at bottom of the spring hole pockets to eliminate noisebetween spring and base interaction.Apply grease at bottom ofspring hole pockets.14. Clean the dome area of new base with alcohol then apply corn starch.Apply corn starch to new baseon dome area after cleaningwith alcohol.15. Reinstall motor and pump to new base.16. Transfer transmission and outer tub onto new base. Use spring tool 22002922 to avoid over stretching thesprings.17. Transfer cabinet shell onto new base and reassemble washer. Be sure to reattach pressure switch hose toback of tub, drain pump hoses with clamps to drain pump, and wire harness to motor. Check all hoses andwires to make sure they are secure.18. Test washer.Page 4 of 4 © 2005 Maytag Services <strong>TDL</strong>-<strong>0050B</strong>-B9/30/2005 I<strong>TDL</strong>-0020A-B