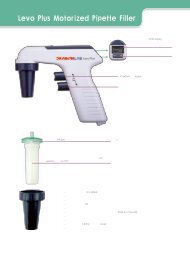
SPECIALTYNMR SAMPLE TUBESGEL PRESSES and ADDITIONAL / REPLACEMENT COMPONENTSSome operational suggestions to help getting startedThe gel press should be assembled as shown in the sketch. Please note that thearrow on the body of the Gel Chamber must point downward towards the thread of theFunnel. This will provide a smooth transition through which the gel will pass.It is also suggested that several “gel only” <strong>sample</strong>s be tried first to get the feel of howthe press will operate.It is very important that the Gel <strong>sample</strong> tube be oriented in the correct way. Since bothends of this tube are opened, the “bottom end” with the special finish is opposite to thecatalog mark on the tube. This is the end that must be inserted into the bottom of theFunnel. The special end finish is necessary to allow the End Plug to seal the tubewithout breaking it.Gel Presses(includes piston driver, cap, piston, gel chamber and funnel)Size 6mm to 4.2mm 5.4mm to 4.2mm 5mm to 4.2mmCat. No. NE‐372‐6/4.2 NE‐372‐5.4/4.2 NE‐372‐5/4.2Additional / Replacement PartsPistons, PTFE, w/Buna O-RingSize 6mm to 4.2mm 5.4mm to 4.2mm 5mm to 4.2mmCat. No. NE‐372‐C‐6 NE‐372‐C‐5.4 NE‐372‐C‐5Piston Spare O-Rings, Buna-NCat. No. NE‐372‐C‐6‐O NE‐372‐C‐5.4‐O NE‐372‐C‐5‐OGel Chambers, PTFESize 6mm to 4.2mm 5.4mm to 4.2mm 5mm to 4.2mmCat. No. NE‐372‐D‐6 NE‐372‐D‐5.4 NE‐372‐D‐5Funnels, PTFESize 6mm to 4.2mm 5.4mm to 4.2mm 5mm to 4.2mmCat. No. NE‐372‐E‐6 ‐ ‐Cat. No. ‐ NE‐372‐E‐5.4 NE‐372‐E‐5Piston Driver and Cap(for all Gel Presses)Cat. No.NE‐372‐ANE‐372‐BDescriptionPiston Driver, BrassCap, Brass
SPECIALTYNMR SAMPLE TUBESSome Reflection on Gel NMR Sample PreparationThe information presented below is intended to be used as a guide in developing yourprocedure and not as a set of specific instructions. A technique needs to be developedby the user that works best, and the first attempt will be a learning experience.What stretch ratio can give the optimal size of RDC?Version 6 to 4.2mm: works well with proteins like protein G.Version 5.4 to 4.2mm: generally good for strong aligning proteins.Version 5 to 4.2mm: generally good for proteins that are both large and elongated.Experimentation with different stretch ratios may be necessary to determine which one is best for the<strong>sample</strong>s at hand.Allow 2-3 days for complete <strong>sample</strong> preparation.Some gel solutions may be basic and/or contain unreacted components which could affect the stability of theprotein if it were added to the initial solution.Approximately 250µl of gel solution would make a <strong>sample</strong> column height of about 20mm.Assuming protein has not been added, seal the bottom of the Gel Chamber (parafilm) and fill with gel solution.Allow to polymerize for at least 1-2 hours. The seal (parafilm) can then be taken off the chamber.Carefully remove the gel with the use of the Piston and an appropriate tool for pushing it through the chamber.Be careful not to scratch the inner surface of the chamber.Dialyze the gel against deionized water overnight to remove unreacted chemicals.While the gel is still soft, it may be cut to some appropriate length. Allow for the length of the Piston and forsome air space between it and the surface of the gel.As a guide line, the gel length should be about ⅓ the length of the Gel Chamber allowing room for an air spaceand the Piston. The air space will allow more of the gel to be expelled.Dry overnight at room temperature or for some hours at an elevated temperature (40-45 o C). The gel willbecome somewhat rigid and smaller in diameter.Place the “dried” gel back into the Gel Chamber, seal the bottom (parafilm) and add protein until the gel swellsto the full diameter of the chamber. Let it sit for 24 hours or longer to allow the protein to diffuse in.Remove any excess protein that has not been diffused into the gel.Assemble the Gel Press and load the gel into the <strong>sample</strong> tube.The Piston will only go as far as the top of the actual funnel area which may still contain some gel. With theGel Chamber removed from the Funnel, the action of an auto-pipet may be used to apply enough air pressureto expel the remaining gel.Seal the bottom of the <strong>sample</strong> tube by gently pressing the Gel End Plug in to place, in such a manneras to avoid trapped air bubbles (the Extraction Rod is used only to remove the Gel End Plug from the<strong>sample</strong> tube).Insert the Gel Top Plug on top of the gel column with the Support Rod.Ideally, the <strong>sample</strong> column should be centered in the receiver coil area. It may take a few trials to find theoptimum <strong>sample</strong> position for this application in the probe.Some references:Bax, A. Tjandra, N. (1997) J. Biomol. NMR, 10, 289-292Chou, J.J., Li, S., Klee, C.B. and Bax, A. (2001) Nat. Struct. Biol., 8, 990-997Chou, J.J., Gaemers, S., Howder, B., Louis, J.M. and Bax, A. (2001) J. Biomol. NMR, 21, 377-382Tycko, R., Blanco, F.J. and Ishii, Y. (<strong>2000</strong>) J. Am. Chem. Soc., 122, 9340-9341