SETTING-UP MANUAL - DENSO Robotics
SETTING-UP MANUAL - DENSO Robotics
SETTING-UP MANUAL - DENSO Robotics

You also want an ePaper? Increase the reach of your titles
YUMPU automatically turns print PDFs into web optimized ePapers that Google loves.
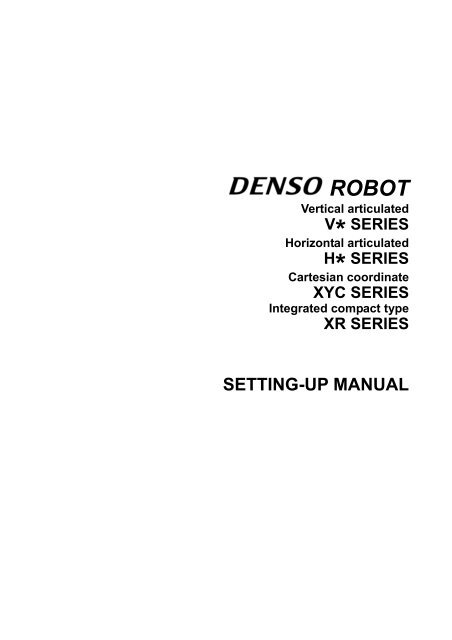
ROBOTVertical articulatedV* SERIESHorizontal articulatedH* SERIESCartesian coordinateXYC SERIESIntegrated compact typeXR SERIES<strong>SETTING</strong>-<strong>UP</strong> <strong>MANUAL</strong>
Copyright © <strong>DENSO</strong> WAVE INCORPORATED, 2009-2011All rights reserved. No part of this publication may be reproduced in any form or by any means withoutpermission in writing from the publisher.Specifications are subject to change without prior notice.All products and company names mentioned are trademarks or registered trademarks of their respectiveholders.
PrefaceThank you for purchasing this high-speed, high-accuracy assembly robot.Before operating your robot, read this manual carefully to safely get the maximum benefit from your robotin your assembling operations.This manual covers the following products.• Robot system configured with the RC7M controller- Vertical articulated robot V * series- Horizontal articulated robot H *-G series- Cartesian coordinate robot XYC-4G series- Integrated compact robot XR-G series(Note) The robot controller version is indicated in the main software ver. column of the controller setting tableaffixed on the controller. It can also be checked on the Version screen called up by pressing [F6 Set]—[F6Maint.]—[F2 Version] from the top screen of the teach pendant.ImportantTo ensure operator safety, be sure to read the precautions and instructions in "SAFETYPRECAUTIONS."
How this book is organizedThis book is just one part of the documentation set. This book consists of SAFETY PRECAUTIONS andchapters one through six.Chapter 1 Operating Devices (TP/MP)This chapter describes how to connect the teach pendant or mini-pendant. It also provides descriptionsof the names of keys, buttons, and switches on them.Chapter 2 Preparations for TeachingThis chapter describes preparations necessary to make before starting teaching or running the robotfrom the teach pendant or mini-pendant.The preparations include powering the robot controller and motor on/off, calibrating the robot, modifyingthe speed, inching selection, setting payload and its center of gravity, and setting the robot installationcondition. Be sure to read this chapter before powering on the robot controller.Chapter 3 General Introduction to Operation Modes and Additional FunctionsThis chapter describes the three operation modes of the robot: Manual mode, Teach check mode, andAuto mode. It also describes machine lock used for simulation.Chapter 4 General Introduction to Coordinates and FiguresThis chapter explains the coordinates used for the robot and figures of the shoulder, elbow, and wrist.Chapter 5 Commands Assigned to Function Keys of the Teach PendantThis chapter describes a variety of commands assigned to the function keys of the teach pendant. Thefirst section illustrates the command menu tree. The following sections provide a detailed explanation ofthose commands, together with the access routes.Chapter 6 Using the Mini-PendantThis chapter describes how to control the robot using the mini-pendant.
ContentsChapter 1 Operating Devices (TP/MP)1.1 Connecting the Teach Pendant and Mini-Pendant ...................................................................... 1-11.1.1 Connecting the Teach Pendant........................................................................................ 1-11.1.2 Connecting the Mini-Pendant ......................................................................................... 1-21.1.3 Pendantless State............................................................................................................. 1-21.2 Handling the Teach Pendant ......................................................................................................... 1-31.2.1 Holding the Teach Pendant and the Deadman Switch.................................................. 1-31.2.2 Names of Keys, Buttons, and Switches on the Teach Pendant..................................... 1-41.2.3 Basic Operation of the Teach Pendant ........................................................................... 1-61.3 Handling the Mini-Pendant........................................................................................................... 1-9Chapter 2 Preparations for Teaching2.1 Turning the Robot Controller ON (TP/MP) .................................................................................. 2-12.2 Turning the Robot Controller OFF (TP/MP)................................................................................. 2-42.3 Deadman Switch(es)/Enable Switch(es) (TP/MP) ........................................................................ 2-72.4 Turning the Motor ON (TP/MP) .................................................................................................. 2-102.5 Turning the Motor OFF (TP/MP) ................................................................................................ 2-122.6 Setting the Reduced Ratios of the Programmed Speed, Acceleration, and Deceleration(TP/MP) ......................................................................................................................................... 2-142.7 Inching Selection (TP/MP) ........................................................................................................... 2-202.8 Setting the Master Control Parameters of the Payload, Center of Gravity, and Control Set ofMotion Optimization (TP/WC)..................................................................................................... 2-222.9 Setting the Robot Installation Condition (TP/WC) .................................................................... 2-372.10 Configuration List ........................................................................................................................ 2-432.11 Communication with Multiple PCs............................................................................................. 2-542.11.1 Overview ......................................................................................................................... 2-542.11.2 Changing connectable PCs ............................................................................................ 2-562.11.3 Write permission ............................................................................................................ 2-56
Chapter 3 General Introduction to Operation Modes and Additional Functions3.1 Operation Modes and Machine Lock............................................................................................. 3-13.1.1 Switching Between Operation Modes (TP/MP).............................................................. 3-23.1.2 Machine Lock (TP/MP) .................................................................................................... 3-33.2 Manual Mode (TP/MP) ................................................................................................................... 3-43.2.1 Running the Robot Manually .......................................................................................... 3-43.2.2 Managing Robot Controller Output Signals (TP/MP) ................................................. 3-153.2.3 Using the Command Builder (TP) ................................................................................ 3-183.2.4 Easy Teaching (TP) ........................................................................................................ 3-303.2.5 Folder Feature................................................................................................................ 3-453.3 Teach Check Mode (TP/MP)......................................................................................................... 3-513.4 Auto Mode (TP/MP) ...................................................................................................................... 3-663.4.1 Starting Internal Automatic Operation (TP/MP)......................................................... 3-663.4.2 Stopping Internal Automatic Operation (TP/MP)........................................................ 3-763.4.3 Switching to External Automatic Operation (TP/MP)................................................. 3-823.4.4 Stopping External Automatic Operation (TP/MP)....................................................... 3-843.4.5 Continue Function.......................................................................................................... 3-853.4.6 SS (Safe Start) Function................................................................................................ 3-923.4.7 Break Point Function (TP) ..........................................................................................3-1053.4.8 Local Variable-Related Enhancement (TP)................................................................ 3-1153.4.9 Changing Route in Restarting the Pass Motion ........................................................3-1243.4.10 Supervisory Task (Software PLC)...............................................................................3-1303.4.11 Supervisory Task Extension........................................................................................3-1423.4.12 Modification of Processing Time Exclusively Occupied by Supervisory Tasks........3-1453.4.13 Supervisory Task Start Mode......................................................................................3-147Chapter 4General Introduction to Coordinates and Figures4.1 Coordinates, Interference Check Area, and Figures in 6-Axis Robots (V*-G Series)................ 4-14.1.1 Coordinates....................................................................................................................... 4-14.1.2 Interference Check Area ................................................................................................ 4-334.1.3 Figures of the Shoulder, Elbow, and Wrist................................................................... 4-584.2 Coordinates, Interference Check Area, and Figures in 4-Axis Robots (H*-G Series).............. 4-694.2.1 Coordinates..................................................................................................................... 4-694.2.2 Interference Check Area ................................................................................................ 4-784.2.3 Shoulder Figure.............................................................................................................. 4-83
Chapter 5 Commands Assigned to Function Keys of the Teach Pendant5.1 Commands Menu............................................................................................................................ 5-15.1.1 Top Screen......................................................................................................................... 5-15.1.2 Menu Tree......................................................................................................................... 5-25.2 Displaying the Program List Window........................................................................................... 5-35.2.1 Showing the Program List Window in Manual Mode ................................................... 5-45.2.2 Showing the Program List Window in Teach Check Mode ......................................... 5-475.2.3 Showing the Program List Window in Auto Mode....................................................... 5-585.3 Displaying the Current Robot Position....................................................................................... 5-705.4 Displaying the Vision Menu....................................................................................................... 5-1085.5 Displaying I/O Signals and Simulating Robot Motion............................................................. 5-1285.6 Displaying the Operation Panel ................................................................................................ 5-1335.7 Displaying the Settings (Main) Window................................................................................... 5-1345.8 Customizing TP Operation Screens [Ver. 1.5 or later]............................................................. 5-1855.9 Switching between Internal and External Auto Modes........................................................... 5-1865.10 Preparing the Robot Controller to Unplug the Teach Pendant............................................... 5-187Chapter 6 Using the Mini-Pendant6.1 Commands Menu............................................................................................................................ 6-16.1.1 Keypad and Top Screen....................................................................................................6-16.1.2 Menu Tree......................................................................................................................... 6-26.2 Operation Using the Mini-Pendant............................................................................................... 6-46.2.1 Turning the Motor ON/OFF ............................................................................................ 6-46.2.2 Machine Lock and Release .............................................................................................. 6-46.2.3 Choosing the Robot Model ............................................................................................... 6-56.2.4 Switching the Motion Modes ........................................................................................... 6-66.2.5 Changing Work Coordinates ........................................................................................... 6-76.2.6 Changing the Robot Speed .............................................................................................. 6-86.2.7 Changing the Inching Angle and Distance..................................................................... 6-96.2.8 Changing Tool Coordinates............................................................................................ 6-116.2.9 Switching between Internal and External Auto Modes .............................................. 6-126.2.10 Handling Programs........................................................................................................ 6-136.2.11 Resetting Programs........................................................................................................ 6-216.2.12 Displaying the Current Robot Arm Position ................................................................ 6-226.2.13 Displaying Variable Values............................................................................................ 6-236.2.14 Reconfiguring I/O Signals.............................................................................................. 6-266.2.15 Executing CAL ............................................................................................................... 6-286.2.16 Releasing and Locking Brakes...................................................................................... 6-296.2.17 Logging Data .................................................................................................................. 6-32
6.2.18 Setting Communications Port ....................................................................................... 6-336.2.19 Changing Serial Port Speed .......................................................................................... 6-346.2.20 Setting IP Address.......................................................................................................... 6-356.2.21 Procedure registration ................................................................................................... 6-376.2.22 Loading New Project...................................................................................................... 6-416.2.23 Using Auxiliary Functions (Common to 4-axis and 6-axis robots) ............................. 6-426.2.24 Maintaining the Robot with the Mini-pendant [RC7 Ver. 2.3 or later]..................... 6-486.2.25 Entering the Direct Teaching Mode (For 4-axis robots) .............................................. 6-526.2.26 Adjusting the Air Pressure Balance of the Z-Axis (For 4-axis robots) ....................... 6-55
Chapter 1Operating Devices(TP/MP)This chapter describes how to connect the teachpendant and mini-pendant to the robot controller. Italso provides explanations of the names andfunctions of their keys, buttons, and switches whichallow you to operate the robot.NOTE 1: Avoid letting the teach pendant ormini-pendant undergo strong shocks, impacts, orvibrations.NOTE 2: Touch the teach pendant or mini-pendantwith your fingers only, never with the tip of a pen orany pointed object. Otherwise, the LCD may bebroken.
Chapter 1 Operating Devices (TP/MP)1.1 Connecting the Teach Pendant andMini-PendantYou may teach or operate the robot from the teach pendant (TP) or mini-pendant (MP).When the robot leaves the factory, none of them is connected to the robot controller(pendantless state) as shown in Section 1.1.4.After unpacking the robot package, connect the teach pendant or mini-pendant to therobot controller where necessary. The teach pendant and the mini-pendant cannot beconcurrently connected or used.Cautions for connecting or disconnecting the TP/MP cable to/from the controller:(1) When and after connecting the cable to the controller, take care not to apply upward/downward orrightward/leftward external pressure to the connector ("A" in the figure below). Such pressure maybreak the connector, resulting in a communications error.(2) When disconnecting the cable from the controller, first turn the controller power OFF, unlock theconnector and pull it out straight.1.1.1 Connecting the Teach PendantConnect the teach pendant to connector CN3 of the robot controller as shown below.Connecting the Teach Pendant1-1
1.1.2 Connecting the Mini-PendantConnect the mini-pendant to the PENDANT connector of the robot controller as shownbelow.NOTE: The mini-pendant cannot be connected together with the teach pendant.NOTE: Turn the controller power off before connecting or disconnecting themini-pendant.1.1.3 Pendantless StateConnecting the Mini-PendantNOTE: The UL-Listed robot system cannot be operated in the pendantless state.If you disconnect the teach pendant or mini-pendant from the robot controller afterteaching, be sure to set the pendantless connector to the PENDANT connector instead.In this pendantless state, you can run the robot automatically by controlling I/O signalsfrom external equipment.Pendantless connectorPendantless State1-2
1.2 Handling the Teach PendantChapter 1 Operating Devices (TP/MP)1.2.1 Holding the Teach Pendant and the Deadman SwitchGrasp the teach pendant when operating it, as shown below. The teach pendant has adeadman switch(es) for ensuring safety.Note: The teach pendant designed for the RC5 controller has two deadman switches, soit is possible to hold the teach pendant in the two ways. The pendant for the RC7Mcontroller has a single deadman switch.Deadman switchTipThe deadman switch is provided to stop the robot automatically and safely when theoperator can no longer operate the robot correctly due to unforeseen circumstancessuch as the operator suffering a blackout or dying while running the robot manually withthe teach pendant. If a situation such as this arises, the strength with which the operatoris pressing the deadman switch will become either decrease or increase markedly. Thedeadman switch is a 3-position switch which is able to recognize and react to thefollowing 3 operating statuses.1) When the switch is not being pressed or is being pressed lightly→ Switch: OFF2) When the switch is being pressed with correct pressure→ Switch: ON3) When the switch is being pressed too strongly→ Switch: OFFIf the switch is OFF or goes OFF, the robot cannot run or the running robot will stop,respectively.In order to ensure safety, the robot is so designed that in manual mode the deadmanswitch needs to be held down when the operator presses any of the arm traverse keys torun the robot.Note: The deadman switch is also called "Enable switch."1-3
1.2.2 Names of Keys, Buttons, and Switches on the Teach PendantThis section shows the names of keys, buttons, switches, and other sections of theteach pendant. It also describes the pendant screen configuration and iconsrepresenting functions.Before running the robot, learn the location of those keys, buttons, and switches, whichwill help you run the robot smoothly and safely.Names of Keys, Buttons, and Switches on the Teach Pendant1-4
Chapter 1 Operating Devices (TP/MP)Normal task programs on haltNormal task programs on halt(Receiving programs fromexternal equipment)Normal task programs on halt(Transmitting programs toexternal equipment)Normal task program(s) runningNormal task program(s) running(Receiving programs from externalequipment)Normal task program(s) running(Transmitting programs to externalequipment)Supervisory task program runningDummy input not setDummy input set to auser-input port(s)Ver. 1.4 or laterI/O output restrictedInternal Auto modeExternal Auto modeManual modeTeach check modeNo mode selectedBackup batteries workingBackup batteries lowRobot select button (Used to select robottypes. The selected type appears.)Motion modeWork coordinatesTool coordinatesSpeed indicatorbar graphStatus bar(Shows therobot status.)Shortcut button(which calls up theshortcut menu. Usethis when you wantto access otherfunctions halfwaythrough someprocessing.)Menu barShift F1 F2 F3 F4 F5 F6button (F7) (F8) (F9) (F10) (F11) (F12)Function buttons(Used to perform the functions assigned.)Top screenNames of Keys, Buttons, and Switches on the Teach Pendant Screen1-5
1.2.3 Basic Operation of the Teach PendantTop screenTurning on the power to the teach pendant will display the top screen* as shown on theprevious page. In the top of the screen is a status bar, which displays the currentoperation mode, task program status, backup battery states, robot status and otherconditions. In the bottom of the screen is a menu bar that shows the functions assignedto the function keys. The middle of the screen displays a variety of windows.* In Ver. 2.3 or later, when the controller is switched on, the language menu appears(preceding the top screen). Choose the desired language. (Refer to Section 2.1.)Function keys and function buttonsThe teach pendant has six function keys whose functions (F1 to F6 assigned) areusually displayed on the six buttons in the menu bar of the screen. Pressing the SHIFTkey (or Shift button) switches the menu bar between "F1 to F6" and "F7 to F12." Whenthose function keys are shifted, their functions (F7 to F12 assigned) are displayed onthe six buttons.Pressing the function keys is functionally equivalent to pressing their correspondingbuttons in the menu bar.- When the function keys (buttons) are not shifted:F1 F2 F3 F4 F5 F6Shiftmark- When the function keys (buttons) are shifted:FunctionbuttonsF7 F8 F9 F10 F11 F12SHIFTFunctionkeysFunction Keys and SHIFT KeySHIFT key and shift markIf the shift mark is (facing up and filled with black), it means that the current menubar can be shifted. Pressing the SHIFT key will shift the menu bar from "F1 to F6" to"F7 to F12" and turn the shift mark to (facing down).If the shift mark is (facing up and filled with gray), it means that the current menu barcannot be shifted. Pressing the SHIFT key will result in no change in the menu display.1-6
Cursor keys and jog dialChapter 1 Operating Devices (TP/MP)There are four cursor keys that are used to select the target data or increase/decreasevalues. Pressing up-, down-, left-, or right-arrow cursor key moves the cursor up, down,leftwards, or rightwards, respectively.When the cursor movement direction is restricted to either up/down orleftwards/rightwards, the restricted direction keys are used to increase or decreasevalues.The jog dial has the same functions as the cursor keys.Touch panelThe LCD screen of the teach pendant acts as a touch panel. You may directly touch thescreen to operate the touch buttons or select data entry areas.CAUTION: Touch the screen with your fingers only. Pressing the screen with the tip ofa pen or any pointed object will result in failures.OK key and Cancel keyThe OK key or Cancel key is usually used to allow input of a new entry or to discard it,respectively.Those keys are also used to close the current window and return to the previous one.Pressing the OK key will save the new entry and exit from the current window; pressingthe Cancel key will exit from the current window without saving new entry.1-7
SHORTCUT buttonThe use of a shortcut allows you halfway through the current processing to carry outother processing. From any of the processing screens, you may call up the ShortcutMenu by pressing the SHORTCUT button.On the Shortcut Menu, you may choose the desired processing.Step 1 Press the SHORTCUT button.Step 2 Press the desired function button on the Shortcut Menu. (Or press thecorresponding function button on the menu bar or press the function key on theteach pendant.)The screen will switch to the processing screen of the selected function.1-8
1.3 Handling the Mini-PendantChapter 1 Operating Devices (TP/MP)The figure below shows the names of keys and switches of the mini-pendant. Whenthe power is applied, the mini-pendant displays the top screen on the LCD. In theuppermost row of the top screen is a status bar which always displays the currentoperation mode, program status, connected robot model, motion mode, speed, andother information.For the operating procedure, refer to Chapter 6.Names of Keys and Switches on the Mini-PendantNote: On almost all key tops are two (or three) function names printed. The upper andcenter functions are enabled when the keypad is not shifted; that is, the SHIFT lamp isoff. The lower ones boxed are enabled when it is shifted; that is, the lamp is on.The center functions on key tops take effect in Manual mode.1-9
1-10Top Screen of the Mini-Pendant
Chapter 2Preparations forTeachingThis chapter describes preparations necessary tomake before starting teaching or running the robotfrom the teach pendant or mini-pendant.The preparations include turning the robotcontroller and motor on/off, calibrating the robot,modifying the speed, inching selection, settingpayload and its center of gravity, and setting therobot installation condition.Be sure to read this chapter before powering on therobot controllerNOTE 1: This chapter uses the abbreviations (TP),(MP), and (WC) which inform you that operationsmarked with those abbreviations can be performedfrom the teach pendant, mini-pendant, and inWINCAPSIII, respectively.NOTE 2: Avoid letting the teach pendant ormini-pendant undergo any strong shocks, impacts,or vibrations.NOTE 3: Touch the teach pendant or mini-pendantwith your fingers only, never with the tip of a pen orany pointed object. Otherwise, the LCD may bebroken.
Chapter 2 Preparations for Teaching2.1 Turning the Robot Controller ON(TP/MP)Turning the robot controller on enables you to operate the robot from the teach pendantor mini-pendant or run the robot automatically.The robot controller supplies the robot unit with power and controls it.Operating procedureStep 1 Flip the power toggle switch provided on the robot controller upward.The power lamp (the left one of the three pilot lamps) comes on. The other two pilotlamps (Auto mode lamp and error lamp) will flash for an instant.2-1
(TP screen)In Ver. 2.3 or later, switching the robot controller on displays the language menu onthe teach pendant preceding the top screen, prompting you to choose the desiredlanguage.(1) Switch the robot controller on. The language menu appears on the teachpendant.(2) Choose the desired language and press the OK button.Note: When German, Korean, or Chinese has been selected, some screensmay be displayed in English.(3) The top screen appears. (In Ver. 2.2 or earlier, this screen first appears whenthe controller is switched on.)2-2
Chapter 2 Preparations for Teaching(MP screen)When the mini-pendant (MP) is connected to the robot controller, the LCD first showsthe following:CAUTION: If you want to turn the controller power on immediately after turning it off,wait 10 seconds or more and check that all of the pilot lamps on the robot controllerare no longer lit and the TP screen and MP screen are turned off.2-3
2.2 Turning the Robot Controller OFF(TP/MP)Turn the robot controller off when(1) The necessary robot operations have been completed.(2) Performing maintenance on the robot unit.(3) Performing maintenance on the robot controller.(4) Connecting or disconnecting visual equipment, Ethernet board, floppy disk drive,and others to or from the robot controller.(5) Connecting or disconnecting the robot control cable between the robot unit and itscontroller.CAUTION: Be sure to turn the robot controller off before connecting ordisconnecting the robot control cable between the robot unit and its controller.Connection/disconnection of the robot control cable while the robot controller power ison will damage the encoder interface circuitry in the robot controller.2-4
Chapter 2 Preparations for TeachingOperating procedure• From the teach pendantStep 1 If the MOTOR lamp is on, press the MOTOR key to turn the motor power off.The MOTOR lamp goes off.MOTOR lampMOTOR keyStep 2 Flip the power toggle switch on the robot controller downwards.The power lamp (the left one of the three pilot lamps) goes off.2-5
Step 1• From the mini-pendantIf the MOTOR lamp is lit, press the MOTOR key to turn the motor off.The MOTOR lamp goes off.MOTOR keyMOTOR lampStep 2Flip the power toggle switch on the robot controller downwards.The power lamp (the left one of the three pilot lamps) goes off.2-6
Chapter 2 Preparations for Teaching2.3 Deadman Switch(es)/Enable Switch(es)(TP/MP)The teach pendant and mini-pendant have a deadman switch(es) each. Holding downthe deadman switch properly activates some functions in Manual mode or Teach checkmode.Note 1: The deadman switch is also called "enable switch."Deadman switch(Enable switch)Bottom of the teach pendantTeach PendantDeadman switch(Enable switch)Mini-pendant2-7
Hold down the deadman switch when(1) You press any of the arm traverse keys in the Manual mode.(2) You press the OK key after pressing the CycStart or StpStart button in the Teachcheck mode.(3) You press [F5 ON/OFF] to turn output signals on or off without running taskprograms.(4) You turn the selected user-input port on or off after setting dummy input to the port.CAUTION: Never keep the deadman switch(es) held down with adhesive tape or thelike. Doing so may fail to stop the robot when running it in Manual mode. It is extremelyDANGEROUS.NOTE: The deadman switch on the teach pendant or mini-pendant is of a 3-positiontype. Releasing the switch or pressing it excessively turns it off, stopping robot motion.Released (OFF) ⇒ Pressed lightly (ON) ⇒ Pressed strongly (OFF)Operating procedure• From the teach pendantStep 1 While holding down the deadman switch, press any of the keys (e.g., arm traversekey).Deadman SwitchStep 2 Release the deadman switch. (Or press it stronger.)The robot will stop.2-8
Chapter 2 Preparations for TeachingStep 1• From the mini-pendantWhile holding down the deadman switch, press any of the keys (e.g., arm traversekeys).Deadman switch(Enable switch)Arm traverse keys(or numeric keypad)Step 2Release the deadman switch.The robot will stop.2-9
2.4 Turning the Motor ON (TP/MP)Turning the motor on enables you to run the robot.CAUTION: Before turning the motor on, be sure to confirm no person(s) is in therestricted space of the robot.Turn the motor on whenRunning the robot in Manual mode, Teach check mode, or Auto mode.Operating procedure• From the teach pendantStep 1 Press the MOTOR key to turn the motor power on.The MOTOR lamp comes on.MOTOR lampMOTOR keyNOTE 1: If pressing the MOTOR key triggers the "Error 2008: Robot Stop isactivated," it means that the Robot Stop input is open-circuited so that the motorcannot be turned on. (Refer to the RC7M CONTROLLER <strong>MANUAL</strong>.)NOTE 2: The motor cannot be turned on if the machine is locked. (Refer to Section3.1.)NOTE 3: You may turn the motor on even when a program is running in Auto mode.However, take extra care since the robot may suddenly move.2-10
Chapter 2 Preparations for TeachingStep 1• From the mini-pendantPress the MOTOR key to turn the motor power on.The MOTOR lamp comes on.MOTOR keyMOTOR lamp2-11
2.5 Turning the Motor OFF (TP/MP)WARNING: Some robot types have axes having no brake. Turning off the motor ofsuch a brakeless axis loses the holding torque so that the freed axis may unexpectedlymove by the force of gravity or external force. It is extremely DANGEROUS.Turn the motor off when(1) Anyone enters the restricted space of the robot.(2) Turning the robot controller off.(3) Running the robot manually.(4) Modifying parameters.(5) Loading task programs.(6) Carrying out CALSET (selecting/deselecting joints to be calibrated).(7) Releasing brakes.Operating procedure• From the teach pendantStep 1 Press the MOTOR key to turn the motor off.The MOTOR lamp goes off.MOTOR lampMOTOR key2-12
Chapter 2 Preparations for TeachingStep 1• From the mini-pendantPress the MOTOR key to turn the motor power off.The MOTOR lamp goes off.MOTOR keyMOTOR lamp2-13
2.6 Setting the Reduced Ratios of theProgrammed Speed, Acceleration, andDeceleration (TP/MP)You may set the reduced ratios (%) of the programmed speed, acceleration, anddeceleration, from the teach pendant or mini-pendant.(1) The default reduced ratios at powering on are 1%.(2) Once the reduced ratios are set, they will remain in effect until you turn the robotcontroller off or make new settings.(3) In Auto mode, the robot will run at the (programmed speed x reduced ratio (%)). Ifyou set 80%, the robot will run at 80% of the programmed speed.In Manual mode or Teach check mode, the robot controller is designed to run therobot at 10% of the programmed speed. If you set 80% to speed, therefore, therobot will run at 10% x 80% of the programmed speed, that is, at 8%, as shown inFigure 2-3.(4) If you set the reduced ratio of the programmed speed, the robot controllerautomatically calculates the reduced ratios of the programmed acceleration anddeceleration according to the formulas below.Reduced ratio for acceleration = (Reduced ratio for speed) 2 /100Reduced ratio for deceleration = (Reduced ratio for speed) 2 /100where, the calculated value will be rounded up to 1% if it is less than 1%.(Example) If the reduced ratio for speed is 20%Reduced ratio for acceleration = 20 2 /100 = 4%If you modify the automatically calculated ratios (%) manually from the teachpendant or mini-pendant, then the most recently modified ratios will take effect.(5) The minimal reduced ratio for speed is 0.1% and that for acceleration/deceleration is 0.0001%. If any value less than 1% is set, the teach pendant ormini-pendant will display the value as 1% in the speed indicator bar graph of thestatus bar.If you set 80% for speed:In Auto mode, the robot will run at 80% of the programmed speed.In Manual mode or Teach check mode, the robot will run at 10% ofthe reduced speed, that is, 8% of the programmed speed.80% of the programmedspeed8% of the programmedspeed (10% of Automode speed)In Auto modeIn Manual or Teachcheck modeFigure 2-3. Differences in Auto Mode and in Manual/Teach Check Mode2-14
Chapter 2 Preparations for TeachingOperating procedureCAUTION: At the start, set the speed to 20% or less. If you run the robotmanually at high speeds from the beginning, you may mistakenly strike the robotagainst the surrounding objects.CAUTION: It is possible to set the reduced ratios of the programmed speed,acceleration, and deceleration even while the program is running. Doing so maysuddenly change the robot speed. It is DANGEROUS.Step 1• From the teach pendantPress the SPEED key.The Set Speed window appears as shown in the next step.TIP: You may call up the window by pressing [F2 Arm]—[F5 Speed] from the topscreen.2-15
Step 2 In the Set Speed window, check that the SPEED row is selected and then press [F5Change.]F5The numeric keypad appears as shown below.TIP: If you use one of the F1 to F4 keys instead of [F5 Change.], you may directlyenter any of the values displayed on the function buttons.TIP: You may increase or decrease the value in units of 5% by using the right- orleft-arrow cursor key, respectively. You may do it in units of 2% by using the jog dial.Step 3Use the numerical buttons on the numeric keypad to enter the desired value.To cancel the newly entered value, press the CLR or BS button.Check the entered value and press the OK button to enter it.NumerickeypadThe numeric keypad disappears.To discard the new entry and return to the Set Speed window, press the CANCELbutton on the numeric keypad instead of the OK button.2-16
Chapter 2 Preparations for TeachingStep 4 In the Set Speed window, check the automatically calculated ratios of theacceleration and deceleration.(1) If the ratios of acceleration and deceleration are OK, press the OK button andskip to Step 8.(2) To set an arbitrary reduced ratio of acceleration, press the down-arrow cursorkey to select the ACCEL row and then press [F5 Change.].F1 F2 F3 F4 F5The numeric keypad appears as shown below.TIP: If you use one of the F1 to F4 keys instead of [F5 Change.], you may directlyenter any of the values displayed on the function buttons.TIP: You may increase or decrease the value in units of 5% by using the right- orleft-arrow cursor key, respectively. You may also increase or decrease the value inunits of 1% by using the jog dial.Step 5Use the numerical buttons on the numeric keypad to enter the desired value.To cancel the newly entered value, press the CLR or BS button.Check the entered value and press the OK button to enter it.NumerickeypadThe numeric keypad disappears.To discard the new entry and return to the Set Speed window, press the CANCELbutton on the numeric keypad instead of the OK button.2-17
Step 6 In the Set Speed window, check the automatically calculated deceleration ratio.(1) If the ratio of the deceleration is OK, press the OK button and skip to Step 8.(2) To set an arbitrary reduced ratio of the deceleration, press the down-arrowcursor key to select the DECEL row and then press [F5 Change.].F1 F2 F3 F4 F5The numeric keypad appears as shown below.TIP: If you use one of the F1 to F4 keys instead of [F5 Change.], you may directlyenter any of the values displayed on the function buttons.TIP: You may increase or decrease the value in units of 5% by using the right- orleft-arrow cursor key, respectively. You may also increase or decrease the value inunits of 1% by using the jog dial.Step 7Use the numerical buttons on the numeric keypad to enter the desired value.To cancel the newly entered value, press the CLR or BS button.Check the entered value and press the OK button to enter it.(To discard the new entry and return to the Set Speed window, press the CANCELbutton on the numeric keypad.)NumerickeypadThe numeric keypad disappears.2-18
Chapter 2 Preparations for TeachingStep 8 The top screen shown below appears. Check that the newly entered ratio isdisplayed in the rightmost area of the status bar.Status bar• From the mini-pendantStep 1 Refer to Chapter 6, Section 6.2.6.2-19
2.7 Inching Selection (TP/MP)Step 1You may inch the robot by a specified distance or angle each time you press any of thearm traverse keys in Manual mode. Once inching is selected, it takes effect until therobot controller is turned off or you switch the robot from inching to normal speedrunning.When the robot controller is turned on, the default is normal speed running.In Auto mode or Teach check mode, inching will not take effect. Even if inching isselected, switching from Manual mode to any other mode will automatically cause therobot to switch from inching to normal speed running. Switching back to Manual modewill cause the robot to switch back to inching.Select inching whenInching the robot in Manual mode.Operating procedureNOTE: Even if inching is selected, the robot will run at a normal speed if the robot isswitched to an operation mode other than Manual mode.• From the teach pendantPress the SPEED key.The Set Speed window appears as shown below.TIP: You may call up the Set Speed window by pressing [F2 Arm]—[F5 Speed] fromthe top screen.Step 2 In the Set Speed window, press the Inching button.The window shows the inching display.2-20
Step 3 Check the inching values and press the OK button.Chapter 2 Preparations for TeachingThe display returns to the top screen where "Inch" is shown in the rightmost area ofthe status bar, as shown below.• From the mini-pendantStep 1 Refer to Chapter 6, Section 6.2.7.2-21
2.8 Setting the Master Control Parameters ofthe Payload, Center of Gravity, andControl Set of Motion Optimization(TP/WC)Step 1You may set the master control parameters of the mass of payload (end-effector andobject to be mounted at the end of the robot arm), the payload center of gravity andcontrol set of motion optimization. For details, refer to the PROGRAMMER'S <strong>MANUAL</strong>I, Chapter 4, Section 4.7.Set the master control parameters of the payload, center of gravity,and control set of motion optimization whenYou have determined the mass of the payload (end-effector and object to be mountedat the end of the robot arm) and the payload center of gravity.Operating procedureThis setting cannot be performed from the mini-pendant. Use the teach pendant orWINCAPSIII.• From the teach pendantOn the top screen, press [F2 Arm].F2The Current Robot Position window appears as shown below.2-22
Chapter 2 Preparations for TeachingStep 2 Press [F6 Aux.].F6The Auxiliary Functions (Arm) window appears as shown below.Step 3 Press [F7 Config.].The User Preferences window appears as shown in the next step.2-23
Step 4 Select the "9: Mass of payload (g)" area by using the jog dial or [F1 BACK] to [F3Jump To].The selected area will become highlighted.Then press [F5 Change.].F1 F2 F3 F5The numeric keypad appears as shown below.Step 5 Use numerical buttons on the numeric keypad to enter the desired value.To cancel the newly entered value, press the CLR or BS button.Check the entered value and press the OK button to establish it. To cancel entrymade in this step and restore the previous setting, press the CANCEL button on thenumeric keypad instead of the OK button.Numerickeypad2-24
Chapter 2 Preparations for TeachingThe numeric keypad disappears.The newly entered value is displayed in the "9: Mass of payload (g)" area, as shownbelow.Press the OK button to establish the new settings. To cancel the new settings andreturn to the previous window, press the Cancel buttonF1 F2 F3Step 6 Select the "10: Payload center of gravity X (mm)" area by using the jog dial or [F1BACK] to [F3 Jump To].The selected area will become highlighted.Then press [F5 Change.].F1 F2 F3 F5The numeric keypad appears as shown in the next step.2-25
Step 7 Use the numerical buttons on the numeric keypad to enter the desired value.To cancel the newly entered value, press the CLR or BS button.Check the entered value and press the OK button to enter it. To cancel entry made inthis step and restore the previous setting, press the CANCEL button on the numerickeypad instead of the OK button.NumerickeypadThe numeric keypad disappears and the newly entered value is displayed in the "10:Payload center of gravity X (mm)" area, as shown below.Press the OK button to establish the new settings. To cancel the new settings andreturn to the previous window, press the Cancel button.2-26
Chapter 2 Preparations for TeachingStep 8 Select the "11: Payload center of gravity Y (mm)" area by using the jog dial or [F1BACK] to [F3 Jump To].The selected area will become highlighted.Then press [F5 Change.].F1 F2 F3 F5The numeric keypad appears as shown below.Step 9 Use the numerical buttons on the numeric keypad to enter the desired value.To cancel the newly entered value, press the CLR or BS button.Check the entered value and press the OK button to enter it. To cancel entry made inthis step and restore the previous setting, press the CANCEL button on the numerickeypad instead of the OK button.Numerickeypad2-27
The numeric keypad disappears and the newly entered value is displayed in the "11:Payload center of gravity Y (mm)" area, as shown below.Press the OK button to establish the new settings. To cancel the new settings andreturn to the previous window, press the Cancel button.F1 F2 F3Step 10 Select the "12: Payload center of gravity Z (mm)" area by using the jog dial or [F1BACK] to [F3 Jump To].The selected area will become highlighted.Then press [F5 Change.].F5The numeric keypad appears as shown in the next step.2-28
Chapter 2 Preparations for TeachingStep 11 Use the numerical buttons on the numeric keypad to enter the desired value.To cancel the newly entered value, press the CLR or BS button.Check the entered value and press the OK button to enter it. To cancel entry made inthis step and restore the previous setting, press the CANCEL button on the numerickeypad instead of the OK button.NumerickeypadThe numeric keypad disappears and the newly entered value is displayed in the "12:Payload center of gravity Z (mm)" area, as shown below.Press the OK button to establish the new settings. To cancel the new settings andreturn to the previous window, press the Cancel button.F1 F2 F32-29
Step 12 Select the "7: Control set of motion optimization" area by using the jog dial or [F1BACK] to [F3 Jump To].The selected area will become highlighted.Then press [F5 Change.].F5The numeric keypad appears as shown below.Step 13 Use the numerical buttons on the numeric keypad to enter the desired value.To cancel the newly entered value, press the CLR or BS button.Check the entered value and press the OK button to enter it. To cancel entry made inthis step and restore the previous setting, press the CANCEL button on the numerickeypad instead of the OK button.Numerickeypad2-30
Chapter 2 Preparations for TeachingThe numeric keypad disappears and the newly entered value is displayed in the "7:Control set of motion optimization" area, as shown below.Press the OK button to establish the new settings. To cancel the new settings andreturn to the previous window, press the Cancel button.Step 14 Press the OK button on the User Preferences window as shown above.The Auxiliary Functions (Arm) window appears.Step 15 Press the Cancel key two times.The display returns to the top screen.The master control parameters set through the above procedure automatically applyto the local control parameters.2-31
• In WINCAPSIIIStep 1 Run WINCAPSIII.NOTE: Log on as a Programmer. Logging on as an Operator does not allow editingof configuration parameters in Step 4.Step 2 Choose Project | Parameters to display the Parameters window.2-32
Chapter 2 Preparations for TeachingStep 3Choose the Config. tab.Step 4Enter the desired values to the following parameters in the Value column of thewindow above.- Control set of motion optimization- Mass of payload (g)- Payload center of gravity X (mm)- Payload center of gravity Y (mm)- Payload center of gravity Z (mm) Inertia of payload (kgcm 2 ) for 4-axis robotsFor details about parameter values, refer to Section 2.10 "Configuration List."After completion of entry, press OK to save them into the current project.2-33
Step 5 Make sure that the power to the robot motors is OFF.NOTE: Proceeding to the next step with the motor power ON causes an error in thedata transfer process from WINCAPSIII to the robot controller.Step 6 Choose Connect | Transfer data to display the bidirectional transfer dialog box.Select arm parameters in WINCAPSIII and press Send.Step 7 Restart the robot controller.2-34
Chapter 2 Preparations for TeachingDEFINITION: Payload Center of Gravity6-axis robotDefine the payload center of gravity in the TOOL0 coordinates in units of mm (refer toFigure 2-4).- The origin of the TOOL0 coordinates is located in the center of the flange surface onthe 6th axis.- The Y component is defined on the orientation vector directed from the center of theflange to the center of the orientation pin hole (dia. 6H7).- The Z component is defined on the approach vector directed from the center of theflange to the normal line of the flange center.- As shown in Figure 2-5, the X component is defined on the normal vector directedalong the X axis (+) in the right-hand coordinates whose Y axis is an orientationvector and whose Z axis is an approach vector.Flange surfaceof the 6th axis+ZbOrientation vectorApproach vectorOrientation vector (Y axis)Orientation pin hole (dia. 6H7)Normal vector (X axis)Approach vector (Z axis)Center of the flangeTOOL0 Coordinates+Xb +Yb ZPayload center of gravity(X6, Y6, Z6)X6YZ6XY6Payload Center of Gravity in theTOOL0 CoordinatesFigure 2-4. Payload Center of Gravity+Y axis(Orientation vector)+Z axis(Approach vector)+X axis(Normal vector)Figure 2-5. Right-hand Coordinates2-35
4-axis robotThe TOOL0 coordinates of the 4-axis robot are defined as illustrated below. Based onthe coordinates, the payload center of gravity will be defined.+Z axis (Approach vector)Origin of TOOL0“A”-Z axis (Approach vector)+Y axis (Orientation vector)Reference hole+X axis (Normal vector)-X axis (Normal vector)(Viewed from “A”)-Y axis (Orientation vector)Figure 2-6. TOOL0 Coordinates in the HM/HS Series2-36
Chapter 2 Preparations for Teaching2.9 Setting the Robot Installation Condition(TP/WC)This section describes how to change the installation condition (floor-mount oroverhead-mount) of vertical articulated robots (V series). The factory default is "0:Floor-mount."Switching between the floor-mount and overhead-mount parameters changes only thecontrol parameters relating to the direction of gravitational force of the robot, not thoserelating to the direction of coordinates.The horizontal articulated robots (H series, X series) cannot change the installationcondition. Their installation conditions differ depending upon the robot type, so they aredetermined at the factory.Operating procedure• From the teach pendantStep 1 On the top screen, press [F2 Arm].F2Step 2 Press [F6 Aux.].F6The Auxiliary Functions (Arm) window appears as shown in the next step.2-37
Step 3 Press [F7 Config.] on the Auxiliary Functions (Arm) window.The User Preferences window appears as shown below.Step 4 Select the "8: Floor-mount or Overhead-mount or Wall-mount" area by using the jogdial or [F1 BACK] to [F3 Jump To].The selected area will become highlighted.Then press [F5 Change.].F1 F2 F3 F5The numeric keypad appears as shown in the next step.2-38
Chapter 2 Preparations for TeachingStep 5 Use numerical buttons on the numeric keypad to enter 0 for floor-mount or 1 foroverhead-mount.To cancel the newly entered value, press the CLR or BS button.Check the entered value and press the OK button to enter it. To cancel entry made inthis step and restore the previous setting, press the CANCEL button.NumerickeypadThe numeric keypad disappears.The newly entered value (0 for floor-mount or 1 for overhead-mount) is displayed inthe "Floor-mount or Overhead-mount" area, as shown below.Press the OK button to establish the new settings. To cancel the new settings andreturn to the previous window, press the Cancel button.Step 6 If the project of this robot has been created in WINCAPS III, change also the originalWINCAPS III project data, using the following procedure in WINCAPS III.Choose Connect | Transfer data, select the Arm parameters at the Controller pane,and then press the Receive button.2-39
• In WINCAPSIIIStep 1 Run WINCAPSIII.NOTE: Log on as a Programmer. Logging on as an Operator does not allow editing ofconfiguration parameters in Step 4.Step 2 Choose Project | Parameters to display the Parameters window.2-40
Chapter 2 Preparations for TeachingStep 3 Choose the Config. tab.Step 4 Enter the desired values to the "Floor-mount or Overhead-mount" parameter.0: Floor-mount1: Overhead-mountAfter completion of entry, press OK to save them into the current project.2-41
Step 5 Make sure that the power to the robot motors is OFF.NOTE: Proceeding to the next step with the motor power ON causes an error in thedata transfer process from WINCAPSIII to the robot controller.Step 6 Choose Connect | Transfer data to display the bidirectional transfer dialog box.Select arm parameters in WINCAPSIII and press Send.Step 7Restart the robot controller.2-42
Chapter 2 Preparations for Teaching2.10 Configuration ListThe table below lists the items displayed in the User Preferences window of the teachpendant (Access: [F2 Arm]--[F6 Aux.]--[F7 Config.]) or in the Config. table of theParameters window in WINCAPSIII (Access: Project | Parameters | Config. tab).Note: Numbers in the configuration list below are used in the controller. In WINCAPSIII, those numbers plus "1" are displayed. (For example, the "Control set of motionoptimization" is numbered 7 in the controller and 8 in WINCAPS III.)Configuration List (Example)No.Items7 Control set of motionoptimizationFactorydefaultPowering-ondefaultDescription0 0 0: OFF1: PTP movement only2: CP movement only3: Both PTP and CP movement(Refer to the PROGRAMMER’S<strong>MANUAL</strong> I, Section 4.6, "Control Sets ofMotion Optimization.")CommentsCan be set withaspChange ().8 Floor-mount, orOverhead-mount9 Mass of payload (g) Differsdependinguponmodels.0 Last value atpowering-offLast value atpowering-off0: Floor-mount1: Overhead-mountMass of end-effector and object to bemounted at the end of the robot arm.Required for6-axis robots.Can be set withaspACLD.10 Payload center ofgravity X (mm)0 Last value atpowering-offX component of payload center ofgravity (consisting of end-effector andobject)(Refer to the PROGRAMMER’S<strong>MANUAL</strong> I, Section 4.6, "Control Sets ofMotion Optimization.")11 Payload center ofgravity Y (mm)80 Last value atpowering-offY component of payload center ofgravity (consisting of end-effector andobject)(Refer to the PROGRAMMER’S<strong>MANUAL</strong> I, Section 4.6, "Control Sets ofMotion Optimization.")Can be set withaspACLD.12 Payload center ofgravity Z (mm)For 4-axes robot inVer. 1.9 or later:Inertia of payload(kgcm 2 )100 Last value atpowering-offZ component of payload center ofgravity (consisting of end-effector andobject)(Refer to the PROGRAMMER’S<strong>MANUAL</strong> I, Section 4.6, "Control Sets ofMotion Optimization.")13to20Encoder pulse countfor positioningallowance (J1 to J8)20 20 Convergence accuracy for specified axis(one of J1 to J8) at execution of a motioncommand with @E optionCan be set withmvSetPulseWidth().21 Positioningcompletion timeout(ms)5600 5600 At execution of a motion command with@E option, if positioning is notcompleted within this specified time, atimeout will occur.Can be set withmvSetTimeOut().2-43
No.ItemsFactorydefaultPowering-ondefault22 Control log mode 1 Last value atpowering-offDescriptionNumber of control logs to be preservedin the ring buffer.Entry range: 1 to 24(1250 x Set value) = No. of control logsCommentsIf many programsand/or variablesare used, settingmany control logsmay cause anerror atpowering-ontime. If suchoccurs, decreasethe number ofcontrol logs.23 Control log samplingintervals8 Last value atpowering-offSampling intervals of control log.Entry range: 8, 16, 24, or 32 msIf a value otherthan a multiple of8 is set, thecontrollerautomaticallymodifies it to amultiple of 8.24 Efficiency of gravityeffect(For 6-axis robot)0 Last value atpowering-off0: Gravity compensation featuredisabled1: Gravity compensation featureenabledInput an integerobtained byconverting a 3-bitbinary to adecimal.25 Curlmt functioncancellation switch0 Last value atpowering-offa) If lowest bit is 0: Resets the currentlimit setting when the motor is turned on.b) If 2nd lowest bit is 0: Resets the servolock releasing when the motor is turnedon. (Only for 4-axis robots)c) If 3rd lowest bit is 0: Resets thecancellation of the PWM switching whenthe motor is turned on. (Only for 4-axisrobots)Do not changethe initial setting.26 Servo-lockconfiguration(For 4-axis robot)0 Last value atpowering-off1: Servo lock released Can be set withOffSrvLock orOnSrvLock.27 Control method(For HM/HS-D series)0 Last value atpowering-off1: P-control(Refer to the INSTALLATION &MAINTENANCE GUIDE for H*-DSERIES, Section 2.7 "Switching to theVibration Suppression Control.")Make sure thatthe "Changingaccel mode" isset to 0.28 High-inertiaconfiguration(For HM/HS-D series)0 Last value atpowering-off1: Loop gain set to high-inertia(Refer to the INSTALLATION &MAINTENANCE GUIDE for H*-DSERIES, Section 2.8 "Setting theHigh-Inertia Configuration.")Make sure thatthe "Changingaccel mode" isset to 0 and the"Mass of payload(g)" is 10000.29 Changing accel mode 0 or 1 Last value atpowering-off0: Gain change function enabled1: Gain change function disabledThe initial settingis 0 or 1 for4-axis or 6-axisrobots,respectively. Donot change theinitial setting.34 Motor power holdingfunction1 Last value atpowering-offSets the motor power state when theAuto Enable switch is switched.0: Turns the motor power OFF if it wasON1: Keeps the current state of the motorpower2-44
Chapter 2 Preparations for TeachingNo.ItemsFactorydefaultPowering-ondefaultDescriptionComments35 Cycloid motion setting 0 Last value atpowering-off0: Cycloid motion disabled1: Cycloid motion enabledCan be set withSetcycloid orResetcycloid.53to60Gain reduce rate(J1 to J8)Valueproperto eachrobotLast value atpowering-offGain reduction rate for one of J1 to J8Takes effectwhen the"Changing accelmode," "Controlmethod" and"High-inertiaconfiguration" areset to 0. Do notchange the initialvalue.61to68High-inertia loadoperation gain reducerate (J1 to J8)(For HM/HS series)0 Last value atpowering-offGain reduction rate for one of J1 to J8when the high-inertia load operation isselectedTakes effectwhen the"Changing accelmode" and"Control method"are set to 0 and"High-inertiaconfiguration" isset to 1. Do notchange the initialvalue.69 New type robot or oldtype robot(For 4-axis robot)0 Last value atpowering-off0: New type (D series or later)1: Old type (C series)If you purchasethe controlleralone to connectit to theHM/HS/HC-Cseries, set thisitem to 1.70 Pass motion setting 0 Last value atpowering-off71 Positioning allowanceof pass end5 Last value atpowering-offWhen restarted after any stop operationduring pass motion, the robot will makemotion towards:0: Target position specified after thepass motion (Default)1: Target position specified before thepass motionCondition for preventing the robot fromtaking motion towards the target positionspecified before pass motion, when therobot is restartedThe condition should be set as adistance from the target position.The conditionrefers to adistance from thetarget position atthe commandlevel, not theactual distancefrom the currentrobot endposition.Do not changethe initial value.78 Damper setting rate(X)(For 6-axis robot)79 Damper setting rate(Y)(For 6-axis robot)80 Damper setting rate(Z)(For 6-axis robot)10000 10000 Damping ratio along the X-axis undercompliance control10000 10000 Damping ratio along the Y-axis undercompliance control10000 10000 Damping ratio along the Z-axis undercompliance controlCan be set withSetDampRate orResetDampRate.Cannot bemodified with theteach pendant.(Ver. 1.4 or later)2-45
No.ItemsFactorydefaultPowering-ondefaultDescriptionComments81 Damper setting rate(RX)(For 6-axis robot)82 Damper setting rate(RY)(For 6-axis robot)83 Damper setting rate(RZ)(For 6-axis robot)84 Compliance controlmode(For 6-axis robot)10000 10000 Damping ratio around the X-axis undercompliance control10000 10000 Damping ratio around the Y-axis undercompliance control10000 10000 Damping ratio around the Z-axis undercompliance control1 1 If lowest bit is 0: Compliance speedcontrol modeIf 2nd lowest bit is 1: Disables the gravitycompensation feature under compliancecontrolCan be set withSetDampRate orResetDampRate.Cannot bemodified with theteach pendant.(Ver. 1.4 or later)Can be set withSetCompVMode,ResetCompVMode,SetCompControl,or SetCompFControl.Cannot bemodified with theteach pendant.(Ver. 1.4 or later)86 Antivibration setting(For 6-axis robot)0 Last value atpowering-off1: Residual vibration reduction controlmodeCan be set withSetVibControl orResetVibControl.87 Compliance controlON/OFF (For 6-axisrobot)0 0 1: Under compliance control Can be set withSetCompControl,SetCompFControl, orResetCompControl.88 Coordinates forcompliance control(For 6-axis robot)89 Force limit rate (+X)(For 6-axis robot)90 Force limit rate (+Y)(For 6-axis robot)91 Force limit rate (+Z)(For 6-axis robot)0 0 0: Base coordinates1: Tool coordinates2: Work coordinates10000 10000 Force control rate along the +X axisunder compliance control10000 10000 Force control rate along the +Y axisunder compliance control10000 10000 Force control rate along the +Z axisunder compliance controlCannot bemodified with theteach pendant.(Ver. 1.4 or later)Can be set withSetFrcCoord.Cannot bemodified with theteach pendant.(Ver. 1.4 or later)Can be set withSetFrcCoord.Cannot bemodified with theteach pendant.(Ver. 1.4 or later)2-46
Chapter 2 Preparations for TeachingNo.Items92 Force limit rate (+RX)(For 6-axis robot)93 Force limit rate (+RY)(For 6-axis robot)94 Force limit rate (+RZ)(For 6-axis robot)95 Force limit rate (-X)(For 6-axis robot)96 Force limit rate (-Y)(For 6-axis robot)97 Force limit rate (-Z)(For 6-axis robot)98 Force limit rate (-RX)(For 6-axis robot)99 Force limit rate (-RY)(For 6-axis robot)100 Force limit rate (-RZ)(For 6-axis robot)101 Compliance settingrate (X)(For 6-axis robot)102 Compliance settingrate (Y)(For 6-axis robot)103 Compliance settingrate (Z)(For 6-axis robot)104 Compliance settingrate (RX)(For 6-axis robot)105 Compliance settingrate (RY)(For 6-axis robot)106 Compliance settingrate (RZ)(For 6-axis robot)107 Compliance/positionalerror allowance (X)(For 6-axis robot)108 Compliance/positionalerror allowance (Y)(For 6-axis robot)109 Compliance/positionalerror allowance (Z)(For 6-axis robot)FactorydefaultPowering-ondefaultDescription10000 10000 Force control rate around the +X axisunder compliance control10000 10000 Force control rate around the +Y axisunder compliance control10000 10000 Force control rate around the +Z axisunder compliance control10000 10000 Force control rate along the -X axisunder compliance control10000 10000 Force control rate along the -Y axisunder compliance control10000 10000 Force control rate along the -Z axisunder compliance control10000 10000 Force control rate around the -X axisunder compliance control10000 10000 Force control rate around the -Y axisunder compliance control10000 10000 Force control rate around the -Z axisunder compliance control10000 10000 Compliance rate along the X-axis undercompliance control10000 10000 Compliance rate along the Y-axis undercompliance control10000 10000 Compliance rate along the Z-axis undercompliance control10000 10000 Compliance rate around the X-axisunder compliance control10000 10000 Compliance rate around the Y-axisunder compliance control10000 10000 Compliance rate around the Z-axisunder compliance control100 100 Allowable deviation along the X-axisunder compliance control100 100 Allowable deviation along the Y-axisunder compliance control100 100 Allowable deviation along the Z-axisunder compliance controlCommentsCan be set withSetFrcCoord.Cannot bemodified with theteach pendant.(Ver. 1.4 or later)Can be set withSetFrcCoord.Cannot bemodified with theteach pendant.(Ver. 1.4 or later)Can be set withSetFrcCoord.Cannot bemodified with theteach pendant.(Ver. 1.4 or later)Can be set withSetCompRate.Cannot bemodified with theteach pendant.(Ver. 1.4 or later)Can be set withSetCompRate.Cannot bemodified with theteach pendant.(Ver. 1.4 or later)Can be set withSetCompEralw.Cannot bemodified with theteach pendant.(Ver. 1.4 or later)2-47
No.ItemsFactorydefaultPowering-ondefaultDescriptionComments110 Compliance/positionalerror allowance (RX)(For 6-axis robot)111 Compliance/positionalerror allowance (RY)(For 6-axis robot)112 Compliance/positionalerror allowance (RZ)(For 6-axis robot)113 Force offset (X)(For 6-axis robot)114 Force offset (Y)(For 6-axis robot)115 Force offset (Z)(For 6-axis robot)116 Force offset (RX)(For 6-axis robot)117 Force offset (RY)(For 6-axis robot)118 Force offset (RZ)(For 6-axis robot)300 300 Allowable deviation around the X-axisunder compliance control300 300 Allowable deviation around the Y-axisunder compliance control300 300 Allowable deviation around the Z-axisunder compliance control0 0 Force offset along the X-axis undercompliance control0 0 Force offset along the Y-axis undercompliance control0 0 Force offset along the Z-axis undercompliance control0 0 Offset moment around the X-axis undercompliance control0 0 Offset moment around the Y-axis undercompliance control0 0 Offset moment around the Z-axis undercompliance controlCan be set withSetCompEralw.Cannot bemodified with theteach pendant.(Ver. 1.4 or later)Can be set withSetFrcAssist.Cannot bemodified with theteach pendant.(Ver. 1.4 or later)Can be set withSetFrcAssist.Cannot bemodified with theteach pendant.(Ver. 1.4 or later)120 Optimizationinitialize0 Last value atpowering-off0: Will reset the control set of motionoptimization to 0 when the power isturned OFF and ON (Default)1: Will not reset the control set of motionoptimization when the power isturned OFF and ON. Maintains thelast value at powering-off.(Ver. 1.4 or later)121to128Torque limit forcompliance control(J1 to J8)(For 6-axis robot)0 0 Current limit value for one of J1 to J8under compliance controlCan be set withSetCompJLimit orResetCompJLimit.Cannot bemodified with theteach pendant.(Ver. 1.4 or later)196 J4 brake lock setting(For VM-6083D/VM-60B1D and VS-Eseries)0 0 If the J4 overrides its software motionlimit when the brake is released:0: Will lock the J4 brake1: Will not lock the J4 brake(Ver. 1.7 or later)2-48
Chapter 2 Preparations for TeachingNo.197198ItemsSetting of TCP speedpattern(Note 1)Factorydefault0Powering-ondefaultLast value atpowering-offDescription0: Conventional speed control1: Constant TCP speed (Tool endspeed in CP motion)Comments(Ver. 1.8 or later)Note 1: If you specify a CP motion involving the rotation of the robot hand, then the system willautomatically decrease the TCP speed (Tool end speed in CP motion) according to the rotation angleby default. This causes some problems that the robot does not run in the specified speed or atconstant speed.In Version 1.8 or later, it is possible to keep the TCP speed constant by setting Parameter No. 197 to 1.If you specify such a motion that will exceed the rotation speed limit, then the system will issue awarning message and run the robot while increasing/decreasing the TCP speed.Restoration ofTOOL/WORK data(Note 2)0Last value atpowering-off0: No resume1: Resume(Ver. 1.8 or later)Note 2: In earlier versions, the system will not retain TOOL/WORK coordinates declared or defined inprograms if the power is turned off. Accordingly, to make a same job, you need to set up the sameoperation environments every time when restarting the robot.Setting Parameter No. 198 to 1 will make the system retain those operation environments. When thepower is on, they will be resumed.199 Arc interpolationapproved value ofeasy teaching200 Arch MoveExecution Flag100 100 Positional error allowance for arcmotion in easy teaching0Last value atpowering-offSetting the arch form at theexecution of the ArchMoveDo not changethis setting if notnecessary.(Ver. 1.8 or later)Can be set withSetArchParam.(Ver. 1.9 or later)201 Arch Move startposition at the sideof a rise0Last value atpowering-offThe start position of a horizontalmovement in upward movement atthe execution of the ArchMoveCan be set withSetArchParam.(Ver. 1.9 or later)202 Arch Move startposition at the sideof a descent0Last value atpowering-offThe start position of a horizontalmovement in downward movementat the execution of the ArchMoveCan be set withSetArchParam.(Ver. 1.9 or later)233 Setting of real timebelt cutting detection0Last value atpowering-offParameter for the individual robot(Ver. 1.9 or later)234 ZT interfere checkon CURLMT0Last value atpowering-offSets if the ZT-axes have the gearinterference.Do not changethis setting if notnecessary.(Ver. 1.9 or later)235 Reserved 0Last value atpowering-offReserved parameter for theextended function(Ver. 1.9 or later)237 Reference errorclear permission0Last value atpowering-offPermission setting of clearing thereference error with the teachpendantDo not changethis setting if notnecessary.(Ver. 1.95 or later)238 Setting of MovementSpeed Limit0Last value atpowering-offParameter for the individual robotDo not changethis setting if notnecessary.(Ver. 1.95 or later)2-49
No.ItemsFactorydefaultPowering-ondefaultDescriptionComments239 Tracking Mode 0240 Enc.1 Std Pos. inrecognition241 Enc.1 Std Pos. inmovement242 Enc.2 Std Pos. inrecognition243 Enc.2 Std Pos. inmovement0000244 Enc.1 Current Pos. 0245 Enc.2 Current Pos. 0246 Enc.1 CALDAT 0247 Enc.2 CALDAT 0248 Work detectionposition accuracy 15249 Upper Limit 1 ofTracking Range20000250 Lower Limit 1 ofTracking Range251 Upper Limit 2 ofTracking Range-2000020000Last value atpowering-offDo not change the setting in thisscreen.Setting screens are not yet prepared.Do not changethe setting in thisscreen.(Ver. 1.95 or later)252 Lower Limit 2 ofTracking Range-20000253 Trigger range ofTracking 1 (side +)20000254 Trigger range ofTracking 1 (side -)-20000255 Trigger range ofTracking 2 (side +)20000256 Trigger range ofTracking 2 (side -)-20000257 User InterruptSetting0258 Enc. 1 Number ofInterrupt0259 Enc. 2 Number ofInterrupt0260 Enc. 1 InterruptSetting0261 Enc. 2 InterruptSetting02-50
Chapter 2 Preparations for TeachingNo.ItemsFactorydefaultPowering-ondefaultDescriptionComments262 Enc. 1 Updating ofInterrupt data0263 Enc. 2 Updating ofInterrupt data0264 Enc. 1 CALDAT (Z) 0265 Enc. 2 CALDAT (Z) 0266 Accuracy of Workposition detection 2267 Check Enc. Lowervelocity268 Enc. 1 Interrupt dataSetting269 Enc. 2 Interrupt dataSetting270 Reference errordetect setting271 High precision CPline control500000272 Enc. vel or accabnormalitydetection273 Tracking Target 0274 Center position (X)of index 11100000Last value atpowering-offDo not change the setting in thisscreen.Setting screens are not yet prepared.Do not changethe setting in thisscreen.(Ver. 1.95 or later)275 Center position (Y)of index 1276 Center position (Z)of index 1100000100000277 Radius of index 1 100000278 Center position (X)of index 2279 Center position (Y)of index 2280 Center position (Z)of index 2100000100000100000281 Radius of index 2 100000282 Upper Limit 1 ofIndex TrackingRange283 Lower Limit 1 ofIndex TrackingRange284 Upper Limit 2 ofIndex TrackingRange1000010002-51
No.ItemsFactorydefaultPowering-ondefaultDescriptionComments285 Lower Limit 2 ofIndex TrackingRange0286 Standard position(X) of index 10287 Standard position(Y) of index 10288 Standard position(Z) of index 10289 Standard position(X) of index 2290 Standard position(Y) of index 2291 Standard position(Z) of index 2000Last value atpowering-offDo not change the setting in thisscreen.Setting screens are not yet prepared.Do not changethe setting in thisscreen.(Ver. 1.95 or later)292 Figure tracking ofindex 10293 Figure tracking ofindex 20294 Check multi detectarea 1200295 Check multi detectarea 2200296 Motor commandSetting297 Servo data number 00Last value atpowering-offLast value atpowering-offMotor command setting for errordetect0: Will occur an error if the MOTOROFF command is executed whenthe robot is running.1: Will not occur an error if theMOTOR OFF command isexecuted when the robot isrunning.Parameter for the individual robot(Ver. 1.98 or later)Do not changethis setting if notnecessary.(Ver. 1.98 or later)307 Setting of singularityavoidance mode0Last value atpowering-off0: Singular point avoiding functiondisabled1: Singular point avoiding functionenabled(Refer to the PROGRAMMER'S<strong>MANUAL</strong> I, Section 3.3.6 "SingularPoint Avoiding Function.")Can be modifiedwithSetSingularAvoid().(Ver. 2.61 or later)2-52
Chapter 2 Preparations for TeachingNo.394ItemsDEFLECTIONmode setting(Note 3)Factorydefault0Powering-ondefaultLast value atpowering-offDescriptionAutomatic compensation for deflectionof the robot arm due to gravity,depending upon the motion position,posture and load conditions.0: Disable1: EnableCommentsVer. 3.0 or laterNote 3: Enable this compensation function before point teaching. Enabling this after point teachingwill shift the taught points, as well as improper settings of the mass of payload and payload center ofgravity.398 Advanced setting ofsingularityavoidance404 Path adjustment atteach checkDiffersdependingon robottype.VS-050,060, 068,087 : 1Others : 01Last value atpowering-offLast value atpowering-offPerforms singularity avoidance Ver. 3.2 or laterduring path operation. To enable thisfunction, however, the singularityavoidance function needs to beenabled (1) in advance.0: Disable1: EnableAdjusts the path so that the robot Ver. 2.8 or latermoves along the same path both atteach check and in automaticoperation.0: The path in the path motion at teachcheck may differ from that inautomatic operation.1: The path in the path motion at teachcheck matches that in auromaticoperation.2-53
2.11 Communication with Multiple PCs2.11.1 OverviewMain system software version 2.7 permits communication with multiple PCs viaEthernet if the multiple IP settings are enabled. Connecting the robot controller withPCs makes it possible to use WINCAPS and other software programs loaded in thosePCs.The robot controller can communicate with multiple PCs. Connecting with multiple PCsrequires either automatic IP address registration or individual IP addressspecifications.Automatic IP address registrationThe main system software automatically permits connection with multiple PCs. Whenaccessed by PCs, the controller automatically registers their IP addresses (up to 10)on a first-come first-served basis.Use this connection to connect PCs to the robot controller without confirming their IPaddresses. The same communication permission setting (Disable, Read only, orRead/write) applies to all PCs connected.Individual IP address specificationThe user specifies IP addresses of PCs to be connected on the robot controllerbeforehand to permit the robot controller to communicate with the specified PCs only.Up to 10 PCs can be specified.This connection allows the user to specify separate communication permissionsettings (Disable, Read only, or Read/write) for each IP address.Use this connection to limit connection of PCs or to specify separate communicationpermission settings for each PC.2-54
Chapter 2 Preparations for TeachingAutomatic IP address registrationConnection with Multiple PCsIndividual IP address specification1st connectionPC12nd connectionPC23rd connectionPC34th connection1st specification 2nd specification 3rd specificationPC1 (192.168.0.11) PC2 (192.168.0.2) PC3 (192.168.0.3)PC44th specificationPermittedPermittedPermittedPermitted5th connectionPC5Permitted PermittedPermittedPC4 (192.168.0.4)5th specificationPermittedPermitted6th connectionPC6Not permittedPermittedPC5 (192.168.0.5)6th specificationNot permitted Not permitted PermittedPermittedPermittedPermitted7th connectionPC78th connectionPC8Not permittedPermittedNot permittedNot permittedPermittedPC6 (192.168.0.6)7th specificationPC7 (192.168.0.7)9th connectionPC9PC1212th connectionPC1111th connectionPC1010th connectionPC10 (192.168.0.10) PC9 (192.168.0.9) PC8 (192.168.0.8)10th specification 9th specification 8th specificationNotes- When automatic IP address registration is selected, changing the communicationpermission setting clears all of automatically registered IP addresses and enablesnew connection of PCs on a first-come first-served basis.- When communication with multiple PCs is permitted, the robot controller cannotexchange data with WINCAPS II. To use WINCAPS II, disable the multiple IPsettings2-55
2.11.2 Changing connectable PCsWhen the robot controller is set up so that it automatically connects to a PC or PCs withautomatic IP address registration, completing the registration of the maximum numberof PCs no longer allows connection to any other PC.To connect to any other PCs, clear the previously registered IP addresses.2.11.3 Write permissionWhen communication with multiple PCs is allowed, during data exchange with a singlePC the robot controller automatically gives a write permission to the PC only in order toprevent other PCs from writing to the controller. In the Connected IP address window,the IP address of the write-permitted PC is displayed in gray.Usually, the robot controller revokes the write permission every time the data transfer iscompleted and it becomes ready to communicate with any of connectable PCs.If data transfer abnormally ends or a communications link breaks before the controllerrevokes the write permission, the write permission cannot be revoked and therefore,any other PC no longer accesses the robot controller. If it happens, clear the IPaddress (in gray) of the write-permitted PC with [F6 Clear] to revoke the writepermission.Note: Only when the write permission cannot be revoked due to errors, manuallyrevoke it with [F6 Clear]. Manually revoking it when data transfer is normally inprogress could result in damaged data.2-56
Chapter 3GeneralIntroduction toOperation Modesand AdditionalFunctionsThis chapter describes the three operation modesof the robot: Manual mode, Teach check mode, andAuto mode. It also describes additional functionsincluding machine lock used for simulation.NOTE 1: This chapter uses the abbreviations (TP),(MP), and (WC) which inform you that operationsmarked with those abbreviations can be performedfrom the teach pendant, mini-pendant, and inWINCAPSIII, respectively.NOTE 2: Avoid letting the teach pendant ormini-pendant undergo any strong shocks, impacts,or vibrations.NOTE 3: Touch the teach pendant, operatingpanel, or mini-pendant with your fingers only, neverwith the tip of a pen or any pointed object.Otherwise, the LCD may be broken.
Chapter 3 General Introduction to Operation Modes and Additional Functions3.1 Operation Modes and Machine LockThe robot offers three operation modes--Manual mode, Teach check mode, and Automode. Manual mode allows you to run the robot manually from the teach pendant ormini-pendant. Teach check mode provides restricted automatic operation in which youcan make a final check of programs with the teach pendant after teaching. Auto modeallows the robot to run automatically.Manual mode, Teach check mode, and Auto mode are described in Sections 3.2, 3.3,and 3.4, respectively.The teach pendant or mini-pendant supports all of the above three modes.Operation modesManual modeTeach check modeJoint modeX-Y modeTool modeCycle checkStep checkAuto mode Internal automatic operation Single-cycle runContinuous runSingle-step runExternal automatic operationCycle stopStep stopHaltEmergency stopCycle stopStep stopHaltEmergency stopIn each of the above three operation modes, you can lock the robot (so called "machinelock") so that it is possible to perform simulations with the robot controller withoutrunning the robot practically.When the robot is in machine lock, you can restrict the I/O output. For details, refer toSection 5.5, "Displaying I/O Signals and Simulating Robot Motion."3-1
3.1.1 Switching Between Operation Modes (TP/MP)Operating procedure• From the teach pendantStep 1 Turn the mode selector switch to the desired mode position.IconModeselectorswitchThe selected mode icon appears in the leftmost area of the status bar.: Internal Auto mode, : External Auto Mode: Manual mode, : Teach check mode• From the mini-pendantStep 1 Turn the mode selector switch to the desired mode position.3-2
Chapter 3 General Introduction to Operation Modes and Additional Functions3.1.2 Machine Lock (TP/MP)Locking the machine allows you to perform simulations with the robot controller withoutrunning the robot practically.Lock the machine when(1) Testing programs without running the robot practically.(2) Checking the cycle time.NOTE: The cycle time calculated may be shorter than the actual one since End motion(@0 option) will apply when the machine is locked. For details, refer to thePROGRAMMER’S <strong>MANUAL</strong> I, Section 3.2.5.Operating procedure• From the teach pendantNOTE: If the motor power is on, press the MOTOR key to turn the motor off (refer toSection 2.5). When the motor power is on, the machine cannot be locked.Step 1 Press the LOCK key.The machine becomes locked and the LOCK lamp comes on.According to the output restriction conditions of I/O signals, the dummy input icon onthe status bar will change.: No I/O output restricted, : I/O output restrictedStep 2 Press the LOCK key again.The lock is released and the LOCK lamp goes off.• From the mini-pendantStep 1 Refer to Section 6.2.2.3-3
3.2 Manual Mode (TP/MP)In Manual mode, you may run the robot manually or manage robot controller outputsignals manually from the teach pendant or mini-pendant.NOTE: The global type of controller limits the maximum speed of the robot arm to 250mm/s or below at the flange (mechanical interface) or the TCP point in Manual orTeach check mode.3.2.1 Running the Robot ManuallyYou may run the robot manually from the teach pendant or mini-pendant in any of thethree modes--Joint mode, X-Y mode, and Tool mode.NOTE: To run the robot manually, the system-input port "Enable Auto" is required to beOFF (opened). (Refer to the CONTROLLER <strong>MANUAL</strong>.)Run the robot manually when- Moving the robot flange (the end of the robot arm) to access an object point afterCAL operation.- Moving the robot flange to a position where Teach Check should start.6-axis robot[ 1 ] Joint modeAs shown below, the Joint mode allows you to drive each of the six jointsindependently.Movements in Joint Mode3-4
Chapter 3 General Introduction to Operation Modes and Additional Functions[ 2 ] X-Y modeX-Y mode allows you to drive the robot arm in base coordinates (whose origin isdefined at the center of the robot basement). Pressing the X, Y, or Z key in X-Y modemoves the robot flange linearly along the X, Y, or Z axis, respectively, as shown below.If work coordinates (whose origin is defined at a corner of the rectangularparallelepiped envelope of an object piece) is defined, then the robot flange moveslinearly in the work coordinates.For details about base coordinates and work coordinates, refer to Chapter 4.If you use the RX, RY, or RZ key in X-Y mode, the robot arm rotates on each axis of thevirtual work coordinates defined on the center of the flange surface without changingthe center position of the flange surface, as shown below.To rotate the robot arm on the origin of work coordinates, refer to the "external TCPfunction" in Chapter 4.Movements in X-Y ModeNOTE: In 5-axis robots, the flange can keep a constant posture (3-dimensionalflange direction) only when it is accurately in parallel with the X-Y plane of the robot(RX and RY are 0 degree).3-5
[ 3 ] Tool modeTool mode allows you to drive the robot arm in mechanical interface coordinates(whose origin is defined at the center of the flange surface) or in tool coordinates. Fordetails about those coordinates, refer to Chapter 4.Pressing the X, Y, or Z key in Tool mode moves the robot flange linearly along the Z, Y,or Z axis, respectively, as shown below.If you use the RX, RY, or RZ key in Tool mode, the robot arm rotates on each axis of thetool coordinates.NOTE: The figure below shows the tool coordinates when TOOL0 is set. These arealso called mechanical interface coordinates.To rotate the robot arm on the origin of work coordinates, refer to the "external TCPfunction" in Chapter 4.Movements in Tool ModeNOTE: In 5-axis robots, the flange can keep a constant posture (3-dimensionalflange direction) only when it is accurately in parallel with the X-Y plane of the robot(RX and RY are 0 degree).3-6
Chapter 3 General Introduction to Operation Modes and Additional Functions4-axis robot[ 1 ] Joint modeThe figure below shows movement of the robot in joint mode, in which arms can beoperated individually. This mode also enables each operation was carried out.Movements in Joint Mode3-7
[ 2 ] X-Y modeThe figure below shows movement of the robot in X-Y mode, in which each axis isoperated in straight movement along the rectangular coordinate (X-Y-Z). The 4th axisis held stationary in the current posture.Movements in X-Y Mode3-8
Chapter 3 General Introduction to Operation Modes and Additional Functions[ 3 ] Tool modeThe figure below shows movement of the robot in tool mode, in which the 4th axis isoperated in straight movement along the coordinates based on the 4th axis.These coordinates are called the tool coordinates. The 4th axis is held stationary in thecurrent posture.These coordinates are expressed in TX, TY and TZ to distinguish them from X-Y mode."A"Viewed from "A"Movements in Tool Mode3-9
Operating procedureCAUTION: At the start, set the reduced ratio of the programmed speed to 20% orless. If you run the robot manually at high speeds from the beginning, you maymistakenly strike the robot against the surrounding objects.NOTE: In X-Y or Tool mode, if a pass runs through the vicinity of a singular point duringmanual operation, the robot will issue error code 6080s (Overspeed) and come to ahalt. Avoid running a pass through the vicinity of a singular point.• From the teach pendantStep 1 Set the mode selector switch to the <strong>MANUAL</strong> position.IconModeselectorswitchStep 2Press the MOTOR key to turn the motor on.Step 3 Press the M-MOD key.The Select Operation Mode window appears as shown in the next step.3-10
Chapter 3 General Introduction to Operation Modes and Additional FunctionsStep 4 Select the desired operation mode by using the cursor keys or touching the screendirectly, then press the OK key.On the operation mode button in the status bar appears the selected operationmode.Operation mode displayedStep 5 While holding down the deadman switch, press one of the arm traverse keys to drivethe robot arm. For details regarding the relationship between the arm traverse keysand driven axes, refer to Table 3-1.Deadmanswitch(providedon the rear)Arm traversekeys3-11
Table 3-1. Arm Traverse Keys and Driven AxesOperationNo. mode AxisFor motion in thepositive directionArm traverse keysFor motion in thenegative directionComments1 Joint mode Joint 1 + J1 X - J1 XJoint 2 + J2 Y - J2 YJoint 3 + J3 Z - J3 ZJoint 4 + J4 RX - J4 RXJoint 5 + J5 RY - J5 RYJoint 6 + J6 RZ - J6 RZ2 X-Y mode X axis + J1 X - J1 XY axis + J2 Y - J2 YZ axis + J3 Z - J3 ZX axis asrotationcenterY axis asrotationcenter+ J4 RX - J4 RX+ J5 RY - J5 RYThe robot arm moves in thecurrently selected workcoordinates.(For work coordinates, referto Chapter 4.)Z axis asrotationcenter+ J6 RZ - J6 RZ3 Tool mode X axis + J1 X - J1 XY axis + J2 Y - J2 YZ axis + J3 Z - J3 ZX axis asrotationcenterY axis asrotationcenter+ J4 RX - J4 RX+ J5 RY - J5 RYThe robot arm moves in thecurrently selected toolcoordinates.(For tool coordinates, referto Chapter 4.)Z axis asrotationcenter+ J6 RZ - J6 RZ3-12
Chapter 3 General Introduction to Operation Modes and Additional Functions• From the mini-pendantStep 1 Set the mode selector switch to the MAN position.Step 2 Press the MOTOR key to turn the motor on.The MOTOR lamp comes on.Step 3 Select the desired operation mode and the desired work coordinates or toolcoordinates.Refer to Chapter 6, Sections 6.2.4, 6.2.5 and 6.2.7.Step 4 While holding down the deadman switch, press one of the arm traverse keys to drivethe robot arm. For details regarding the relationship between the arm traverse keysand driven axes, refer to Table 3-2.Deadman switch(Enable switch)Arm traverse keys(or numeric keypad)3-13
Table 3-2. Arm Traverse Keys and Driven AxesOperationNo. mode AxisFor motion in thepositive directionArm traverse keysFor motion in thenegative directionComments1 Joint mode Joint 1 + J1 X - J1 XJoint 2 + J2 Y - J2 YJoint 3 + J3 Z - J3 ZJoint 4 + J4 RX - J4 RXJoint 5 + J5 RY - J5 RYJoint 6 + J6 RZ - J6 RZ2 X-Y mode X axis + J1 X - J1 XY axis + J2 Y - J2 YZ axis + J3 Z - J3 ZX axis asrotationcenterY axis asrotationcenter+ J4 RX - J4 RX+ J5 RY - J5 RYThe robot arm moves in thecurrently selected workcoordinates.(For work coordinates, referto Chapter 4.)Z axis asrotationcenter+ J6 RZ - J6 RZ3 Tool mode X axis + J1 X - J1 XY axis + J2 Y - J2 YZ axis + J3 Z - J3 ZX axis asrotationcenterY axis asrotationcenter+ J4 RX - J4 RX+ J5 RY - J5 RYThe robot arm moves in thecurrently selected toolcoordinates.(For tool coordinates, referto Chapter 4.)Z axis asrotationcenter+ J6 RZ - J6 RZ3-14
Chapter 3 General Introduction to Operation Modes and Additional Functions3.2.2 Managing Robot Controller Output Signals (TP/MP)You can manually manage output signals from the robot controller (which is equippedwith user-I/O ports and system-I/O ports), with the teach pendant or mini-pendant.Manage robot controller output signals whenYou need to turn output signals on or off without running programs.Operating procedure• From the teach pendantStep 1 Set the mode selector switch to the <strong>MANUAL</strong> position.Step 2 Press [F4 I/O].The I/O Monitor window appears as shown in the next step.3-15
Step 3 Display a target I/O signal, by scrolling the screen with the cursor keys, jog dial, [F1BACK], or [F2 NEXT].TIP: You can press [F3 Jump To] to call up the numeric keypad where you can enterthe output port address. Doing so will directly call up the target output signal.The I/O Monitor window appears as shown below.Step 4Select the target output signal by using the cursor keys or touching the screendirectly.Step 5 On the above window, press [F5 ON/OFF] (or OK key) to toggle the selected signalon or off.The system message dialog box appears as shown below.3-16
Chapter 3 General Introduction to Operation Modes and Additional FunctionsStep 6 Check the ON/OFF state of the target output signal, then press the OK button whileholding down the deadman switch.To manage other output signals, go back to Step 4.To finish this procedure, press the Cancel button.• From the mini-pendantStep 1 Refer to Chapter 6, Section 6.2.14.3-17
3.2.3 Using the Command Builder (TP)Step 1The command builder facilitates program editing and entry using the teach pendant.The use of the command builder allows you to enter program codes with ease asdescribed below.• You may enter commands even if you do not remember complicated commandnames.• When entering commands, you may easily enter the associated parameters.• With the "Favorites" function, you may quickly enter frequent-to-use commands.Operating procedureGiven below is an operating procedure for entering commands with the commandbuilder.• From the teach pendantSet the mode selector switch to the <strong>MANUAL</strong> position.Step 2Press [F1 Program].The Program List window appears as shown in the next step.Step 3 Select the task program you want to edit, by using the cursor keys or jog dial or bytouching the screen directly. Then press [F5 Edit.].F5The coding list of the selected program appears as shown in the next step.3-18
Chapter 3 General Introduction to Operation Modes and Additional FunctionsStep 4 Move the cursor to the line after which you want to insert a new line, then press [F1NewLine.]. Or move the cursor to the line you want to edit, then press [F5 EditLine].F1F5The Insert New Program Line window appears as shown below.Step 5 Press [F4 Category].F4The Category Selection window appears as shown in the next step.3-19
Step 6 In the Category Selection window, choose the category, which contains acommand(s) you want to enter, and then press the OK button to display theCommands selection screen shown in the next step.If you choose "All commands" in the Category Selection window, all commands willappear in the Commands window.If you choose "Favorites," a set of commands registered beforehand will be listed.TipIn step 5, on the Insert New Program Line window or on the Edit Program window:- [F1 User.] is a shortcut key to the favorite command window (that can be called upby choosing the "Favorites" on the Category Selection window).- [F2 Flow.] is a shortcut key to the flow control statement window (that can becalled up by choosing the "Flow control statement" on the Category Selectionwindow).- [F3 Robot.] is a shortcut key to the robot control statement window (that can becalled up by choosing the "Robot control statement" on the Category Selectionwindow).- [F5 Recent.] is a shortcut key to a list of commands in the most recently selectedcategory.Step 7 Scroll the Commands window that shows commands contained in the selectedcategory and choose the desired command.F33-20
Chapter 3 General Introduction to Operation Modes and Additional FunctionsIf you do not remember the name of the necessary command, press [F3 Alpha.].The Alphabet Selection window will appear as shown below.Choose a leading character of the desired command on the above window, and acommand(s) starting with it will be automatically displayed.3-21
Step 8 If the selected command has a parameter(s), move the cursor to the associatedparameter listed in the Parameters window by using the cursor key or by pressingthe touch panel. Then press [F5 Edit.].The parameter entry screen will appear as shown below, where you edit parametervalues. (After editing, press the OK button, and the screen will return to theCommands window.)F5Some parameter values may not be cleared. Therefore, even if no specification ofthe initial value is required such as DEFINT ix=0, you need to enter for the initialvalue substitution area once.If you do so, press the OK button and then delete unnecessary character strings inStep 9.3-22
Chapter 3 General Introduction to Operation Modes and Additional FunctionsStep 9 If it is necessary to modify other parameter values, choose the target parameterand repeat Step 8. Upon completion of parameter editing, press the OK button. Thescreen will return to the program code entry screen.Step 10 Edit the program, e.g., by deleting unnecessary parameters, according to yourneeds. Then press the OK button, and the screen will return to the program codinglist.3-23
Command BuilderOperating flow of command builderPress OK to replace theselected line with thenewly entered line.F1 F2 F3 F4 F5Press OK to replace thecurrent parameter valuewith the newly enteredvalue.Screen 1:Program codeentry screenDefault values areautomatically applied.Select the desired category toshow the associatedcommands.Screen 3:CommandselectionscreenScreen 2:CategoryselectionscreenAccordingtopara-meters, use thefull key ornumericalkeys.3-24Screen 4:Parameter entryscreenScreen 5:Alphabet selectionscreen
Chapter 3 General Introduction to Operation Modes and Additional FunctionsProgram code entry screenOn the program code entry screen, you may edit character strings to be inserted as anew program line or to be replaced with the current program line.[F1 User.][F2 Flow.][F3 Robot.]Shortcut key to the favorite command window (that can becalled up by choosing the "Favorites" on the CategorySelection window).Shortcut key to the flow control statement screen (that canbe called up by choosing the "Flow control statement" onthe Category Selection window).Shortcut key to the robot control statement screen (that canbe called up by choosing the "Robot control statement" onthe Category Selection window).[F4 Category] Displays the Category Selection window.[F5 Recent.]Shortcut key to a list of commands in the most recentlyselected category.[F6 Clr All] Clears all characters being entered.3-25
Category selection screenOn the category selection screen, you may choose the type of commands you want toenter for the command builder.• To choose the desired category, use the jog dial or cursor keys.• After choosing the desired category, press the OK button. Commands in theselected category will be listed in the Commands window. If you press the Cancelbutton, the screen will switch to a list of commands in the most recently selectedcategory.• If you choose "All commands," all commands will be listed in the Commandswindow.• If you choose "Favorites," a list of commands you have registered by using the Addbutton on the command selection screen will be listed in the Commands window.3-26
Chapter 3 General Introduction to Operation Modes and Additional FunctionsCommand selection screenOn the command selection screen, you may choose necessary commands from thoselisted in the Commands window and enter the associated parameter(s).[F1 Back][F2 Next]Displays the previous page of the command/parameterselection screen.Displays the next page of the command/parameterselection screen.[F3 Alpha.] Calls up the Alphabet Selection window.[F4 Category] Calls up the Category Selection window.[F5 Edit.]Calls up the Parameters window if a parameter value isselected with the cursor.[Add]Adds the currently selected command to the Favoritescategory. When the Favorites category window isdisplayed, the Del button will appear instead of Add.Up to 256 commands may be registered.If no commands are registered, "--Not registered--" willappear in the Commands window of the Favorites category.[Del]Deletes the currently selected command from the Favoritescategory. When the categories other than the Favorites areselected, the Add button will be displayed instead of Del.3-27
[Ins][Replce]Inserts a newly entered character string to the currentcursor position.Replaces the contents of the program line currentlyselected for editing with a newly entered character string.Parameter entry screenOn the parameter entry screen, you may enter or edit parameters of the selectedcommand.• According to the type of parameters selected, the full keypad or numerical keypadwill appear.• An initial value previously specified for each parameter will be displayed.• If you press the OK button after editing character strings or numerical values, thescreen will return to the command/parameter selection screen.3-28
Chapter 3 General Introduction to Operation Modes and Additional FunctionsAlphabet selection windowIn the alphabet selection window, you may quickly search necessary commands byentering an alphabet letter of a leading character.• If you enter an alphabet letter, a command(s) starting with it will be automaticallydisplayed.• If there is more than one command starting with the selected alphabet letter, youneed to choose the target command in the Commands window.• If there is no command starting with the selected alphabet letter, a command next tothe alphabet letter in the alphabet order will be selected.3-29
3.2.4 Easy Teaching (TP)Easy teaching is a new facility that enables data entry, program edition, and teaching ofpoint coordinates from the teach pendant with ease of operation.The easy teaching allows you to:(1) Insert a motion command and its parameters (including destination positions) tothe desired program by one-touch operation.(2) Edit motion commands and their parameters by one-touch operation.(3) Execute and check programs you have edited before compiling them.3.2.4.1 Inserting a Motion CommandStep 1What follows is an operation flow for inserting a motion command by using the easyteaching facility.• Possible from the teach pendant onlySet the mode selector switch to the <strong>MANUAL</strong> position.Step 2On the top screen, press [F1 Program].The Program List window appears as shown below.Select a program you want to edit and then press [F5 Edit.] or [Display.](or [F1 NewProg.].NOTE: To edit existing programs, use [F5 Edit.]; to check them, use [Display.]. Tocreate a new program, use [F1 NewProg.]).F53-30
Chapter 3 General Introduction to Operation Modes and Additional FunctionsStep 3The coding list of the selected program appears as shown below.EasyteachingiconPress the easy teaching icon to call up the easy teaching window.Step 4Press parameter icons to set up the motion command parameters.TIP: The specifications of parameter icons that seem to be depressed will be set upas effective parameter values.Command select button(reserved for future expansion)Parametericons (Seethe tablebelow.)Easy teachingwindowNOTE: The Command select button is reserved for future expansion. It is currentlydisabled.Interpolation (Note 1) Pass Start Displacement (Note 1) Destination PositionPTP control (Syntax: "P") End motion (@0 option) Immediate value (Note 2)CP control (Syntax: "L") Pass motion (@P option) Position variable, global (Note 2)Arc Motion (Syntax: "C")Encoder value check motion(@E option)Joint variable, global (Note 2)Homogeneous transform matrixvariable, global (Note 2)Global variable number. Press thisbutton to call up a numeric keypadwhere you can modify the currentvariable value.(Note 1) The feature implemented for the depressed icon takes effect.(Note 2) Each time you press this button, the icon will cycle through [Immediate] -> [Position variable] -> [Jointvariable] -> [Trans variable] in this order. The feature implemented for the displayed icon takes effect.3-31
Step 5Move the cursor to a line immediately preceding the line where you want to insert amotion command, then press [CreateLn].By calculating the parameter icon information and the current robot position, thecontroller automatically creates an appropriate motion command. Then it inserts thecommand to the line next to the selected line.MotioncommandnewlyinsertedIf you select an immediate value to specify the destination position, then thecurrent position value will be written in the current motion command. For theprocedure, go to Step 6.If you select a global variable to specify the destination position, then thecurrent position will be saved into the global variable. For the procedure, go to Step7.Step 6If you insert such a motion command that defines interpolation along an arc (e.g.,MOVE C) and destination position with an immediate value, then pressing[CreateLn] will display the following message.With this dialog being opened, move the robot arm to the destination position andthen press [OK]. The command will be inserted.3-32
Chapter 3 General Introduction to Operation Modes and Additional FunctionsStep 7If you insert such a motion command that defines interpolation along an arc (e.g.,MOVE C) and destination position with a global variable, then pressing [CreateLn]will display the following message.Keep this dialog open and move the robot arm to the destination position, thenpress [OK].The following confirmation massage may appear informing that the global variablehas already contained any value.If overwriting is OK, press [OK]. The variable will be updated.3-33
3.2.4.2 Editing a Motion CommandWhat follows is an operation flow for editing an existing motion command by using theeasy teaching facility.Step 1Step 2Carry out Steps 1 through 3 in Section 3.2.4.1 to call up the easy teaching window.Move the blue cursor to a program line you want to edit, then press [F5 EditLine].If the command on the selected line can be edited in the easy teaching window(refer to Section 3.2.4.4), then the parameter information will display according tothe parameter icons.ParametericonsWhen the window is called up, the parameter icons reflect the command informationon the selected line.You may change the parameters by using the parameter icons or change thedestination point (or viapoints) by pressing [F5 Change] (see Step 3) or [F6 GetPos](See Step 4). After that, pressing [OK] will make the new settings go into effect.F5F6Step 3To enter the desired numeric value by using [F5 Change]:Move the cursor to a field you want to change with the up-, down, left-, andright-arrow keys or jog dial, then press [F5 Change]. The numeric keypad willappear as shown below. Enter the desired numeric value.3-34
Chapter 3 General Introduction to Operation Modes and Additional FunctionsNOTE: If a motion command you selected defines interpolation along an arc (e.g.MOVE C), you may define the viapoints and destination points by using the up- anddown-arrow keys or jog dial.Step 4To get the current robot position by using [F6 GetPos]:Press [F6 GetPos], and the controller will get the current robot position into thememory area and overwrite the line you are editing with the gotten data.NOTE: If you are editing a motion command that defines interpolation along an arc(e.g. MOVE C), a window will appear prompting you to choose either a viapoint ordestination point. Choose either one.Step 5Circled below are parameters that cannot be edited in this screen.Parametersthat cannot beedited here.F4To edit them, press [F4 Text]. The alphanumeric key screen will appear as shown inStep 6.3-35
Step 6Use the alphanumeric key screen shown below to edit parameters in the text mode.NOTE: Pressing [Cancel] in the above screen will cancel all settings made in theeasy teaching window.3-36
Chapter 3 General Introduction to Operation Modes and Additional Functions3.2.4.3 Executing Motion CommandsWhat follows is an operation flow for executing motion commands by using the easyteaching facility.Step 1Carry out Steps 1 through 3 in Section 3.2.4.1 to call up the easy teaching window.EasyteachingwindowMove the blue cursor to a program line to be executed, then press [].[Fwd>]: If a command on the selected line can be edited in the easy teachingwindow (refer to Section 3.2.4.4), then the program line will execute [Fwd>]:Pressing this button will execute the command selected with the blue cursor.[
"Single-step run": Runs a single step of the selected program and stops theexecution."Single-cycle run": Runs the selected program once from the beginning to the endor to any command not executable by easy teaching.In either "Single-step run" or "Single-cycle run," you can stop the program runhalfway just by performing any of stop operations (e.g., pressing the STOP key)during execution.TipIf you attempt to run any command that is not executable by easy teaching orcontains a syntax error, then the following warning message will appear.TipWhen the easy teaching window is displayed, pressing the deadman switch willchange the functions assigned to the left- and right-arrow cursor keys from thehorizontal scrolling on a program line to the same function as the [], respectively.The [] icons will be also changed as shown below.Changed likethis.3-38
Chapter 3 General Introduction to Operation Modes and Additional Functions• Additional Explanation about Easy Teaching[ 1 ] Box frame on a program lineIf you run a motion command by using the easy teaching window, a box frame mayappear on a program line in addition to a blue cursor. The box frame indicates that theboxed line includes a destination point obtained by a command executed mostrecently.In the case of [Fwd>]: If you temporarily stop the following program at line 0007 beingexecuted by [Fwd>], for example, then a box frame comes on line 0007 since thedestination point obtained by the most recently executed motion command is written inline 0007.Box frame and bluecursor areoverlapped with eachother.If line 0007 is executed again with [Fwd>] by a single step, the blue cursor moves toline 0008 but the box frame stays on 0007. This is because the destination pointobtained by the most recently executed motion command is written in line 0007.Box frameBlue cursor3-39
In the case of [
Chapter 3 General Introduction to Operation Modes and Additional Functions3.2.4.4 Applicability of Parameters in Easy TeachingThe following tables show whether parameters of commands are applicable to editing,displaying of the easy teaching window, and execution in easy teaching.NOTES(1) If a command contains any parameter not listed in these tables, then no easyteaching window will be displayed. Neither is such a command executable.(2) When an easy teaching window is displayed:- Pressing the OK key will eliminate unnecessary space codes in parameters.- A very small value entered to a destination position or initial passing startposition may be automatically expressed in floating point or double-precisionfloating point format.SymbolsO: Operable & editableOP: OperableD: DisplayableNO: Not operable or editableCPL: Operable after compileFW: Forward motion onlyG-var: Global variableL-var: Local variablePos: PositionCommandMOVEInterpolationPassing StartOffsetPose(Destinationposition)***ArgumentsMotionOptionsOther OptionsP O @0 O Immediate O SPEED Immediate OP, D NEXT NO, DL O @P O G-var: Pos O G-var: Value OP, DC O* @E O L-var: Pos NO L-var: Value NO@Numeral OP, D ACCEL Immediate OP, DG-var: Value OP, DL-var: Value NODECEL Immediate OP, DG-var: Value OP, DL-var: Value NOAPPROACHInterpolationReferencePositionPassing StartOffsetApproachDistanceMotion Options OtherOptionP OP Immediate OP @0 OP Immediate OP SPEED Immediate OP NEXT NOL OP G-var: Pos OP @P OP G-var Value OP G-var Value OPL-var: Pos NO @E OP L-var: Value NO L-var: Value NO@Numeral OP ACCEL Immediate OPG-var Value OPL-var: Value NODECEL Immediate OPG-var Value OPL-var: Value NODEPART**InterpolationPassing Start Depart Distance OperationOther OptionsOffsetOptionP OP @0 OP Immediate OP SPEED Immediate OP NEXT NOL OP @P OP G-var Value OP G-var Value OP@E OP L-var: Value NO L-var: Value NO@Numeral OP ACCEL Immediate OPG-var Value OPL-var: Value NODECEL Immediate OPG-var Value OPL-var: Value NO3-41
SymbolsO: Operable & editableOP: OperableD: DisplayableNO: Not operable or editableCPL: Operable after compileFW: Forward motion onlyG-var: Global variableL-var: Local variablePos: PositionCommandCHANGETOOLTool CoordinatesImmediateG-var: ValueL-var: ValueOP, FWOP, FWNOArgumentCHANGEWORKUser CoordinatesImmediateG-var: ValueL-var: ValueOP, FWOP, FWNOSPEEDRobot SpeedImmediateG-var: ValueL-var: ValueOP, FWOP, FWNOJSPEEDJoint SpeedImmediateG-var: ValueL-var: ValueOP, FWOP, FWNOACCEL Acceleration DecelerationImmediate OP, FW Immediate OP, FWG-var: Value OP, FW G-var: Value OP, FWL-var: Value NO L-var: Value NOJACCEL Joint Acceleration Joint DecelerationImmediate OP, FW Immediate OP, FWG-var: Value OP, FW G-var: Value OP, FWL-var: Value NO L-var: Value NODECELDecelerationImmediateG-var: ValueL-var: ValueOP, FWOP, FWNOJDECELJoint SpeedImmediateG-var: ValueL-var: ValueOP, FWOP, FWNO3-42
Chapter 3 General Introduction to Operation Modes and Additional FunctionsSymbolsO: Operable & editableOP: OperableD: DisplayableNO: Not operable or editableCPL: Operable after compileFW: Forward motion onlyG-var: Global variableL-var: Local variablePos: PositionCommandArgumentIndirect reference range of "G-var: Value"ArrayArrayNumeric , global variable Immediate O Example: P1,P[1] means that the variable number ofposition global variable P1 is 1.Numeric, global variable Immediate OP Example: P[I1],P[I[1]] means the contents of globalinteger variable number 1 of global position variable P1.G-varNOL-varNONumeric, local variable NOArray, local variable Immediate NOG-varNOL-varNONumeric, local variable NOArray, global variable Immediate NONumeric, global variable Immediate NOG-varNOL-varNONumeric, local variable NOArray, local variable Immediate NOG-varNOL-varNOVariable typeG-var: PosL-var: PosP, T, JDEFPOS, DEFTRN, DEFJNT, DIM POSITION, DIM JOINT, DIM TRANSVariable Type GlobalVariableValue Variable Type LocalVariableArray Type Value LocalVariableI, F, DDEFINT, DEFSNG, DEFDBL, %, !, #, DIM INTEGER, DIM SINGLE, DIM DOUBLE* If you stop the robot temporarily during an arc motion, you may restart it from the stopped position only in the same direction([Fwd>] or [
3.2.4.5 Notes for Easy Teaching(1) At the start of a pass motion, the robot motion in easy teaching may be slightlydifferent from that in Teach check, Auto, or External mode.(2) If a figure flag is set to -1, the final robot figure may be different between [Fwd>]and [
Chapter 3 General Introduction to Operation Modes and Additional Functions3.2.5 Folder FeatureThe folder feature hierarchically manages user programs using a set of folders.3.2.5.1 Folders Displayed on Teach PendantThe folder feature added allows the teach pendant to display folder-related items in theProgram List on the teach pendant as shown below.• Enhanced display in Manual modeShows the number of programs inthe current folder and the numberof folders. The number ofprograms includes header filesand excludes operation panelfiles.Shows the directory level of thecurrent folder.Indicates the operation panel files.Refer to the "Panel Designer"User's Manual.Indicates folders (directories).3-45
• Enhanced function keys in Manual mode[NewProg.]In Version 2.2 or later, this command allows you to create also header files and folders.You can create also header filesand folders.• Program:One controller can hold up to 256 programs created.• Header file: The file name can be up to 32 characters long. One controller can holdup to 256 "header files plus operation panel files."• Folder:[Delete]The folder name can be up to 16 characters long. One controller canhold up to 256 folders created. Folders can be organized in a maximumof four levels excluding the root folder.This command can delete PAC programs, header files, folders, and operation panelfiles.Deleting a folder erases all the objects inside the deleted folder.3-46
Chapter 3 General Introduction to Operation Modes and Additional Functions[Copy]• Copy: Selecting this option copies the selected PAC program, header file, or folder.The name of the object copied last appears in parenthesis following the Pasteoption button, meaning that the object is the one that will be pasted next.Copying a folder copies also all objects contained in that folder.No operation panel file can be copied except when it is contained in a folder.Copying such a folder can copy also operation panel files contained.• Paste: Selecting this option pastes the object copied last into the current folderdesignated by "Dir:."If the current folder already contains an object having the same name as theobject to copy, a "Paste under a new name or Overwrite" dialog appears,prompting the user's choice.Pasting PAC program(s) under a new name automatically makes its compileflag inactive ("Disable" in the Use column); overwriting it with a new oneretains the compile flag status of the old one.Overwriting the destination folder with a source oneIn overwriting a folder, if the destination folder contains objects not containedin the source folder, those objects will remain intact.[Search]This command searches for a PAC program having the specified name in the currentfolder designated by "Dir:." It cannot search for header files, operation panel files, orfolders.[UpFolder]This command shifts to the upper folder from the current folder. If the current folder isalready the root folder, nothing happens.[Display.]Pressing this command button with a PAC program or header file being selecteddisplays its contents; pressing it with a folder being selected shifts the screen to theinside of that folder.3-47
[Config.]Pressing this command button toggles the compile flag on (active) and off (inactive).This applies to PAC programs only. Programs whose compile flags are active aresubject to compilation.The compile flag provides the following five choices:- "Make the specified program active." or "Make the specified program inactive."This appears only when the cursor points to a particular PAC program. Taking thischoice reverses the current status of the selected PAC program.- "Make all programs in the current folder active."Selecting this makes all the PAC programs displayed in the current folder (folderdesignated by "Dir:") active.- "Make all programs in the current folder inactive."Selecting this makes all PAC programs displayed in the current folder designatedby "Dir:" inactive.- "Make all programs active."Selecting this makes all PAC programs in the controller active.- "Make all programs inactive."Selecting this makes all PAC programs in the controller inactive.[New PRJ]This command erases all PAC programs, header files, folders, and operation panelfiles stemming from the root folder.NOTE: Measuring the run time of a program in a folderSelecting [F1 Program]–[F6 Aux.]–[F1 Set PRJ.] displays the configuration list. The listcontains the parameter "13: Delete cycle time calculation code" that provides thefollowing three choices.0: Measure the run time of all programs.1: Measure the run time of programs that can be called through IO (that is, their rootsare named "PRO * ").2: Do not measure the run time of any programs.To display the run time of programs in the folder, set this parameter to "0."3-48
Chapter 3 General Introduction to Operation Modes and Additional Functions• Enhanced display in modes other than Manual modeIn modes other than Manual mode, only executable PAC programs and the folderscontaining such programs are displayed.The functions of the [Search], [UpFolder], [Display.] are the same as in Manualmode. You can move objects from one folder to another in the same way as in Manualmode.In modes other than Manualmode, only executable PACprograms and the folderscontaining such programs aredisplayed.• Handling local variablesThe folder feature added enables programs or variables having the same name tocoexist in a robot controller, as long as those programs or variables are locatedindividually in different folders.If located in different folders, variables having the same variable name and used inprograms with the same name will be treated as different variables. To locate aparticular program, click the Path button.Register variable window3-49
3.2.5.2 Folders Displayed on Mini-PendantThe mini-pendant displays folders as shown below.Key: [PRO][dir1 ][dir2 ]These are folders.Pressing [OK] calls up the "Functions" screen that lists the following.SearchPRO: Search for a specified program name in the current folder.Display: Show the property of the selected program. Pressing this with a folderbeing selected shifts the screen to the inside of that folder.UpFolder: Shift to the upper folder from the current folder. If the current folder isalready the root folder, nothing happens.NowFolder: Show the current folder.3.2.5.3 Staring Programs from I/OAn I/O can start only PAC programs located in the root. It cannot start programs in afolder even they have the name "PRO*."3.2.5.4 Supervisory TasksThe folder feature added enables supervisory tasks having the same name to coexistin a robot controller, as long as those tasks are located in different folders. The numberof supervisory tasks allowed is 32 (TSR0 to TSR31).Up to 32 supervisory tasks can run simultaneously independent of normal taskprograms. If more than 32 supervisory tasks are made active simultaneously, the error"7799: The maximum number of TSR was exceeded." occurs, terminating all programsincluding supervisory tasks.3-50
Chapter 3 General Introduction to Operation Modes and Additional Functions3.3 Teach Check Mode (TP/MP)Teach check mode allows you to make a final check of programs (which haveundergone teaching) with the teach pendant or mini-pendant in automatic operationunder the following restrictions:- The maximum robot speed is 10% or less of the maximum speed defined in Automode.NOTE: The global type of controller limits the maximum speed of the robot arm to250 mm/s or below at the flange (mechanical interface) or the TCP point in Manual orTeach check mode.- To run a task program, hold down both deadman switch and OK key.Two types of teach check are available--Cycle check and Step check.Cycle check executes the selected task program from the current program line to theend by a single cycle; Step check executes the selected program from the currentprogram line by a single step.CAUTION: Before starting teach check operation, be sure to confirm that all personsare out of the restricted space of the robot. The robot will automatically run.NOTE: Two or more task programs cannot execute concurrently in Teach check mode.Therefore, any motion command specifying concurrent execution of other programswill be ignored.Run the robot in Teach check mode whenYou want to run the robot automatically using a task program while physically near therobot, in order to check or modify the object points and passes you have defined inteaching, while ensuring safety.3-51
[ 1 ] Cycle checkTo monitor the program contents during cycle check, press [F11 Display.] (afterpressing the shift key if necessary) on the top screen or press the Display. button at thebottom of the Program List window.Operating procedure• From the teach pendantStep 1 Set the mode selector switch to the TEACHCHECK position.The teach check icon appears in the leftmost area of the status bar.F1Step 2 Press [F1 Program].The Program List window appears as shown below.Step 3 Select the task program you want to check, by using the cursor keys or jog dial or bytouching the screen directly.The selected program will become highlighted.F43-52
Chapter 3 General Introduction to Operation Modes and Additional FunctionsStep 4 Press the MOTOR key to turn the motor on.The MOTOR lamp comes on.Step 5 On the screen shown in Step 3, press [F4 CycStart].The system message dialog box appears as shown below.Step 6 While holding down the deadman switch, press the OK key, and then keep both ofthem depressed until the execution is completed.If you release either one of the deadman switch and OK key, the robot comes to ahalt.Step 1• From the mini-pendantRefer to Chapter 6, Section 6.2.10, "(4.1) Cycle Start."3-53
[ 2 ] Step checkTo monitor the program contents during step check, press [F11 Display.] (after pressingthe shift key if necessary) on the top screen or press the Display. button at the bottomof the Program List window.Operating procedure• From the teach pendantStep 1 Set the mode selector switch to the TEACHCHECK position.Step 2 Press [F1 Program].F1The Program List window appears as shown below.Step 3 Select the task program you want to check, by using the cursor keys or jog dial or bytouching the screen directly.The selected program will become highlighted.F63-54
Chapter 3 General Introduction to Operation Modes and Additional FunctionsStep 4 Press the MOTOR key to turn the motor on.The MOTOR lamp comes on.Step 5 On the screen shown in Step 3, press [F6 StpStart] (or the right-arrow cursor key).The system message dialog box appears as shown below.Step 6 While holding down the deadman switch, press the OK key, and then keep both ofthem depressed until the execution is completed.If you release either one of the deadman switch and OK key, the robot comes to ahalt.Step 1• From the mini-pendantRefer to Chapter 6, Section 6.2.10, "(4.2) Step Start and Step Back."3-55
[ 3 ] Step Back FunctionThis function steps backwards the current program executed by Step Start or CycleStart, one instruction at a time.The Step Back function is diagrammatically shown below.0001 PROGRAM PRO10002 TAKEARM0003 Robot motion command0004 Non-robot motion command0005 Robot motion command0006 Non-robot motion command0007 Non-robot motion command0008 Robot motion commandStep Start or CycleStart• All stepsexecuted• Cursor : blue• DownwardtriangleStep Back• Only robotoperationsexecuted• Cursor :neutral green• UpwardtriangleStep Start or CycleStart• Only robot operationsexecuted• Cursor : green• Downward triangle• Execute each step• Cursor : blue• Downward triangleExecuting Step Back command steps backwards the program. During Step Backoperation, only robot motion commands, TAKEARM, and GIVEARM (Refer to thePROGRAMMER’S <strong>MANUAL</strong> I.) will be executed. Other commands will not be actuallyexecuted, and only the line number will step back. The settings relating to end-effector,workpiece, and speed made when Step Start or Cycle Start was executed will bereflected on Step Back operation.If control returns to TAKEARM, GIVEARM will be executed; if it returns to GIVEARM,TAKEARM will be executed.If Step Start or Cycle Start is executed after Step Back, only robot motion commands,TAKEARM, and GIVEARM are executed until the step at which Step Back wasexecuted (Tool, work and speed settings are as for Step Back). At subsequent steps,all commands will be executed.Cursor color in the Program List window and in the coding table• Neutral green in Step Back operation• Green in Step Start and Step Start operation from Step Back until the Step Backstarted step• Blue in cases other than the above two.The triangle on the left of line number shows the direction of operation. Downwardtriangle indicates forward stepping and the upward triangle indicates backwardstepping.3-56
Chapter 3 General Introduction to Operation Modes and Additional FunctionsNOTE 1: Restrictions on Step BackThis function traces the commands when Step Start or Cycle Start is executed. Basedon that data, the Step Back function executes those commands. However, there is alimit for recording data. A maximum of 100 commands can be recorded and when thelimit is exceeded the old commands will be erased in sequence and new onesrecorded.The Step Back function can work only within a program, since data that has beenrecorded will be cleared if any other program is selected and executed. Note thatprograms that are called by CALL or GOSUB are not being treated as other programs,so the Step Back function can work within those programs.If a specified line is executed, the control cannot return to the lines preceding thespecified line.3-57
NOTE 2: About Skipping InterruptSkip Interrupt (See the CONTROLLER <strong>MANUAL</strong>, Interruption Skip (Input) signal) isineffective during Step Start or Cycle Start between two consequent Step Backcommands, except in the following situation.• When the robot action is temporarily stopped during Step Start or Cycle Start (whenthe program list or the program list cursor is blue), and the same robot actioncommand is executed after Step Back command.0001 PROGRAM PRO1• Step run or cycle run• Cursor: Blue0002 TAKEARM0003 INTERR<strong>UP</strong>T ON0004 Robot operation command0005 Robot operation command0006 Robot operation command0007 INTERR<strong>UP</strong>T OFFMovement stop(Uncompletedoperation).• Step back from theposition wheremovement is stopped• Cursor: Neutral greenInvalid• Step run or Cycle run• Cursor: GreenInvalidValidOperationCompletion3-58
Chapter 3 General Introduction to Operation Modes and Additional FunctionsOperating procedure• From the teach pendantStep 1 Set the mode selector switch to the TEACHCHECK position.Run a single step or a single cycle of the program.Step 2 Press [F5 StepBack].You may step backwards the program by using the left-arrow cursor key.When the cursor moves to the line where you want to run Step Back, the cursor turnsneutral green. Also, the triangle on the left of the line number comes upward.F5Step 3Press [F5 StepBack] again.You may step backwards the program by using the left-arrow cursor key.The system message dialog box appears as shown below.3-59
Step 4While holding down the deadman switch, press the OK button.Only when both of them are depressed, commands will be executed. If you releaseeither one of the deadman switch and OK button, the program immediately stops.NOTE: When running the robot for checking, always be ready to press the STOPkey.The cursor goes one step (command) back, and the cursor turns neutral green (Thetriangle on the left of the line number shows upward direction).Step 5Repeat Steps 3 and 4 to step backwards the program.Step 6After Step Back, press [F6 StpStart] (or the right-arrow cursor key) or [F4 CycStart].The screen shows the following state.The cursor moves to the line that performs Step Start or Cycle Start and triangleshows the downward direction.3-60
Chapter 3 General Introduction to Operation Modes and Additional FunctionsStep 7Press [F6 StpStart] (or the right-arrow cursor key) or [F4 CycStart] again.The system message dialog box appears as shown below.Step 8While holding down the deadman switch, press the OK button.Only when both of them are depressed, commands will be executed. If you releaseeither one of the deadman switch and OK button, the program immediately stops.NOTE: When running the robot for checking, always be ready to press the STOPkey.Step 9Repeat steps 7 and 8, all the time confirming that the program is running safely.Step 1• From the mini-pendantRefer to Chapter 6, Section 6.2.10, "(4.2) Step Start and Step Back."3-61
Selecting Commands To Be Executed During Step Back OperationYou may select commands to be executed during Step Back operation from thefollowing two options:1) Robot motion commands only2) All commandsHowever, even if you select "All commands", only robot motion commands, TAKEARM,and GIVEARM will be executed during Step Back operation.To change the current setting, turn the mode selector switch to the <strong>MANUAL</strong> positionand call up the Step Back Setting window.Access: [F1 Program]—[F6 Aux.]—[F9 StpBack.]The setting you made here will go into effect when you restart the robot controller.NOTE: With the mini-pendant, you cannot select commands to be executed duringStep Back operation. The "Robot motion commands only" remains effective unless youchange it with the teach pendant.3-62
Chapter 3 General Introduction to Operation Modes and Additional Functions[ 4 ] Execution by Specifying LineThis function allows you to execute Teach Check from any line.• You can execute cycle check and step check together.This operation is necessary whenYou want to confirm or correct the operation subsequent to the specified line, whileexecuting teach check.Note regarding line specification:• If the specified line is a comment line or a blank line which cannot be executed, thenthat line will be ignored and the first executable line from that line is considered.• When CALL command is executed and CALL destination program is displayed in theteach pendant, the line specification related to the displayed program is notpossible.Before specifying the line, select the corresponding program from program list.• When you use local variable without declaring local variables or initializing variablesor without executing commands for getting semaphore, or perform calculation andmotor operation, error may occur.NOTE: Local variables are preserved in memory when memory is released when userprograms are transferred from WINCAPSIII and compiled in teach pendent andcommands declaring local variables like DIM or DEFINT are executed. The localvariables once preserved remain in memory till the memory is released. Hence it ispossible to use these variables by executing local variable declaration commands justonce.Even if the memory for local variable is preserved, if the local variables are notinitialized (or value substituted), the values are considered indeterminate.NOTE: Two or more task programs cannot execute concurrently in Teach check mode.Therefore, any motion command specifying concurrent execution of other programswill be ignored.NOTE: With the mini-pendant, you cannot specify a line for Teach Check.3-63
Executing by Specifying an Arbitrary Line• From the teach pendantThe operating procedure given below is common to Cycle Check and Step Check.Step 1 Perform Steps 1 through 3 in [ 1 ] Cycle Check or [ 2 ] Step Check.Step 2 Press [Display.] in the window, and the contents of the program appear as shownbelow.F3Step 3 Press [F3] or select [Jump To] in the window, and the numeric keypad will appear.3-64
Chapter 3 General Introduction to Operation Modes and Additional FunctionsStep 4 From the numeric keypad, enter the desired number and press the OK button.The numeric keypad will disappear and the cursor will move to the specified line.Step 5 Go to Step 4 in [ 1 ] Cycle Check or [ 2 ] Step Check.3-65
3.4 Auto Mode (TP/MP)In Auto mode, the robot can run automatically. Running the desired program in therobot controller from the teach pendant or mini-pendant is called "internal automaticoperation." Switching the control to external equipment and running the robot fromexternal equipment is called "external automatic operation."CAUTION: Before proceeding to automatic operation, be sure to set the reduced ratiosof the programmed speed, acceleration, and deceleration.NOTE: To place the robot in Auto mode, system-input port "Enable Auto" is required tobe short-circuited (ON).If you turn the mode selector switch of the teach pendant or mini-pendant to the AUTOposition with the "Enable Auto" port opened (OFF), then error message 21F3 appears.Confirm that no one is within the restricted space of the robot, short-circuit the "EnableAuto" port, remove the error, and then proceed to automatic operation. For details on"Enable Auto," refer to the CONTROLLER <strong>MANUAL</strong>.3.4.1 Starting Internal Automatic Operation (TP/MP)You may run the selected task program from the teach pendant or mini-pendant in anyof the three types--Single-cycle run, Continuous run, and Single-step run, which aredescribed in the table below.Table 3-3. Three Types of Runs in Internal Automatic OperationTypes of RunsExplanation1 Single-cycle run Executes the selected program from the beginning to theend once.2 Continuous run Executes the selected program continuously.3 Single-step run Executes the selected program from the current programline by a single step.CAUTION: Before proceeding to internal automatic operation, be sure to readSAFETY PRECAUTIONS, Section 4.7 "Precautions for automatic operation" given atthe beginning of this manual. Starting internal automatic operation will run the robot.Perform internal automatic operation whenYou check the robot motion or run the robot independently without using a PLC or otherexternal equipment.3-66
Chapter 3 General Introduction to Operation Modes and Additional FunctionsStep 1[ 1 ] Single-cycle runBefore proceeding to a single-cycle run, perform set the reduced ratios of theprogrammed speed, acceleration, and deceleration.CAUTION: At the start, set the reduced ratio of the programmed speed at 20% orless. If you run the robot manually at high speeds from the beginning, you maymistakenly strike the robot against the surrounding objects.Operating procedure• From the teach pendantSet the mode selector switch to the AUTO position.Step 2 Press [F1 Program].F1The Program List window appears as shown in the next step.3-67
Step 3 Select the task program you want to run, by using the cursor keys or jog dial or bytouching the screen directly.The selected program will become highlighted.Step 4 Press the MOTOR key to turn the motor on.The MOTOR lamp comes on.Step 5 Check that the program you have selected is highlighted, press [F4 Start.].F4The system message dialog box appears as shown in the next step.3-68
Chapter 3 General Introduction to Operation Modes and Additional FunctionsStep 6 In the system message dialog box, press the OK button to select Single-cycle.After completion of a single-cycle run, to run the program again, go back to Step 2.NOTE: The elapsed time on display refers to the time length from the start to end ofthe program including temporary stop time caused by Step stop or Halt.Step 1• From the mini-pendantRefer to Chapter 6, Section 6.2.10, "(2) Starting a program."3-69
[ 2 ] Continuous runBefore proceeding to a continuous run, perform set the reduced ratios of theprogrammed speed, acceleration, and deceleration.CAUTION: At the start, set the reduced ratio of the programmed speed at 20% orless. If you run the robot manually at high speeds from the beginning, you maymistakenly strike the robot against the surrounding objects.Operating procedure• From the teach pendantStep 1 Set the mode selector switch to the AUTO position.Step 2 Press [F1 Program].F1The Program List window appears as shown in the next step.3-70
Chapter 3 General Introduction to Operation Modes and Additional FunctionsStep 3 Select the program you want to run, by using the cursor keys or jog dial or bytouching the screen directly.F4The selected program will become highlighted.Step 4 Press the MOTOR key to turn the motor on.The MOTOR lamp comes on.Step 5 On the above screen, press [F4 Start.].The system message dialog box appears as shown below.3-71
Step 6 In the system message dialog box, select Continuously by using the cursor keys orjog dial or by touching the screen directly. Then press the OK button.NOTE: The robot will continue to run unless you use any of robot stop, halt (orstop), step stop, and cycle stop. For details on those stop types, refer to Section3.4.2.NOTE: The elapsed time on display refers to the time length from the start to end ofthe program including temporary stop time caused by Step stop or Halt.Step 1• From the mini-pendantRefer to Chapter 6, Section 6.2.10, "(2) Starting a program."3-72
Chapter 3 General Introduction to Operation Modes and Additional Functions[ 3 ] Single-step runBefore proceeding to a single-step run, perform CAL operation and set the reducedratios of the programmed speed, acceleration, and deceleration.CAUTION: At the start, set the reduced ratio of the programmed speed at 20% orless. If you run the robot manually at high speeds from the beginning, you maymistakenly strike the robot against the surrounding objects.Operating procedure• From the teach pendantStep 1 Set the mode selector switch to the AUTO position.Step 2 Press [F1 Program].F1The Program List window appears as shown in the next step.3-73
Step 3 Select the task program you want to run, by using the cursor keys or jog dial or bytouching the screen directly.F6The selected program will become highlighted.Step 4 Press the MOTOR key to turn the motor on.The MOTOR lamp comes on.Step 5 On the above screen, press [F6 StpStart] (or the right-arrow cursor key).The system message dialog box appears as shown below.3-74
Chapter 3 General Introduction to Operation Modes and Additional FunctionsStep 6 In the system message dialog box, press the OK button.The selected program executes a single step.NOTE: After completion of a single-step run, to repeat a single-step run, repeatSteps 5 and 6.Step 1• From the mini-pendantRefer to Chapter 6, Section 6.2.10, "(3) Step Start."3-75
3.4.2 Stopping Internal Automatic Operation (TP/MP)You can stop internal automatic operation from the teach pendant or mini-pendant byany of Cycle stop, Step stop, Halt (Stop), and Robot stop (Note), which are described inthe table below.Table 3-4. Four Types of Stops in Internal Automatic Operation1 Cycle stopTypes of StopsTP: [F3 CycStop]MP: CYCLE STOP keyCycle stoptriggeredExplanationStops the robot afterexecuting the laststep of the taskprogram.When stoppedMotorAutoStep No.modeRestartON ON Last step Select theprogram again,and you may starta single-step runor single-cycle runfrom the head ofthe program.RestartRobotstoppedhere2 Step stopTP: [F3 StepStop]MP: STEP STOP keyStep stoptriggeredRobotstoppedhereInterrupts the runningtask program midwayafter executing thestep in which the stepstop key is pressed.ON ON StepexecutedYou may start asingle-step run orsingle-cycle runfrom the stepimmediatelyfollowing thecurrent step.Restart3 Halt (Stop)TP: [F1 Halt] or STOP keyMP: HALT key or STOP keyRestartHalt (stop)triggeredRobotstoppedhereImmediatelyinterrupts the runningtask programselected or allrunning taskprograms midway themoment [F1 Halt] orSTOP key is pressed,respectively.ON ON Step inprogressYou may start asingle-step run orsingle-cycle runfrom the currentstep again.3-76
Chapter 3 General Introduction to Operation Modes and Additional FunctionsTypes of StopsExplanationMotorWhen stoppedAutomodeStep No.Restart4 Emergency stopTP: Emergency stop buttonMP: Emergency stop buttonEmergencystop triggeredPressing theemergency stopbutton immediatelystops all running taskprograms midwayand shuts down themotor power.OFF OFF Step inprogressTurn the motoron, and you maystart a single-steprun or single-cyclerun from the headof the programagain.Robotstoppedhere3-77
[ 1 ] Cycle Stop (TP/MP)Cycle stop can only be triggered from the teach pendant or mini-pendant.Operating procedure• From the teach pendantStep 1 Press [F3 CycStop].F3The current program will execute up to the last step and then the robot will stop.Step 1• From the mini-pendantRefer to Chapter 6, Section 6.2.10, "(2) Starting a program" and "(3) Step Start."3-78
Chapter 3 General Introduction to Operation Modes and Additional Functions[ 2 ] Step Stop (TP/MP)Operating procedure• From the teach pendantStep 1 Press [F2 StepStop].F2The current program step in progress will execute and then the program will beinterrupted.CAUTION: Before restarting the robot after a Step Stop, confirm that there is norisk of bump or accident in the subsequent robot motion. Restarting the robot after aStep Stop as it was will execute the step immediately following the current stepdisplayed.Step 1• From the mini-pendantRefer to Chapter 6, Section 6.2.10, "(2) Starting a program" and "(3) Step Start."3-79
[ 3 ] Halt (Stop) (TP/MP)Operating procedure• From the teach pendantStep 1 Press [F1 Halt] or STOP key.NOTE: Pressing [F1 Halt] immediately stops the task program selected on theProgram List window; pressing the STOP key immediately stops all task programs.F1The current program step in progress will be immediately interrupted so that therobot comes to a halt.CAUTION: Before restarting the robot after a Halt, confirm that there is no risk ofbump or accident in the subsequent robot motion. Restarting the robot after a Halt asit was will execute the interrupted step.Step 1• From the mini-pendantRefer to Chapter 6, Section 6.2.10, "(2) Starting a program" and "(3) Step Start."3-80
Chapter 3 General Introduction to Operation Modes and Additional Functions[ 4 ] Emergency stop (TP/MP)Operating procedure• From the teach pendantStep 1 Press the emergency stop button.All running task programs will be immediately stopped so that the robot will stop.CAUTION: The emergency stop function shuts down the motor power; however,the robot may move unexpectedly due to inertia.CAUTION: Before restarting the robot after an emergency stop, confirm that thereis no risk of bump or accident in the subsequent robot motion. Restarting the robotas is after an emergency stop executes the selected program from the beginning.Step 1• From the mini-pendantPress the emergency stop button.All running task programs will be immediately stopped so that the robot will stop.CAUTION: The emergency stop function shuts down the motor power; however,the robot may move unexpectedly due to inertia.CAUTION: Before restarting the robot after an emergency stop, confirm that thereis no risk of bump or accident in the subsequent robot motion. Restarting the robotas is after an emergency stop executes the selected program from the beginning.3-81
3.4.3 Switching to External Automatic Operation (TP/MP)You may switch from internal to external automatic operation from the teach pendant ormini-pendant. External automatic operation allows you to run the robot automaticallyfrom external equipment.Switch to external automatic operation whenYou run the robot automatically from external equipment.Operating procedure• From the teach pendantStep 1 Set the mode selector switch to the AUTO position.Step 2 Press the MOTOR key.The MOTOR lamp comes on.Step 3 Press the shift key on the top screen, and then press the called-up [F10 INT/EXT]instead of [F4 I/O].F4(F10)The system message dialog box appears as shown in the next step.3-82
Chapter 3 General Introduction to Operation Modes and Additional FunctionsStep 4 Press the OK button in the system message dialog box shown below.Internal automatic operation has been switched to external automatic operation.NOTE: After having carried out Steps 1 through 4, pressing [F10 INT/EXT] togglesbetween external and internal automatic operation.• From the mini-pendantStep 1 Refer to Chapter 6, Section 6.2.9.3-83
3.4.4 Stopping External Automatic Operation (TP/MP)You may stop external automatic operation from the teach pendant or mini-pendantusing the same procedure as internal automatic operation. Refer to Section 3.4.2.You may also stop external automatic operation from external equipment. For details,refer to the CONTROLLER <strong>MANUAL</strong>.3-84
Chapter 3 General Introduction to Operation Modes and Additional Functions3.4.5 Continue FunctionIf any of the following conditions arises in automatic operation, the Continue functionsuspends the currently running program in the "Continue-stopped" state. It enables the"Continue start" and "Automatic position restoration."Conditions that trigger a "Continue stop"(1) "Halt (Stop) " or "Step Stop" to all tasks(2) Motor OFF(3) Error at Level 2(4) "Emergency stop" triggered by pressing the emergency stop button on the teachpendant (provided that the Continue parameter is set to "1: Continue")(5) External emergency stop input signal (system input signal) released (provided thatthe Continue parameter is set to "1: Continue)"Continue start"Executing the "Continue start" restarts all programs that have "Continue-stopped."Automatic position restorationExecuting "Continue start" automatically restores the robot to the position where theprogram has been halted.Usage of the Continue functionIf the user manually moves the robot arm, rearranges a workpiece that the robot handhas mistakenly unchucked, and uses the Continue function, then the Continue functionrestores the robot arm to the halted position and restarts the halted programs, providedthat the robot arm lies within the valid area.3-85
3.4.5.1 Parameters for the Continue functionThe Continue function enables "Automatic position restoration" and "Continue start."The user can access those Continue parameters listed in the table below.ContinueUser-accessible Continue parametersParameter Setting DescriptionAutomatic positionrestorationAllowance forposition restoration0: Disable(Factory default)"Continue stop" is effective in any of thefollowing.(1) "Halt (Stop)" or "Step Stop"(2) Motor OFF(3) Error at Level 21: Continue "Continue stop" is effective in any of thefollowing.(1) to (3) above(4) When the emergency stop button on theteach pendant is pressed.(5) When an external emergency stop inputsignal (system input signal) is released.1: Enable(Factory default)Auto position restoration takes place during"Continue start." Set "0" if this function is tobe made ineffective.0: Disable No automatic position restoration takesplace.J1 to J6(Factory default is10000 which means10 degrees.)This parameter shows the valid area forperforming Auto Position Correction. Thevalid area is expressed in 10 3 degrees.• Access to the Continue parameters from the teach pendantAccess: [F1 Program]—[F6 Aux.]—[F7 Continue] from the top screen of the teachpendantChange the Continue parameters from the teach pendant.3-86
Chapter 3 General Introduction to Operation Modes and Additional Functions• Access to the Continue parameters in WINCAPSIIILog on at Programmer level.Continue and Automatic position restoration parametersChoose Project | Parameters | Interpreter tab.Change the "Robot Stop mode for continue-start" and "Auto position restoration"parameters.Allowance for position restorationChoose Project | Parameters | Path. tab.Change the parameters of the allowable area range for position restoration.3-87
3.4.5.2 "Continue start" operating procedureStop input signal typeEmergency stop commandfrom teach pendantExternal emergency stopProtective stop(only in global type)InstantaneousstopStep stop"Continue start" is available only when there are "Continue-stopped" programs.Listed below are the program stop conditions that differ depending upon the stop inputsignal type.NOTE: "Continue-stopped" programs can be restarted by "Continue start" withoutContinue start permission output signal issued.Program Stop States by Stop Input Signal TypeSupportingMini I/O (CN5)YesYesContinue startContinueparameter setting Program stop state permission signal(NOTE)0: Disable On halt ON1: Continue Continue-stopped OFF0: Disable On halt ON1: Continue Continue-stopped OFFYes Continue-stopped ONAll programs Continue-stopped ONSpecifiedNoprogramsTemporary-stopped OFFAll programs --- Continue-stopped ONSpecifiedYesprogramsStep-stoppedOFFError at Level 2 Continue-stopped ONYesOn haltOFFAbnormal stop Error at Level 3or higherNOTE: To use a Continue start permission output signal in Mini I/O dedicated mode, change the parameterfor port 24 from Dedicated output (factory default) to Continue start permission. (Refer to Section 3.4.5.3.)• Continue start from the teach pendantPressing the [F10 Continue] starts a program whose status is Continue Stop.Continue Start from the Teach Pendant3-88
Chapter 3 General Introduction to Operation Modes and Additional Functions• Continue start from I/OsListed below are the operating procedures for Continue start using I/O signals, whichdiffer depending upon the I/O mode type.These procedures can start programs whose status is in Continue Stop.Procedures for Continue StartI/O modeMini I/O dedicated modeI/O standard modeI/O compatibility mode(For RC7M controller, this mode canbe selected when I/O ports have beenexpanded with an I/O expansionboard.)How to Execute Continue StartRestart using I/O commandCommand area Data area011Continue Start---Restart using I/O commandCommand area Data area 1 Data area 2 Status area0001Program operation00000100Continue start--- ---One millisecond after turning the Continue start signal ON, turn theProgram start signal ON.NOTE: In Continue start, the program number is ignored.3.4.5.3 Enabling Continue start permission signal (In Mini I/O dedicatedmode)Access: [F4 I/O.]—[F6 Aux.]—[F1 Set H/W]Setting the "40: User or System output setting" parameter to "1" on the I/O HardwareSettings window enables Continue start permission signal output."40: User or System output setting" parameter0: Disables Continue start signal output (factory default)1: Enables Continue start signal outputI/O Hardware Settings WindowContinue Start Permission Signal Enabled3-89
3.4.5.4 Resetting programs• From the teach pendantThe teach pendant is capable of resetting programs. Pressing [F7 ProgRst.] stops thecurrently running programs and prompts the user to choose "this program" or "allprograms" to be reset.Resetting Program(s) from the Teach Pendant• From I/OsUsing I/Os can reset programs if not "On halt." The program resetting procedures listedbelow change the programs from "Continue-stopped" to "On halt."Program Resetting ProceduresI/O modeHow to Reset ProgramsMini I/O dedicated modeUse I/O commands.Command area101Reset all programs.Data area---I/O standard mode(For the RC7M controller, thismode is available when I/O portshave been expanded with an I/Oexpansion board.)I/O compatibility mode(For the RC7M controller, thismode is available when I/O portshave been expanded with an I/Oexpansion board.)Use I/O commands.Command area Data area 1 Data area 2 Status area0001Program operation01000000Reset.1000000000000000 ---Turn the Program Reset signal ON and one millisecond later, turn theOperation Preparation Start signal ON.3-90
Chapter 3 General Introduction to Operation Modes and Additional Functions3.4.5.5 Continue start errorsListed below are the errors that could occur in Continue Start.NOTE: If an error at Level 3 or higher occurs, the "Continue-stopped" programs will beautomatically changed to "On halt" so that "Continue start" becomes no longerpossible.Error code Error message Level Description2481 Arm-end position outof allowable range3 In Continue-start operation, the currentrobot arm position is out of the allowancespecified for automatic position restoration.27A8 Continue-start error. 3 Attempted to execute Continue start whenit is not permitted.When the Continue start permission signalis ON, Continue start is possible.27A9 Continue-start failed. 4 During execution of Continue start, anyimpermissible processing has beeperformed.3-91
3.4.6 SS (Safe Start) FunctionIn automatic operation, if the inaction status of robot exceeds a specific time becauseof awaiting signal from external device, then for the sake of safety, this function eithercarries out Continue Stop or it makes the speed of restart operation slow for apre-determined time.Robot is waiting for signalExceeding specified timeSS FunctionForced"Continue Stop."orMaking the speed ofrestart operation slow fora pre-determined time[ 1 ] This function is useful whenEnsuring further safety, as a part of safety function of the equipment.Examples of processes unsafe for an operator when work is damaged by robot aregiven below.(1) Work (product) is damaged.(2) No output of signal from the sensor indicating presence of work.(3) Robot is in a state of inaction and awaiting signal.(4) The operator mistakes robot's inaction as robot being in "Stop Operation"(5) The worker rearranges the product that was damaged without firsttemporarily stopping the operation of the robot.(6) Output of signal from the sensor indicating presence of work.(7) The robot begins the next operation immediately at normal high speed.↓These conditions can pose potential danger to the operator.In this way, with the help of this function you can stop the process automatically ormake the speed of next operation slow for a pre-determined time when the inactionperiod of the robot exceeds a specific time because of awaiting signal from externaldevice and render conditions safe.[ 2 ] Notes for SS function• When you are using SS function, perform a preliminary test (including those ofperipherals).Particularly, make sure that the there is no danger of the speed of the robot in SSfunction and the speed of the peripherals not matching and therefore causing mutualinterference.• This function is very much a part of safety function. Please read "For safe use"before actual designing or operation for safe use of the robot.3-92
Chapter 3 General Introduction to Operation Modes and Additional Functions[ 3 ] Operation mode of SS functionTypes of modeThe SS function works in the following two operation modes.(1) Stop ModeWhen inaction period exceeds a specific period, ‘Continue Stop’ is executed in thismode.(2) Slow modeWhen inaction period exceeds a specific period, the speed of next operation isslow for a pre-determined time in this mode.• Stop mode• When inaction period exceeds a specific period, ‘Continue Stop’ is executed in thismode.This specific time is called as "TC period." Also, period of robot inaction is called"Inaction Period." The time is counted from 0 from the moment when the externaldevice temporarily stops the operation of arm or tool. When TC period is exceeded,Continue Stop is carried out.From the time TC period is exceeded till the time ‘Continue Stop’ is executed, themode is said to be ‘SS Mode’• If the MOVE operation is started within the TC period, the time count of inactionperiod is stopped.• After "Continue Stop", when operation is restarted and if again it goes into inactionstatus, inaction period count will be restarted from 0The figure below depicts the Stop Mode operation.In this example, inaction period count is started after the end of MOVE operation ofPRO1 and when TC time is exceeded, "Continue Stop" is executed.3-93
PRO1 PRO2 PRO3TAKEARMMOVEIn this figure, if Continue Stop isexecuted only for PRO1, PRO3 willexecute.To prevent it, whenever TC time iselapsed, execute Continue Stop for allprograms.GIVEARMI1=I2+I3TAKEARMMOVETC time elapseContinue Stop• Slow modeWhen inaction period exceeds a specific period, the speed of next operation is slowfor a pre-determined time in this mode.This fixed time is called "TS period." From the time TC period is exceeded till the endof TS period, the mode is said to be ‘SS Mode’• Speed of slow operation is called "Slow speed."• All operation commands which are run in SS modes run slow.• If all the programs are stopped or all programs are closed in SS operation, then theSS mode ends.• Once the slow operation is started, an icon that indicates the SS mode is displayedin the graph in the Speed Setting window as shown below.3-94
Chapter 3 General Introduction to Operation Modes and Additional Functions< Operation example >The following figure shows an example of Slow Mode operation.In this example, after the end of MOVE1 operation of PRO1, the counting of inactionperiod is started and after TC period is exceeded, the mode switches to SS mode.Then, the slow operation of MOVE1 of PRO2 is started. MOVE2 of PRO2 is carried outslowly because it is started in the TS period.From MOVE2 of PRO1 onwards, the actions take place at original speed.PRO1PRO2TAKEARMMOVE1GIVEARMTAKEARMMOVE2TAKEARMMOVE1MOVE2GIVEARM.TC time elapseStart of SS modeTS time elapseEnd of slow operationFrom here, normal speedoperation3-95
• Setting procedure of SS function operation mode(1) Set the mode selector switch to the <strong>MANUAL</strong> position.(2) Turn the motor off.(3) Press [F1] or select [Program] in the window.The Program List window appears as shown below.F63-96
Chapter 3 General Introduction to Operation Modes and Additional Functions(4) In the Program List window, press [F6 Aux.].The Auxiliary Functions (Program) window appears as shown below.(5) Press [F8 SS Mode.].The Safety Start Setting window appears.(6) Select the "Safety start mode" by using the cursor keys or jog dial or by touchingthe screen directly.The "Safety start mode" will become highlighted.(7) Set the desired value and press the OK button.To disable the SS function : 0Slow mode : 1Stop mode : 23-97
[ 4 ] Setting time and speedYou may set the TC period, TS period and Slow speed in either of the following twoways.(1) By direct entry of valuesSet the TC time, TS time and slow speed from the teach pendant.This method should be used when you want to enable the SS function for alloperations during automatic operation.(2) By entering commands in the programInsert ndTC and ndTS commands in programs.This method should be used when you want to enable the SS function in aparticular operation during automatic operation.NOTES• Do not use both the above ways concurrently. Doing so will make you confused as towhich settings made in those ways are effective. It is DANGEROUS.• The specified value is effective even if you turn the robot controller off.• The most recently executed value will becomes the default thereafter.3-98
Chapter 3 General Introduction to Operation Modes and Additional FunctionsBy direct entry of valuesSetting the TC period(1) Follow steps (1) through (5) in "Setting procedure of SS function operation mode."(6) Select the "TC time" by using the cursor keys or jog dial or by touching the screendirectly.The "TC time" will become highlighted.(7) Enter an arbitrary TC period and press OK.You may enter any value from 0 to 600 seconds. The factory default is 60 seconds.NOTE: Setting "0" will disable the SS function. The SS function is kept disableduntil you enter a value other than 0 to the TC time.3-99
Setting the TS period(1) Follow steps (1) through (5) in "Setting procedure of SS function operation mode."(6) Select the "TS time" by using the cursor keys or jog dial or by touching the screendirectly.The "TS time" will become highlighted.(7) Enter any TS time and press OK.You may enter any value from 3 to 30 seconds. The factory default is 5 seconds.3-100
Chapter 3 General Introduction to Operation Modes and Additional FunctionsSetting the Slow speed(1) Follow steps (1) through (5) in "Setting procedure of SS function operation mode."(6) Select the "Reduced speed for safety start" by using the cursor keys or jog dial orby touching the screen directly.The "Reduced speed for safety start" will become highlighted.(7) Enter the desired slow speed and press OK.You can enter any value from 1% to 10%. The factory default is 10%.3-101
By typing the commands in programsTC time setting command[Function]Set the TC time[Prototype][Explanation][Macro definition][Related Function]ndTc ()Same as the TC function of any programming language.Sets the TC time.Valid values for TC time are 0 to 600 seconds. Factory setting is60 seconds.When 0 is set, it is equivalent to executing TC OFF of aprogramming language. file is required.ndTS3-102
Chapter 3 General Introduction to Operation Modes and Additional FunctionsTS time and slow speed setting command[Function]Sets the TS time and Slow speed.[Prototype][Explanation][Macro definition][Related Function]ndTS (< TS time >, < Slow speed>)Same as the TS function of any programming language.Sets the TS time and Slow speed.Valid values for TS time are 3 to 30 seconds. Factory setting is 5seconds.Valid values for Slow speed are 1% to 10%. Factory setting is10%. file is required.ndTC3-103
[ 5 ] Dedicated output in SS functionFunctionOutputs in SS mode.This function is enabled only if set in "Slow mode."Port numberCompatibility mode : Connector No. 29 of CN10.Standard mode : Connector No. 11 of CN10.How it worksThis function gives the indication to the operator that the operations are taking place in"SS mode" by ringing a buzzer or by making the LED ON when this signal is ON.ONWhen operation is in SS mode.OFFWhen TS time is exceeded and operation is not in SS mode.NOTE: This signal is OFF even in slow operation if TS time is exceeded. Theoperations subsequent to signal OFF are carried out at original speed.3-104
Chapter 3 General Introduction to Operation Modes and Additional Functions3.4.7 Break Point Function (TP)You may set a break point at any program step in programs. If a program is running andencounters a break point, it will immediately stop. The step where a break point is setcannot be executed.You can set a break point only from the teach pendant.Max. number of break points thatcan be setOperation modes in break pointstake effectRequirements for setting breakpoints32 points in all programsExternal automatic Cycle startInternal automatic Cycle startTeach check Cycle startExternal automatic Highlighted stepInternal automatic Highlighted stepManualAny stepTeach check Highlighted stepBreak point stop modeWhen a program encounters a break point step, you may choose either of the followingtwo stop modes:(1) Immediate halt of that program in which the break point is set(2) Immediate halt of all running programsProgram status when stopped at the break pointWhen the program is stopped at the break point, the teach pendant screen will displaythe following 2 status.(1) Halt at BP (Break point): Only the program in which the break point is set isstopped (factory default)(2) Continue Stop at BP (Break point): Control stops the program at the program stepwhere Continue Start is possible(Halt at the BP is functionally equivalent to Halt. Continue Stop at BP is functionallyequivalent to Continue Stop.)Saving the break point settingsAll break points you have set will be saved even if the controller power is switched OFF,except for the following:Break points will be released when:• You clear the break point• You clear all the break points• The program is edited• You delete the program• You recompile the program with the teach pendant• The controller receives program data from WINCAPSIII.3-105
Restarting after BP stopRestart the program at the BP stopping step to proceed the robot operation.According to the BP stop status, the program will restart in either of the following twoways:Halt at BP: Only the program in which the break point is set will be restart.Continue Stop at BP: Programs will Continue Start if possible.When this operation neededThis operation is needed when you want to stop the program at any step in a program.Setting a break point• From the teach pendantStep 1 Set the mode selector switch to the <strong>MANUAL</strong> position.Mode selector switchStep 2 Press [F1 Program].F1The Program List window appears, as shown in the next step.3-106
Chapter 3 General Introduction to Operation Modes and Additional FunctionsStep 3 Select a program in which you want to set break points.The selected program will become highlighted.F5Step 4 Press [F5 Edit.] or [Display].The program steps appear as shown below.3-107
Step 5 Select a step where you want to set a break point.The selected step will become highlighted.BP buttonStep 6 Press [BP].The BreakPoint Setting window appears as shown in the next step.Step 7 Select "Set BreakPoint" and press the OK button.A red circle will appear at the left side of line number where the break point is set.3-108
Chapter 3 General Introduction to Operation Modes and Additional FunctionsClearing the break point• From the teach pendantStep 1 To clear the break point already set, choose the program step following Steps 1 to 5given in the above section. The next screen will appear.The step, where the break point is set, is highlighted.Step 2 Press [BP].Step 3 Select "Reset BreakPoint" and press the OK button.The red circle marked at the left side of the line number disappears and the breakpoint will be cleared.3-109
Setting the Break Point Stop mode• From the teach pendantStep 1 Set the mode selector switch to the <strong>MANUAL</strong> position.Mode selector switchStep 2 Press [F1 Program] on the top screen.F1The Program List window appears as shown below.Step 3 Press [F6 Aux.].F6The Auxiliary Functions (Program) window appears as shown in the next step.3-110
Chapter 3 General Introduction to Operation Modes and Additional FunctionsStep 4 Press [F5 BP Settng].The Select BreakPoint setting window appears as shown below.Step 5 Select whether to Stop only a task on BP or to Stop all tasks, then press OK.3-111
Executing BP (break point) stop operations• Auto modeStep 1 Set a BP (break point) in any step you want to do so.For the setting procedure, see "Setting a break point" given earlier in this section.Step 2 Start the program in which the BP (break point) is set.For program starting, refer to Section 3.4 "Auto Mode."Step 3 The program will halt at the step where the BP (break point) is set.Note 1About Step StartWhen the step to be executed after Step Start is the BP Stet Start, theprogram first Step Stops at that step. After that, if restarted, the program willtemporarily stop at the BP step.3-112
Chapter 3 General Introduction to Operation Modes and Additional Functions• Teach check modeIn teach check mode, there are two types of BP setting display.Red circleGray circleStep in which you can stop at BP by the BP settingStep in which there is BP setting step, however it does not stop at thebreak point• The command of Step Back is effective for only controlling the robotmotion and this step cannot be executed when running any programreferring to the historical record of robot motions.• BP step at the time of step backStep 1 Set a BP (break point) in any step.For the setting, see "Setting a break point" given earlier in this section.Step 2 Cycle Start the program in which the BP (break point) is set.For program starting, refer to Section 3.3 "Teach Check Mode."Step 3 The program will halt at the step in which the BP (break point) is set showing thescreen shown below.Note 1About StepStartWhen the step to be executed after StepStarted is the BP-set step, first stepstops at the BP-set step. After that, if you restart it, the program temporarilystops at the BP.Note 2Any program steps with a gray-circled BP-set will not stop at the BP step afterCycleStarted or StepStarted..3-113
Clearing all break points• From the teach pendantStep 1 Follow Steps 1 to 4 in Break Point setting.(You can choose any program.)Step 2 Press [BP]. The BreakPoint Setting window appears as shown below.Step 3 Select "Clear All BreakPoints" and press the OK button.Red circles marked on all break points will disappear and the break points will becleared.3-114
Chapter 3 General Introduction to Operation Modes and Additional Functions3.4.8 Local Variable-Related Enhancement (TP)3.4.8.1 Referring To or Writing Into Local VariablesThis new local variable-related enhancement allows you to refer to or write into localvariables (integer, floating-point, double-precision, vector, position, joint,homogeneous transform matrix, string, and DEFIO variables) in a program.This enhancement includes the following variable facilities:(1) Quick referenceYou can immediately refer to local variables defined in a program just by specifying adesired program line.(2) Referring to registered variablesYou can refer to local variables as well as global variables. Use this facility when youcannot designate a program line since the program is running or when you want torefer to variables in more than one program.(3) Running a program with local variable argumentsYou can run a program with local variable arguments independently.NOTE: This facility will not be supported for a program with array variable arguments,e.g., PROGRAM SUB1 (li%(10)).(4) Referring to or writing into local variables in WINCAPSIIIIn WINCAPSIII you can refer to or write into local variables.NOTE: You can use the above facilities (1) through (3) with the teach pendant, not withthe mini-pendant.3-115
3.4.8.2 Quick Variable Reference (TP)The quick variable reference function allows you to refer to local variables defined in aprogram, just by specifying a desired program line and pressing the QUICK referencebutton provided in the coding list window as shown below.QUICKreferencebuttonNOTE: Only in manual mode, you can highlight a desired program line or move thecursor to a desired line.The "Variables included in one line" window (see below) appears where local variablesinvolved in the currently highlighted line and global variables are displayed. Thesample window below displays variable "I1" in the STEP STOP program line.Integer, floating-point, double-precision, or DEFIO variables, if any, will display withtheir values.If DEFIO variables are referred to, "IO variable type," "Port address" and "Mask info"also appear.Display switcher buttonValues of integer, floating-point,double-precision, and DEFIOvariables only will display.In the case of DEFIO variables,"IO variable type," "Portaddress" and "Mask info" alsoappear.3-116
Chapter 3 General Introduction to Operation Modes and Additional FunctionsNOTE 1: If the index of the referred-to variable is out of range (Example 1 below) or nota numerical value (Example 2 below), then the index field of the variable name willshow "?."(Example 1) Although the number of integer variables defined is 200, you attempt torefer to integer variable I201 written in a program line.(Example 2) You attempt to display a variable with macro name index like I[slotnum].If the index field shows "?," then no value will display even for integer, floating-point,double-precision, and DEFIO variables. Press the [Display.] and choose the index youwant to refer to.NOTE 2: If the port address of a referred-to DEFIO variable is out of the specified I/Orange, then the DEFIO variable will display in gray.NOTE 3: An array variable assigned to an argument cannot be displayed.(Example) PROGRAM SUB1 (li%, li2%(10))The li2 cannot be displayed since the argument is an array variable.With the display switcher button, you may switch from the "Variables included in oneline" to "Variables included in all lines." The sample window below shows variablesincluded in all program lines in the currently selected program.Display switcher buttonVariable name index fieldshows "?".Variable types.NOTE 1: While the "Variables included in one line" window displays not only localvariables but global variables, the "Variables included in all lines" window cannotdisplay global variables.NOTE 2: In the "Variables included in all lines" window, all array variables will displaywith "?" in their indexes. Press the [Display] and choose the index you want to refer to.3-117
Pressing [Register] registers variables. You can refer to those registered variables withthe display facility.[Register] buttonNOTE 1: If the index field of a variable name shows "?" on the above screen, thevariable cannot be registered here.NOTE 2: Any DEFIO variable whose port address is out of the specified range cannotbe registered here.Press [Display] shown below to display the values of the selected variable (see thenext page)NOTE: If you select a DEFIO variable whose port address is out of the specified range,its details cannot be displayed.[Display] button3-118
Chapter 3 General Introduction to Operation Modes and Additional FunctionsThe next sample screen shows the values of locally defined position variable PX (3).On this screen, you may modify the local variable values or replace local variables aswell as for global variables. To register the modified variables, press [F12 Register].Press the Shift button to shiftthe menu bar and show [F12Register] button here.NOTE 1: When a variable's index field is "?," pressing [Display] will display a variablewhose index is 0. Move the cursor to that index.NOTE 2: To modify the current value of a DEFIO variable, you need to hold down thedeadman switch, same way as modifying I/Os.NOTE 3: This quick reference facility cannot take position data into local variables.3-119
3.4.8.3 Referring to Registered Variables (TP)This registered variable reference function allows you to refer to previously registeredvariables. Use this facility when you cannot designate a program line since theprogram is running or when you want to refer to variables in more than one program.To register variables, use [Register] in the variable quick reference function (seeSection 3.4.8.2) or [F12 Register] on the variable value screen. It is possible to registera maximum of 50 variables.To call up the registered variables window, press [WATCH] in the coding list window or[F6 RegVar.] in the Select Variable Type window.The Registered variable list window will appear as shown below.3-120NOTE 1: Global variables registered will appear as "Global" in the program namecolumn (ProName).NOTE 2: If the program name, variable name, or the number of dimensions of aregistered variable is modified and compiled, then the variable will appear in gray.NOTE 3: If the program name, variable name, I/O variable type, port address, or maskinformation of a registered DEFIO variable is modified and compiled, then the DEFIOvariable will appear in gray.Press [Display.], and the values of the selected variable will appear where you maymodify those values or replace local variables as well as for global variables. (SeeSection 3.4.8.2.)
Chapter 3 General Introduction to Operation Modes and Additional Functions3.4.8.4 Running a Program with Local Variable Arguments (TP)You can run a program containing local variable arguments in stand-alone mode or editthose arguments.If you attempt to start an on-halt program containing arguments in the Program Listscreen, the Argument setting window will appear. The sample screen given below willappear if you attempt to start the PROGRAM SUB1 (li%).NOTE: If a program has an argument containing an array variable, no Argumentsetting window will appear. Instead, a run-time error will occur with the error message736F "Cannot start any programs with array argument(s)."To modify argument values, press [Display.]. After modification, check the newargument values in the Argument setting window and then press [OK].To modify arguments, press[Display]. You can modify it inthe same way as for globalvariables.As shown below, the same prompting dialog as for ordinary start will appear. After that,the same starting operation as usual will take place.3-121
3.4.8.5 Referring To or Writing Into Local Variables in WINCAPSIIIWINCAPSIII refers to or writes into local variables.Start WINCAPSIII. Choose Connect | Monitor Communication | Monitoring (online).Choose View | Locals to display the Local variables window.3-122
Chapter 3 General Introduction to Operation Modes and Additional FunctionsSelect a program to display the local variables used in the program, in the Localvariables window.Local variables of type array appear as shown below.The sample below shows local variables of type array declared with DIMLEMON01%(3,2,2).Modify variable values by direct entry to the Value column.3-123
3.4.9 Changing Route in Restarting the Pass MotionWhen stopped in the pass motion, for the route for the robot motion after restarting it,you can select one of the following two options.(1) Move the robot end to the target position after restarting the pass motion withoutany change.ABStoppedpositionRoute afterrestartedCPass motion without any change (Traditional)(2) The new feature can execute the pass motion to the target position on the pathpreviously defined (PTP control) or to the target position on the path newly definedafter restarting.ABStoppedpositionPassafterrestartingCNew pass motion, added in Version 1.43-124
Chapter 3 General Introduction to Operation Modes and Additional FunctionsPrecautions for using the New Feature(1) In spite of the interpolation method of pass motion command, the movement ofrobot to the target position before the pass motion, when restarting the robot runsin the PTP control mode. When the movement on the 2 straight lines is consideredto be the pass motion, the end of robot moves on the plane, determined by the 2straight lines, resulting in the route shown by the solid line (as shown in thefollowing figure). When the robot is stopped or restarted during the pass motion,the route becomes the one that is shown by the broken line, however, the end isnot moved on the plane, determined by the 2 straight lines, as in the originaloperation. The end moves on the plane or under the plane, depending on thestopping position. Besides, as the posture of the robot arm is also changed, besure to run the robot after confirming that there is no interference with anysurroundings.Difference of the robot end route dependingon the stop process enabled or disabled(2) This function will become effective if the specified stop process is performed in theinterval within the pass motion started and ended. When restarting, as the robotmoves to the target position before pass motion started, the operation returningthe robot end to the target position before pass motion started is sometimesperformed even when the robot stops near the target position after the pass motionstarted.(3) As the movement after restarting becomes the pass motion of the movement to thetarget position before pass started and movement to the target position after passstarted, depending on the stop position, error may occur when restarting and theoperation is incomplete.(4) When the pass motion command is Step-run, movement to the target position isnot possible even after restarting and the robot will proceed to execute next step ofthe program.3-125
Changing the robot end routePerform the operations according to the following procedure. This setting can be madeonly from the teach pendant.Step 1 Set the mode selector switch to the <strong>MANUAL</strong> position.Press [F2 Arm] on the top screen.F2The Current Robot Position window appears as shown below.Step 2 Press [F6 Aux.].F6The Auxiliary Functions (Arm) screen appears.3-126
Chapter 3 General Introduction to Operation Modes and Additional FunctionsStep 3 Press [F7 Config].The User Preferences window appears.Step 4 Select [70: Pass Motion setting (0: Disabled, 1: Enabled)] using the jog dial orbuttons from [F1 Back] to [F3 Jump To].The selected line will become highlighted.Press [F5 Change].F5The numerical keypad will appear.3-127
Step 5 Enter 0 or 1 from the numeric keypad.If you enter 0, "(1) Move to the target position after starting the pass motion" will beperformed; if you enter 1, "(2) Pass motion of movement to the target position beforepass start (PTP control) and movement to the target position after pass start" will beperformed, as mentioned in the beginning of this section.To cancel the entered value, press the CLR or BS button.Confirm the entered value. If it is right, press the OK button to fix it.If you want to cancel this operation as it is, press the CANCEL button.The numeric keypad disappears and [70: Pass Motion setting (0: Disabled, 1:Enabled) ] is updated by the newly entered value.Press the OK button. To cancel the value, press the Cancel button.The setting procedure is now completed. In further operations, the setmovement/motion will be executed.3-128
Chapter 3 General Introduction to Operation Modes and Additional Functions• ReferencesAt the time of restart, you may switch between the enable and disable of movement tothe target position before pass motion start, by setting the [71: Pass Motion EndRange]. The [71: Pass Motion End Range] may be set by the distance to the targetposition.The setting procedure is the same as the [70: Pass Motion setting (0: Disabled, 1:Enabled)]. Refer to the (1) to (5) process of setup changing method. It becomesenabled when the value to be set is more than 1.ALBDECRelation between the movements basedon the set distance and stopping positionWith [71: Pass Motion End Range] being set to L, if the straight line movement from Ato B and from B to C as shown above is considered as a pass motion, then restartingwill run the robot to B if the stop position is D. However, if the stop position is E, then therobot will be directly moved to C instead of moving to B.NotesThe set values are given as an approximate range. They will not the absolute position.Even changing those values will sometimes bring no actual operation, depending uponthe current running speed or the interpolation method.3-129
3.4.10 Supervisory Task (Software PLC)3.4.10.1 Outline of Supervisory TaskThe supervisory task function enables the robot controller to centralize control of anentire facility.If defined as a supervisory task program, a program written in PAC language can keeprunning independently of normal task programs and operation modes. Up to 32supervisory tasks (TSR0.PAC to TSR31.PAC) can be defined. (See Note below.)For safety, names of supervisory tasks are restricted to TSR0.PAC to TSR31.PAC andany motion-control programs are prohibited in supervisory tasks.Note: [Ver. 2.2 or later] Enhancement by the folder feature added(1) The folder feature newly added enables supervisory tasks having the samename to coexist in a robot controller, as long as those tasks are located inindividual folders.(2) Up to 32 supervisory tasks can run simultaneously independent of normal taskprograms. If more than 32 supervisory tasks are made active simultaneously,the error "7799: The maximum number of TSR was exceeded." occurs,terminating all programs including supervisory tasks.Use the following as supervisory tasks:(1) Customizing operation screens on the teach pendant, which can contain up to 500buttons and 50 screens (Refer to the PROGRAMMER'S <strong>MANUAL</strong> I, Section 13.5"Customizing TP Operation Screens.")(2) Writing programs for automatic recovery process to be followed if an error occursin facilities or robots(3) Controlling facilities (As an alternative of sequencer for facility scale of 200 I/Opoints and approx. 100 steps in a rudder command)Supervisory tasks feature:(1) Written in PAC language. (Up to 32 programs can be defined and their names arefixed to TSR0.PAC to TSR31.PAC.)(2) Arithmetic/logical operation commands, I/O get commands, program controlcommands only executable.(3) Priority assigned for execution over all other normal task programs.(4) Limited occupation time frame (Uses 2 ms every 8 ms).3-130
Chapter 3 General Introduction to Operation Modes and Additional FunctionsSupervisory task start condition parameters(1) Supervisory task enable/disable parameter"Not Use Supervisor TASK" or "Use Supervisor TASK" in the Supervisor TASKSetting window(2) INIT run mode parameter, whether or not to involve motor on and CAL"INIT:(not [MOTOR ON + CAL])" or "INIT:(MOTOR ON + CAL)" in the INIT Settingwindow(3) External speed parameter (10 or 100) for INIT run mode"INIT Set SPEED 10" or "INIT Set SPEED 100" in the INIT Setting (SPEED)windowStarting supervisory tasksSupervisory tasks may be started by any of the following operations or events providedthat:- the supervisory task mode has been enabled (by selecting the "Use SupervisorTASK" in the Supervisory TASK Setting window) and- any supervisory task program (TSR0 to TSR31) exists.(1) Turning the robot controller on(2) Switching the operation mode from Manual to Auto(3) Pressing the [F1 START] in the Supervisor TASK Setting window(4) Selecting and starting a supervisory task in the Program List window in Auto orTeach Check modeIf a supervisory task is initiated, the supervisory task icon will appear in the task bar asshown below.Supervisory task icon3-131
Terminating supervisory tasksSupervisory tasks will terminate if any of the following events occurs:(1) Turning the robot controller off(2) Pressing the [F6 STOP] in the Supervisor TASK Setting window(3) Loading or compiling a project(4) Error in a supervisory task itself(5) Level 4 error or higher one(6) Reading or writing from/onto a floppy disk(7) Receiving a file from WINCAPSIII(8) Making the supervisory task mode inactive to delete it from optional featuresSupervisory task commands(1) INIT (Initialize the robot controller)This command turns the motor power on depending upon the INIT run modesetting (motor). For details about INIT command, refer to the PROGRAMMER'S<strong>MANUAL</strong> I.3-132
Chapter 3 General Introduction to Operation Modes and Additional Functions3.4.10.2 Using Supervisory Tasks[ 1 ] Making the supervisory task mode activeThe supervisory task mode is an optional feature, so you need to make it activeaccording to the procedure given below.(1) Calling up the System Extension windowAccess: [F6 Set]—[F7 Options.]—[F8 Extnsion]—[F5 Input ID] from the top screenof the teach pendant(2) Adding a supervisory task modeEnter "1111" from the numeric keypad.3-133
Press the OK button. The supervisory task mode will be added.(3) Restarting the robot controllerTurn the controller off and then on. The supervisory task mode becomes activeand you may make supervisory task settings.On the top screen, press the SHIFT key and check that the S-TASK is displayed inF8 of the menu bar.F8Press [F8 S-TASK]. The Supervisor TASK Setting window appears as shownbelow.3-134
Chapter 3 General Introduction to Operation Modes and Additional Functions[ 2 ] Setting supervisory task parameters(1) Supervisory task enable/disable parameterThis parameter enables or disables the supervisory task mode.Access: [F8 S-TASK]—[F7 USE] from the top screen of the teach pendantIn the Supervisor TASK Setting window shown below, choose the desired settingand press the OK. To make no change, press the Cancel.(2) INIT execution mode parameterThis parameter specifies whether or not the execution of the INIT commandinvolves "MOTOR ON."Access: [F8 S-TASK]—[F8 Mode] from the top screen of the teach pendantIn the INIT Setting (MOTOR ON) window shown below, choose the desired settingand press the OK. To make no change, press the Cancel.3-135
(3) INIT external speed parameterThis parameter determines whether the external speed will be 10 or 100 atexecution of INIT command.Access: [F8 S-TASK]—[F9 Speed] from the top screen of the teach pendantIn the INIT Setting (SPEED) window shown below, choose the desired setting andpress the OK. To make no change, press the Cancel.3-136
Chapter 3 General Introduction to Operation Modes and Additional Functions[ 3 ] Starting supervisory tasksTurn the robot controller on.Supervisory tasks will start automatically provided that:- the supervisory task mode has been enabled by selecting the "Use SupervisorTASK" in the Supervisory TASK Setting window and- any supervisory task program (TSR0 to TSR31) exists.NOTE: Under the above conditions, supervisory tasks will be started even in Manual orTeach Check mode.To start no supervisory task, turn the controller on while holding down the deadmanswitch.Switch the operation mode from Manual to Auto from the teachpendant or an external I/O.Supervisory tasks will start automatically provided that:- the supervisory task mode has been enabled by selecting the "Use SupervisorTASK" in the Supervisory TASK Setting window and- any supervisory task program (TSR0 to TSR31) exists.Switching the operation mode from an external I/O when the controller is placed in theexternal mode will also start supervisory tasks. Before doing this, make sure that nonormal programs are running.NOTE: Switching to Auto mode by using Enable Auto signal and Robot Error Clearsignal will also start supervisory tasks.Press the START button in the Supervisor TASK Setting window.From the top screen of the teach pendant, choose [F8 S-TASK]—[F1 START] underthe following conditions:- the supervisory task mode has been enabled by selecting the "Use SupervisorTASK" in the Supervisory TASK Setting window and- any supervisory task program (TSR0 to TSR31) exists.Select and start a supervisory task in the Program List window in Autoor Teach Check mode.From the Program List window, choose a desired supervisory task program(s) (TSR0to TSR31) and start it, provided that any supervisory task program(s) exists.3-137
[ 4 ] Terminating supervisory tasksIf any of the following operations takes place or any of the following errors occurs whena supervisory task program is running, then the supervisory task will terminate.Turn the robot controller offPress the STOP button in the Supervisor TASK Setting windowAccess: [F8 S-TASK]—[F6 STOP] from the top screen of the teach pendantLoad or compile a projectAccess: [F6 Set]—[F1 Load!] from the top screen of the teach pendantorAccess: [F1 Program]—[F6 Aux.]—[F12 Compile] from the top screen of the teachpendant in Manual modeError in a supervisory task itselfIf any error occurs in a supervisory task itself, the supervisory task currently running willterminate.Level 4 error or higher oneIf an error at level 4 or above occurs in supervisory tasks, normal tasks, or robotcontroller system, then the supervisory task currently running will terminate.Read or write from/onto a floppy diskReading data stored in a floppy disk to the robot controller or writing data stored in therobot controller to a floppy disk will terminate the currently running supervisory task.Access: [F6 Set]—[F3 FD.]—[F1 Read.] from the top screen of the teach pendantAccess: [F6 Set]—[F3 FD.]—[F2 Write.] from the top screen of the teach pendant3-138
Chapter 3 General Introduction to Operation Modes and Additional FunctionsReceive a file from WINCAPSIIIReceiving an execution file or parameters from WINCAPSIII terminates thesupervisory task currently running.Make the supervisory task mode inactive to delete it from optionalfeaturesAccess: [F6 Set]—[F7 Options.]—[F8 Extnsion]—[F4 Remove] from the top screen ofthe teach pendantNote that the supervisory task setting remains enabled.3-139
3.4.10.3 Restrictions on the Use of Supervisory TasksThe purpose of a supervisory task is to centralize control of an entire facility. It involvesplacing some restrictions on the use of it.[ 1 ] Restrictions on the normal program operation(1) No motion commands or vision commands are executable in a supervisory task.To execute those commands, make a user program containing them and run it asa supervisory task.(2) A supervisory task may support robot stop and start commands, but not supportTemporary stop, Instantaneous stop, Step stop, or Break point stop. It also ignoresthe SUSPEND command.(3) If you want to start a supervisory task only when the robot controller is turned on,then use internal I/Os to bypass the overlapped initiation of the supervisory task.(4) If a supervisory task is started by any other supervisory task, then no priorityoptions or cycle options are supported. This means that these supervisory tasksmay conflict with each other.(5) A supervisory task is so designed that it cannot be self-started repeatedly. Torepeat it, use loop commands.(6) In Teach Check mode, releasing the deadman switch will not stop runningsupervisory tasks.(7) A supervisory task does not support Step check or Step back.(8) A HOLD command for a supervisory task will be ignored.(9) A normal task cannot manage any supervisory task by using KILL or SUSPENDcommand or other means.(10) During execution of a supervisory task, you may make vision board settings.However, it may block the operation of the supervisory task.(11) If an error occurs or an emergency stop signal is inputted, a supervisory taskcannot run any normal task.3-140
Chapter 3 General Introduction to Operation Modes and Additional Functions[ 2 ] Rules for using a supervisory task(1) Avoid using the following commands in a loop to repeat them in a supervisory task.Otherwise, the supervisory task itself may not terminate. This is because asupervisory task has higher priority over normal task programs.INIT, RUN, KILL, SUSPEND commands(2) Avoid simultaneous execution of RUN and SUSPEND commands or that of RUNand KILL commands to a same program in a supervisory task. Doing so mayfreeze the robot system, skip a Stop command, or cause any other failures. Torecover from such states, you need to restart the robot controller.(3) If a semaphore (priority order) is specified in a supervisory task, there is apossibility that a lower priority task may get a semaphore. This is because using asemaphore may cause a supervisory task to lose highest priority 101.(4) If a supervisory task that repeats normal tasks runs, then mode switching from theexternal equipment may become no longer possible.To recover from such states, stop the supervisory task from the teach pendant.To prevent such states,- design programs so that they will conditionally start according to Auto mode orExternal mode, or- design a supervisory task itself so that it will be terminated from external input.Starting a user program during switching to External mode may issue an alarm.Correct the program so that it will conditionally start according to the mode, just asabove.[ 3 ] Rules for a supervisory task mode not in useWhen a supervisory task mode is not in use, programs named TSR0 to TSR31 executeas normal task programs. To debug supervisory task programs, therefore, disable asupervisory task mode and use Teach Check mode or Break Point function.3-141
3.4.11 Supervisory Task ExtensionConventional supervisory tasks supported by the main system software version 1.7 orlater are designed to terminate if Level 4 error or higher one occurs.Main system software version 1.95 newly supports the supervisory task extension thatprevents supervisory tasks from terminating if Level 4 error occurs except memoryerrors (errors 7000s).3.4.11.1 What is a supervisory task extension?On some occasions, e.g., when the robot controller is controlled by external equipmentin RS232C communication, the robot controller is required to operate independently tosome extent.The solution is to use a supervisory task. However, current supervisory tasks willterminate if Level 4 error or higher one occurs so that the communication will stop andthe external equipment will no longer monitor the controller status.To prevent it, the supervisory task extension limits termination to essential occasionsonly. If the extension is enabled, supervisory tasks will no longer terminate even ifLevel 4 error such as a servo error, operation error, or I/O error occurs. They willterminate only if a memory error (error 7000s) occurs.If Level 5 error occurs, supervisory tasks will terminate as they have been.The table below lists whether supervisory tasks will terminate or not if the followinglevel errors occur.Error code 7 *** 6 *** 5 *** 4 *** 3 *** 2 *** 1 ***ErrorlevelLevel 5 T T T T TLevel 4 T T/R T/R T/R T/RLevel 3 orlowerR R R R R R RT: Terminate.T/R: Keep running if the supervisory task extension is enabled.R: Keep running./: Not applicable.3-142
Chapter 3 General Introduction to Operation Modes and Additional Functions3.4.11.2 Enabling the supervisory task extensionThe supervisory task extension is optionally provided. You need to enable theextension from the top screen of the teach pendant according to the steps given below.(1) Call up the System Extension window.Access: [F6 Set]—[F7 Options.]—[F8 Extnsion]F5(2) Press [F5 Input ID].The numeric keypad will appear where you enter the necessary ID code--1111 forconventional supervisory task or 1112 for supervisory task extension.3-143
(3) Press the OK button. Your selection will be saved.(4) Reboot your robot controller to make the new setting go into effect.3-144
Chapter 3 General Introduction to Operation Modes and Additional Functions3.4.12 Modification of Processing Time Exclusively Occupied bySupervisory TasksThis new feature allows you to modify the processing time exclusively occupied bysupervisory tasks in a processing cycle (8 ms) to be applied when the supervisorytasks and user tasks (PAC programs) run concurrently (multitasking).With this feature, you can switch the priority levels between supervisory tasks and usertasks at the desired timing. This makes it possible to assign higher priority toprocessing of supervisory tasks during particular operation or vice versa.3.4.12.1 What is the processing time exclusively occupied by supervisorytasks?As shown below, the task processing cycle of the robot controller is 8 ms that is sharedby supervisory tasks and user tasks.When supervisory tasks and user tasks are running concurrently, the processing timeexclusively occupied by supervisory tasks is 2 ms by default (because the supervisorytasks are given the highest priority "101" by default).During the remaining 6 ms, user tasks have higher priority than supervisory tasks(because user tasks are given higher priority than supervisory tasks by default).Processing Time Exclusively Occupied by Supervisory Tasks in the Processing Cycle (by default)3-145
3.4.12.2 Choice of processing time periods to be exclusively occupied bysupervisory tasksYou can make a choice from the following five processing time periods:0 ms, 2 ms, 4 ms, 6 ms and 8 ms in an 8 ms task processing cycleExample: If you select "4 ms," the execution time required for supervisory tasks will beshorter and that for user tasks, longer than ones required by default (2 ms).Note: If you select "0 ms," supervisory tasks will be processed only when no usertasks are being processed. If there is no free time, no supervisory tasks will be able tobe processed.Note: If you select "8 ms," no user tasks can be processed when any supervisory taskis being processed. To process user tasks, you need to insert a process of DELAY orWAIT for getting an arm semaphore in the supervisory tasks.3.4.12.3 Modifying the processing time exclusively occupied bysupervisory tasksYou can modify the processing time to be exclusively occupied by supervisory tasks inPAC programs or with the teach pendant.This modification can be made even if any supervisory task is executing and it willimmediately take effect.• From the teach pendant(1) Call up the processing time window (Occupation time setting).Access: [F8 S-TASK]—[F10 Occupy](2) Select the desired processing time and press [OK].• In PAC programsUse the SETOCC<strong>UP</strong>ATIONTIME command. Refer to the PROGRAMMER’S <strong>MANUAL</strong> I.SyntaxSETOCC<strong>UP</strong>ATIONTIME Coding example SETOCC<strong>UP</strong>ATIONTIME 4 'Set 4 ms/8 ms3-146
Chapter 3 General Introduction to Operation Modes and Additional Functions3.4.13 Supervisory Task Start ModeIn system software versions earlier than 2.2, any of the following events activates allsupervisory tasks in the robot controller.(1) Turning the controller power on(2) Switching the operation mode from Manual to Auto mode(3) Pressing [F8 S-TASK]–[F1 START]The supervisory task start mode newly added in version 2.2 or later provides thefollowing three choices: "Start all supervisory tasks," "Start supervisory tasks in a root,"and "Do not start supervisory tasks."Access: [F8 S-TASK]—[F2 Setting]The Supervisory Task Start Mode window appears.• Start S-TASKs in a route:• S-TASKs is not started:Selecting this starts only supervisory tasks in the currentroute when any of the above three events occurs.Selecting this starts no supervisory tasks when any ofthe above three events occurs.Note: Independent of the current setting of the supervisory task start mode,supervisory tasks can start by selecting them on the Program List or by using a RUNcommand.3-147
Chapter 4GeneralIntroduction toCoordinates andFiguresThis chapter explains the coordinates used for therobot and figures of the shoulder, elbow, and wrist.NOTE 1: Avoid letting the teach pendant or minipendant undergo any strong shocks, impacts, orvibrations.NOTE 2: Touch the teach pendant or mini pendantwith your fingers only, never with the tip of a pen orany pointed object. Otherwise, the LCD may bebroken.
Chapter 4 General Introduction to Coordinates and Figures4.1 Coordinates, Interference Check Area,and Figures in 6-Axis Robots (V* -GSeries)4.1.1 CoordinatesThis section describes the coordinates required for correct handling of the robot.[ 1 ] Base coordinates[1.1] Base (world) coordinates and work coordinatesThe base coordinates are so-called world coordinates which refer to 3-dimensionalCartesian coordinates whose origin is at the center of the robot basement. It hascomponents Xb, Yb, and Zb which are identical with X, Y, and Z in X-Y mode explainedin Section 3.2.1, "Running the Robot Manually,"[ 2 ] X-Y mode."Work coordinates are 3-dimensional Cartesian coordinates defined for each operationspace of workpiece. The origin can be defined anywhere and as much as needed. Itlies at a corner of the rectangular parallelepiped envelope of an object workpiece asshown below. Work coordinates are expressed by the coordinate origin (X, Y, Z)corresponding to the base coordinates and the angles of rotation (Rx, Ry, Rz) around X,Y and Z axes of base coordinates.If work coordinates are not defined, base coordinates go into effect.Figure 4-1. Base Coordinates and Work Coordinates4-1
[1.2] Position dataPosition data refers to a set of data which includes seven components of basecoordinates. Of these seven components, three are robot flange center coordinates(the end-effector tip coordinates if an end-effector is defined) and four are current robotattitude components, as shown below.Position data allows you to represent the current position of the robot flange center andobject points.Position data:XY Coordinate values (in mm) Defines the position of the robot flange center or theZend-effector center.RX Yaw angle: Rotation angle around X axis (in degrees)RY Pitch angle: Rotation angle around Y axis (in degrees) Defines the robot attitude.RZ Roll angle: Rotation angle around Z axis (in degrees)FIG Figure (Value: 0 to 31)Figure 4-2. Components of Position DataA set of X, Y, and Z coordinate values represents the position of the robot flange center(or tip of the end-effector if defined) expressed in base coordinates (Xb, Yb, and Zb) inunits of mm.As shown in Figure 4-3, the yaw, pitch, and roll angles, which are expressed by RX, RY,and RZ, refer to rotation angles around the respective axes of the base coordinatesystem defined by the mechanical interface coordinate system whose origin is at thecenter of the flange surface. These angles are expressed in units of degree.With respect to the positive (+) direction on axes of the base coordinates, clockwiserotation is treated as positive (+).You should always preserve the rotation order of RZ, RY, and RX. Changing it willcause the robot to take a different attitude in spite of the same rotation angle defined.Figure represented by FIG value refers to a figure of robot arm joints. It is explained inSection 4.1.3, "Figures of the Shoulder, Elbow, and Wrist."NOTE: In 5-axis robots, the flange can keep a constant posture (3-dimensionalflange direction) only when it is accurately in parallel with the X-Y plane of the robot(RX and RY are 0 degree).4-2
Chapter 4 General Introduction to Coordinates and Figures(R X , R Y , R Z ) = (0, 0, 0)(R X , R Y , R Z ) = (180, 90, 90)Zm1YmZmYmXmXmRoll angle1 Rotate 90 degreesaround Z axisYaw angle3 Rotate 180degrees aroundX axis(R X , R Y , R Z ) = (0, 0, 90)(R X , R Y , R Z ) = (0, 90, 90)Zm2 Rotate 90degreesaround Y axisYmZmYmXm32Pitch angleXmFigure 4-4. Examples of roll, pitch and yaw angle rotationAttitude: (Rx, Ry, Rz) = (0, 0, 0) → (Rx, Ry, Rz) = (180, 90, 90)4-3
[1.3] Defining work coordinatesTwo procedures, 3-point teaching and direct value entry, are available for defining workcoordinates.Defining work coordinates by 3-point teaching[F2 Arm]—[F6 Aux.]—[F5 Work]—[F4 AutoCalc]In this method coordinates are created by teaching three points, namely, the origin ofwork coordinates, a point on X-axis and a point on X-Y plane.Hand of robotWork coordinate originPoint on X axisPoint on X-Y planeDefining work coordinates by direct value entry[F2 Arm]—[F6 Aux.]—[F5 Work]—[F5 Change.]Enter the coordinate origin (X, Y, Z) corresponding to the base coordinates and rotationangles (Rx, Ry, Rz) around the X-axis, Y-axis and Z-axis of base coordinates.4-4
Chapter 4 General Introduction to Coordinates and Figures• Defining work coordinates by 3-point teachingStep 1 On the top screen of the teach pendent, press [F2 Arm].Step 2 Press [F6 Aux.] in the Current Robot Position window.Step 3Press [F5 Work] in the Auxiliary Functions (Arm) window.The Define Work Coordinates window appears as shown below.Select the coordinates by using the cursor or jog dial, and then press [F4AutoCalc].F4Step 4The Work coordinate automatic calculation window appears.To set a desired position variable name to each of the "Origin of work," "Point on Xaxis of work," and "Point on X-Y plane of work," first choose the "Origin of work" rowand press [F5 Change.].F54-5
Step 5The numeric keypad will appear as shown below. Enter a desired position variablename for the "Origin of work" and press the OK button. In the same way, set desiredposition variable names to the "Point on X axis of work" and "Point on X-Y plane ofwork."Step 6 Call up the Position Variables assignment window ([F2 Arm]—[F4 Var.]—[F4Position.]) shown below.In the Position Variables assignment window, assign the value of the robot armposition to be taught to each of the three position variables you have set in Step 5.(1) Place the cursor on the position variable to which you want to assign the robotarm position value.(2) In Manual mode, move the tool end of the robot arm to the teaching point.(3) Press [F6 Get Pos.] in order to read in the current position of the tool end to theselected position variable.(4) Carry out Steps (1) through (3) above for each of the "Origin of work," "Point onX axis of work," and "Point on X-Y plane of work."NOTE • Teach the "Origin of work" and "Point on X axis of work" precisely.• Define work coordinates after establishing the tool definition.4-6
Chapter 4 General Introduction to Coordinates and FiguresStep 7 Press the Cancel button twice to return to the Work coordinate automatic calculationwindow.Step 8At the bottom of the Work coordinate automatic calculation window, the defined workcoordinates are displayed. If they are satisfactory, press the OK button; if not, pressthe Cancel button.Step 9If you press the OK button in Step 8, the defined work coordinates will be enteredinto the target work number.4-7
• Defining work coordinates by direct value entryStep 1 On the top screen of the teach pendant, press [F2 Arm].Step 2 Press [F6 Aux.] in Current Robot Position window.Step 3 Press [F5 Work.] in Auxiliary Functions (Arm) window.The Define Work Coordinates window appears.Select the work coordinates to be defined using the cursor or jog dial.Step 4Press [F5 Change.] in the Define Work Coordinates window.The numeric keypad will appear as shown below.Step 5 Using the numeric keypad, enter the desired numerical values. After checking theentered values, press the OK button.4-8
Chapter 4 General Introduction to Coordinates and Figures[1.4] External TCP function (for rotation on the origin of workcoordinates) (Ver. 3.2 or later, option)The external TCP function enables the robot arm to rotate on the origin defined in workcoordinates, while in Manual mode the robot arm rotates without changing the centerposition of the flange surface.The external TCP function needs a license. Purchase the license from our salesrepresentative and add the external TCP function to the extension functions (see"Enabling extension functions" in Chapter 5, Section 5.7).Origin of workcoordinatesNormal rotationRotation by external TCP functionThe external TCP function can also reduce teaching points required for CP motion(linear or arc) with the robot holding a workpiece, e.g., for deburring a workpiece with aLeutor fixed to the facility or for applying sealing to a workpiece with a sealing gunfixed.Origin of workcoordinatesMoving from P1 to P2 in CP motion (MOVE L, P1)Normal movementMovement by external TCP function4-9
Configuring the external TCP functionTo use the external TCP function, add the attribute (FIX) to the work coordinates, usingthe teach pendant (as shown below) or the program command WORK command.If work coordinates with a FIX attribute added is selected, for example, the coordinatesnumber is followed by "FIX" or "F" as shown below.Notes in using the external TCP function- The external TCP function is not available to extended joints.- The attribute (FIX) cannot be added to WORK0 (base coordinates).- WINCAPS III cannot configure the external TCP function. It can only supporttransmission of work data configured for the external TCP function.- The external TCP function does not allow free curve motion.- Some running conditions may cause Error 6869 "External TCP calculation error."Changing the position and posture conditions by splitting the motion into severalsections may enable the external TCP function.4-10
Chapter 4 General Introduction to Coordinates and Figures[ 2 ] Tool CoordinatesA 6-axis robot has tool coordinates that make it easy to express the position andmoving path of an end-effector mounted on the robot flange.The tool coordinates are defined based on the mechanical interface coordinates. Thissection begins with an explanation of the mechanical interface coordinates.[2.1] Mechanical interface coordinatesThe mechanical interface coordinates refers to 3-dimensional Cartesian coordinateswhose origin is at the center of the flange surface as shown in Figure 4-3. X, Y, and Zaxes in mechanical coordinates are expressed as Xm, Ym, and Zm as shown in Figure4-5.The Xm, Ym, and Zm are identical with X, Y, and Z in Tool mode explained in Section3.2.1, "Running the Robot Manually," [ 3 ] Tool Mode."FlangesurfaceCenter of theflangeZm: Normal axis on the center of the flange surfaceYm: Axis passing through the flange center andorientation key holeXm: Axis passing through the flange center andcrossing Zm and Ym at right anglesFigure 4-5. Definition of Mechanical Interface CoordinatesUnlike the work coordinates or base coordinates, the mechanical interface coordinatesrotate as the robot flange rotates.Figure 4-6. Rotation of Mechanical Interface Coordinates Following the Flange Rotation4-11
[2.2] Difference in robot motion when driven in mechanical interfacecoordinates and base coordinatesIn Manual mode, if you choose Tool mode and TOOL0 (Flange) on the teach pendant,the robot will run in mechanical interface coordinates. If you choose X-Y mode,WORK0 (Base) will be automatically selected so that the robot will run in basecoordinates.For details about TOOL0, refer to [2.5] in this section.Figures 4-7 and 4-8 show the differences in robot motion when the robot is driven inmechanical interface coordinates and base coordinates, by using the X, Y, and Z keysand by using the RX, RY, and RZ keys, respectively.X-Y mode (in base coordinates)Tool mode (in mechanical interface coordinates)Figure 4-7. Robot Motion Manually Driven by X, Y, and Z Keys4-12
Chapter 4 General Introduction to Coordinates and FiguresX-Y mode (in base coordinates)Tool mode (in mechanical interface coordinates)NOTE: The + rotation is for clockwise and the -direction for counterclockwise with respect to the vector.Figure 4-8. Robot Motion Manually Driven by RX, RY, and RZ Keys4-13
[2.3] Tool coordinatesBased on mechanical interface coordinates, you may define tool coordinates byspecifying the origin offset distance from the mechanical interface coordinates and theyaw/pitch/roll angles.You can define up to 63 tool coordinates (TOOL1 to TOOL63). TOOL0 is defined bysystem for mechanical interface coordinates.The X, Y, and Z axes in tool coordinates are expressed by Xt, Yt, and Zt, respectively,as shown below.FlangesurfaceTool coordinates(Orientation direction)ToolFigure 4-9. Mechanical Interface Coordinates and Tool Coordinates4-14
Chapter 4 General Introduction to Coordinates and Figures[2.4] Creating tool coordinatesYou may create tool coordinates by entering necessary data from the teach pendant orby writing TOOL command in your program.The figure below shows the necessary data to be set for creating tool coordinates.X=Y= Offset distance components (in mm)Z=RX=RY=Axis rotation angles (in degree)RZ=Figure 4-10. Definition Data for Tool CoordinatesThe offset distance and the rotation angles should be specified, based on themechanical interface coordinates. The rotation order should be RZ, RY, and RX.MechanicalinterfacecoordinatesOffset(1) Turn the RZ.(2) Turn the RY.(3) Turn the RX.ToolcoordinatesRZ=90 deg, RY=90 deg, RX=90 degFigure 4-11. Example: Creating Tool Coordinates4-15
[2.5] TOOL0 (Mechanical interface coordinates)TOOL0 is reserved for mechanical interface coordinates defined by the system. Youcannot define these coordinates.If expressed in the same way as shown in Figure 4-10, TOOL0 may be defined asshown in Figure 4-12.Default settings for TOOL1 to TOOL63 are the same as TOOL0.NOTE: If an undefined tool coordinates is specified, the robot runs in TOOL0equivalent.X = 0Y = 0Z = 0RX = 0RY = 0RZ = 0Offset distance components (in mm)Axis rotation angles (in degree)Figure 4-12. Definition Data for TOOL04-16
Chapter 4 General Introduction to Coordinates and Figures[2.6] Advantages of tool coordinatesThis section describes what advantages you may have by using tool coordinates.In manual operation or in teachingWhen running the robot in tool coordinates, you can directly handle the end-effectormounted on the flange, making teaching easier.The figure below shows the comparison of robot moving paths between in mechanicalinterface coordinates and in tool coordinates.In mechanical interface coordinates (TOOL0) In tool coordinates (TOOLn where n is any of 1 to 63)If X- key is pressed:If Z- key is pressed:Enables you to move the end-effector to yourobject point in teaching.If RX+ key is pressed:If RZ+ is pressed:Enables you to rotate the end-effector around theZt axis.Figure 4-13. Example of Manual Robot Running in Tool Coordinates4-17
In programmed running(1) Using APPROACH or DEPART commandAPPROACH or DEPART command controls the robot movement on the Z axis of thetool coordinates. You can arbitrarily define the Z-axis orientation in the tool coordinates,allowing you to easily control the end-effector. The figure below shows an example ofthe tool coordinates definition.For details about APPROACH and DEPART commands, refer to thePROGRAMMER'S <strong>MANUAL</strong> I, Section 12.1, "Motion Control."Approach vectorApproach vectorTOOL0 (mechanical interface coordinates)Changing the Z-axis orientation by toolcoordinates definitionFigure 4-14. Example of APPROACH (DEPART) Execution in Tool Coordinates4-18
Chapter 4 General Introduction to Coordinates and Figures(2) Using ROTATEH commandROTATEH command controls rotation around the Z axis of the tool coordinates. Youcan arbitrarily define the Z-axis orientation in the tool coordinates, allowing you toeasily control the end-effector. Figure 4-15 shows an example of the tool coordinatesdefinition.For details about ROTATEH command, refer to the PROGRAMMER'S <strong>MANUAL</strong> I,Section 12.1, "Motion Control."Approach vectorApproach vectorTOOL0 (mechanical interface coordinates)Changing the vector orientation andoffsetting the coordinate originby tool definitionFigure 4-15. Example of ROTATEH Execution in Tool Coordinates4-19
[2.7] Tool definitionTool definition refers to defining arbitrary tool coordinates by specifying thecomponents listed in the table given below.The offset distances (X, Y, and Z) are values in mm from the origin of the mechanicalinterface coordinates. The rotation angles (RX, RY, and RZ) are values in degreearound the X, Y, and Z axes of the tool coordinates.Table 4-1. Components Required for Tool Coordinates DefinitionComponents Description UnitXYZRXRYRZOffset distance on the X axis of the mechanicalinterface coordinatesOffset distance on the Y axis of the mechanicalinterface coordinatesOffset distance on the Z axis of the mechanicalinterface coordinatesRotation angle around the X axis of the toolcoordinatesRotation angle around the Y axis of the toolcoordinatesRotation angle around the Z axis of the toolcoordinatesmmmmmmdegreedegreedegree4-20
Chapter 4 General Introduction to Coordinates and FiguresOperating procedure for tool definitionAccording to the procedure below, you may define arbitrary tool coordinates from theteach pendant. In this example, TOOL1 is defined. The same procedure would apply toTOOL2 through TOOL63.With this procedure, you may also display or modify the current tool coordinates.• From the teach pendantStep 1 On the top screen of the teach pendant, press [F2 arm].F2The Current Robot Position window will appear as shown below.Step 2 Press [F6 Aux.].F6The Auxiliary Functions (Arm) window will appear as shown in Step 3.4-21
Step 3 Press [F4 Tool.].F4The Define Tool Coordinates window will appear as shown below.Step 4 Select the X area of TOOL1 by using the cursor keys or jog dial.The X area of TOOL1 will become highlighted.Then press [F5 Change.].F5The numeric keypad will appear as shown in Step 5.4-22
Chapter 4 General Introduction to Coordinates and FiguresStep 5 In the numeric keypad shown below, enter the desired offset distance on the X axiswith the numerical buttonsNumerickeypadStep 6 Check the new entry (offset distance on the X axis), and then press the OK button.The new entry will be entered into the X area of TOOL1 as shown below.4-23
Step 7 Repeat Steps 4 through 6 to enter offset values to the Y, Z, RX, RY, and RZ areas ofTOOL1.Step 8 Press the OK button to finish the procedure of the tool coordinates definition.Precautions when defining tool coordinates(1) The CHANGETOOL statement will take effect only in a program that has gottenrobot control by successful execution of the TAKEARM statement.Execution of the TAKEARM statement will initialize the tool coordinates definitionto TOOL0 (default that is the same as settings for the mechanical interfacecoordinates).(2) From the step where CHANGETOOL statement is written in the programs, thedefined tool coordinates will take effect. The definition will remain valid up to thestep immediately preceding the step where new CHANGETOOL statement iswritten.(3) If no CHANGETOOL statement is written in a program, TOOL0 (mechanicalinterface coordinates) will apply.(4) Once you select tool coordinates on the Select Operation Mode window called upby the M-MOD key on the teach pendant, it will take effect in Tool mode until it willbe changed.(5) If TOOL number used for running the robot to the object point and attitude differsfrom TOOL number previously used in writing the current point and attitude, theresulting position and attitude of the robot flange will become different from theprevious ones.For example, when programming, if you have written the object point and attitudeusing the APPROACH command in TOOL0 and you insert TOOLn (n is any of 1through 63) in any step preceding the APPROACH command, then executing theprogram brings the center of the robot flange to a different point and attitude thanthose defined in TOOL0, depending upon the contents of those different tooldefinitions.(6) The tool coordinates definitions made in program execution and in manual runningare saved in the same memory location.If you switch the operation mode from Auto mode to Manual mode, the toolcoordinates definition made in programming will remain in effect.(7) You may at anytime check the current TOOL number in the status bar on the teachpendant. Refer to p. 4-29.For details about commands and tool definitions, refer to the PROGRAMMER'S<strong>MANUAL</strong> I, Section 12.1, "Motion Control, APPROACH" and Section 9.5, "ToolCoordinates, TOOL." Also refer to Section 4.1.1, [2.7] Tool definition in this chapter.4-24
Chapter 4 General Introduction to Coordinates and FiguresSample program for switching defined tool coordinatesExecution of CHANGETOOL 0 will cancel the current tool coordinates definition andrestore the default TOOL0 (mechanical interface coordinates).TAKEARM statement automatically involves CHANGETOOL 0.The figure below shows a sample program that switches the defined tool coordinatesfrom TOOL1 to TOOL2. End-effector 1 and End-effector 2 used in this program areillustrated in Figures 4-17 and 4-18, respectively. The positional relationship betweenthe robot unit, End-effector 1, and End-effector 2 is assumed as shown in Figure 4-19.End-effector 1 is placed at P1 and End-effector 2 is at P2.PROGRAM TOOL SampleTool 1, (0, -49.7, 79.2, 45, 0, 0) 'Defines TOOL1.Tool 2, (0, -65, 37.5, 90, 0, 0) 'Defines TOOL2.TakeArm'Executes CHANGETOOL0 automatically.'Setting End-effector 1Approach P, P1, 200Move L, P1 See Figure 4-19.Set IO[104] 'Sets End-effector 1.Depart P, 200ChangeTool 1'Switches to TOOL1.::'Releasing End-effector 1ChangeTool 0'Restores the default TOOL0.Approach P, P1, 200 See Figure 4-20.Move L, P1Reset IO[104] 'Releases End-effector 1.Depart P, 200'Setting End-effector 2Approach P, P2, 200Move L, P2 See Figure 4-21.Set IO[105] 'Sets End-effector 2.Depart P, 200ChangeTool 2'Switches to TOOL2.::Figure 4-16. Switching the Defined Tool Coordinates4-25
Figure 4-17. End-effector 1 Figure 4-18. End-effector 2In the sample program shown in Figure 4-16, End-effector 1 and End-effector 2 aredefined as TOOL1 and TOOL2, respectively.Execution of TAKEARM automatically specifies TOOL0, so the robot will move to P1(where End-effector 1 is placed) on the flange surface basis. As illustrated in Figure4-19, End-effector 1 will be mounted by "Set IO [104]." "Depart P,200" will make therobot apart from P1 and CHANGETOOL 1 switches the tool coordinates from TOOL0to TOOL1.Figure 4-19. Moving Path for Setting End-effector 14-26
Chapter 4 General Introduction to Coordinates and FiguresTo replace End-effector 1 with End-effector 2, first release End-effector 1 as follows."CHANGETOOL 0" will switch the current tool coordinates from TOOL1 to TOOL0. Asshown in Figure 4-20, the robot will move to P1 on the flange surface basis and releaseEnd-effector 1 at P1.Figure 4-20. Moving Path for Releasing End-effector 1As shown in Figure 4-21, in mechanical interface coordinates, the robot will move to P2where End-effector 2 will be mounted. "Depart P,200" will make the robot apart from P2.Then TOOL0 will be switched to TOOL2.Figure 4-21. Moving Path for Setting End-effector 24-27
Displaying the current tool coordinatesThe current tool coordinates are always shown in the status line of the screen on theteach pendant, independent of the operation modes (Auto, Manual, and Teach checkmodes).Denotes TOOL04-28
Chapter 4 General Introduction to Coordinates and Figures[2.8] End-effector samples and their tool coordinates definitionsThe figure below shows end-effector samples (chuck and other tools). Figure 4-23shows their tool coordinate definitions.Figure 4-22. End-effector Types and Their Coordinate Origins4-29
The chuck is mounted in parallelwith the orientation vector of the flange.AThe chuck is mounted in parallelwith the orientation vector of the flange.BThe chuck is mounted at an angle of 45°to the orientation vector of the flange.CThe chuck is mounted at right anglesto the orientation vector of the flange.DEFFigure 4-23. Tool Coordinates Definition Examples4-30
Chapter 4 General Introduction to Coordinates and Figures[2.9] Simplified Tool Coordinates DefinitionAccess: [F2 Arm]—[F6 Aux.]—[F4 Tool.] ―[F4 AutoCalc]OverviewMounting an actual tool on the robot flange and teaching the same point four times(4-point teaching) enables the tool coordinates to be defined. It eliminates the need ofcalculation using values specified on drawings and allows actual tools involving theirtolerances to be used in tool coordinates definition.With the tool mounted on the robotflange, teach the same point.In teaching the point four times, the greater the posture change,the more accurate the setting made.The following window appears where you specify four teaching points using positionvariables.First press [F5 Change.] and enter the desired variable number, then press theSHORTCUT button.4-31
The Position Variables window appears as shown below.Teach the point four times and use [F6 Get Pos.] to get the four taught points into theposition variable.After getting the four points into the position variable, press Cancel to return to theSetting of tool coordinate system window.Beneath the 4-point teaching table, the calculated values are displayed in black.Note: If they are displayed in pink, calculation fails due to the taught values beingapproximate. Teach the four points again.Press OK to enter the calculated values into the tool definition table in the Define ToolCoordinates window shown earlier.In the Define Tool Coordinates window, press OK to establish those values.Checking the tool coordinates definedSwitch the operation mode to Tool and select the defined tool. Confirm that the tool enddoes not move when running the robot to change only its posture without motion of Rxor Ry. If the tool end greatly moves, make tool coordinates definition again.4-32
4.1.2 Interference Check AreaChapter 4 General Introduction to Coordinates and FiguresYou may define an interference check area(s) to prevent the robot arm from interferingwith other devices or facilities.The interference check area may be defined based on the base coordinates and workcoordinates shown below.Figure 4-24. Work Coordinates and Base Coordinates4-33
[ 1 ] Notes on interference check area(1) The center of the interference check area is always based on the base coordinates(WORK0).(2) Even if work coordinates are changed, the interference check area does notchangeTool coordinate origin of WORK1Tool coordinate origin of WORK0Interference check areaZ-axisInterference check areaVectorZcomponentX componentY componentX-axisPositionY-axisFigure 4-25. Interference Check Area4-34
Chapter 4 General Introduction to Coordinates and Figures[ 2 ] Setting the center, angle and range of areaTwo procedures, 2-point teaching and direct value entry, are available for defining aninterference check area(s).Defining an interference check area by 2-point teaching [F4: AutoCalc]You may define an interference check area(s) by teaching a work coordinates number(where you want to set an interference check area) and two points—vertexes farthestand nearest to the origin of the base coordinates.Z-axisInterference check areaNearest vertexFarthest vertexVectorZcomponentX componentYcomponentX-axisPositionY-axisFigure 4-26. Defining an Interference Check Area by 2-point Teaching4-35
Defining an interference check area by direct value entry [F5: Change.]You may define an interference check area by entering an area origin point (X, Y, andZ) relative to the base coordinates, the rotation angles (Rx, Ry, and Rz) around theX-axis, Y-axis, and Z-axis of the base coordinates, and the vector.Z- axisInterference check areaVectorZcomponentX componentY componentX- axisPositionY- axisFigure 4-27. Defining an Interference Check Area by Direct Value Entry4-36
Chapter 4 General Introduction to Coordinates and Figures[ 3 ] Defining an interference check area by 2-point teachingStep 1 On the top screen of the teach pendant, press [F2 Arm].Step 2 Press [F6 Aux.] in the Current Robot Position window.Step 3In the Auxiliary Functions (Arm) window, press [F6 Area], and the Define Areawindow appears as shown below.Select the desired work coordinates using the cursor or jog dial, and then press [F4AutoCalc].F4Step 4The Interference area automatic generation window appears as shown below.To set the reference work coordinates number (to be used for defining aninterference check area) and unassigned position variable names to be used forfarthest and nearest vertexes, select "Work coordinate," "Interference area vertex1," or "Interference area vertex 2," respectively, by using the cursor keys or jog dialand then press [F5 Change.].4-37
Step 5The numeric keypad will appear as shown below. Enter the desired number and twoposition variable names to the "Work coordinate," "Interference area vertex 1," and"Interference area vertex 2," respectively.NOTE: For base coordinates, enter 0 to the "Work coordinate."Step 6 Call up the Position Variables assignment window ([F2 Arm]—[F4 Var.]—[F4Position]) shown below.In the Position Variables assignment window, assign the value of the robot armposition to be taught to each of the two position variables you have entered forvertexes farthest and nearest to the origin of the base coordinates in Step 5.(1) Place the cursor on the position variables set for 2-point teaching.(2) In Manual mode, move the tool end of the robot arm to the teaching point.(3) Press [F6 Get Pos.] in order to read in the current position of the tool end to theselected position variable.(4) Carry out (1) through (3) above for each of the farthest and nearest vertexes.NOTE • Define an interface check area after defining tool coordinates and workcoordinates.• Before teaching the nearest and farthest vertexes, set the Manual mode inthe work coordinates of the reference work coordinated number.4-38
Chapter 4 General Introduction to Coordinates and FiguresStep 7 Press the Cancel button twice to return to the Interference area automaticgeneration window.Step 8At the bottom of the Interference area automatic generation window, the definedinterference check area is displayed. If its values are satisfactory, press the OKbutton; if not, press the Cancel button.NOTE: The center of the interference check area is always based on the basecoordinates (Work0). Therefore, the calculated center of position is not the center ofthe specified work coordinates.Step 9If you press the OK button in Step 8, the defined interference check area values willbe entered into the target interference check area.4-39
[ 4 ] Defining an interference check area by direct value entryStep 1 On the top screen of the teach pendant, press [F2 Arm].Step 2 Press [F6 Aux.] in the Current Robot Position windowStep 3 Press [F6 Area] in the Auxiliary Functions (Arm) window.The Define Area window appears.Select an interference check area to be defined using the cursor keys or jog dial.Step 4Press [F5 Change.] in the Define Area window.The numeric keypad will appear as shown below.Step 5 Using the numeric keypad, enter the desired numerical values. After checking theentered values, press the OK button.4-40
Chapter 4 General Introduction to Coordinates and Figures[ 5 ] Making the defined interference check areas active orinactiveThe number of interference check areas that can be defined by the area function is 32and they are defined by AREA0 to AREA31.Out of those defined areas, you may select areas to be actually used according to theprocedure given below.If you make many defined interference check areas active, the sampling interval willbecome long, resulting in delayed detection. Only the necessary areas should bemade active.Operating procedure• From the teach pendantStep 1 On the top screen of the teach pendant, press [F2 Arm].Step 2 Press [F6 Aux.] in the Current Robot Position window.Step 3 Press [F6 Area.] in the Auxiliary Functions (Arm) window, and the following windowwill appear.4-41
Step 4Call up the defined interference check area to be modified with the cursor key or jogdial as shown below.Then press [F6 Activate], and the Interference Area Detection Setting window willappear as shown below.F6Step 5 Select Inactive or Active (in this example, select Active), then press the OK button.The screen will return to the Define Area window as shown on the next page.4-42
Chapter 4 General Introduction to Coordinates and FiguresStep 6 The new setting (in this example, AREA 3 Active) will appear and the color of thesquare indicator for that setting will change (in this example, the indicator for Area 3turns green).Meaning of the square indicator colorGreen: ActiveBlack: InactivePress the OK button.4-43
[ 6 ] Turning the specified I/O signal(s) on or off at the detectionof area interferenceIf you make the following signal setting, the controller will turn the specified signal(s) onwhen the origin of the tool coordinates enters interference check area(s) defined andmade active.NOTE: Be careful when specifying I/O signal numbers. If you set a wrong I/O signal(s),the wrong signal will come ON when the origin of the tool coordinates entersinterference check areas.Operating procedure• From the teach pendantStep 1 On the top screen of the teach pendant, press [F2 Arm].Step 2 Press [F6 Aux.] in the Current Robot Position window.Step 3 Press [F6 Area.] in the Auxiliary Functions (Arm) window.Step 4 Call up the defined interference check area to be modified with the cursor key or jogdial.Step 5 In the Define Area window, select an entry field in the 1st column of the bottom line.Then press [F5 Change.]. The numeric keypad will appear as shown on the nextpage.F54-44
Chapter 4 General Introduction to Coordinates and FiguresStep 6 From the numeric keypad, enter the desired value, and then press the OK button.If no I/O output is required, enter "-1."Step 7 The new setting will appear in the selected entry field. Press the OK button.4-45
[ 7 ] Specifying a position variable name to which the currentposition value will be assigned at the detection of areainterferenceYou may specify the name of a position variable to which the current position value willbe assigned the moment the origin of the tool coordinates enters the interferencecheck area.NOTE: Be careful when specifying a position variable name(s). If you specify a wrongvariable name(s), the value of the specified position variable will be changed when theorigin of the tool coordinates enters the interference check area.Operating procedure• From the teach pendantStep 1 On the top screen of the teach pendant, press [F2 Arm].Step 2 Press [F6 Aux.] in the Current Robot Position window.Step 3 Press [F6 Area.] in the Auxiliary Functions (Arm) window.Step 4 Call up the defined interference check area to be modified with the cursor key or jogdial.Step 5 In the Define Area window, select an entry field in the 3rd column of the bottom line.Then press [F5 Change.]. The numeric keypad will appear as shown on the nextpage.F54-46
Chapter 4 General Introduction to Coordinates and FiguresStep 6 From the numeric keypad, enter the desired position variable name, and then pressthe OK button.If no position variable is to be used, enter "-1."Step 7 The new setting will appear in the selected entry field. Press the OK button.4-47
[ 8 ] Interpreting a detected area interference as an errorThe moment the origin of the tool coordinates interferes with the active interferencearea, the system can detect it as an error and cut the motor power off to prevent thearm from proceeding into the area further.In Version 1.8 or later, the following choices are available on the "Error Display on AreaInterference" window.ItemsThe system willdetect it as an error Error signal outputwhen:0: Disable (inside) No1: Enable (inside) The robot arm Yes2: Enable+ManMv (inside)invades the definedarea.Yes (You may switch toManual mode and operate therobot manually for recovery.)3: Disable (outside) No4: Enable (outside) The robot arm exits Yes5: Enable+ManMv (outside)from the definedarea.Yes (You may switch toManual mode and operate therobot manually for recovery.)Access: [F2 Arm]—[F6 Aux.]—[F6 Area.]4-48
Chapter 4 General Introduction to Coordinates and FiguresNOTES(1) Once an area interference error occurs, the system cuts off the motor power sothat the origin of the tool coordinates remains in the area. If you attempt to turn themotor power on under this state, an error will occur again and the motor power willbe cut off. You need to disable the error detection, turn the motor power on, movethe origin of the tool coordinates out of the area by manual operation, and thenenable the error detection again.(2) In Version 1.8 or later, if you set up any of items 3 through 5 (Detection when therobot arm exits from the defined area) for two check areas or more concurrently,then the system will interpret the overlapped area only as a motion space. If nooverlapped area exists, the robot cannot run, so you need to modify the settings.(3) When enabling interference check areas overlapped, refer to the precautions onthe next page.4-49
• Precautions in enabling interference check areas overlappedEnabling interference check areas overlapped and assigning an area output signalhaving the same number to those areas makes only the first invaded interferencecheck area effective.NOTES(1) Leaving an area and entering the adjoining area that overlaps the first one doesnot output an area interference error signal.(2) There are no problems as long as an area output signal having the same numberis not double assigned to interference check areas.(3) There are no problems as long as interference check areas are not overlapped.Example of two interference areasoverlappedExample of area setting(in WINCAPSIII)Arm motion examplesArm pathArea signal output state by patternsPattern 1Pattern 2Pattern 3Entering Area 0 turns the output signal ON. Leaving Area 0 turns it OFF. Inthe figure above, the origin of the tool coordinates has left Area 0 and is nowstaying in Area 1. Turning the motor power off and on in this state keeps theoutput signal OFF relating to Area 0. However, staying in Area 1 is detectedso that the output signal relating to Area 1 is turned ON.Entering Area 1 turns the output signal ON. Leaving Area 1 turns it OFF.Entering Area 0 turns the output signal ON. Leaving Area 0 turns it OFF. Ifthe origin of the tool coordinates enters an overlapped plane of twointerference check areas, the output signal assigned to the area from whichthe origin first exits will be enabled.4-50
Chapter 4 General Introduction to Coordinates and FiguresThe following procedure specifies whether or not to detect the invasion to theinterference check area(s) as an error.• Operating procedure for area interference error detectionStep 1 On the top screen of the teach pendant, press [F2 Arm].Step 2 Press [F6 Aux.] in the Current Robot Position window.Step 3 Press [F6 Area.] in the Auxiliary Functions (Arm) window.Step 4 Call up the defined interference check area to be modified with the cursor keys or jogdial.Step 5 In the Define Area window, select an entry field in the rightmost column of the bottomline.Then press [F5 Change.]. The error detection disable/enable screen will appear asshown on the next page.F54-51
Step 6 Select Enable (or Disable), and then press the OK button.Step 7 The new setting will appear in the selected entry field. Press the OK button.4-52
Chapter 4 General Introduction to Coordinates and Figures[ 9 ] Defining an interference check area in WINCAPSIIIStep 1 Start WINCAPSIII and log on as a Programmer.Open the project of the target robot.Choose View | Tool/Work/Area Settings to display the Area window shown below.Step 2 Specify the interference check area related parameters for each area.- X, Y, Z: Origin of the interference check area- RX RY, RZ: Rotation angles of the interference check area- DX, DY, DZ: Vectors of the interference check area- IO: Number of an I/O signal that is turned ON when the origin of the toolcoordinates invades the interference check area.- POS: Number of a position variable (global variable) to which the positionvalue of the end-of-arm tooling should be assigned the moment theorigin of the tool coordinates invades the area.- ERR: Specify whether or not to interpret a detected area interference as anerror. (0: Do not interpret as an error, 1: Interpret as an error)- ENABLE: Specify whether or not to detect an area interference.(0: Do not detect, 1: Detect)4-53
Step 3 After completion of data entry, choose Connect | Transfer data to transfer the areadata to the robot controller.The area data received by the robot controller takes effect immediately.4-54
Chapter 4 General Introduction to Coordinates and Figures[ 10 ] Escaping from the interference check areaIf the robot enters the interference check area, errors of entering prohibited area 0 toentering prohibited area 31 (ERROR2490 to 2497, 26B0 to 26C7) will occur. If you set[2: Enable +ManMv] in the interference check area setting, then you may move therobot out of the interference check area from the teach pendant or the mini-pendant inthe cases marked with "Available" in the table below.ModeOperationMotor ON Manual key Variable shift Motor lock DirectManual Available Available N/A Available N/ATeach check N/A - N/A N/A -Internal auto N/A - - N/A -External auto N/A - - N/A -Setting [2:Enable + ManMv]Step 1 On the top screen of the teach pendant, press [F2 Arm].Step 2 Press [F6 Aux.] in the Current Robot Position window.Step 3 In the Auxiliary Functions (Arm) window, press [F6 Area].Step 4 Using the cursor keys or jog dial, select the area you want to change.4-55
Step 5 Select the rightmost column of the table. Press [F5 Change.].F5Step 6 Select [2: Enable+ManMv] and press OK.Step 7 You can change all the settings in the window for values you want. If you change anyof them, confirm them and press OK.4-56
Chapter 4 General Introduction to Coordinates and FiguresEscaping procedureStep 1 Error will occur when the robot enters the interference area.InterferenceAreaPosition of the robot endStep 2 Switch off AutoEnable to change the operation mode to Manual.Mode selector switchStep 3 Move the robot outside the interference area.InterferenceAreaPosition of the robot endNote 1. Move the robot in the direction away from the interference point, althoughrobots can move to the position anywhere commanded.Note 2. If the robot enters an area of interference again, Error 2490-2497/26B0-26C7(Prohibited area 0 - 31) will reoccur.Note 3. If the areas of interference overlap, as shown in the figure below, error occursfirst upon the robot end starting within the area 1 enters in the area 2. However, youcan avoid this by aid of the method given above.124-57
4.1.3 Figures of the Shoulder, Elbow, and Wrist[ 1 ] Available 32 FiguresA 6-axis robot can take different figures for its shoulder, elbow, wrist, 6th axis, and 4thaxis for a single point and attitude (X, Y, Z, RX, RY, and RZ) at the end of theend-effector.Figures 4-28 through 4-32 show how the robot can take different figures for its shoulder,elbow, wrist, 6th axis, and 4th axis, respectively.Combining these different figures allows the robot to take 32 different figures for itssingle position and attitude, as listed in Table 4-2.Figure 4-33 shows examples of eight possible combinations of the shoulder, elbow,and wrist figures in the V series robot.Table 4-2. Available FiguresValue 4th-Axis Figure 6th-Axis Figure Wrist Figure Elbow Figure Shoulder Figure0 SINGLE 4 SINGLE FLIP ABOVE RIGHTY1 SINGLE 4 SINGLE FLIP ABOVE LEFTY2 SINGLE 4 SINGLE FLIP BELOW RIGHTY3 SINGLE 4 SINGLE FLIP BELOW LEFTY4 SINGLE 4 SINGLE NONFLIP ABOVE RIGHTY5 SINGLE 4 SINGLE NONFLIP ABOVE LEFTY6 SINGLE 4 SINGLE NONFLIP BELOW RIGHTY7 SINGLE 4 SINGLE NONFLIP BELOW LEFTY8 SINGLE 4 DOUBLE FLIP ABOVE RIGHTY9 SINGLE 4 DOUBLE FLIP ABOVE LEFTY10 SINGLE 4 DOUBLE FLIP BELOW RIGHTY11 SINGLE 4 DOUBLE FLIP BELOW LEFTY12 SINGLE 4 DOUBLE NONFLIP ABOVE RIGHTY13 SINGLE 4 DOUBLE NONFLIP ABOVE LEFTY14 SINGLE 4 DOUBLE NONFLIP BELOW RIGHTY15 SINGLE 4 DOUBLE NONFLIP BELOW LEFTY16 DOUBLE 4 SINGLE FLIP ABOVE RIGHTY17 DOUBLE 4 SINGLE FLIP ABOVE LEFTY18 DOUBLE 4 SINGLE FLIP BELOW RIGHTY19 DOUBLE 4 SINGLE FLIP BELOW LEFTY20 DOUBLE 4 SINGLE NONFLIP ABOVE RIGHTY21 DOUBLE 4 SINGLE NONFLIP ABOVE LEFTY22 DOUBLE 4 SINGLE NONFLIP BELOW RIGHTY23 DOUBLE 4 SINGLE NONFLIP BELOW LEFTY24 DOUBLE 4 DOUBLE FLIP ABOVE RIGHTY25 DOUBLE 4 DOUBLE FLIP ABOVE LEFTY26 DOUBLE 4 DOUBLE FLIP BELOW RIGHTY27 DOUBLE 4 DOUBLE FLIP BELOW LEFTY28 DOUBLE 4 DOUBLE NONFLIP ABOVE RIGHTY29 DOUBLE 4 DOUBLE NONFLIP ABOVE LEFTY30 DOUBLE 4 DOUBLE NONFLIP BELOW RIGHTY31 DOUBLE 4 DOUBLE NONFLIP BELOW LEFTY4-58
Chapter 4 General Introduction to Coordinates and Figures(1) Shoulder figureA shoulder figure is defined by a set of the values of the 1st-, 2nd-, and 3rd-axiscomponents.The robot can take two different shoulder figures--Left-handed (LEFTY) andRight-handed (RIGHTY).LEFTYRIGHTYFigure 4-28. Shoulder Figure(2) Elbow figureAn elbow figure is defined by a set of the values of the 2nd- and 3rd-axis components.The robot can take two different elbow figures--Over-handed (ABOVE) andUnder-handed (BELOW).ABOVEBELOWFigure 4-29. Elbow Figure4-59
(3) Wrist figureA wrist figure is defined by a set of the values of the 4th- and 5th-axis components.The robot can take two different shoulder figures--Normal (NONFLIP) and Reversed(FLIP). The NONFLIP figure refers to a figure of the robot whose 4th axis is turned by180 degrees without changing the wrist figure.NONFLIPFLIPFigure 4-30. Wrist Figure(4) 6th-axis figureA 6th-axis figure is defined by the value of the 6th-axis component.The robot can take two different 6th-axis figures--SINGLE and DOUBLE. If the 6th axisrotates by -180°
Chapter 4 General Introduction to Coordinates and Figures(5) 4th-axis figureThe 4th-axis figure is defined by the value of the 4th-axis component.The robot can take two different 4th-axis figures--SINGLE 4 and DOUBLE 4. If the 4thaxis rotates by -180°
Figure-1LEFTY, ABOVE, and NONFLIPFigure-2LEFTY, ABOVE, and FLIPFigure-3LEFTY, BELOW, and NONFLIPFigure-4LEFTY, BELOW, and FLIPFigure-5RIGHTY, ABOVE, and NONFLIPFigure-6RIGHTY, ABOVE, and FLIPFigure-7RIGHTY, BELOW, and NONFLIPFigure-8RIGHTY, BELOW, and FLIPFigure 4-33. Possible Combinations of Robot Shoulder, Elbow, and Wrist Figures4-62
Chapter 4 General Introduction to Coordinates and FiguresCAUTION: When carrying out a command with CP control, if the robot figures at thestart point differ from those saved in programming or teaching, be sure to checkbeforehand that no part of the robot will interfere with the surrounding equipment orfacilities. This is because each joint of the robot will take currently suitable motionsdepending upon the current figures to make the tip of the end-effector reach an objectpoint even if the robot position and attitude at the start point are the same as those inprogramming or teaching. However, the path of the end-effector is virtually the samealthough the figures may be different.(ABOVE)Point A Point B(BELOW)CAUTION: All of the 32 different figures may not be applicable to every position andattitude of the robot due to the robot structure. In some cases, only theLEFTY/ABOVE/NONFLIP figure may be applicable depending upon point and attitude.(In almost of all practical cases, the robot may not take all of the logically possiblefigures, but only two figures are possible--LEFTY/ABOVE/NONFLIP andLEFTY/ABOVE/FLIP. For the 4th-axis figure, the robot will take SINGLE 4.)4-63
[ 2 ] Boundaries of Robot FiguresThis section describes the boundary of each of the robot shoulder, elbow, wrist, and6th-axis figures.When judging the boundaries of the robot shoulder, elbow, and wrist, the system usesintersection point Pw of the two rotary axes of the 5th and 6th axes, as illustrated inFigure 4-34.Figure 4-34. Location of PwA boundary point in figures is called a singular point.Any path defined by commands with CP control (e.g., MOVE, APPROACH, andDEPART) should not run through the vicinity of the singular point. Refer to thePROGRAMMER'S <strong>MANUAL</strong> I, Section 3.3, "Interpolation Control." If the path runsthrough the vicinity of the singular point, the robot will issue ERROR6080s(Overspeed) or ERROR6070s (Over software motion limit) and then stop.4-64
Chapter 4 General Introduction to Coordinates and Figures(1) LEFTY/RIGHTY (Shoulder figure)The rotary axis of the 1st axis is defined as the boundary between LEFTY and RIGHTY.When viewed from the normal line on the side of the arm link, if point Pw exists in theleft-hand side of the rotary axis of the 1st axis, the figure is LEFTY; if point Pw exists inthe right-hand side, it is RIGHTY. In Figure 4-35, the boundary is drawn with alternatelong and short dash lines.NOTE: If point Pw exists on the rotary axis of the 1st axis, that is, on the boundarybetween LEFTY and RIGHTY, then it is called a singular point.Figure 4-35. Boundary between LEFTY and RIGHTY4-65
(2) ABOVE/BELOW (Elbow figure)The centerline of the arm link (connecting the shoulder with elbow) is defined as theboundary between ABOVE and BELOW.If point Pw exists in the + side of the centerline, the figure is ABOVE; if point Pw existsin the -side, it is BELOW. In Figures 4-36 and 4-37, the boundary is drawn withalternate long and short dash lines.Figure 4-36. Boundary between ABOVE and BELOW for LEFTYFigure 4-37. Boundary between ABOVE and BELOW for RIGHTY4-66
Chapter 4 General Introduction to Coordinates and Figures(3) FLIP/NONFLIP (Wrist figure)The rotary axis of the 4th axis is defined as the boundary between FLIP and NONFLIP.If the normal line on the flange surface tilts up the rotary axis of the 4th axis, the figureis FLIP; if it tilts down the rotary axis, it is NONFLIP. In Figures 4-38 and 4-39, theboundary is drawn with alternate long and short dash lines.Figure 4-38. Boundary between FLIP and NONFLIP for LEFTYFigure 4-39. Boundary between FLIP and NONFLIP for RIGHTY4-67
(4) SINGLE/DOUBLE (6th-axis figure)If the rotation angle (θ6) of the 6th axis is within the range of -180°
Chapter 4 General Introduction to Coordinates and Figures4.2 Coordinates, Interference Check Area,and Figures in 4-Axis Robots (H* -GSeries)4.2.1 CoordinatesThis section describes the coordinates required for correct handling of the robot.[ 1 ] Base coordinates[1.1] Base (world) coordinates and work coordinatesThe base coordinates are so-called world coordinates which refer to 3-dimensionalCartesian coordinates whose origin is at the center of the robot basement. It hascomponents Xb, Yb, and Zb which are identical with X, Y, and Z in X-Y mode explainedin Section 3.2.1, "Running the Robot Manually," [ 2 ] X-Y mode."Work coordinates are 3-dimensional Cartesian coordinates defined for each operationspace of workpiece. The origin can be defined anywhere and as much as needed. Itlies at a corner of the rectangular parallelepiped envelope of an object workpiece asshown below. Work coordinates are expressed by the coordinate origin (X, Y, Z)corresponding to the base coordinates and the angles of rotation (Rx, Ry, Rz) around X,Y and Z axes of base coordinates.If work coordinates are not defined, base coordinates come into effect.Figure 4-41. Base Coordinates and Work Coordinates4-69
[1.2] Position dataPosition data refers to a set of data which includes five components of basecoordinates. Of these five components, three are robot flange center coordinates (theend-effector tip coordinates if an end-effector is defined) and two are current robotattitude components, as shown below.Position data allows you to represent the current position of the robot flange center andobject points.Position data:XYZTFIGCoordinate values(in mm)Rotation angle (in degree)Figure (Value: 0 or 1)Defines the position of the robot flange center orthe end-effector center.Defines the robot attitude.Figure 4-42. Components of Position DataA set of X, Y, and Z coordinate values represents the position of the robot flange center(or tip of the end-effector if defined) expressed in base coordinates (Xb, Yb, and Zb) inunits of mm.The rotation angle expressed by T refers to an angle formed by the X axis of theTOOL0 coordinates and the Xb axis of the base coordinates. The angle is expressed inunits of degree.Figure represented by FIG value refers to a figure of robot arm joints. It is explained inSection 4.2.3, "Shoulder Figure."4-70
Chapter 4 General Introduction to Coordinates and Figures[1.3] Defining work coordinatesTwo procedures, 3-point teaching and direct value entry, are available for defining workcoordinates.Defining work coordinates by 3-point teaching[F2 Arm]—[F6 Aux.]—[F5 Work]—[F4 AutoCalc]In this method coordinates are created by teaching three points, namely, the origin ofwork coordinates, a point on X-axis and a point on X-Y plane.For the operating procedure, refer to "• Defining work coordinates by 3-pointteaching" .Hand of robotWork coordinate originPoint on X axisPoint on X-Y planeDefining work coordinates by direct value entry[F2 Arm]—[F6 Aux.]—[F5 Work]—[F5 Change.]Enter the coordinate origin (X, Y, Z) corresponding to the base coordinates and rotationangles (Rx, Ry, Rz) around the X-axis, Y-axis and Z-axis of base coordinates.For the operating procedure, refer to "• Defining work coordinates by direct valueentry".[1.4] External TCP functionEven the 4-axis robots can use the external TCP function, except motion in the Z-axisdirection. For instructions on how to configure the external TCP function, refer to the"External TCP function (for rotation on the origin of work coordinates)" for the 6-axisrobots in Section 4.1.4-71
[ 2 ] Tool Coordinates[2.1] Tool definitionTool definition refers to entering offset values for the dimensions of end-effectors to bemounted. This enables the robot to move the end of the mounted end-effector todesired positions.Without tool definition, the point defined in X-Y mode (that is, the coordinates shown inX-Y mode on the LCD) is referred to as the tool end. When the power is turned on, therotation center of the 4th axis (the center of the robot flange) is referred to as the toolend.If you establish tool definition according to the actual end-effector to be mounted andselect the X-Y mode, the robot controller will automatically offset the coordinates in X-Ymode by the values specified in tool definition so as to show the actual end position ofthe end-effector as a tool end.Therefore, even if the same position has been taught, the tool end will differ dependingupon whether or not tool definition is established.In X-Y mode, you may rotate the 4th axis or the tool end manually. The center of therotation will differ depending upon whether or not tool definition is established, asshown below.Figure 4-43. Manual Rotation of 4th Axisin X-Y mode, w/o Tool DefinitionFigure 4-44. Manual Rotation of 4th Axisin X-Y mode, w/ Tool Definition4-72
Chapter 4 General Introduction to Coordinates and Figures[2.2] Tool definition procedureYou may enter data relating to end-effectors to be used with the teach pendant.Enter numerical values in the X-Y coordinates whose origin is the center of rotation ofthe 4th axis. The coordinates are called "Tool coordinates" which are shown below.Viewed from AAFigure 4-45. Tool CoordinatesTable 4-3 lists parameters in tool definition. Each parameter specifies tool offset oneach tool coordinate.Table 4-3. Tool Components and ParametersTool components Used for UnitX Offset in TX direction mmY Offset in TY direction mmZ Offset in TZ direction mmT Offset in TT direction degree4-73
Operating procedure for tool definitionAccording to the procedure below, you may define arbitrary tool coordinates from theteach pendant. In this example, TOOL1 is defined. The same procedure would apply toTOOL2 through TOOL63.With this procedure, you may also display or modify the current tool coordinates.• From the teach pendantStep 1 On the top screen of the teach pendant, press [F2 Arm].The Current Robot Position window appears as shown below.F2Step 2 Press [F6 Aux.].The Auxiliary Functions (Arm) window appears as shown below.F64-74
Chapter 4 General Introduction to Coordinates and FiguresStep 3 Press [F4 Tool.].The Define Tool Coordinates window appears as shown below.F4Step 4 Select the X column of TOOL1 row by using the cursor keys or jog dial.The selected area will become highlighted.Then press [F5 Change.].The numeric keypad appears as shown in the next step.F54-75
Step 5 Use the numerical buttons on the numeric keypad to enter the desired offsetdistance on the X axis. Then press the OK button.The numeric keypad disappears and the offset distance on the X axis will be enteredin the X column of the TOOL1 row as shown below.If the newly entered value is satisfactory, press the OK button; if not, press theCancel button.Step 6 Repeat Steps 4 and 5 to enter offset distances to the Y, Z, and T columns of theTOOL1 row.Step 7 After entering offset values to all of the X, Y, Z, and T of the TOOL1, press the OKbutton. This completes the procedure of tool definition for TOOL1.4-76
Chapter 4 General Introduction to Coordinates and FiguresPrecautions when defining tool coordinates(1) The CHANGETOOL statement will take effect only in a program that has gottenrobot control by successful execution of the TAKEARM statement.Execution of the TAKEARM statement will initialize the tool coordinates definitionto TOOL0 (default that is the same as settings for the mechanical interfacecoordinates).(2) From the step where CHANGETOOL statement is written in the programs, thedefined tool coordinates will take effect. The definition will remain valid up to thestep immediately preceding the step where new CHANGETOOL statement iswritten.(3) If no CHANGETOOL statement is written in a program, TOOL0 (mechanicalinterface coordinates) will apply.(4) Once you select tool coordinates on the Select Operation Mode window called upby the M-MOD key on the teach pendant, it will take effect in Tool mode until it willbe changed.(5) If TOOL number used for running the robot to the object point and attitude differsfrom TOOL number previously used in writing the current point and attitude, theresulting position and attitude of the robot flange will become different from theprevious ones.For example, when programming, if you have written the object point and attitudeusing the APPROACH command in TOOL0 and you insert TOOLn (n is any of 1through 63) in any step preceding the APPROACH command, then executing theprogram brings the center of the robot flange to a different point and attitude thanthose defined in TOOL0, depending upon the contents of those different tooldefinitions.(6) The tool coordinates definitions made in program execution and in manual runningare saved in the same memory location.If you switch the operation mode from Auto mode to Manual mode, the toolcoordinates definition made in programming will remain in effect.(7) You may at anytime check the current TOOL number in the status bar on the teachpendant. Refer to "Displaying the current tool coordinates" on page 4-28.For details about commands and tool definitions, refer to the PROGRAMMER'S<strong>MANUAL</strong> I, Section 12.1, "Motion Control, APPROACH" and Section 9.5, "ToolCoordinates, TOOL." Also refer to Section 4.1, "[2.7] Tool definition" in this chapter.4-77
4.2.2 Interference Check AreaYou may define an interference check area(s) to prevent the robot arm from interferingwith other devices or facilities.The interference check area may be defined based on the base coordinates and workcoordinates shown below.Figure 4-46. Work Coordinates and Base Coordinates4-78
Chapter 4 General Introduction to Coordinates and Figures[ 1 ] Notes on interference check area(1) The center of the interference check area is always based on the base coordinates(WORK0).(2) Even if work coordinates are changed, the interference check area does notchangeTool coordinate origin of WORK1Tool coordinate origin of WORK0Interference check areaZ-axisInterference check areaVectorZcomponentX componentY componentX-axisPositionY-axisFigure 4-47. Interference Check Area4-79
[ 2 ] Setting the center, angle and range of areaTwo procedures, 2-point teaching and direct value entry, are available for defining aninterference check area(s).Defining an interference check area by 2-point teaching [F4: AutoCalc]You may define an interference check area(s) by teaching a work coordinates number(where you want to set an interference check area) and two points—vertexes farthestand nearest to the origin of the base coordinates.For the operating procedure, refer to "[ 3 ] Defining an interference check area by2-point teaching" on page 4-37.Z-axisInterference check areaNearest vertexFarthest vertexVectorZcomponentX componentYcomponentX-axisPositionY-axisFigure 4-48. Defining an Interference Check Area by 2-point Teaching4-80
Chapter 4 General Introduction to Coordinates and FiguresDefining an interference check area by direct value entry [F5: Change.]You may define an interference check area by entering an area origin point (X, Y, andZ) relative to the base coordinates, the rotation angles (Rx, Ry, and Rz) around theX-axis, Y-axis, and Z-axis of the base coordinates, and the vector.For the operating procedure, refer to "[ 4 ] Defining an interference check area by directvalue entry" on page 4-40.Z- axisInterference check areaVectorZcomponentX componentY componentX- axisPositionY- axisFigure 4-49. Defining an Interference Check Area by Direct Value Entry4-81
[ 3 ] Making the defined interference check areas active orinactiveFor settings, refer to Section 4.1.2 [ 5 ].[ 4 ] Turning the specified I/O signal(s) on or off at the detectionof area interferenceFor settings, refer to Section 4.1.2 [ 6 ].[ 5 ] Specifying a position variable name to which the currentposition value will be assigned at the detection of areainterferenceFor settings, refer to Section 4.1.2 [ 7 ].[ 6 ] Interpreting a detected area interference as an errorFor settings, refer to Section 4.1.2 [ 8 ].[ 7 ] Defining an interference check area in WINCAPSIIIFor settings, refer to Section 4.1.2 [ 9 ].[ 8 ] Escaping from the interference check area [Ver. 1.4 or later]For settings, refer to Section 4.1.2 [ 10 ].4-82
4.2.3 Shoulder FigureChapter 4 General Introduction to Coordinates and FiguresThe 4-axis robot can take two figures when positioning as shown in Figures 4-50 and4-51.Table 4-4. Available FiguresValue0 SINGLE-RIGHTY1 SINGLE-LEFTY2345678 DOUBLE-RIGHTY9 DOUBLE-LEFTY10FiguresRIGHTY(positiveside)2nd axis2nd axisFigure 4-50. RIGHTYLEFTY(negativeside)Figure 4-51. LEFTYWhen the floor-mounted robot is viewed from the top:If the 2nd axis is positioned at the positive side on the X axis of the base coordinates asshown in Figure 4-50, the figure is called "RIGHTY"; if at the negative side as shown inFigure 4-51, it is called "LEFTY."4-83
Chapter 5Commands Assignedto Function Keys ofthe Teach PendantThis chapter describes the variety of commandsassigned to the function keys of the teach pendant.The first section illustrates the command menutree. The following sections provide a detailedexplanation of those commands, together with theaccess routes.NOTE 1: Avoid letting the teach pendant or minipendant undergo any strong shocks, impacts, orvibrations.NOTE 2: Touch the teach pendant or mini pendantwith your fingers only, never with the tip of a pen orany pointed object. Otherwise, the LCD may bebroken.
Chapter 5 Commands Assigned to Function Keys of the Teach Pendant5.1 Commands Menu5.1.1 Top ScreenUsing the keys, buttons, and switches on the teach pendant allows you to call up avariety of screens on the LCD, each of which has its exclusive commands menu. Fromthe menu, you may choose commands by pressing the function keys.(1) Switching the robot controller on first displays the language menu on the teachpendant, prompting you to select the desired language (English or Japanese).NOTE: In Ver. 2.2 or earlier, switching the controller on first displays the topscreen shown in step (4) below.(2) Select the desired language (English or Japanese) and press the OK button.(3) The following message appears, prompting you to determine whether or not todisplay the language menu again when the controller is switched on at the nexttime.Select Yes or No, then press the OK button.(4) The top screen appears.Starting with this screen, you may access the function menu commands.F1 F2 F3 F4 F5 F6F10 F11Menu on the Top ScreenMenu barMenu bar(shifted)5-1
5.1.2 Menu TreeTOP ScreenF1F2F3F4F5F6F9F10F11F1F2F3F4F5F6F7F10F12F1F3F4F5F6F7F8F9F10F12F1F2F3F4F5F6F10F1F2F1F2F3F4F5F6F7F8F9ProgramNewProg.DeleteCopyVar.Edit.Aux.New PRJSyntxErrConfig.ArmRobot.OpeMode.Var.Speed.Aux.Show PShow JShow TMonitorMaint.VisionI/OBackNextJump toClrDummyON/OFFAux.ClrDummyOpePanelBackNextSetLoad!Log.USB mem.Mem InfoSet Com.Maint.Options.Save!SaveFilePanelInt/ExtUnplug5-2
Chapter 5 Commands Assigned to Function Keys of the Teach Pendant5.2 Displaying the Program List WindowAccess: [F1 Program]The [F1 Program] command on the top screen has different three menu hierarchies forManual, Teach Check, and Auto modes as shown in Section 5.1.2.Sections 5.2.1, 5.2.2, and 5.2.3 describe the function of the [F1 Program] command inManual, Teach Check, and Auto modes, respectively.5-3
5.2.1 Showing the Program List Window in Manual ModePressing [F1 Program] on the top screen in Manual mode will display the Program Listwindow as shown below.F1 F2 F3 F4 F5 F6When shiftedF7 F10 F12The Program List window has the following items:[Program Name] Lists program names declared by the PROGRAM statement.In Ver. 2.2 or later, this column also displays folder names, headerfile names, and operation panel file names.[Name][Cmpild][Source][Modifd][Use]Shows the source file name of the listed program. The [Name] and[Program Name] are not always coincident with each other.Shows whether the listed file has been compiled into run-timeformat. PAC files are usually compiled.Shows whether the source file of the listed program has beenloaded to the robot controller. If loaded, it is displayed with "Yes."Shows whether the listed program is modified after compiled intorun-time format. If the program only is uploaded from WINCAPSIIIto the robot controller, for example, "Yes" is displayed in this column.Shows whether the listed program is to be compiled. If you press[F12 Config.] and make the compile flag active, this column willdisplay "Enable" and the program will be compiled in compilation.The hierarchy of the [F1 Program] menu in Manual mode is given on the next page.5-4
Chapter 5 Commands Assigned to Function Keys of the Teach Pendantin Manual ModeF1F1F2F3F4F5F6F7F10F12F1F2F3F4F5F6F8F10F11F12F1F2F3F4F5F6F10F11F1F3F5F7F8F9F10F12ProgramNewProg.DeleteCopyVar.Integer.Float.Vector.Pos.Joint.RegVar.Double.Tran.String.VarsUsedEdit.NewLine.Del LineCopyLinePasteEditLineSave.SyntxErrSetBPAux.Set PRJ.OptionsBPSettngContinueSS Mode.StpBack.LoadModeCompileNew PRJSyntxErrConfig.5-5
Creating a new program in Manual modeAccess: [F1 Program]—[F1 NewProg.]Creates a new program.(1) Press [F1 NewProg.] in the Program List window, and the system message dialogbox will appear as shown below. Select [Program](2) Press the OK button in the system message dialog box to proceed, and the EnterProgram Name window will appear as shown below.5-6
Chapter 5 Commands Assigned to Function Keys of the Teach Pendant(3) Enter the desired program name and then press the OK button.A new program edit window will appear as shown below where you may create anew program.5-7
Deleting a program in Manual modeAccess: [F1 Program]—[F2 Delete]Deletes an existing program selected in the Program List window.(1) In the Program List window, select the program to be deleted.F2(2) Press [F2 Delete], and the system message dialog box will appear as shownbelow.(3) Press the OK button in the above system message dialog box to proceed.The system will delete the selected program and display the system message "Doyou want to compile ?"(4) Press the OK button.If you press the Cancel button, the program deletion will be cancelled and thescreen will return to the Program List window.5-8
Chapter 5 Commands Assigned to Function Keys of the Teach PendantCopying a program in Manual modeAccess: [F1 Program]—[F3 Copy]Copies an existing program, header file, or folder when selected in the Program Listwindow.NOTE 1: In Version 2.2 or later (supporting the folder feature), header files and folderscan be copied, but operation panel files cannot.NOTE 2: Copying a folder copies also all elements contained in that folder. If that foldercontains an operation panel file, therefore, the file is also copied.(1) In the Program List window, select the program to be copied.F3(2) Press [F3 Copy], and the system message dialog box will appear as shown below.(3) Select Copy and press the OK button, and the selected program file will be copied.5-9
(1) With the Program List window being displayed, press [F3 Copy] to regard theprogram file copied last as an object to be pasted. The object name appearsfollowing the "Paste" option in parentheses as shown below.(2) Select Paste and press the OK button, and the object will be pasted into thecurrent folder designated by "Dir:."If the current folder already contains a file having the same name as the object tobe pasted, the following dialog box appears, prompting you to select "Copy by thealias" or "Overwrite."NOTE: In overwriting a folder, if the destination folder contains elements notcontained in the source folder, those elements will remain intact.(3) If "Copy by the alias" is selected, the keyboard appears as shown below. Enter afile name and press OK with the keyboard.5-10
Chapter 5 Commands Assigned to Function Keys of the Teach PendantDisplaying and modifying variable values in Manual modeAccess: [F1 Program]—[F4 Var.]Displays values assigned to various types of variables, the number of variables used,and/or modifies them.(1) Press [F4 Var.] in the Program List window, and the Select Variable Type windowwill appear as shown below.(2) Select the desired variable type or the number of variables used. Thecorresponding window will display as described on the following pages.5-11
Displaying and modifying integer variable valuesAccess: [F1 Program]—[F4 Var.]—[F1 Integer.]Displays values assigned to integer variables and/or modifies them.Pressing [F1 Integer.] will display the Integer Variables window as shown below.Function keys available[F1 Back] Displays the previous page of the variables list.[F2 Next] Displays the next page of the variables list.[F3 Jump To][F5 Change.][F7 Copy Var]Displays the Jump To Variable Number window where youmay type a variable name you want to see with thenumerical keys and press OK. Doing so will display thetarget variable name.Displays the numeric keypad where you may enter avariable value you want to assign with the numerical keysand then press OK. Doing so will assign the newly enteredvalue to the variable.Displays the Variable Number of Copy Destination windowwhere you may enter a variable name to which you want tocopy a variable value and then press OK. Doing so willdisplay the system message "Are you sure you want to copythe variable X into the Y." Selecting Yes will copy thecurrently selected variable value to the specified variablename.5-12
Chapter 5 Commands Assigned to Function Keys of the Teach PendantDisplaying and modifying floating-point variable valuesAccess: [F1 Program]—[F4 Var.]—[F2 Float.]Displays values assigned to floating-point variables and/or modifies them.Pressing [F2 Float.] will display the Floating-point Variables window as shown below.Function keys available[F1 Back] Displays the previous page of the variables list.[F2 Next] Displays the next page of the variables list.[F3 Jump To][F5 Change.][F7 Copy Var]Displays the Jump To Variable Number window where youmay type a variable name you want to see with thenumerical keys and press OK. Doing so will display thetarget variable name.Displays the numeric keypad where you may enter avariable value you want to assign with the numerical keysand then press OK. Doing so will assign the newly enteredvalue to the variable.Displays the Variable Number of Copy Destination windowwhere you may enter a variable name to which you want tocopy a variable value and then press OK. Doing so willdisplay the system message "Are you sure you want to copythe variable X into the Y." Selecting Yes will copy thecurrently selected variable value to the specified variablename.5-13
Displaying and modifying vector variable valuesAccess: [F1 Program]—[F4 Var.]—[F3 Vector.]Displays values assigned to vector variables and/or modifies them.Pressing [F3 Vector.] will display the Vector Variables window as shown below.Function keys available[F1 Back] Displays the previous page of the variables list.[F2 Next] Displays the next page of the variables list.[F3 Jump To][F5 Change.][F7 Copy Var]Displays the Jump To Variable Number window where youmay type a variable name you want to see with thenumerical keys and press OK. Doing so will display thetarget variable name.Displays the numeric keypad where you may enter avariable value you want to assign with the numerical keysand then press OK. Doing so will assign the newly enteredvalue to the variable.Displays the Variable Number of Copy Destination windowwhere you may enter a variable name to which you want tocopy a variable value and then press OK. Doing so willdisplay the system message "Are you sure you want to copythe variable X into the Y." Selecting Yes will copy thecurrently selected variable value to the specified variablename.5-14
Chapter 5 Commands Assigned to Function Keys of the Teach PendantDisplaying and modifying position variable valuesAccess: [F1 Program]—[F4 Var.]—[F4 Pos.]Displays values assigned to position variables and/or modifies them.Pressing [F4 Pos.] will display the Position Variables window as shown below.Function keys available[F1 Back] Displays the previous page of the variables list.[F2 Next] Displays the next page of the variables list.[F3 Jump To][F4 Move][F5 Change.][F6 Get Pos.][F7 Copy Var]Displays the Jump To Variable Number window where youmay type a variable name you want to see with thenumerical keys and press OK. Doing so will display thetarget variable name.Displays the system message "Will move to the positionspecified by the variable xx." While OK is held down, therobot arm moves to the specified position. You can specifyPTP or CP.In Version 2.61 or later, it is also possible to move the robotarm to a target position specified with an approach length. Tointerrupt the movement halfway, release OK. The specifiedtarget position setting is retained. Pressing OK againrestarts the movement to the target position.Displays the numeric keypad where you may enter avariable value you want to assign with the numerical keysand then press OK. Doing so will assign the newly enteredvalue to the variable.Displays the system message "Are you sure you want toread the current position into the variable xx?" Pressing OKwill enter the current position values into the selectedvariable name.Displays the Variable Number of Copy Destination windowwhere you may enter a variable name to which you want tocopy a variable value and then press OK. Doing so willdisplay the system message "Are you sure you want to copythe variable X into the Y." Selecting Yes will copy the currentlyselected variable value to the specified variable name.5-15
Displaying and modifying joint variable valuesAccess: [F1 Program]—[F4 Var.]—[F5 Joint.]Displays values assigned to joint variables and/or modifies them.Pressing [F5 Joint.] will display the Joint Variables window as shown below.Function keys available[F1 Back] Displays the previous page of the variables list.[F2 Next] Displays the next page of the variables list.[F3 Jump To][F4 Move][F5 Change.][F6 Get Pos.][F7 Copy Var]Displays the Jump To Variable Number window where youmay type a variable name you want to see with thenumerical keys and press OK. Doing so will display thetarget variable name.Displays the system message "Will move to the positionspecified by the variable xx." While OK is held down, therobot arm moves to the specified position. You can specifyPTP or CP.In Version 2.61 or later, it is also possible to move the robotarm to a target position specified with an approach length. Tointerrupt the movement halfway, release OK. The specifiedtarget position setting is retained. Pressing OK againrestarts the movement to the target position.Displays the numeric keypad where you may enter avariable value you want to assign with the numerical keysand then press OK. Doing so will assign the newly enteredvalue to the variable.Displays the system message "Are you sure you want toread the current position into the variable xx?" Pressing OKwill enter the current position values into the selectedvariable name.Displays the Variable Number of Copy Destination windowwhere you may enter a variable name to which you want tocopy a variable value and then press OK. Doing so willdisplay the system message "Are you sure you want to copythe variable X into the Y." Selecting Yes will copy the currentlyselected variable value to the specified variable name.5-16
Chapter 5 Commands Assigned to Function Keys of the Teach PendantDisplaying registered variable list [Ver. 1.9 or later]Access: [F1 Program]—[F4 Var.]—[F6 RegVar.]Displays the registered variable list.This registered variable reference facility allows you to refer to previously registeredvariables. Use this facility when you cannot designate a program line since theprogram is running or when you want to refer to variables in more than one program.To call up the registered variables window, press [WATCH] in the coding list window or[F6 RegVar.] in the Select Variable Type window. The Registered variable list windowwill appear as shown below.For details, refer to Section 3.4.8 "Local Variable-Related Enhancement."5-17
Displaying and modifying double-precision variablevaluesAccess: [F1 Program]—[F4 Var.]—[F8 Double.]Displays values assigned to double-precision variables and/or modifies them.Pressing [F8 Double.] will display the Double-precision Variables window as shownbelow.Function keys available[F1 Back] Displays the previous page of the variables list.[F2 Next] Displays the next page of the variables list.[F3 Jump To][F5 Change.][F7 Copy Var]Displays the Jump To Variable Number window where youmay type a variable name you want to see with thenumerical keys and press OK. Doing so will display thetarget variable name.Displays the numeric keypad where you may enter avariable value you want to assign with the numerical keysand then press OK. Doing so will assign the newly enteredvalue to the variable.Displays the Variable Number of Copy Destination windowwhere you may enter a variable name to which you want tocopy a variable value and then press OK. Doing so willdisplay the system message "Are you sure you want to copythe variable X into the Y." Selecting Yes will copy thecurrently selected variable value to the specified variablename.5-18
Chapter 5 Commands Assigned to Function Keys of the Teach PendantDisplaying and modifying variable values inhomogeneous transform matrixAccess: [F1 Program]—[F4 Var.]—[F10 Tran.]Displays values assigned to variables in homogeneous transform matrix and/ormodifies them.Pressing [F10 Tran.] will display the Tran Variables window as shown below.Function keys available[F1 Back] Displays the previous page of the variables list.[F2 Next] Displays the next page of the variables list.Displays the Jump To Variable Number window where youmay type a variable name you want to see with the[F3 Jump To]numerical keys and press OK. Doing so will display thetarget variable name.Displays the system message "Will move to the positionspecified by the variable xx." While OK is held down, therobot arm moves to the specified position. You can specifyPTP or CP.[F4 Move]In Version 2.61 or later, it is also possible to move the robotarm to a target position specified with an approach length. Tointerrupt the movement halfway, release OK. The specifiedtarget position setting is retained. Pressing OK againrestarts the movement to the target position.Displays the numeric keypad where you may enter avariable value you want to assign with the numerical keys[F5 Change.]and then press OK. Doing so will assign the newly enteredvalue to the variable.Displays the system message "Are you sure you want toread the current position into the T variable XX?" Pressing[F6 Get Pos.]OK will enter the current position values into the selectedvariable name.Displays the Variable Number of Copy Destination windowwhere you may enter a variable name to which you want tocopy a variable value and then press OK. Doing so will[F7 Copy Var]display the system message "Are you sure you want to copythe variable X into the Y." Selecting Yes will copy the currentlyselected variable value to the specified variable name.5-19
Displaying and modifying string variable valuesAccess: [F1 Program]—[F4 Var.]—[F11 String.]Displays values assigned to string variables and/or modifies them.Pressing [F11 String.] will display the String Variables window as shown below.Function keys available[F1 Back] Displays the previous page of the variables list.[F2 Next] Displays the next page of the variables list.[F3 Jump To][F5 Change.][F7 Copy Var]Displays the Jump To Variable Number window where youmay type a variable name you want to see with thenumerical keys and press OK. Doing so will display thetarget variable name.Displays the Enter Character String window (see the nextpage) where you may enter a character string you want toassign with the letter buttons and then press OK. Doing sowill assign the newly entered string to the variable.Displays the Variable Number of Copy Destination windowwhere you may enter a variable name to which you want tocopy a variable value and then press OK. Doing so willdisplay the system message "Are you sure you want to copythe variable X into the Y." Selecting Yes will copy thecurrently selected variable value to the specified variablename.5-20
Chapter 5 Commands Assigned to Function Keys of the Teach PendantPressing [F5 Change.] on the String Variables window will call up the Enter CharacterString window as shown below.Use the letter buttons to enter a character string you want to assign to the currentlyselected string variable. Then press the OK button to fix the new string.5-21
Displaying and modifying the number of variables usedAccess: [F1 Program]—[F4 Var.]—[F12 VarsUsed.]Displays the number of variables used for each type of variables and/or modifies them.(1) Press [F12 VarsUsed.] to display the following window.(2) Select the item whose number of variables you want to change, then press [F5Change.]. The numeric keypad will appear.(3) Enter the desired value and press the OK button. The newly entered value willappear in the selected item box.F5F55-22
Chapter 5 Commands Assigned to Function Keys of the Teach Pendant(4) Check the entered value and press the OK button.The following system message will appear. Press the OK button, and compilingwill start.Upon successful completion of compiling and loading, the number of variables youhave entered becomes effective.If you press the Cancel button in the above window, the entered value does notbecome effective until compiling and loading takes place next time.NOTE: Regarding the number of global variablesIn this controller, the number of variables used can be modified only when theexecution program is loaded.When the number of variables used is modified, depending on the compiler, first a fileindicating the modification of the number of variables used is created and then theprogram is loaded. The new setting becomes effective from when loading iscompleted.When it is necessary to increase the number of global variables, the remainingmemory area may not be sufficient. In this case, the error codes "739E Failure to loadexecution file" and "73D4 Lack of memory" are displayed.In some cases, the following procedures may be effective for securing the necessarymemory area.a) Make a backup of the variables by WINCAPSIII.b) Change the number of all global variables to 1, compile and load them.c) Change the number of the global variables to the desired number, compile andload them.d) Return the backup variables to the controller.5-23
Editing a program in Manual ModeAccess: [F1 Program]—[F5 Edit.]Edits a program you select in the Program List window.(1) Select the program to be edited.F5(2) Press [F5 Edit.], and the selected program will appear in the program edit windowas shown below.F1 F2 F3 F4 F5 F6(F10)(3) Select the desired edit type (NewLine, Del Line, CopyLine, Paste, EditLine, Save.,or SyntxErr) by pressing the corresponding function key. The correspondingwindow will display as described on the following pages.5-24
Chapter 5 Commands Assigned to Function Keys of the Teach PendantInserting a new program line in Manual modeAccess: [F1 Program]—[F5 Edit.]—[F1 NewLine.]Insert a new program line immediately after the line selected in the Program Listwindow.(1) Select the program line after which you want to insert a new program line.(2) Press [F1 NewLine.] in the program edit window, and the coding window willappear as shown below.F1 F2 F3 F4 F5 F6(3) Enter a line of code by using the letter buttons.(4) Press the OK button to enter the new line into the program.(5) Press [F6 Save.].The system message "Do you want to save/compile this program?" appears.(6) Press the OK button to compile the edited program.If you press the Cancel button, the system message will disappear and the codingwindow with the new entry will remain displayed. In this state, if you press the OKkey, the system will discard the new entry and return to the Program List window. Ifyou press the Cancel key, the following system message appears: "This programhas been modified. Are you sure you want to discard this modified program? OK:Discard this program, Cancel: Continue editing, F6: Save the modification"Function keys availableShortcut to the favorite command window (that can be called up by[F1 User.]choosing the "Favorites" on the Category Selection window).Shortcut to the flow control statement screen (that can be called up by[F2 Flow.] choosing the "Flow control statement" on the Category Selectionwindow).Shortcut to the robot control statement screen (that can be called up[F3 Robot.] by choosing the "Robot control statement" on the Category Selectionwindow).[F4 Category] Displays the Category Selection window.[F5 Recent.] Shortcut to a list of commands in the most recently selected category.[F6 ClrAll] Clears all characters being entered.5-25
Deleting a program line in Manual modeAccess: [F1 Program]—[F5 Edit.]—[F2 Del Line]Deletes the program line you select in the program edit window.(1) Select the program line that you want to delete.(2) Press [F2 Del Line] in the program edit window, and the selected line will beerased.F6(3) Press [F6 Save.].The system message "Do you want to save and compile?" appears.(4) Select whether to compile or not, then press the OK button.If you press the Cancel button, the system message will disappear and theprogram edit window after the new entry will remain displayed. In this state, if youpress the OK key, the system will discard the new entry and return to the ProgramList window. If you press the Cancel key, the following system message appears:"This program has been modified. Are you sure you want to discard this modifiedprogram? OK: Discard this program, Cancel: Continue editing, F6: Save themodification"5-26
Chapter 5 Commands Assigned to Function Keys of the Teach PendantCopying a program line in Manual modeAccess: [F1 Program]—[F5 Edit.]—[F3 CopyLine]Copies the program line selected in the program edit window (shown below), into thememory. The copied data will be used when [F4 Paste] command will execute.F35-27
Pasting a program line in Manual modeAccess: [F1 Program]—[F5 Edit.]—[F4 Paste]Pastes the program line (that you copied with [F3 CopyLine] into the memory)immediately following a line you select in the program edit window.(1) In the program edit window as shown below, select the program line after whichyou want to paste a copied line.(2) Press [F4 Paste].F4(3) Press [F6 Save.].The system message "Do you want to save/compile this program?" appears.(4) Press the OK button to compile the edited program.If you press the Cancel button, the system message will disappear and theprogram edit window with the new entry will remain displayed. In this state, if youpress the OK key, the system will discard the new entry and return to the ProgramList window. If you press the Cancel key, the following system message appears:"This program has been modified. Are you sure you want to discard this modifiedprogram? OK: Discard this program, Cancel: Continue editing, F6: Save themodification"5-28
Chapter 5 Commands Assigned to Function Keys of the Teach PendantEditing a line of program code in Manual modeAccess: [F1 Program]—[F5 Edit.]—[F5 EditLine]Edits the line of program code selected in the program edit window.(1) Select the program line that you want to edit.(2) Press [F5 EditLine] in the program edit window, and the coding window will appearas shown below.F1 F2 F3 F4 F5 F6(3) Edit a line of code by using the letter buttons.(4) Press the OK button to enter the edited line into the program.(5) Press [F6 Save.].The system message "Do you want to save/compile this program?" appears.(6) Press the OK button to compile the edited program.If you press the Cancel button, the system message will disappear and theprogram edit window with the new entry will remain displayed. In this state, if youpress the OK key, the system will discard the new entry and return to the ProgramList window. If you press the Cancel key, the following system message appears:"This program has been modified. Are you sure you want to discard this modifiedprogram? OK: Discard this program, Cancel: Continue editing, F6: Save themodification"Function keys availableShortcut to the favorite command window (that can be called up by[F1 User.]choosing the "Favorites" on the Category Selection window).Shortcut to the flow control statement screen (that can be called up by[F2 Flow.] choosing the "Flow control statement" on the Category Selectionwindow).Shortcut to the robot control statement screen (that can be called up[F3 Robot.] by choosing the "Robot control statement" on the Category Selectionwindow).[F4 Category] Displays the Category Selection window.[F5 Recent.] Shortcut to a list of commands in the most recently selected category.[F6 ClrAll] Clears all characters being entered.5-29
Saving and compiling an edited program in ManualmodeAccess: [F1 Program]—[F5 Edit.]—[F6 Save.]Saves and compiles an edited program. If the program is set to "Disable" in theProgram List window, this command performs saving only; if it is set to "Enable," thiscommand performs both saving and compiling.During compiling, the following window is displayed.After compiling, the "Compile Log" will appear if the task program contains any errors.Fix the program until no syntax error will be detected, since the task program cannotexecute if containing any error.You may check anytime a compile log, by pressing [F1 Program]—[F10 SyntxErr] inManual mode.5-30
Chapter 5 Commands Assigned to Function Keys of the Teach PendantDisplaying a compile log in Manual modeAccess: [F1 Program]—[F5 Edit.]—[F10 SyntxErr]Displays the compile log as shown below.The compile log is useful when you correct syntax errors in programming. You mustcorrect the program until no syntax errors are detected.Setting a break point(s) in Manual modeAccess: [F1 Program]—[F5 Edit.]—[F11 SetBP]Sets a break point(s) at a desired program step(s). If the set break point is encounteredduring execution of program, the program will immediately stop.5-31
Providing auxiliary functions in Manual modeAccess: [F1 Program]—[F6 Aux.]Provides the following auxiliary functions for project editing.F1F3When shiftedF7 F8 F9 F10 F125-32
Chapter 5 Commands Assigned to Function Keys of the Teach PendantSetting project parameters in Manual modeAccess: [F1 Program]—[F6 Aux.]—[F1 Set PRJ.]Sets the parameters of variables to be used by the project and makes project-relatedsettings.For details about parameters, refer to the PROGRAMMER'S <strong>MANUAL</strong> I, Chapter 22(Appendix), "22.4 Configuration List."(1) Press [F1 Set PRJ.] in the Auxiliary Functions (Programs) window. The ProjectParameter window will appear as shown below.F5(2) Select the item to be modified and then press [F5 Change.]The numeric keypad will appear as shown below.5-33
(3) Enter the desired value(s) with the numerical buttons in the above window, andthen press the OK button.The new settings will appear in the Project Parameter window.(4) Check the new settings. If they are satisfactory, press the OK button, and thesystem message dialog box will appear as shown below.To clear the new settings, press the Cancel button in the Project Parameterwindow.(5) The system message dialog box asks whether the new settings are to be appliedto the current project.To apply the new settings to the current project immediately, press the OK button,making compilation start soon.To apply those settings from subsequent project compilation, press the Cancelbutton.5-34
Chapter 5 Commands Assigned to Function Keys of the Teach PendantSetting compiling options in Manual modeAccess: [F1 Program]—[F6 Aux.]—[F3 Options.]Sets the compiling options.(1) Press [F3 Options] in the Auxiliary Functions (Programs) window. The CompileOptions window will appear as shown below.(2) Select the item to be modified and then press [F5 Change.]The numeric keypad will appear as shown below.F5(3) Enter the desired value(s) with the numerical buttons in the above table, and thenpress the OK button.The new settings will appear in the Compile Options window.(4) Check the new settings. If they are satisfactory, press the OK button to make themtake effect. To clear those settings, press the Cancel button.5-35
ParametersInspect Date(0:OFF 1:ON)Explicit TypeDeclarationInitial valuesParametervalues0 0:OFF1:ON1 0:OFF1:ONCommentsError will occur unless localvariables are explicitly declaredwith a specification statementor postfix. If this option is foundinvalid, without explicitdescriptions, it will be regardedas a single accuracy variable.Block Table 100 Sets the size of working rangefor storing the nested state ofloops and conditionalstatement, etc.Line Table 2000 Sets the size of working rangefor registering lineinformation.The numericalvalue of this table is equal tothe number of all the lines thatcan be compiled. The samevalue is equal to the nest levelallowed for compiling.IO Table 50 Sets the size of working rangefor registering information onIO variables. The numericalvalue of this table is equal tothe number of defined IOvariables.Dim Table 150 Sets the size of working rangefor registering information onarray variables. The numericalvalue of this table is equal tothe number of array variablesthat can be defined.Free Chain 8000 Sets the size of working rangefor registering informationaddress link. This is the rangeused for solving labeladdresses, jumping address ofbranch and loop commands,and global variables.Name Table 16000 Sets the size of working rangefor registering informationconcerning label and othernames. This is the range usedfor registering information onreserved words anduser-defined labels, etc.Inspect ConstantRangeSymbol Table(make)Name Table(make)Relocation Table(make)1 Checks the range of anargument with the statementdescribed as constant whencreating the executionprogram.30000010000163845-36
Chapter 5 Commands Assigned to Function Keys of the Teach PendantSetting the break point stop mode in Manual modeAccess: [F1 Program]—[F6 Aux.]—[F5 BP Settng]Selects either of the following two BP stop modes to be applied when break points areencountered:- Stop only the program on which the encountered break point is set- Stop all running programs(1) Press [F5 BP Settng] in the Auxiliary Functions (Programs) window. The SelectBreakPoint Setting window will appear as shown below.(2) Select the desired option.(3) Press the OK button to make the new setting effective. To cancel it, press theCancel button.5-37
Setting the resume-related parameters in Manual modeAccess: [F1 Program]—[F6 Aux.]—[F7 Continue]Sets the resume-related parameters for Continue Start.(1) Press [F7 Continue] in the Auxiliary Functions (Programs) window. The ContinueParameters Setting window will appear as shown below.F5(2) Select the item to be modified and then press [F5 Change.]The numeric keypad will appear as shown below.(3) Enter the desired value(s) with the numerical buttons in the above table, and thenpress the OK button.The new settings will appear in the Continue Parameter Setting window.(4) Check the new settings. If they are satisfactory, press the OK button to make themtake effect. To clear those settings, press the Cancel button.5-38
Chapter 5 Commands Assigned to Function Keys of the Teach PendantSetting the safe start related parameters in ManualmodeAccess: [F1 Program]—[F6 Aux.]—[F8 SS Mode.]Sets the safe start related parameters.(1) Press [F8 SS Mode.] in the Auxiliary Functions (Programs) window. The SafetyStart Setting window will appear as shown below.F5(2) Select the item to be modified and then press [F5 Change.]The numeric keypad will appear as shown below.(3) Enter the desired value(s) with the numerical buttons in the above table, and thenpress the OK button.The new settings will appear in the Safety Start Setting window.(4) Check the new settings. If they are satisfactory, press the OK button to make themtake effect. To clear those settings, press the Cancel button.5-39
Setting the step return options in Manual modeAccess: [F1 Program]—[F6 Aux.]—[F9 StpBack.]Sets the step return options.(1) Press [F9 StpBack.] in the Auxiliary Functions (Programs) window. The Step BackSetting window will appear as shown below.(2) Select the desired option.(3) Press the OK button to make the new setting effective. To cancel it, press theCancel button.Restarting the controller will make this setting go into effect.5-40
Chapter 5 Commands Assigned to Function Keys of the Teach PendantEnabling/disabling the automatic loading of a project inManual modeAccess: [F1 Program]—[F6 Aux.]—[F10 LoadMode]Enables or disables the automatic loading of a project.(1) Press [F10 LoadMode] in the Auxiliary Functions (Programs) window. The ProjectAuto Load Setting window will appear as shown below.(2) Select the desired option.(3) Press the OK button to make the new setting effective. To cancel it, press theCancel button.Restarting the controller will make this setting go into effect.5-41
Compiling a projectAccess: [F1 Program]—[F6 Aux.]—[F12 Compile]Compiles a project or all programs which are set to "Enable" in the Program Listwindow.(1) Press [F12 Compile.] in the Auxiliary Functions (Programs) window. The systemmessage will appear as shown below.(2) To cancel compiling and return to the Auxiliary Functions (Programs) window,press the Cancel button.To start compiling, press the OK button.(3) Upon successful completion of project compilation, the system will automaticallyload the project and then return to the Auxiliary Functions (Programs) window.5-42
Chapter 5 Commands Assigned to Function Keys of the Teach PendantIf project compilation is not successful, the compile log window will appear as shownbelow. It displays syntax errors in the program. According to these error messages,modify your program.5-43
Creating a new project in Manual modeAccess: [F1 Program]—[F7 New PRJ]Erases all task programs stored in the robot controller and will then create a newproject.(1) Press [F7 New PRJ] in the Program List window. The system message dialog boxwill appear as shown below.(2) Press the OK button.5-44
Chapter 5 Commands Assigned to Function Keys of the Teach PendantDisplaying syntax errors in Manual modeAccess: [F1 Program]—[F10 SyntxErr]Displays syntax errors found in compilation.The display of syntax errors is useful for fixing syntax errors contained in a program.You should fix the program until no syntax errors will display.(1) Press [F10 SyntxErr] in the Program List window. The Compile Log window willappear as shown below.5-45
Enabling/disabling a selected program for compilation in ManualmodeAccess: [F1 Program]—[F12 Config.]Enables a selected program to get compiled or disables it from getting compiled.In compilation, the system will first check the enable/disable flags of programs andthen compile only those programs whose flags are set to "Enable."If a project contains more than one program with a same name but only one of them isset to "Enable," then no compile error will occur.If you edit and save programs whose flags are set to "Enable," the system willautomatically compile them.(1) In the Program List window, select a program that you want or do not want tocompile.(2) Press [F12 Config.] (or the Config. button located at the bottom of the Program Listwindow). This switches the selected program between "Enable" and "Disable."F125-46
Chapter 5 Commands Assigned to Function Keys of the Teach Pendant5.2.2 Showing the Program List Window in Teach Check ModePressing [F1 Program] on the top screen in Teach check mode will display the ProgramList window as shown below.When shiftedF1 F2 F4 F5 F6F7 F8 F9 F11 F12The Program List window has the following items:[Program Name] Lists program names declared by the PROGRAM statement.[Status][LineNo.][RnTime][Priorty][F/B]Shows the execution status of the listed program.Shows the line being executed or on halt.Shows the run time that the listed program takes to run. Note thatprograms named PROxx (where xx is a numeral) only may showthe run time.If the listed program runs continuously, the run time required forevery cycle will appear.Shows the priority order for executing programs. The less thenumeric value, the higher the priority.Shows whether the listed program is currently executing forwards orbackwards.The hierarchy of the [F1 Program] menu in Teach checks mode is given on the nextpage.5-47
in Teach Check ModeF1F1F4F5F6F7F9F11F12F1F2F6ProgramHaltCycStartStepBackStpStartProgRst.Priorty.Display.PrintDbgBackNextClr Disp5-48
Chapter 5 Commands Assigned to Function Keys of the Teach PendantHalting the selected program in Teach check modeAccess: [F1 Program]—[F1 Halt]Halts the task program selected in the Program List window.Pressing [F1 Halt] in the Program List window (shown below) will immediately interruptthe selected program.F1TIP: Pressing [F1 Halt] halts the selected program only. Pressing the STOP key on theteach pendant stops all task programs.5-49
Causing a step stop in Teach check modeAccess: [F1 Program]—[F2 StepStop]Interrupts the task program selected in the Program List window as shown below, afterexecuting the current program step.F25-50
Chapter 5 Commands Assigned to Function Keys of the Teach PendantCausing a single-cycle run in Teach check modeAccess: [F1 Program]—[F4 CycStart]Runs a single cycle of the program selected in the Program List window.(1) Select the program to be run in the Program List window (shown below).F4(2) Press [F4 CycStart], and the system message dialog box will appear as shownbelow.(3) While holding down the deadman switch, press the OK key. Make sure to keepboth switches depressed until the execution completes.NOTE: The elapsed time on display refers to the time length from the start to end of theprogram, including temporary stop time caused by Step stop or Halt.5-51
Returning the selected program by a single step in Teach checkmodeAccess: [F1 Program]—[F5 StepBack]Returns the program selected in the Program List window by a single step at a time.(1) Press [F5 StepBack] in the Program List window.(2) The system message appears as shown below.Holding down the deadman switch, press the OK button to move back the programby one step.5-52
Chapter 5 Commands Assigned to Function Keys of the Teach PendantCausing a single-step run in Teach check modeAccess: [F1 Program]—[F6 StpStart]Runs a single step of the program selected in the Program List window.(1) Select the program to be run in the Program List window (shown below).F6(2) Press [F6 StpStart], and the system message dialog box will appear as shownbelow.(3) While holding down the deadman switch, press the OK key. Make sure to keepboth switches depressed until the execution completes.5-53
Stopping the program(s) in Teach check modeAccess: [F1 Program]—[F7 ProgRst.]Stops the program(s).(1) Press [F7 ProgRst.] in the Program List window.The Reset Program window will appear as shown below.(2) Select the program to be stopped and press the OK button.The task will be stopped.NOTE: The currently running program also stops.5-54
Chapter 5 Commands Assigned to Function Keys of the Teach PendantSetting the priority order of programs in Teach check modeAccess: [F1 Program]—[F9 Priorty.]Sets the priority order of a program you select in the Program List window.(1) Select the target program.(2) Press [F9 Priorty.], and the numeric keypad will appear as shown below.Numerickeypad(3) Enter the priority order with the numerical buttons. (Entry range: 102 to 255)Note: The priority order of the supervisory task cannot be changed.(4) Press the OK button.5-55
Displaying codes of the selected program in Teach check modeAccess: [F1 Program]—[F11 Display.]Displays codes of the program selected in the Program List window.(1) Select the target program.(2) Press [F11 Display.], and the program code window will appear as shown below.F1 F2 F4 F5 F6(F7) (F9) (F11) (F12)When the program code window is displayed, the following commands are stilleffective: [F1 Halt], [F2 StepStop], [F4 CycStart], [F6 StpStart], [F7 Var.], [F8 I/O.], [F9Priorty.], and [F12 PrintDbg].5-56
Chapter 5 Commands Assigned to Function Keys of the Teach PendantDisplaying a debug window in Teach check modeAccess: [F1 Program]—[F12 PrintDbg]Displays the debug window where you may view the result of executing thePRINTDBG command in PAC language.This command allows you to check the execution result of a program or theintermediate result of the computation.The debug window displays the last 40 lines of the execution result. Scroll the screento show older data.A red triangle marker indicates a current line being used by this command.If a sample program shown below is executed, the debug window will display theresults as shown below.'!TITLE "PrintDbg test program"PROGRAM TESTDIM COUNTER AS INTEGERFOR COUNTER = 1 TO 5PRINTDBG "Value =";COUNTERIF COUNTER = 3 THEN EXIT FORNEXTPRINTDBG "Result = ";COUNTEREND5-57
5.2.3 Showing the Program List Window in Auto ModePressing [F1 Program] on the top screen in Auto mode will display the Program Listwindow as shown below.When shiftedF1 F2 F3 F4 F6F7 F9 F10 F11 F12The Program List window has the following items:[Program Name] Lists program names declared by the PROGRAM statement.[Status][LineNo.][RnTime][Priorty]Shows the execution status of the listed program.Shows the line being executed or on halt.Shows the run time that the listed program takes to run. Note thatprograms named PROxx (where xx is a numeral) only may showthe run time.If the listed program runs continuously, the run time required forevery cycle will appear.Note: In Version 1.4 or later, the run time is displayed for each stepwhen step run is carried out.Shows the priority order for executing programs. The less thenumeric value, the higher the priority.The hierarchy of the [F1 Program] menu in Auto mode is given on the next page.5-58
Chapter 5 Commands Assigned to Function Keys of the Teach Pendantin Auto ModeF1F1F2F3F4F6F7F9F10F11F12F1F2F6ProgramHaltStepStopCycStopStart.StpStartProgRst.Priorty.ContinueDisplay.PrintDbgBackNextClr Disp5-59
Halting the selected program in Auto modeAccess: [F1 Program]—[F1 Halt]Halts the task program selected in the Program List window.Pressing [F1 Halt] in the Program List window (shown below) will immediately interruptthe selected program.F1TIP: Pressing [F1 Halt] halts the selected program only. Pressing the STOP key on theteach pendant stops all task programs.5-60
Chapter 5 Commands Assigned to Function Keys of the Teach PendantCausing a step stop in Auto modeAccess: [F1 Program]—[F2 StepStop]Interrupts the program selected in the Program List window as shown below, afterexecuting the current program step.F25-61
Causing a cycle stop in Auto modeAccess: [F1 Program]—[F3 CycStop]Stops the task program selected in the Program List window as shown below, afterexecuting the current program up to the last step.F3NOTE: The elapsed time on display refers to the time length from the start to the end ofthe program, including temporary stop time caused by Step stop or Halt.5-62
Chapter 5 Commands Assigned to Function Keys of the Teach PendantRunning the selected program in Auto modeAccess: [F1 Program]—[F4 Start.]Runs the task program selected in the Program List window, by a single cycle orcontinuously.(1) Select the program to be run in the Program List window (shown below).F4(2) Press [F4 Start.], and the system message dialog box will appear as shown below.(3) Select Single-cycle or Continuously, then press the OK button to proceed.NOTE: The elapsed time on display refers to the time length from the start to the end ofthe program, including temporary stop time caused by Step stop or Halt.5-63
Causing a single-step run in Auto modeAccess: [F1 Program]—[F6 StpStart]Runs a single step of the task program selected in the Program List window.(1) Select a program to be run in the Program List window (shown below).F6(2) Press [F6 StpStart], and the system message dialog box will appear as shownbelow.(3) Press the OK button to proceed.NOTE: The elapsed time on display refers to the time length from the start to the end ofthe program, including temporary stop time caused by Step stop or Halt.The actual elapsed time is +0.00 to +0.03 more than the elapsed time, to include thetime required for starting and ending the step. [Ver. 1.4 or later]5-64
Chapter 5 Commands Assigned to Function Keys of the Teach PendantDisplaying the Reset Program window in Auto modeAccess: [F1 Program]—[F7 ProgRst.]Displays the Reset Program windows.(1) Press [F7 ProgRst.] in the Program List window.The Reset Program window will appear as shown below.(2) Select the program to be stopped and press the OK button.The task will be stopped.NOTE: The currently running program also stops.5-65
Setting the priority order of programs in Auto modeAccess: [F1 Program]—[F9 Priorty.]Sets the priority order of the task programs selected in the Program List window.(1) Select the target program.(2) Press [F9 Priorty.], and the numeric keypad will appear as shown below.Numerickeypad(3) Enter the priority order with the numerical buttons. (Entry range: 102 to 255)Note: The priority order of the supervisory task cannot be changed.(4) Press the OK button.5-66
Chapter 5 Commands Assigned to Function Keys of the Teach PendantResuming selected program(s) in Auto modeAccess: [F1 Program]—[F10 Continue]Resumes program(s) that has been stopped with "Cont.Stp." and selected in theProgram List window.(1) Select programs you want to resume and press [F10 Continue] in the Program Listwindow.NOTE: Programs that can be resumed show Continue Stop in the Status column.The system message will appear if programs that can resume are present.(2) Press the OK button to resume the program you have selected.To cancel resuming, press the Cancel button.If programs that can be resumed do not exist, the system message will appear asshown below.5-67
Displaying codes of the selected program in Auto modeAccess: [F1 Program]—[F11 Display.]Displays codes of the program selected in the Program List window.(1) Select the target program.(2) Press [F11 Display.], and the program code window will appear as shown below.F1 F2 F3 F4 F6(F7) (F9) (F12)When the program code window is displayed, the following commands are stilleffective: [F1 Halt], [F2 StepStop], [F3 Cyc Stop], [F4 Start], [F6 StpStart], [F7 Var.], [F8I/O], [F9 Priorty.], and [F12 PrintDbg].5-68
Chapter 5 Commands Assigned to Function Keys of the Teach PendantDisplaying a debug window in Auto modeAccess: [F1 Program]—[F12 PrintDbg]Displays the debug window where you may view the result of executing thePRINTDBG command in PAC language.This command allows you to check the execution result of a program or theintermediate result of the computation.The debug window displays the last 40 lines of the execution result. Scroll the screento show older data.A red triangle marker indicates a current line being used by this command.If a sample program shown below is executed, the debug window will display theresults as shown below.'!TITLE "PrintDbg test program"PROGRAM TESTDIM COUNTER AS INTEGERFOR COUNTER = 1 TO 5PRINTDBG "Value =";COUNTERIF COUNTER = 3 THEN EXIT FORNEXTPRINTDBG "Result = ";COUNTEREND5-69
5.3 Displaying the Current Robot PositionAccess: [F2 Arm]Pressing [F2 Arm] on the top screen will display the Current Robot Position window asshown below.When shiftedF1 F3 F4 F5 F6F7 F8 F9 F10 F12Pressing [F7 Show P] (or P button), [F8 Show J] (or J button), or [F9 Show T] (or Tbutton) switches the expression of the current robot position to the position variabletype, joint variable type, or homogeneous transform matrix variable type, respectively.The J1 through J6 (J4 for the 4-axis robot) show where each axis is positioned withinthe motion space.The hierarchy of the [F2 Arm] menu is given on the next page.5-70
Chapter 5 Commands Assigned to Function Keys of the Teach PendantF2F1F3F4F5F6F7F8F9F10F12F1F2F5F6F1F2F3F4F5F6F8F10F11F12F2F3F4F5F6F7F10F11F12F1F2F3F4F5F6F7F8F10F11F12F1F3F4F5F6F7F8F9F11ArmRobot.OpeMode.BackNextWork No.Tool No.Var.Integer.Float.Vector.Pos.Joint.RegVar.Double.Tran.String.VarsUsedSpeed.Aux.ColisionDirect.Tool.Work.Area.Config.OverloadCtrlLog.Exec CALShow PShow JShow TMonitorMaint.M Space.RANG.Brake.Adj.ZBalPM inf.CALSET.JointsArmGroupBrakeLinkInfoAutoGainCALSETPathServoDsablArmENC rstExtensionENC inf.ENC rstENC set.5-71
Selecting the robot type (reserved)Access: [F2 Arm]—[F1 Robot.]Selects the type of robot you have. This command is reserved for future use ofeight-axis robots or two 4-axis robots. It allows the control of the teach pendant toswitch between six axes and two extended axes or between two 4-axis robots.While the teach pendant has only six arm traverse keys, the robot controller can controlup to 8 axes (e.g., controlling a single 6-axis robot plus two extended axes or two4-axis robots). To control more than six axes with those six keys of the teach pendant,you need to use this command and switch the control to the extended axes.This command is functionally equivalent to the R-SEL key.(1) In the Current Robot Position window shown below, press [F1 Robot.].F1(2) The Select Robot window will appear as shown below. Select the type of yourrobot and then press the OK button.Reference: VS-*** series displays part of robot type in this window. For detailed robottypes, see "Displaying the version information of each module".5-72
Chapter 5 Commands Assigned to Function Keys of the Teach PendantSwitching the operation modes, work coordinates and toolcoordinatesAccess: [F2 Arm]—[F3 OpeMode.]Switches the operation modes, work coordinates and tool coordinates.This command is functionally equivalent to the M-MOD key.(1) In the Current Robot Position window shown below, press [F3 OpeMode.].F3(2) The Select Operation Mode window will appear as shown below. Select thedesired operation mode, work coordinates and tool coordinates, and then pressthe OK button.5-73
Displaying and modifying variable valuesAccess: [F2 Arm]—[F4 Var.]Displays values assigned to various types of variables and the number of variablesused and/or modifies them.This command is functionally equivalent to [F1 Program]—[F4 Var.] in Manual mode.Displaying and modifying integer variable values[F2 Arm]—[F4 Var.]—[F1 Integer.]Refer to page 5-12.Displaying and modifying floating-point variable values[F2 Arm]—[F4 Var.]—[F2 Float.]Refer to page 5-13.Displaying and modifying vector variable values[F2 Arm]—[F4 Var.]—[F3 Vector.]Refer to page 5-14.Displaying and modifying position variable values[F2 Arm]—[F4 Var.]—[F4 Pos.]Refer to page 5-15.Displaying and modifying joint variable values[F2 Arm]—[F4 Var.]—[F5 Joint.]Refer to page 5-16.Displaying registered variable list. [Ver. 1.9 or later][F2 Arm]—[F4 Var.]—[F6 RegVar.]Refer to page 5-17.Displaying and modifying double-precision variable values[F2 Arm]—[F4 Var.]—[F8 Double.]Refer to page 5-18.Displaying and modifying variable values in homogeneous transform matrix[F2 Arm]—[F4 Var.]—[F10 Tran.]Refer to page 5-19.Displaying and modifying string variable values[F2 Arm]—[F4 Var.]—[F11 String.]Refer to page 5-20.Displaying and modifying the number of variables used[F2 Arm]—[F4 Var.]—[F12 VarsUsed.]Refer to page 5-22.5-74
Chapter 5 Commands Assigned to Function Keys of the Teach PendantSetting the reduced ratios of the programmed speed, acceleration,and decelerationAccess: [F2 Arm]—[F5 Speed.]Sets the reduced ratios (percentage) of the programmed speed, acceleration, anddeceleration, as well as selecting speed-running or inching.This command is functionally equivalent to the SPEED key.(1) In the Current Robot Position window shown below, press [F5 Speed.].F5(2) The Set Speed window will appear as shown below. Set the desired ratios of theprogrammed speed, acceleration and deceleration. Additionally, selectspeed-running or inching. Then press the OK button.TIP: For the detailed operating procedure about setting of the reduced ratios, refer toChapter 2, Section 2.7.5-75
Providing auxiliary functionsAccess: [F2 Arm]—[F6 Aux.]Provides the auxiliary functions concerning coordinates definition, interference areadefinition, user preferences, overload anticipation, and CAL operation.(1) Press [F6 Aux.], and the Auxiliary Functions (Arm) window will appear as shownbelow.F2 F4 F5 F6(2) Select the desired auxiliary function by pressing the corresponding function key.The corresponding window will display as described on the following pages.5-76
Chapter 5 Commands Assigned to Function Keys of the Teach PendantCollision Detection Function[Ver. 2.61 or later]Access: [F2 Arm]—[F6 Aux.] —[F2 Colision]The collision detection function detects a collision between the robot arm or theend-of-arm tool and the surrounding equipment without using special sensors andbrings the robot to an emergency stop in order to reduce damages that could becaused by a collision. This function is available in both manual and automaticoperations.For details, refer to PROGRAMMER’S <strong>MANUAL</strong> I.5-77
Entering the direct teaching mode (For 4-axis robots)Not supported in UL-Listed robot systemsAccess: [F2 Arm]—[F6 Aux.]—[F3 Direct.]The direct teaching mode allows you to move the robot arm by hand (without using theteach pendant) with the motor being OFF and teach the current position to a jointvariable, position variable, or homogeneous transform matrix variable. (Usual teachingrequires the motor to be turned ON.)Note 1: The HS-G series and HM-G-W series (dust- & splash-proof type) have no airbalance cylinder on the Z-axis, so the operation procedure for the direct teaching modediffers from that of the conventional 4-axis robots.Note 2: The HM-4A***G-W series (20 kg payload type) does not support the directteaching mode.Note 3: In the global type of robot systems of the early version of the G series, holdingdown the deadman switch (enable switch) is required for direct teaching modeoperation and brake releasing.Note 4: Do not quickly start and stop the direct teaching mode in succession. It maytrigger the error 5790 "Speed over in direct mode."Note 5: The XR-G series of robots do not release the 3rd-axis (Z-axis) brake in thedirect teaching mode.• For conventional 4-axis robots except the HS-G & HM-G-W series(1) In the Auxiliary Functions (Arm) window, press [F3 Direct.]. The air balanceadjustment window will appear.NOTE: The air pressure adjustment for Z-axis balance is required only when youmake the robot enter the direct teaching mode at the first time after turning therobot controller ON.(2) According to the instructions given on the screen, adjust the air pressure. If the"Complete the air pressure" is displayed as shown below, press the OK button.5-78
Chapter 5 Commands Assigned to Function Keys of the Teach Pendant(3) Wait for the following window to appear and press the OK button.(4) Wait for the following window to appear.Turn the motor OFF and then press the OK button.(5) Wait for the following window to appear.Check the message and press the OK button.Caution 1: Do not quickly start and stop the direct teaching mode in succession.It may trigger error 5790 "Speed over in direct mode."Caution 2: When moving the robot by hand, hold by a part other than the plasticcover.5-79
• For the HS-G & HM-40***G-W seriesThe HS-G and HM-G-W series have no air balance cylinder on the Z-axis, so theoperation procedure for the direct teaching mode differs from that of the conventional4-axis robots.(1) In the Auxiliary Functions (Arm) window, press [F3 Direct.].The following message will appear.(2) Press the OK button in the above window.After that, holding down the brake release switch provided on the top of the 2ndarm releases the brake.Note: The brake release switch is effective only in the direct teaching mode.Caution: Releasing the brake will drop the Z-axis downward. Make surebeforehand that it will not cause damage to person or equipment.Caution: When moving the robot by hand, hold by a part other than the plastic cover.Brake release button for the 3rd-axisBrake release button for the 3rd-axis(3) In the following start window, press the OK button.5-80
Chapter 5 Commands Assigned to Function Keys of the Teach PendantDefining tool coordinatesAccess: [F2 Arm]—[F6 Aux.]—[F4 Tool.]Defines tool coordinates.(1) Press [F4 Tool.] in the Auxiliary Functions (Arm) window, and the following windowwill appear.F5(2) In the above window, select the item to be defined and then press [F5 Change.]The numeric keypad will appear as shown below.Numerickeypad(3) Enter the desired value with the numerical buttons in the above window, and thenpress the OK button.5-81
Simplified Tool Coordinates DefinitionAccess: [F2 Arm]—[F6 Aux.]—[F4 Tool.]—[F4 AutoCalc]Mounting an actual tool on the robot flange and teaching the same point four times(4-point teaching) enables the tool coordinates to be defined.It eliminates the need of calculation using values specified on drawings and allowsactual tools involving their tolerances to be used in tool coordinates definition.With the tool mounted on the robotflange, teach the same point.In teaching the point four times, the greater the posture change,the more accurate the setting made.(1) Select the desired tool in the Define Tool Coordinates window and press[F4 AutoCalc]. The Setting of Tool Coordinate System window appears.5-82
Chapter 5 Commands Assigned to Function Keys of the Teach Pendant(2) Teach the robot the same point in four different postures (teaching points).Specify the four teaching points using position variables.Press [F5 Change.] and enter the desired variable number.Beneath the 4-point teaching table, the calculated values are displayed in black.Note: If they are displayed in pink, calculation fails due to the taught values beingapproximate. Teach the four points again.Press OK to enter the calculated values into the tool definition table. Press OK again toestablish those values.5-83
Defining work coordinatesAccess: [F2 Arm]—[F6 Aux.]—[F5 Work.]Defines work coordinates.(1) Press [F5 Work.] in the Auxiliary Functions (Arm) window, and the followingwindow will appear.F4F5(2) In the above window, select the item to be defined and then press [F5 Change.].NOTE: For automatic calculation of work coordinates press [F4 AutoCalc]. Fordetails, refer to the next page.The numeric keypad will appear as shown below.Numerickeypad(3) Enter the desired value with the numerical buttons in the above window, and thenpress the OK button.5-84
Chapter 5 Commands Assigned to Function Keys of the Teach PendantCalculating work coordinates automatically in ManualmodeAccess: [F2 Arm]—[F6 Aux.]—[F5 Work.]—[F4 AutoCalczxigfu]Calculates work coordinates automatically if you merely specify three points--Origin ofwork coordinates, point on the X axis of work coordinates and point on the X-Y plane ofwork coordinates.For details regarding work coordinates definition, refer to Section 4.1.1, [1.3] andSection 4.2.1, [1.3] for 6-axis and 4-axis robots, respectively.(1) Press [F4 AutoCalc] in the Define Work Coordinates window, and the followingwindow appears.If three points are on a straight line, the automatic calculation will fail to set workcoordinates and the following window appears.5-85
Defining an interference check areaAccess: [F2 Arm]—[F6 Aux.]—[F6 Area.]Defines an interference check area(s) or rectangular parallelepiped(s). If theend-effector comes in or goes out of the defined interference check area, the systeminterprets it as interference so that it may activate specified tasks preprogrammed if anI/O port address is set.(1) Press [F6 Area.] in the Auxiliary Functions (Arm) window, and the followingwindow will appear.F4F5(2) In the above window, select the item to be defined and then press [F5 Change.].NOTE: For automatic calculation of the interference check area, press [F4AutoCalc]. For details, refer to the next page.The numeric keypad will appear as shown below.Numerickeypad(3) Enter the desired value with the numerical buttons in the above window, and thenpress the OK button.5-86
Chapter 5 Commands Assigned to Function Keys of the Teach PendantCalculating the coordinates of an interference checkarea automatically in Manual modeAccess: [F2 Arm]—[F6 Aux.]—[F6 Area.]—[F4 AutoCalc]Calculates the coordinates of an interference check area(s) automatically if you merelyspecify three points--Work coordinates and two vertexes (farthest and nearest to theorigin of the base coordinates) of the interference check area.5-87
Setting the user preferencesAccess: [F2 Arm]—[F6 Aux.]—[F7 Config.]Sets or modifies the user preferences such as the control set of motion optimization,robot mounting style, mass of payload, and payload center of gravity (as master controlparameters).(1) Press [F7 Config.] in the Auxiliary Functions (Arm) window, and the followingwindow will appear.(2) In the above window, select the item to be defined and then press [F5 Change.].The numeric keypad will appear as shown below.F5Numerickeypad(3) Enter the desired value with the numerical buttons in the above window, and thenpress the OK button.5-88
Chapter 5 Commands Assigned to Function Keys of the Teach PendantDisplaying anticipated overloads to the capacity ofmotors and brake resistance of the robot controllerAccess: [F2 Arm]—[F6 Aux.]—[F10 Overload]Displays anticipated overloads (percentages) to the capacity of joint-drive motors andto the brake resistance of the robot controller.(1) Press [F10 Overload] in the Auxiliary Functions (Arm) window, and the followingsystem message dialog box will appear.(2) Press the OK button to close the dialog box.When the system logs control data, it calculates anticipated overloads. To update theanticipated overloads; therefore, write program in which STARTLOG will execute at thestart of the motion whose overloads should be anticipated, as shown in the sampleprogram given on the next page.The system will calculate anticipated overloads for a maximum of 10 seconds from thestart of logging. If the time from the start (STARTLOG) of logging to the end(STOPLOG) is less than 10 seconds, the system will calculate overloads for that time.If the time exceeds 10 seconds, the system will calculate them for the first 10 seconds.If a motion cycle whose overloads should be anticipated takes more than 10 seconds,therefore, you need to log control data for each of 10-second or less motion cycles tomonitor anticipated overloads.Anticipated overloads will not be updated until STARTLOG executes again.5-89
(Sample program for logging)PROGRAM PRO1 'Main program'TAKEARMCLEARLOG :Clears log data before STARTLOGSTARTLOG :Start of loggingCALL SUB1CALL SUB2STOPLOG :End of logging (If STOPLOG executes within 10 secondsfrom STARTLOG, the anticipatedoverloads for that time will appear.)GIVEARMEND5-90
Chapter 5 Commands Assigned to Function Keys of the Teach PendantSaving or deleting control log to/from the flash memoryAccess: [F2 Arm]—[F6 Aux.]—[F11 CtrlLog.]Saves or deletes control log preserved in the flash memory.(1) Press [F11 CtrlLog.] in the Auxiliary Functions (Arm) window, and the followingwindow appears.F1 F2 F6(F7)(F12)Function keys available[F1 StrtLog] Starts keeping a control log.[F2 StopLog] Stops keeping a control log.[F6 ClrLog] Clears the current log so as to allow a new log.[F7 SaveLog.]Saves the current log stored in the work memory into theflash memory. If the controller is turned OFF, data stored inthe work memory will be lost, but data in the flash memorywill not.You may read out log data stored in the flash memory byspecifying the log in WINCAPSIII.[F12 DelLog.] Deletes the current log stored in the flash memory.5-91
Executing CAL operationAccess: [F2 Arm]—[F6 Aux.]—[F12 Exec CAL]Executes CAL operation.(1) Press [F12 Exec CAL] in the Auxiliary Functions (Arm) window, and the followingsystem message dialog box will appear.(2) Check that the motor power is ON, and then press the OK button in the abovedialog box to proceed.The system message dialog box will appear as shown below.(3) Press the OK button in the above dialog box.5-92
Chapter 5 Commands Assigned to Function Keys of the Teach PendantSwitching the expression of the current robot position to theposition variable typeAccess: [F2 Arm]—[F7 Show P]Switches the expression of the current robot position to the position variable type.Press [F7 Show P] in the Current Robot Position window, and the screen will switch asshown below where the current robot position is expressed in position variables.This command is functionally equivalent to the P button provided in the upper rightcorner of the Current Robot Position window.5-93
Switching the expression of the current robot position to the jointvariable typeAccess: [F2 Arm]—[F8 Show J]Switches the expression of the current robot position to the joint variable type.Press [F8 Show J] in the Current Robot Position window, and the screen will switch asshown below where the current robot position is expressed in joint variables.This command is functionally equivalent to the J button provided in the upper rightcorner of the Current Robot Position window.5-94
Chapter 5 Commands Assigned to Function Keys of the Teach PendantSwitching the expression of the current robot position to the tran.variable typeAccess: [F2 Arm]—[F9 Show T]Switches the expression of the current robot position to the homogeneous transformmatrix variable type.Press [F9 Show T] in the Current Robot Position window, and the screen will switch asshown below where the current robot position is expressed in tran. variables.This command is functionally equivalent to the T button provided in the upper rightcorner of the Current Robot Position window.5-95
Servo Monitor:Display the current value or load factor.Access: [F2 Arm]— -[F10 ServoMonitor]Current valuesLoad ratesPressing this clears themaximum values.The Servo Monitor command has been newly assigned to the function keys of theteach pendant.OverviewThe servo monitor displays the following information for each axis on the teachpendant.ItemCurrent valueMax. current valueLoad rateMax. load rateDisplays the following monitor values:Present current values of each axis (rating ratio)Maximum current values of each axisPressing [F6 CLR.Max] clears these values.Present load rates of each axisMaximum load rates of each axisPressing [F6 CLR.Max] clears these values.Notes- Immediately after the robot controller is powered up, the servo monitor cannotdisplay stabilized load rates. Wait approx. 30 seconds for the monitor to be stabilizedand then clear those value to display correct ones.- The load rates displayed by the servo monitor are the present values. To considerload rates that the axes would undergo during continuous operation, use anticipatedoverloads calculated by writing STARTLOG and STOPLOG in programs. To displaythe anticipated overloads, press [F2 Arm]—[F6 Aux.]—[F10 Overload], referring tothe Setting-up Manual, Chapter 5, "Displaying anticipated overloads to the capacityof motors and brake resistance of the robot controller."5-96
Chapter 5 Commands Assigned to Function Keys of the Teach PendantDisplaying the Maintenance Functions (Arm) windowAccess: [F2 Arm]—[F12 Maint.]Displays the Maintenance Functions (Arm) window.(1) Press [F12 Maint.] in the Current Robot Position window, and the MaintenanceFunctions (Arm) window will appear as shown below.• V *-D series(For the VM-Dseries only)• H *-D series(2) Select the desired maintenance function. The corresponding window will displayas described on the following pages.5-97
Setting the motion space (software motion limit)Access: [F2 Arm]—[F12 Maint.]—[F1 M Space.]Sets the motion space or software motion limit.(1) Press [F1 M Space.] in the Maintenance Functions (Arm) window.The Motion Space (Software motion limit) window will appear as shown below.(2) Select the item to be modified and then press [F5 Change.].The numeric keypad will appear.F5Numerickeypad(3) Enter the desired value with the numerical buttons in the above window, and thenpress the OK button.The new entry will be entered into the Motion Space (Software motion limit)window.(4) Press the OK key.To cancel the new entry, press the Cancel key.5-98
Chapter 5 Commands Assigned to Function Keys of the Teach PendantSetting the ready angleAccess: [F2 Arm]—[F12 Maint.]—[F2 RANG.]Sets the ready angle (RANG).(1) Press [F2 RANG.] in the Maintenance Functions (Arm) window.The RANG window will appear as shown below.(2) Select the item to be modified and then press [F5 Change.].The numeric keypad will appear.F5Numerickeypad(3) Enter the desired value with the numerical buttons in the above window, and thenpress the OK button.The new entry will be entered into the RANG window.(4) Press the OK key.To cancel the new entry, press the Cancel key. To return to the MaintenanceFunctions (Arm) window, press the OK or Cancel key.5-99
Releasing or locking brakesAccess: [F2 Arm]—[F12 Maint.]—[F3 Brake.]Not supported in UL-Listed robot systemsNOTE: In the global type of robot systems of the early version of the G series, holdingdown the deadman switch (enable switch) is required for direct teaching modeoperation and brake releasing.• For 6-axis robots: VM-G, VS-G and VP-G seriesReleases and locks J1 to J6 brakes.(1) Press [F3 Brake.] in the Maintenance Functions (Arm) window.The Brake Release Settings window will appear as shown below.(2) Select the target brake.(3) Press [F5 ON/OFF], and the indicator color of the selected brake will change fromblack to green if locked or from green to black if released.Black: Brake locked, Green: Brake releasedTo lock all axes' brakes, press [F4 CanclAll]; to release them, press [F6 SelctAll].(4) Check the brake status, and then press the OK button to make the new entry takeeffect.5-100
Chapter 5 Commands Assigned to Function Keys of the Teach Pendant• For 4-axis robotsReleases or locks the Z-axis brake in the H *-D series.(1) Press [F3 Brake.] in the Maintenance Functions (Arm) window.The Brake Release Settings window will appear as shown below.(2) Select the "Z axis brake released." or "Z axis brake locked."(3) Check the brake status, and then press the OK button to make the new entry takeeffect.Caution: When moving the HS-G and HM-G series by hand, hold by a part other thanthe plastic cover.5-101
Adjusting the air pressure balance of the Z axis (for4-axis robots)Access: [F2 Arm]—[F12 Maint.]—[F4 Adj.Z.Bal]Adjusts the air pressure balance of the Z axis in the H *-D series. (This command doesapply to the V *-D series.)(1) Press [F4 Adj.Z.Bal] in the Maintenance Functions (Arm) window, and thefollowing window will appear.Make sure that the motor is turned ON and press the OK button.(2) According to the instructions given on the screen, adjust the air pressure. If the"Complete the air pressure" is displayed as shown below, press the OK button.5-102
Chapter 5 Commands Assigned to Function Keys of the Teach Pendant(3) If the air pressure balance of the Z axis is not proper, the warning messageappears. Follow the instruction to readjust the air pressure balance.(4) Wait for the following window to appear, then press the OK button.5-103
Selecting and deselecting joints to be calibratedAccess: [F2 Arm]—[F12 Maint.]—[F6 CALSET.]Selects and/or deselects joints to be calibrated.(1) Press [F6 CALSET.] in the Maintenance Functions (Arm) window.The Set CALSET window will appear as shown below.F4 F5 F6(2) Select the target joint.(3) Press [F5 ON/OFF], and the indicator color of the selected joint will change fromgreen to black if selected or from black to green if deselected.Green: Joint selected for calibration, Black: Joint deselectedTo deselect all joints, press [F4 CanclAll]; to select them for calibration, press [F6SelctAll].(4) Check the joint status, and then press the OK button to make the new entry takeeffect.TIP: For details about the CALSET procedure, refer to the INSTALLATION &MAINTENANCE GUIDE, "CALSET."5-104
Chapter 5 Commands Assigned to Function Keys of the Teach PendantDisplaying encoder informationAccess: [F2 Arm]—[F12 Maint.]—[F10 ENC inf.]Displays encoder information.Pressing [F10 ENC inf.] in the Maintenance Functions (Arm) window will display theEncoder Information window as shown below.The above window displays the system status of the robot controller and the jointstatus. If the status is normal, the indicator lights in green; if abnormal, it goes off.Pressing the OK or Cancel button will return the screen to the Maintenance Functions(Arm) window.5-105
Resetting the motor encoder dataAccess: [F2 Arm]—[F12 Maint.]—[F11 ENC rst]Resets the motor encoder data.You need to reset encoders and perform CALSET if:- Error 641* occurs due to run-down encoder backup batteries, or- Error 677* occurs due to a great impact applied to the robot when the power is off.(* is any of 1 to 6 denoting the object axis.)Given below is an encoder resetting procedure.(1) Pressing [F11 ENC rst] in the Maintenance Functions (Arm) window will displaythe Encoder reset window as shown below.(2) Enter the axis number whose encoder is to be reset, and press [OK].The System Message appears.(3) Pressing [OK], the encoder of the selected axis will be reset.5-106
Chapter 5 Commands Assigned to Function Keys of the Teach PendantSetting ID data of motor encodersAccess: [F2 Arm]—[F12 Maint.]—[F12 ENC set]Sets the ID data of motor encoders.This command is intended for <strong>DENSO</strong> WAVE service personnel only. Do not use thiscommand.5-107
5.4 Displaying the Vision MenuAccess: [F3 Vision]Pressing [F3 Vision] on the top screen will display the Set Vision menu as shownbelow.The [F7 Window] and [F9 Analysis] are newly supported in Version 1.5 or later.F1 F2 F3 F4 F6When shiftedF7 F8 F9 F11 F12NOTE: Before using the vision control [F3 Vision], make sure that:• An optional µVision board is integrated in the robot controller,• The robot is placed in Manual mode, and• The vision semaphore is released (no TAKEVIS obtained).The hierarchy of the [F3 Vision] menu is given on the next page.5-108
Chapter 5 Commands Assigned to Function Keys of the Teach PendantF3F1F2F3F4F6F7F8F9F11F12F1F2F3F1F2F3F5F7F8F1F2F3F5F7F8F1F2F3F4F5F7F8VisionCameraDisplayCLSSet DrawingTP MonitorUpdateContinueStopWindowUpdateEditDeleteChangeCaptureLiveModelDisplayNewDeleteChangeCaptureLiveAnalysisCaptureLiveWindowSerch modelChangeNormalBinaryOptionsInit.5-109
Getting image signals from the specified camera into the visionboardAccess: [F3 Vision]—[F1 Camera]Sets the camera input parameters and gets image signals sent from the specifiedcamera into the µVision board.(1) Press [F1 Camera] in the Set Vision window, and the Input Camera window willappear as shown below.F1 F2 F5(2) Set the camera input parameters as follows:Camera No.: Specify the connected camera number.Table No.: Specify the number of the table that is looked up during input.Table No. 0: Normal (Brightness 0 to 255)Table No. 1: 70% brightness compression (Brightness 0 to 175)Table No. 2: γ correctionTable No. 3: ReversalTable No. 4: 70% brightness compression reversalTable Nos. 5 to 15: User defined tablesProcess No.: Specify the process screen number from which camera imagesignals will be read.(3) Press [F1 Update] to get image signals from the specified camera.[F1 Update][F2 Live][F5 Change]Function keys availableUpdates camera input parameters and reads image signals from thecamera. The Camera Input window remains open.Displays the image of the camera selected on the monitor by lookuptable 0 (fixed).Displays the numeric keypad where you may modify the tablenumber.5-110
Chapter 5 Commands Assigned to Function Keys of the Teach PendantDisplaying the specified image on the monitorAccess: [F3 Vision]—[F2 Display]Sets the monitor display parameters and displays the specified image on the monitor.(1) Press [F2 Display] in the Set Vision window, and the Screen Display window willappear as shown below.F1F5(2) Set the monitor display parameters as follows:Drawing:Specify the screen to be drawn.Camera & Process: Specify the image to be displayed.Table No.: Specify the number of the table that is looked up duringinput.Table No. 0: Normal (Brightness 0 to 255)Table No. 1: 70% brightness compression(Brightness 0 to 175)Table No. 2: γ correctionTable No. 3: ReversalTable No. 4: 70% brightness compression reversalTable Nos. 5 to 15: User defined tables[F1 Update][F5 Change]Function keys availableUpdates monitor display parameters and calls up the specifiedimage on the monitor. The Screen Display window remains open.Displays the numeric keypad where you may modify the tablenumber.5-111
Clearing the drawing screen or process screenAccess: [F3 Vision]—[F3 CLS]Clears data on the specified drawing screen or process screen.(1) Press [F3 CLS] in the Set Vision window, and the Clear Screen window will appearas shown below.F3 F4 F5 F6(2) Specify the Clear value.Clear: Set the value with which the clearing process should take place.The Process screen will be filled with brightness of specified value. The Drawingscreen will be cleared by 0.Normally specify 0.Function keys available[F3 Change] Displays the numeric keypad where you may modify the clear value.[F4 CanclAll] Cancels all the selections of the screen.[F5 Sel/Canc] Selects/cancels selection of the screen to be cleared.[F6 SelctAll] Selects all the screens.5-112
Chapter 5 Commands Assigned to Function Keys of the Teach PendantSetting the drawing destination screenAccess: [F3 Vision]—[F4 Drawing]Sets the drawing destination screen.When this menu is called up, its settings show the current ones of the µVision board.Unless otherwise specified with VISSCREEN again when the programs are running,the drawing destination screen configured in this menu applies.The configuration shown below produces the same as when "VISSCREEN 1, 0, 1" isexecuted.(1) Press [F4 Drawing] in the Set Vision window, and the Set Drawing window willappear as shown below.5-113
Displaying the camera input screen and process screenAccess: [F3 Vision]—[F6 Monitor]Displays a camera image and process screen image on the LCD of the teach pendant(TP).The resolution is 256 x 240 pixels and the grayscale is 16 levels. The display rate is 2frames per second for camera images.When a camera image is displayed, process screen 3 is used as a video capturememory (where camera images are temporarily stored), so temporary data of processscreen 3 will be lost.Camera images or process screen images on the LCD are temporarily in grayscale,which is normal. Once this menu screen is closed, the teach pendant screen reverts tothe original color display.(1) Press [F4 Drawing] in the Set Vision window, and the Set Drawing window willappear as shown below.F1 F2 F3Function keys available[F1 Update] Updates the teach pendant screen according to the settings.Gets camera images continuously. If Camera 1 or 2 is selected, the[F2 Continue] images will be get at a rate of two frames per second (and updatedonce every 0.5 second).[F3 Stop] Stops continuous reading.Note: When using this command, be sure to turn off the screen saver on the teachpendant.5-114
Chapter 5 Commands Assigned to Function Keys of the Teach PendantBrowsing windows to be used in image analysis [Ver. 1.5 or later]Access: [F3 Vision]—[F7 Window]Browses the parameter values of windows to be used in image analysis and allows youto monitor the frame of the specified window.(1) Press [F7 Window] in the Set Vision window, and the Edit Window will display asshown below.F1 F2 F3 F5F7F8Parameters DescriptionWindow No. : Number assigned to a window (0 to 255)Window type : Shape of a window (Square, line, circle, ellipse, or sector)X origin : X-coordinate origin of a stored window (0 to 511)Y origin : Y-coordinate origin of a stored window (0 to 480)Other parameters differ depending upon window shapes. For further details regardingwindow shapes, refer to "WINDMAKE" in the PROGRAMMER'S <strong>MANUAL</strong> I.Function keys available[F1 New] Creates, edits, and saves a new window (Edit mode)[F2 Edit] Edits a window already stored (Edit mode)[F3 Del]Deletes data of the selected window number.The deleted data will be completely lost.[F5 Change] Changes the window number.[F7 Capture] Captures a camera image and displays it on the process screen.[F8 Live] Switches to a camera image.5-115
(2) Press OK to display the frame of the selected window.During execution of "New," "Edit" or "Del," a progress bar will appear as shownbelow since it takes several seconds to retrieve necessary data from the µVisionboard.Shown below is a frame example of a window number selected. (The colors arenot the same as the original image colors).Window frame5-116
Chapter 5 Commands Assigned to Function Keys of the Teach PendantCreating, editing and saving a new window (Edit mode)[Ver. 1.5 or later]Access: [F3 Vision]—[F7 Window]—[F1 New]Creates, edits and saves a new window.(1) Press [F1 New] in the Edit Window, and the numeric keypad will appear as shownbelow.(2) Enter the number of a new window to be created.Parameters DescriptionWindow No. : Number assigned to a window (0 to 255)Window type : Shape of a window (Square, line, circle, ellipse, or sector)X origin : X-coordinate origin of a stored window (0 to 511)Y origin : Y-coordinate origin of a stored window (0 to 480)Other parameters differ depending upon window shapes. For further detailsregarding window shapes, refer to "WINDMAKE" in the PROGRAMMER'S<strong>MANUAL</strong> I.(3) Press OK. The system message will appear and then the following Edit Windowwill display.5-117
Function keys available[F1 1 pixel] Specifies the movement quantum in units of 1 pixel.[F2 10 pixel] Specifies the movement quantum in units of 10 pixels.[F3 50 pixel] Specifies the movement quantum in units of 50 pixels.[F5 Change] Changes each model data.[F7 Capture] Captures a camera image and displays it on the process screen.[F8 Live] Switches to a camera image.(4) You may change the size of the window by modifying the parameters in thewindow and check the changed size on the monitor.Window frame5-118
Chapter 5 Commands Assigned to Function Keys of the Teach PendantEditing and saving an existing window (Edit mode)[Ver. 1.5 or later]Access: [F3 Vision]—[F7 Window]—[F2 Edit]Edits and saves a new window.(1) Press [F2 Edit] in the Edit Window, and the following window will appear.F1 F2 F3 F5F7F8Parameters DescriptionWindow type : Shape of a window (Square, line, circle, ellipse, or sector)X origin : X-coordinate origin of a stored window (0 to 511)Y origin : Y-coordinate origin of a stored window (0 to 480)Other parameters differ depending upon window shapes. For further detailsregarding window shapes, refer to "WINDMAKE" in the PROGRAMMER'S<strong>MANUAL</strong> I.(2) Other operating procedure is the same as in [F1 New].Function keys available[F1 1 pixel] Specifies the movement quantum in units of 1 pixel.[F2 10 pixel] Specifies the movement quantum in units of 10 pixels.[F3 50 pixel] Specifies the movement quantum in units of 50 pixels.[F5 Change] Changes each model data.[F7 Capture] Captures a camera image and displays it on the process screen.[F8 Live] Switches to a camera image.5-119
Browsing the stored model dataAccess: [F3 Vision]—[F8 Model]Browses the stored model data that is required in search function.(1) Press [F8 Model] in the Set Vision window, and the Edit Model window will appearas shown below.F1 F2 F3 F5When shiftedF7F8Model No.: Stored model number (0 to 99)Origin X: Origin of X coordinates of the stored model (16 to 485)Origin Y: Origin of Y coordinates of the stored model (16 to 454)Width: Width of the stored model (10 to 256)Height: Height of the stored model (10 to 256)Offset X: Offset X from origin (-511 to +511)Offset Y: Offset Y from origin (-511 to +511)Offset angle: Offset angle from the origin of angle (-360 to 360)Size: File size of the stored modelRemain: Memory available for storing modelsOrigin X and origin Y are not stored into registered data, so they are indicated by"***."When a new model is created, process screen 3 is used as a work area and hencethe contents of the screen will change.5-120
Chapter 5 Commands Assigned to Function Keys of the Teach PendantFunction keys available[F1 Display] Displays the image of the selected model number on the monitor.[F2 New] Creates and stores a new model (in Edit mode).[F3 Delete]Deletes the data of the selected model number. The deleted data islost completely.[F5 Change] Allows you to modify model numbers.[F7 Capture] Captures a camera image and displays it on the process screen.[F8 Live] Switches to a camera image.X, YcoordinatesWidthOrigin(0, 0)Offset XHeightOffsetYY-axisX-axisAngle originOffset angleSearch modelThe offset from the angle origin is specified in 'Offset Angle'. As shown in the drawing, when [OffsetAngle] is specified when there is an offset with respect to the angle origin, the offset value is affects theresultant [Angle] of [SHMODEL].5-121
5-122During model editing, deleting, or creating, a progress bar will appear as shown belowsince it takes several seconds to retrieve necessary data from the µVision board. Thetime required will vary depending upon the number of models stored.
Chapter 5 Commands Assigned to Function Keys of the Teach PendantCreating a new modelAccess: [F3 Vision]—[F8 Model]—[F2 New]Creates a new model and stores it.(1) Press [F2 New] in the Edit Model window, and the following edit window willappear as shown below.F1 F2 F3 F5Model No.: Specify the number of a model to be created. (0 to 99)Origin X: Specify the origin of X coordinates of a model to be created.(16 to 485)Origin Y: Specify the origin of Y coordinates of a model to be created.(16 to 454)Width: Specify the width of a model to be created. (10 to 256)Height: Specify the height of a model to be created. (10 to 256)Offset X: Specify offset X from origin (-511 to +511)Offset Y: Specify offset Y from origin (-511 to +511)Offset angle: Offset angle from the angle origin (-360-360).(2) The allowable range of parameter values appears on the monitor screen. Takingthose as reference, set the desired values.Function keys available[F1 1 pixel] Specifies the movement quantum at the rate of 1 pixel.[F2 10 pixel] Specifies the movement quantum at the rate of 10 pixels.[F3 50 pixel] Specifies the movement quantum at the rate of 50 pixels.[F5 Change] Allows you to modify model data.5-123
Analyzing images [Ver. 1.5 or later]Access: [F3 Vision]—[F9 Analysis]Allows you to analyze images temporarily from the teach pendant without setting upcorresponding programs.Image analysis functionsModel searchLabelingEdge findingArea/Center of gravity/Major axis angleTypes of image analysisImage processingRemarksinstructionsSHMODELIf labeling does not finish within theBLOBspecified time, a timeout error occurs.If the specified processing range exceeds360 degrees in the sector window, edgeVISEDGEfinding applies to the range exceeding 360degrees.Extracts features such as area, center ofVISMEASUREgravity, and major axis angle.QR code VISREADQR Reads QR code symbols.Filter processing VISFILTER Filters input screens.Circle searchCorner searchSHCIRCLESHCORNERIf a timeout occurs during searching, thenumber of corners found before theoccurrence of the timeout will bedisplayed.The timeout length can be modified withthe search timeout parameter accessedby [F3 Vision]-[F11 Options].(1) Press [F9 Analysis] in the Set Vision window, and the Image Analysis window willdisplay as shown below.Image analysis parametersImage analysis typeWindow No.Camera and processscreen informationHigher and lowerthresholdsF1 F2 F3 F4 F5F7F85-124
Chapter 5 Commands Assigned to Function Keys of the Teach PendantWindow No.: Number of the target window to be processed.Binary vision parameters : Specifies the upper and lower limits for binaryvision.Function keys available[F1 Capture] Captures a camera image and displays it on the process screen.[F2 Live] Switches to a camera image.[F3 Window] Sets the shape and size of a temporary window.[F4 Model]Temporarily displays the image of the model to be searched inmodel search.[F5 Change] Changes parameter values.[F7 Normal][F8 Binary]Switches to the normal vision where a grayscale image displays in256-tone.Switches to the binary vision where a binary image displays in2-tone.(2) Select the desired image analysis.Pressing [F8 Binary] will show a binary image based on the higher and lowerthreshold values you have entered. A camera live image may also display as abinary image in real-time.Normal visionBinary vision5-125
Setting or modifying vision board parametersAccess: [F3 Vision]—[F11 Options]Sets or modifies vision board parameters.(1) Press [F11 Options] in the Set Vision window, and the Vision Parameters windowwill appear as shown below.Function keys available[F1 Back] Displays the previous page of the parameter list.[F2 Next] Displays the next page of the parameter list.[F3 Jump To] Displays the setup data of the specified number.[F5 Change.]Displays the numeric keypad where you may enter a newparameter.(2) To modify the parameters, press [F5 Change.]. The numeric keypad will appear asshown below.5-126
Chapter 5 Commands Assigned to Function Keys of the Teach PendantInitializing the vision boardAccess: [F3 Vision]—[F12 Init.]Initializes the vision board to the default settings.This is equivalent to the powering-on reset. This command resets settings made inprograms, such as temporary window data, drawing-related settings made in programs,image data in the process screen memory.Use this command if a vision board error occurs.NOTE: You may initialize the vision board only in Manual mode.NOTE: Never execute this command during setting in WINCAPSIII or with the teachpendant. Doing so will initialize the vision board so that no correct setting may bemade.(1) Press [F12 Init.] in the Set Vision window, and the system message will appear asshown below.5-127
5.5 Displaying I/O Signals and SimulatingRobot MotionAccess: [F4 I/O]Displays the I/O Monitor window where you may monitor I/O signals and/or simulatethe robot motion with the I/O signals.Pressing [F4 I/O] on the top screen will display the I/O Monitor window as shownbelow.F1 F2 F3 F4 F5 F6(F10)Function keys available[F1 Back] Displays the previous page of the I/O signal list.[F2 Next] Displays the next page of the I/O signal list.[F3 Jump To][F4 Dummy IN]Displays the Jump to I/O No. window where you may typean I/O port address you want to see with the numericalkeys and press OK. Doing so will display the target input oroutput signal.Allows the selected system-input port to accept a dummyinput. That input port will be marked with "!" and the dummyI/O icon will appear in the status bar of the top of thescreen. This command is useful for testing programs.[F5 ON/OFF]Displays the system message "Are you sure you want toturn the I/O xxxx on (or off)?" Pressing the OK button willturn the selected input port on (or off).[F6 Aux.] Details are given on the next page.[F10 ClrDummy] Clears the dummy input setting.5-128
Chapter 5 Commands Assigned to Function Keys of the Teach PendantProviding auxiliary functionsAccess: [F4 I/O]—[F6 Aux.]Provides the auxiliary functions concerning I/Os.Pressing [F6 Aux.] in the I/O Monitor window will display the Auxiliary Function (I/O)window as shown below.F1 F2 F3F7Configuring hardwareAccess: [F4 I/O]—[F6 Aux.]—[F1 Set H/W]Configures hardware such as I/O assignment mode and DeviceNet expansion.(1) Press [F1 Set H/W] in the Auxiliary Function (I/O) window, and the I/O HardwareSettings window will appear as shown below.(2) Select the desired item and press [F5 Change.]. You may modify the setting.F55-129
Switching between standard and compatible allocationmodes [Ver. 1.6 or later]Access: [F4 I/O]—[F6 Aux.]—[F2 AlocMode]Switches between the standard and compatible allocation modes from the teachpendant.(1) Press [F2 AlocMode] in the Auxiliary Functions (I/O) window. The Chooseallocation window appears as shown below.NOTE: If your controller is equipped with a DeviceNet master board, the "Choosededicated port allocation" window will appear instead. For details, refer to User'sManual of the DeviceNet Master Unit, Chapter 3 "I/O Allocation."(2) Using the jog dial or cursor keys, select the desired allocation mode.(3) Press OK.The following system message appears, requesting you to restart your controller.(4) Press OK.The screen returns to the Auxiliary Functions (I/O) window.(5) Turn the controller power off and then on.The I/O allocation mode is changed.5-130
Chapter 5 Commands Assigned to Function Keys of the Teach PendantSetting I/O output restrictions when machine is locked[Ver. 1.4 or later]Access: [F4 I/O]—[F6 Aux.]—[F7 I/O Lock]Sets the I/O output restriction range when machine is locked.(1) Press [F7 I/O Lock] in the Auxiliary Functions (I/O) window. The I/O Lock Settingwindow appears as shown below.(2) Select the desired I/O output restriction type and press the OK button.Then, the Output Conditions Setting When Machine Lock is released window willappear.ChoiceEnable All:All outputs are allowed with no I/O output restrictions evenwhen the machine is locked.Disable GeneralOUT: Forbids all outputs of ports used for general output.Disable SystemOUT: Forbids all outputs of ports used for specialized output.However, port 16 are not prohibited.Disable All:Forbids all outputs of ports apart from port 16 when themachine is locked.Note 1: In all case other than "Enable All," the actual I/O output is restricted when themachine is locked. However, the I/O display of teach pendant is refreshed. according tothe program.Note 2: I/O output is refreshed on clicking [OK] after modifying I/O lock settings.Note 3: I/O lock settings are reset to "Disable All" every time the computer is switchedon.5-131
(3) The output conditions set when freeing machine lock become valid when [OK] ispressed after selecting the output conditions set when freeing machine lock.Note: The settings of I/O output restrictions when machine is locked are reset to theoriginal I/O conditions.5-132
Chapter 5 Commands Assigned to Function Keys of the Teach Pendant5.6 Displaying the Operation PanelAccess: [F5 OpePanel]Displays the operation panel on the teach pendant screen.Pressing [F5 OpePanel] on the top screen will display the Operation Panel window asshown below.Touching a button on the panel will change its color between black (OFF) and green(ON). Switching on/off on the panel concurrently modifies the internal I/O values, 128to 211.F1F2Function keys available[F1 Back] Displays the previous page of the operation panel.[F2 Next] Displays the next page of the operation panel.5-133
5.7 Displaying the Settings (Main) WindowAccess: [F6 Set]Displays the Settings (Main) window.(1) Press [F6 Set] on the top screen, and the following window will appear.F1 F2 F3 F4 F5 F6When shiftedF7 F8 F9(2) Select the desired setting function. The corresponding window will display asdescribed on the following pages.5-134
Chapter 5 Commands Assigned to Function Keys of the Teach PendantF6F1F2F3F4F5F6F7F8F9F1F2F5F1F2F12F1F2F3F4F5F7F10F11F12F1F2F3F4F5F7F10F3F5F6F8F11F12SetLoad!Log.ErrLogOprLogTrigerUSB mem.Read.Write.Aux.Mem InfoSet Com.Permit.SerialIFModemAddressGatewayHiSpeed!ClientServerComm.buffMaint.Total hVersionDate.BatteryOdometerClr DataFan StopOptions.ProtectDisplayLanguageExtnsionROBTYPEUpdate.Save!SaveFile5-135
Loading a projectAccess: [F6 Set]—[F1 Load!]Loads a project sent from the PC teaching system, enabling the robot controller toexecute it.(1) Press [F1 Load!] in the Settings (Main) window, and the following system messagedialog box will appear.(2) Press the OK button to start loading.5-136
Chapter 5 Commands Assigned to Function Keys of the Teach PendantDisplaying the error logAccess: [F6 Set]—[F2 Log.]—[F1 ErrLog]Displays the error log.New 1,000 logs are recorded for operation log.(1) Press [F6 Set] - [F2 Log.] - [F1 ErrLog], and the Error Log window will appear asshown below.F1 F2 F3Program in which an error occursFull-path buttonError line numberIn the bottom line of the log list appears the error details of the selected errornumber.The number of records for error logs is 1,000.(2) To check older log, scroll the log list with the cursor keys, jog dial, [F1 BACK], or[F2 NEXT]. Or, press [F3 Jump To] to call up the numeric keypad where you enterthe line number of the desired error log. Doing so will directly call up the target log.(3) In Version 1.8 or later, you may choose which level errors should be logged.In the Error Log window shown on the previous page, press [F6 Aux.] and[F1 ErrLvl] to call up the Record Err Level window shown below.Choose the desired error level. The system will log errors at the level youhave chosen or higher errors.NOTE: Errors at levels lower than the specified here will not be logged but it doesnot mean that such errors will no longer occur.NOTE: The "Emergency stop ON 600C (Error level 0)" will be always loggedregardless of the error level setting.5-137
5-138
Chapter 5 Commands Assigned to Function Keys of the Teach PendantDisplaying the operation log [Ver. 1.9 or later]Access: [F6 Set]—[F2 Log.]—[F2 OpeLog]Displays the error log.(1) Press [F6 Set] - [F2 Log.] - [F2 OpeLog], and the Operation Log window willappear as shown below.F1 F2 F3The number of records for error logs is 1,000.(2) Contents of the Operation Log DisplayIn the bottom line of the log list appears the operation details of the selected itemnumber.The Client column shows the operation sources that trigger the logged operations. Theclient may be any of the following:TP:PC:I/O:SYS:Teach pendantIn WINCAPSI/OMain system softwareNOTE 1: Emergency stop is triggered by operating the teach pendant, but the client istreated as I/O.NOTE 2: In some processing operations, the log information may be shown in such aformat as [cnfPAC 9 val 1]. This means that the operation has changed theenvironment settings. In the case of [cnfPAC9 val 1], it means that the 9th item of thePAC parameter table has been changed to value "1." For environment setting values,refer to the PROGRAMMER'S <strong>MANUAL</strong> I, Chapter 22 (Appendix), Section 22.3.NOTE 3: The operation logging maintains a record of processing operations requiredfor maintenance and does not maintain all operation records.5-139
Reading and Writing Data with USB Flash MemoryAccess: [F6 Set]—[F3 USB.]Displays the USB memory access menu to read or write project data from/to a USBflash memory drive.Using a USB flash memory drive enables data exchange between the robot controllerand WINCAPS in the PC.It is also possible to create multiple projects in a USB flash memory drive or read themout selectively.USB flash memory drives whose operation has been verifiedManufacturerI-O DATALogitecModelEDP-###M, EDC-###MLMC-###UDA### denotes the capacity.- When formatting the USB flash memory drive, select the "FAT" in the file systemmenu.- Never touch or remove a USB flash memory drive or turn the controller power offwhen the USB flash memory drive is being accessed.- Insert the USB flash memory drive directly into the USB connector. Do not use aUSB extension cable.5-140
Chapter 5 Commands Assigned to Function Keys of the Teach PendantData that can be handled by USB flash memory driveThe table below lists data that can be handled by USB flash memory drives. Select theappropriate data to read or write as necessary.Data Type File or Data RemarksSource programdataVariables dataI/O dataArm dataVisual-relateddataSource program files (PAC, H, PNL)Executable files (NIC, MAP)Settings files (DAT)All global dataNumber of variables usedI/O settingsSettings for expansion boardArm parametersTool/work/area coordinatesdefinitionVisual equipment settingsOnly files with their compileflags active ("Enable" in theUse column) can be writteninto USB flash memory.Reading variables data intothe robot controllerautomatically changes the"number of variables used" inthe controller.• Never read in arm dataprepared for other robots.• Tool and work datamodified by TOOL orWORK command will notbe updated when writteninto the memory. To writeupdated data, first save thesystem parameters (seep. 5-183) and then writedata into the USB flashmemory.Write (to USB flash memory)only.Communications settingsLog data Version informationVarious log dataBackup data Various types of data Ver. 2.3 or laterData exchange between robot controller and WINCAPSIIIData can be exchanged between the robot controller and WINCAPSIII by means of aUSB flash memory drive.For the operating procedures in WINCAPSIII, refer to the WINCAPSIII GUIDE, "USBTool"USB memory data modification not allowedNever modify data stored in the USB flash memory drive from the robot controller. Anymodification makes it impossible to access the memory because USB memory datacontains check codes used for checking data corruption and guaranteeing accuratedata read/write.5-141
Reading USB memory data into the robot controller[RC7 Ver. 2.2 or later]Access: [F6 Set]—[F3 USB.]—[F1 Read.]Reads data stored in a USB flash memory into the robot controller.(1) Press [F3 USB.] in the Setting (Main window), and the USB Memory Access Menuappears as shown below.F1F2(2) Press [F1 Read.] in the USB Memory Access Menu, and projects stored in theUSB flash memory appear as shown below.Select a project to read from the USB flash memory, then press [F5 Select] and OKbutton.CAUTION: Never read in arm data prepared for other robots. Doing so will causethe robot to malfunction. It is very DANGEROUS.5-142
Chapter 5 Commands Assigned to Function Keys of the Teach Pendant(3) The Select File to Read window appears as shown below.Select data to read and then press the OK button.(4) The update confirmation screen for the CALSET and RANG appears as shownbelow.Press the OK button, and the controller starts reading data from the USB flashmemory.5-143
(5) During reading, the following system message appears.(6) Upon completion of reading, the following message appears.Restart the robot controller.CAUTION: Without restarting the robot controller, the robot may not operatenormally.Notes on reading new variables data from USB flash memoryReading new variables from the USB flash memory overwrites the current variablesstored in the robot controller with the new ones.Note that, if the robot controller has 50 integer variables and the USB flash memorycontains 30 integer variables, the 31st to 50th variables in the controller will be lost atthe end of the read operation.5-144
Chapter 5 Commands Assigned to Function Keys of the Teach PendantWriting data stored in the robot controller to USB flashmemory [RC7 Ver. 2.2 or later]Access: [F6 Set]—[F3 USB.]—[F2 Write.]Writes (Saves) data stored in the robot controller into a USB flash memory.(1) Press [F2 Write.] in the USB Memory Access Menu, and the Enter Project Namewindow appears as shown below.Enter the project name and press the OK button.(2) The Select File to Save window appears.Press the OK button, and the controller starts writing data into the USB flashmemory.5-145
5-146(3) During writing, the following system message appears.
Chapter 5 Commands Assigned to Function Keys of the Teach PendantSaving Control Log into USB Flash Memory[RC7 Ver. 2.2 or later]Access: [F6 Set]—[F3 USB.]—[F12 Aux.]—[F11 CtrlLog.]Determines whether or not to save the control log into a USB flash memory togetherwith data stored in the robot controller.The control log takes up a large storage space, while it is not required as backup of thefacility data. Therefore, enable this feature only when you need to save the control log.(1) In the USB Memory Access Menu, press [F12 Aux.]–[F11 CtrlLog.], and theControl Log Save Setting window appears as shown below.(2) Select "Enable" or "Disable" and then press the OK button.5-147
Displaying the memory information of the robot controllerAccess: [F6 Set]—[F4 Mem Info]Displays the memory information of the robot controller.(1) Press [F4 Mem Info] in the Settings (Main) window, and the Controller MemoryInformation window will appear as shown below.The window shows the used and total sizes of the Variables memory andPrograms memory.(2) To close the Controller Memory Information window, press the OK button.5-148
Chapter 5 Commands Assigned to Function Keys of the Teach PendantDisplaying the Communications Setting MenuAccess: [F6 Set]—[F5 Set Com.]Displays the communications setting menu.(1) Press [F5 Set Com.] in the Settings (Main) window, and the CommunicationsSetting Menu will appear as shown below.(2) Select the desired setting function. The corresponding window will display asdescribed on the following pages.5-149
Setting the communication permissionAccess: [F6 Set]—[F5 Set Com.]—[F1 Permit.]Sets the communication permission or the read/write permission for eachcommunications port.(1) Press [F1 Permit.] in the Communications Setting Menu, and the CommunicationPermission Settings window will appear as shown below.NOTE: COM1 is occupied by the teach pendant, so its settings cannot be changed.COM2 is used for communication with the PC teaching system. COM3 and COM4are reserved for future extension. Ethernet is used as Ethernet port.F5(2) Select the target port and then press [F5 Change.]. The Change PermissionSettings window will appear as shown below.NOTE: "Read only" or "Read/write" can be set to only any one of COM2, COM3,COM4, and Ethernet port.5-150
Chapter 5 Commands Assigned to Function Keys of the Teach PendantTIP: In the Change Permission Settings window are three choices, defined as:"Disable": Disables the selected communications port."Read only": Allows external equipment (such as PC teaching system) to readdata from the robot controller."Read/write": Allows external equipment (such as PC teaching system) toexchange data with the robot controller.(3) Select the desired item and press the OK button. The Communication PermissionSettings window will reappear.(4) Check the new entry, then press the OK button to make the new entry take effect.If you press the Cancel button instead of the OK button, the new entry will becancelled.5-151
Ethernet connection setupProcedure for automatic IP address registrationAccess: [F6 Set]—[F5 Set Com.]—[F1 Permit.]Press [F2 MultiIP] in the Communication Permission Settings window.The following window appears. Select Enable and press OK.On the Communication Permission Settings screen, the Ethernet (MultiIP) appearsinstead of Ethernet. Automatic IP address registration is selected.The communication permission setting (Disable, Read only, Read/write) made hereapplies to all PCs.5-152
Chapter 5 Commands Assigned to Function Keys of the Teach PendantProcedure for individual IP address specificationSelecting automatic IP address registration displays Ethernet (MultiIP) instead ofEthernet in the Communication Permission Settings window as shown on theprevious page.Select Ethernet (MultiIP) and press [F5 Change.] to call up the Change PermissionSettings window shown below.Select Individual IP and press OK to call up [F3 IndivIP].Press [F3 IndivIP] to display the Individual IP Settings window shown below.Select the desired IP address or Permit. field using the cursor. Then press [F5Change.] and change the corresponding data.Press OK to establish the new settings.5-153
Changing PCs connectableAccess: [F6 Set]—[F5 Set Com.]—[F1 Permit.]—[F1 Conn.IP]The Connected IP address window appears as shown below.Select the IP address to clear and then press [F6 Clear].Specifying a new IP address enables the PC to be connected.Pressing [F4 Refresh] updates the IP address list.5-154
Chapter 5 Commands Assigned to Function Keys of the Teach PendantSetting the transmission rates for RS-232C serialinterface portsAccess: [F6 Set]—[F5 Set Com.]—[F2 Serial IF]Sets the transmission rate for each of the RS-232C serial interface ports.(1) Press [F2 Serial IF] in the Communications Setting Menu, and the Set RS-232Cwindow will appear as shown below.F4F5NOTE: COM1 is occupied by the teach pendant, so its settings cannot be changed.COM2 is used for communication with the PC teaching system and its defaulttransmission rate is 19,200 bps. COM3 and COM4 are reserved for futureextension.NOTE: The higher transmission rate may yield the higher transmission error rate.(2) Select the target port and then press [F5 Change.]. The Select Transmission Ratewindow will appear as shown below.5-155
(3) Select the desired transmission rate, then press the OK button to close the SelectTransmission Rate window.(4) Check the new entry, then press the OK button to make the new entry take effect.If you press the Cancel button instead of the OK button, the new entry will becancelled.If you press [F4 Default.] in the Set RS-232C window, the following defaults will berestored:The default of the COM1 (Teach pendant) cannot be changed.PortTransmissionrate (bps)ParityData(characterlength)Stop bitCR/LF codeCOM1 (Teach pendant) 19200 None 8 bits 1 bit CRCOM2 (RS-232C) 19200 None 8 bits 1 bit CRCOM3 19200 None 8 bits 1 bit CRCOM4 19200 None 8 bits 1 bit CR5-156
Chapter 5 Commands Assigned to Function Keys of the Teach PendantInitializing modemAccess: [F6 Set]—[F5 Set Com.]—[F3 Modem]Initializes the modem connected to the selected modem port.(1) Press [F3 Modem] in the Communications Setting Menu, and the Set Modemwindow will appear as shown below.(2) Select the modem port with which the target modem is connected and then pressthe OK button to proceed. The following system message will appear.(3) Check the message and then press the OK button to start initializing the modem.The system message "Completed initializing the modem successfully." will appear.(4) Press the OK button to close the system message dialog box.5-157
Setting the IP address of the robot controllerAccess: [F6 Set]—[F5 Set Com.]—[F4 Address]Sets the IP address of the robot controller.(1) Press [F4 Address] in the Communications Setting Menu, and the Set ControllerIP Address window will appear as shown below.(2) Select the item to be set, and then press [F5 Change.].The numeric keypad will appear as shown below.F5Numerickeypad(3) Enter the desired value with the numerical buttons in the above window, and thenpress the OK button to enter the new entry into the Set Controller IP Addresswindow.(4) Check the new entry, then press the OK button to make the new entry take effect.If you press the Cancel button instead of the OK button, the new entry will becancelled. To close the Set Controller IP Address window, press the OK or Cancelbutton.5-158
Chapter 5 Commands Assigned to Function Keys of the Teach PendantSetting gatewaysAccess: [F6 Set]—[F5 Set Com.]—[F5 Gateway]Sets the gateways and destinations.(1) Press [F5 Gateway] in the Communications Setting Menu, and the Set Gatewaywindow will appear as shown below.(2) Select the item to be set, and then press [F5 Change.].The numeric keypad will appear as shown below.F5Numerickeypad(3) Enter the desired value with the numerical buttons in the above window, and thenpress the OK button.The new entry will be entered into the Set Gateway window.(4) Check the new entry, then press the OK button to make the new entry take effect.If you press the Cancel button instead of the OK button, the new entry will becancelled. To close the Set Gateway window, press the OK or Cancel button.5-159
Setting high speed program file transmission[Ver. 1.4 or later]Access: [F6 Set]—[F5 Set Com.]—[F7 HiSpeed!]Sets the high speed mode to receive projects from the teaching system in the PC.(1) Press [F7 HiSpeed!] in the Communications Setting Menu. This opens theProgram File Transferring Setting window.(2) Select either "Normal speed mode" or "High speed mode," then press [OK].Note in using "High speed mode"In the high speed mode, the received data will not be automatically saved even uponcompletion of project reception. Therefore, turning the robot controller off loses thedata. To avoid data loss, be sure to press [SaveFile] in the [Set (Main)] window.5-160
Chapter 5 Commands Assigned to Function Keys of the Teach PendantConfiguring the client of the robot controller[Ver. 1.9 or later]Access: [F6 Set]—[F5 Set Com.]—[F10 Client]Configures the client port of the robot controller.(1) Press [F10 Client] in the Communications Setting Menu, and the Client Settingswindow will appear as shown below.(2) To set the IP address of the target connection port, select the IP Address field to beset and press [F5 Change.] and then [F5 Edit].The numeric keypad will appear as shown below.Numerickeypad(3) Enter the desired value with the numerical buttons in the above window, and thenpress the OK button. The newly entered value will appear on the Client Settingswindow.5-161
(4) To set the target connection port number, select the Port field to be set and press[F5 Change.].The numeric keypad will appear as shown below.Numerickeypad(5) Enter the desired value to the target connection port with the numerical buttons inthe above window, and then press the OK button. The newly entered value willappear on the Client Settings window.(6) To set the delimiter, select the Delimiter field to be set and press [F5 Change.].The Choose Delimiter window will appear as shown below.(7) Select the desired delimiter code in the above window, and then press the OKbutton. The new delimiter code will appear on the Client Settings window.(8) Check the new entry, then press the OK button to make the new entry go intoeffect.If you press the Cancel button instead of the OK button, the new entry will becancelled. To close the Client Settings window, press the OK or Cancel button.5-162
Chapter 5 Commands Assigned to Function Keys of the Teach PendantSetting the server of the robot controller[Ver. 1.9 or later]Access: [F6 Set]—[F5 Set Com.]—[F11 Server]Configures the server port of the robot controller.(1) Press [F11 Server] in the Communications Setting Menu, and the Server Settingswindow will appear as shown below.(2) To set the port number, select the Port field to be set and press [F5 Change.].The numeric keypad will appear as shown below.Numerickeypad(3) Enter the desired value with the numerical buttons in the above window, and thenpress the OK button. The newly entered value will appear on the Server Settingswindow.5-163
(4) To set the delimiter, select the Delimiter field to be set and press [F5 Change.].The Choose Delimiter window will appear as shown below.(5) Select the desired delimiter code in the above window, and then press the OKbutton. The new delimiter code will appear on the Server Settings window.(6) Check the new entry, then press the OK button to make the new entry go intoeffect.If you press the Cancel button instead of the OK button, the new entry will becancelled. To close the Server Settings window, press the OK or Cancel button.5-164
Chapter 5 Commands Assigned to Function Keys of the Teach PendantResizing the communications bufferAccess: [F6 Set]—[F5 Set Com.]—[F12 Comm.buff]Allows you to resize the communications buffer of each port on the RS-232C serialinterface.Usually it is not necessary to resize the factory default. If resizing is required for yourapplications, use this command.NOTE: Resizing a communications buffer will discard the data that has not been readout from the buffer or saved into the memory. According to your needs, first use I/Ocontrol commands for the RS-232C or serial-binary communications (refer to thePROGRAMMER'S <strong>MANUAL</strong> I) to save the data stored in the buffer, and then resize thecommunications buffer.(1) In the Communications Setting Menu, press [F12 Comm. buff].The Set Communication Buffer Size window will appear as shown below.F1 F2 F3 F5NOTE: In the Set Communication Buffer Size window, #0 through #15 COM ports areassigned as shown below.#0 COM1: Used for communication with the teach pendant. No access is allowed.#1 COM2: Used for communication with WINCAPSIII.#2 COM3 and #3 COM4: Reserved for function extension.#4 through #7: For servers.#8 through #15: For clients.5-165
(2) Select the target port and press [F5 Change.].The Select Communications Buffer Size window will appear as shown below.(3) Select the desired buffer size and press the OK button. The SelectCommunications Buffer Size window will be closed.(4) Confirm the new setting value and then press the OK button. The new setting willgo into effect.If you press the Cancel button instead of the OK button, the new setting value willbe canceled.NOTE: Pressing the OK button to make the new setting go into effect will discardthe buffer data.5-166
Chapter 5 Commands Assigned to Function Keys of the Teach PendantDisplaying the Maintenance menuAccess: [F6 Set]—[F6 Maint.]Displays the Maintenance menu.(1) Press [F6 Maint.] in the Settings (Main) window, and the Maintenance menu willappear as shown below.F1 F2 F3 F4 F5When shiftedF7(2) Select the desired setting function. The corresponding window will display asdescribed on the following pages.5-167
Displaying the robot controller ON-time and the robotrunning timeAccess: [F6 Set]—[F6 Maint.]—[F1 Total h]Displays the robot controller ON-time and the robot running time.(1) Press [F1 Total h] in the Maintenance menu, and the Total hours window willappear as shown below.F4F5The Total hours window has the following items:[Total operation][Total running]Shows the grand total of the robot controller ON-time countedafter the controller leaves the factory.Shows the grand total of the robot running time counted after therobot leaves the factory.[Cumu. operation] Shows the ON-time of the robot controller counted after it isturned ON this time.[Cumu. running][Operation][Running]Shows the running time of the robot counted after the robotcontroller is turned ON this time.Shows the total of the robot controller ON-time counted after youreset the user counter to zero.Shows the total of the robot running time counted after you resetthe user counter to zero.Function keys available[F4 Cumu. o][F5 Cumu. r]Calls up the system message dialog box where you may reset theuser counter of the robot controller ON-time.Calls up the system message dialog box where you may reset theuser counter of the robot running time.5-168
Chapter 5 Commands Assigned to Function Keys of the Teach Pendant(2) To reset the user counter of the robot controller ON-time to zero, press [F4 Cumu.o] in the Total hours window.The following window will appear. If you want to reset the counter to zero, pressthe OK button.(3) To reset the user counter of the robot running time to zero, press [F5 Cumu. r] inthe Total hours window.The following window will appear. If you want to reset the counter to zero, pressthe OK button.5-169
Displaying the version information of each moduleAccess: [F6 Set]—[F6 Maint.]—[F2 Version]Displays the version information of each module in the robot controller.(1) Press [F2 Version] in the Maintenance menu, and the Version window will appearas shown below.Function keys available[F5 RoboType][F6 PSU]Displays the robot model in detail.Enabled only for the VS-*** series of robots.Displays the type and version of the power system inside the robotcontroller.5-170
Chapter 5 Commands Assigned to Function Keys of the Teach PendantSetting the calendar clock built in the robot controllerAccess: [F6 Set]—[F6 Maint.]—[F3 Date.]Sets the calendar clock built in the robot controller.(1) Press [F3 Date.] in the Maintenance menu, and the Date & Time window willappear as shown below.(2) Select the item to be set, and then press [F5 Change.].The numeric keypad will appear as shown below.F5Numerickeypad(3) Enter the desired value with the numerical buttons in the above window, and thenpress the OK button to take the new entry into the Date & Time window.(4) Check the new entry, then press the OK button to make the new entry take effect.If you press the Cancel button instead of the OK button, the system message "Theparameters have been changed. Are you sure you want to revert to previoussettings?" will appear. Press the OK button to cancel the new entry; press theCancel button to return to the Date & Time screen.5-171
Setting the next battery replacement dateAccess: [F6 Set]—[F6 Maint.]—[F4 Battery]Sets the next replacement date of the memory backup battery of the robot controller.When the replacement day comes, the message "It's time to replace the backupbattery of the robot controller." will appear in the menu bar of the teach pendant.(1) Press [F4 Battery] in the Maintenance menu, and the Next Battery ReplacementDate window will appear as shown below.The current setting (June/5/2002 in this example) is displayed in the top of thewindow.The date entry areas display the default replacement date (June 5, 2002) that istwo years later the current date (June/5/2000) at which you open this window,assuming that the battery service life is two years.(2) If you open this window just to check the current setting, be sure to press theCancel button.If the displayed default replacement date is the date you want to set, press the OKbutton.To set new replacement date, select the item to be modified, and then press [F5Change.]. The numeric keypad will appear as shown below.Numerickeypad5-172
Chapter 5 Commands Assigned to Function Keys of the Teach Pendant(3) Enter the desired date with the numerical buttons in the above window, and thenpress the OK button.NOTE: To set months, use the numerical buttons. For January,February, ...December, enter 1, 2, ...12, respectively.The new entry will be entered into the Next Battery Replacement Date window.CAUTION: Make sure that the new replacement date you set is within two yearsfrom when you have actually replaced the battery with a new one.(4) Check the new entry, then press the OK button to make the new entry take effect.If you press the Cancel button instead of the OK button, the new entry will becancelled. To close the Next Battery Replacement Date window, press the OK orCancel button.5-173
Displaying the odometer and trip meter for each axisAccess: [F6 Set] —[F6 Maint.]—[F5 Odometer]Displays the odometer and trip meter which count traversed distance of each axis.(1) Press [F5 Odometer] in the Maintenance menu, and the following window willappear.F6The Odometer window has the following items:[Odometer] Shows the total distance of each axis traversed after the robot leavesthe factory.[Trip meter] Shows the distance of each axis traversed after you reset the trip meterto zero.(2) To reset the trip meter to zero, press [F6 Reset]. The following window will appear.If you want to reset the trip meter to zero, press the OK button.5-174
Chapter 5 Commands Assigned to Function Keys of the Teach PendantClearing user programs and variablesAccess: [F6 Set]—[F6 Maint.]—[F7 Clr Data]Deletes all user programs stored and clears all global variables to zero.(1) In the Maintenance window, press [F7 Clr Data].The choice screen appears where you may choose data type to be cleared.(2) Choose either one of the following three choices and press OK.- Programs: Delete all user programs.- Variables: Clear all global variables to zero.- Programs + Variables: Delete all user programs and clear all global variables tozero.(3) The following system message appears.Press OK. Then deleting programs or clearing variables will start.(Program Deletion Confirmation Message)5-175
5-176(Variable Clearing Confirmation Message)
Chapter 5 Commands Assigned to Function Keys of the Teach PendantDisplaying the Option MenuAccess: [F6 Set]—[F7 Options.]Displays the option menu.(1) Press [F5 Options.] in the Settings (Main) window, and the Option Menu windowwill appear as shown below.(2) Select the target option setting function. The corresponding window will display asdescribed on the following pages.5-177
Protecting parameters/programsAccess: [F6 Set]—[F7 Options.]—[F3 Protect.]Sets the protection mode which protects programs and/or parameters from gettingmodified unintentionally from the teach pendant.(1) Press [F3 Protect.] in the Option Menu, and the Protection Mode Setting windowwill appear as shown below.(2) The Protection Mode Setting window provides the following three choices. Selectthe desired one and press the OK button. The selected one goes into effect.ChoicesParameters & Programs ProtectionParameters ProtectionNo ProtectionFunctionProtect parameters, variables andprograms from getting edited with theteach pendant.Protect parameters from getting editedwith the teach pendant.Cancel the protection mode.5-178
Chapter 5 Commands Assigned to Function Keys of the Teach PendantScreen SaverAccess: [F6 Set]—[F7 Options.]—[F5 Display]Allows you to customize the screen saver on the teach pendant.(1) On the Option Menu, press [F5 Display] to call up the Display Setting window.(2) Customize the screen saver by selecting the following items and then press theOK button.Customizing the screen saverScreen saver: 0: Disable (Not use), 1: Enable (Use), 2: Screen Off*Setting "2" turns off the backlight only. (* Ver. 2.61 or later)Waiting time: Entry range from 1 to 9999 (minutes)If the touch panel is not accessed or no hardware button (such asMOTOR and F1) is pressed for the period specified by thiswaiting time, the screen saver will automatically run.Refresh cycle: Entry range from 1 to 9 (seconds)Once the screen saver runs, the screen switches to themonochrome mode where the black and white sections willreverse partially and sequentially at cycles specified by thisrefresh cycle.Note: The refresh cycle may seem to be 1 to 4 times fasterdepending upon the display contents on the screen.TIP: Persistence of vision on theLCDKeeping the same patterndisplayed on an LCD screen mayyield persistence of vision.Persistence of vision itself doesnot influence the robot operation,performance, function or safety.Enabling the screen saver canprevent the screen from yieldingpersistence of vision.When the screen saver is running, pressing the touch panel or any hardware button ofthe teach pendant will turn off the screen saver; however, the native function of thetouch panel or hardware buttons will be ignored except the "Robot stop button," "Motorkey (off)," "Mode selector switch (Manual, Auto)" and "STOP key." For example, if thescreen saver has started running when any setting window was displayed, pressingthe [F5 change.] will turn off the screen saver, but will not call up the numeric keypad.5-179
Selecting languageAccess: [F6 Set]—[F7 Options.]—[F6 Language]Switches the pendant screen language version to the language you select.(1) Press [F6 Language] in the Option Menu, and the Select Language window willappear as shown below.(2) Select the desired language and then press the OK button.Closing all windows being opened makes the new language setting go into effect.The top screen appears in the language you have just selected.Note: When German, Korean, or Chinese has been selected, some screens maybe displayed in English.5-180
Chapter 5 Commands Assigned to Function Keys of the Teach PendantEnabling extension functionsAccess: [F6 Set]—[F7 Options.]—[F8 Extnsion]—[F5 Input ID]Enables extension functions.Once enabled, the setting will be retained even if the controller power is turned off and on.(1) Press [F8 Extnsion] in the Option Menu, and the System Extension windowappears.(2) Press [F5 Input ID], and the Input ID Number window appears.(3) Enter the ID number and press [OK].(4) System message appears and press [OK]. The extended function displays.NOTE: When removing the extended function, press [Remove], and then input the IDnumber.(5) Turn the controller power OFF, and ON again to enable functions.5-181
ID Number ListExtension function ID No. ReferenceTip compliance control 6519 PROGRAMMER'S <strong>MANUAL</strong> I, Section 3.5.3Supervisory task 1111 Chapter 3, Section 3.4.10Supervisory task extension 1112 Chapter 3, Section 3.4.11Error code saving feature 3237 PROGRAMMER'S <strong>MANUAL</strong> I, Section 8.13.2Extension board function Attached OPTIONS <strong>MANUAL</strong>passwordORiN 1214 ORiN <strong>MANUAL</strong>New Panel 1453 Panel Designer ManualMini I/O All general 6319 ORiN <strong>MANUAL</strong>DETECT command 1312 Programming manual I "DETECT"Setting the robot type for the controllerAccess: [F6 Set]—[F7 Options.]—[F11 ROBTYPE]Sets the robot type for the controller.This command is intended for <strong>DENSO</strong> WAVE service personnel only. Do not use thiscommand.Updating the controller systemAccess: [F6 Set]—[F7 Options.]—[F12 Update.]Updates the controller system version.This command is intended for <strong>DENSO</strong> WAVE service personnel only. Do not use thiscommand.5-182
Chapter 5 Commands Assigned to Function Keys of the Teach PendantSaving System ParametersAccess: [F6 Set]—[F8 Save!]Saves the system parameters stored in the robot controller so that turning the robotcontroller off will not lose those parameter values.(1) Press [F8 Save!] in the Settings (Main) window, and the following system messagedialog box will appear.(2) Press the OK button to save the system parameters and display the followingsystem message dialog box.(3) Press the OK button to close the system message dialog box.5-183
Saving ProgramsAccess: [F6 Set]—[F9 SaveFile]Saves the programs stored in the robot controller. The programs can be maintainedeven when power to the robot controller is switched off.(1) Press [F9 SaveFile] in the Settings (Main) window. The following system messagedialog box will appear.(2) Press [OK] to save the program.(3) Once the program is saved the following system message will appear(4) Press [OK]5-184
Chapter 5 Commands Assigned to Function Keys of the Teach Pendant5.8 Customizing TP Operation Screens[Ver. 1.5 or later]Access: [F9 Panel]Customizes the TP operation screens.Main software version 1.5 or later allows you to easily customize your own operationscreens on the teach pendant for facilitating control of the robot by the robot controller.In PAC language, you may program your own control buttons in size, position, andcolor and paste them onto the Teach Pendant screen.Once the PAC program in which you have defined your own screens runs, thosescreens go into effect and remain in effect as long as you do not clear them, even if yourestart the robot system or controller.For details, refer to the PROGRAMMER'S <strong>MANUAL</strong> I, Section 13.5 "Customizing TPOperations Screens" and PROGRAMMER'S <strong>MANUAL</strong> II, PAC library".(1) Displays TP Operation Screen by pressing [F9 Panel].Sample Screen5-185
5.9 Switching between Internal and ExternalAuto ModesAccess: [F10 Int/Ext]Switches between the internal and external Auto modes.When this command is to be executed, the robot controller should be placed either ininternal Auto mode or external Auto mode.(1) Press [F10 Int/Ext] on the top screen, and the following window will appear.(2) Press the OK button to switch.5-186
Chapter 5 Commands Assigned to Function Keys of the Teach Pendant5.10 Preparing the Robot Controller to Unplugthe Teach PendantAccess: [F11 Unplug]Readies the robot controller for unplugging of the teach pendant.Before unplugging the teach pendant from the robot controller, be sure to use thiscommand.Before carrying out this command, ensure that:- The robot controller should be placed in Auto mode and- An emergency stop signal should be inputted.(1) Press [F11 Unplug] on the top screen, and the following window will appear.(2) Press the OK button to proceed.The following window will appear.(3) Unplug the teach pendant from the robot controller.5-187
Chapter 6Using theMini-PendantThis chapter describes how to control the robotusing the mini-pendant.NOTE 1: Avoid letting the mini-pendant undergoany strong shocks, impacts, or vibrations.
Chapter 6 Using the Mini-Pendant6.1 Commands MenuUsing the keys, buttons, and switches on the mini-pendant allows you to call up avariety of screens on the LCD. This section guides you through the menu tree and thengives you detailed operations.6.1.1 Keypad and Top ScreenWhen the power is first applied to the robot controller, the mini-pendant displays the topscreen shown below. In the top line of the screen is a status bar which always displaysthe current operation mode, program status, connected robot model, motion mode,speed, and other information. For details about the top screen, refer to Chapter 1,Section 1.3.Top screenStatus bar6-1
6.1.2 Menu Tree6-2
Chapter 6 Using the Mini-Pendant6-3
6.2 Operation Using the Mini-Pendant6.2.1 Turning the Motor ON/OFFKey: [MOTOR]OperationPressing [MOTOR] toggles the joint-drive motors on and off.Pressing this key when the LED is off will turn the motors on and switch the LED on.Pressing it when the LED is on will turn the motors off and switch the LED off.6.2.2 Machine Lock and ReleaseKey: [LOCK] [SHIFT] + [MOTOR]OperationPressing [LOCK] toggles between the machine lock and release.Pressing this key when the LED is off will lock the machine. When the machine islocked, the LED blinks. Pressing this key with the LED blinking will release the lock.6-4
Chapter 6 Using the Mini-Pendant6.2.3 Choosing the Robot ModelKey: [1: R-SEL]Operation(1) Press [1:R-SEL] to call up the Robot screen as shown below, which lists all robotmodels you can choose.(2) When the power is first applied to the robot controller, the mini-pendant showsrobot models preset by default. Use up and down cursor keys to choose the robotmodel you want to run and then press [OK].To discard the new choice, press [CANCEL].6-5
6.2.4 Switching the Motion ModesKey: [2: M-MOD]Operation(1) Press [2:M-MOD] to call up the "MoveMode" screen as shown below, which liststhe motion modes you can choose for your robot.(2) From the Joint, X-Y, and Tool modes, choose one in which you want to run yourrobot in Manual operation, by using up and down cursor keys. Then press [OK].To discard the new choice, press [Cancel].6-6
6.2.5 Changing Work CoordinatesKey: [WORK]OperationChapter 6 Using the Mini-Pendant[SHIFT] + [2: M-MOD](1) Press [WORK] to call up the "WorkNo" screen as shown below, which shows thecurrent work coordinates number.(2) When the power is first applied to the robot controller, the WORK0 (Basecoordinate) is set by default. Enter a number indicating the desired workcoordinates, and then press [OK].To discard the new setting, press [CANCEL].6-7
6.2.6 Changing the Robot SpeedKey: [3: SPEED]Operation(1) Press [3:SPEED] to call up the speed setting screen shown below where you canchange the robot speed.(2) Choose "Speed" with the up and down cursor keys, enter the desired speed (from0.1 to 100) from the numeric keypad, then press [OK].If you use the right or left cursor key instead of the numeric keypad, the speed willincrease or decrease in units of 5, respectively.To discard the new setting, press [CANCEL].6-8
6.2.7 Changing the Inching Angle and DistanceKey: [3: SPEED]OperationChapter 6 Using the Mini-Pendant(1) Press [3:SPEED] to call up the speed setting screen shown below where you canchange the inching angle and distance.(2) To change the inching angle:Choose "InchJ" with the up and down cursor keys, enter the desired angle from thenumeric keypad, then press [OK].To discard the new setting, press [CANCEL].(3) To change the inching distance:Choose "XY" with the up and down cursor keys, enter the desired distance fromthe numeric keypad, then press [OK].To discard the new setting, press [CANCEL].6-9
6-10If the robot enters the inching mode, the "Inc" will appear in the rightmost area of thestatus bar.
6.2.8 Changing Tool CoordinatesKey: [TOOL]OperationChapter 6 Using the Mini-Pendant[SHIFT] + [3: SPEED](1) Press [TOOL] to call up the "ToolNo" screen as shown below, which shows thecurrent tool coordinates number.(2) When the power is first applied to the robot controller, the TOOL0 (Flange) is setby default. Enter a number indicating the desired tool coordinates. Then press[OK].To discard the new setting, press [CANCEL].6-11
6.2.9 Switching between Internal and External Auto ModesKey: [INT/EXT]Operation(1) With the top screen displayed, press [INT/EXT] in Internal Auto mode to switch toExternal Auto mode.Switches to E(2) With the top screen displayed, press [INT/EXT] in External Auto mode to switch toInternal Auto modeSwitches to A.6-12
Chapter 6 Using the Mini-Pendant6.2.10 Handling ProgramsKey: [PROGRAM]Operation(1) Press [PROGRAM] to call up the program list as shown below.(2) Press [OK] to call up the "Functions" screen that lists program handles.- SearchPRO: Search program names.- Display: Show the property of the selected program.(3) Choose the "Display" handle with the up and down cursor keys and then press[OK]. The property of the selected program appears as shown below, including theprogram number, title, the number of steps, and others.Start lineTotal number of program lines(4) To display other program information, scroll the screen vertically with the up anddown cursor keys.6-13
(1) Checking programs in detailsOn the program list window called up by the [PROGRAM], you can check the programdetails--execution status, currently running program line, execution time, andexecution priority by scrolling the screen horizontally with the right and left cursor keys.(1.1) Displaying the program execution statusYou can check the execution status of programs currently loaded.(1.2) Displaying the currently running program lineYou can check the currently running program line.(1.3) Displaying the program execution timeYou can check the execution time (in seconds) of loaded programs.6-14
Chapter 6 Using the Mini-Pendant(1.4) Displaying the program execution priorityYou can check the execution priority level of each program currently loaded.(2) Starting a program(1) On the program list window called up by the [PROGRAM], you can choose aprogram to run with the up and down cursor keys.(2) Press [RUN] to show the program running mode menu.- Single: Single-cycle run (Execute the selected program from the beginning tothe end once.)- Cycles: Continuous run (Repeat the selected program.)- Cont-Exec: Continue start (Start the program whose status is Continue Stop.)(3) Choose a program running mode with the up and down cursor keys, then press[OK]. The selected program will run.NOTE: Make sure that the motor power is on before starting any programs.6-15
(4) If you want to stop the current robot motion immediately, press [STEP STOP],[CYCLE STOP] or [HALT] to halt the currently running program.(3) Step Start(1) On the program list window called up by the [PROGRAM], you can choose aprogram to run with the up and down cursor keys.(2) Press [STEP START] to call up the Step Forward screen as shown below.(3) Press [OK] to step-start the selected program.NOTE: Make sure that the motor power is on before starting the operation.6-16
Chapter 6 Using the Mini-Pendant(4) If you want to stop the current robot motion immediately, press [STEP STOP],[CYCLE STOP] or [HALT] to halt the currently running program.(4) Teach Check(4.1) Cycle Start(1) Turn the mode selector switch to the TEACH position to switch to Teach Checkmode.Switches to T.(2) Press [PROGRAM] to call up the program list window as shown below. Choose aprogram to run with the up and down cursor keys.6-17
(3) Press [RUN] to call up the Single Cycle screen.(4) While holding down the deadman switch, press [OK]. The program will run a singlecycle. Keep holding them down until the program will finish.NOTE: Make sure that the motor power is on before starting the operation.(5) If you release either one of the deadman switch and [OK], then the robot runningby programs will immediately stop.If you want to stop the current robot motion immediately, press [STEP STOP],[CYCLE STOP] or [HALT].6-18
Chapter 6 Using the Mini-Pendant(4.2) Step Start and Step Back(1) Turn the mode selector switch to the TEACH position to switch to Teach Checkmode.(2) Press [PROGRAM] to call up the program list window as shown below. Choose aprogram to run with the up and down cursor keys.(3) Press [STEP START] to call up the Step Forward screen.(4) While holding down the deadman switch, press [OK]. The program will run a singlestep. Keep holding them down until the program will finish.NOTE: Make sure that the motor power is on before starting the operation.6-19
(5) If you release either one of the deadman switch and [OK], then the robot runningby programs will immediately stop.If you want to stop the current robot motion immediately, press [STEP STOP],[CYCLE STOP] or [HALT].(6) Press [STEP BACK] to call up the Step Back screen.(7) While holding down the deadman switch, press [OK]. The program will stepbackwards . Keep holding them down until the program will finish.NOTE: Make sure that the motor power is on before starting the operation.(8) If you release either one of the deadman switch and [OK], the robot running byprograms will immediately stop.If you want to stop the current robot motion immediately, press [STEP STOP],[CYCLE STOP] or [HALT].6-20
Chapter 6 Using the Mini-Pendant6.2.11 Resetting ProgramsKey: [PRO RESET][SHIFT] + [PROGRAM]Operation(1) Press [PRO RESET] to call up the "Reset" screen as shown below. Choose one ofitems listed on the screen by using the up and down cursor keys.- Programs: Normal task programs- SupvsrTsk: Supervisory task programs(2) Press [OK] to reset the selected programs to the beginning. Those programs willbecome on halt.To discard the new choice, press [CANCEL]. The display will return to the topscreen.6-21
6.2.12 Displaying the Current Robot Arm PositionKey: [ARM]Operation[SHIFT] + [RUN](1) Press [ARM] to call up the current robot position window.(2) When the robot controller is turned on, the coordinates is expressed in jointvariables by default as shown above.Press [OK] to call up the Display Style window where you can select the desiredexpression.(3) Choose the desired expression by using the up and down cursor keys, then press[OK].To discard the new choice, press [CANCEL].On the current robot position window, using the right and left cursor keys canswitch the expression of the current robot position between the position variabletype, joint variable type, and homogeneous transform matrix variable type.6-22
6.2.13 Displaying Variable ValuesKey: [VARIABLE]OperationChapter 6 Using the Mini-Pendant[SHIFT] + [STEP BACK](1) Press [VARIABLE] to call up the screen which lists variables used in your robotcontroller.When the robot controller is turned on, the integer variables are displayed bydefault as shown above.(2) Select the desired variable by cycling through variable types to be displayed withthe right and left cursor keys.(The screen cycles through "I ⇔ F ⇔ D ⇔ V ⇔ P ⇔ J ⇔ T ⇔ I.")(3) With the desired variable type displayed, press [OK] to call up the "Function"screen to handle the selected variable.To discard the new setting, press [CANCEL].NOTE: There are two types of "Function" screens. For I, F, D, and V variables,three items (JumpTo, Change, and Copy) will display; for P, J, and T variables, fiveitems (JumpTo, Move, Change, GetPos, and Copy) will display.(4) Choose one of the items with the up and down cursor keys, then press [OK]. Todiscard the new choice, press [CANCEL].6-23
(4.1) JumpToIf you choose "JumpTo" with the up and down cursor keys and press [OK], then thefollowing JumpTo screen appears. Enter the variable number you want to jump to,into the highlighted line and press [OK].To discard the new setting and return to the previous screen, press [CANCEL].(4.2) ChangeIf you choose "Change" with the up and down cursor keys and press [OK], then thefollowing variable setting window appears. Enter the desired value to be assignedto the variable and press [OK].To discard the new setting and return to the previous screen, press [CANCEL].(4.3) CopyIf you choose "Copy" with the up and down cursor keys and press [OK], then theCopyTo window appears. Enter an arbitrary variable number which the value of thevariable will be copied to, then press [OK].To discard the new setting and return to the previous screen, press [CANCEL].6-24
Chapter 6 Using the Mini-Pendant(4.4) MoveIf you choose "Move" with the up and down cursor keys and press [OK], then thePTP/CP selection window appears.To discard the new choice and return to the previous screen, press [CANCEL].After selecting the PTP or CP motion, press [OK] while holding down the deadmanswitch. The robot arm will move to the specified position (in Manual mode or TeachCheck mode).Restarting the robot arm's movement to the specified position (Ver.2.61 or later)To interrupt the robot arm's movement to the specified target position, release [OK].The screen returns to the target position setting one. Pressing [OK] again restarts themovement to the target position. Pressing [CANCEL] returns the screen to the PositionVariable one.(4.5) GetPosIf you choose "GetPos" with the up and down cursor keys and press [OK], then thecurrent position reading window appears as shown below.To discard the new choice and return to the previous screen, press [CANCEL].Press [OK] to get the current robot position into the specified variable.(4.6) AprMove (Global variables only) (Ver.2.61 or later)This function allows you to move the robot arm to a specified position with an approachlength. (Refer to the "APPROACH" in the PROGRAMMER'S <strong>MANUAL</strong> I.)If you choose "AprMove" with the up and down cursor keys and press [OK], then theapproach length setting window appears as shown below. Entering the desiredapproach length and pressing [OK] specifies the target position with the approachlength. Only when both of [OK] and either one of the deadman switches are depressed,the robot arm moves to the target position. Releasing [OK] halfway interrupts themovement, retaining the target position setting. Pressing [OK] with either one of thedeadman switches held down again restarts the movement to the target position.Pressing [CANCEL] cancels the target position setting and returns to the PositionVariable one.6-25
6.2.14 Reconfiguring I/O SignalsKey: [I/O][SHIFT] + [STEP START]OperationI/O Port and I/O AllocationI/O port Symbol I/O allocation SymbolUser input GI Selectable I/O SelctblUser output GO DeviceNet master allocation DVMastrSystem input DI Compatible allocation CompatiSystem output DO Standard allocation StandrdHand inputHINote: In Ver. 1.95 or later, the mini-pendantHand outputHOdisplays these symbols.Internal I/OITCC-Link system input area SICC-Link system output area SOCC-Link remote registerinput area (RWw)WICC-Link remote registeroutput area (RWr)WO(1) Press [I/O] to call up the I/O signal truth table as shown below.(2) To change the truth status assigned to I/O lines, choose the line with the up, down,left, and right cursor keys.6-26
Chapter 6 Using the Mini-Pendant(3) Press [OK] call up the "Function" screen that handles I/O signals.To return to the I/O signal truth table, press [CANCEL].(4) Choose one of handles with the up and down cursor keys, then press [OK].(4.1) ON/OFFIf you choose "ON/OFF" with the up and down cursor keys and press [OK], thenthe following screen appears where you can reverse the truth assignment of theline.To discard the new setting and return to the I/O signal truth table, press [CANCEL].(4.2) JumpToIf you choose "JumpTo" with the up and down cursor keys, the JumpTo screenappears. Enter an I/O line number you want to jump to, into the highlighted line andthen press [OK].To discard the new setting and return to the I/O signal truth table, press [CANCEL].On the I/O signal truth table, using the up, down, right, and left cursor keys with the[SHIFT] held down can shift the screen.6-27
6.2.15 Executing CALKey: [CAL](Effective in Manual mode)Operation(1) Press [CAL] to call up the CAL confirmation window as shown below.(2) Check that the motor power is on, then press [OK] to execute CAL.To abort it and return to the previous screen, press [CANCEL].6-28
6.2.16 Releasing and Locking BrakesChapter 6 Using the Mini-PendantKey: [BRAKE](Effective in Manual mode)Not supported in UL-Listed robot systemsOperationFor 6-axis robots(1) Press [BRAKE] to call up the "Brake" window as shown below.(2) Choose the All Axes or Each Axis to handle by using the up and down cursor keys,then press [OK]. The display will proceed to the brake control screen.(2.1) All AxesIf you choose "All Axes" with the up and down cursor keys and press [OK], then thefollowing All Axes screen will appear where you can control the brakes.To return to the previous screen, press [CANCEL].Choose "Release" or "Lock" with the up and down cursor keys, then press [OK].The following confirmation dialogs will appear, respectively.Press [OK] to release or lock all axes.To abort brake setting and return to the previous screen, press [CANCEL].6-29
(2.2) Each AxisIf you choose "Each Axis" with the up and down cursor keys and press [OK], thenthe following Each Axis screen appears where you can control the brake for eachjoint. The letters, R and L, stand for current Release and Lock status of each jointbrake, respectively.To abort brake setting and return to the previous screen, press [CANCEL].Choose an arbitrary joint with the up and down cursor keys. (You can verticallyscroll the screen with those keys.)Then press [OK]. Either of the following windows will appear.To switch the selected joint brake between Release and Lock status, press [OK].To abort brake setting and return to the previous screen, press [CANCEL].If the selected brake is released or locked successfully as specified, the followingmessage will display.6-30
Chapter 6 Using the Mini-PendantFor 4-axis robots(1) Press [BRAKE] to call up the "Z Axis Brake" window as shown below.(2) Choose "Release" or "Lock" with the up and down cursor keys, then press [OK].The following confirmation dialogs will appear, respectively.(3) Press [OK] to release or lock the Z-axis brake.To abort brake setting and return to the previous screen, press [CANCEL].If the Z-axis brake is released or locked successfully as specified, the followingmessage will display.6-31
6.2.17 Logging DataKey: [LOG][SHIFT] + [BRAKE]OperationPress [LOG] to call up the Log screen as shown below where you can handle the errorand control logging.(1) Checking error logChoose "ErrorLog" with the up and down cursor keys, then press [OK] to call up theerror log as shown below. You can check errors in your robot controller.You can vertically scroll the screen with the up and down cursor keys.To escape from error logging, press [CANCEL].(2) Handling control logChoose "CtrlLog" with the up and down cursor keys, then press [OK] to call up theSave log confirmation dialog as shown below.Press [OK] to save the control log.To discard the control log, press [CANCEL].6-32
Chapter 6 Using the Mini-Pendant6.2.18 Setting Communications PortKey: [COM](Effective in Manual mode)Operation(1) Press [COM] to call up the "COM Setting" screen shown below which listscommunications settings for the robot controller.(2) Choose "Permit" with the up and down cursor keys and then press [OK]. ThePermission screen appears as shown below.(X): Not permitted, (R): Only read permitted, (RW): Read/write permittedTo abort setting, press [CANCEL].(3) Choose any port whose communications permission should be changed, from the232C, COM3, COM4 and Ether ports, by using the up and down cursor keys. (Youcan vertically scroll the screen with those keys.)Then press [OK] to proceed to the "Permit-COMx" setting as shown below.To abort setting, press [CANCEL].Choose any of "Disable", "read only" and "read/write," and then press [OK] toestablish the new setting.To cancel the new setting, press [CANCEL].6-33
6.2.19 Changing Serial Port SpeedKey: [COM](Effective in Manual mode)Operation(1) Press [COM] to call up the "COM Setting" screen shown below which listscommunications setting for the robot controller.(2) Choose "RS-232C" with the up and down cursor keys, then press [OK]. Thecommunications ports window appears as shown below which lists thecommunications ports available in your robot controller. (You can vertically scrollthe screen with those keys.)To abort setting and return to the previous screen, press [CANCEL].(3) Choose any port whose communications speed should be changed, from theCOM2-232C, COM3 and COM4 ports, by using the up and down cursor keys.Then press [OK] to proceed to the communications rate setting shown below.To abort setting and return to the previous screen, press [CANCEL].(4) Choose any of "9600bps", "19200bps", "38400bps", "57600bps" and "115200bps"with the up and down cursor keys, then press [OK] to establish it.To discard the new setting, press [CANCEL].6-34
Chapter 6 Using the Mini-Pendant6.2.20 Setting IP AddressKey: [COM](Effective in Manual mode)Operation(1) Press [COM] to call up the "COM Setting" screen shown below which listscommunications setting for the robot controller.(2) Choose "IPaddress" with the up and down cursor keys, then press [OK]. The IPaddress setting window appears as shown below where you can set the IPaddress of your robot controller.To abort setting and return to the previous screen, press [CANCEL].(3) Choose an input field with the up, down, right, and left cursor keys, then enter anew address plus a dot (as a field delimiter).To discard the new setting, press [CANCEL]. Generally, the "Subnet mask" fieldswill require no change.When [8] is entered;6-35
(4) After filling up the field, press [OK]. The following confirmation message willappear.Press [OK] to establish the new setting.To discard the new setting, press [CANCEL].6-36
Chapter 6 Using the Mini-Pendant6.2.21 Procedure registrationProcedure for automatic IP address registrationPress [COM] on the top screen to call up the COM Setting window shown below.Select MultiIP using the up and down cursor keys and the press OK.The MultiIP Use screen appears.Select Enable and press OK to select automatic IP address registration.The COM Setting window appears as shown below.6-37
Procedure for individual IP address specificationSelecting automatic IP address registration calls up the Permit-Ether window wherethe user can select individual IP address specification.Select IndivIP and press OK.The COM Setting window appears as shown below.Select IndivIP and press OK.The individual IP specification screen appears as shown below.Up to 10 IP addresses can be specified with individual communication permissionsettings, using the following procedure.Select the desired IP number and press OK.6-38
Chapter 6 Using the Mini-PendantSelect IPaddress and press OK.Specify the IP address of the target PC and the press OK.The screen returns to the IP 1 Setting window shown on the top of this page.In the IP 1 Setting window, select Permit (RW) and press OK to display thecommunication permission setting screen shown below.Select any one from Disable, Read only, and Read/write.6-39
Changing PCs connectablePress [COM] on the top screen to call up the COM Setting window.Select ConnectIP and press OK.The Connected IP window appears as shown below, listing the IP addresses of PCsconnectable.IP addresses having a token are underlined.Select an IP address to clear and then press OK.The following window appears.Select Clear and press OK to clear the IP address selected above to [0.0.0.0].The robot controller allows a new PC to access the controller.6-40
Chapter 6 Using the Mini-Pendant6.2.22 Loading New ProjectKey: [LOAD][SHIFT] + [COM]Operation(1) Press [LOAD] to load a new project into your robot controller. The loadconfirmation message will appear as shown below.(2) Press [OK] to proceed. During loading, the message shown below is displayed.NOTE: Loading a new project may take few minutes.To abort it, press [CANCEL].6-41
6.2.23 Using Auxiliary Functions (Common to 4-axis and 6-axisrobots)Key: [AUX]Operation(1) Press [AUX] to call up the "Aux. Function" menu shown below.(2) Choose the desired function with the up and down cursor keys. (You can verticallyscroll the screen with those keys.) Then press [OK] to proceed.(2.1) VersionIf you choose "Version" in the "Aux Function" menu with the up and down cursorkeys and press [OK], then the following Version menu appears.To abort setting, press [CANCEL].Choose "ROM" and press [OK], and the version of the system software currentlyloaded in your controller will appear.Choose "Servo" and press [OK], and the version of the servo control subsystemwill appear.6-42
Chapter 6 Using the Mini-Pendant(2.2) Save FileIf you choose "SaveFile" in the "Aux Function" menu with the up and down cursorkeys and press [OK], then the following confirmation message will appear.Press [OK] to save the program files that are currently active.To abort saving, press [CANCEL].(2.3) Clear DataIf you choose "ClrData" in the "Aux Function" menu with the up and down cursorkeys and press [OK], then the following Clr Data menu appears.Deleting program filesChoose "Program" in the "Clr Data" menu with the up and down cursor keys, andthen press [OK]. The following confirmation message will appear.To abort deleting, press [CANCEL].Press [OK] to delete all program files currently loaded in your controller.To abort deleting, press [CANCEL].6-43
Deleting variablesChoose "Variable" in the "Clr Data" menu with the up and down cursor keys, andthen press [OK]. The following confirmation message will appear.To abort deleting, press [CANCEL].Press [OK] to delete all variables currently loaded in your controller.To abort deleting, press [CANCEL].(2.4) Maintenance -- Adjusting contrast of the mini-pendant screenThe contrast of the mini-pendant screen has been adjusted at the factory. If youneed to change the current setting for matching the operating environment, followthe procedure below. The contrast is adjustable to four levels. Choose [AUX]—[Maintenance] to call up the Contrast screen. Choose the desired contrast level (usually Level 1 or 2) with the up and downcursor keys, then press [OK]. After a few seconds, the contrast changes to thenew level.To discard the new setting, press [CANCEL] instead of [OK].Level 0Level 1Level 2Level 3Low (Light)High (Dark)Note: When the Contrast screen appears, the cursor always lies on Level 0independently of the current contrast level.6-44
Chapter 6 Using the Mini-Pendant(2.5) USB Memory--Accessing the USB flash memory drive (Ver. 3.0 or later)This menu reads or writes project data from/to a USB flash memory drive.This function is equivalent to the project data exchange using the teach pendant.For details, refer to "Reading and Writing Data with USB Flash Memory" inChapter 5, Section 5.7.Note that the mini-pendant cannot select data type from the "Data that can behandled by USB flash memory drive" table given in Section 5.7. It exchanges alldata together; therefore, project data not containing all data cannot be exchanged.Caution: Never read in project data of other robots. Doing so causes the robot tomalfunction. It is DANGEROUS.Note: Before proceeding to this operation, plug a USB flash memory drive into thecontroller so that the controller recognizes it beforehand.Reading(1) On the USB mem screen shown above, select "Read" with the up and down cursorkeys and press [OK] to display the Project selection screen.(2) Select the project to read in and press [OK], and the following confirmationmessage appears, asking whether to overwrite the CALSET data.To read in data except CALSET data, press [CANCEL]; to read in all data includingCALSET data, press [OK].6-45
(3) The following confirmation screen appears.To abort reading, press [CANCEL].(4) To start reading, press [OK]. Wait for processing to complete for a while.(5) Wait for the following completion screen to appear.Note: After completion of reading, restart the robot controller; otherwise, thecontroller may not function normally.6-46
Chapter 6 Using the Mini-PendantWriting(1) On the USB mem screen, select "Write" with the up and down cursor keys andpress [OK] to display the project name to use.(2) The following confirmation message appears, asking whether to start writing.To abort writing, press [CANCEL].(3) To start writing, press [OK]. Wait for processing to complete for a while.(4) Wait for the following completion screen to appear.6-47
6.2.24 Maintaining the Robot with the Mini-pendant[RC7 Ver. 2.3 or later]You can perform the following items with the mini-pendant.(1) Performing CALSET(2) Resetting the motor encoder data(3) Setting the calendar clock built in the robot controller (Date setting)(4) Setting the next battery replacement date[ 1 ] Performing CALSETAccess: [AUX]—[ArmAux]—[CalSet.](1) The "Select Joint" screen for CALSET appears as shown below.(2) Select the target joint for CALSET.NOTE: Selecting "0" performs all-axis CALSET.(3) Press the OK key to start CALSET.TIP: For details about the CALSET operation, refer to the INSTALLATION &MAINTENANCE GUIDE, "CALSET."6-48
Chapter 6 Using the Mini-Pendant[ 2 ] Resetting the motor encoder data (only for bus-connected encoders)You need to reset encoders and perform CALSET if:-Error 641* occurs due to depleted encoder backup batteries, or-Error 677* occurs due to a great impact applied to the robot when the power is off.(* is any of 1 to 6 denoting the object axis.)Note: If attempted for encoders other than bus-connected ones, this resetting functioncannot be activated but just displays "Disable!!."Access: [AUX]—[ArmAux]—[EncRst](1) The "Select Joint" screen appears, prompting you to choose the joint to reset therelated encoder.(2) Select the target joint.(3) Press the OK key to start resetting the encoder on the target joint.6-49
[ 3 ] Setting the calendar clock built in the robot controller (Date setting)Access: [AUX]—[Maintenance]—[Date](1) The "Date" screen appears as shown below.(2) Select "Display" to show the current calendar clock setting.(3) Select "Setting" to change the calendar clock setting.Choose the items to change with the right and left cursor keys and enter newvalues with the numeric keypad.Press the OK key to establish the new setting.6-50
[ 4 ] Setting the next battery replacement dateAccess: [Aux]—[Maintenance]—[Battery]Chapter 6 Using the Mini-PendantSets the next replacement date of the memory backup battery loaded in the robotcontroller.When the replacement day comes, Error 2103 "Time to change controller backupbattery" (Level 1) appears periodically.(1) The "Battery Replacement" date screen appears as shown below.(2) Choose an input field with the right and left cursor keys, then enter new data (nextreplacement date) with the numeric keypad.Press the OK key to establish the new setting.Note: The battery should be replaced every two years (refer to the"INSTALLATION & MAINTENANCE GUIDE"). If you replace the battery, set"current year + 2 years" as the next replacement date.6-51
6.2.25 Entering the Direct Teaching Mode (For 4-axis robots)Key: [AUX](Effective in Manual mode)Not supported in UL-Listed robot systemsOperationIn the direct teaching mode, you can move the robot arm by hand (without using themini-pendant) with the motor OFF and teach the current position to variables.Before making the robot enter the direct teaching mode, make sure that the motorpower is OFF and the CAL has been completed.NOTE: Only when you make the robot enter the direct teaching mode at the first timeafter turning the robot controller ON, the air pressure adjustment for Z-axis balance isrequired so that you need to turn the motor power ON.Entering the direct teaching mode(1) Press [AUX] to call up the "Aux. Function" menu shown below.(2) Vertically scroll the screen with the up and down cursor keys to choose the "ArmAux."(3) Press [OK]. The "Arm Aux." window appears.To abort setting and return to the previous screen, press [CANCEL.]6-52
Chapter 6 Using the Mini-PendantNOTE: Steps (4) through (6), which adjust the air pressure balance of the Z-axis, arerequired only when you make the robot enter the direct teaching mode at the first timeafter turning the robot controller ON.(4) If you choose "Direct" and press [OK], then the "Z-Balance" window appears asshown below.To abort air balance setting and return to the previous screen, press [CANCEL.]Adjust the air pressure so that the indicator line comes within the OK range of thegauge.Indicator lineThis mark shows the current air balance state.0: Appropriate: Increase the air pressure: Decrease the air pressure(5) Press [OK]. The following screen will appear.(6) Press [OK]. The following message appears, prompting you to turn the motorpower off.To abort setting, press [CANCEL].6-53
(7) Turn the motor power off and press [OK]. The Brake release confirmation screenwill appear.(8) Press [OK]. The Z-axis brake will be released and the robot will enter the directteaching mode. In the direct teaching mode, the "D" appears in the status bar.Displays "D."Escaping from the direct teaching mode(1) Perform steps (1) through (3) in the direct teaching mode entry procedure.In the "Arm Aux." screen, choose "Direct" and then press [OK]. The Brake lockconfirmation screen appears as shown below.To abort setting, press [CANCEL].(2) Press [OK]. The Z-axis brake will be locked and the robot will escape from thedirect teaching mode.6-54
Chapter 6 Using the Mini-Pendant6.2.26 Adjusting the Air Pressure Balance of the Z-Axis (For4-axis robots)Key: [AUX]Operation(Effective in Manual mode)To adjust the air pressure balance of the Z-axis, you need to turn the motor power on.(1) Press [AUX] to call up the "Aux. Function" menu shown below.(2) Vertically scroll the screen with the up and down cursor keys to choose the "ArmAux."(3) Press [OK]. The "Arm Aux." window appears.To abort setting and return to the previous screen, press [CANCEL.]6-55
(4) If you choose "Z-Balance" and press [OK], then the "Z-Balance" window appearsas shown below.To abort air balance setting and return to the previous screen, press [CANCEL].Adjust the air pressure balance so that the indicator line comes within the OKrange of the gauge.Indicator lineThis mark shows the current air balance state.0: Appropriate: Increase the air pressure: Decrease the air pressure(5) Press [OK]. The following screen will appear.(6) Press [OK] or [CANCEL] to complete the air balance adjustment procedure.6-56
Vertical Articulated V * SeriesHorizontal Articulated H * SeriesCartesian Coordinate XYC SeriesIntegrated compact type XR SERIES<strong>SETTING</strong>-<strong>UP</strong> <strong>MANUAL</strong>First Edition April 2009Third Edition January 2011Fourth Edition April 2011<strong>DENSO</strong> WAVE INCORPORATED4N**CThe purpose of this manual is to provide accurate information in the handling and operating of therobot. Please feel free to send your comments regarding any errors or omissions you may havefound, or any suggestions you may have for generally improving the manual.In no event will <strong>DENSO</strong> WAVE INCORPORATED be liable for any direct or indirect damagesresulting from the application of the information in this manual.