
Create successful ePaper yourself
Turn your PDF publications into a flip-book with our unique Google optimized e-Paper software.
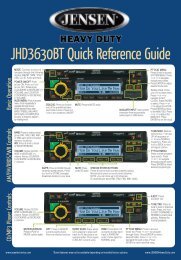
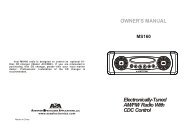
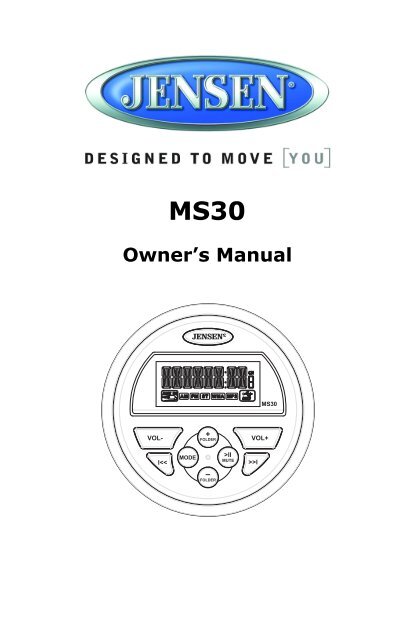
<strong>MS30</strong>INTRODUCTIONThank you for choosing a <strong>Jensen</strong> product. We hope you will find the instructions in this owner’smanual clear and easy to follow. If you take a few minutes to look through it, you’ll learn how touse all the features of your new <strong>Jensen</strong> receiver for maximum enjoyment.Features• Waterproof iPx6• UV and Corrosion Resistant• AM/FM Tuner• 12 Programmable Presets (6 AM, 6 FM)• USB MP3/WMA Player• Rear Auxiliary Audio Input• Rear Line Output• 4-Channel Amplified Audio OutputBox Contents• <strong>MS30</strong> Radio• Radio Mounting Bracket• Screw Posts (x2)• Locking Hex Nuts (x2)• Washers (x2)ComplianceCompliance with FCC Rules (U.S.A. Only)This device complies with Part 15 of the FCC rules. Operation is subject to the following twoconditions: (1) This device may not cause harmful interference, and (2) this device must acceptany interference received, including interference that may cause undesired operation.NOTICEThis equipment has been tested and found to comply with the limits for a Class B digital device,pursuant to Part 15 of the FCC rules. These limits are designed to provide reasonable protectionagainst harmful interference in a residential application. This equipment generates, uses, and canradiate radio frequency energy and, if not used in accordance with the instructions, may causeharmful interference to radio communications.FCC WARNING• Changes or modifications not expressly approved by the party responsible for compliancecould void the user’s authority to operate this equipment.• Proper connections must be used for connection to a host computer and/or peripherals inorder to meet FCC emission limits.1
<strong>MS30</strong>Safety Information• To ensure full satisfaction with the product, please read the entire instruction manual.• Keep instructions for future reference.• Follow all operation guidelines and adhere to all safety warnings and cautions to ensure safeuse.• Do not install near any heat sources such as radiators, heat registers, stoves, or otherapparatus (including amplifiers) that produce heat.• Only use attachments/accessories specified by the manufacturer.• Never use harsh cleaning agents. Clean only with a dry cloth.When DrivingKeep the volume level Iow enough to be aware of your surroundings.Protect from WaterDo not submerge, as this can cause electrical shorts, fire or other damage.Protect from High TemperaturesExposure to direct sunlight for an extended period of time can produce very high temperaturesinside your vehicle. Give the interior a chance to cool down before starting playback.Do not mount the radio within close proximity of the engine compartment.Use the Proper Power SupplyThis product is designed to operate with a 12 volt DC negative ground battery system.WARNING:• DO NOT OPEN, DISASSEMBLE OR ALTER THE UNIT IN ANY WAY. Doing so may resultin fire, electric shock or product damage.• USE THE CORRECT AMPERE RATING WHEN REPLACING FUSE. Failure to do so mayresult in fire, electric shock or product damage.• DO NOT INSTALL IN LOCATIONS THAT MIGHT HINDER VEHICLE OPERATION. Doingso may obstruct vision or hamper movement which can result in a serious accident.• INSTALL THE WIRING SO THAT IT IS NOT CRIMPED OR PINCHED BY SCREWS ORSHARP METAL EDGES. Route the cables away from moving parts or sharp pointed edges.This will prevent crimping and damage to the wiring. If the wiring must pass through a metalhole, be sure to use a rubber grommet to prevent the wire's insulation from being cut by themetal edge of the hole. It is also recommended to apply sealing caulk to any opening thatmay potentially allow water to enter.• Be sure to choose a location that is flat and has clearance above the unit to prevent anydamage, as well as allow for ventilation.• Before drilling any holes, carefully inspect the area underneath and behind the mountingsurface where the device will be mounted to make sure it will not interfere with existingwires, fuel lines, the fuel tank or any other objects that could be damaged.• Always disconnect the vehicle negative battery terminal during installation to preventaccidental shorting.2
<strong>MS30</strong>INSTALLATIONMounting the Radio1. Choose a mounting location on the dash board or instrument panel that will allow roombehind to run radio cables to the power source. Consider how you will use the AUX IN, LINEOUT and USB connectors and route the appropriate extension cables to an accessible area.2. Cut a hole in the dash board using the template provided in the back of this manual. At least3 3/4” depth is needed to mount the radio.IMPORTANT! Do not mount this unit where it can be submerged in water.3. Slide the included spring washers (B) over the screw posts (A) and attach the screw posts tothe back of the radio.4. Place the radio in front of the dashboard opening so the wiring can be brought through theopening.5. After completing the wiring connections, turn the radio on to confirm operation (vehicleaccessory switch must be on). If the radio does not operate, recheck all wiring until theproblem is corrected. Once proper operation is achieved, turn the accessory switch off andproceed with final mounting of the radio. Refer to the “Wiring Diagram” on page 5.NOTE: Before final installation, test the wiring connections to make sure the unit isconnected properly and the system works.6. Insert the radio into the mounting hole.7. Place the “U” bracket (C) over the screw posts and secure the radio to the dash using theincluded hex nuts (D). If necessary, cut the score marks (E) on either side of the mountingbracket to custom fit the bracket length for your application. See Figure A.CDA3 Inch HoleBEFigure A - Installation3
<strong>MS30</strong>Auxiliary InputConnect a portable audio device to the Audio Input (AUX IN RIGHT/LEFT) on the back of the unitusing RCA cables.Line OutputThe Line Out connectors (LINE OUT RIGHT/LEFT) on the back of the unit output a line-levelanalog signal. Use this output to connect to an external amplifier.4
<strong>MS30</strong>Wiring DiagramUSB ConnectorBlackBlackANTENNAYellowAUX IN RIGHT (red)10AMPType ATO FuseYellowGreyAUX IN LEFT (white)LINE OUT RIGHT (red)GreyLINE OUT LEFT (white)+12 VDC SWITCHEDNOTE: Do not connect the red wire toa constant power connection. Thered wire should be connected to avehicle connection with switchedpower, such as IGN or ACC.5
<strong>MS30</strong>OPERATION14<strong>MS30</strong>2 +VOL-FOLDERVOL+3MODE >ll6MUTEll7lFOLDER8 95Basic FunctionsPowerPress the JENSEN power button (1) to turn the unit on/off.Restore Factory SettingsPerform the following steps to reset the radio to factory default settings:1. Press and hold the power button (1) to display the software version.2. Press the VOL + button (3) to display “RESET”.3. Press the power button to confirm factory default restore. After reset, the unit will default toFM mode.VolumePress the VOL + button (3) to increase the volume.Press the VOL - button (2) to decrease the volume.Press and hold either button to change the volume level quickly.MutePress the MUTE button (9) to silence the audio output in tuner, AUX or USB mode. Press again torestore the previous volume level.ModePress the MODE button (8) to select a mode of operation: FM, AM, AUX or USB.6
<strong>MS30</strong>Audio MenuPress and hold the MODE button (8) to access the audio menu. Press the MODE buttonrepeatedly to adjust the following settings: BASS, TREBLE, BALANCE, FADER, AS and PS. Usethe VOL +/- buttons (3, 2) to choose a value for each setting. See “Radio Mode” for instructionsregarding the Auto Store (AS) and Preset Scan (PS) features.Radio ModeUSA/Europe (EURO) Tuning Mode SelectionTo change from USA to European tuning mode, perform the following steps:1. Press and hold the MODE button (8) for 2 seconds to access the system menu.2. Press the MODE button repeatedly to move through the menu options (BASS > TREBLE >BALANCE > FADER > AS/PS > USA/EURO). The unit will display USA (if set to USAfrequency tuning mode) or EURO (if set to European frequency mode).3. With the display showing the current tuning mode, press the VOL - or VOL+ button (2, 3) tochange between USA/EURO.4. Press the JENSEN power button (1) to confirm your selection.Frequency TuningPress the l>l button (6, 7) to fine tune the radio frequency.Channel SeekPress and hold the l>l button to seek strong radio frequencies.Preset Channel StoreTo manually store a favorite channel to one of the six preset channels, perform the followingsteps:1. Press the l>l button (6, 7) to tune to the radio frequency you want to store.2. Press and hold the FOLDER + or - button (4, 5) to access the preset channel list.3. Press the l>l button to select the desired preset channel number (1-6).4. Wait three seconds and the unit will save the station to the chosen preset channel anddisplay “SAVED” on the screen.Auto StorePress and hold the MODE button (8) to access the audio menu. Press the MODE buttonrepeatedly until “AS” appears on the display. Press the >>l button to begin the Auto Store functionand store the strongest stations to the preset tuning channels. The unit will automatically performa Preset Scan once the Auto Store is complete.Preset ScanPress and hold the MODE button to access the audio menu. Press the MODE button repeatedlyuntil “PS” appears on the display. Press the >>l button to begin the Preset Scan function andlisten to a preview of each stored station.Preset Channel selectPress the FOLDER +/- buttons (4, 5) to select available preset channels.7
<strong>MS30</strong>USB ModeInsert/Remove USB DeviceYou can connect a USB device directly to the USB interface at the rear of the radio for playback ofcompatible files. Playback begins automatically.Press the MODE button (8) to switch to USB mode from another source.Play/Pause (USB)During USB playback, press the MUTE button (9) to play or pause the selected track.Next/Previous FilePress the l>l button (6, 7) to select the previous or next track.Folder NavigationPress the FOLDER +/- buttons (4, 5) to select the next/previous folder. Playback will begin withthe first song file in the selected folder.Fast Forward/Fast ReversePress and hold the l>l button to fast forward or fast reverse.Auxiliary Input ModePress the MODE button (8) to directly access auxiliary input mode (AUX IN) from any other modewhen a portable audio device is connected to the unit.8
<strong>MS30</strong>TROUBLESHOOTINGTable 1: TroubleshootingProblemNo PowerNo AM/FM ReceptionNo SoundSolutionIf the power supply is connected to the vehicle accessory circuitsbut the engine is not on, switch the ignition key to “ACC”Fuse may be blown. Replace with 10 AMP ATO fuse.Antenna cable not connected; insert antenna cable firmly.Check volume level; increase volume if necessary.Check power; make sure device is on.Check device; press the play/pause button to ensure unit is not inPause mode.9
<strong>MS30</strong>SPECIFICATIONSGeneralPower Supply Requirements. . . . . . . . . . . . . . . . . . . . . . . . . . DC 12 Volts, Negative GroundOperating Voltage . . . . . . . . . . . . . . . . . . . . . . . . . . . . . . . . . . . . . . . . . . . . . . . . . .10-16VDCUnit Dimensions . . . . . . . . . . . . . . . . . . . . . . . . . . . . . . . . . . . . . . . 3.0” Diagonal, 3.3” DeepMounting Dimensions . . . . . . . . . . . . . . . . . . . . . . . . . . . . . . . . . . . . . 3.0” Diagonal, 4” DeepWeight . . . . . . . . . . . . . . . . . . . . . . . . . . . . . . . . . . . . . . . . . . . . . . . . . . . . . . . . . . . . . . . .1 lb.FM TunerTuning Range . . . . . . . . . . . . . . . . . . . . . . . . . . . . . . . . . . . . . . . . . . . . . . . . . . 87.5-107.9FMSensitivity . . . . . . . . . . . . . . . . . . . . . . . . . . . . . . . . . . . . . . . . . . . . . . . . . . . . . . . . . . . . 25dBAM TunerTuning Range . . . . . . . . . . . . . . . . . . . . . . . . . . . . . . . . . . . . . . . . . . . . . . . . . . . . . 530-1710Sensitivity . . . . . . . . . . . . . . . . . . . . . . . . . . . . . . . . . . . . . . . . . . . . . . . . . . . . . . . . . . .
ASA Electronics Corporationwww.asaelectronics.comwww.jensenheavyduty.comwww.jensenmarinedirect.com/©2012 ASA Electronics Corporationv. 061812