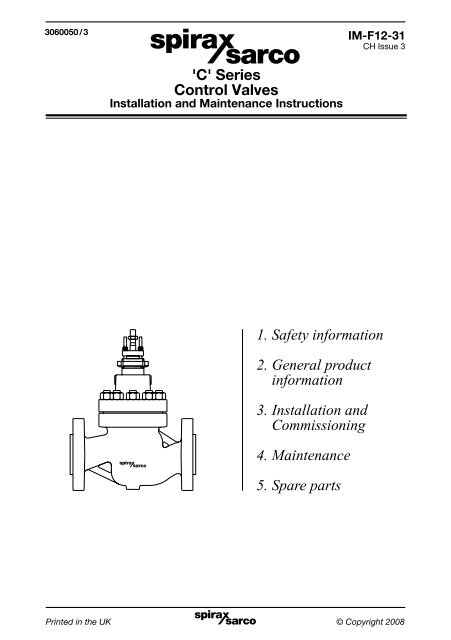
'C' Series Control Valves Installation and ... - Spirax Sarco
'C' Series Control Valves Installation and ... - Spirax Sarco
'C' Series Control Valves Installation and ... - Spirax Sarco

Create successful ePaper yourself
Turn your PDF publications into a flip-book with our unique Google optimized e-Paper software.
3060050/3<br />
<strong>'C'</strong> <strong>Series</strong><br />
<strong>Control</strong> <strong>Valves</strong><br />
<strong>Installation</strong> <strong>and</strong> Maintenance Instructions<br />
IM-F12-31<br />
CH Issue 3<br />
1. Safety information<br />
2. General product<br />
information<br />
3. <strong>Installation</strong> <strong>and</strong><br />
Commissioning<br />
4. Maintenance<br />
5. Spare parts<br />
IM-F12-31 Printed in the CH UK Issue 3 © Copyright 20081
2<br />
IM-F12-31 CH Issue 3
1. Safety information<br />
Safe operation of these products can only be guaranteed if they are properly<br />
installed, commissioned, used <strong>and</strong> maintained by qualified personnel (see Section<br />
1.11) in compliance with the operating instructions. General installation <strong>and</strong> safety<br />
instructions for pipeline <strong>and</strong> plant construction, as well as the proper use of tools<br />
<strong>and</strong> safety equipment must also be complied with.<br />
1.1 Intended use<br />
Referring to the <strong>Installation</strong> <strong>and</strong> Maintenance Instructions, name-plate <strong>and</strong> Technical<br />
Information Sheet, check that the product is suitable for the intended use/application.<br />
The products listed below comply with the requirements of the European Pressure<br />
Equipment Directive 97/ 23/ EC <strong>and</strong> carry the mark when so required. The products<br />
fall within the Pressure Equipment Directive categories as shown in Table 1 <strong>and</strong> 2:<br />
Table 1 DIN products for the <strong>'C'</strong> series<br />
CE43<br />
CE63<br />
CE83<br />
CE43<br />
CE63<br />
CE83<br />
CE43<br />
CE43B<br />
CE63<br />
CE83<br />
CE83B<br />
CE43<br />
CE43B<br />
CE63<br />
CE83<br />
CE83B<br />
CE43<br />
CE43B<br />
CE63<br />
CE83<br />
CE83B<br />
Product<br />
PN100<br />
PN63<br />
PN40<br />
PN25<br />
PN16<br />
Group 1<br />
Gases<br />
Group 2<br />
Gases<br />
Group 1<br />
Liquids<br />
Group 2<br />
Liquids<br />
DN25 SEP SEP SEP SEP<br />
DN40 - DN100 2 1 2 SEP<br />
DN125 - DN200 3 2 2 SEP<br />
DN250 3 2 2 1<br />
DN300 3 3 2 1<br />
DN25 SEP SEP SEP SEP<br />
DN40 - DN100 2 1 2 SEP<br />
DN125 - DN200 3 2 2 SEP<br />
DN250 3 2 2 1<br />
DN300 3 3 2 1<br />
DN25 SEP SEP SEP SEP<br />
DN40 2 1 SEP SEP<br />
DN50 - DN100 2 1 2 SEP<br />
DN125 - DN200 3 2 2 SEP<br />
DN250 3 2 2 1<br />
DN300 3 3 2 1<br />
DN25 SEP SEP SEP SEP<br />
DN40 1 SEP SEP SEP<br />
DN50 - DN100 2 1 SEP SEP<br />
DN125 2 2 2 SEP<br />
DN150 - DN200 3 2 2 SEP<br />
DN250 3 2 2 1<br />
DN300 3 3 2 1<br />
DN25 SEP SEP SEP SEP<br />
DN40 - DN50 1 SEP SEP SEP<br />
DN65 - DN125 2 1 SEP SEP<br />
DN150 - DN200 2 1 2 SEP<br />
DN250 - DN300 3 2 2 SEP<br />
IM-F12-31 CH Issue 3 3
Table 2 ANSI products for the <strong>'C'</strong> series<br />
4<br />
CE43<br />
CE63<br />
CE83<br />
Product<br />
ANSI 600<br />
ANSI 300<br />
ANSI 150<br />
ANSI 600<br />
ANSI 300<br />
ANSI 150<br />
ANSI 600<br />
ANSI 300<br />
ANSI 150<br />
Group 1<br />
Gases<br />
Group 2<br />
Gases<br />
Group 1<br />
Liquids<br />
Group 2<br />
Liquids<br />
DN25 SEP SEP SEP SEP<br />
DN40 - DN100 2 1 2 SEP<br />
DN125 - DN200 3 2 2 SEP<br />
DN250 3 2 2 1<br />
DN300 3 3 2 1<br />
DN25 SEP SEP SEP SEP<br />
DN40 - DN100 2 1 2 SEP<br />
DN125 - DN200 3 2 2 SEP<br />
DN250 3 2 2 1<br />
DN300 3 3 2 1<br />
DN25 SEP SEP SEP SEP<br />
DN40 - DN50 1 SEP SEP SEP<br />
DN65 - DN100 2 1 SEP SEP<br />
DN125-DN150 2 1 2 SEP<br />
DN200 - DN250 3 2 2 SEP<br />
DN300 3 3 2 1<br />
DN25 SEP SEP SEP SEP<br />
DN40 - DN100 2 1 2 SEP<br />
DN125 - DN200 3 2 2 SEP<br />
DN250 3 2 2 1<br />
DN300 3 3 2 1<br />
DN25 SEP SEP SEP SEP<br />
DN40 2 1 SEP SEP<br />
DN50 - DN100 2 1 2 SEP<br />
DN125 - DN200 3 2 2 SEP<br />
DN250 3 2 2 1<br />
DN300 3 3 2 1<br />
DN25 SEP SEP SEP SEP<br />
DN40 - DN50 1 SEP SEP SEP<br />
DN65 - DN100 2 1 SEP SEP<br />
DN125 - DN150 2 1 2 SEP<br />
DN200 - DN250 3 2 2 SEP<br />
DN300 3 3 2 1<br />
DN25 SEP SEP SEP SEP<br />
DN40 - DN100 2 1 2 SEP<br />
DN125 - DN200 3 2 2 SEP<br />
DN250 3 2 2 1<br />
DN300 3 3 2 1<br />
DN25 SEP SEP SEP SEP<br />
DN40 - DN100 2 1 2 SEP<br />
DN125 - DN200 3 2 2 SEP<br />
DN250 3 2 2 1<br />
DN300 3 3 2 1<br />
DN25 SEP SEP SEP SEP<br />
DN40 - DN50 1 SEP SEP SEP<br />
DN65 - DN100 2 1 SEP SEP<br />
DN125 - DN150 2 1 2 SEP<br />
DN200 - DN250 3 2 2 SEP<br />
DN300 3 3 2 1<br />
IM-F12-31 CH Issue 3
i) The products have been specifically designed for use on water, steam, diathermic oil,<br />
air or condensate which are in Group 2 of the above mentioned Pressure Equipment<br />
Directive. The products’ use on other fluids within Group 2 or fluids within Group 1<br />
may be possible but, if this is contemplated, <strong>Spirax</strong> <strong>Sarco</strong> should be contacted to<br />
confirm the suitability of the product for the application being considered.<br />
ii) Check material suitability, pressure <strong>and</strong> temperature <strong>and</strong> their maximum <strong>and</strong> minimum<br />
values. If the maximum operating limits of the product are lower than those of the<br />
system in which it is being fitted, or if malfunction of the product could result in a<br />
dangerous overpressure or overtemperature occurrence, ensure a safety device is<br />
included in the system to prevent such over-limit situations.<br />
iii) Determine the correct installation situation <strong>and</strong> direction of fluid flow.<br />
iv) <strong>Spirax</strong> <strong>Sarco</strong> products are not intended to withst<strong>and</strong> external stresses that may be<br />
induced by any system to which they are fitted. It is the responsibility of the installer<br />
to consider these stresses <strong>and</strong> take adequate precautions to minimise them.<br />
v) Remove protective covers from all connections <strong>and</strong> protective film from all nameplates,<br />
where appropriate, before installation on steam or other high temperature<br />
applications.<br />
1.2 Access<br />
Ensure safe access <strong>and</strong> if necessary a safe working platform (suitably guarded)<br />
before attempting to work on the product. Arrange suitable lifting gear if required.<br />
1.3 Lighting<br />
Ensure adequate lighting, particularly where detailed or intricate work is required.<br />
1.4 Hazardous liquids or gases in the pipeline<br />
Consider what is in the pipeline or what may have been in the pipeline at some<br />
previous time. Consider: flammable materials, substances hazardous to health,<br />
extremes of temperature.<br />
1.5 Hazardous environment around the product<br />
Consider: explosion risk areas, lack of oxygen (e.g. tanks, pits), dangerous gases,<br />
extremes of temperature, hot surfaces, fire hazard (e.g. during welding), excessive<br />
noise, moving machinery.<br />
1.6 The system<br />
Consider the effect on the complete system of the work proposed. Will any proposed<br />
action (e.g. closing isolation valves, electrical isolation) put any other part of the<br />
system or any personnel at risk?<br />
Dangers might include isolation of vents or protective devices or the rendering<br />
ineffective of controls or alarms. Ensure isolation valves are turned on <strong>and</strong> off in a<br />
gradual way to avoid system shocks.<br />
1.7 Pressure systems<br />
Ensure that any pressure is isolated <strong>and</strong> safely vented to atmospheric pressure.<br />
Consider double isolation (double block <strong>and</strong> bleed) <strong>and</strong> the locking or labelling of<br />
closed valves. Do not assume that the system has depressurised even when the<br />
pressure gauge indicates zero.<br />
1.8 Temperature<br />
Allow time for temperature to normalise after isolation to avoid danger of burns.<br />
IM-F12-31 CH Issue 3 5
1.9 Tools <strong>and</strong> consumables<br />
Before starting work ensure that you have suitable tools <strong>and</strong>/or consumables<br />
available. Use only genuine <strong>Spirax</strong> <strong>Sarco</strong> replacement parts.<br />
1.10 Protective clothing<br />
Consider whether you <strong>and</strong>/or others in the vicinity require any protective clothing<br />
to protect against the hazards of, for example, chemicals, high/low temperature,<br />
radiation, noise, falling objects, <strong>and</strong> dangers to eyes <strong>and</strong> face.<br />
1.11 Permits to work<br />
All work must be carried out or be supervised by a suitably competent person.<br />
<strong>Installation</strong> <strong>and</strong> operating personnel should be trained in the correct use of the product<br />
according to the <strong>Installation</strong> <strong>and</strong> Maintenance Instructions.<br />
Where a formal ‘permit to work’ system is in force it must be complied with. Where<br />
there is no such system, it is recommended that a responsible person should know<br />
what work is going on <strong>and</strong>, where necessary, arrange to have an assistant whose<br />
primary responsibility is safety.<br />
Post’warning notices’ if necessary.<br />
1.12 H<strong>and</strong>ling<br />
Manual h<strong>and</strong>ling of large <strong>and</strong>/or heavy products may present a risk of injury. Lifting,<br />
pushing, pulling, carrying or supporting a load by bodily force can cause injury<br />
particularly to the back. You are advised to assess the risks taking into account the<br />
task, the individual, the load <strong>and</strong> the working environment <strong>and</strong> use the appropriate<br />
h<strong>and</strong>ling method depending on the circumstances of the work being done.<br />
1.13 Residual hazards<br />
In normal use the external surface of the product may be very hot. If used at the<br />
maximum permitted operating conditions the surface temperature of some products<br />
may reach temperatures of 232°C (450°F).<br />
Many products are not self-draining. Take due care when dismantling or removing<br />
the product from an installation (refer to ‘Maintenance instructions’).<br />
1.14 Freezing<br />
Provision must be made to protect products which are not self-draining against<br />
frost damage in environments where they may be exposed to temperatures below<br />
freezing point.<br />
1.15 Disposal<br />
Unless otherwise stated in the <strong>Installation</strong> <strong>and</strong> Maintenance Instructions, this product<br />
is recyclable <strong>and</strong> no ecological hazard is anticipated with its disposal providing<br />
due care is taken.<br />
1.16 Returning products<br />
Customers <strong>and</strong> stockists are reminded that under EC Health, Safety <strong>and</strong> Environment<br />
Law, when returning products to <strong>Spirax</strong> <strong>Sarco</strong> they must provide information on<br />
any hazards <strong>and</strong> the precautions to be taken due to contamination residues or<br />
mechanical damage which may present a health, safety or environmental risk. This<br />
information must be provided in writing including Health <strong>and</strong> Safety data sheets<br />
relating to any substances identified as hazardous or potentially hazardous.<br />
6<br />
IM-F12-31 CH Issue 3
2. General product information<br />
2.1 Description<br />
The <strong>'C'</strong> series is a range of carbon steel (CE43), alloy steel (CE83) or stainless steel (CE63)<br />
two port, cage trim, control valves conforming to ANSI B 16.34 <strong>and</strong> ASME VIII st<strong>and</strong>ards. The<br />
valves are available in sizes 1" to 8" (DN25 to DN200), with ANSI <strong>and</strong> PN flange connections.<br />
When used in conjunction with a pneumatic linear actuator the <strong>'C'</strong> series valve will provide<br />
characterised modulating or on/off control.<br />
Compatible actuators <strong>and</strong> positioners:<br />
Pneumatic PN1000 series, spring-to-close<br />
actuators PN2000 series, spring-to-open<br />
PP5 (pneumatic)<br />
Positioners EP5 (electropneumatic)<br />
SP200 (smart electropneumatic)<br />
Note: For further details reference the relevant Technical Information Sheet.<br />
2.2 Sizes <strong>and</strong> pipe connections<br />
1", 1½", 2", 2½", 3", 4", 5", 6" <strong>and</strong> 8" (DN25, 40, 50, 65, 80,100,125, 150 <strong>and</strong> 200).<br />
Flanged to ANSI 150, ANSI 300, ANSI 600 (Raised face or ring type joint) or<br />
PN16, PN25, PN40, PN63, <strong>and</strong> PN100 (Raised face with ANSI face-to-face dimension).<br />
1", 1½" <strong>and</strong> 2" socket weld.<br />
2.3 Options<br />
Trim<br />
Equal %, linear, fast opening (on/off) characteristics, soft seat, hard faced,<br />
low noise <strong>and</strong> anti-cavitation (single <strong>and</strong> multi-cage).<br />
Stem seal PTFE chevron, graphite packing <strong>and</strong> bellows.<br />
Plug Balanced or unbalanced to ANSI Class IV, V or VI shut-off.<br />
See <strong>'C'</strong> series valve options Technical Information Sheet TI-F12-23.<br />
2.4 Technical data<br />
Unbalanced plug<br />
Plug design PTFE sealed balanced plug<br />
Graphite sealed balanced plug<br />
Trim design<br />
Cage trim with equal percentage, linear <strong>and</strong> fast opening flow characteristic<br />
options.<br />
Class IV Metal-to-metal seat IEC 534-4<br />
Leakage Class IV & V Hard face stellite IEC 534-4<br />
Class VI PTFE soft seat IEC 534-4<br />
CE valves Equal percentage<br />
Flow CF valves Fast opening<br />
characteristic CL valves Linear<br />
CM valves Modified equal percentage<br />
Rangeability<br />
50:1 Equal percentage<br />
30:1 Linear<br />
1" <strong>and</strong> 1½" (DN25 <strong>and</strong> DN40) ¾" (20 mm)<br />
2" (DN50) 13/16" (30 mm)<br />
Travel 2½" <strong>and</strong> 3" (DN65 <strong>and</strong> DN80) 1½" (38 mm)<br />
4" (DN100) 2" (50 mm)<br />
5" <strong>and</strong> 6" (DN125 <strong>and</strong> DN150) 2½" (65 mm)<br />
8" (DN200) 3" (75 mm)<br />
IM-F12-31 CH Issue 3 7
2.5 Limiting conditions<br />
Body<br />
design conditions<br />
Design stem seals<br />
temperature<br />
8<br />
ANSI 300 <strong>and</strong> ANSI 600<br />
St<strong>and</strong>ard PTFE CE43 14°F to +482°F (-10°C to +250°C)<br />
CE63 -20°F to +482°F (-29°C to +250°C)<br />
chevron stem seals<br />
CE83 14°F to +482°F (-10°C to +250°C)<br />
CE43 14°F to +572°F (-10°C to +300°C)<br />
St<strong>and</strong>ard<br />
CE63 -20°F to +572°F (-29°C to +300°C)<br />
bonnet<br />
Graphite packing CE83 14°F to +572°F (-10°C to +300°C)<br />
Graphite sealed<br />
balanced plug<br />
PTFE sealed<br />
balanced plug<br />
CE43 14°F to +797°F (-10°C to +425°C)<br />
Extended<br />
CE63 -20°F to +1004°F (-29°C to +540°C)<br />
bonnet<br />
CE83 14°F to +1004°F (-10°C to +540°C)<br />
CE43 797°F (425°C)<br />
Class IV CE63 1004°F (540°C)<br />
CE83 1004°F (540°C)<br />
Class VI 356°F (180°C)<br />
CE43 1110 psi g (76.6 bar g)<br />
ANSI 300 CE63 1080 psi g (74.5 bar g)<br />
Designed for a maximum cold CE83 1125 psi g (77.6 bar g)<br />
hydraulic test pressure of: CE43 2220 psi g (153.0 bar g)<br />
Maximum differential pressure See relevant actuator TI<br />
ANSI 600 CE63 2160 psi g (149.0 bar g)<br />
CE83 2250 psi g (155.0 bar g)<br />
2.6 Operating range for body material <strong>and</strong> flange type only.<br />
Note: See limiting conditions for stem <strong>and</strong> plug limitations.<br />
CE43 Carbon steel<br />
Pressure bar g<br />
� � ��<br />
���<br />
�<br />
���<br />
�� �� �� �� �� �� �� �� ���<br />
���<br />
���<br />
���<br />
���<br />
Steam<br />
saturation<br />
curve<br />
���<br />
���<br />
�<br />
�<br />
�<br />
���<br />
� �<br />
���<br />
�<br />
���<br />
�<br />
���<br />
�<br />
���� ����<br />
� � �<br />
����<br />
Temperature °F<br />
Pressure psi g<br />
The product must not be used in this region.<br />
A-C PN16, A-D PN25, A-E PN40, A-F PN63, A-G PN100,<br />
B-H ANSI 150, B-J ANSI 300, B-K ANSI 600<br />
Temperature °C<br />
IM-F12-31 CH Issue 3
CE83 Alloy steel<br />
Pressure bar g<br />
� � ��<br />
����<br />
�<br />
���<br />
�� �� �� �� �� �� �� �� ���<br />
���<br />
���<br />
���<br />
�<br />
���<br />
���<br />
�<br />
�<br />
�<br />
���<br />
� �<br />
���<br />
�<br />
���<br />
�<br />
���<br />
Steam<br />
saturation<br />
curve<br />
�<br />
���� ����<br />
���<br />
���<br />
���<br />
� � �<br />
����<br />
2.7 Weights (approximate) in lbs <strong>and</strong> (kg)<br />
Valve size<br />
Weights<br />
1" 1½" 2" 2½" 3" 4" 5" 6" 8"<br />
DN25 DN40 DN50 DN65 DN80 DN100 DN125 DN150 DN200<br />
29 48 59 92 130 213 264 396 660<br />
(13) (22) (27) (42) (59) (97) (120) (180) (300)<br />
2.8 Valve flow coefficients at 100% lift<br />
Cv (US) for single stage trims (Kvs shown in brackets). FL = Flow recovery factor<br />
Valve size<br />
Temperature °F<br />
Pressure psi g<br />
The product must not be used in this region.<br />
A-C PN16, A-D PN25, A-E PN40, A-F PN63, A-G PN100,<br />
B-H ANSI 150, B-J ANSI 300, B-K ANSI 600<br />
CE63 Stainless steel<br />
Pressure bar g<br />
� B �� �� �� �� �� �� �� �� �� ���<br />
����<br />
A<br />
���<br />
���<br />
Steam<br />
���<br />
���<br />
A<br />
saturation<br />
���<br />
curve<br />
���<br />
K<br />
���<br />
C H D E J F G<br />
�<br />
�<br />
� ��� ��� ��� ��� ���� ���� ����<br />
Pressure psi g<br />
Temperature °F<br />
The product must not be used in this region.<br />
A-C PN16, A-D PN25, A-E PN40, A-F PN63, A-G PN100,<br />
B-H ANSI 150, B-J ANSI 300, B-K ANSI 600<br />
1" 1½" 2" 2½" 3" 4" 5" 6" 8"<br />
DN25 DN40 DN50 DN65 DN80 DN100 DN125 DN150 DN200<br />
Equal % Cv 19 35 63 95 130 216 293 385 560<br />
(Kvs) (16) (30) (54) (81) (111) (185) (250) (330) (480)<br />
FL 0.94 0.94 0.94 0.94 0.90 0.89 0.85 0.85 0.85<br />
Three reduced Cv are available for equal percentage <strong>and</strong> linear trims, for further details see:<br />
TI-F12-23, <strong>'C'</strong> series valve options.<br />
For conversion Cv (UK) = Cv (US) x 0.833 Kvs = Cv (US) x 0.855<br />
IM-F12-31 CH Issue 3 9<br />
Temperature °C<br />
Temperature °C
2.9 Part numbers, description <strong>and</strong> materials<br />
No. Part Material<br />
10<br />
CE43 Carbon steel ASTM A216 WCB<br />
1 Body CE63 Stainless steel ASTM A351 CF8M<br />
CE83 Alloy steel ASTM A217 WC6<br />
CE43 Carbon steel ASTM A216 WCB<br />
2 Bonnet CE63 Stainless steel ASTM A351 CF8M<br />
CE83 Alloy steel ASTM A217 WC6<br />
3 Valve plug Stainless steel<br />
4 Valve cage Stainless steel AISI 316 ENP<br />
5 Valve seat Stainless steel<br />
6 Valve stem Stainless steel AISI 316<br />
7 Valve plug sealing rings Graphite<br />
8 Lock-nut Stainless steel AISI 316<br />
9 Mounting nut Zinc plated carbon steel<br />
10 Gl<strong>and</strong> spring Stainless steel AISI 302<br />
11 Gl<strong>and</strong> seal PTFE chevron or graphite<br />
12 Bonnet gasket Stainless steel /graphite (3 elements)<br />
CE43 Carbon steel ASTM A193 B7<br />
13 Bonnet studs CE63 Stainless steel ASTM A193 Gr. B8M<br />
CE83 Alloy steel ASTM A193 B16<br />
CE43 Carbon steel ASTM A194 2H<br />
14 Bonnet nuts CE63 Stainless steel ASTM A194 Gr. 8M<br />
CE83 Alloy steel ASTM A194 GRD4<br />
15 Stuffing box studs Stainless steel ASTM A193 Gr. B8M<br />
16 Stuffing box nuts Stainless steel ASTM A194 Gr. 8M<br />
17 Stem scraper Glass filled PTFE<br />
18 Stuffing box bush Stainless steel AISI 316<br />
19 Stuffing box ring Stainless steel AISI 316<br />
20 Valve stem wiper Fluoroelastomer<br />
21 'O' ring Fluoroelastomer<br />
27 Cage adaptor Stainless steel<br />
High temperature packing<br />
22 Gl<strong>and</strong> seal Graphite<br />
23 Gl<strong>and</strong> follower Stainless steel<br />
25 Belleville washers Steel<br />
IM-F12-31 CH Issue 3
15<br />
19<br />
20<br />
21<br />
10<br />
17<br />
2<br />
1<br />
3<br />
Cage adaptor kit (K)<br />
27<br />
4<br />
Fig. 1<br />
<strong>'C'</strong> series valve with single stage cage trim<br />
5<br />
Fig. 1c<br />
Cage adaptor kit (K)<br />
F5<br />
Adaptor gasket<br />
IM-F12-31 CH Issue 3 11<br />
8<br />
16<br />
18<br />
9<br />
11<br />
13<br />
14<br />
6<br />
12<br />
7<br />
4 Single stage cage trim<br />
Fig. 1a<br />
Two stage cage trim<br />
4<br />
Fig. 1b<br />
Three stage cage trim<br />
4
12<br />
3. <strong>Installation</strong> <strong>and</strong> Commissioning<br />
Note: Before actioning any installation, observe the 'Safety information' in Section 1.<br />
3.1 General<br />
The valve should be installed in such a position as to allow full access to the valve <strong>and</strong> actuator<br />
for maintenance purposes. Prior to fitting the valve the pipework should be flushed clear to<br />
remove any debris or other particles.<br />
Remove the flange protectors <strong>and</strong> fit the valve into the pipeline taking notice of the direction<br />
of flow arrow on the valve body.<br />
Care should be taken to prevent any strain being imposed on the valve body due to pipe<br />
misalignment. Tighten flange bolts evenly. Check flange bolts for tightness after 24 hours of<br />
operation. Care should be taken to ensure that the valve/actuator spindle is not painted or<br />
coated with any other substance.<br />
When carrying out maintenance of the valve care should be taken to avoid damage to the valve<br />
plug, stem <strong>and</strong> seat.<br />
3.2 Bypass arrangements<br />
It is recommended that isolating valves be fitted upstream <strong>and</strong> downstream of the control valve.<br />
A bypass can be fitted around the valve with a manual regulating valve allowing the process to<br />
be controlled whilst the control valve is isolated for maintenance.<br />
3.3 Commissioning<br />
For commissioning instruction refer to the <strong>Installation</strong> <strong>and</strong> Maintenance Instructions, covering<br />
<strong>Spirax</strong> <strong>Sarco</strong> actuators.<br />
IM-F12-31 CH Issue 3
4. Maintenance<br />
Note: Before actioning any maintenance, observe the 'Safety information' in Section 1.<br />
4.1 General<br />
Valve parts are subject to normal wear <strong>and</strong> must be inspected <strong>and</strong> replaced as necessary.<br />
Inspection <strong>and</strong> maintenance frequency depends on the severity of service conditions. This<br />
Section gives instructions for packing lubrication, packing maintenance, trim maintenance,<br />
<strong>and</strong> bellows seal replacement. All maintenance operations can be performed with the valve<br />
body in the line.<br />
4.2 Routine maintenance procedures<br />
24 hours operation<br />
After 24 hours service check pipework connections <strong>and</strong> flange bolts for tightness.<br />
For valves which have high temperature graphite packed gl<strong>and</strong> seals; the gl<strong>and</strong> nut should<br />
be tightened by approximately ¼ of a turn taking care not to overtighten as this may cause<br />
excessive friction on the valve stem.<br />
3 months operating intervals<br />
After every 3 months of normal service, visually check the gl<strong>and</strong> seals for signs of leakage<br />
<strong>and</strong> if necessary take the following corrective action:<br />
- For valves having the chevron gl<strong>and</strong> seals, remove <strong>and</strong> replace the PTFE chevron seal (refer<br />
to Section 4.3).<br />
- For valves having the high temperature graphite packed gl<strong>and</strong> seals, tighten the gl<strong>and</strong> nut<br />
approximately ¼ of a turn taking care not to overtighten as this may cause excessive friction<br />
on the valve stem. If no adjustment is remaining, replace the graphite gl<strong>and</strong> seal (refer to<br />
Section 4.4).<br />
Annually<br />
The valve should be inspected for wear <strong>and</strong> tear replacing any worn or damaged parts such<br />
as valve plug <strong>and</strong> stem, valve seat <strong>and</strong> gl<strong>and</strong> seals. Refer to 'Spare parts' Section 5 for<br />
'Available spares'.<br />
High temperature graphite packed gl<strong>and</strong> seals are subject to wear during normal operation.<br />
It is therefore recommended that the graphite packing is replaced during this routine<br />
inspection to prevent premature failure of the gl<strong>and</strong> seals during normal operation.<br />
IM-F12-31 CH Issue 3 13
4.3 Procedure for renewing chevron gl<strong>and</strong> seals<br />
For spring-loaded single PTFE chevron gl<strong>and</strong> seals, the gl<strong>and</strong> spring (10) maintains a sealing<br />
force on the packing. If leakage is noted around the stuffing box bush (18) check to be sure the<br />
shoulder on the bush is touching the bonnet. If the shoulder is not touching the bonnet, tighten<br />
the stuffing box nuts (16), until the shoulder is against the bonnet. If leakage cannot be stopped<br />
in this manner, the gl<strong>and</strong> seals will need replacing.<br />
If the leakage comes from the outside diameter of the seals, it is possible that the leakage is<br />
caused by damage to the stuffing box wall. If performing any of the following procedures, inspect<br />
the valve stem <strong>and</strong> packing box wall for damage.<br />
4.3.1 Replacing chevron gl<strong>and</strong> seals:<br />
1. Isolate the control valve from the pressure, <strong>and</strong> release pressure from the valve body.<br />
2. Disconnect the operating lines from the actuator <strong>and</strong> any leak-off piping from the bonnet.<br />
Disconnect the valve stem (6) from the actuator <strong>and</strong> then remove the actuator from the<br />
valve by unscrewing the mounting nut (9).<br />
3. Loosen the stuffing box nuts (16) so that the seals are not tight on the valve stem.<br />
4. Unscrew the bonnet nuts (14).<br />
5. Carefully lift the bonnet (2) <strong>and</strong> keep the spindle lock-nut (8) fitted to ensure that the plug<br />
comes out with the bonnet. Please note: When the lock-nut (8) has been removed carefully<br />
slide the plug stem from the bonnet without damaging it.<br />
6. Cover the opening in the valve body to protect the gasket surface <strong>and</strong> prevent foreign<br />
material from getting into the body cavity.<br />
7. Remove the stuffing box nuts (16), stuffing box ring (19), <strong>and</strong> stuffing box bush (18). Carefully<br />
push out all the remaining packing parts from the body side of the bonnet using a rounded rod or<br />
other tool that will not scratch the stuffing box wall. Clean the stuffing box <strong>and</strong> metal packing parts.<br />
8. Inspect the valve stem threads <strong>and</strong> stuffing box surface for any sharp edges which might cut<br />
the packing. Scratches or burrs could cause damage to the new packing. If the surface<br />
condition cannot be improved using a light dressing paper, replace the damaged parts.<br />
9. Remove the cover protecting the body cavity <strong>and</strong> install a new bonnet gasket set (F1, F2 <strong>and</strong><br />
F3), making sure that the gasket seating surfaces are clean <strong>and</strong> undamaged. Then slide the<br />
bonnet over the stem <strong>and</strong> onto the bonnet studs (13) - see page 15.<br />
Note:<br />
Proper tightening of the bonnet nuts compresses the bonnet gasket set (F1, F2 <strong>and</strong> F3)<br />
enough to both load <strong>and</strong> seal the seat ring gasket (F4). It also compresses the outer edge<br />
of the bonnet gasket enough to seal the body-to-bonnet joint.<br />
Ensure that bolting threads are clean, <strong>and</strong> evenly tighten the nuts onto the studs in a<br />
diagonal pattern. Because of the bolt-up characteristics of spiral wound gaskets, a<br />
tightened nut may loosen an adjacent nut. Repeat the diagonal tightening pattern several<br />
times until each nut is tight <strong>and</strong> the body-to-bonnet seal is made. When the operating<br />
temperature has been reached, perform this torquing procedure once again.<br />
10. Lubricate the studs (13) <strong>and</strong> tighten the nuts (14), using proper bolting procedures. (See<br />
Table 1 'Recommended tightening torques', page 22).<br />
11. Tighten the stuffing box nuts (16) until the stuffing box ring (19) sits on the shoulder of the<br />
stuffing box bush (18).<br />
12. Mount the actuator on the valve body assembly <strong>and</strong> reconnect the actuator <strong>and</strong> valve<br />
stem according to the procedure in the appropriate actuator <strong>Installation</strong> <strong>and</strong> Maintenance<br />
Instructions.<br />
14<br />
IM-F12-31 CH Issue 3
Fig. 2<br />
<strong>'C'</strong> series valve with<br />
single stage cage trim<br />
F1<br />
Spacer ring<br />
2<br />
1<br />
3<br />
Graphite gasket<br />
F2<br />
Spiral gasket<br />
F3<br />
Gl<strong>and</strong> packing 11<br />
IM-F12-31 CH Issue 3 15<br />
8<br />
16<br />
19<br />
18<br />
10<br />
9<br />
13<br />
14<br />
F4 5 4 Single stage cage trim<br />
6
4.4 Procedure for renewing graphite gl<strong>and</strong> seals<br />
If there is undesirable packing leakage first try to limit the leakage <strong>and</strong> establish a stem seal by<br />
tightening the stuffing box nuts (16).<br />
Note: If the packing is relatively new <strong>and</strong> tight on the stem, <strong>and</strong> if tightening the stuffing box nuts<br />
does not stop the leakage, it is possible that the valve stem is worn or damaged so that a seal cannot<br />
be made.<br />
4.4.1 Replacing graphite gl<strong>and</strong> seals:<br />
13. Follow Steps 1 to 10 in Section 4.3.1, taking note when removing the belleville springs,<br />
of the position of each disc.<br />
14. Install the packing components according to the order in Fig. 3.<br />
Install the graphite rings (23) individually. Each ring should be pressed firmly to the<br />
bottom of the housing, using the follower <strong>and</strong> /or a spacer as required, ensuring that the<br />
join is staggered by at least 90° from the previous ring - see below.<br />
15. Fit the packing follower (22), refit the belleville washers (25) following the original order, <strong>and</strong><br />
stuffing box ring (19) into position. Lubricate the stuffing box nuts (16). Install <strong>and</strong> tighten the<br />
packing flange nuts finger tight.<br />
16. Mount the actuator on the valve body assembly <strong>and</strong> reconnect the actuator <strong>and</strong> valve stem.<br />
17. The packing should now be compressed by a nominal 10%. Mark a line on the follower 3 mm<br />
above the top of the gl<strong>and</strong> housing. Then tighten the packing flange nuts, until the line on<br />
the follower reaches the top of the housing (See Figs. 3a <strong>and</strong> 3b opposite).<br />
18. With the packing initially compressed to a nominal 10%, check the torque on the stuffing box<br />
nuts. At this point it is beneficial to perform at least 5 settling cycles, with the nut torque being<br />
restored during each cycle.<br />
Therefore, operate the valve through approximately 5 cycles, <strong>and</strong> retorque the nuts at both<br />
the top <strong>and</strong> the bottom of the stroke.<br />
16<br />
Ring 1 Ring 2 Ring 3 Ring 4 Ring 5<br />
IM-F12-31 CH Issue 3
Fig. 3 Graphite gl<strong>and</strong> seal assembly<br />
Line<br />
marked<br />
on the<br />
follower<br />
3 mm<br />
Fig. 3a Fig. 3b<br />
IM-F12-31 CH Issue 3 17<br />
25<br />
22<br />
23
4.5 Trim maintenance<br />
4.5.1 Disassembly of valves with st<strong>and</strong>ard bonnet <strong>and</strong><br />
temperature extension bonnet:<br />
1. Remove the actuator <strong>and</strong> the bonnet according to Steps 1 to 5 of the replacing chevron<br />
seals procedure (see Section 4.3.1).<br />
Caution:<br />
When lifting the valve plug stem (6) <strong>and</strong> attached valve plug (3) out of the body, be certain<br />
that the cage (4) remains in the body (1). This will prevent cage damage that might be<br />
caused by the cage dropping back into the body after being lifted part way out.<br />
2. Packing parts can be removed if desired. Replace these parts as described in the replacing<br />
packing procedure, (see Section 4.3.1). Remove the cage adaptor (27) from any restrictedtrim<br />
body, <strong>and</strong> wrap it for protection.<br />
3. Lift the valve plug <strong>and</strong> stem assembly out of the valve body <strong>and</strong> set it on a protective surface. If<br />
the valve plug is to be reused, protect the valve plug seating surface to prevent any scratches.<br />
4. Remove the cage <strong>and</strong> the associated gaskets (F1, F2 <strong>and</strong> F3), (see Fig. 4).<br />
5. Remove the seat (5) <strong>and</strong> seat gasket (F4).<br />
6. Inspect parts for wear or damage which would prevent proper operation of the valve.<br />
Replace where necessary.<br />
4.5.2 Disassembly valves with bellows sealed bonnet (refer to Fig. 5):<br />
1. Remove the actuator <strong>and</strong> the bonnet according to Steps 1 to 5 of the replacing chevron<br />
seals procedure (see Section 4.3.1).<br />
2. Unscrew the nuts (14) securing the bonnet to the bellows housing (31) <strong>and</strong> remove the bonnet<br />
assembly.<br />
3. Unscrew the nuts (30) securing the bellows housing to the valve body <strong>and</strong> remove the housing<br />
complete with stem <strong>and</strong> plug.<br />
Carefully supporting the bellows housing, remove the pin fixing the valve head to the stem (26).<br />
Remove the valve head <strong>and</strong> the cage adaptor (27) (see Fig. 4c) for restricted trim valves <strong>and</strong><br />
withdraw the stem / bellows assembly (18) from the bellows housing.<br />
4. Remove the cage <strong>and</strong> the associated gaskets (F1, F2, <strong>and</strong> F3), (see Fig. 4).<br />
5. Remove the seat (5) <strong>and</strong> seat gasket (F4).<br />
6. Inspect parts for wear or damage which would prevent proper operation of the valve.<br />
Replace where necessary.<br />
18<br />
IM-F12-31 CH Issue 3
1<br />
7<br />
3<br />
Graphite gasket<br />
F1<br />
Spacer ring<br />
F2<br />
Spiral gasket<br />
F3<br />
Cage adaptor kit (K)<br />
27<br />
4<br />
Fig. 4<br />
<strong>'C'</strong> series valve with single stage cage trim<br />
Fig. 4c<br />
Cage adaptor kit (K)<br />
Fig. 5 Extended<br />
bonnet<br />
F5<br />
Adaptor gasket<br />
Fig. 4a<br />
Two stage cage trim<br />
Fig. 4b<br />
Three stage cage trim<br />
IM-F12-31 CH Issue 3 19<br />
14<br />
F4 5 4 Single stage cage trim 4<br />
6<br />
30<br />
14<br />
4<br />
6<br />
18<br />
31<br />
26
4.6 Valve plug <strong>and</strong> stem maintenance:<br />
Caution:<br />
When replacing the valve plug sealing rings (7), be careful not to scratch the surfaces<br />
of the ring grooves in the valve plug, the surfaces of the replacement ring, may not seal<br />
properly.<br />
1. Remove the valve plug (3) in accordance with the instructions in trim maintenance, (see<br />
Section 4.5, page 18).<br />
4.6.1 Assembly st<strong>and</strong>ard <strong>and</strong> extension bonnet valves (unbalanced)<br />
1. Install the seat ring gasket (F4), <strong>and</strong> seat (5) - See Section 4.5, page 18.<br />
2. Install the cage (4) - see Section 4.5, page 18.<br />
3. Slide the valve plug (3) <strong>and</strong> stem assembly into the cage. Make sure the valve plug sealing<br />
rings (7) are evenly engaged in the entrance chamfer at the top of the cage (4) to avoid<br />
damaging the rings - see Section 4.5, page 18.<br />
4.6.1.1 Assembly st<strong>and</strong>ard <strong>and</strong> extension bonnet valves (balanced)<br />
When required, graphite balance seals should be fitted – Seals (7) are supplied as two<br />
matching halves. Two complete rings (4 halves) should be fitted. Check for the fit of each<br />
half ring (as shown in Picture A). These seal rings will de-laminate easily <strong>and</strong> should not be<br />
fitted using any force, it should be possible to easily slide each ring around the groove as<br />
shown in Pictures A <strong>and</strong> B.<br />
Picture A<br />
Picture B<br />
20<br />
3<br />
7<br />
IM-F12-31 CH Issue 3
If the seal ring is a tight fit, some material can be carefully removed using abrasive paper<br />
(shown for example in Picture C). This process should be repeated until each half ring can<br />
easily slide around the groove.<br />
Picture C<br />
Before fitting each seal half ring lightly remove sharp edges <strong>and</strong> burrs, leaving a radius of<br />
approximately 1 mm all around the outside diameter - Picture D.<br />
Picture D<br />
IM-F12-31 CH Issue 3 21
Fit two matching half rings in the correct orientation <strong>and</strong> check for a gap by sliding the two<br />
halves around the groove (see Picture E). It should be easy to move the rings around as stated<br />
previously. A gap of approximately 2 mm should be present at one end when the two halves<br />
are pushed together. If this is not the case then some material can be carefully removed from<br />
the ends.<br />
Seal ring 7<br />
Picture E<br />
It is important to be very careful, the seal ring will de-laminate if excessive force is applied.<br />
If there is any sign of de-lamination, the seal half ring should be rejected. Remove any burrs<br />
or ragged edges before testing for the gap again. Repeat this procedure for the end of each<br />
seal half ring until the gap is adequate.<br />
Picture F<br />
Please note – The gaps in each seal ring set (7) must be turned through 90° relative to each<br />
other (see Picture E). This will avoid a direct vertical leak path.<br />
22<br />
Space for a second seal ring 7<br />
Please note – The<br />
gaps in each seal ring<br />
set (7) must be turned<br />
through 90° relative to<br />
each other. This will<br />
avoid a direct vertical<br />
leak path.<br />
IM-F12-31 CH Issue 3
4.6.1.2 Fitting the plug assembly<br />
In every case it should be possible to fit the plug assembly in the cage or balance seal housing<br />
on the bench before fitting it to the valve (see Picture G). A light smear of silicone based grease<br />
e.g. MS383 should be applied to the bore of the cage first.<br />
It is advisable to have assistance at this point. Each seal should be held in place to allow<br />
compression into the cage bore. Any evidence of seal damage at this stage must be avoided.<br />
Damaged seals must be rejected.<br />
The fit of the cage over the seals should not<br />
be excessively tight. Under no circumstances<br />
should a heavy blow be required to<br />
compress the seals. Firm h<strong>and</strong> pressure<br />
applied all around should be adequate<br />
(see Picture G). WARNING - A hammer,<br />
mallet or hard drift must never be used!<br />
It should be possible for the cage to move under<br />
its own weight once the seals are compressed.<br />
Where the plug assembly is inserted into<br />
the cage i.e. on single stage trims, the plug<br />
assembly should move under its own weight<br />
once the seals are compressed.<br />
If it does not move easily by h<strong>and</strong>, the fit is too<br />
tight. In this case the plug assembly should be<br />
removed <strong>and</strong> each seal half ring can be reduced<br />
in diameter as shown in Picture H.<br />
Some material can be removed very carefully<br />
from the outside surface of each seal half ring<br />
(Picture H). This procedure must not be done<br />
with the seal assembled to the plug head<br />
because light marks will appear on the metal<br />
surface. It should not be necessary to remove<br />
excessive amounts of material. A good fit<br />
should be found providing each ring is treated<br />
Picture G<br />
the same.<br />
Before fitting each seal half ring lightly remove sharp edges <strong>and</strong> burrs, leaving a radius of<br />
approximately 1 mm all around the outside diameter.<br />
Repeat the process above <strong>and</strong> test for a free moving fit as before (Picture G).<br />
Picture H<br />
IM-F12-31 CH Issue 3 23
4.6.1.2 Fitting the plug assembly (continued)<br />
Stuffing box nuts (16) must be screwed in to the following torque: for M6 thread 12 N m, for<br />
M8 thread 20 N m. A light smear of silicone based grease e.g. MS383 should be applied to<br />
the bore of the gl<strong>and</strong> housing.<br />
If a cage adaptor (27) is to be used, install the adaptor gasket (F5) <strong>and</strong> place it on top of the<br />
cage. Place the gaskets (F1, F2, <strong>and</strong> F3) on top of the cage or cage adaptor, (see Fig. 6).<br />
Caution:<br />
If the packing is to be reused <strong>and</strong> was not removed from the bonnet, use care when<br />
installing the bonnet to avoid damaging the packing with the valve stem threads.<br />
Mount the bonnet on the body <strong>and</strong> complete assembly according to Steps 10 to 12 of the<br />
procedure for replacing chevron gl<strong>and</strong> seals Section 4.3, page 14, omitting Step 11 if new<br />
packing is not being installed, <strong>and</strong> being sure to observe the 'Note' prior to Step 10.<br />
4.7.2 Assembly bellows sealed bonnet valves<br />
1. Install the seat gasket (F4), <strong>and</strong> seat (5), (see Fig. 6).<br />
2. Install the cage (4). Rotation of the cage or assembly with respect to the is acceptable.<br />
Place the gaskets (F1, F2, <strong>and</strong> F3) on top of the cage.<br />
If a cage adaptor (27) is to be used, install the adaptor gasket (F5).<br />
3. Insert replacement stem / bellows assembly (6) with new lower bellows flange gasket (29)<br />
ensuring that the anti-rotation pin (26) locates in the slot in the bellows housing (31) <strong>and</strong><br />
taking great care not to damage the bellows. If a cage adaptor (27) is to be used, place it<br />
onto the stem before sliding on the gaskets (F1, F2 <strong>and</strong> F3).<br />
4. Fit the valve plug (3) <strong>and</strong> the head pin (26). Peen the entrance to the head pin bore to<br />
prevent the pin working loose in operation.<br />
By sliding the valve plug into the cage, refit the bellows housing (31) on the valve body.<br />
When the cage adaptor is used, fit it on the top of the cage.<br />
Replace the nuts (14) <strong>and</strong> tighten to the recommended torque (see Table 1, page 22).<br />
Using a new gasket (32) refit the bonnet (2) on the bellows housing (31). Replace the four<br />
nuts (30) <strong>and</strong> tighten to the recommended torque (see Table 1, page 22).<br />
Caution:<br />
If the packing is to be reused <strong>and</strong> was not removed from the bonnet, use care when<br />
installing the bonnet to avoid damaging the packing with the valve stem threads.<br />
5. Mount the bonnet on the body <strong>and</strong> complete assembly according to Steps 10 to 14 of the<br />
procedure for replacing chevron gl<strong>and</strong> seals Section 4.3, omitting Steps 11 <strong>and</strong> 12 if new<br />
packing is not being installed, <strong>and</strong> being sure to observe the 'Note' prior to Step 10.<br />
24<br />
IM-F12-31 CH Issue 3
F1<br />
Spacer ring<br />
1<br />
7<br />
3<br />
Graphite gasket<br />
F2<br />
Spiral gasket<br />
F3<br />
Cage adaptor kit (K)<br />
27<br />
4<br />
Fig. 6<br />
<strong>'C'</strong> series valve with single stage cage trim<br />
Fig. 6c<br />
Cage adaptor kit (K)<br />
F5<br />
Adaptor gasket<br />
IM-F12-31 CH Issue 3 25<br />
16<br />
14<br />
F4 5 4 Single stage cage trim<br />
6<br />
Fig. 7 Extended bonnet<br />
30<br />
32<br />
14<br />
29<br />
6<br />
2<br />
31<br />
26
26<br />
5. Spare parts<br />
The spare parts available for the CE43, CE63 <strong>and</strong> CE83 valves, 1" to 8" (DN25 to DN200), are<br />
detailed below. No other parts are supplied as spares.<br />
Available spares<br />
Actuator clamping nut A<br />
Gl<strong>and</strong> seal kit<br />
PTFE seal set B<br />
Graphite packing set C<br />
Valve plug <strong>and</strong> stem assembly D, E<br />
Graphite gasket F1<br />
Bonnet Spacer F2<br />
Valve gasket kit Spiral wound gasket F3<br />
Seat gasket F4<br />
Adaptor gasket (single stage reduced trim only) F5<br />
Piston seal kit Graphite G<br />
Valve seat I<br />
Valve cage J<br />
Cage adaptor kit (seat, cage <strong>and</strong> reduction adaptor) K<br />
Note: A 'valve gasket kit' should be ordered with the above items.<br />
Table 1 Recommended tightening torques<br />
Bonnet nuts (14)<br />
Valve size Nut size<br />
Nut torque lbf ft (N m)<br />
minimum to maximum<br />
1" ½" 22.1 to 29.5 (30.0 to 40.0)<br />
1½" " 38.3 to 45.7 (52.0 to 62.0)<br />
2" " 46.8 to 54.2 (63.5 to 73.5)<br />
2½" ¾" 81.5 to 96.2 (110.5 to 130.5)<br />
3" ¾" 72.6 to 87.4 (98.5 to 118.5)<br />
4" " 116.5 to 131.3 (158.0 to 178.0)<br />
5" " 140.1 to 154.9 (190.0 to 210.0)<br />
6" 1" 169.6 to 184.4 (230.0 to 250.0)<br />
8" 11" 184.4 to 199.1 (250.0 to 270.0)<br />
Valve stem to plug connection<br />
Valve stem size<br />
ins (mm)<br />
Bolt torque<br />
min. to max. lbf ft (N m)<br />
Groove pin replacement<br />
Drill size ins (mm)<br />
½" (12.7) 59.0 to 73.7 (80 to 100) 0.08" (2)<br />
¾" (20.0) 169.6 to 199.1 (230 to 270) 0.08" (2)<br />
Bellows seal bonnet packing flange nuts (30)<br />
Valve size Bolt torque min. to max. lb ft (N m)<br />
1" to 4" 36.9 to 44.3 (50 to 60)<br />
5" to 8" 51.6 to 59.0 (70 to 80)<br />
IM-F12-31 CH Issue 3
Fig. 8 Spare parts - <strong>'C'</strong> series valve with single stage cage trim<br />
D<br />
J<br />
F1<br />
F2<br />
F3<br />
Cage adaptor kit (K)<br />
27<br />
4<br />
F4<br />
F5<br />
Adaptor gasket<br />
Note:<br />
When placing an order for spares please indicate clearly the product code, serial number<br />
<strong>and</strong> date code (found on the label of the valve body) to ensure that the order is processed<br />
quickly, efficiently <strong>and</strong> correctly.<br />
How to order spares<br />
Always order spares by using the description given in the column headed 'Available spares'.<br />
Also state the information shown in the <strong>'C'</strong> series valve selection guide (See page 28), the serial<br />
number, <strong>and</strong> date code of the valve.<br />
IM-F12-31 CH Issue 3 27<br />
I<br />
A<br />
B or C<br />
14<br />
E<br />
G
<strong>'C'</strong> series valve selection guide<br />
Valve size<br />
Valve series C = Cage trim<br />
Valve characteristic<br />
28<br />
1", 1½", 2", 2½", 3", 4", 5", 6" <strong>and</strong> 8"<br />
DN25, 40, 50, 65, 80, 100, 125, 150 <strong>and</strong> 200<br />
E = Equal percentage<br />
F = Fast opening<br />
L = Linear<br />
M = Modified equal percentage<br />
4 = Carbon steel<br />
Body material 6 = Stainless steel<br />
8 = Alloy steel<br />
2 = Butt weld (1" to 8")<br />
Connections 3 = Flanged<br />
4 = Socket weld (1" to 4")<br />
P = PTFE chevron<br />
Stem sealing options H = Graphite<br />
B = Bellows<br />
T = AISI 431 hardened<br />
Seating options G = PTFE soft seat<br />
W = Hard faced stellite AISI 316<br />
C = St<strong>and</strong>ard cage<br />
Type of trim P = Noise reducing perforated cage<br />
A = Anti-cavitation cage<br />
1 = One<br />
2 = Two<br />
Number of stages<br />
3 = Three<br />
Other = To be specified<br />
B = Balanced<br />
Trim balancing<br />
U = Unbalanced<br />
S = St<strong>and</strong>ard<br />
Bonnet type H = Extended for high temperature<br />
L = Extended for low temperature<br />
0 = No reductions<br />
Reduced trim 1 = 1 Reduction<br />
2 = 2 Reductions<br />
3 = 3 Reductions<br />
Cv To be specified<br />
Connection type To be specified<br />
2" C E 4 3 P T C 1 U S 1<br />
Cv 35<br />
How to order<br />
Example: 1 off 2" CE43PTC1US1 Cv 35 flanged to ANSI 300.<br />
ANSI 300<br />
2"<br />
C<br />
E<br />
4<br />
3<br />
P<br />
T<br />
C<br />
1<br />
U<br />
S<br />
1<br />
Cv 35<br />
ANSI 300<br />
IM-F12-31 CH Issue 3