User Manual
User Manual User Manual
SmartAddresser 5Since you already know how to design a basic Avery 5161 label, we'll continue using theexample found in Creating a New Label Template. However, instead of using theDefault Address Blocks area as in the previous topic, we are going to create a customaddress block that includes both text and variable fields, much like the informationfound in Adding and Combining Fields. If you've reviewed the information found withinthat topic, you'll realize just how simple and powerful the Label Layout Assistant is. Theaddress block we're going to construct using the the Assistant will contain the followinginformation:BarcodeTray Number, an asterisk, Bundle Number, and the Endorsement line"Valued Customer" static text along with First and Last fields"Or Current Resident" static textAddress fieldCity field, a static text comma, State field, and zip fieldWhereas creating a template with all of that information could be a headache if writingit manually, the Label Layout Assistant makes it extremely simple! We'll start byfocusing on the Field List and Mail Merge Fields areas.146
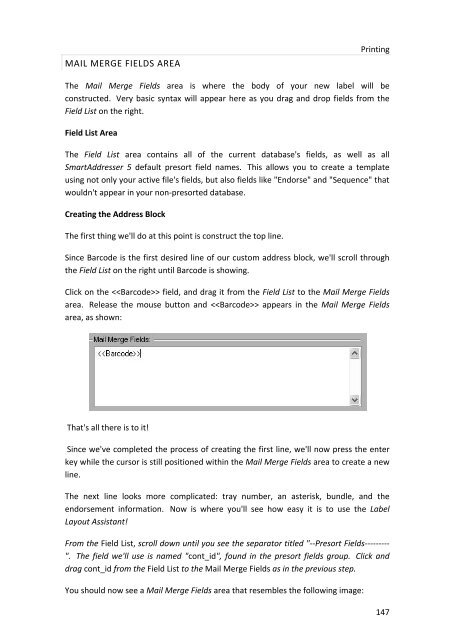
MAIL MERGE FIELDS AREAPrintingThe Mail Merge Fields area is where the body of your new label will beconstructed. Very basic syntax will appear here as you drag and drop fields from theField List on the right.Field List AreaThe Field List area contains all of the current database's fields, as well as allSmartAddresser 5 default presort field names. This allows you to create a templateusing not only your active file's fields, but also fields like "Endorse" and "Sequence" thatwouldn't appear in your non-presorted database.Creating the Address BlockThe first thing we'll do at this point is construct the top line.Since Barcode is the first desired line of our custom address block, we'll scroll throughthe Field List on the right until Barcode is showing.Click on the field, and drag it from the Field List to the Mail Merge Fieldsarea. Release the mouse button and appears in the Mail Merge Fieldsarea, as shown:That's all there is to it!Since we've completed the process of creating the first line, we'll now press the enterkey while the cursor is still positioned within the Mail Merge Fields area to create a newline.The next line looks more complicated: tray number, an asterisk, bundle, and theendorsement information. Now is where you'll see how easy it is to use the LabelLayout Assistant!From the Field List, scroll down until you see the separator titled "--Presort Fields---------". The field we'll use is named "cont_id", found in the presort fields group. Click anddrag cont_id from the Field List to the Mail Merge Fields as in the previous step.You should now see a Mail Merge Fields area that resembles the following image:147
- Page 101 and 102: Duplicate DetectionCheck the desire
- Page 103 and 104: Duplicate DetectionFor more informa
- Page 105 and 106: Duplicate Detection* Creates a fiel
- Page 107 and 108: Duplicate Detection• Select the d
- Page 109 and 110: Duplicate DetectionTIP!The informat
- Page 111 and 112: Duplicate Detection• If you plan
- Page 113 and 114: DUPLICATE DETECTIONDUPLICATE DETECT
- Page 115 and 116: Duplicate DetectionOriginal* Keeps
- Page 117 and 118: Duplicate DetectionExact Match* Wil
- Page 119 and 120: SEARCHING AND QUERYING DATABASIC SE
- Page 121 and 122: Searching and Querying Data• Sele
- Page 123 and 124: Searching and Querying DataTIP!When
- Page 125 and 126: Searching and Querying DataCREATING
- Page 127: Searching and Querying Data• Type
- Page 130 and 131: SmartAddresser 5Piece SetupThe Clas
- Page 132 and 133: SmartAddresser 5Calculator indicati
- Page 134 and 135: SmartAddresser 5Container Setup128p
- Page 136 and 137: SmartAddresser 5Check the Include C
- Page 138 and 139: SmartAddresser 5The Prepare in Reve
- Page 140 and 141: PrintingPRINTINGPRINTING ADDRESS LA
- Page 142 and 143: SmartAddresser 5Opens the Label Des
- Page 144 and 145: SmartAddresser 5PRINTING CONTAINER
- Page 146 and 147: SmartAddresser 5EDITING LABEL AND R
- Page 148 and 149: SmartAddresser 5Using the column se
- Page 150 and 151: SmartAddresser 5After selecting you
- Page 154 and 155: SmartAddresser 5Next we'll add the
- Page 156 and 157: SmartAddresser 5Close the Preview a
- Page 158 and 159: SmartAddresser 5endorsement, name,
- Page 160 and 161: SmartAddresser 5Adjust the Page Set
- Page 162 and 163: SmartAddresser 5This area of the Pa
- Page 164 and 165: SmartAddresser 5Click OK to close t
- Page 166 and 167: SmartAddresser 5type. Furthermore,
- Page 168 and 169: SmartAddresser 5first,lastaddressci
- Page 170 and 171: SmartAddresser 5the field name. Whe
- Page 172 and 173: SmartAddresser 5Choose the appropri
- Page 174 and 175: SmartAddresser 5You can see the too
- Page 176 and 177: SmartAddresser 5objects.Send to Bac
- Page 178 and 179: SmartAddresser 5line when they are
- Page 180 and 181: SmartAddresser 5Have a repetitive j
- Page 182 and 183: SmartAddresser 5Deletes the current
- Page 184 and 185: SmartAddresser 5With the Scripts Wi
- Page 186 and 187: SmartAddresser 5Click on the open b
- Page 188 and 189: SmartAddresser 5Click the "Auto" ch
- Page 190 and 191: SmartAddresser 5We're halfway there
- Page 192 and 193: SmartAddresser 5Click the Save butt
- Page 194 and 195: SmartAddresser 5Congratulations, yo
- Page 196 and 197: PROPERTIESDICTIONARIESA.K.A. Dictio
- Page 198 and 199: SmartAddresser 5If you recognize a
- Page 200 and 201: SmartAddresser 5The next time you p
MAIL MERGE FIELDS AREAPrintingThe Mail Merge Fields area is where the body of your new label will beconstructed. Very basic syntax will appear here as you drag and drop fields from theField List on the right.Field List AreaThe Field List area contains all of the current database's fields, as well as allSmartAddresser 5 default presort field names. This allows you to create a templateusing not only your active file's fields, but also fields like "Endorse" and "Sequence" thatwouldn't appear in your non-presorted database.Creating the Address BlockThe first thing we'll do at this point is construct the top line.Since Barcode is the first desired line of our custom address block, we'll scroll throughthe Field List on the right until Barcode is showing.Click on the field, and drag it from the Field List to the Mail Merge Fieldsarea. Release the mouse button and appears in the Mail Merge Fieldsarea, as shown:That's all there is to it!Since we've completed the process of creating the first line, we'll now press the enterkey while the cursor is still positioned within the Mail Merge Fields area to create a newline.The next line looks more complicated: tray number, an asterisk, bundle, and theendorsement information. Now is where you'll see how easy it is to use the LabelLayout Assistant!From the Field List, scroll down until you see the separator titled "--Presort Fields---------". The field we'll use is named "cont_id", found in the presort fields group. Click anddrag cont_id from the Field List to the Mail Merge Fields as in the previous step.You should now see a Mail Merge Fields area that resembles the following image:147


