(2) Pre-install adjustmentDo not carelessly change the magnification on site, as it necessitates reinspection. Do notcarelessly change the temperature correction bimetallic mounting position as well, as it affectsthe precision.When the tip <strong>of</strong> the recording pen (4) does not align with the graduation line for time onthe recording chart, the clock-driven drum may slant. Correct it referring to <strong>Chapter</strong> 2:<strong>Measurement</strong> <strong>of</strong> temperature.(3) Installation <strong>of</strong> the aneroid barographAs a general rule, the aneroid barograph should be positioned on a solid desk or table in thebarometer room. Lay a rubber sheet or other cushion under the aneroid barograph to absorbvibrations <strong>of</strong> the building.5.7.3 Electronic BarometerCylindrical resonator and electrostatic capacity barometers should be used according to operatinginstructions. Since they contain precise electronic parts and circuits, they should be installed in aplace free from humidity, direct sunlight, and vibrations.5.8 Practical Training5.8.1 Aneroid BarometerIt is not necessary to repair at station for aneroid barometer. At this practice, open the cover andcheck the mechanism. Make observation <strong>of</strong> the barometer capsules, gears, lever, and hair springs(See Figure 5.3 and 5.4).5.8.2 Aneroid BarographExamine the aneroid barograph to understand the mechanism for maintenance. The aneroidbarograph is consists <strong>of</strong> the barometer capsule, the clock-driven drum, and the pen system. Theindicator can be adjusted by rotating the pointer adjusting knob. Repair the clock-driven drumaccording to the repair instruction in <strong>Chapter</strong> 2: <strong>Measurement</strong> <strong>of</strong> temperature. It is recommendednot to shift the pen arm, and bimetallic compensator.5.8.3 Disassembling and Cleaning the Mercury Barometer(1) Preparation and precautionsThis section covers the practice <strong>of</strong> disassembling andcleaning a Fortin barometer. It is ideal to clean thebarometer on a fine dry day. Because, the air mass <strong>of</strong>high temperature and high humidity contains much dust.Cleaning should be performed slowly and steadily.The barometer must be turned upside down fordisassembly and cleaning work, like transporting.With the barometer standing in a vertical setting,tighten the adjusting screw (Figure 5.2 (18) ) and fillthe glass tube with mercury.When the mercury comes into contact with thetop <strong>of</strong> the glass tube, it emits a metallic sound like aclick. This sound should be kept in mind to check forRepair framePolyethylene pat17
entrance <strong>of</strong> air bubbles after cleaning.After filling the glass tube with mercury, remove theFigure 5.10 Repair framebarometer from the hanger plate and turn it upside down.and Polyethylene patUse cleaning tools free <strong>of</strong> oil, moisture and acid to preventamalgamation.During disassembly and cleaning, it is important to remember the feeling <strong>of</strong> thetightening <strong>of</strong> the screw to reassemble the components as before.Tools required for disassembly and cleaning are listed in the attached table.(2) Disassembling the mercury cisternIn the same way for transporting the barometer, turn the barometer upside down after themercury reaches the top <strong>of</strong> the glass tube. Install the barometer in the repair frame formercury barometer (Figure 5.10). It is recommended to pack the barometer withpolyethylene bag from the scale to barometer tube. Pressing the brass cylinder, turn the screwunder cover (Figure 5.11, b), to the left, to remove.Pick up the wash-leather bag to check for mercury leakage. If mercury is leaking, pressthe wooden base screw bridge with a finger, turn the barometer back to the vertical setting, andremove the leaking mercury into a beaker. This leakage mercury has been amalgamated andmust not be mixed with mercury in the mercury cistern.Pressing the upper part <strong>of</strong> three screws (Figure 5.11, d) with one hand, turn the brasscylinder (Figure 5.11, c) to the left to remove. If the screw is stiff, tighten it slightly, apply asmall amount <strong>of</strong> oil, or pat it slightly, before loosening the screw.Pat the wash-leather bag to remove mercury, and turn the boxwood counterclockwise(Figure 5.12) to which the wash-leather bag is attached. If the screw is stiff, tighten it with arather thick hemp thread (Figure 5.13, a, b) and the other end around the hand (Figure 5.13, c),and turn the boxwood counterclockwise with the thread. This should be done carefully not toleakage mercury, as the glass cylinder is filled with mercury (Figure 5.12).(3) Draining mercury from the mercury cisternSyringe a small amount <strong>of</strong> mercury into a beaker. Be careful not to splash the mercury.Insert a finger into the mercury cistern to feel the opening <strong>of</strong> the tube (Figure 5.14,b). Plugthe opening with a finger to prevent mercury flowing out <strong>of</strong> the glass tube. Excess force willbreak the tapered part <strong>of</strong> the glass tube. With the opening <strong>of</strong> the tube plugged with the middlefinger, lift up the barometer with the other hand, and pour mercury into a beaker slowlywithout spilling outside the beaker. After removing the mercury completely, turn thebarometer upside down as before and unplug the opening <strong>of</strong> the glass tube.(4) Disassemble the mercury cistern glass cylinderLoosen and remove three screws (Figure 5.15, a) one by one, feeling the tightening <strong>of</strong> thescrew. Next, remove the brass metal frame, wooden frame, and glass cylinder (Figure 5.16).It is recommended to mark the screws and holes to prevent mismatching during thereassembly. It is also recommended to mark the glass tube seam and gasket positions toprevent mercury leakage after reassembly.The leather gaskets attached in the upper and lower parts <strong>of</strong> the glass tube should not beremoved. When the gaskets are very dirty, however, remove and s<strong>of</strong>ten them well. Pinch18



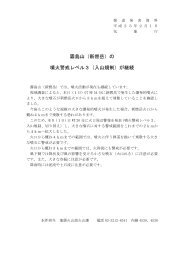
![関東地方の「紅葉の見ごろ予想」[PDF形式:250KB] - 気象庁](https://img.yumpu.com/47747063/1/184x260/pdf250kb-.jpg?quality=85)
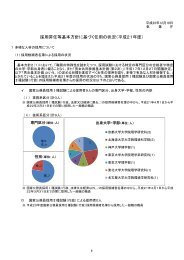
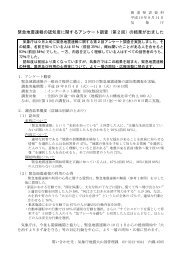
![雨に関する各市町村の50年に一度の値一覧[PDF形式:417KB] - 気象庁](https://img.yumpu.com/47450161/1/190x134/50pdf417kb-.jpg?quality=85)
![1か月予報[九州北部地方]解説資料](https://img.yumpu.com/47153516/1/184x260/1.jpg?quality=85)
![職員募集案内パンフレット[PDF形式:約9MB] - 気象庁](https://img.yumpu.com/45714300/1/184x260/pdf9mb-.jpg?quality=85)


![ダウンロードファイル[PDF形式: 約15MB] - 気象庁](https://img.yumpu.com/43657928/1/190x135/pdf-15mb-.jpg?quality=85)
