INSTALLATION INSTRUCTIONS OF BAY/BOW FRAME ... - Pella.com
INSTALLATION INSTRUCTIONS OF BAY/BOW FRAME ... - Pella.com
INSTALLATION INSTRUCTIONS OF BAY/BOW FRAME ... - Pella.com

You also want an ePaper? Increase the reach of your titles
YUMPU automatically turns print PDFs into web optimized ePapers that Google loves.
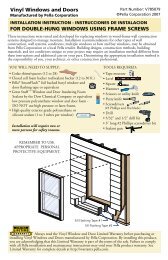
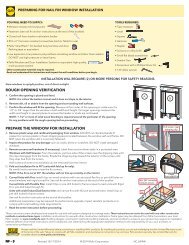
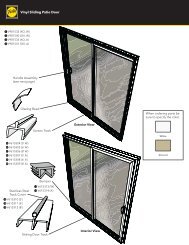
4PREPARING<strong>FRAME</strong> OPENINGS AND WINDOWSFOR <strong>INSTALLATION</strong> INTO <strong>FRAME</strong> (CONTINUED)Note: Use opening preparation Step 4G only for unitsNOT using bulb gasket.G. Apply a minimum of 3/8" diameter of sealant on theexterior jamb and head stops of the bay/bow frame.Apply the sealant as close to the outside edge as possible.5 WINDOW PREPARATION (CASEMENT ONLY)The interior frame covers must beremoved to provide access to the predrilledframe screw installation holes.CAUTION: To Avoid Interior FrameCover Breakage - Carefully read andunderstand the following steps beforeproceeding with cover removal.The order of interior frame cover removalis indicated below. Use reverse order forre-installation of covers.A. Prepare the Window.1. Remove the screen and set aside.2. Use pliers to remove the plug(s) from the lockhandle location(s).3. Remove the construction handle tool from thehandle package.Construction Handle Tool may be used as alock handle or crank handle.