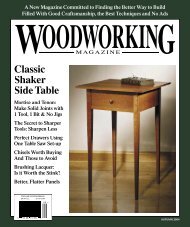
Classic Shaker Side Table - Popular Woodworking Magazine
Classic Shaker Side Table - Popular Woodworking Magazine
Classic Shaker Side Table - Popular Woodworking Magazine
You also want an ePaper? Increase the reach of your titles
YUMPU automatically turns print PDFs into web optimized ePapers that Google loves.
Use glue and 5 ⁄ 8 " brads to attach the sides tothe front and back. Apply glue to the rabbets atthe corners. If you’re using a solid-wood bottom,don’t place glue in the grooves. The bottom shouldbe allowed to expand and contract (unless you’reusing plywood).Slip your bottom into the groove and clampthe drawer. Place your clamps as shown in thephoto on page 25. If you’re adding brads to thejoints, drive them through the sides into the rabbetsin the front and back.Fitting the Drawer in its SpaceWhen the glue is dry, take the drawer out of theclamps and try to fit it in its opening. It probablywon’t fit. This is OK. The first step in getting it tofit is to take your block plane and remove materialfrom the top edge of the sides, front and back,checking the fit as you go. You can easily gaugeyour progress by first marking a 1 ⁄ 16 " line aroundthe outside of the drawer. As you plane, use thisline as a reference.Check the fit of the drawer at the top and bottomby inserting one corner of the drawer in theopening so you don’t have to worry about theside-to-side fit. When the drawer fits at the topand bottom, check the side-to-side fit.Removing material from the sides can be donewith a plane or a power sander. If you’re planing,remember to work in from both the front and backto avoid tear-out on the end grain that shows onthis surface. Remove material slowly and workboth sides evenly. It shouldn’t take much to getthe drawer to slip into place.You may notice at this point that the revealaround the drawer looks OK at the top and thesides, but the bottom is a tight fit. Here’s a littletrick: Take your block plane and lightly bevel thebottom front edge to give the appearance of a gapto match the top space. Continue to trim the frontwith your block plane until the reveal is consistentall around the drawer front.If you’re having trouble planing the end grainon the sides of the front, here’s another little tip:Wet the end grain with some mineral spirits. Thiswill make it easier to slice.Now it’s time to fit the depth. Because we madethe drawer 1 ⁄ 2 " shorter than its opening, it will slipin past the front edge of the table. Slide the drawerall the way in, and measure how far in it went.Then predrill and drive two #8 x 1"-long roundheadscrews (one on either side) in the drawerback. By adjusting the depth of the screws, youcan fit the drawer front flush to the table.With these basic skills in place, you can nowuse different material thicknesses. And as you becomemore comfortable with your skills, you cantry a new drawer joint on occasion. But you’ll alwaysbe able to make a simple one-setup drawerthat fits perfectly with these rabbets. WM– David ThielThe first step in fitting the drawer is to trim theheight. A simple block plane can be used to takeoff a little bit at a time until the fit is perfect.Next, a larger jack plane removes material from both sides until the drawer slides in smoothly.Screws1 ⁄ 32 " revealWith the drawer in place, you can see the reveal at both sides, on top and onbottom. By beveling the lower edge of the drawer front with a block plane,the spacing appears to match on all four sides.Another trick to fitting a drawer is to use screws in the back to help adjust thedepth. The two screws can be adjusted in and out to fit the drawer front flushin the opening.woodworking-magazine.com ■ 27


