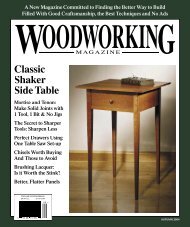
safer, but they require wood, material and timeto fabricate. And don’t even ask me to explain themath involved in making taper cuts on a jointer.It makes my head hurt.The most straightforward, safe and foolproofway to cut tapers is to lay them out on the legs, cutthem out with a band saw (or jigsaw in a pinch)and clean up the cuts on your jointer or with ahand plane (my tool of choice).The leg taper begins 1" down from where theaprons end. The legs taper down to 5 ⁄ 8 " square atthe foot. That seems almost too delicate a taper,on paper. But when you see the results, you’ll beimpressed with the strength and beauty of thelegs. Don’t forget that the tapers are on only thetwo inside edges of the legs. With the tapers complete,you’re ready to assemble the base.Gluing it upBegin by sanding or planing all your base piecesso they are ready for finishing. If you choose toThe dovetails are simple backsaw work. Even ifyou miss your line, you’ll be able to fix it whenyou cut the socket. If you mess up the socket,the result will never show. Saw down to theshoulder and pare away the little waste sliverwith a chisel.sand, I recommend you sand the legs by hand witha small sanding block. A random-orbit sander willgive you a bellied surface, which will spoil the fitof your joint. Begin with #100-grit paper and workyour way up the grits to #180- or #220-grit.Start the assembly by gluing a side apron intoa mating front and back leg. When this assemblyis complete, you can then check the fit of yourdovetail a second time and make any modificationsnecessary for a tight fit. If you’re going topeg your joints from the inside (as described in“Mortises & Tenons for <strong>Table</strong>s”), now is the timeto peg those side aprons. Then glue up the remainderof the table base.Sorting Out the GutsThe rest of the table is simple joinery, but you needto pay close attention to how everything fits so thatthe drawer slides well. The first order of businessis to fit and glue up the four drawer guides. Thedrawer rides on the two at the bottom. The two atCutting the Dovetails on the Upper Front RailSecond, mark out the shape of the dovetail onthe top of the leg using a mechanical pencil or(even better) a marking knife.This table is a great project for practicing yourplaning. The parts of the base aren’t wide, so youdon’t have to worry about the corner of the planeiron digging into your work. If you’re interested inlearning to use a hand plane, planing the tapers,rails and edges of tabletops are three goodplaces to begin.the top have dual functions: They attach the tablebase to the top and they prevent the drawer fromtipping downward when it’s pulled out.Start by notching the corners of all four guides.A 3 ⁄ 16 " x 3 ⁄ 16 " notch allows the guides to fit aroundthe legs. You can cut it with a band saw or jigsawif you like, but a backsaw will be just as fast andaccurate. When the guides fit around the legs,glue the lower guides to the aprons. Make suretheir top edge is flush with the lower front rail.This ensures the drawer won’t hang up.Before you glue on the upper guides, youshould drill countersunk holes that will allowyou to screw the base to the underside of the top.These holes need to be elongated a bit to allow thetop to expand and contract, but please don’t gettoo worked up about this point. There is no needto rout out a slot or drill overlapping holes. Simplydrive your drill into the hole, and while thedrill is running, pivot it forward and back.Glue the upper guides in place. Make sure theyare flush to the top of the apron (or just a little below)and don’t drop below the upper front rail.You can see details of what the inside of thetable base looks like – with all the guides andrunners in place – in “Simple & Fast RabbetedDrawers” on page 24.Third, use your backsaw to define the edges ofthe socket. Saw inside the marked line. You canpare away the extra waste with a chisel oncethe socket is chopped out.To remove the waste, first loosen it up bychopping a series of score lines on top of theleg. Then come in from the front of the joint(as shown) to pop the waste out. Keep workingdown and back. This is good chisel practice.Return To the TopYou might think that building and fitting the draweris the next step, but it’s not. In a small project,the top will change how everything fits below it.If you tighten the screws between the top and basetoo much, the drawer will bind up in the case. Soreally the best course of action is to make the top,attach it, then fit the drawer.Cut your top panel to its finished size and layout the bevel on its underside. You can cut thisbevel on the table saw much like you would araised panel for a door. This can be tricky dependingon the height of your table saw’s fence and thesize of the throat opening for the saw blade.If you choose this route, set your table saw’s20 ■ woodworking magazine Autumn 2004
Notch fitsaround legOnce you cut the notch in the drawer guide,a sharp chisel can fine-tune the fit with ease.To learn how to correctly sharpen a chisel, see“Sharpening a Chisel” on page 11.blade for a 7° bevel and sneak up on the propercut by making a couple of passes over the blade,changing the height of the blade and location ofthe fence until you get the bevel you desire.If that approach doesn’t appeal to you, I recommendyou mark the bevel on the undersideand shape it with a rasp and file. A rasp (I preferthe inexpensive Microplane rasp for this job) canremove wood in a hurry. A mill file, scraper andsandpaper will clean up your work from there.Plane or sand the top for finishing. Attach it tothe base with #8 x 1" screws. The easiest way toaccomplish this is to put the top upside down onyour bench. Then clamp the table base in placeto the top. Drill pilot holes into the top and thendrive each screw home. Now you are ready toconstruct the drawer.Upper drawer guidesThe holes need to allow the body of the screwto pivot. So reaming out the holes as shown isperfectly acceptable.Drawer DetailsWhen I’ve built this project in the past, I’ve madea dovetailed drawer, which is typical of <strong>Shaker</strong>construction methods. But to make the projectsimpler to build, I recommend you try out thedrawer-building method detailed on page 24.That style of drawer is easy to construct and willbe more than adequate for the light duty thisdrawer is certain to receive.Note that the sizes in the cutting list for thistable assume you will make the drawer using thisrabbeted construction method.No matter how I make my drawers, I usuallychoose poplar for the sides and bottom. It’s inex-pensive and machines well. When the drawer isbuilt, I fit it with a jack plane. Plane the top, bottomand outside faces of the drawer’s sides untilit moves smoothly in and out of the table’s base.Then turn your attention to getting the right gap(called the “reveal”) around the drawer front, atask suited for a block plane.With the drawer fit, attach the knob. I like toscrew a piece of scrap on the top edge of the drawerback to prevent the drawer from being pulledall the way out of the table (unless you mean to).It’s a small detail that I’m fond of.Cleaning UpBreak all the edges with #120-grit sandpaper anddisassemble the table for finishing. With cherry,I think it’s worth the extra effort to accelerate itsdarkening by applying a couple of coats of boiledlinseed oil and putting the table out in the sunfor a day. Then you can brush or wipe on yourfavorite film finish. I prefer a satin lacquer.The first time I built this table, I was going togive it away to my sister as a wedding gift. Butwhen it was complete, it sparked something rarein me: envy. So I kept the table and it sits by mybedside as a reminder of the rewards of good design.My sister can have the next one. WM— Christopher SchwarzSuppliesRockler800-279-4441 or rockler.com1 • Cherry <strong>Shaker</strong> 7⁄ 7 8 " knob, 3⁄ 3 8 " tenon,#78493, $2.59/pairPrice as of publication deadline.The entire top is riding across the blade on a 1 ⁄ 2 "-wide edge, so take care when cutting the bevel.Thin the sides of the drawer until you get asmooth fit. A sander can do the job, but a handplane removes material in a much morepredictable (if slightly slower) manner.woodworking-magazine.com ■ 21


