matrix_s7xe_s7x_s5x_stepper owner manual.pdf - GymStore.com
matrix_s7xe_s7x_s5x_stepper owner manual.pdf - GymStore.com
matrix_s7xe_s7x_s5x_stepper owner manual.pdf - GymStore.com

You also want an ePaper? Increase the reach of your titles
YUMPU automatically turns print PDFs into web optimized ePapers that Google loves.
PREMIUM SERIESSTEPPERPremium_<strong>stepper</strong>_090723.indd 17/23/09 10:18 AM
Premium_<strong>stepper</strong>_090723.indd 17/23/09 10:18 AM
CHAPTER 1: Important Safety Instructions1.4 ELECTRICAL REQUIREMENTSThe Matrix Stepper has different electrical requirements depending on themodel chosen. The chart below should assist you with your facility planning:5x: These products are designed to be self powered and do not require anexternal power supply source to operate. However, these units can be ACpowered if an optional power cord is purchased. This will power the consoleat all times and requires no minimum RPM for operation. These units can bedaisy-chained together, up to 4 units per dedicated 15 amp circuit, using aMatrix daisy-chain cord adapter (sold separately).7x: These products can operate without power; however, the machine mustboot the software with each new user. This can mean a delay of up to 35seconds while the machine’s operating system prepares for a workout. It’ssimilar to turning your cell phone on for the 1st time of the day. These unitscan also be AC powered. This will power the console at all times and requiresno minimum RPM for operation. A powered product lowers the startingresistance and is easier to use for beginners. These units can be daisychainedtogether, up to 4 units per dedicated 15 amp circuit, using a Matrixdaisy-chain cord adapter (sold separately).7xe: These products must be AC powered. These units can be daisy-chainedtogether, up to 4 units per dedicated 15 amp circuit, using a Matrix daisychaincord adapter (sold separately).For your safety and for the performance of your Matrix product, the groundon your circuits must be non-looped. Please refer to NEC article 210-21and 210-23. Any alterations to the standard Matrix power cords will void allwarranties.1.5 BATTERY CHARGE (5X, 7X)The Stepper saves its battery charge by moving into a shutdown modewhenever STEP FASTER appears on the display. If the user does notmaintain a step rate above 35 steps per minute, then a 30-secondshutdown process begins.When the battery voltage is low, LOW BATTERY appears on the display ifthe unit is moving into the shutdown mode. The following situation is thetime to recharge the battery:• If no one has used the unit for an extended period of time, the batterymay need recharging.• The unit continues to function with a low battery, however, userand program information is lost once the user stops.If the battery must be recharged, use the optional power adapter chargingunit. The charger should be connected to the Stepper for a minimum ofeight hours to ensure a thorough charge. After a <strong>com</strong>pletion of charge,the battery light turns from red into green (see illustration). If LOWBATTERY still appears on the display in a full of charging, the batterycould be extinct. Please check with an authorized service technician forreplacing the battery.CAUTION: The battery stored inside the unit contains hazardousmaterials to the environment. Proper disposal of the battery is requiredby the local law.CHAPTER 2: Preventative Maintenance1.6 GROUNDING INSTRUCTIONSThe <strong>stepper</strong> must be grounded. If it should malfunction or breakdown, groundingprovides a path of least resistance for electric current to reduce the risk of electricshock. The <strong>stepper</strong> is equipped with a cord having an equipment-groundingconductor and a grounding plug. The plug must be plugged into an appropriateoutlet that is properly installed and grounded in accordance with all local codesand ordinances. If the user does not follow these grounding Instructions, theuser could void the Matrix limited warranty.DANGER: Improper connection of the equipment-grounding conductorcan result in the risk of electric shock. Check with a qualified electrician orserviceman if the user is in doubt as to whether the product is properly grounded.Do not modify the plug provided with the product if it will not fit the outlet;have a proper outlet installed by a qualified technician.2.1 RECOMMENDED CLEANING TIPSPreventative maintenance and daily cleaning will prolong the life and look of yourMATRIX Stepper.Please read and follow these tips.• Position the equipment away from direct sunlight. The intense UV light cancause discoloration on plastics.• Locate your equipment in an area with cool temperatures and low humidity.• Clean with a soft 100% cotton cloth.• Clean with soap and water or other non-ammonia based all purpose cleaners.• Wipe foot pads, handles, heart rate grips, and handlebars clean after each use.• Do not pour liquids directly onto your equipment. This can cause damage to theequipment and in some cases electrocution.• Check pedal motion and stability.• Adjust leveling feet when equipment wobbles or rocks.• Maintain a clean area around equipment, free from dust and dirt.2.2 CHECK FOR DAMAGED PARTSDO NOT use any equipment that is damaged or has worn or broken parts. Use onlyreplacement parts supplied by Matrix Fitness Systems.MAINTAIN LABELS AND NAMEPLATES. Do not remove labels for any reason. Theycontain important information. If unreadable or missing, contact Matrix FitnessSystems for a replacement. 1-866-693-4863, www.<strong>matrix</strong>fitness.<strong>com</strong>MAINTAIN ALL EQUIPMENT Preventative maintenance is the key to smoothoperating equipment. Equipment needs to be inspected at regular intervals.Defective <strong>com</strong>ponents must be replaced immediately. Improperly workingequipment must be kept out of use until it is repaired. Ensure that any person(s)making adjustments or performing maintenance or repair of any kind is qualified todo so. Matrix Fitness Systems will provide service and maintenance training at ourcorporate facility upon request or in the fieldif proper arrangements are made.4Premium_<strong>stepper</strong>_090723.indd 47/23/09 10:18 AM
CHAPTER 2: Preventative Maintenance2.3 CARE AND MAINTENANCE INSTRUCTIONSIn order to maximize life span, and minimize down time, all MATRIX equipmentrequires regular cleaning, and maintenance items performed on a scheduledbasis. This section contains detailed instructions on how to perform these items,the frequency of which they should be done, and a check list to sign off eachtime service is <strong>com</strong>pleted for a specific machine. Some basic tools and supplieswill be necessary to perform these tasks which include (but may not belimited to):2.4 PREVENTATIVE MAINTENANCE CHECKLISTFacility:MAKE: MODEL: S/NLOCATION: TECHNICIAN: DATE:Metric Allen wrenches#2 Phillips head screwdriverAdjustable wrenchTorque wrench (capability to read foot lbs, and inch lbs)Lint free cleaning clothsTeflon based spray lubricantMild, water soluble, detergent – such as “Simple Green”, or other Matrixapproved productTeflon based spray lubricant such as “Super Lube”, or other Matrix approvedproductVacuum cleaner w/extendable hose and crevasse tool attachmentInspect power cordsCheck E-stop cord/buttonVacuum/clean under coverCheck motor drive beltCheck running beltFlip/replace deckCheck resistance systemLubricate pivot pointsCheck connecting jointsRemove covers, check beltsCheck pedal & crankCheck/lube seat adjustmentClean/lube guide rodsInspect belt/cable assy.Check locking pinsCheck pulleysInspect upholsteryCheck/tighten hardwarePlease find the worksheet sample for our equipment provided in this <strong>manual</strong>and make copies as needed, keeping them up to date as the required service/maintenance items are performed. It is critical that you also log the accumulated(total) amount of miles or running hours on the equipment each time service ormaintenance is performed.De-wax rollersNotes/<strong>com</strong>mentsVerify electronics operationLubricate Acme screwYou may periodically see addendums to this document, as the Matrix TechnicalSupport Team identifies items that require specific attention, the latest versionwill always be available on the Matrix website, <strong>matrix</strong>fitness.<strong>com</strong>DAILY MAINTENANCE ITEMS1) Clean entire machine use water and mild detergent such as “SimpleGreen”, or other Matrix approved solution (cleaning agents should bealcohol and ammonia free).MAKE: MODEL: S/NLOCATION: TECHNICIAN: DATE:Inspect power cordsCheck E-stop cord/buttonVacuum/clean under coverCheck motor drive beltCheck running beltFlip/replace deckDe-wax rollersNotes/<strong>com</strong>mentsCheck resistance systemLubricate pivot pointsCheck connecting jointsRemove covers, check beltsCheck pedal & crankCheck/lube seat adjustmentVerify electronics operationClean/lube guide rodsInspect belt/cable assy.Check locking pinsCheck pulleysInspect upholsteryCheck/tighten hardwareLubricate Acme screw5Premium_<strong>stepper</strong>_090723.indd 57/23/09 10:18 AM
CHAPTER 3: Using Manager Preference3.1 USING MANAGER PREFERENCE MODEThis section allows a user to manipulate default settings for the machines.It may be accessed by pressing the LEVEL UP/LEVEL DOWN simultaneouslyfor 5 seconds. To change a setting, press “ENTER” on the keypad anduse the Level buttons and numeric keypad to change the values. Pressing“ENTER” again will save the change. Pressing “BACK” will bring you to theprevious menu. To exit manager’s mode, hold “STOP” down for 5 seconds.Below is a list of the settings.Maximum TimeDefault TimeDefault LevelDefault AgeDefault WeightAccumulated DistanceAccumulated TimeSoftware VersionTimer ModeSpeed/Distance ModeOut of OrderGenderLanguageSound ModeCHAPTER 4: Serial Number Location4.1 STEPPER SERIAL NUMBER LOCATIONSERIAL # PLACEMENTSERIAL#PLACEMENT4.2 UNIVERSAL CONSOLE SERIAL NUMBER LOCATION6Premium_<strong>stepper</strong>_090723.indd 67/23/09 10:18 AM
5.1 S5x CONSOLE DESCRIPTIONCHAPTER 5: S5x Overlay And Workout DescriptionThe MATRIX <strong>stepper</strong> is inspected before it is packaged. It is shipped in two pieces: the base and the console. Carefully unpack the unit anddispose of the box material.WORKOUT KEYS: Simple program view and selection buttons.GO: One touch Start.ENTER: To confirm each program setting.UP/DOWN LEVEL: Easy information and level selection.UP/DOWN TIME: Easy information and time adjustment.STOP: Ends workout and shows workout summary data.NUMBER KEYPAD: Workout data input for workout setup. Level adjustment during workout.COOL DOWN: Puts <strong>stepper</strong> into Cool Down mode.FAN: Allows for fan speed selection (fan has three operating speeds.)TOGGLE DISPLAY: Allows user to select what information is displayed on the console.7Premium_<strong>stepper</strong>_090723.indd 77/23/09 10:18 AM
CHAPTER 5: S7x Overlay And Workout DescriptionS7x CONSOLE DESCRIPTIONThe MATRIX <strong>stepper</strong> is inspected before it is packaged. It is shipped in two pieces: the base and the console. Carefully unpack the unit anddispose of the box material.MULTI-PURPOSE KEYS: Keys have different functions depending oneach screen.GO: One touch Start.ENTER: To confirm each program setting.UP/DOWN LEVEL: Easy information and level selection.UP/DOWN TIME: Easy information and time adjustment.STOP: Ends workout and shows workout summary data.NUMBER KEYPAD: Workout data input for workout setup.COOL DOWN: Puts <strong>stepper</strong> into Cool Down mode.FAN: Allows for fan speed selection (fan has three operating speeds.)S7x ENTERTAINMENT ZONEiPOD ® : Will take the user directly to the iPod screen to allow for iPod controland playlist selection.VOLUME UP/DOWN: Adjusts the volume output through the headphone jackof the integrated console TV or iPod output.NUMBER KEYPAD: Allows for easy TV channel selections.CHANNEL UP/DOWN: Allows for channel selection.DISPLAY MODE: Allows user to cycle through console display options, iPod,TV or profile display.LAST CHANNEL: Allows the user to cycle between the current channel andthe previous channel viewed.8Premium_<strong>stepper</strong>_090723.indd 87/23/09 10:18 AM
CHAPTER 5: S7xe Overlay And Workout DescriptionS7xe CONSOLE DESCRIPTIONThe MATRIX <strong>stepper</strong> is inspected before it is packaged. It is shipped in two pieces: the base and the console. Carefully unpack the unit anddispose of the box material.The S7xe has a full integrated touch screen display. All information required for workouts is explained on screen. Exploration of the interface is highlyencouraged. The information explaining how to program for various workouts will give an explanation about the contents of each screen on the S7xe.S7xe ENTERTAINMENT ZONEiPOD ® : Will take the user directly to the iPod screen to allow for iPod control and playlist selection.VOLUME UP/DOWN: Adjusts the volume output through the headphone jack.NUMBER KEYPAD: Allows for easy TV channel selections.CHANNEL UP/DOWN: Allows for channel selection.DISPLAY MODE: Allows user to cycle through console display options, iPod, TV or profile display.LAST CHANNEL: Allows the user to cycle between the current channel and the previous channel viewed.QUICK START: One-touch start. Starts a <strong>manual</strong> workout.9Premium_<strong>stepper</strong>_090723.indd 97/23/09 10:18 AM
5.2 MANUAL WORKOUT OPERATIONCHAPTER 5: S5x, S7x, S7xe Overlay And Workout DescriptionQUICK START OPERATIONPress the GO button and the <strong>stepper</strong> will enter into a <strong>manual</strong> mode ofoperation. All energy expenditure values will be calculated using the defaultweight measurement.MANUAL WORKOUT OPERATIONManual is a workout that allows you to <strong>manual</strong>ly adjust the level values atanytime. The <strong>manual</strong> workout also contains a setup screen which allows youto input your weight to help calculate a more accurate caloric burn rate.To enter into this workout on a S5x, use the following guidelines:1. Choose MANUAL by selecting the <strong>manual</strong> workout button and press ENTER.2. Enter the desired workout length using the ARROW KEYS or the NUMBERKEYPAD and press ENTER.3. Enter user weight (user weight is used to calculate the caloric expenditurevalue-providing an accurate weight helps to ensure an accurate caloricexpenditure rating for each user) using the ARROW KEYS or the NUMBERKEYPAD and press ENTER.4. Enter the desired initial level using the ARROW KEYS or theNUMBER KEYPAD and press ENTER.To enter into this workout on a S7x or S7xe, follow the onscreen prompts.5.3 OPERATING LEVEL BASED PROGRAMSYour Matrix <strong>stepper</strong> offers a variety of level-based workouts to challengeusers of all fitness levels. The following information will briefly explain theworkout and how to program the <strong>stepper</strong> for each workout selection.ROLLING HILLS WORKOUT OPERATIONRolling hills is a level-based workout that automatically adjusts the level valueto simulate walking or running up hills.3. Enter the desired workout length using the ARROW KEYS or the NUMBERKEYPAD and press ENTER.4. Enter user weight (user weight is used to calculate the caloric expenditurevalue, providing an accurate weight helps to ensure an accurate caloricexpenditure rating for each user) using the ARROW KEYS or the NUMBERKEYPAD and press ENTER.To enter into this workout on a S7x or S7xe, follow the onscreen prompts.5.4 HEART RATE CONTROL WORKOUT OPERATIONYour Matrix <strong>stepper</strong> offers a heart rate control workout mode. The heart ratecontrol workout mode allows the user to program their desired heart ratezone and the <strong>stepper</strong> will automatically adjust the level based upon theuser’s heart rate. The heart rate zone is calculated using the following equation:(220-Age)*%=target heart rate zone. The user must wear a telemetricheart rate monitor or continually hold onto the contact heart rate grips forthis workout.To enter into this workout on a S5x, use the following guidelines:1. Choose TARGET HEART RATE by selecting the target heart rate workoutbutton and press ENTER.2. Enter age using the ARROW KEYS or the NUMBER KEYPAD andpress ENTER.3. Enter the desired percent of maximum heart rate using the ARROW KEYSand press ENTER.4. Enter the desired workout length using the ARROW KEYS or the NUMBERKEYPAD and press ENTER.5. Enter user weight (user weight is used to calculate the caloric expenditurevalue, providing an accurate weight helps to ensure an accurate caloricexpenditure rating for each user) using the ARROW KEYS or the NUMBERKEYPAD and press ENTER.To enter into this workout on a S7x or S7xe, follow the onscreen prompts.1. Choose ROLLING HILLS by selecting the rolling hills workout button andpress ENTER.2. Enter the desired intensity using the ARROW KEYS or the NUMBERKEYPAD and press ENTER.3. Enter the desired workout length using the ARROW KEYS or the NUMBERKEYPAD and press ENTER.4. Enter user weight (user weight is used to calculate the caloric expenditurevalue, providing an accurate weight helps to ensure an accurate caloricexpenditure rating for each user) using the ARROW KEYS or the NUMBERKEYPAD and press ENTER.To enter into this workout on a S7x or S7xe, follow the onscreen prompts.FAT BURN WORKOUT OPERATIONFat burn is a level-based workout that is designed to help user’s burn fatthrough various resistance changes.To enter into this workout on a S5x, use the following guidelines:1. Choose FAT BURN by selecting the fat burn workout button and pressENTER.2. Enter the desired intensity level using the ARROW KEYS or the NUMBERKEYPAD and press ENTER.10Premium_<strong>stepper</strong>_090723.indd 107/23/09 10:18 AM
CHAPTER 5: S5x, S7x, S7xe Overlay And Workout Description5.5 FIT TESTAge EXCELLENT GOODABOVEAVERAGEAVERAGEBELOWAVERAGEPOORVERY POOR18-25 12826-35 12836-45 13046-55 13256-65 12965 + 130Age EXCELLENT GOODABOVEAVERAGEAVERAGEBELOWAVERAGEPOORVERY POOR18-25 14026-35 13836-45 14046-55 13556-65 13965 + 13411Premium_<strong>stepper</strong>_090723.indd 117/23/09 10:18 AM
CHAPTER 6: S5x, S7x, S7xe Stepper Specifications, Parts, and Assembly Guides6.1 S5x, S7x, S7xe MODEL SPECIFICATIONSFeaturesS7xe S7x S5xStep ranage 12.2” 12.2” 12.2”Contact & telemetric HR Yes Yes YesUltra non-slip pedals Yes Yes YesQ-factor 3.3” 3.3” 3.3”Handlebar design Ergonimically designed handrails and horn Ergonimically designed handrails and horn Ergonimically designed handrails and hornThumb switch controls Yes Yes YesResistance SystemTechnology JID brushless generator JID brushless generator JID brushless generatorPower requirements 120v/60Hz AC power Self-powered/optional AC power jack Self-powered/optional AC power jackMinimum watts 18 18 18ConsoleDisplay type 15” touch screen LCD 7” LCD Dot-<strong>matrix</strong> LEDDisplay feedbackUser definedmulti-language displayTime, distance (kilometers or miles), calories, calories perhour, speed, SPM, floors climbed, heart rate, METs, watts,dynamic profile display, static profile displayYes-English, German, French, Italian, Spanish, Dutch,Portuguese, Chinese, JapaneseTime, distance (kilometers or miles), calories, calories perhour, speed, incline, pace, heart rate, METs, Watts, ProfileYes-English, German, French, Italian, Spanish, Dutch,Portuguese, Chinese, JapaneseResistance levels 25 25 25WorkoutsManual, rolling, intervals, fat burn, random, target HR,constant watts, fit testManual, rolling, intervals, fat burn, random, target HR,constant watts, fit testCSAFE, FitLinxx ready Yes Yes YesOn-the-fly program change Yes Yes YesFit Touch Technology Yes No NoIntegrated Vista ClearDigital Ready TelevisionYes-15” screen size Yes-7” screen size NoWireless Data transmitter Yes Yes YesiPod <strong>com</strong>patible Yes Yes NoNike + iPod <strong>com</strong>patible Yes Yes NoPersonal Fan Yes Yes YesTech SpecsOverall dimensions 45”L x 31”W x 70.5” H 45”L x 31”W x 70.5” H 45”L x 31”W x 70.5” HMaximum user weight 400lbs 400lbs 400lbsWeight 211lbs 209lbs 208llbsShipping weight 239lbs 237lbs 236lbsTime, speed, floors climbed, calories, watts, level, heartrate, SPMNoManual, rolling, intervals, fat burn, random, target HR,constant watts, fit testElectrical Requirements AC powered Self-power, power optional Self-power, power optional12Premium_<strong>stepper</strong>_090723.indd 127/23/09 10:18 AM
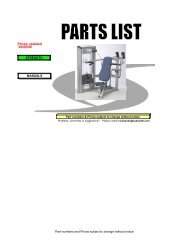
CHAPTER 6: S5x, S7x, S7xe Stepper Specifications, Parts, and Assembly Guides6.2 REQUIRED FASTENERS & ASSEMBLY TOOLSFASTENERS AND ASSEMBLY TOOLSREFERENCESKETCHDESCRIPTIONQUANTITYPAKEAGE COLORZ01SOCKET HEAD BOLT(M8x16L)8WHITEZ02LOCK WASHER8WHITEZ34 SOCKET HEAD BOLT(M8x25L) 2Z02 LOCK WASHER 4BLUEBLACKZ07BUTTON HEAD BOLT(M8x40L)4BLACKZ02 LOCK WASHER 2YELLOWZ10 BUTTON HEAD BOLT(M8x45L) 2 YELLOWZ03SCREW SET2ORANGEZ05BUTTON HEAD BOLT(M8x16L)4ORANGEZ06ARC WASHER8ORANGEZ04 LOCK WASHER 3 GREENZ05 BUTTON HEAD BOLT(M8x16L) 3 GREENZ09BUTTON HEAD BOLT(M5x15L)4REDZ50PHILLIPS DRIVER(4.5x50mm)1PURPLEZ525mm ALLEN WRENCH2PURPLEZ536mm ALLEN WRENCH1PURPLE13Premium_<strong>stepper</strong>_090723.indd 137/23/09 10:18 AM
6CHAPTER 6: S5x, S7x, S7xe Stepper Specifications, Parts, and Assembly Guides6.3 ASSEMBLY STEPSZ01Z02Z02Z01Z07Z09Z09Z0214Premium_<strong>stepper</strong>_090723.indd 147/23/09 10:18 AM
666.3 ASSEMBLY STEPSCHAPTER 6: S5x, S7x, S7xe Stepper Specifications, Parts, and Assembly GuidesZ41Z02Z10CONSOLE SCREWZ03Z06Z04 x 3Z05 x 3Z34Z06Z03Z05 x 4Z06Z06Z0515Premium_<strong>stepper</strong>_090723.indd 157/23/09 10:18 AM
CHAPTER 6: S5x, S7x, S7xe Stepper Specifications, Parts, and Assembly Guides6.3 ASSEMBLY STEPS16Premium_<strong>stepper</strong>_090723.indd 167/23/09 10:18 AM
Premium_<strong>stepper</strong>_090723.indd 177/23/09 10:18 AM
MATRIX FITNESS SYSTEMS | 1610 LANDMARK DRIVE COT TAGE GROVE WI 53527 USAToll Free 866.693.4863 <strong>matrix</strong>fitness.<strong>com</strong> Fax 608.839.8687PART # 0000088210REV. 1.4Premium_<strong>stepper</strong>_090723.indd 187/23/09 10:18 AM