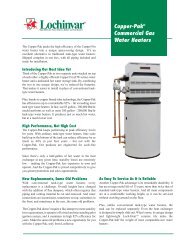
continued - Lochinvar
continued - Lochinvar
continued - Lochinvar

You also want an ePaper? Increase the reach of your titles
YUMPU automatically turns print PDFs into web optimized ePapers that Google loves.
Outdoor Armor Water Heater Installation & Operation ManualRatingsHLWModel NumberNote: Change “N”to “L” for L.P. gasmodels.CSAInput Modulation Btu/hr(Note 2)Water ContentGallonsWaterConnectionsGasConnectionsOAN151PM 30,000 - 150,000 1.3 1-1/4" 1/2"OAN200PM 40,000 - 199,999 1.7 1-1/4" 1/2"OAN286PM 57,000 - 285,000 2.4 2" 3/4"OAN400PM 80,000 - 399,999 3.4 2" 1"OAN501PM 100,000 - 500,000 4.2 2" 1"OAN601PM 120,000 - 600,000 4.2 2" 1"OAN701PM 140,000 - 700,000 5.0 2" 1"OAN801PM 160,000 - 800,000 5.7 2" 1"NOTICEMaximum allowed working pressure is located on the rating plate.Notes:1. Outdoor Armor water heaters are supplied withspecial gas venting materials. Use only the method ofinstallation specified in the Outdoor Armor Installationand Operation Manual.2. Standard outdoor Armor water heaters are equippedto operate from sea level to 4,500 feet only with noadjustments. The water heater will de-rate by 4% foreach 1,000 feet above sea level up to 4,500 feet.3. The manual reset high limit provided with the outdoorwater heater is listed to UL353. The auto reset highlimit is listed to ANSI Z21.87.7
Outdoor Armor Water Heater Installation & Operation Manual1 Determine water heater locationInstallation must comply with:• Local, state, provincial, and national codes, laws, regulations,and ordinances.• National Fuel Gas Code, ANSI Z223.1 – latest edition.• National Electrical Code.NOTICE WARNINGCAUTION WARNING8The outdoor Armor water heater gasmanifold and controls met safe lighting andother performance under tests specified inANSI Z21.10.3 – latest edition.Outdoor models must be installed outdoorsonly and must use the outdoor vent kitassembly supplied by the manufacturer.Personal injury or product damage mayresult if any other cap is used or if an outdoormodel is used indoors. All covers, doorsand jacket panels must be properly installedto ensure proper operation and prevent ahazardous situation.This product contains a condensatemanagement and disposal system thatmay be subject to freezing if exposed tosustained temperatures below 32°F.Precautions should be taken to protect thecondensate trap and drain lines duringextended periods of outdoor temperaturesbelow 32°F. Consult the manufacturer(and see Table 1A below) for an optionalcondensate trap kit recommended for areaswhich may experience temperatures below32°F. Note: This condensate option is onlyavailable for Models OA 151 - 286 and501 - 801.Model OA 400 is NOT suitable for installationin areas which may experience temperaturesbelow 32°F.Tabe 1A - Ambient TemperatureRequirementsModel Kit NumberMinimum AllowableAmbient TemperatureOK 151/211OA 151/200KIT30123 5°FOK/OA 286 KIT30124 5°FOK/OA501 - 801KIT3012510°F (OK/OA 501)5°F (OK/OA 601 - 801)Before locating the water heater, check:1. Check for nearby connection to:• Water piping• Gas supply piping• Electrical power2. - Keep venting areas free of obstructions.- Keep area clean and free of combustible and flammablematerials.- To avoid a blocked air inlet or blocked flue condition,keep the outdoor air inlet and flue outlet clear of leaves,debris, etc.CAUTION CAUTION WARNINGCAUTIONDo not install outdoor models directly onthe ground. You must install the outdoorunit on a concrete, brick, block or pressuretreatedwood platform.Do not locate unit so that high winds candeflect off of adjacent walls, buildingsor shrubbery causing recirculation.Recirculation of flue products may causeoperational problems, bad combustion ordamage to controls. Locate unit at least3 feet (0.91m) from any wall or verticalsurface to prevent wind conditions fromaffecting performance.The outdoor unit must not be installed inan area that is enclosed by walls or a fencethat will block free wind movement aroundthe unit. Free movement of wind aroundthe outdoor unit is required to carry awaythe flue products and provide combustionair. The flue outlet/combustion air inletof an outdoor unit must not be installedcloser than 10 feet from an inside corner ofan L-shaped structure. Walls or enclosedfencing may cause eddy currents whichcan recirculate the flue products into thecombustion air inlet. Recirculation of flueproducts may cause operational problems,bad combustion or non-warrantabledamage to controls.- Do not install the outdoor unit under adeck.- Do not install an outdoor unit in a well,stairwell, alcove, courtyard or otherrecessed area.- Do not install outdoor units on stackframes.Failure to comply with the above couldresult in severe personal injury, death orsubstantial property damage.- Do not install outdoor units in locationswhere rain from building runoff drainswill spill onto the unit.- Do not locate the outdoor unit so thatwater from sprinklers may spray directlyonto it. Water may damage controls orother electrical components.
Outdoor Armor Water Heater Installation & Operation Manual1 Determine water heater location (<strong>continued</strong>)3. Check area around the water heater. Remove anycombustible materials, gasoline and other flammableliquids.Failure to keep the water heater area clear WARNINGand free of combustible materials, gasolineand other flammable liquids and vapors canresult in severe personal injury, death orsubstantial property damage.4. If a new water heater will replace an existing water heater,check for and correct system leaks causing oxygen corrosionor heat exchanger cracks from hard water deposits.Provide clearances:Clearances from combustible materials1. Hot water pipes—at least 1/4" (6mm) from combustiblematerials.2. Vent pipes—minimum of 14" (356mm) from the rear and0" on the right side from combustible materials.Clearances for service access1. If you do not provide the minimum clearances, it maynot be possible to service the water heater withoutremoving it from the space.Recommended service clearances:Front - 30" (762mm)Top - 24" (610mm)Left side - 24" (610mm)Rear - 24" (610mm)Outdoor vent / air intake location WARNINGThe flue products discharged from the flueoutlet on the outdoor vent may be veryhot. Avoid touching or other direct contactwith the flue gases or the vent terminationassembly. These components are hot anddirect contact can result in burns.To prevent recirculation of the flue products into the combustionair inlet, follow all instructions in this section.Flue gas condensate can condense on exterior walls or on thevent. Some discoloration to exterior building or unit surfacescan be expected. Adjacent brick or masonry surfaces should beprotected with a rust resistant sheet metal plate.Maintain a minimum of 24" (610mm) clearance to the side ofthe air inlet.Locate the outdoor vent termination at least 48" (1.22m) belowand 48" (1.22m) horizontally from any window, door, walkwayor gravity air intake.Locate outdoor unit at least 10 feet (3.05m) away from anyforced air inlet.Multiple outdoor unit installations require 24" (.61m) clearancebetween each vent termination.Clearances around outdoor installations can change with time.Do not allow the growth of trees, shrubs or other plants toobstruct the proper operation of the outdoor vent system.Flooring and foundationFlooringThe outdoor Armor water heater is approved for installation oncombustible flooring.Do not install the water heater on carpeting WARNINGeven if foundation is used. Fire can result,causing severe personal injury, death, orsubstantial property damage.Under no circumstances is the manufacturer to be heldresponsible for water damage in connection with this appliance,or any of its components. If flooding is possible, elevate thewater heater sufficiently to prevent water from reaching thewater heater.Prevent combustion air contaminationDo not install in locations that can allow contamination ofcombustion air. Refer to Table 1B for products and areaswhich may cause contaminated combustion air.Table 1B Corrosive Contaminants and SourcesProducts to avoid:Spray cans containing chloro/fluorocarbonsPermanent wave solutionsChlorinated waxes/cleanersChlorine-based swimming pool chemicalsCalcium chloride used for thawingSodium chloride used for water softeningRefrigerant leaksPaint or varnish removersHydrochloric acid/muriatic acidCements and gluesAntistatic fabric softeners used in clothes dryersChlorine-type bleaches, detergents, and cleaning solventsfound in household laundry roomsAdhesives used to fasten building products and other similarproductsAreas likely to have contaminantsDry cleaning/laundry areas and establishmentsSwimming poolsMetal fabrication plantsBeauty shopsRefrigeration repair shopsPhoto processing plantsAuto body shopsPlastic manufacturing plantsFurniture refinishing areas and establishmentsNew building constructionRemodeling areasGarages with workshops9
Outdoor Armor Water Heater Installation & Operation Manual2 Prepare water heaterRemove water heater from wood pallet1. After removing the outer shipping carton from the waterheater, remove the installation kit.2. Remove the front door to access the lag bolts in front ofthe unit (FIG. 2-1).3. To remove the water heater from the pallet (afterremoving the front door):a. Remove the two lag bolts from the wood palletinside the water heater (FIG. 2-1).b. Detach the water heater from the lag bolts in the rearof the unit, see FIG. 2-1.NOTICEDo not drop the water heater or bump thejacket on the floor or pallet. Damage tothe water heater can result.Figure 2-1 Water heater Mounted on Shipping PalletInstall flue pipe assembly - Models151 - 601 (reference FIG. 2-2 for flue pipe assembly installation)The outdoor water heater is shipped with all the necessaryvent components. All components must be installed prior tooperation. Basic steps are listed below to guide you throughthe installation of the flue pipe assembly provided with theunit.1. Locate all venting components from the installation kitand carton.2. Before connecting the vent pipe sections or components,verify the gasket is seated evenly inside the groove in thefemale end of the elbow and flue adapter.3. Remove the factory provided screws from the vent/aircover and use them to install the wall strap.4. Insert the elbow into the flue adapter.Do not use grease or other lubricant CAUTIONon the vent seals. Only water may beused for this purpose. Grease or otherlubricant can make the seal brittle or itcan result in tears in the surface of theseal, this will result in flue gas leakage.5. Slide the flue pipe through the wall strap and insert it intothe elbow.6. Install the bird screen into the top of the vent.Figure 2-2 Install Flue Pipe Assembly - Models 151 - 601Install flue pipe assembly - Models701 - 801 (reference FIG. 2-3 for flue pipe assembly installation)The outdoor water heater is shipped with all the necessaryvent components. All components must be installed prior tooperation. Basic steps are listed below to guide you through theinstallation of the flue pipe assembly provided with the unit.1. Locate all venting components from the installation kit andcarton.2. Before connecting the vent pipe sections or components,verify the gasket is seated evenly inside the groove in thefemale end of all pieces.3. Remove the vent cover from the back of the unit.4. Insert the elbow into the flue adapter and tighten the clampusing a 5/16" nut driver.5. Re-install the vent cover on the back of the unit.6. Remove the provided screws from the vent cover and usethem to install the wall strap.Figure 2-3 Install Flue Pipe Assembly - Models 701 - 801NOTE: VERIFY GASKETS ARE SEATEDEVENLY INSIDE THE GROOVE.VENT TERMINATIONWALL STRAPFLUE PIPEBIRD SCREENFLUE PIPEELBOWNOTE: VERIFY GASKETS ARESEATED EVENLY INSIDETHE GROOVE.WALL STRAP SCREWSWALL STRAPIMG00442VENT/AIR COVERFLUE ADAPTERDo not use grease or other lubricant CAUTIONon the vent seals. Only water may beused for this purpose. Grease or otherlubricant can make the seal brittle or itcan result in tears in the surface of theseal, this will result in flue gas leakage.7. Slide the flue pipe through the wall strap and insert it intothe elbow, tighten clamp.8. Install the bird screen into the top of the vent and tightenthe clamp.IMG0044510WALL STRAPSCREWSELBOWCLAMPVENT COVER
Outdoor Armor Water Heater Installation & Operation Manual2 Prepare water heater (<strong>continued</strong>)Gas conversionsFigure 2-4 Installing Propane Orifice - Models 151 - 286 WARNINGTable 2A LP Conversion TableLP Conversion TableModelLP Orifice Stamping151 150200 210 / W150286 285400 8.0Models 151 - 2861. Remove the top and front access covers from the unit(Phillips screwdriver required for removal).2. Remove the three screws securing the gas valve to theventuri (FIG. 2-4).3. Locate the propane orifice disk from the conversion kit bag.Verify that the stamping on the orifice disk matches thewater heater size (151 – 286) (see Table 2A above).Place the orifice into the black rubber grommet in the sideof the gas valve and secure in the valve (FIG. 2-4).4. Reposition the gas valve against the venturi and replace thescrews (FIG. 2-4) securing the valve to the venturi.5. After installation is complete, attach the propane conversionlabel (in the conversion kit bag) next to the water heaterrating plate. Attach the LP caution label (in the conversionkit bag) to the left side of the unit in the lower left corner.6. Replace the top and front access covers. WARNINGFor a water heater already installed, youmust turn off gas supply, turn off powerand allow the water heater to cool beforeproceeding. You must also completely testthe water heater after conversion to verifyperformance as described under Start-up,Section 10 of this manual. Failure to complycould result in severe personal injury, death,or substantial property damage.For Models 151 - 400 you must install apropane orifice to operate the outdoor waterheater on propane gas. Verify when installingthat the orifice size marking matches waterheater size (Models 151 – 400, Table 2A).The 501 - 801 Models do not require anorifice installation for propane operation,but they will require a valve adjustment.After converting to LP, check combustionper the Start-up procedure in Section 10of this manual. Failure to check and verifycombustion could result in severe personalinjury, death, or substantial property damage.Model 4001. Remove the top and front access covers from the unit(Phillips screwdriver required for removal).2. Remove the three screws securing the venturi to theblower.Note: When separating the venturi from the blower,take care not to damage the O-ring inside the blower(FIG. 2-5 on page 12).3. Remove the four screws securing the gas valve to theventuri (FIG. 2-5).4. Locate the propane orifice disk from the conversion kitbag. Verify that the stamping on the orifice disk matchesthe water heater size (see Table 2A).5. Remove the existing orifice from the O-ring in the side ofthe gas valve and replace it with the orifice from the kit.Position and secure the orifice in the valve as shown inFIG. 2-5.6. Reposition the gas valve against the venturi and replacethe screws (FIG. 2-5) securing the valve to the venturi.7. Inspect the O-ring inside the blower. Handle the O-ringwith care, do not damage. Reposition the venturi againstthe blower and replace the screws securing the venturi tothe blower (FIG. 2-5).8. After installation is complete, attach the propaneconversion label (in the conversion kit bag) next to thewater heater rating plate. Attach the LP caution label (inthe conversion kit bag) to the left side of the unit in thelower left corner.9. Replace the top and front access covers. WARNING DANGERAfter converting to LP, check combustionper the Start-up procedure in Section 7 ofthis manual. Failure to check and verifycombustion could result in severe personalinjury, death, or substantial propertydamage.Armor 400: Inspect the O-ring whenthe blower is disassembled. The O-ringmust be in good condition and must beinstalled. Failure to comply will cause agas leak, resulting in severe personal injuryor death.11
Outdoor Armor Water Heater Installation & Operation Manual2 Prepare water heaterFigure 2-5 Installing Propane Orifice - Model 400Model 5011. Remove the top access cover from the unit (Phillipsscrewdriver required for removal).2. Turn the adjustment screw on the gas valve clockwiseuntil it stops. Then turn the adjustment screwcounterclockwise four and three quarter (4 3/4) turns(see FIG. 2-6).3. Use a combustion analyzer to verify CO 2 is withinthe range of 9.6 – 10.5%. If not, adjust the screwcounterclockwise incrementally to raise CO 2 andclockwise to lower CO 2 (FIG. 2-6).4. After adjustment is complete, attach the propaneconversion label (in the conversion kit bag) next to thewater heater rating plate. Attach the LP caution label (inthe conversion kit bag) to the left side of the unit in thelower left corner.5. Replace the top access cover. WARNINGAfter converting to LP, check combustionper the Start-up procedure in Section10 of this manual. Failure to check andverify combustion could result in severepersonal injury, death, or substantialproperty damage.Figure 2-6 Gas Valve Adjustment - Model 5014. Use a combustion analyzer to verify CO 2 is within the rangeof 9.6 – 10.5%. If not, adjust the screw counterclockwiseincrementally to raise CO 2 and clockwise to lower CO 2(FIG. 2-7).5. After adjustment is complete, attach the propane conversionlabel (in the conversion kit bag) next to the water heaterrating plate. Attach the LP caution label (in the conversionkit bag) to the left side of the unit in the lower left corner.6. Replace the gas valve cover along with the top access cover. WARNINGFigure 2-7 Gas Valve Adjustment - Models 601 - 801COVERALLEN WRENCHLeveling the water heaterAfter converting to LP, check combustionper the Start-up procedure in Section10 of this manual. Failure to check andverify combustion could result in severepersonal injury, death, or substantialproperty damage.ADJUSTMENT SCREW1. Set the water heater in place and check level.a) Adjust legs if necessary to level the water heater,see FIG. 2-8 below.Figure 2-8 Leveling Legs on the Water HeaterModels 601 - 8011. Remove the top access cover from the unit (Phillipsscrewdriver required for removal).2. Remove the cover on top of the gas valve (FIG. 2-7).3. Turn the adjustment screw on top of the gas valveclockwise one and three quarter (1 3/4) turns on the 601Model, one and a half (1 1/2) turns on the 701 Model, andone turn on the 801 Model (see FIG. 2-7).12
Outdoor Armor Water Heater Installation & Operation Manual3 System pipingSystem water piping methodsObserve a minimum of 1/4 inch clearance around allun-insulated hot water pipes when openings around the pipesare not protected by non-combustible materials.General piping informationBasic steps are listed below along with illustrations on thefollowing pages (FIG.’s 3-6 thru 3-10), which will guide youthrough the installation of the outdoor water heater.1. Connect the cold water supply to the inlet side of the waterheater.2. Connect the hot water supply to the outlet side of the waterheater.3. Install a backflow preventer on the cold feed make-up waterline.4. Install the factory supplied pump as shown in FIG.’s 3-6thru 3-10. If pump is installed outdoors use pump cover,reference the Pump Cover Installation section on this page.5. Install an expansion tank on the system supply. Consult thetank manufacturer’s instruction for specific informationrelating to tank installation. Size the expansion tank for therequired system volume and capacity.6. Install a drain valve at the lowest point of the system.7. This appliance is supplied with a relief valve sized inaccordance with ASME Boiler and Pressure Vessel Code,Section IV (“Heating Boilers”). Pipe the discharge of thesafety relief valve to a suitable drain to prevent injury inthe event of pressure relief. Pipe the discharge to a drain.Provide piping that is the same size as the safety relief valveoutlet. Never block the outlet of the safety relief valve.Pump cover installation reference FIG.’s 3-1 and 3-2 forpump cover installation)If the water heater was purchased with a pump, please followthe instructions below to install the pump and outdoor coverassembly. If a field supplied pump is used, ensure that itis installed per the manufacturer’s specification in regardto indoor or outdoor location. An outdoor rated pump isrecommended.1. Locate the pump, pump cover assembly, flange kit andadditional mounting nuts.2. Before installing the pump, ensure the intended pipinglocation allows room for the sheet metal cover assemblywithout interference.3. Install the pump with the provided flanges and hardware.4. Mount the pump cover base sheet metal aligning the holesfor the piping and the bolts.5. Using additional nuts, secure the sheet metal to the pumpbolts.6. Install the sheet metal top on the base with the providedscrews (10x).Figure 3-1 Pump Cover Installation - Models 151 - 286SCREWS (10X)PUMP COVERTOP BASEPUMP COVERBOTTOM BASEMOUNTINGNUTS WARNINGPUMPIMG00456Figure 3-2 Pump Cover Installation - Models 400 - 801SCREWS (10X)PUMP COVERTOP BASEPUMP COVERBOTTOM BASEMOUNTINGNUTSPUMPIMG00457The relief valve, tee and other necessaryfittings are shipped in the install kit with thewater heater and are to be field installed.See the *piping illustrations included in this section, FIG.’s 3-6thru 3-10 for suggested guidelines in piping the outdoor waterheater.*Please note that these illustrations are meantNOTICEto show system piping concept only, theinstaller is responsible for all equipment anddetailing required by local codes.Flow switch and relief valve installationBasic steps are listed below to guide you through the installationof the flow switch and relief valve provided with the unit.1. Install the tee with the 3/4 inch fitting positioned verticallyand on the top as shown in FIG. 3-3.2. Install the relief valve into the 3/4 inch fitting of the teeinstalled in Step 1 (FIG. 3-3).3. Install the close nipple on the downstream side of thetemperature and pressure relief valve tee (FIG. 3-3).4. Install the tee with the 1 inch fitting positioned verticallyand on the top (FIG. 3-3).13
Installation & Operation Manual3 System piping5. Attach the paddle to the flow switch per the manufacturer’sinstructions. Reference Table 3A to select thecorrect paddle for the pipe size used (consult themanufacturer’s instructions for a detailed explanation).For Example: If using a 1 1/4 inch pipe size (ModelsOAN151 - OAN200) select paddle #1.6. Install the assembled flow switch into the 1 inch fitting ofthe tee installed in Step 4 (see FIG. 3-3).NOTICETurn the sensitivity screw clockwise to increasethe flow rate required to activate the switch.Turn the sensitivity screw counterclockwise todecrease the flow rate required to activate theswitch.Figure 3-4 Flow Switch AdjustmentNORMALLYOPENNOTICEBe sure to install flow switch so that the arrowon the flow switch is pointing in the directionof the flow (see FIG. 3-4).SENSITIVITYADJUSTMENTFigure 3-3 Flow Switch and Relief Valve InstallationGROUNDCOMMONNORMALLYCLOSEDRELIEF VALVECLOSE NIPPLEFLOWSWITCHTEE WITH 1"FITTING ON TOPCLOSE NIPPLETEE WITH 3/4"FITTING ON TOPCOUPLING6" NIPPLE(400-701 ONLY)IMG00424ScaldingThis water heater can deliver scalding temperature water at anyfaucet in the system. Be careful whenever using hot water to avoidscalding injury. Certain appliances such as dishwashers andautomatic clothes washers may require increased temperaturewater. By setting the thermostat on this water heater to obtainthe increased temperature water required by these appliances,you may create the potential for scald injury. To protect againstinjury, you should install a mixing valve in the water system.This valve will reduce point of discharge temperature by mixingcold and hot water in branch supply lines. Such valves areavailable from the local plumbing supplier.Flow switch adjustmentRefer to Table 3A for the proper setting of the sensitivity screw.For reference, the position of the screw prior to setting shouldbe turned clockwise with a Phillips driver until it stops (FIG.3-4). Proceed to turn the screw counterclockwise the amountof turns listed in Table 3A based on the model.Consult the manufacturer’s instructions for wiring the flowswitch to your system.Figure 3-5 Scald Warning Label Located on the ApplianceTable 3A Paddle Size / Sensitivity Screw AdjustmentMODEL PADDLE SIZESENSITIVITY SCREWADJUSTMENTNote: Paddles are included with the flow switch.151 #1 9 turns200 #1 6 turns286 #3 8¾ turns400 #1 8 turns501 #1 7½ turns601 #1 7 turns701 #1 6½ turns801 #1 5½ turns14
Installation & Operation Manual3 System piping (<strong>continued</strong>)The following chart (Table 3B) details the relationship of watertemperature and time with regard to scald injury and may beused as a guide in determining the safest water temperature foryour applications.Table 3B Approximate Time / Temperature Scald ChartAPPROXIMATE TIME / TEMPERATURERELATIONSHIPS IN SCALDS120°F More than 5 minutes125°F 1 1/2 to 2 minutes130°F About 30 seconds135°F About 10 seconds140°F Less than 5 seconds145°F Less than 3 seconds150°F About 1 1/2 seconds155°F About 1 secondWater chemistryThe required temperature rise and theNOTICEstandard circulating pump are sized basedon the heating of potable water with ahardness of 5 to 25 grains per gallon anda total dissolved solids not exceeding 350ppm. Consult the manufacturer whenheating potable water exceeding thesespecifications.Heating of high hardness and/or high total dissolved solidswater may require a larger circulating pump, and a revisedtemperature rise specification based on the water chemistry ofthe water to be heated.Water with a hardness of less than 5 grains per gallon willusually have a pH which can be aggressive and corrosivecausing non-warrantable damage to the pump, and associatedpiping. Corrosion due to water chemistry generally shows upfirst in the hot water system because heated water increasesthe rate of corrosive chemical reactions.Table 3C Water Heater Pump Applications / RecommendedTemperature RiseModelPiping componentsWater heater system piping:Water heater system piping MUST be sized per the piperequirements listed in FIG.’s 3-9 and 3-10. Reducing the pipesize can restrict the flow rate through the water heater, causinginadvertent high limit shutdowns and poor system performance.Check valves:Field supplied. Check valves are recommended for installationas shown in FIG.’s 3-6 thru 3-10.Water heater isolation valves:Field supplied. Full port ball valves are required. Failure to usefull port ball valves could result in a restricted flow rate throughthe water heater.Anti-scald mixing valve:Field supplied. An anti-scald mixing valve is recommendedwhen storing domestic hot water above 115°F.Unions:Field supplied. Recommended for unit serviceability.Temperature and pressure relief valve:Factory supplied on water heaters. The temperature and pressurerelief valve is sized to ASME specifications. Storage tanks mayrequire additional valves depending on local codes.Tank sensor:<strong>Lochinvar</strong> supplies a tank sensor. The tank sensor must beinstalled in the tapping provided in the lower 25% of the storagetank to achieve proper operation. As shipped from the factory,the tank sensor is in the literature package shipped with the unit.Placing the sensor in the tapping provided on the storage tankwill improve temperature response and prevent short cycles ofoperation.*PipeSizeWater Heater Pump ApplicationsArmstrong GrundfosFlow Rate(GPM)Loss(FT/HD)Temp.Rise151 1-1/4" E8 -- 16 16.6 18°F200 1-1/4" E8 -- 21 11.8 18°F286 2" E17 -- 30 17.1 18°F400 2" E24 -- 39 21 18°F501 2" E22 -- 53 26 18°F601 2" E22 -- 53 26 22°F701 2" -- TP 40-160 63 32 22°F801 2" -- TP 40-160 67 31 24°FNOTICEPump sizing and flow requirements are based on 45 feet ofpiping, 4 - 90° elbows, and 2 - fully ported ball valves.15
Installation & Operation Manual3 System pipingFigure 3-6 Single Heater - Single TankCOLD WATERSUPPLYMIXING VALVETHERMOMETERFLOW CHECKVALVE (TYPICAL)BUILDINGRETURNBALL VALVE(TYPICAL)WATERHEATERCIRCULATORWATERHEATERHOT WATERSUPPLYUNION(TYPICAL)TEMPERATURE& PRESSURERELIEF VALVEFLOW SWITCHSTORAGETANKIMG00302DRAINY-STRAINER(RECOMMENDED) CAUTIONNOTICEThe piping will not support the weight of the water heater circulator pump. Do not attempt to supportthe weight of the water heater circulator pump with the piping or its accessories. Refer to the pumpmanufacturer’s installation instructions. Failure to comply could result in severe personal injury, death, orsubstantial property damage.Please note that these illustrations are meant to show system piping concept only, the installer is responsiblefor all equipment and detailing required by local codes.Indoor tank shown for illustration purposes.16
Installation & Operation Manual3 System piping (<strong>continued</strong>)Figure 3-7 Single Heater - Single Tank (2 Temperature)FLOW CHECKVALVE (TYPICAL)180° HOTWATERSUPPLY140° HOTWATERSUPPLYMIXINGVALVETHERMOMETER(TYPICAL)UNION(TYPICAL)BALL VALVE(TYPICAL)TEMPERATURE& PRESSURERELIEF VALVE(TYPICAL)HIGH TEMPERATUREBUILDING RETURNWATER HEATERCIRCULATORLOWTEMPERATUREBUILDINGRETURNSTORAGETANKCOLDWATERSUPPLYEXPANSIONTANKFLOWSWITCHIMG00361DRAINY-STRAINER(RECOMMENDED)WATERHEATER CAUTIONNOTICEThe piping will not support the weight of the water heater circulator pump. Do not attempt to supportthe weight of the water heater circulator pump with the piping or its accessories. Refer to the pumpmanufacturer’s installation instructions. Failure to comply could result in severe personal injury, death, orsubstantial property damage.Please note that these illustrations are meant to show system piping concept only, the installer is responsiblefor all equipment and detailing required by local codes.Indoor tank shown for illustration purposes.17
Outdoor Armor Water Heater Installation & Operation Manual3 System pipingFigure 3-8 Single Heater - Double TankBALL VALVE(TYPICAL)FLOW CHECKVALVE (TYPICAL)COLD WATERSUPPLYMIXING VALVEBUILDINGRETURNEXPANSION TANKWATER HEATERCIRCULATORTHERMOMETERFLOW SWITCHHOT WATERSUPPLYUNION(TYPICAL)TEMPERATURE& PRESSURERELIEF VALVE(TYPICAL)WATER HEATERIMG00309Y-STRAINER(RECOMMENDED)STORAGE TANK(TYPICAL)DRAIN(TYPICAL) CAUTIONNOTICEThe piping will not support the weight of the water heater circulator pump. Do not attempt to supportthe weight of the water heater circulator pump with the piping or its accessories. Refer to the pumpmanufacturer’s installation instructions. Failure to comply could result in severe personal injury, death, orsubstantial property damage.Please note that these illustrations are meant to show system piping concept only, the installer is responsiblefor all equipment and detailing required by local codes.Indoor tank shown for illustration purposes.18
Outdoor Armor Water Heater Installation & Operation Manual3 System piping (<strong>continued</strong>)Figure 3-9 Double Heater - Single TankNumber of UnitsModel 2 3 4 5 6 7 8Required Pipe Sizes in NPT151 1 1/2" 2" 2" 2" 2 1/2" 3" 3"200 1 1/2" 2" 2 1/2" 2 1/2" 3" 3" 4"286 2" 2 1/2" 2 1/2" 3" 3" 4" 4"400 2 1/2" 3" 3 1/2" 4" 4" 5" 5"501 3" 3 1/2" 4" 5" 5" 5" 6"601 3" 3 1/2" 4" 5" 5" 5" 6"701 3" 4" 5" 5" 6" 6" 6"801 3" 4" 5" 6" 6" 6" 6"EXPANSION TANKWATER HEATERCIRCULATOR(TYPICAL)WATER HEATER(TYPICAL)COLD WATERSUPPLYUNION(TYPICAL)FLOW CHECKVALVE (TYPICAL)BALL VALVE(TYPICAL)BUILDING RETURNHOT WATERSUPPLYTHERMOMETERTHERMOMETER& PRESSURERELIEF VALVEY-STRAINER(RECOMMENDED)STORAGE TANKDRAINIMG00362 CAUTIONNOTICEThe piping will not support the weight of the water heater circulator pump. Do not attempt to supportthe weight of the water heater circulator pump with the piping or its accessories. Refer to the pumpmanufacturer’s installation instructions. Failure to comply could result in severe personal injury, death, orsubstantial property damage.Please note that these illustrations are meant to show system piping concept only, the installer is responsiblefor all equipment and detailing required by local codes.Indoor tank shown for illustration purposes.19
Outdoor Armor Water Heater Installation & Operation Manual3 System pipingFigure 3-10 Double Heater - Double TankCOLD WATERSUPPLYNumber of UnitsModel 2 3 4 5 6 7 8Required Pipe Sizes in NPT151 1 1/2" 2" 2" 2" 2 1/2" 3" 3"200 1 1/2" 2" 2 1/2" 2 1/2" 3" 3" 4"286 2" 2 1/2" 2 1/2" 3" 3" 4" 4"400 2 1/2" 3" 3 1/2" 4" 4" 5" 5"501 3" 3 1/2" 4" 5" 5" 5" 6"601 3" 3 1/2" 4" 5" 5" 5" 6"701 3" 4" 5" 5" 6" 6" 6"801 3" 4" 5" 6" 6" 6" 6"FLOW CHECKVALVE (TYPICAL)BUILDINGRETURNHOT WATERSUPPLYTHERMOMETERMIXING VALVEUNION(TYPICAL)EXPANSIONTANKWATERHEATER(TYPICAL)FLOWSWITCH(TYPICAL)WATER HEATERCIRCULATOR(TYPICAL)BALL VALVE(TYPICAL)Y-STRAINER(RECOMMENDED)TEMPERATURE& PRESSURERELIEF VALVE(TYPICAL)IMG00399STORAGE TANK(TYPICAL)DRAIN(TYPICAL) CAUTIONNOTICE20The piping will not support the weight of the water heater circulator pump. Do not attempt to supportthe weight of the water heater circulator pump with the piping or its accessories. Refer to the pumpmanufacturer’s installation instructions. Failure to comply could result in severe personal injury, death, orsubstantial property damage.Please note that these illustrations are meant to show system piping concept only, the installer is responsiblefor all equipment and detailing required by local codes.Indoor tank shown for illustration purposes.
Outdoor Armor Water Heater Installation & Operation Manual4 Gas connectionsConnecting gas supply piping1. Remove the top access panel and refer to FIG.’s 4-1 thru 4-4to pipe gas to the water heater.a. Install ground joint union for servicing, whenrequired.b. On Models 151 - 400 install a manual shutoff valve inthe gas supply piping outside water heater jacket whenrequired by local codes or utility requirements.2. Install sediment trap / drip leg.Figure 4-3 Gas Supply Piping - Model 501GAS SUPPLYSEDIMENT TRAP/DRIP LEGMANUALSHUTOFF VALVE(FACTORY SUPPLIED)UNION(FACTORY INSTALLED)Figure 4-1 Gas Supply Piping - Models 151 - 200IMG00398Figure 4-4 Gas Supply Piping - Models 601 - 801GAS SUPPLYGAS SUPPLYUNIONDRIP LEGMANUAL SHUTOFF VALVE(FACTORY SUPPLIED)GAS SUPPLYSEDIMENT TRAP /DRIP LEGMANUALSHUT OFFVALVE(FIELD SUPPLIED)UNIONMANUALSHUTOFF VALVE(FIELD SUPPLIED)IMG00290Figure 4-2 Gas Supply Piping - Models 286 - 400IMG003973. Support piping with hangers, not by the water heater or itsaccessories. WARNINGSEDIMENT TRAP/DRIP LEGIMG00296The gas valve and blower will not supportthe weight of the piping. Do not attemptto support the weight of the piping withthe water heater or its accessories. Failureto comply could result in severe personalinjury, death, or substantial propertydamage.4. Purge all air from the gas supply piping.5. Before placing the water heater in operation, check thewater heater and its gas connection for leaks.a. The appliance must be disconnected from the gassupply piping system during any pressure testing ofthat system at a test pressure in excess of 1/2 PSIG(3.5 kPa).b. The appliance must be isolated from the gas supplypiping system by closing a manual shutoff valveduring any pressure testing of the gas supply pipingsystem at test pressures equal to or less than 1/2 PSIG(3.5 kPa).c. The appliance and its gas connection must be leaktested before placing it in operation.21
Outdoor Armor Water Heater Installation & Operation Manual4 Gas connections WARNING WARNING WARNING WARNINGDo not check for gas leaks with an openflame – use the bubble test. Failure to usethe bubble test or check for gas leaks cancause severe personal injury, death, orsubstantial property damage.6. Use pipe sealing compound compatible with propanegases. Apply sparingly only to male threads of the pipejoints so that pipe dope does not block gas flow.Failure to apply pipe sealing compound asdetailed in this manual can result in severepersonal injury, death, or substantialproperty damage.Outdoor Armor water heaters are typicallyshipped ready to fire on natural gas. Checkthe water heater rating plate to determinewhich fuel the water heater is set for. Ifset to natural gas, it may be converted toLP by installing an orifice or by makinga gas valve adjustment (see pages 11 and12). In order to operate on LP gas, anorifice MUST BE installed or a gas valveadjustment MUST BE made. Failure tocomply could result in severe personalinjury, death, or substantial propertydamage.Use two wrenches when tightening gaspiping at water heater (FIG. 4-5), usingone wrench to prevent the water heatergas line connection from turning. Failureto support the water heater gas connectionpipe to prevent it from turning coulddamage gas line components.Figure 4-5 Inlet Pipe with Backup WrenchNatural gas:Pipe sizing for natural gas1. Refer to Table 4A for pipe length and diameter. Based onrated water heater input (divide by 1,000 to obtain cubicfeet per hour).a. Table 4A is only for natural gas with specific gravity0.60 inches, with a pressure drop through the gaspiping of 0.50 inches w.c.b. For additional gas pipe sizing information, refer toANSI Z223.1 (or B149.1 for Canadian installations).Natural gas supply pressure requirements1. Pressure required at the gas valve inlet pressure port:• Maximum 14 inches w.c. with no flow (lockup) orwith water heater on.• Minimum 4 inches w.c. with gas flowing (verify duringwater heater startup).2. Install 100% lockup gas pressure regulator in supply line ifinlet pressure can exceed 14 inches w.c. at any time. Adjustlockup regulator for 14 inches w.c. maximum.Propane gas:Outdoor Armor water heaters are typically WARNINGshipped ready to fire on natural gas. Checkwater heater rating plate to determine whichfuel the water heater is set for. If set tonatural gas, it may be converted to LP byinstalling an orifice or by making a gas valveadjustment (see pages 11 and 12). In orderto operate on LP gas, an orifice MUST BEinstalled or a gas valve adjustment MUSTBE made. Failure to comply could result insevere personal injury, death, or substantialproperty damage.Pipe sizing for propane gasIMG00297USE BACKUP WRENCH TOPREVENT PIPE FROM ROTATINGNOTICEMaximum inlet gas pressure must notexceed the value specified. Minimum WARNINGvalue listed is for the purposes of inputadjustment.221. Contact gas supplier to size pipes, tanks, and 100% lockupgas pressure regulator.Propane supply pressure requirements1. Adjust propane supply regulator provided by the gassupplier for 14 inches w.c. maximum pressure.2. Pressure required at gas valve inlet pressure port:• Maximum 14 inches w.c. with no flow (lockup) or withwater heater on.• Minimum 8 inches w.c. with gas flowing (verify duringwater heater startup).Ensure that the high gas pressure regulatoris at least 6 - 10 feet upstream of theappliance.
Outdoor Armor Water Heater Installation & Operation Manual4 Gas connections (<strong>continued</strong>)Table 4A Natural Gas Pipe Size ChartNominalIron PipeSize (Inches)Single UnitNatural Gas Pipe Capacity ChartLength of Pipe in Straight Feet for 1/2 PSI10 20 30 40 50 60 70 80 90 100 125 150 175 2001/2 175 120 97 82 N/A N/A N/A N/A N/A N/A N/A N/A N/A N/A3/4 369 256 205 174 155 141 128 121 113 106 95 86 79 741 697 477 384 328 292 267 246 236 210 200 179 164 149 1381-1/4 1400 974 789 677 595 543 502 472 441 410 369 333 308 2871-1/2 2150 1500 1210 1020 923 830 769 707 666 636 564 513 472 4412 4100 2820 2260 1950 1720 1560 1440 1330 1250 1180 1100 974 871 8202-1/2 6460 4460 3610 3100 2720 2460 2310 2100 2000 1900 1700 1540 1400 13003 11200 7900 6400 5400 4870 4410 4000 3800 3540 3330 3000 2720 2500 23404 23500 16100 13100 11100 10000 9000 8300 7690 7380 6870 6150 5640 5130 4720 WARNINGOutdoor Armor water heaters are typically shipped ready to fire on natural gas. Check the water heater ratingplate to determine which fuel the water heater is set for. If set to natural gas, it may be converted to LP byinstalling an orifice or by making a gas valve adjustment (see pages 11 and 12). In order to operate on LP gas,an orifice MUST BE installed or a gas valve adjustment MUST BE made. Failure to comply could result in severepersonal injury, death, or substantial property damage.Check inlet gas supplyNOTICE WARNINGCSA or UL listed flexible gas connections areacceptable, but you must exercise caution toensure that the line has adequate capacityto allow your water heater to fire at fullrate. Consult with local codes for properinstallation or service procedures.DO NOT adjust or attempt to measuregas valve outlet pressure. The gas valve isfactory-set for the correct outlet pressure.This setting is suitable for natural gas andpropane, requiring no field adjustment.Attempting to alter or measure the gas valveoutlet pressure could result in damage tothe valve, causing potential severe personalinjury, death, or substantial property damage.The gas piping must be sized for the proper flow and length ofpipe, to avoid excessive pressure drop. Both the gas meter andthe gas regulator must be properly sized for the total gas load.If you experience a pressure drop greater than 1 inch w.c., themeter, regulator, or gas line is undersized or in need of service.Perform the steps below when checking inlet gas supply:1. Turn the main power switch to the “OFF” position.2. Shut off gas supply at the manual gas valve in the gaspiping to the appliance.3. On Models 151 - 501 loosen the set screw one (1) fullturn from inside the pressure tap on top of the gas valve.On Models 601 - 801 remove the 1/8" (3 mm) pipe plugon the inlet flange to the valve and install a suitable 1/8"(3 mm) fitting (field supplied) for the manometer tubing.Place the tubing of the manometer over the tap once theset screw is loosened or the 1/8" (3 mm) fitting is installed(depending on model) as shown in FIG.’s 4-6 thru 4-9 onpage 24.4. Slowly turn on the gas supply at the field installedmanual gas valve.5. Turn the power switch to the “ON” position.6. Adjust the temperature set point on the control panel ofthe SMART SYSTEM control module to call for heat.7. Observe the gas supply pressure as the burner fires at100% of rated input. Percent of burner input will bedisplayed on the control panel.8. Ensure inlet pressure is within specified range.Minimum and maximum gas supply pressures arespecified in this section of the manual.9. If gas supply pressure is within normal range and noadjustments are needed, proceed on to Step 11.10. If the gas pressure is out of range, contact the gas utility,gas supplier, qualified installer or service agency todetermine the necessary steps to provide proper gaspressure to the control.11. Turn the power switch to the “OFF” position.12. Shut off the gas supply at the manual gas valve in the gaspiping to the appliance.13. Remove the manometer from the pressure tap on top ofthe gas valve. On Models 151 - 501 re-tighten the setscrew inside the pressure tap. On Models 601 - 801remove the 1/8" (3 mm) field supplied fitting andreinstall the pipe plug removed in Step 3.When re-tightening the set screw, be sure to WARNINGtighten securely to prevent gas leaks.Do not check for gas leaks with an openflame -- use the bubble test. Failure touse the bubble test or check for gas leakscan cause severe personal injury, death, orsubstantial property damage.14. Turn on the gas supply at the manual gas valve.15. Turn the power switch to the “ON” position.16. Adjust the temperature set point on the control panel ofthe SMART SYSTEM control module to the desiredwater temperature so the appliance will call for heat.23
Outdoor Armor Water Heater Installation & Operation Manual4 Gas connections17. Check burner performance by cycling the system whileyou observe burner response. The burner should ignitepromptly. Flame pattern should be stable. Turn systemoff and allow burner to cool, then cycle burner again toensure proper ignition and flame characteristics.Figure 4-6 Inlet Gas Supply Check - Models 151 - 286LOOSEN THE SET SCREW ONE (1) FULL TURN ANDPLACE THE MANOMETER TUBING OVER THEPRESSURE TAPFigure 4-9 Inlet Gas Supply Check - Models 601 - 801REMOVE THE 1/8” (3MM) PIPE PLUG ONTHE INLET FLANGE TO THE VALVE ANDINSTALL A SUITABLE 1/8” (3MM) FITTING(FIELD SUPPLIED) FOR THE MANOMETERTUBING.DETAILIMG00403IMG00400Figure 4-7 Inlet Gas Supply Check - Model 400LOOSEN THE SET SCREW ONE (1) FULL TURN ANDPLACE THE MANOMETER TUBING OVER THEPRESSURE TAPDETAILGas pressureThe gas pressure must remain between 4 inches w.c. (natural),8 inches w.c. (LP) minimum and 14 inches w.c. (natural andLP) maximum during stand-by (static) mode and while inoperating (dynamic) mode. If an in-line regulator is used, itmust be a minimum of 10 feet from the outdoor water heater. Itis very important that the gas line is properly purged by the gassupplier or utility company. Failure to properly purge the linesor improper line sizing, will result in ignition failure.The problem is especially noticeable in NEW LP installationsand also in empty tank situations. This can also occur whena utility company shuts off service to an area to providemaintenance to their lines.IMG00401Figure 4-8 Inlet Gas Supply Check - Model 501DETAILGas valve replacementThe gas valve MUST NOT be replaced with a conventional gasvalve under any circumstances. As an additional safety feature,this gas valve has a flanged connection to the venturi and blower. WARNINGFailure to follow all precautions could resultin fire, explosion, or death!LOOSEN THE SET SCREW ONE (1) FULL TURN ANDPLACE THE MANOMETER TUBING OVER THEPRESSURE TAPDETAIL WARNINGDO NOT adjust gas valve outlet pressure.The gas valve is factory-set for the correctoutlet pressure. This setting is suitablefor natural gas and propane, requiringno field adjustment. Attempting to alterthe gas valve outlet pressure could resultin damage to the valve, causing potentialsevere personal injury, death, or substantialproperty damage.IMG0040224
Outdoor Armor Water Heater Installation & Operation Manual5 Field wiring WARNINGNOTICE CAUTIONRECIRCULATIONPUMPELECTRICAL SHOCK HAZARD – Foryour safety, turn off electrical power supplybefore making any electrical connectionsto avoid possible electric shock hazard.Failure to do so can cause severe personalinjury or death.Wiring must be N.E.C. Class 1.WGBKIf original wiring as supplied with thewater heater must be replaced, use onlytype 105°C wire or equivalent.The water heater must be electricallygrounded as required by NationalElectrical Code ANSI/NFPA 70 – latestedition.All wiring exterior to the appliance mustbe enclosed in approved conduit.Label all wires prior to disconnectionwhen servicing controls. Wiring errors cancause improper and dangerous operation.Figure 5-1 Line Voltage Field Wiring ConnectionsL2/NSERVICESWITCHGL1120V SUPPLYLINE GROUND NEUTRALBKGWInstallation must comply with:1. National Electrical Code and any other national, state,provincial, or local codes, or regulations.Line voltage connections1. Connect 120 VAC power wiring to the line voltageterminal strip in the junction box, as shown in FIG. 5-1.2. Provide and install a fused disconnect or service switch(15 amp recommended) as required by the code (seeFIG. 5-1).3. The DHW (water heater) pump is shipped loose on allArmor models. Wire the water heater pump as shown inFIG. 5-1.4. The outdoor water heater is capable of controlling abuilding recirculation pump (field supplied). Wire thebuilding recirculation pump as shown in FIG. 5-1.5. Dry contacts are sized for 1 hp/120V, 2 hp/240V or15A/120V, 25A/240V.Low voltage connections1. Route all low voltage wires through the knockouts in therear of the water heater, as shown in FIG. 5-2.2. Connect low voltage wiring to low voltage connectionboard as shown in FIG. 5-3 on page 28 of this manual andthe water heater wiring diagram.DOMESTICHOT WATERPUMPWGBKL4/NGL3Figure 5-2 Routing Field Wiring (Models 151 - 286)LOW VOLTAGECONNECTION BOARDLINE VOLTAGEJUNCTION BOXLOW VOLTAGEWIRINGKNOCKOUTPLUGSIMG00298LINE VOLTAGEWIRING KNOCKOUT PLUGS25
Outdoor Armor Water Heater Installation & Operation Manual5 Field wiringTank thermostat1. Connect the tank thermostats (isolated contact only) tothe tank thermostat contacts as shown in FIG. 5-3.Tank sensor1. By installing a tank sensor, the SMART SYSTEM controlcan perform the tank thermostat function. The SMARTSYSTEM control automatically detects the presence ofthis sensor and generates a DHW call for heat whenthe tank temperature drops below the programmeddifferential and finishes the call for heat when the tanktemperature reaches above the programmed offset.2. The tank sensor TST20015 is the only sensor suitablefor use with the SMART SYSTEM control. Connect thesensor leads to the Tank Sensor terminals on the LowVoltage Connection Board (FIG. 5-3).High gas pressure switchIf a switch is provided to detect excessive gas pressure, removethe jumper wire from the terminals on the connection board,and then connect them to its normally closed contacts(FIG. 5-3).Low gas pressure switch1. If a switch is provided to detect low gas pressure, removethe jumper wire from the terminals on the connectionboard and connect them to its normally open contacts(FIG. 5-3).2. If both a high and low gas pressure switch are used,connect their respective contacts in series, and connectthem to the terminals on the connection board (FIG.5-3).NOTICESee Section 4 - Gas Connections for adetailed explanation regarding high andlow gas pressure switch operation.Flow switch1. A flow switch is used to guarantee flow through the waterheater before allowing it to fire. The flow switch must beinstalled at the water heater outlet.2. Connect these terminals to the normally open contacts onthe flow switch (FIG. 5-3).Rate outputThis output provides a 0 - 10V signal that is proportional tothe firing rate of the water heater. This may be used by a BMSsystem to monitor the actual rate of the water heater.ModBusWhen the optional ModBus interface module is installed, theRS-485 ModBus cable is connected to these terminals. Useshielded, 2-wire twisted pair cable. If desired, the shield canbe connected to ground by installing a jumper wire betweenterminals 1 and 3 on connector X5 on the optional ModBusinterface module.Water heater Building ManagementSystem (BMS)1. An external control may be connected to control either thefiring rate or the set point of the water heater. If the externalcontrol uses a set of contacts to enable the water heater,connect the contacts to the Tank Thermostat terminals.Otherwise, the SMART SYSTEM control will be enabled bythe 0-10V signal.2. Make sure the (-) terminal is connected to the (-) orcommon output terminal of the external control, and the(+) terminal is connected to the (+) or 0 - 10 VDC terminalof the external control. Make sure the (-) voltage is notbelow ground.26
Outdoor Armor Water Heater Installation & Operation Manual5 Field wiring (<strong>continued</strong>)Runtime contactsThe SMART SYSTEM control closes a set of dry contactswhenever the burner is running. This is typically used byBuilding Management Systems to verify that the waterheater is responding to a call for heat.Alarm contactsThe SMART SYSTEM control closes another set of contactswhenever the water heater is locked out or the power isturned off. This can be used to turn on an alarm, or signala Building Management System that the water heater isdown.Wiring of the cascadeWhen wiring the water heaters for Cascade operation, selectone water heater as the Leader water heater. The remainingwater heaters will be designated as Members. See page 35“Configuration of the Cascade” for a detailed explanationof this procedure.Connect the tank sensor to the Leader water heater. For theCascade system to work properly the tank sensor must beinstalled. The tank sensor should be wired to the low voltageconnection board at the terminals marked for the tanksensor (see FIG. 5-3). The Leader control will use the watertemperature at the tank sensor to control the operation ofthe Cascade.Communication between the Leader water heater and theMember water heaters is accomplished by using shielded,2-wire twisted pair communication cable. Connect one ofthe twisted pair wires to Cascade terminal A on each ofthe Low Voltage Connection boards, and the other wire ofthe twisted pair to Cascade terminal B on each of the LowVoltage Connection Boards. Connect the shield wires toone of the shield terminals on the Low Voltage ConnectionBoards (FIG. 5-3). If more than two water heaters are on theCascade, daisy chain the wiring from the Cascade terminalson the second water heater to the Cascade terminals on thethird water heater, then from the third to the forth, and soon. The connections between heaters can be made in anyorder, regardless of the addresses of the water heaters. Tryto keep each cable as short as possible.27
Outdoor Armor Water Heater Installation & Operation Manual5 Field wiringFigure 5-3 Low Voltage Field Wiring ConnectionsFLOW SWITCHCOMNOTANK THERMOSTATLOW WATER CUTOFFFROMPREVIOUSHEATERBASHIELD SHIELDBATONEXTHEATERTANK SENSORBUILDINGMANAGEMENTSYSTEMABIMG0042328
Outdoor Armor Water Heater Installation & Operation Manual6 Condensate disposalCondensate drain1. This water heater is a high efficiency appliance thatproduces condensate.2. The side of the water heater has a 1/2 inch PVC unionfor connection of a 1/2 inch PVC pipe (FIG. 6-1).3. Slope condensate tubing down and away from the waterheater into a drain or condensate neutralizing filter.Condensate from the outdoor water heater will beslightly acidic (typically with a pH from 3 to 5). Installa neutralizing filter if required by local codes.A Neutralizer Kit (FIG. 6-1) is available from the factory(KIT3087 for Models 151 - 501 and KIT3046 for Models601 - 801).4. Install the 1/2 inch PVC tee assembly (shipped with theunit) as shown in FIG. 6-1.5. Leave the top of the 1/2 inch tee OPEN. This is neededas a vacuum break.6. Do not expose condensate line to freezing temperatures.Precautions should be taken to protect the condensatemanagement and disposal system during extendedperiods of outdoor temperatures below 32°F.NOTICENOTICEUse materials approved by the authorityhaving jurisdiction. In the absence of otherauthority, PVC and CPVC pipe must complywith ASTM D1785 or D2845. Cement andprimer must comply with ASME D2564 orF493.To allow for proper drainage on largehorizontal runs, a second line vent maybe required and tubing size may need toincrease to 1 inch.The condensate line must remainunobstructed, allowing free flow ofcondensate. If condensate is allowed tofreeze in the line or if the line is obstructedin any other manner, condensate can exitfrom the water heater tee, resulting inpotential water damage to property.8. A condensate removal pump is required if the water heateris below the drain. When installing a condensate pump,select one approved for use with condensing water heatersand furnaces. The pump should have an overflow switchto prevent property damage from condensate spillage. Theswitch should be wired in series with the blocked drainswitch inside the water heater (see FIG. 7-1 on page 30).7. Use only plastic tubing or piping as a condensate drainline (FIG. 6-1).Figure 6-1 Condensate Disposal1/2" PVC TEE ASSEMBLY(FACTORY SUPPLIED)IMG00300FLOOR DRAIN ORDRAIN PAN1/2" PVC UNION(FACTORY SUPPLIED)NEUTRALIZER KITKIT3087 shown for illustration purposes.29
Outdoor Armor Water Heater Installation & Operation Manual7 Start-upChlorine concentration less than 200 ppm1. Do not fill the water heater or operate with watercontaining chlorine in excess of 200 ppm.2. Filling with chlorinated fresh water should be acceptablesince drinking water chlorine levels are much lower.3. Do not use the water heater to directly heat swimmingpool or spa water.4. At initial fill and during water heater startup and testing,check system thoroughly for any leaks. Repair all leaksbefore proceeding further.Check for gas leaks WARNING WARNINGBefore starting the water heater, andduring initial operation, smell nearthe floor and around the water heaterfor gas odorant or any unusual odor.Remove the top access panel and smellthe interior of the water heater enclosure.Do not proceed with startup if there is anyindication of a gas leak. Use an approvedleak detection solution. Repair any leaksat once.DO NOT adjust gas valve outlet pressure.The gas valve is factory set for the correctoutlet pressure. This setting is suitablefor natural gas and propane, requiringno field adjustment. Attempting toalter the gas valve outlet pressure couldresult in damage to the valve, causingpotential severe personal injury, death, orsubstantial property damage. WARNINGPropane water heaters only – Your propanesupplier mixes an odorant with the propaneto make its presence detectable. In someinstances, the odorant can fade, and the gasmay no longer have an odor. Before startup(and periodically thereafter), have thepropane supplier verify the correct odorantlevel in the gas.Inspect/fill condensate systemInspect/check condensate lines and fittings1. Inspect the condensate drain line, condensate PVC fittingsand condensate trap.Fill condensate trap with water1. Remove the PVC cap retaining screw from the PVC cap(FIG. 7-1).2. Remove the 2 inch PVC cap with the switch located at thetop of the trap (FIG. 7-1).3. Fill with fresh water until the water begins to pour out ofthe drain.4. Replace the cap. Press the cap onto the trap until the capmakes contact with the drain.5. Replace the retaining screw. WARNINGThe condensate trap (FIG. 7-1) must be filledwith water during all times of water heateroperation to avoid flue gas emission fromthe condensate drain line. Failure to fill thetrap could result in severe personal injury ordeath.Figure 7-1 Condensate TrapRETAININGSCREW2” PVC CAP WITHBLOCKED DRAIN SWITCHPVC TEE ASSEMBLY(FACTORY SUPPLIED)CONDENSATE FROMHEAT EXCHANGERTO FLOORDRAIN30
Outdoor Armor Water Heater Installation & Operation Manual7 Start-up (<strong>continued</strong>)Final checks before starting the waterheater Read the Outdoor Armor Water Heater Service Manualto familiarize yourself with SMART SYSTEM controlmodule operation. Read this manual, pages 32 and 33 forproper steps to start the water heater. Verify the water heater and system are full of water andall system components are correctly set for operation. Verify the preparation procedures of Section 7, pages 30and 31 have been completed. Fill the vent condensate trap with water (removing theretaining screw in order to remove the 2 inch PVC capwith the switch located at the top of the trap). Replacethe cap. Press the cap onto the trap until the cap makescontact with the drain. Replace the retaining screw. Verify electrical connections are correct and securelyattached.Start the water heater1. Read and follow the Operating instructions in FIG.’s 7-2and 7-3, pages 32 and 33.If water heater does not start correctly1. Check for loose connections, blown fuse or service switchoff?2. Is water heater water temperature above 200°F?3. Is tank thermostat or tank set point set below tanktemperature?4. Is gas turned on at meter or water heater?5. Is incoming gas pressure less than 4 inches w.c.?If none of the above corrects the problem, refer to theTroubleshooting Section of the Outdoor Armor Water HeaterService Manual.Check system and water heater Check water piping1. Check system piping for leaks. If found, shut down thewater heater and repair immediately. (See WARNINGSon pages 30 and 31 (startup) regarding failure to repairleaks.)2. Check Delta T. Reference Section 3 - System Piping onpage 15 for more information regarding Delta T.3. Vent any remaining air from the system using manualvents. Air in the system will interfere with circulation andcause heat distribution problems and noise. Check vent piping and air piping1. Check for gastight seal at every connection, seam of airpiping, and vent piping.Venting system must be sealed gastight WARNINGto prevent flue gas spillage and carbonmonoxide emissions, which will result insevere personal injury or death. Check gas piping1. Check around the water heater for gas odor followingthe procedure on page 21 of this manual (Connecting GasSupply Piping).If you discover evidence of any gas leak, WARNINGshut down the water heater at once. Findthe leak source with a bubble test and repairimmediately. Do not start the water heateragain until corrected. Failure to complycould result in severe personal injury, death,or substantial property damage. Propane water heaters – verify conversion1. Verify propane conversion has been completed per thePropane Conversion instructions.DO NOT adjust gas valve outlet pressure. WARNINGThe gas valve is factory-set for the correctoutlet pressure. This setting is suitablefor natural gas and propane, requiringno field adjustment. Attempting to alterthe gas valve outlet pressure could resultin damage to the valve, causing potentialsevere personal injury, death, or substantialproperty damage. WARNINGOutdoor Armor water heaters are typicallyshipped ready to fire on natural gas. Checkwater heater rating plate to determine whichfuel the water heater is set for. If set tonatural gas, it may be converted to LP byinstalling an orifice or by making a gas valveadjustment (see pages 11 and 12). In orderto operate on LP gas, an orifice MUST BEinstalled or a gas valve adjustment MUSTBE made. Failure to comply could result insevere personal injury, death, or substantialproperty damage.Check flame and combustion1. Turn the main power off to the water heater by placing the“On/Off” switch in the OFF position.2. Remove the flue temperature sensor from the flue pipeconnection. Note: Combustion measurements will bemade at this point.3. Turn the main power on to the water heater by placing the“On/Off” switch in the ON position.31
Outdoor Armor Water Heater Installation & Operation Manual7 Start-upFigure 7-2 Operating Instructions - Models 151 - 286FOR YOUR SAFETY READ BEFORE OPERATINGWARNING: If you do not follow these instructions exactly, a fire or explosionmay result causing property damage, personal injury, or loss of life.A. This appliance does not have a pilot. It isequipped with an ignition device whichautomatically lights the burner. Do not tryto light the burner by hand.B. BEFORE OPERATING smell all aroundthe appliance area for gas. Be sure tosmell next to the floor because s ome gasis heavier than air and will settle on thefloor.WHAT TO DO IF YOU SMELL GAS• Do not try to light any appliance.• Do not touch any electric switch; donot use any phone in your building.• Immediately call your gas supplier from aneighbor’s phone. Follow the gas supplier’sinstructions.• If you cannot reach your gas supplier, callthe fire department.C. Use only your hand to move the gas controlswitch. Never use tools. If the switch will notmove by hand, don’t try to repair it, call aqualified service technician. Force or attemptedrepair may result in a fire or explosion.D. Do not use this appliance if any part has beenunder water. Immediately call a qualifiedservice technician to inspect the appliance andto replace any part of the control system andany gas control which has been under water.1. STOP! Read the safety informationabove on this label.2. Set the thermostat to lowest setting.3. Turn off all electric power to theappliance.4. This appliance is equipped with an ignitiondevice which automatically lights theburner. Do not try to light the burner byhand.5. Remove front door.6. Move switch to the “OFF” position.7. Wait five (5) minutes to clear out any gas.If you then smell gas, STOP! Follow “B”in the safety information above this label.If you don’t smell gas, go to next step.OPERATING INSTRUCTIONS8. Move the switch to the “ON” position.9. Install front door.10. Turn on all electric power to appliance.11. Set thermostat to desired setting.12. If the appliance will not operate, follow theinstructions “To Turn Off Gas To Appliance” andcall your service technician or gas supplier.1. Set the thermostat to lowest setting.2. Turn off all electric power to the applianceif service is to be performed.3. Remove front door.TO TURN OFF GAS TO APPLIANCE4. Move the switch to the “OFF” position.5. Install front door.LBL 233 9 REV C32
Outdoor Armor Water Heater Installation & Operation Manual7 Start-up (<strong>continued</strong>)Figure 7-3 Operating Instructions - Models 400 - 80133
Outdoor Armor Water Heater Installation & Operation Manual7 Start-upCheck flame and combustion (<strong>continued</strong>)4. Place the water heater into the active position by pressingthe RIGHT SELECT [ON] key (FIG. 8-1, page 40).5. Locate the pinhole button below the RESET button onthe display board (FIG. 8-1). Insert a thin wire (such asa paper clip) into the hole and press the button once andhold for 5 seconds to place the water heater into ServiceMode. In Service Mode the water heater will fire atignition speed and will then modulate up to full fire.6. Insert the probe from a combustion analyzer into the flueoutlet.7. Once the water heater has modulated up to full fire,measure the combustion. The values should be in therange listed in Table 7A below. The CO levels should beless than 150 ppm for a properly installed unit.If the combustion is not within the specified range,reference the Troubleshooting Section of the OutdoorArmor Water Heater Service Manual for possible causesand corrective actions.Table 7A Flue Products ChartNatural GasPropaneCO 2 O 2 CO 2 O 28.0% - 10% 3.0% - 6.5% 9.0% - 11% 4.1% - 6.9%8. Once the combustion analysis is complete, test the safetyshutoff device by turning the manual shutoff valve to theOFF position and ensuring that the water heater shutsdown and registers an alarm. Open the manual shutoffvalve and reset the control.Set water heater operationSet tank set point temperatureNOTICEVerify WHR circulator modePlease note that the brackets ([]) denotescreen status.The NAVIGATION dial may be used during normal operationto adjust the tank set point temperature.1. From the Status Screen press the NAVIGATION dial.2. Press the NAVIGATION dial then rotate the NAVIGATIONdial to adjust the temperature.3. Once the desired temperature is displayed, press theRIGHT SELECT [SAVE] key.4. Press the RIGHT SELECT [HOME] key to upload thechanges.5. If the RIGHT SELECT [SAVE] key is not pressed, thenew settings will be discarded.When the tank thermostat or tank sensor calls for heat, theSMART SYSTEM control will turn on the water heater pump.When the DHW call for heat ends, the water heater pump willcontinue to run for a period of time. This pump delay is set atthe factory to 60 seconds. If a shorter or longer delay is desired,the appropriate parameter in the control must be changed. Seethe Outdoor Armor Water Heater Service Manual for a detailedexplanation of this procedure.9. Turn the main power off to the water heater.10. Place the water heater back into normal operation.34
Outdoor Armor Water Heater Installation & Operation Manual7 Start-up (<strong>continued</strong>)Set clockNOTICEPlease note that the brackets ([]) denotescreen status.The SMART SYSTEM control has a built-in clock that ituses for its night setback feature and for logging events. Thisclock must be set when the water heater is installed, andanytime the water heater has been powered off for more than4 hours. Use the following procedure to set the clock:1. Press and hold the LEFT SELECT [MENU] key for atleast 5 seconds.2. The display changes to read [PASSWORD],with four (4) zeros below it.3. Press the RIGHT SELECT [SAVE] key.4. The display will then show a menu with the time anddate and temperature unit.5. Press the NAVIGATION dial twice.6. Turn the NAVIGATION dial to adjust the hours. Pressthe NAVIGATION dial.7. Turn the NAVIGATION dial to adjust the minutes. Pressthe NAVIGATION dial.8. Turn the NAVIGATION dial to adjust the month. Pressthe NAVIGATION dial.9. Turn the NAVIGATION dial to adjust the date. Press theNAVIGATION dial.Configuration of the cascadeNOTICEPlease note that the brackets ([]) denotescreen status.When installed in a Cascade system, the individual controlsmust be programmed for cascade operation. This isaccomplished by accessing the control parameters.Press the [MENU] key for at least five (5) seconds. Inputthe Installer code as described in the Outdoor Armor ServiceManual. Once the control parameters have been accessed,use the NAVIGATION dial to select the Control Modeparameters. Press the NAVIGATION dial to access theseparameters.Rotate the NAVIGATION dial to select the parameter“Cascade Address”. Press the NAVIGATION dial to accessthis parameter. Each appliance in the Cascade system mustbe programmed with its own address. The water heaterdesignated as the Leader will have an address of 0. Theremaining water heaters in the Cascade will be Members andhave addresses from 1 - 7. Rotate the NAVIGATION dialto select the appropriate address. Press the RIGHT SELECT[SAVE] key.Press the RIGHT SELECT [HOME] key to upload theaddress into the control. Repeat this procedure for all waterheaters in the Cascade, designating the Leader control and theMember controls.Note: A tank sensor must be installed when operatingoutdoor water heaters in Cascade.10. Turn the NAVIGATION dial to adjust the year. Press theRIGHT SELECT [SAVE] key.11. Press the RIGHT SELECT [HOME] key.NOTICEThe internal clock does not adjust forDaylight Savings Time and therefore,will require a manual adjustment.The clock is automatically updated whenever a PC isconnected and the Win Pro-Installer program is started.35
Outdoor Armor Water Heater Installation & Operation Manual8 Operating informationGeneralHow the water heater operatesThe outdoor water heater uses an advanced stainless steel heatexchanger and electronic control module that allows fullycondensing operation. The blower pulls in air and pushes flueproducts out of the water heater through the heat exchangerand flue piping. The control module regulates blower speedto control the water heater firing rate. The gas valve senses theamount of air flowing into the water heater and allows only theright amount of gas to flow.Control inputs and outputsTank thermostat / tank sensorEither of these inputs will tell the water heater to provide heatto the water tank. If a tank sensor is connected, the SMARTSYSTEM control will ignore the tank thermostat.0 - 10VDC input (set point or power)The outdoor water heater can be controlled by a BuildingManagement System (BMS) using a 0 - 10 VDC signal. Thecontrol can be configured by the installer to use this signal toeither control set point or firing rate. This signal can be sent tothe heater through ModBus as well.Temperature controlModulationThe outdoor water heater is capable of modulating its firingrate from a minimum of 20% to a maximum of 100%. Thefiring rate is dictated by the hot water draw and various othertemperature limitations.Night setbackThe controller may be programmed to reduce the DHW setpoint during certain times each week. Seven different start andstop times may be programmed for the DHW setback.Flame current supportTo prevent nuisance shutdowns when the water heater is firingat minimum rates, the control will increase fan speed when theflame signal drops too low.Protection featuresOutlet temperature, flue temperature, and temperaturerise limitingThe outlet temperature is monitored by the water heater outlettemperature sensor. When the outlet temperature exceeds185°F, the unit will reduce the fan speed. If the outlet watertemperature exceeds 195°F the control will shut the unit downuntil it cools off.The control module monitors the flue temperature by a sensorlocated in the flue exhaust. If the flue temperature exceeds215°F the control will reduce the maximum fan speed. Ifthe flue temperature exceeds 240°F the control will shut theunit down. The unit will restart automatically once the fluetemperature drops 25°F and the minimum off time has expired.The control monitors the temperature difference betweenthe inlet and the outlet sensor. On Models 151 - 501 if thisdifference is between 25 - 30°F the control will reduce the fanspeed. If the temperature difference exceeds 30°F the controlwill shut the unit down.On Models 601 - 801 if the temperature difference is between30 - 35°F the control will reduce the maximum fan speed. Ifthe temperature difference exceeds 35°F the control will shutthe unit down.The unit will restart automatically once the temperaturedifference has dropped below 25°F (Models 151 - 501) or 30°F(Models 601 - 801) and the minimum off time has expired.Freeze protectionDO NOT install the water heater in a location likely to freeze.The following integral feature of the SMART SYSTEM controlmodule provides some protection for the water heater.• The SMART SYSTEM control module providesfreeze-up protection as follows when the water heaterwater temperature drops below 45°F:• Below 45°F, the water heater pump operates constantly.• Below 37°F, the water heater turns on.• The water heater and pump will turn off if waterheater water temperature rises above 45°F. CAUTIONThis feature of the SMART SYSTEM controlmodule does not eliminate the possibilityof freezing. The installation must stilluse recognized design, installation andmaintenance practice to prevent freezepotential for the water heater.36
Outdoor Armor Water Heater Installation & Operation Manual8 Operating information (<strong>continued</strong>)Monitor external limitsConnections are provided on the connection board forexternal limits such as a flow switch and gas pressureswitches. The SMART SYSTEM will shut off the burnerand inhibit relighting whenever any of these external limitsopen.Runtime and alarm outputsThe water heater provides dry contacts for indicatingwhen the water heater is running, and when it is unable tooperate.Runtime and cycle countingThe control uses a timer to monitor the total hours ofburner operation. The timer monitors the time the waterheater is firing.The control uses two (2) ignition counters to monitor theamount of water heater cycles. The first counter counts allignitions of the control. The second counter counts onlyignition attempts that have failed.Service reminderThe control can be programmed for service remindernotification. This notification will become active wheneither a set amount of time has expired, or a set amount ofrunning hours or cycles has expired (all adjustable by theinstaller). The display will show a Maintenance Requiredscreen. The installer’s name and phone number can beprogrammed into the control. This information will appearon the Maintenance Required screen. The service remindernotification can be reset or disabled by the installer.The time dependent feature has been disabled by themanufacturer. To enable this feature change the parameterto the desired time interval, reference the Outdoor ArmorService Manual for details regarding parameters.Error loggingThe control will hold in memory the last 10 lockouts aswell as the last 10 blockings. The date and time of theoccurrence will be recorded as well. Only the 10 mostcurrent occurrences of each will be held in memory.Water heater temperature regulationOperating temperature (target)The SMART SYSTEM control module senses watertemperature and regulates water heater firing and firing rateto achieve a target temperature. The target temperature canbe set between 60°F and 190°F.High limit operationsThe outdoor water heater is equipped with a fixed automaticreset high limit and an adjustable manual reset high limit.The automatic reset high limit has a set point of 200°F andthe manual reset high limit has a maximum set point of210°F.When the outlet temperature exceeds 200°F, the automatic highlimit action occurs. The water heater shuts down until the outletwater temperature cools below 190°F, and a 60 second timer hasexpired. If the outlet temperature continues to increase, themanual reset high limit action will occur at 210°F.High limit test procedurePlease note that the brackets ([]) denoteNOTICEscreen status.1. Turn ON the main power to the water heater by placing theON/OFF switch in the ON position.2. From the Status Screen, press the NAVIGATION dial toaccess the Set Points Screen.3. Press the LEFT SELECT (LIMITS) key.4. Select the manual reset high limit (MRHL) by rotatingthe NAVIGATION dial counterclockwise, then pressthe NAVIGATION dial.5. Decrease the set point of the MRHL to below the currentoutlet temperature (or to its minimum setting, whicheveris higher) by turning the NAVIGATION dialcounterclockwise.6. Press the RIGHT SELECT [SAVE] key.7. Press the RIGHT SELECT [HOME] key. The newparameter will upload to the control.8. If the current outlet temperature is above the new MRHLset point, the MRHL will function causing water heaterlockout. If this occurs, skip to Step 11.9. If the current outlet temperature is below the new MRHLset point, locate the pinhole (SERVICE button) below theRESET button on the display board. Insert a thin probe(such as a paper clip) into the hole and press the buttoncontinuously for five (5) seconds to place the water heaterinto Service Mode. In Service Mode, the water heater willfire at ignition speed and will then modulate up to full fire.10. Once the outlet temperature rises up to the MRHL setpoint, the MRHL will function, causing the water heater toshut down and lock out.11. Repeat Steps 2, 3 and 4.12. Set the MRHL to the appropriate set point by turning theNAVIGATION dial clockwise.13. Repeat Steps 6 and 7.14. Press the RESET button to clear the lockout.15. If needed, press the RIGHT SELECT [STOP] key to exitService Mode.Low water cutoff protection1. The SMART SYSTEM control module uses temperaturesensing of both supply and return areas of the heat exchanger.If the flow rate is too low or the outlet temperature toohigh, the control module modulates and shuts the waterheater down. This ensures water heater shutdown in theevent of low water or low flow conditions.2. Some codes and jurisdiction may accept these integralfeatures of the control in lieu of requiring an additionallimit control or low water cutoff. Consult local jurisdictionto determine. A low water cutoff is available from thefactory (WTR30024).37
Outdoor Armor Water Heater Installation & Operation Manual8 Operating informationCascadeWhen multiple water heaters are installed, they can bewired together in a cascade sequence. A maximum of eightwater heaters can be controlled from a single control. Inthis application one water heater would be designated as theLeader control and all others would be designated as Membercontrols. The Leader control can be programmed to useLead/Lag or Efficiency Optimization control methods.Once the Leader water heater receives a call for heat froma tank sensor, BMS or ModBus, the control will determinewhat the set point will be. A fixed temperature set point canbe programmed into the control. See page 34 of this manualto program the set point.If the water temperature at the tank is less than the set point- differential, then the control will initiate a call for heat onthe Cascade (see the Outdoor Armor Water Heater ServiceManual for an explanation of the differential). The Leaderwill energize the lead water heater on the Cascade. For a newstartup this will be the Leader water heater.Sequence of the cascadeTo equalize the runtime of all water heaters on the Cascade,the firing sequence will automatically be changed at setintervals.For the first 24 hours after initializing the Cascade, thesequence will be changed every hour. After that the sequencewill be changed once every 24 hours. The switching on/offsequence will be as follows:TIMESWITCHING ON SEQUENCEStartL-M1-M2-M3-M4-M5-M6-M7+ 1 hour M1-M2-M3-M4-M5-M6-M7-L+ 2 hours M2-M3-M4-M5-M6-M7-L-M1Access modesUserThe user can adjust tank target temperatures by pressing theNAVIGATION dial when “SETPOINTS” is flashing at thebottom of the display. The date and time, and the temperatureunits can also be changed (see page 35).InstallerMost parameters are available only to the installer, accessible byentering the installer password, see the Outdoor Armor WaterHeater Service Manual.Saving parameters (reference the Parameter Table inthe Outdoor Armor Water Heater Service Manual)NOTICEPlease note that the brackets ([]) denotescreen status.To save parameters and exit programming:Press the RIGHT SELECT [SAVE] key and then press theRIGHT SELECT [HOME] key.To enter a parameter and continue programming:Press the RIGHT SELECT [SAVE] key 1 time to return to theparameter listings; press again to return to the menu listings.Remember to press the RIGHT SELECT [HOME] key whenfinished programming in order to save the changes made.See the Outdoor Armor Water Heater Service Manual for adetailed description of parameters and access modes.If a water heater locks out, it will automatically be given thelowest priority for the rest of that 24 hour period.Night Setback operation with cascadeNight Setback operation of the water heaters within theCascade is available. Programming of the Night Setbackwill be done through the Leader water heater. Refer to theOutdoor Armor Water Heater Service manual for informationregarding Night Setback.38
Outdoor Armor Water Heater Installation & Operation Manual8 Operating information (<strong>continued</strong>)Sequence of operationOPERATIONDISPLAY1. The control will turn on the water heater pump (always ON exceptin Night Setback). The flow switch and/or LWCO must close.2. Air pressure switch and blocked drain switch must close.3. The control starts a 15 second prepurge cycle.4. The control starts a 4 second trial for ignition by firing the sparkelectrode and opening the gas valve.5. If flame is not detected within 1 second after the sparking ends,the control will perform a 10 second post-purge, then startanother prepurge cycle and try to light the burner again. On the501 and larger models, the control will lock out if this secondattempt also fails. On the 400 and smaller models, the controlwill perform a total of 4 attempts before locking out.6. If flame is detected, it holds the firing rate steady for 5 secondsto let the flame stabilize, then it begins to modulate the firing ratebased on a set point or some other command (such as a 0-10VBMS signal).7. Once the call for heat is satisfied, the control will turn off theburner. The blower will continue to run during a 10 secondpostpurge.8. The water heater pump will continue to run for its respectivepump delay time before turning off. A 60 second anti-cycle periodwill start, which will delay any new call for heat until it times out.9. In Standby, ready to start a new cycle.39
Outdoor Armor Water Heater Installation & Operation Manual8 Operating informationOutdoor Armor water heater control moduleUse the control panel (FIG. 8-1) to set temperatures, operating conditions, and monitor water heater operation.Figure 8-1 Control PanelThe information on the bottom of the display shows the functions of the two SELECT keys (on either corner), and theNAVIGATION dial (in the center):MENU = Left SELECT KeySETPOINTS = NAVIGATION Dial - Pressing DownSHDN = Right SELECT Key40
Outdoor Armor Water Heater Installation & Operation Manual8 Operating information (<strong>continued</strong>)Figure 8-2 Status Display ScreenStatus Display ScreensSection Display DescriptionSTANDBYThe unit has not received a call for heat from a remote thermostat norhas it received a call for heat from a DHW thermostat.A(Water heaterStatus Bar)STARTPREPURGEIGNITION%POSTPURGESHUTDOWNThe unit has begun a burn cycle and is checking all safety circuits.The unit has initiated a 10 second purge period on a call for heat.The unit has begun a 4 second spark period to ignite the main burner.The unit has fired and is running at the displayed percentage.The call for heat has been satisfied and the unit runs the fan for anadditional 10 seconds to clear the combustion chamber and ventsystem of residual flue products.The unit has been placed in the OFF position.The controlled temperature has exceeded its set point and its offset.B(Call for HeatIndicators)BLOCKEDThe unit has detected a condition that has temporarily interruptedthe current call for heat.The tank thermostat or sensor has a call for heat.The unit is being controlled by a 0 - 10V BMS signal.The member unit is supplying heat while in Cascade Mode.41
Outdoor Armor Water Heater Installation & Operation Manual8 Operating informationStatus Display Screens (cont’d)Section Display DescriptionTANK:The temperature read by the tank sensor (if connected).INLET TEMP:The temperature read at the inlet to the heat exchanger.C(OperationalInformation)D(LEFT SELECTkey function)OUTLET TEMP:DELTA T:FLUE TEMP:FLAME CURRENT:FAN SPEED:SYSTEM PUMP:DHW PUMP:BMS VOLTAGE:RATE OUTPUT:DHW RUN HOURS:DHW CYCLES:LAST 10 FAULTS NO:MENUEXITYESLIMITSThe temperature read at the outlet of the heat exchanger.The temperature difference between the inlet and the outlet of theheat exchanger.The temperature read by the flue sensor.The current measured by the flame sense circuit.The speed of the combustion blower.The status of the recirculation pump output.The status of the DHW pump output.The voltage received from a BMS system.A 0 - 10V signal indicating the firing rate of the water heater.The total hours of operation in the DHW Mode.The total burner cycles in the DHW Mode.The last 10 lockouts.Press and hold the LEFT SELECT key for 5 seconds to enter the MenuScreen.Press the LEFT SELECT key to exit the current screen or setting.Press the LEFT SELECT key to confirm that the water heater needsto shutdown.Press the LEFT SELECT key to enter the screen that allows you toadjust the limit settings.HOMEPress the LEFT SELECT key to return to the Status Screen and uploadparameter changes.42
Outdoor Armor Water Heater Installation & Operation Manual8 Operating information (<strong>continued</strong>)Status Display Screens (cont’d)Section Display DescriptionTurning the NAVIGATION dial will select the next or previous StatusScreen.Pressing the NAVIGATION dial will show the next fault, NSB (NightSetback) trigger, or ramp delay setting.E(NAVIGATIONDial Function)Pressing the NAVIGATION dial will select the setting indicated bythe cursor.Pressing the NAVIGATION dial will display the Set Points Screen.Turning the NAVIGATION dial will move the cursor up or down.Turning the NAVIGATION dial will increase or decrease the currentsetting.F(RIGHT SELECTkey function)SHDNONNOSAVEHOMEPress the RIGHT SELECT key to turn the water heater OFF.Press the RIGHT SELECT key to turn the water heater ON.Press the RIGHT SELECT key to cancel the shutdown operation.Press the RIGHT SELECT key to save the current change.Press the RIGHT SELECT key to return to the Status Screen andupload parameter changes.43
Outdoor Armor Water Heater Installation & Operation Manual9 MaintenanceMaintenance and annual startupTable 9A Service and Maintenance SchedulesService technician(see the following pages for instructions)Owner maintenanceANNUAL START-UPGeneral:• Address reported problems• Inspect interior; clean and vacuum ifnecessary;• Clean condensate trap and fill with freshwater• Check for leaks (water, gas, flue,condensate)• Verify• Flue and air lines in good conditionand sealed tight• Check system water pressure/systempiping/expansion tank• Check control settings• Check ignition and flame sense electrodes(sand off any deposits; cleanand reposition)• Check wiring and connections• Perform start-up checkout andperformance verification per Section 7of this manual.• Flame inspection (stable, uniform)• Flame signal (at least 10 microamps athigh fire)• Clean the heat exchanger if fluetemperature is more than 54°F abovereturn water temperature.• Check Delta T (Temperature Rise)DailyMonthly• Check water heater area• Check pressure/temperaturegauge• Check air and vent terminationscreens• Check relief valve• Check condensate drain system•Check automatic air vents• Check Delta T (TemperatureRise)If combustion or performanceindicate need:• Clean heat exchanger• Remove and clean burner usingcompressed air only• Clean the blower wheelEvery6 months• Check water heater piping (gasand water) for leaks• Operate relief valve44
Outdoor Armor Water Heater Installation & Operation Manual9 Maintenance (<strong>continued</strong>) WARNINGFollow the service and maintenance procedures given throughout this manual and in component literatureshipped with the water heater. Failure to perform the service and maintenance could result in damage to thewater heater or system. Failure to follow the directions in this manual and component literature could resultin severe personal injury, death, or substantial property damage. WARNING WARNINGThe water heater should be inspected annually only by a qualified service technician. In addition, themaintenance and care of the water heater designated in Table 9A and explained on the following pages mustbe performed to assure maximum water heater efficiency and reliability. Failure to service and maintain thewater heater and system could result in equipment failure.Electrical shock hazard – Turn off power to the water heater before any service operation on the water heaterexcept as noted otherwise in this instruction manual. Failure to turn off electrical power could result inelectrical shock, causing severe personal injury or death.Address reported problems1. Inspect any problems reported by the owner andcorrect before proceeding.Inspect water heater area1. Verify that water heater area is free of any combustiblematerials, gasoline and other flammable vapors andliquids.Figure 9-1 Condensate TrapRETAININGSCREW2” PVC CAP WITHBLOCKED DRAIN SWITCHPVC TEE ASSEMBLY(FACTORY SUPPLIED)2. Verify that air opening area is free of any of thecontaminants listed in Section 1 - Determine WaterHeater Location. If any of these are present in the waterheater intake air vicinity, they must be removed.Inspect water heater interior1. Remove the front access cover and inspect the interiorof the water heater.2. Vacuum any sediment from inside the water heater andcomponents. Remove any obstructions.Clean condensate trap1. Inspect the condensate drain line, condensate PVCfittings, and condensate trap.2. Remove the PVC cap retaining screw from the PVC cap(FIG. 9-1).3. Remove the 2 inch PVC cap with the switch located atthe top of the trap (FIG. 9-1).4. Remove any sediment in the trap.5. Fill with fresh water until the water begins to pour outof the drain.6. Replace the cap. Press the cap onto the trap until thecap makes contact with the drain.7. Replace the retaining screw.CONDENSATE FROMHEAT EXCHANGER WARNINGThe condensate trap must be filled with waterduring all times of water heater operation toavoid flue gas emission from the condensatedrain line. Failure to fill the trap could resultin severe personal injury or death.Check all piping for leaks WARNINGTO FLOORDRAINEliminate all system or water heater leaks.Leaking water may cause severe propertydamage.1. Inspect all water and gas piping and verify to be leak free.2. Look for signs of leaking lines and correct any problemsfound.3. Check gas line using the procedure found in Section 4 - GasConnections.Flue vent system and air piping1. Visually inspect the entire flue gas venting system and airpiping for blockage, deterioration or leakage. Repair anyjoints that show signs of leakage. Verify that the air inletpipe internal to the appliance is connected and properlysealed.2. Verify that water heater vent discharge and air intake areclean and free of obstructions.45
Outdoor Armor Water Heater Installation & Operation Manual9 Maintenance WARNINGCheck water system46Failure to inspect for the above conditionsand have them repaired can result insevere personal injury or death.1. Verify all system components are correctly installed andoperational.2. Check the cold fill pressure for the system. Verify it iscorrect (must be a minimum of 12 PSI).3. Watch the system pressure as the water heater heats up(during testing) to ensure pressure does not rise too high.Excessive pressure rise indicates expansion tank sizing orperformance problem.4. Inspect automatic air vents and air separators. Removeair vent caps and briefly push valve to flush vent. Replacecaps. Make sure vents do not leak. Replace any leakingvents.Check expansion tank1. Expansion tanks provide space for water to move inand out as the heating system water expands due totemperature increase or contracts as the water cools.Tanks may be open, closed or diaphragm or bladder type.See Section 3 - System Piping for suggested best location ofexpansion tanks and air eliminators.Check water heater relief valve1. Inspect the relief valve and lift the lever to verify flow.Before operating any relief valve, ensure that it ispiped with its discharge in a safe area to avoid severescald potential. Read Section 3 - System Piping beforeproceeding further. WARNINGSafety relief valves should be re-inspectedAT LEAST ONCE EVERY THREE YEARS,by a licensed plumbing contractor orauthorized inspection agency, to ensurethat the product has not been affected bycorrosive water conditions and to ensurethat the valve and discharge line have notbeen altered or tampered with illegally.Certain naturally occurring conditionsmay corrode the valve or its componentsover time, rendering the valve inoperative.Such conditions are not detectable unlessthe valve and its components are physicallyremoved and inspected. This inspectionmust only be conducted by a plumbingcontractor or authorized inspection agency– not by the owner. Failure to re-inspectthe water heater relief valve as directedcould result in unsafe pressure buildup,which can result in severe personal injury,death, or substantial property damage.Following installation, the valve lever must WARNINGbe operated AT LEAST ONCE A YEAR toensure that waterways are clear. Certainnaturally occurring mineral deposits mayadhere to the valve, rendering it inoperative.When manually operating the lever, waterwill discharge and precautions must be takento avoid contact with hot water and to avoidwater damage. Before operating lever, checkto see that a discharge line is connected tothis valve directing the flow of hot waterfrom the valve to a proper place of disposal.Otherwise severe personal injury may result.If no water flows, valve is inoperative. Shutdown the water heater until a new reliefvalve has been installed.2. After following the above warning directions, if the reliefvalve weeps or will not seat properly, replace the relief valve.Ensure that the reason for relief valve weeping is the valveand not over-pressurization of the system due to expansiontank waterlogging or undersizing.Inspect ignition and flame senseelectrodes1. Remove the ignition and flame sense electrodes from thewater heater heat exchanger access cover.2. Remove any deposits accumulated on the ignition/flamesense electrode using sandpaper. If the electrodes cannotbe cleaned satisfactorily, replace with new ones.3. Replace ignition/flame sense electrode, making sure gasketis in good condition and correctly positioned.Check ignition ground wiring1. Inspect water heater ground wire from the heat exchangeraccess cover to ground terminal strip.2. Verify all wiring is in good condition and securely attached.3. Check ground continuity of wiring using continuity meter.4. Replace ground wires if ground continuity is not satisfactory.Check all water heater wiring1. Inspect all water heater wiring, making sure wires are ingood condition and securely attached.Check control settings1. Set the SMART SYSTEM control module display toParameter Mode and check all settings. See Section 1 ofthe Outdoor Armor Service Manual. Adjust settings ifnecessary. See Section 1 of the Outdoor Armor ServiceManual for adjustment procedures.2. Check settings of external limit controls (if any) and adjustif necessary.
Outdoor Armor Water Heater Installation & Operation Manual9 Maintenance (<strong>continued</strong>)Perform start-up and checks1. Start water heater and perform checks and tests specifiedin Section 7 - Start-up.2. Verify cold fill pressure is correct and that operatingpressure does not go too high.Check burner flame1. Inspect flame through observation window.2. If the flame is unsatisfactory at either high fire or lowfire, turn off water heater and allow water heater tocool down. Remove the burner and clean it thoroughlyusing a vacuum cleaner or compressed air. Do not usecompressed air to clean burner if performed inside abuilding.3. Remove the burner, reference FIG. 9-2 below.4. When replacing the burner, ensure gasket is in goodcondition and positioned correctly (FIG. 9-2).Figure 9-2 Burner AssemblyINSULATIONHEAT EXCHANGERACCESS COVERBURNERCheck flame signalAIR / GAS ARMGASKETSCREWS(QTY. 5)IMG004471. At high fire the flame signal shown on the display shouldbe at least 10 microamps.2. A lower flame signal may indicate a fouled or damagedflame sense electrode. If cleaning the flame sense electrodedoes not improve, ground wiring is in good condition,and ground continuity is satisfactory, replace the flamesense electrode.3. See Section 3 - Troubleshooting in the Outdoor ArmorService Manual for other procedures to deal with lowflame signal.Review with owner1. Emphasize the need to perform the maintenance schedulespecified in this manual.2. Remind the owner of the need to call a licensed contractorshould the water heater or system exhibit any unusualbehavior.3. Remind the owner to follow the proper shutdown procedureand to schedule an annual start-up.Cleaning heat exchangerFor recommended materials; including brush, appropriateextension(s), refractory cover, and detailed instructions seeTable 9B - Heat Exchanger Cleaning Kits.1. Shut down water heater:• Follow the “To Turn Off Gas to Appliance” instructionsfor the water heater in Section 7 - Startup.2. Allow time for the water heater to cool to ambienttemperature if it has been firing.3. Remove the nuts securing the heat exchanger access coverto the heat exchanger and set aside.4. Remove the heat exchanger access cover, burner, andgas/air arm assembly. WARNINGThe water heater contains ceramic fibermaterials. Use care when handling thesematerials per instructions in the ServiceManual. Failure to comply could result insevere personal injury.5. Remove the condensate hose from the heat exchanger end.Connect a field supplied 3/4" diameter hose to a drain pan.Using field supplied means, cover the refractory in the backof the combustion chamber of the heat exchanger.6. Use a vacuum cleaner to remove any accumulation on thewater heater heating surfaces. Do not use any solvent.7. Brush the heat exchanger while dry using a nylon bristlebrush. Caution: DO NOT use a metal brush. Re-vacuumthe heat exchanger.8. Finish cleaning using a clean cloth dampened with warmwater. Rinse out debris with a low pressure water supply.9. Allow the heat exchanger to thoroughly dry.10. Remove the field supplied rear refractory cover from theback of the combustion chamber of the heat exchanger andreassemble.11. Close isolation valves on piping to isolate water heater fromsystem. Attach a hose to the water heater drain and flushwater heater thoroughly with clean water by using purgingvalves to allow water to flow through the water make-upline to the water heater.12. Perform start-up and check-out procedures in the CheckFlame and Combustion - Section 7 - Startup on pages 31 and34 of this manual.13. Replace the access cover and restore water heater tooperation.47
Outdoor Armor Water Heater Installation & Operation Manual9 MaintenanceTable 9B Heat Exchanger Cleaning KitsModelKitNumber151 - 400 KIT30063PartNumberCTN20005ComponentDescriptionRear Refractory CoverMSC20083* Nylon 4" Wheel Brush*MSC20084MSC200863mm Allen Wrench1/4" x 24" DrillExtensionCheck Delta T1. Check Delta T. Reference Section 3 - System Piping onpage 15 for more information regarding Delta T.Oiled bearing circulators1. The circulator shipped with the outdoor water heater iswater-lubricated. No oiling is required.2. Check other circulators in the system. Oil any circulatorsrequiring oil, following circulator manufacturer’sinstructions. Over-oiling will damage the circulator.CTN20005Rear Refractory CoverMSC20083* Nylon 4" Wheel Brush*501 - 801 KIT30064MSC20085MSC200861/4" x 12" DrillExtension1/4" x 24" DrillExtension CAUTION* Do NOT use a metal brush. Only usethe kit provided brush or an equivalentreplacement nylon brush.Figure 9-3 Rope Gasket - Heat Exchanger DoorROPE GASKETCAUTION: IF GASKET IS DAMAGEDDO NOT REUSE, THE HEAT EXCHANGER DOORMUST BE REPLACED.NOTICERope gasket is intended for sealingcombustion (see FIG. 9-3). If gasketis damaged DO NOT reuse, the heatexchanger door must be replaced. Consultfactory for replacement heat exchangerdoor (kit WTR3080 and WTR3086).48
Outdoor Armor Water Heater Installation & Operation Manual10 DiagramsFigure 10-1 Ladder Diagram120VACJUNCTION BOXNEUTRAL GROUNDTERMINAL STRIP120V SUPPLY "L"TERMINAL STRIP120V SUPPLY "N"LINLOUTON / OFFINTEGRATED CONTROLSWITCHX1-6 F2X1-112BLOWER3.15A3F15ABUILDINGRECIRC PUMPRELAYX1-2BUILDINGRECIRC PUMPRELAYBUILDINGRECIRC PUMPCONTACTSBUILDINGRECIRCPUMPX5-9F3.8ADHW PUMPRELAY24V DCSUPPLYX1-3X5-1DHW PUMPRELAYDHW PUMPCONTACTSJUNCTION BOXDHWPUMP120 VACX4-3CN5-53.5AAW 801ONLY24 VACFLOWCONNECTION BOARDLWCOCN5-14 X4-8INTEGRATEDCONTROL11SWITCHTANKTHERMOSTAT12 CN7-4CN7-324 VACCN7-1CN7-2CN5-10 X4-12CN5-12X4-101314LOW GASPRESSURESWITCHHIGH GASPRESSURESWITCHCN5-11X4-11910CN5-3 X4-5LOUVERRELAY COIL524VAC66CN5-4 X4-4LOUVERPROVING SWITCH78INTEGRATEDCONTROLX7RIBBON CABLEPC INTERFACEALARMBELLSILENCINGSWITCH12613S2INLETSENSOROPERATING S1aSENSORHIGH LIMIT S1bSENSORS3aFLUESENSORS3bFLUESENSORCONNECTIONBOARDX5-6X5-4X5-12X5-5X5-13X5-14AW 286-801 ONLYBLOCKEDO-TEMP HEX SWDRAIN SWITCHAIR PRESSURESWITCHGAS VALVEX5-2X5-10X5-11X2-2X2-1GAS VALVERELAYALARMCONTACTS12CN5-1 X4-7CN5-8 X4-14BLOWER1X5-7RUN-TIMECONTACTS34CN5-2 X4-6CN5-9 X4-1324X5-16X5-85X5-15TR2TANKSENSORSHIELDS416171920CN6CN6CN6X6X6X6SPARKRODX1-7FLAME RODCASCADE A B21CN6X6SHIELDBMS +IN -RATE +OUT -SHIELDMODBUS A BSHIELD0-10V0-10V222324252627282930CN6X6CN6X6CN6X6CN6X6MOCN8-1 X6-1 X4-1 X9-2DCN8-2 X6-2 B X4-2 X9-1UCN8-3 X6-3 X4-3 X9-3SCAUTIONHIGH VOLTAGE SPARK LEADNOTES:1. Where possible, switches are shown without utilities (gas, water orelectricity) connected to the unit. As such, actual switch states mayvary from those shown on diagrams depending upon whether utilitiesare connected or a fault condition is present.2. See wiring diagram for additional notes.BOX DEPICTSOPTIONAL ITEMSLOW VOLTAGE120 VACHIGH VOLTAGELADDER DIAGRAMLBL20149 REV D49
Outdoor Armor Water Heater Installation & Operation Manual10 DiagramsFigure 10-2 Wiring DiagramLOW VOLTAGE120 VACHIGH VOLTAGEBOX DEPICTSOPTIONAL ITEMSBOX DEPICTSDUAL SENSORSINGLE HOUSINGALARM BELLSILENCING SWITCHBELL JUMPERALARMCONTACTSRUN-TIMECONTACTS24 VAC LOUVERRELAY COILLOUVERPROVING SWITCHGAS PRESSURESWITCHFLOWSWITCHTANKTHERMOSTAT1234567891011121314CONNECTION BOARDCN5-1CN5-8CN5-2CN5-9CN5-3CN5-10CN5-11CN5-4CN5-5CN5-14CN5-12CN5-6CN5-13CN5-7BKBKBKBKBKBKBKBKBKBKBKBKBKBKX-7X4-7X4-14X4-6X4-13X4-5X4-12X4-11X4-4X4-3X4-8X4-10X4-2X4-9X4-1INTEGRATEDCONTROLX1-3X1-4X1-2X1-6X1-5X1-8X1-1OR/BKPR/WBKWGRCOMNOCOMNOON/OFFSWITCHORORPRPRJUNCTIONBOXLNLDHWPUMPBUILDINGRECIRC.PUMPL120VGNDSUPPLYNNTRANSFORMERR W G1 2 33.5AAW 801ONLYTANKSENSORSHIELDCASCADE A BSHIELD1516171819202122CN6X6X5-7X5-16RTBLOWER1 2 3 4 5BMSIN+ -0-10V2324X5-8X5-15X5-9WBKY50+ -0-10VSHIELDABSHIELDRATEOUTMODBUSOPTIONLOWWATERCUT-OFFSHIELDGROUNDINGJUMPER24 VACCOM252627282930X5-1X5-2CN7-1CN7-2CN7-3CN7-4MODBUS BOARDMTR-01CN8-1CN8-2CN8-3R BLGX6-3X6-2X6-1X6-4X5-1X5-2X5-10X5-11X5-4X5-12X5-6X5-5X5-13X5-14X2-2X2-1X1-7TR2BLP/BKYBKYW/R-TOPERATING SENSOR S1aHIGH LIMIT SENSOR S1bINLET SENSOR S2FLUE SENSOR S3aFLUE SENSOR S3bGAS VALVE@24VACFLAME SENSORSPARKGRODCAUTION HIGH VOLTAGE SPARK LEADNotes:1. All wiring must be installed in accordance with: local, state, provincial and national code requirements per either N.E.C. in USA or C.S.A. in Canada.2. If any original equipment wire as supplied with the appliance must be replaced, it must be replaced with wire having same wire gauge (AWG) and rated for aminimum of 105°C. Exceptions: Replacement high vo ltage spark lead and ribbon cables must be purchased from the factory. Use of a non-approved spark leador ribbon cables can lead to operational problems which could result in non-repairable damage to the integrated controller or other components.3. Actual connector block locations may vary from those shown on diagrams. Refer to actual components for proper connector block locations when usingdiagrams to troubleshoot unit.X4-1X4-2X4-3X4-4X1-1X1-2X1-3OGYGBKWGX9-1X9-2X9-3X9-4OPO/BKR/BKGYW/BKPRBLOCKED DRAIN SWITCHAIR PRESSURE SWITCH-T-T-T-TAW 286-801 ONLYO-TEMP HEX SWWIRING DIAGRAMLBL20134 REV D
OUTDOOR CONDENSING WATER HEATERInstallation & Operation ManualNotes51
Revision Notes: Revision A (ECO #C10942)initial release.Revision B (ECO #C11235) reflects updatesmade to the freezing conditions warnings.Revision C (ECO C12102) reflects the additionof condensate kit option information for areasthat may reach below 32°F as well as a warningnot to install OA 400 in these areas and Table1A on page 8.OAW-I-O Rev C02/13