Upgrading the Switch's Firmware of a SW651A, SW652A - servswitch
Upgrading the Switch's Firmware of a SW651A, SW652A - servswitch
Upgrading the Switch's Firmware of a SW651A, SW652A - servswitch

You also want an ePaper? Increase the reach of your titles
YUMPU automatically turns print PDFs into web optimized ePapers that Google loves.
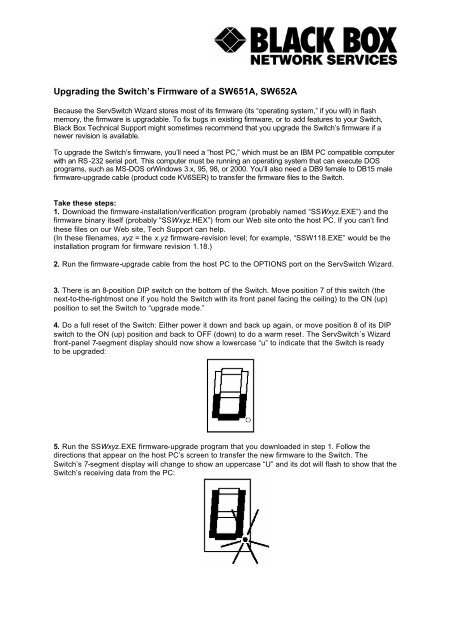
<strong>Upgrading</strong> <strong>the</strong> Switch’s <strong>Firmware</strong> <strong>of</strong> a <strong>SW651A</strong>, <strong>SW652A</strong>Because <strong>the</strong> ServSwitch Wizard stores most <strong>of</strong> its firmware (its “operating system,” if you will) in flashmemory, <strong>the</strong> firmware is upgradable. To fix bugs in existing firmware, or to add features to your Switch,Black Box Technical Support might sometimes recommend that you upgrade <strong>the</strong> Switch’s firmware if anewer revision is available.To upgrade <strong>the</strong> Switch’s firmware, you’ll need a “host PC,” which must be an IBM PC compatible computerwith an RS-232 serial port. This computer must be running an operating system that can execute DOSprograms, such as MS-DOS orWindows 3.x, 95, 98, or 2000. You’ll also need a DB9 female to DB15 malefirmware-upgrade cable (product code KV6SER) to transfer <strong>the</strong> firmware files to <strong>the</strong> Switch.Take <strong>the</strong>se steps:1. Download <strong>the</strong> firmware-installation/verification program (probably named “SSWxyz.EXE”) and <strong>the</strong>firmware binary itself (probably “SSWxyz.HEX”) from our Web site onto <strong>the</strong> host PC. If you can’t find<strong>the</strong>se files on our Web site, Tech Support can help.(In <strong>the</strong>se filenames, xyz = <strong>the</strong> x.yz firmware-revision level; for example, “SSW118.EXE” would be <strong>the</strong>installation program for firmware revision 1.18.)2. Run <strong>the</strong> firmware-upgrade cable from <strong>the</strong> host PC to <strong>the</strong> OPTIONS port on <strong>the</strong> ServSwitch Wizard.3. There is an 8-position DIP switch on <strong>the</strong> bottom <strong>of</strong> <strong>the</strong> Switch. Move position 7 <strong>of</strong> this switch (<strong>the</strong>next-to-<strong>the</strong>-rightmost one if you hold <strong>the</strong> Switch with its front panel facing <strong>the</strong> ceiling) to <strong>the</strong> ON (up)position to set <strong>the</strong> Switch to “upgrade mode.”4. Do a full reset <strong>of</strong> <strong>the</strong> Switch: Ei<strong>the</strong>r power it down and back up again, or move position 8 <strong>of</strong> its DIPswitch to <strong>the</strong> ON (up) position and back to OFF (down) to do a warm reset. The ServSwitch´s Wizardfront-panel 7-segment display should now show a lowercase “u” to indicate that <strong>the</strong> Switch is readyto be upgraded:5. Run <strong>the</strong> SSWxyz.EXE firmware-upgrade program that you downloaded in step 1. Follow <strong>the</strong>directions that appear on <strong>the</strong> host PC’s screen to transfer <strong>the</strong> new firmware to <strong>the</strong> Switch. TheSwitch’s 7-segment display will change to show an uppercase “U” and its dot will flash to show that <strong>the</strong>Switch’s receiving data from <strong>the</strong> PC:
6. When <strong>the</strong> upgrade’s complete, <strong>the</strong> 7-segment display will change back to <strong>the</strong> lowercase “u” and <strong>the</strong>dot will stop flashing. Move position 7 <strong>of</strong> <strong>the</strong> Switch’s DIP switch back to OFF (down) to return <strong>the</strong>Switch to normal operation.CAUTION—if <strong>the</strong> upgrade goes wrong:The upgrade program rewrites <strong>the</strong> Switch’s existing firmware code with<strong>the</strong> code in <strong>the</strong> SSWxyz.HEX file. If <strong>the</strong> upgrade process is interrupted,<strong>the</strong> Switch will contain invalid code and will not operate properly.A partial, interrupted, or failed upgrade can be fixed, but only if youimmediately repeat <strong>the</strong> upgrade process without turning OFF position 7<strong>of</strong> <strong>the</strong> Switch’s DIP switch. (The code that <strong>the</strong> Switch uses to downloadnew firmware is not itself affected by <strong>the</strong> upgrade process.) If you moveposition 7 back to OFF after a failed upgrade attempt, <strong>the</strong> Switch willbegin running <strong>the</strong> incomplete code. This could have unpredictableresults and might damage your Switch or <strong>the</strong> attached equipment!7. Verify that <strong>the</strong> upgrade has been successful by having <strong>the</strong> Switch indicate its new firmware revision