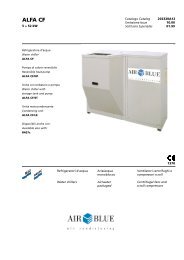
english - Chiller
english - Chiller
english - Chiller

Create successful ePaper yourself
Turn your PDF publications into a flip-book with our unique Google optimized e-Paper software.
ENGLISHVia Oslo n° 3 35010 Vigonza (PD) Tel. 049/8931944 Fax. 049/8931271INSTRUCTIONMANUAL
INSTRUCTION MANUALENGLISHUnit series:SCAESCAE…HSCACSCAC…HRSARHSASMAESMAE…HMAE+TCXMHAE+THCXDUO_____________________________________2
INSTRUCTION MANUALENGLISHInstallation, operation and maintenance instructions are givenas a guide to good practice in the installation, putting intoservice, operation and maintenance, of this unitThis manual is written in the language of the country where the unit is expected to be installed. If thelanguage is different from that of the envisaged country please ask your dealer for a copy prior to installing orusing the unit and inform ACM’s Customer Service by fax if possible, at this number: 0039/49/8931271,stating the manual code number.ForewordThis unit must be used for its designed purpose without exceeding operating limits.The instruction manual is an integral and essential part of the unit.Read this instruction manual through carefully as it provides a very important guide to installation, use andmaintenance safety. This manual must be kept in a safe place and always put back after consulting it.A.C.M. srl declines all responsibility for damages to persons or things due to the failure to comply with theinstruction safety rules of this manual or due to the improper use of the unit itself.It is absolutely compulsory to follow the instructions given in the manual regarding installation, start up, useand maintenance for safety reasons, correct operation and for the warranty.Only experienced (qualified) personnel should install, start up and service this unit, as envisaged in thismanual; by qualified personnel we mean people who have the necessary technical-professionalqualifications for servicing electrical and refrigeration systems and who comply with the instructions providedon the unit, with those written in this manual and with the local safety rules and regulations.Only experienced (qualified) personnel are authorized to access the inside of the unit.Caution! There are moving and live parts inside the unit. It is compulsory to turn the main switch off andpadlock it before removing the outside panels.In all cases affix the warning: «SERVICING - DO NOT CARRY OUT ANY MANOEUVRES»All vessels and containers subject to control by the competent authorities must be reported and subject toinspection and, if so requested, to regular inspection.You will find the serial number books for such vessels and containers enclosed with this manual. Thematerials used for their construction and the gas they are filled with are all flameproof and flame retardant.However it is advisable to install fire extinguishers (using appropriate agents for the surrounding materials)near their installation site.3
INSTRUCTION MANUALENGLISHInstallationNever work on live parts. The presence of a second person is recommended when connecting to theelectricity mains, starting up or servicing, who can help in the event of electrical shock.If the unit has to be moved or lifted follow the instructions given in this manual carefully.This unit contains substances that can damage the ozone layer. Do not release gas into the atmosphere:collect it and deliver it to authorised recycling centres.Prior to using the unit check it is in good condition; if in doubt contact the supplier. Packaging materials, ifthere are any, must be handed over to collection centres as they are a potential hazard source if usedimproperly.The unit must be anchored to a base strong enough to withstand its static load and possible stresses whenrunning (wind force, snow, etc.).If the unit is fitted with air intake and expulsion grids, the unit should be installed so they are free fromobstacles and are not a nuisance or cause damage to people.The units are filled with, or envisaged for filling with, R407C.Any leak of gas must not be allowed to cause a dangerous concentration higher than 1250 ggm, equal to4430 mg/m ³, in rooms where there are people. To this end, installation must comply with ISO 1662 [UNI8011, points 4.3, 6.1 and 6.3.1].Direct expansion units are not allowed on premises where the mobility of people is limited (law courts,prisons, hospitals, etc.).If the units are installed inside rooms where there are people, the pressure limiter device discharges must beconveyed to the outside.Prior to making any electrical connections make sure that the rating plate data correspond to mains voltage.The electrical supply circuit must be adequate to the unit’s maximum absorbed power.All electrical connections must be carried out in accordance with the instructions given in this manual andmust also comply with the IEC 364 standards (HD 384) [CEI 64-8].It is of paramount importance to check earthing system efficiency.The hydraulic and refrigeration circuits or ducts must be expertly made according to the instructions given inthis manual.Before connecting the unit to the hydraulic and refrigeration circuits or ducts, wash or clean thoroughly allducts.If water is used its characteristics must conform to the data given in this manual.4
INSTRUCTION MANUALENGLISHMaintenanceIt is strongly recommended, to provide regular maintenance of your installation by a specialist in A.C.M.equipment. Regular maintenance ensures that any malfunction is detected and corrected in good time, andminimizes the possibility that serious damage will occur. Finally regular maintenance ensures the maximumsoperating life of the equipmentTamperings or alterations of parts not authorized by the manufacturer could compromise safety and unitefficiency.Damage due to misuse, tampering, lack of maintenance or failure to comply with the manufacturer’sinstructions will relieve ACM from all liabilities.We would remind you that failure to respect certain installation and maintenance instructions may resultcancellation of the A.C.M. warrantyThe premises must be well ventilated before the welding units, tools with naked flames or high temperatureparts are used because the thermal decomposition of possible refrigerant gases in the room causes theemission of highly toxic and corrosive fumes. It is highly recommended to keep the room well ventilatedwhen repairing refrigeration circuits and to work on a circuit «washed» with nitrogen, and possibly with aflow of nitrogen.If the unit is not going to be used for a long period of time:- Turn the electricity off by removing the power cable from the main switch.- Disconnect the hydraulic circuits and air ducts; drain the internal circuits.If parts of the refrigeration circuit have to be removed, salvage the gas refrigerant and hand it over to anauthorized collection center; fill the circuit with dry nitrogen at a pressure of 12 bar and seal shut.Close all unit accesses.5
INSTRUCTION MANUALENGLISHNormal operation conditionsCheek all wiring connection and trace the circuits to make sure that they agree with the enclosed wiringdiagram. Wiring diagrams are furnished with unit, but extra copies may be obtained from A.C.M.Voltage is to by within plus or minus 10%. Of the voltage specified on the unit name plate frequency is to bewithin plus or minus 10%.Forbidden uses of the unit¬ Do not use this unit for purposes other than those it has been designed for.¬ Do not use it under operation conditions different from those described in this manual. If it has to be usedunder different operating conditions the manufacturer’s prior consent must be obtained.¬ Do not use this unit on premises where there are abnormal levels of dust, acids, corrosive gases ormarine air, exposure to radiation’s and EMC.¬ Do not use this unit where there are explosion or fire risks.¬ Do not install this unit where there are vibrations or shocks.¬ Do not install this unit where there is no possibility of artificial lighting.¬ Do not use the unit’s electrical system to supply other devices (units, sockets, tools).¬ Do not use this unit if protection grids or panels have been removed or are not firmly secured, or if locksare open.¬ Do not use this unit if it has been tampered with or unauthorised alterations have been made.6
INSTRUCTION MANUALENGLISHIdentifying hazards and first aid measuresAccident sources are electricity, fluorohalogenates and internal moving parts.ElectrocutionELECTRICAL HAZARDá Warning! Turn the unit off before helping the injured person.in shockáLoses consciousnessand stops breathingFibrillationheartfailureKeep the injured person on his back, resting, in awarm place. If necessary give him oxygen and askfor medical assistance.Give him artificial respiration immediately and askfor medical assistance.Give him a heart massage immediately and artificialrespiration; ask for medical assistance.High exposure to gasinhalationSprayed with atomizedliquid.Exposure to the irritatingand toxic fumes ofhydrogen chloride andhydrogen fluoride let intothe room caused bythermal decompositionFLUOROHALOGENATES HAZARDAnaesthetic effect,arrhythmiaTake the injured person away from the source ofexposure. If necessary give him oxygen and ask formedical assistance.Skin or eyes freeze-burnt Wash the part immediately with clean warm water.If there is irritation or signs of blistering ask formedical assistance.Inflammation of themucosa of the respiratorytract.Take the injured person away from the source ofexposure and keep him in a warm place, resting. Ifnecessary give him oxygen and ask for medicalassistance.Hit by fan impellersCaught up and draggedby arms or legsMOVING PARTS HAZARDá Warning! Turn the unit off before helping the injured person.cutswoundsamputationscontusionáSurface cuts should be medicated and bandagedwith sterile material if possible. In all cases it isadvisable to have them checked by a doctor. In thecase of a haemorrhage, tampon with a possiblysterile gauze or bandage. If it is an artery that ishaemorrhaging (bright red blood and pulsing) pressthe artery between the wound and the heart to stophaemorrhaging and ask for medical assistance. Ifcontusions or fractures are suspected do not let theinjured person move the arm/leg.7
INSTRUCTION MANUALENGLISHRigging the unit according to label placed on panels8
INSTRUCTION MANUALENGLISHFilling the system(if fitted)CAUTION: the use of untreated or improperly treated water in this equipment may result inscaling, erosion, corrosion, algae or slime. The services of a qualified water treatmentspecialist should be engaged to determine what treatment, if any, is advisable.The filling procedure is the follow:- flushing and clearing of the system- filling the system- venting of the systemcleaning of systemCAUTION: if a commercial flushing solution is used, the unit must be bypassed during flushing to preventpermanent damage to the unit tube.If the unit is cleaned with water it is advisable to carry on the first filling with the valves closed and them toempty the water from the lower point of the circuit.Open the valves and fill again circuit, make the circulation pump running for one hour tacking care to stop thepump every so often for short period of time. After the cleaning, clean the filter.Filling the systemFilling of the system can be carried out through the unit filling/draining cock of the unit.It is recommended to fill the unit at a very low rate in order to prevent turbolences and consequently airpockets.During the operation open all the unit’s vent and the vents placed on the upper side of the system.When the operation has been finished, close all the vents and valves previously opened.Venting the systemAfter the filling start the pump every so often cecking the venting through the manual and automatic vents ofthe circuit.At the end the water flow must result regular and no noise of air pocket must be heard.Ceck the pressure on the gauge and adjust it set point.caution: be sure the water rate is according with the same required by the project and, however it is higherthan the minimum values figured in this manual.9
INSTRUCTION MANUALENGLISHPreparation for start-upStart-up should be carried out only by qualified and experienced personnel.PRELIMINARY OPERATIONSBefore starting the unit, even only momentarily, make sure that following points are checked:· With the main switch off, check that the electrical power connections and those of the auxiliary circuitcomply with the instructions given on the terminal boards in this manual and with local and nationalcodes.· Check that unit voltage is within the voltage limits specified on the name plate.· Open the main switch and check that all the connection terminals are tightly secured and clean. Themobile parts of the contactors and relays must be able to move unhindered. Make sure they are properlyconnected and tight.· Remove any objects in front of the exchange coils that are hindering the free circulation of air.· Check the circuit is filled with gas.This may be limited to checking pressures which should correspond to a saturation temperature near toroom temperature.· Check that oil level in the compressor’s crankcase is at least half way up the indicator.· Make sure that all the sensor bulbs are firmly inserted in their pockets and that the thermal conductorsubstance is there.· Make sure that all air and water connections have been made correctly.10
INSTRUCTION MANUALENGLISHStart up procedure :• Check the compressor’s intake and discharge cocks and the liquid line cock are open.• Place the main switch SG on the control panel, in the position “1” in order to energize the crankcaseheater(s)Unit power light will illuminateCAUTION :energize the compressor heater(s) for a minimum of 12 hours before operating the unit..Make sure the crankcase is warm before starting the compressor.• In the wiring diagram the terminals 78 and 79 are available for an external signal ; make a bridge in casethere is no signal .• If the unit is fitted with storage/circulating kit (PAC/P) select with the selector SFP the pumps operation.• If unit is in heat pump mode ,place the cooling/heating selector SFP in the chosen operation mode.• If the unit is controlled by an external supervisor ,make sure it is able to start the unit in cooling orheating.• Place the SFMC switch on position “ON”.After a certain time, adjustable from 5 to 10 minutes, the compressor will start.• Check the fan motor rotate in correct direction and ,if necessary, reverse a phase after having openedthe main switch• Check the air flow to ensure the flow is within the utilization range.• Check the water rate to ensure the flow is within the utilization range.• In the event of malfunctioning, turn the unit off immediately by placing the SFMC selector “OFF” on thepanel• Check the flow of refrigerant through the sight glass is smooth and without bubbles, bubbles indicate arefrigerant shortage and probably a leak.• Check the oil is visible in the compressor oil level sight glass.• Run the unit for a minimum of 1 hour and make sure the moisture indicator indicates “dry circuit”.Caution:All the unit controls can be placed in a remote control panel11
INSTRUCTION MANUALENGLISHStart up procedure :RSA –RHSA-SMAE+TCX-SMAE-H+THCX• Check the compressor’s intake and discharge cocks and the liquid line cock are open.• Place the main switch SG on the control panel, in the position “1” in order to energize the crankcaseheater(s)Unit power light will illuminateCAUTION :energize the compressor heater(s) for a minimum of 12 hours before operating the unit..Make sure the crankcase is warm before starting the compressor.• In the wiring diagram the terminals 78 and 79 are available for an external signal ; make a bridge in casethere is no signal .• Acting on the panel board ,place the fan operating selector SFMVM on position “ON”• If the unit is controlled by an external supervisor ,make sure it is able to start the unit in cooling orheating.• Check the fan motor rotate in correct direction and ,if necessary, reverse a phase after having openedthe main switch• Place the SFMC switch on position “ON”.After a certain time, adjustable from 5 to 10 minutes, the compressor will start.• Check the air flow to ensure the flow is within the utilization range.• In the event of malfunctioning, turn the unit off immediately by placing the SFMVM selector “OFF” on thepanel• Check the flow of refrigerant through the sight glass is smooth and without bubbles ,Bubbles indicate arefrigerant shortage and probably a leak.• Check the oil is visible in the compressor oil level sight glass.• Run the unit for a minimum of 1 hour and make sure the moisture indicator indicates “dry circuit”.CautionAll the unit controls can be placed in a remote control panel12
INSTRUCTION MANUALENGLISHOperationCompressor(s) operation is controlled by thermostat and a timer (when connected to the unit).To stop the unit place selector SFMC on “OFF”To start the unit again place the same selector onWhen running, the adjustment thermostat and timer, if connected to the unit, will control compressoroperation.To stop the unit just place selector SF on «OFF».To start the unit position the same selector «ON».Day or weekend shutdownIf the unit is to be shut down for a short period of time, act only on selector SFMC to stop ant to start the unit.In such a way the crankcase heater remains in operation .Seasonal shutdown (by qualified service technician)If the unit is to be shut down for long period of time place selector SFMC on «OFF» and next the unit’s mainswitch SG on «0».Open the system master switch. If the system is will be subject to freezing temperatures during the shutdownperiod, drain the tubes and piping completely.The evaporator drain can be carried out through the drain cock.Seasonal start up (by qualified service technician)CAUTION: perform the applicable procedures outlined under “One year” in the maintenance section.Make sure the system is charged and check the pressure. If necessary refill the system according toFILLING THE SYSTEM procedures.Open the compressor suction and discharge valves and the liquid line shutoff valve .Test the entire refrigerant system for leaks.Place the selector SG of the panel on position “1” to energize the crankcase heater.CAUTION: energize the compressor crankcase heater for a minimum of 12 hours before operatingthe unit. Ensure the crankcase heater is warm before starting the unit.Perform the applicable procedures outlined under START UP section13
INSTRUCTION MANUALENGLISHMaintenanceMAINTENANCE OPERATIONS MUST BE CARRIED OUT ONLY BY QUALIFIED ANDEXPERIENCED ENGINEER.14
INSTRUCTION MANUALENGLISHRefrigerant leak testWhen there is a refrigerant leak during normal operation, inspect the piping and circuid for leake with aleak director.Check every possible point of leakage and repeat it.When mending requires the partial empty of a circuit section, use suitable equipment’s to recover therefrigerant. Before overfill the refrigerant in this case, it is necessary to pressure to check tightness.The overfilling must be carried out with refrigerant in gaseous phase (R22) or in liquid phase (R134aR407c) checking the charge through the sightglass.Pressurizing the circuitPressurize the circuit or the repaired section with the valves closed.Fill the section with dry nitrogen at a pressure of 12 bar and check any leaks using a soapy solution.Bubbles indicate refrigerant shortage and probably a leak in which case check every possible point ofleakage and all operations must be repeated.Evacuate the system to a pressure of 113 Pa.Interrupt suction of the pump and stop it.Check that the pressure indicated on the vacuum meter remains constant. If there is an increase ofpressure in the circuit a leak is indicated, in the case repeat all the operation described.Creating vacuumBe very thorough in this field evacuation procedure, because moisture inside the circuit is verydangerous for the compressor’s windings and the controls.CAUTION: never use the compressor for field evacuation.Vacuum creating procedure:1 -make sure that the circuit has been successfully pressurized.2 -connect the vacuum pump as shown in the drawing.3 -produce vacuum in the circuit at a pressure of 113 Pa.4 -introduce dry nitrogen at a pressure of 12 bar.5 -repeat the vacuum operation as per point 3.6 –introduce nitrogen as per phase 4.7 -produce vacuum in the circuit at a pressure of 113 Pa close pump suction, maintain circuit undervacuum for at least 3 hours.8 -check that the pressure in the vacuum meter remains constant.15
INSTRUCTION MANUALENGLISHRefrigerant Charging.Charging can be done with refrigerant in the liquid state (R134a-R407c) or gaseous state(R22).CAUTION: in the liquid state charring has to be done with the circuit under vacuum, with the compressor still,with water circulating through the evaporator and following the instructions given below.Charging in the liquid stateConnect the refrigerant cylinder to the service valve without tightening it.Open the cylinder’s valve to purge the connection, tighten the coupling nut and place the cylinder towardsthe bottom in such a way the liquid refrigerant will flow from the cylinder to the circuit.Keep an accurate check on the quantity of refrigerant charged which should correspond to the values givenin unit nameplate. For this purpose it is necessary to have scales for weighing or, alternatively, a cylinderpreloaded at the required values.Once the circuit has charged , close the cylinder valve ,start the unit at max. capacity , checking theoperation according to instructions outlined in section “CHECKING THE CHARGE”Disconnect the connection pipe between unit and cylinder.Charging in the gaseous stateCharging in the gaseous state is required for topping-up the circuit when there is refrigerant shortageand after having accurately controlled tightness.To charge in the gaseous state proceed as follows:Allow the compressor to continue running.Connect the refrigerant cylinder to the service valve without tightening it.Open the cylinder’s valve to purge the connection, tighten the coupling nut and place the cylinder towardsthe bottom in such a way the gaseous refrigerant will flow from the cylinder to the circuit.Check the flow sightglassOnce the circuit has charged , close the cylinder valve ,start the unit at max. capacity , checking theoperation according to instructions outlined in section “CHECKING THE CHARGE”Disconnect the connection pipe between unit and cylinder.CAUTION: do not charge in the liquid state as it could seriously damage the compressor. The cylinder mustbe placed vertically with the discharge connection at the top.WARNING: do not charge any more than is actually necessary otherwise it would cause extensivecompressor damage.After charging, if required, check that superheat and subcooling values are within the right limit.16
INSTRUCTION MANUALENGLISHChecking the chargeIf the system is properly charged superheating at the gaseous line should be 7- 8 °C , and subcooling at theliquid line access valve should be 4 – 6 ° C.To check whether or not the values indicated have been reached, under normal operating conditions at fullload, proceed as follows:superheatingallow the unit to function in a normal manner checking that high and low pressure readings in the relevantgauges are constant.Read the suction temperature just downstream the thermostatic valve’s bulb. The difference between thistemperature and saturation temperature read on the low pressure gauge must be within the described limits.subcoolingRead the temperature of the liquid in outlet from the condenser. The difference between the saturationtemperature seen on the high pressure gauge and that measured, must be within the described limits.17
INSTRUCTION MANUALENGLISHPreventive maintenanceRegular preventive maintenance will highlight any malfunctioning and let you remedy it in time, minimizingthe possibility of more serious problems. The system’s value is also maintained over time.WHAT TO DO WEEKLY MONTHLY SIX MONTHLY YEARLYcheck the level of oil in the compressor’s casing * * * *through the indicator glasscheck the quantity of coolant and check humidity * * * *on the liquid passage indicatorcheck operating temperatures and pressures * * * *inspect the unit to make sure there are no unusual * * * *conditions (compressor making too much noise,vibrations, pipes leaking)check tightness of the refrigeration circuit using a* * *leak detector, paying particular attention to joinsand welded parts.check that triggering of the thermostats and* * *pressure switches complies with the values givenin the calibration table.check electrical absorption * * *inspect the contacts of the contactors and the* *control and safety instruments and devices.check tightness of all the electrical connections on* *the various terminals.check that all the sensor bulbs that detect* *temperatures are properly fitted inside theirpockets and that contact is guaranteed with thespecial conductor paste.check cleanliness and act accordingly. * *clean the filters on the room air intake. * *clean the exchange battery flaps with a steam* * *nozzle.check belt tension. * * *look for any loose bolts or screws; tighten them. *clean the unit, remove any rust that might haveformed under certain environmental conditionsand protect the repaired parts adequately.*18
INSTRUCTION MANUALENGLISHApplication formIn the event you need copy of this manual, drawings or information on thecomponents installed, please contact A.C.M. head office sending the following form:TO: after service departmentapplicantCompany: ______________________________________________Kind att. Of Mr. __________________________________________Address:________________________________________________________________________________________________________telephone:_____________________________Fax__________________________________Unit:_________________________________Model:_______________________________Nameplate number:______________________DateSignature_________________________19