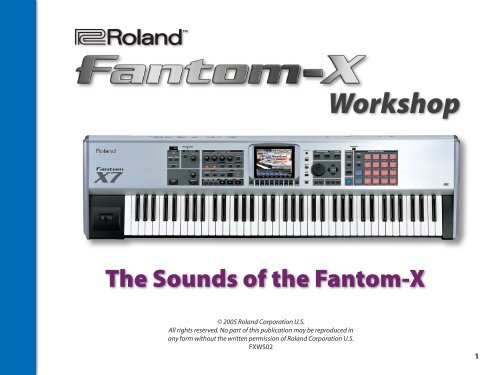
FXWS02âThe Sounds of the Fantom-X - Roland UK
FXWS02âThe Sounds of the Fantom-X - Roland UK
FXWS02âThe Sounds of the Fantom-X - Roland UK

Create successful ePaper yourself
Turn your PDF publications into a flip-book with our unique Google optimized e-Paper software.
About <strong>the</strong> <strong>Fantom</strong> Workshop BookletsThe <strong>Fantom</strong>-X Workshop booklets explain some <strong>of</strong> <strong>the</strong> excitingfeatures <strong>of</strong> <strong>Roland</strong>’s <strong>Fantom</strong>-X family <strong>of</strong> products. EachWorkshop booklet covers a single topic, and is intended as acompanion to <strong>the</strong> <strong>Fantom</strong>-X manuals.This booklet requires <strong>Fantom</strong>-X O.S. Version 2 or higher. Tolearn about <strong>the</strong> latest <strong>Fantom</strong>-X s<strong>of</strong>tware, visit www.<strong>Roland</strong>US.com, or call <strong>Roland</strong> U.S. Product Support at 323-890-3745.O<strong>the</strong>r <strong>Fantom</strong> Workshop Booklets• The <strong>Fantom</strong>-X Experience—A quick tour <strong>of</strong> how <strong>the</strong> major<strong>Fantom</strong>-X creative tools interact.• The Rhythms <strong>of</strong> <strong>the</strong> <strong>Fantom</strong>-X—Exploring <strong>the</strong> pads, drumsounds, and rhythms <strong>of</strong> <strong>the</strong> <strong>Fantom</strong>-X.• The <strong>Fantom</strong>-X Effects—This booklet helps you get <strong>the</strong> mostout <strong>the</strong> powerful effects processing in <strong>the</strong> <strong>Fantom</strong>-X.• Sequencing on <strong>the</strong> <strong>Fantom</strong>-X—Learn how to record using<strong>the</strong> <strong>Fantom</strong>-X sounds and its full-featured sequencer.• Sampling on <strong>the</strong> <strong>Fantom</strong>-X—Capture loops, vocals, or anyo<strong>the</strong>r sound with <strong>the</strong> <strong>Fantom</strong>-X’s built-in sampler.• Smart Storage in <strong>the</strong> <strong>Fantom</strong>-X—Learn all about <strong>the</strong><strong>Fantom</strong>-X’s storage options for samples and o<strong>the</strong>r data.• Performing with <strong>the</strong> <strong>Fantom</strong>-X—Splits, layers, realtimecontrollers, and more make <strong>the</strong> <strong>Fantom</strong>-X hot onstage.• Making a CD <strong>of</strong> Your <strong>Fantom</strong>-X Music—Learn how to turnyour <strong>Fantom</strong>-X music into a final audio CD.• Advanced <strong>Fantom</strong>-X Sequencing Techniques—Learn howto use time-based effects, create arpeggios, work withmastering effects, and record realtime patch tweaks.• Audio Tracks—This booklet explains how to record livevocals and instruments in your <strong>Fantom</strong>-X songs.About This BookletIn this booklet, we’ll discuss <strong>the</strong> sounds, or “patches,” <strong>of</strong> <strong>the</strong><strong>Fantom</strong>-X. We’ll explain how a patch works, and how to quicklyget to <strong>the</strong> patches you want. We’ll also check out some <strong>of</strong> <strong>the</strong>exciting built-in <strong>Fantom</strong>-X sounds, and visit Piano mode.You’ll learn how to play patches expressively using realtimecontrols. We’ll talk about editing patches so you can tweakfactory patches or create new sounds <strong>of</strong> your own. Finally, we’llexplore <strong>the</strong> remote selection <strong>of</strong> <strong>Fantom</strong>-X patches via MIDI.This booklet discusses things that happen inPatch mode. To enter Patch mode, press <strong>the</strong>PATCH/RHYTHM button.In this booklet, we’re talking about standard <strong>Fantom</strong>-X patches, whichplay <strong>the</strong> same sound up and down <strong>the</strong> keyboard at different pitches. The<strong>Fantom</strong>-X also <strong>of</strong>fers a special category <strong>of</strong> patch called “rhythm sets,” whichare usually played on <strong>the</strong> <strong>Fantom</strong>-X pads. Rhythm sets are discussed in TheRhythms <strong>of</strong> <strong>the</strong> <strong>Fantom</strong>-X Workshop booklet.Using patches in Performance mode is discussed in <strong>the</strong> Sequencing on <strong>the</strong><strong>Fantom</strong>-X and Performing with <strong>the</strong> <strong>Fantom</strong>-X Workshop booklets.Understanding <strong>the</strong> Symbols in This BookletThroughout this booklet, you’ll come across information thatdeserves special attention—that’s <strong>the</strong> reason it’s labeled withone <strong>of</strong> <strong>the</strong> following symbols.A note is something that adds information about <strong>the</strong> topic at hand.A tip <strong>of</strong>fers suggestions for using <strong>the</strong> feature being discussed.Warnings contain important information that can help you avoid possibledamage to your equipment, your data, or yourself.
Selecting Patches on <strong>the</strong> <strong>Fantom</strong>-XIn this section, we’ll talk about selecting a patch for <strong>the</strong><strong>Fantom</strong>-X keyboard. While <strong>the</strong>re are a few ways to locate apatch you want, <strong>the</strong> first step is to let <strong>the</strong> <strong>Fantom</strong>-X know thatit’s a keyboard patch you’re after.Looking for PatchesTo search for a patch to use, press F1 (Patch List)—a screen like<strong>the</strong> one shown here appears.Normally you select a patch for <strong>the</strong> keyboard and a rhythm set for <strong>the</strong> pads.However, you can turn this around if you like. If you select a rhythm set for<strong>the</strong> keyboard, each key plays a different drum/percussion sound. If youselect a patch for <strong>the</strong> pads, each pad plays <strong>the</strong> patch at a different pitch. Fornow, though, we’ll presume you want to play a patch on <strong>the</strong> keyboard.Press PATCH/RHYTHM to display <strong>the</strong> Patch Play screen, and<strong>the</strong>n press F7 (Kbd) to select <strong>the</strong> keyboard.Search by CategoryThe Patch List screen is configured by default to present you<strong>the</strong> available patches arranged by musical category, as youcan see along <strong>the</strong> left side <strong>of</strong> <strong>the</strong> screen. Most <strong>of</strong> <strong>the</strong> time, thisprovides a sensible, easy way to locate a patch.If you don’t see category names listed at <strong>the</strong> left, press F4 (Patch Categ).You can select patches on <strong>the</strong> Patch Play screen by highlighting<strong>the</strong> patch number—as shown above—or bank name, and <strong>the</strong>nturning <strong>the</strong> VALUE dial. (We’ll explain banks in a few pages).More typically, though, you’ll ei<strong>the</strong>r be:• looking for a patch you want to use, or• selecting a known, favorite patch.We’ll discuss <strong>the</strong>se two different operations separately. In <strong>the</strong>next sections, we’ll assume you’re on <strong>the</strong> Patch Play screen.Here’s how to select patches by category from <strong>the</strong> patch list:• Press F2 (↓) or F1 (↑) to select <strong>the</strong> category you want.• Once <strong>the</strong> desired category is selected, press 5 or 6 orturn <strong>the</strong> VALUE dial to select a patch.• You can try out <strong>the</strong> patch by playing <strong>the</strong> keyboard, or bypressing and holding F7 (Preview) to hear a brief passagethat demonstrates <strong>the</strong> selected patch.• When you’ve got <strong>the</strong> patch you want, press F8 (Select) toconfirm your choice and exit <strong>the</strong> patch list.
Search by LocationPress F5 (Patch) to view your patches sorted according to <strong>the</strong>irlocations in <strong>the</strong> <strong>Fantom</strong>-X’s memory.Viewing patches in banks is handy when a patch’s location—on a memory card or expansion board, for example— makes iteasy to find. It’s also a great way to quickly play your samples.Select <strong>the</strong> desired patch as we described on Page 4.Selecting Favorite PatchesThe <strong>Fantom</strong>-X has an even faster way <strong>of</strong> selecting patches youuse over and over. You can designate 64 patches as “favorites”that can be selected using <strong>the</strong> eight F buttons. Each bank <strong>of</strong>favorites puts ano<strong>the</strong>r eight patches at your fingertips.Adding a Patch to Your Favorites List<strong>Fantom</strong>-X patches are actually stored in groups, or “banks.” Youcan see <strong>the</strong> banks listed along <strong>the</strong> left side <strong>of</strong> <strong>the</strong> screen:• USER—This bank contains 256 memory locations in whichyou can store your own patches, or edits <strong>of</strong> <strong>the</strong> factorypatches.• Preset-A through Preset-I—Preset Banks A-I hold <strong>the</strong> 1,152<strong>Fantom</strong>-X factory patches.• GM—These two banks appear as one continuous bankholding <strong>the</strong> 256 General MIDI and General MIDI 2 sounds.• CARD—This bank contains any <strong>Fantom</strong>-X patches you’vesaved to an installed PC memory card.• User Sample, Card Sample—These banks allow you todirectly select and play samples in user or card memoryusing <strong>the</strong> Auto Patch feature described in <strong>the</strong> Sampling on<strong>the</strong> <strong>Fantom</strong>-X Workshop booklet.• XP-A through XP-D—When you’ve installed an SRX Serieswave expansion board, its patches show up in <strong>the</strong> XP (for“expansion”) memory area corresponding to <strong>the</strong> SRX slotin which you’ve installed <strong>the</strong> board.There are two ways to add—or “register”—a Favorite patch.Quickly Add a Patch from <strong>the</strong> Patch Play Screen1. After selecting <strong>the</strong> patch on <strong>the</strong> Patch Play screen, press F2(Favorite) to display <strong>the</strong> Favorite Patch window.2. Turn VALUE to select <strong>the</strong> desired Favorites bank.3. Hold down SHIFT and press <strong>the</strong> F1-F8 button you’d like touse for selecting <strong>the</strong> patch in <strong>the</strong> future.4. Press EXIT to return to <strong>the</strong> Patch Play screen.
Add a Patch Directly from <strong>the</strong> Patch List1. On <strong>the</strong> Patch List screen, press F3 (Favorite) to display <strong>the</strong>Favorite Patch window.Exploring <strong>the</strong> <strong>Fantom</strong>-X PatchesNow that we’ve discussed <strong>the</strong> ways in which you can easily getto any <strong>of</strong> <strong>the</strong> many patches, we thought we’d point out a fewpatches that show <strong>of</strong>f <strong>the</strong> <strong>Fantom</strong>-X’s range.We recommend finding <strong>the</strong>se patches by category from <strong>the</strong> Patch Listscreen for now. Make sure to press F4 (Patch Categ) on <strong>the</strong> Patch List screento display patches by musical category.2. Press F2 (↓) or F1 (↑) to select <strong>the</strong> desired Favorites bank.3. Press 6 or 5 to select <strong>the</strong> desired location for <strong>the</strong> patchwithin <strong>the</strong> selected Favorites bank.4. Press F6 (Regist) to add <strong>the</strong> patch as a new favorite.Removing a Patch from <strong>the</strong> Favorites ListIn <strong>the</strong> Favorite Patch window, select <strong>the</strong> patch you want toremove from <strong>the</strong> list, and press F5 (Remove).Selecting a Patch from Your Favorites ListPatch Category Take a moment to...UltimatGrand AC. Piano play up and down <strong>the</strong> keyboard,varying your touch to hear <strong>the</strong>patch’s expressiveness.The VorteX Synth FX listen to <strong>the</strong> sheer complexity <strong>of</strong>this patch.X StrSection Strings check out <strong>the</strong> rich realism <strong>of</strong> thisstring patch by playing lines andchords. (Keep your foot <strong>of</strong>f <strong>the</strong>Hold pedal for best results.)FlamencoGt X AC. Guitar play some tender guitar licks. Slaphard for a quick hammer-on.HimalayaPipe Flute play this haunting, e<strong>the</strong>real patchslowly, letting <strong>the</strong> sound unfold.Strobot Pulsating throb in time with this rave patch.Press PATCH/RHYTHM if you’re not already on <strong>the</strong> PatchPlay screen, and <strong>the</strong>n press F2 (Favorite)—your first bank <strong>of</strong>Favorite patches appears. To select a different Favorites bank,turn <strong>the</strong> VALUE dial.You can see that each <strong>of</strong> <strong>the</strong> Favorite patches has an F buttonname printed to its left—press <strong>the</strong> desired patch’s F button toselect <strong>the</strong> patch.
Realtime ControllersThe <strong>Fantom</strong>-X boasts an assortment <strong>of</strong> realtime controllers:• The Pitch Bend/Modulation lever—Push <strong>the</strong> lever forward to turn up<strong>the</strong> current patch’s LFO. Push it leftor right to bend <strong>the</strong> pitch <strong>of</strong> notesdown or up, respectively.• The keyboard itself—You can use“aftertouch” to control sounds bypressing down into <strong>the</strong> keyboard.• The REALTIME CONTROL knobs (circled in red below)—Byturning <strong>the</strong> knobs, you can:• adjust a patch’s filter and envelope settings.• adjust arpeggiator and rhythm generator settings.• change <strong>the</strong> values <strong>of</strong> patch or effect parameters.The realtime controllers allow you to manipulate <strong>the</strong> sound <strong>of</strong><strong>the</strong> currently selected patch or effect as you play, respondingin realtime to your actions. To try this out:1. Select <strong>the</strong> Square Sphere patch in <strong>the</strong> Pulsating category.2. Press <strong>the</strong> D Beam ASSIGNABLE button so it’s lit.3. Press <strong>the</strong> REALTIME CONTROL button repeatedly—wi<strong>the</strong>ach press, <strong>the</strong> functions <strong>of</strong> <strong>the</strong> REALTIME CONTROL knobschange, as shown on <strong>the</strong> display.4. Play <strong>the</strong> patch and experiment with how <strong>the</strong> D Beam andREALTIME CONTROL knobs change <strong>the</strong> sound as you play.As you operate a realtime control, you’re changing <strong>the</strong> value<strong>of</strong> one or more parameters in <strong>the</strong> patch or in <strong>the</strong> patch’s effect.We’ll explain how to set up assignable realtime control later.Piano Mode• The two ASSIGNABLE SW buttons (circled in yellow above)—Press <strong>the</strong> buttons to turn settings on or <strong>of</strong>f, or transpose<strong>the</strong> keyboard up and/or down by semitones.• The D Beam—Move your hand up or downabove <strong>the</strong> D Beam lenses to:• trigger pads.• play notes using a mono synth sound.• change <strong>the</strong> values <strong>of</strong> patch or effectparameters.The <strong>Fantom</strong>-X <strong>of</strong>fers a special Piano mode that provides <strong>the</strong>ultimate acoustic or electric piano-playing experience. Whenyou press PIANO MODE so it lights, <strong>the</strong> <strong>Fantom</strong>-X displaypresents you unique options for <strong>the</strong> creation <strong>of</strong> <strong>the</strong> mostrealistic, expressive piano sounds.
Piano mode opens up by default with <strong>the</strong> <strong>Fantom</strong>-X’sextraordinary 88-note multisampled piano. You can, if youwish, select o<strong>the</strong>r acoustic piano patches, or select an electricpiano patch.• If you’re on <strong>the</strong> acoustic piano screen—you can highlight <strong>the</strong>current patch’s name and turn VALUE to select a differentacoustic piano.• If you’re on <strong>the</strong> electric piano screen—you can highlight <strong>the</strong>current patch’s name and turn VALUE to select a differentelectric piano.simulates <strong>the</strong> way in which a real piano’s strings causeits neighboring strings to vibrate in sympathy, creating apiano’s characteristic resonance. You can set <strong>the</strong> desiredamount <strong>of</strong> resonance.To adjust a parameter, press <strong>the</strong> corresponding F button, and<strong>the</strong> parameter’s window pops open onscreen. To close <strong>the</strong>window, press <strong>the</strong> F button again.GM (General MIDI) acoustic and electric piano patches cannot be selectedin Piano mode.To switch between piano types, press F1 (List), and <strong>the</strong>n:• Press F1 (AC. Piano) or F2 (El. Piano).• Turn <strong>the</strong> VALUE dial to select <strong>the</strong> desired patch.• Press F8 (Select) to confirm your choice.In Piano mode, <strong>the</strong> acoustic and electric piano screens <strong>of</strong>fer<strong>the</strong>ir own unique options.Electric Pianos in Piano ModeAcoustic Pianos in Piano ModeWith an acoustic piano in Piano mode, you can set:• Key Touch—This parameter adjusts <strong>the</strong> <strong>Fantom</strong>-X’s responseto <strong>the</strong> force with which you hit <strong>the</strong> keys in Piano mode.Select <strong>the</strong> value that best reflects your playing style.• Open Close—As you raise or lower a real grand piano’s lid,<strong>the</strong> piano’s sound changes. Use <strong>the</strong> Open Close parameterto set <strong>the</strong> height <strong>of</strong> <strong>the</strong> virtual <strong>Fantom</strong>-X piano’s lid.• Resonance—When you play an acoustic piano in Pianomode, <strong>the</strong> <strong>Fantom</strong>-X multi-effects are automatically setto use Effect 78, Sympa<strong>the</strong>tic Resonance. This effectWhen you’re playing an electric piano, you can set <strong>the</strong> electricpiano’s Key Touch (explained above), and turn on an effecttypically used for electric piano.
You can turn on:• Tremolo—This effect causes notes to swing side-to-side,left-to-right, as in classic Stage-model electric pianos.• Chorus—Chorus adds <strong>the</strong> shimmering effect so commonlyapplied to electric pianos.• Phaser—Funky electric pianos <strong>of</strong>ten use phasing that addsa whooshing swirl to <strong>the</strong> sound.• EQ—EQ allows you to brighten-up or smooth out anelectric piano sound to taste.• Speaker Simulator—This effect helps recreate <strong>the</strong> sound <strong>of</strong>vintage electric piano speakers.To turn on and customize an effect, press its F button—<strong>the</strong> Fbutton lights onscreen and its parameters are displayed. Youcan adjust <strong>the</strong> displayed parameters using <strong>the</strong> REALTIMECONTROL knobs. Each parameter is numbered to show <strong>the</strong>knob that controls it.For a detailed explanation <strong>of</strong> <strong>the</strong> electric piano parameters, see <strong>the</strong> EffectList section <strong>of</strong> your Owner’s Manual, starting on Page 270.How a Patch WorksIf you want to edit patches or create your own, you’ll needto understand what makes a patch tick, so to speak. In thissection, we’ll discuss <strong>the</strong> mechanics <strong>of</strong> a patch.Where Does a Patch Get Its Sound?Each <strong>Fantom</strong>-X patch is actually a group <strong>of</strong> one or more audiorecordings playing back toge<strong>the</strong>r as a single sound. There arelots <strong>of</strong> settings in a patch that control how <strong>the</strong> recordings playand interact—<strong>the</strong> <strong>Fantom</strong>-X effects contribute significantly toa patch’s sound, too—but everything starts with this group <strong>of</strong>recordings.There are two kinds <strong>of</strong> recordings a <strong>Fantom</strong>-X patch can play.It can play:• built-in recordings—The <strong>Fantom</strong>-X contains 1,436 briefsound recordings stored as PCM “waveforms.” When youinstall an SRX Series wave expansion board, you add evenmore waveforms from which patches can be built.• your own recordings—A patch can also play recordings, or“samples,” you’ve captured yourself on <strong>the</strong> <strong>Fantom</strong>-X, orthat you’ve imported via USB. These may be brief chunks <strong>of</strong>sound, like <strong>the</strong> built-in waves, or complete performances.When you sample something on <strong>the</strong> <strong>Fantom</strong>-X, it’s a patch or rhythm setthat plays it. See <strong>the</strong> Sampling on <strong>the</strong> <strong>Fantom</strong>-X Workshop booklet for moreon sampling.Tones: The Structure <strong>of</strong> a PatchEach patch is a set <strong>of</strong>four sound-producingdevices called “tones.” It’s<strong>the</strong> tones that actuallyplay <strong>the</strong> recordings thatmake up a patch.Each tone can play:• a stereo waveform orsample, or• two mono waveforms or samples.A patch may or may not use all four <strong>of</strong> its tones, depending on <strong>the</strong>complexity <strong>of</strong> <strong>the</strong> sound its programmer is trying to achieve.A tone doesn’t have to play a stereo waveform or sample, or two monowaveforms or samples—it can play a single mono waveform or sampleif you like.
Each tone has its own set <strong>of</strong> about 90 parameters thatdetermine how its waveforms or samples play. Tones can beset to play toge<strong>the</strong>r in different ways, resulting in a variety <strong>of</strong>different sounds from <strong>the</strong> same basic sonic materials.In addition, <strong>the</strong>re are parameters that control <strong>the</strong> behavior <strong>of</strong><strong>the</strong> combined sound produced by <strong>the</strong> patch’s active tones.Making Your Own PatchesAfter you’ve read <strong>the</strong> following sections and are ready to get started, seePage 56 in <strong>the</strong> Owner’s Manual for some helpful patch-programming tips.In this booklet, we discuss editing—and <strong>the</strong>refore creating—patches on <strong>the</strong><strong>Fantom</strong>-X itself. If you prefer, you can accomplish <strong>the</strong> same thing on yourcomputer using <strong>the</strong> <strong>Fantom</strong>-X Editor (and Librarian) s<strong>of</strong>tware.To get to a patch’s parameters, select <strong>the</strong> patch on <strong>the</strong> PatchPlay screen, and <strong>the</strong>n press PATCH EDIT.You can create a new patch from one <strong>of</strong> your samples by selecting it from<strong>the</strong> patch list’s User or Card Sample bank, and <strong>the</strong>n pressing PATCH EDIT.You may find it helpful to compare your edits against <strong>the</strong> last-saved version<strong>of</strong> <strong>the</strong> current patch as you work. See Page 60 in <strong>the</strong> Owner’s Manual.Getting <strong>the</strong> Right TonesSince a patch is made up <strong>of</strong> its tones, a key element in patchprogramming is choosing <strong>the</strong> right waves or samples for itstones to play.A patch’s effect plays a large role in its final sound, too. To learn more abouteffects, check out <strong>the</strong> Workshop booklet The <strong>Fantom</strong>-X Effects.If you’re tweaking an existing patch—or you’re editing a patchthat plays samples you’ve made—<strong>the</strong> tones you want are mostlikely already in place. When you’re creating a new patch fromscratch, though, <strong>the</strong> first thing you’ll want to do is figure outhow many tones you really want to use. Many patches soundgreat with just one or two tones. There’s no need to use all fouravailable tones unless each one really contributes to <strong>the</strong> soundyou want—<strong>the</strong>re’s no point in doing programming work forno reason, after all. And <strong>the</strong>re’s ano<strong>the</strong>r reason to keep yourpatches lean, as you’ll learn in <strong>the</strong> following section.About Tones and PolyphonyEvery synth or sampler has a maximum number <strong>of</strong> waveformsor samples it can play at a single time. This limit is referred to as<strong>the</strong> instrument’s “available polyphony,” and each note playedby a waveform or sample is called a “voice” in this context.Each stereo waveform or sample a tone plays uses two voices,one for its left side, and one for <strong>the</strong> right. Likewise, a toneuses two voices when it plays two mono waves or tones. Themore tones a patch uses, <strong>the</strong> more voices <strong>of</strong> polyphony iteats up. With four tones active, a patch can use eight voices<strong>of</strong> polyphony for each note you play. If you play a three-notechord, you’d be using 24 voices—if you play two chords with<strong>the</strong> sustain pedal down, you’d be using 48 voices!
Since <strong>the</strong> <strong>Fantom</strong>-X can play a whopping 128 voices at once,you’re unlikely to have any problems playing patches in Patchmode. When you’re using multiple patches during recording,however, you may notice notes not playing in passages withlots <strong>of</strong> dense instrumentation. If this occurs, check <strong>the</strong> patchesyou’re using and see if you can live without any <strong>of</strong> <strong>the</strong>ir tones.You can easily see how many voices you’re using at any time. Press PATCH/RHYTHM, LAYER/SPLIT or MIXER, and <strong>the</strong>n hold down SHIFT and press F4(Voice Monitor) to view a graphic display <strong>of</strong> <strong>the</strong> voices currently in use.The Four Graphic Editing ScreensThe Owner’s Manual—starting on Page 60—provides more details thanwe can here, but <strong>the</strong> following brief descriptions will get you started.The Pitch Env Edit ScreenUse <strong>the</strong> Pitch Env—for “Pitch Envelope”—Edit screen’sparameters to automate changes to a tone’s pitch as a noteplays, as described on Page 68 in <strong>the</strong> Owner’s Manual.Activating and Selecting TonesTo turn tones on or <strong>of</strong>f on a patch editing screen, press F8(Tone Sw/Sel) to show <strong>the</strong> Tone Switch/Select F buttons.• To turn each <strong>of</strong> <strong>the</strong> four possible tones on or <strong>of</strong>f—press <strong>the</strong>desired F1-F4 button. When a tone’s on, it lights yellow.• To edit a tone’s parameters—press <strong>the</strong> corresponding F5-F8 button. When a tone’s selected for editing, it turnsred onscreen. To edit <strong>the</strong> parameters <strong>of</strong> multiple tonessimultaneously, press <strong>the</strong>ir F buttons at <strong>the</strong> same time.To hide <strong>the</strong> Tone Sw and Tone Select buttons, press EXIT.The TVF Edit ScreenThe TVF—for “Time Variant Filter”—can remove selectedfrequency ranges from a tone’s waveform or sample, asdescribed on Page 69 in <strong>the</strong> Owner’s Manual.Editing a Tone’s ParametersWhen you press PATCH EDIT, <strong>the</strong> <strong>Fantom</strong>-X <strong>of</strong>fers a set <strong>of</strong>screens that let you literally see <strong>the</strong> effect <strong>of</strong> each edit youmake.You can adjust important parameter values on <strong>the</strong> graphic editing screensusing <strong>the</strong> four REALTIME CONTROL knobs.10
The TVF Envelope Edit ScreenThe TVF Envelope Edit screen allows you to automate changesto a tone’s frequency content as a note plays, as described onPage 71 in <strong>the</strong> Owner’s Manual.The Structure Edit ScreenOn <strong>the</strong> Structure Edit screen, you can set <strong>the</strong> relationshipbetween <strong>the</strong> patch’s tones—this can have a major impacton <strong>the</strong> patch’s sound. See Page 63 in <strong>the</strong> Owner’s Manual formore.The TVA Env Edit ScreenThe TVA Env—for “Time Variant Amplifier” envelope—Editscreen allows you to automatically shape a tone’s volume as anote plays, as explained on Page 72 in <strong>the</strong> Owner’s Manual.The Patch Overview ScreenThe Patch Overview screen provides quick access to <strong>the</strong> mostcommonly used tone parameters. Use F2 (↓) or F1 (↑) to movefrom section to section, and <strong>the</strong> REALTIME CONTROL knobs toadjust parameter values in <strong>the</strong> currently selected section.The Structure Edit and Patch Overview ScreensThere are two additional graphic editing screens you candisplay by pressing F5 repeatedly.To learn about <strong>the</strong> LFO parameters, see Page 74 in <strong>the</strong> Owner’s Manual.11
The Pro Edit ParametersFor detailed editing, <strong>the</strong> <strong>Fantom</strong>-X <strong>of</strong>fers Pro Edit mode’sPatch Edit screen, in which all patch-wide and tone-specificparameters are arranged in sections from top to bottom on<strong>the</strong> display. To move from section to section, press F2 (↓) orF1 (↑). To edit a parameter within <strong>the</strong> selected section, press5 or 6 to highlight it and turn VALUE to adjust its setting.To enter Pro Edit mode, press F6 (Pro Edit) on a graphic editingscreen. To return to graphic editing, press F6 (Zoom Edit) on<strong>the</strong> Patch Edit screen.What The Parameter Sections Do• General—These parameters apply to <strong>the</strong> patch as a whole.It’s where you sets its musical category, overall level andpanning, and set <strong>the</strong> patch’s importance to you whenpolyphony is at its limit. You can adjust its tuning andresponse, and do some overall tweaking to a few keyparameters. See Page 60 in <strong>the</strong> Owner’s Manual for more.• Wave—These parameters allow you to select each tone’sPCM wavesform(s) or sample(s), and set <strong>the</strong>ir basicbehavior. See Page 62 in <strong>the</strong> Owner’s Manual.• TMT (Tone Mix Table)—Set <strong>the</strong> manner in which <strong>the</strong> activetones interact here. Also, control <strong>the</strong> basic volume andplayback characteristics <strong>of</strong> a tone with <strong>the</strong>se settings. SeePage 63 in <strong>the</strong> Owner’s Manual.• Pitch—Set a tone’s basic tuning here, and how it respondsto <strong>the</strong> Pitch Bend/Modulation lever, as well as to <strong>the</strong> pitchenvelope, below. See Page 67 in <strong>the</strong> Owner’s Manual.• Pitch Env (Pitch Envelope)—The pitch envelope allows youto automate changes to a tone’s pitch as a note plays. SeePage 68 in <strong>the</strong> Owner’s Manual.• TVF (Time Variant Filter)—The Time Variant Filter canremove selected frequency ranges from a tone’s waveformor sample. Set <strong>the</strong> properties and basic behavior <strong>of</strong> <strong>the</strong>filter here. See Page 69 in <strong>the</strong> Owner’s Manual.• TVF Env (TVF Envelope)—The TVF envelope allows you toautomate changes to a tone’s frequency content as a noteplays. See Page 71 in <strong>the</strong> Owner’s Manual.• TVA (Time Variant Amplifier)—The TVA parameters set <strong>the</strong>basic volume behavior <strong>of</strong> a tone, and set its panning. SeePage 71 in <strong>the</strong> Owner’s Manual.• TVA Env (TVA Envelope)—The TVA envelope allows you toautomatically shape a tone’s volume as a note plays. SeePage 72 in <strong>the</strong> Owner’s Manual.• Output—The Output parameters determine where a tone’ssound goes: to effects or directly to selected physicaloutputs. You can set <strong>the</strong> amount <strong>of</strong> <strong>the</strong> tone to be sent to<strong>the</strong> desired effects. See Page 73 in <strong>the</strong> Owner’s Manual.• LFO 1, LFO 2—LFOs provide repeating, cyclical changesto <strong>the</strong> desired parameter values, such as pitch, panningand more. Each tone has two standard LFOs that can beconfigured as desired. See Page 74 in <strong>the</strong> Owner’s Manual.• Step LFO—The step LFO allows you to set up more complexrepeating changes than a standard LFO. See Page 76 in <strong>the</strong>Owner’s Manual.• Solo/Porta (Portamento)—These parameters determinewhe<strong>the</strong>r <strong>the</strong> entire patch plays only one note at a time ormultiple simultaneous notes, and sets <strong>the</strong> way in whichone note moves to <strong>the</strong> next. Portamento, or note sliding,is also controlled by this group <strong>of</strong> settings. See Page 77 in<strong>the</strong> Owner’s Manual.• Misc—These miscellaneous parameters allow you to delay<strong>the</strong> start <strong>of</strong> a tone as you play, and to set a tone’s responseto certain MIDI messages. See Page 78 in <strong>the</strong> Owner’sManual.12
• CTRL 1, 2, 3, 4—These parameters constitute <strong>the</strong> patch’s“matrix control” area. Matrix control lets you use a variety<strong>of</strong> devices, including MIDI messages, to alter patchparameter values as notes play. Each <strong>of</strong> <strong>the</strong> four CTRLscreens lets you select a controlling device, or “source,” andup to four parameters, or “destinations,” for manipulation.Sources can be controllers transmitted from <strong>the</strong> REALTIMECONTROL knobs, as explained in <strong>the</strong> next section.Programming <strong>the</strong> REALTIME CONTROL KnobsTo program <strong>the</strong> behavior <strong>of</strong> <strong>the</strong> REALTIME CONTROL knobswhen <strong>the</strong>ir ASSIGNABLE LED is lit:1. Hold down SHIFT and turn any <strong>of</strong> <strong>the</strong> knobs—<strong>the</strong> ControlSetting screen appears, where you can set each <strong>of</strong> <strong>the</strong> fourknobs to transmit <strong>the</strong> desired type <strong>of</strong> MIDI message.The Patch Edit Utility MenuOn <strong>the</strong> Patch Edit screen, press F4 (Util Menu) to display <strong>the</strong>Utility menu.To perform one <strong>of</strong> <strong>the</strong> Utility menu operations, highlight itusing <strong>the</strong> VALUE dial or 6 or 5, and <strong>the</strong>n press F8 (Select).Copying Tone SettingsIf you’d like to copy <strong>the</strong> settings from one tone to ano<strong>the</strong>rwithin <strong>the</strong> same patch—or even “borrow” <strong>the</strong> settings <strong>of</strong> atone from ano<strong>the</strong>r patch—use <strong>the</strong> Tone Copy feature. In <strong>the</strong>Utility menu, select Patch Tone Copy.Press F2 (↓) or F1 (↑) to display and set <strong>the</strong> assignable behavior <strong>of</strong> <strong>the</strong> DBeams and ASSIGNABLE SW buttons.2. When you’re done, press F8 (System Write)—in Patchmode, realtime control settings are stored in systemmemory. (In Performance mode, each performance has itsown realtime control settings.)In <strong>the</strong> Patch Tone Copy window, you can select <strong>the</strong> tone youwant to copy (<strong>the</strong> Source patch and tone) and to where youwant to copy it (<strong>the</strong> Destination patch and tone).To audition <strong>the</strong> copy source patch, press F6 (Compare) so <strong>the</strong> Comparebutton lights red.When you’re ready, press F8 (Exec) to make <strong>the</strong> copy.13
Initializing a PatchIf you’d like to start a patch from total scratch by setting all <strong>of</strong><strong>the</strong> current patch’s parameters to <strong>the</strong>ir default values, you can“initialize” it using <strong>the</strong> Utility menu’s Patch Initialize operation.Don’t worry about running a saved patch by initializing it—you’re onlyresetting <strong>the</strong> parameters belonging to a copy <strong>of</strong> <strong>the</strong> patch currently in <strong>the</strong><strong>Fantom</strong>-X’s edit memory. You can save this copy to a new memory locationas described in “Saving New or Edited Patches” in <strong>the</strong> next column.Saving New or Edited PatchesWhe<strong>the</strong>r you’ve been editing an existing patch or creating anew one, store your work in <strong>the</strong> <strong>Fantom</strong>-X’s memory beforeselecting ano<strong>the</strong>r patch or powering <strong>of</strong>f to avoid losing yourwork. To do so, “write” <strong>the</strong> patch. Here’s how.Start by pressing WRITE—<strong>the</strong> Write Menu screenappears, ready to store your patch since you’recoming from a patch-editing screen.The Patch Edit Msmpl Edit ButtonThe Patch Edit screen’s F5 (Msmpl Edit)—for “MultisampleEdit”—button allows you to map out a group <strong>of</strong> samplesup and down <strong>the</strong> keyboard. To learn about working on <strong>the</strong>Multisample Edit screen, see <strong>the</strong> Sampling on <strong>the</strong> <strong>Fantom</strong>-XWorkshop booklet.Final TouchesOnce you’ve got your new patch’s parameters <strong>the</strong> way youwant <strong>the</strong>m, take a little time to program <strong>the</strong> patch’s effect. The<strong>Fantom</strong>-X effects add a lot to <strong>the</strong> sound <strong>of</strong> a patch.If you plan to use your patch in a recording on <strong>the</strong> <strong>Fantom</strong>-X,don’t worry about any slight changes you may need to maketo <strong>the</strong> patch so it fits perfectly in your arrangement. Recordingwork takes place in Performance mode, where you can tweakmany patch parameters while hearing <strong>the</strong> patch in context.If “Patch/Rhythm” isn’t highlighted at <strong>the</strong> top <strong>of</strong> <strong>the</strong> screen,press F2 (Patch/Rhythm). If it is, you can press ENTER insteadif you like.Be sure to save your patch to user or card memory when you’re done, asdescribed next.14
To name a patch:1. The first character position is underlined, so turn VALUE toselect <strong>the</strong> first character <strong>of</strong> <strong>the</strong> patch’s name.2. Press 4 to move <strong>the</strong> underline to <strong>the</strong> next character’sposition, and turn VALUE to select <strong>the</strong> second character.3. Repeat Step 2 to enter <strong>the</strong> characters <strong>of</strong> <strong>the</strong> patch nameyou want.As you name <strong>the</strong> patch, you can:• Press F1 (Change Type) repeatedly to jump betweenupper-case, lower-case and numeric characters.• Press F2 (Delete) to remove <strong>the</strong> character at <strong>the</strong> underline’scurrent location.• Press F3 (Insert) to insert a blank space in which you canenter a new character at <strong>the</strong> underline’s current location.When you’ve finished naming <strong>the</strong> patch, press F8 (Write). ThePatch Write window pops up:1. Use F3 (↓) and/or F2 (↑) to select <strong>the</strong> <strong>Fantom</strong>-X’s internaluser memory as <strong>the</strong> location in which <strong>the</strong> patch is to besaved, or to select Card if you’ve installed a memory card.2. Turn VALUE to select <strong>the</strong> user or card location in whichyou’d like to store <strong>the</strong> patch, and <strong>the</strong>n press F8 (Write) tostore <strong>the</strong> patch.If <strong>the</strong>re’s already a patch in <strong>the</strong> selected location, and you’d like to auditionit before replacing it with a new patch, press F4 (Compare) so it turns red.As long as Compare is on, you can try out patches to see which one youwant to replace. To turn <strong>of</strong>f Compare, press F4 (Compare) again.Don’t worry about replacing one <strong>of</strong> <strong>the</strong> factory user patches. They’re allcopies <strong>of</strong> preset patches permanently stored in your <strong>Fantom</strong>-X.3. The <strong>Fantom</strong>-X asks if you’re sure you want to proceed.Press F8 (Exec) to finish storing <strong>the</strong> patch.Selecting Patches Remotely Via MIDISince <strong>the</strong> <strong>Fantom</strong>-X has such extraordinary sounds, you maywant to use it with an external sequencer, such as one you’drun on a computer. You can easily select <strong>Fantom</strong>-X soundsdirectly from a sequencing program by transmitting <strong>the</strong>appropriate MIDI messages on <strong>the</strong> MIDI channel for <strong>the</strong><strong>Fantom</strong>-X’s keyboard or pads in Patch mode, or <strong>the</strong> patch’spart channel in Performance mode.See Page 230 in <strong>the</strong> Owner’s Manual to learn about <strong>the</strong> Kbd and Pad PatchTX/RX Channel parameters in Patch mode. Performance Parts 1-16 receiveMIDI messages on MIDI Channels 1-16, respectively, by default.To select a patch via MIDI, send <strong>the</strong> <strong>Fantom</strong>-X <strong>the</strong> appropriateBank Select MSB and LSB values, and Program Change value.These values are listed in <strong>the</strong> following chart.The XP groups in <strong>the</strong> following chart depend on <strong>the</strong> SRX boards you’veinstalled. See each installed board’s Owner’s Manual.Patch Bank Select and Program Change ChartGroup Number Bank Select ProgramMSB LSB NumberUSER 001-128 87 0 1-128129-256 87 1 1-128CARD 001-128 87 32 1-128129-256 87 33 1-128PR-A 001-128 87 64 1-128PR-B 001-128 87 65 1-128PR-C 001-128 87 66 1-128PR-D 001-128 87 67 1-128PR-E 001-128 87 68 1-12815
Group Number Bank Select ProgramMSB LSB NumberPR-F 001-128 87 69 1-128PR-G 001-128 87 70 1-128PR-H 001-128 87 71 1-128PR-I 001-128 87 72 1-128GM (2) 001-256 121 0-4 (see patch list)CARD 001-256 87 32, 33 1-128USER SAMPLE 001-2000 64 0-14 1-128CARD SAMPLE 001-7000 65 0-53; 54 1-128; 1-88XP-A SRX-01 001- 93 0 1-SRX-02 001- 93 1 1-: : : : :XP-B SRX-01 001- 93 0 1-SRX-02 001- 93 1 1-: : : : :XP-C SRX-01 001- 93 0 1-SRX-02 001- 93 1 1-: : : : :XP-D SRX-01 001- 93 0 1-SRX-02 001- 93 1 1-: : : : :The EndWe hope you’ve enjoyed this introduction to <strong>the</strong> amazingsounds <strong>of</strong> <strong>the</strong> <strong>Fantom</strong>-X. Check out <strong>the</strong> o<strong>the</strong>r <strong>Fantom</strong>-XWorkshop booklets, as well your <strong>Fantom</strong>-X Handbook, Owner’sManual, and <strong>the</strong> Audio Track Expansion guide. We’re confidentyou’ll have a great time with <strong>the</strong> exciting, inspiring <strong>Fantom</strong>-X.For <strong>the</strong> latest <strong>Fantom</strong>-X updates and support tools, visit <strong>the</strong> <strong>Roland</strong> U.S.Web site at www.<strong>Roland</strong>US.com. If you need personal assistance, call ouramazing Product Support team at 323-890-3745.16