You also want an ePaper? Increase the reach of your titles
YUMPU automatically turns print PDFs into web optimized ePapers that Google loves.
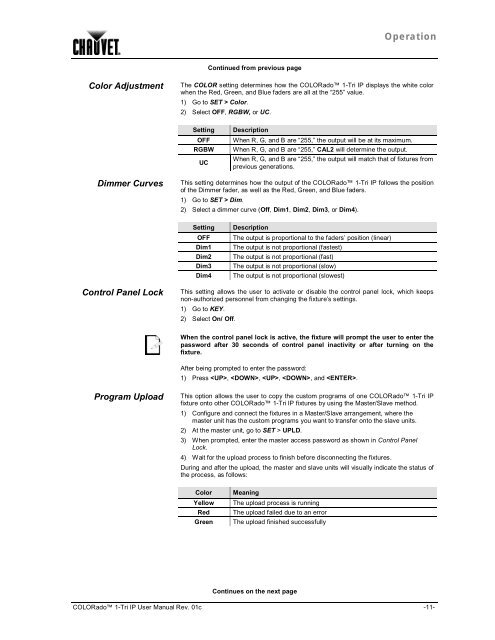
OperationContinued from previous pageColor AdjustmentThe COLOR setting determines how the COLORado 1-<strong>Tri</strong> <strong>IP</strong> displays the white colorwhen the Red, Green, and Blue faders are all at the “255” value.1) Go to SET > Color.2) Select OFF, RGBW, or UC.SettingOFFRGBWUCDescriptionWhen R, G, and B are “255,” the output will be at its maximum.When R, G, and B are “255,” CAL2 will determine the output.When R, G, and B are “255,” the output will match that of fixtures fromprevious generations.Dimmer CurvesThis setting determines how the output of the COLORado 1-<strong>Tri</strong> <strong>IP</strong> follows the positionof the Dimmer fader, as well as the Red, Green, and Blue faders.1) Go to SET > Dim.2) Select a dimmer curve (Off, Dim1, Dim2, Dim3, or Dim4).SettingOFFDim1Dim2Dim3Dim4DescriptionThe output is proportional to the faders’ position (linear)The output is not proportional (fastest)The output is not proportional (fast)The output is not proportional (slow)The output is not proportional (slowest)Control Panel LockThis setting allows the user to activate or disable the control panel lock, which keepsnon-authorized personnel from changing the fixture’s settings.1) Go to KEY.2) Select On/ Off.When the control panel lock is active, the fixture will prompt the user to enter thepassword after 30 seconds of control panel inactivity or after turning on thefixture.After being prompted to enter the password:1) Press , , , , and .Program UploadThis option allows the user to copy the custom programs of one COLORado 1-<strong>Tri</strong> <strong>IP</strong>fixture onto other COLORado 1-<strong>Tri</strong> <strong>IP</strong> fixtures by using the Master/Slave method.1) Configure and connect the fixtures in a Master/Slave arrangement, where themaster unit has the custom programs you want to transfer onto the slave units.2) At the master unit, go to SET > UPLD.3) When prompted, enter the master access password as shown in Control PanelLock.4) Wait for the upload process to finish before disconnecting the fixtures.During and after the upload, the master and slave units will visually indicate the status ofthe process, as follows:ColorYellowRedGreenMeaningThe upload process is runningThe upload failed due to an errorThe upload finished successfullyContinues on the next pageCOLORado 1-<strong>Tri</strong> <strong>IP</strong> User <strong>Manual</strong> Rev. 01c -11-


