EN / ACS800-07/U7 Hardware Manual (45 to 560 ... - Simark Controls
EN / ACS800-07/U7 Hardware Manual (45 to 560 ... - Simark Controls
EN / ACS800-07/U7 Hardware Manual (45 to 560 ... - Simark Controls

You also want an ePaper? Increase the reach of your titles
YUMPU automatically turns print PDFs into web optimized ePapers that Google loves.
<strong>ACS800</strong> Single Drive <strong>Manual</strong>sHARDWARE MANUALS (appropriate manual is included in thedelivery)<strong>ACS800</strong>-01/U1 <strong>Hardware</strong> <strong>Manual</strong> 0.55 <strong>to</strong> 160 kW (0.75 <strong>to</strong> 200 HP)3AFE64382101 (English)<strong>ACS800</strong>-01/U1/04/U4 Marine Supplement 0.55 <strong>to</strong> 160 kW (0.75 <strong>to</strong>200 HP) 3AFE64291275 (English)<strong>ACS800</strong>-11/U11 <strong>Hardware</strong> <strong>Manual</strong> 5.5 <strong>to</strong> 110 kW (7.5 <strong>to</strong> 125 HP)3AFE68367883 (English)<strong>ACS800</strong>-31/U31 <strong>Hardware</strong> <strong>Manual</strong> 5.5 <strong>to</strong>110 kW (7.5 <strong>to</strong> 125 HP)3AFE68599954 (English)<strong>ACS800</strong>-02/U2 <strong>Hardware</strong> <strong>Manual</strong> 90 <strong>to</strong> 500 kW (125 <strong>to</strong> 600 HP)3AFE6<strong>45</strong>67373 (English)<strong>ACS800</strong>-04/U4 <strong>Hardware</strong> <strong>Manual</strong> 0.55 <strong>to</strong> 160 kW (0.75 <strong>to</strong> 200 HP)3AFE68372984 (English)<strong>ACS800</strong>-04/04M/U4 <strong>Hardware</strong> <strong>Manual</strong> <strong>45</strong> <strong>to</strong> <strong>560</strong> kW (60 <strong>to</strong>600 HP) 3AFE64671006 (English)<strong>ACS800</strong>-04/04M/U4 Cabinet Installation <strong>45</strong> <strong>to</strong> <strong>560</strong> kW (60 <strong>to</strong>600 HP) 3AFE68360323 (English)<strong>ACS800</strong>-<strong>07</strong>/<strong>U7</strong> <strong>Hardware</strong> <strong>Manual</strong> <strong>45</strong> <strong>to</strong> <strong>560</strong> kW (50 <strong>to</strong> 600 HP)3AFE64702165 (English)<strong>ACS800</strong>-<strong>07</strong>/<strong>U7</strong> Dimensional Drawings <strong>45</strong> <strong>to</strong> <strong>560</strong> kW (50 <strong>to</strong>600 HP) 3AFE64775421<strong>ACS800</strong>-<strong>07</strong> <strong>Hardware</strong> <strong>Manual</strong> 500 <strong>to</strong> 2800 kW3AFE64731165 (English)<strong>ACS800</strong>-17 <strong>Hardware</strong> <strong>Manual</strong> 55 <strong>to</strong> 2500 kW (75 <strong>to</strong> 2800 HP)3AFE68397260 (English)<strong>ACS800</strong>-37 <strong>Hardware</strong> <strong>Manual</strong> 55 <strong>to</strong> 2700 kW (75 <strong>to</strong> 3000 HP)3AFE68557925 (English)• Safety instructions• Electrical installation planning• Mechanical and electrical installation• Mo<strong>to</strong>r control and I/O board (RMIO)• Maintenance• Technical data• Dimensional drawings• Resis<strong>to</strong>r brakingFIRMWARE MANUALS, SUPPLEM<strong>EN</strong>TS AND GUIDES(appropriate documents are included in the delivery)Standard Control Program Firmware <strong>Manual</strong>3AFE6<strong>45</strong>27592 (English)System Control Program Firmware <strong>Manual</strong>3AFE64670646 (English)Control Program Template Firmware <strong>Manual</strong>3AFE64616340 (English)Master/Follower 3AFE6<strong>45</strong>90430 (English)Pump Control Program Firmware <strong>Manual</strong>3AFE68478952 (English)Extruder Control Program Supplement 3AFE64648543 (English)Centrifuge Control Program Supplement 3AFE64667246 (English)Traverse Control Program Supplement 3AFE64618334 (English)Crane Control Program Firmware <strong>Manual</strong> 3BSE11179 (English)Adaptive Programming Application Guide3AFE6<strong>45</strong>27274 (English)OPTION MANUALS (delivered with optional equipment)Fieldbus Adapters, I/O Extension Modules etc.
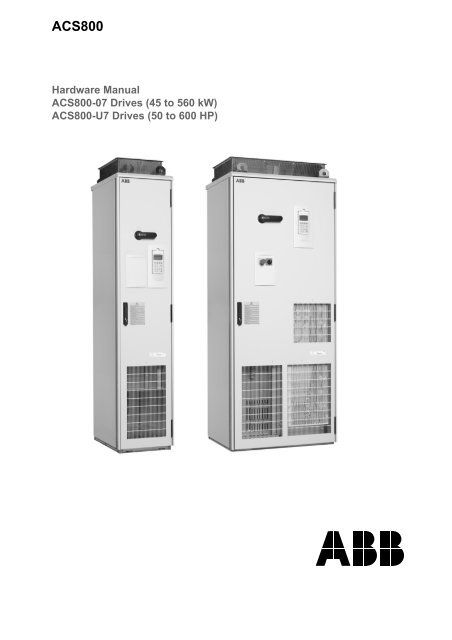
<strong>ACS800</strong>-<strong>07</strong> Drives<strong>45</strong> <strong>to</strong> <strong>560</strong> kW<strong>ACS800</strong>-<strong>U7</strong> Drives50 <strong>to</strong> 600 HP<strong>Hardware</strong> <strong>Manual</strong>3AFE64702165 Rev G <strong>EN</strong>EFFECTIVE: 19.1.2009© 2009 ABB Oy. All Rights Reserved.
1Update NoticeThe notice concerns the following <strong>ACS800</strong>-<strong>07</strong> Drives (<strong>45</strong><strong>to</strong> <strong>560</strong> kW) and <strong>ACS800</strong>-<strong>U7</strong> Drives (50 <strong>to</strong> 600 HP)<strong>Hardware</strong> <strong>Manual</strong>s:Code Revision Language3AFE64702165 G English <strong>EN</strong>3AFE64787292 G Danish DA3AFE64787306 G German DE3AFE64787314 G Spanish ES3AFE64787322 G Finnish FI3AFE64787331 G French FR3AFE64787373 G Italian IT3AFE64787403 G Dutch NL3AFE64787438 G Portuguese PT3AFE64787<strong>45</strong>4 G Russian RU3AFE64787462 G Swedish SVCode: 3AUA00000594<strong>45</strong> Rev AValid: from 01.02.2010 until the release of the next revision ofthe manualContents:The headings in this update notice refer <strong>to</strong> the modifiedsubsections in the original English manual. Each heading alsoincludes a page number and a classifier NEW, CHANGED, orDELETED. The page number refers <strong>to</strong> the page number in theoriginal English manual. The classifier describes the type ofthe modification.NEW (page 6): Safety / Installation and maintenance work• After maintaining or modifying a drive safety circuit or changing circuit boardsinside the module, retest the functioning of the safety circuit according <strong>to</strong> thestart-up instructions.• Do not change the electrical installations of the drive except for the essentialcontrol and power connections. Changes may affect the safety performance oroperation of the drive unexpectedly. All cus<strong>to</strong>mer-made changes are on thecus<strong>to</strong>mer's responsibility.[...]Note:• The Safe <strong>to</strong>rque off function (option +Q968) does not remove the voltage from themain and auxiliary circuits.CHANGED (page 10): Safety / Permanent magnet mo<strong>to</strong>r• Ensure that the mo<strong>to</strong>r cannot rotate during work. Prevent the start-up of anydrives in the same mechanical group by opening the Prevention of unexpectedstart switch (option +Q950) or Safe <strong>to</strong>rque off switch (option +Q968) andpadlocking it. Make sure that no other system, like hydraulic crawling drives, areable <strong>to</strong> rotate the mo<strong>to</strong>r directly or through any mechanical connection like felt,nip, rope, etc.Update Notice
2NEW (page 10): Safety / Permanent magnet mo<strong>to</strong>r• Note concerning permanent magnet mo<strong>to</strong>r drives in case of a multiple IGBTpower semiconduc<strong>to</strong>r failure: In spite of the activation of the Safe <strong>to</strong>rque offfunction (option +Q968), the drive system can produce an alignment <strong>to</strong>rque whichmaximally rotates the mo<strong>to</strong>r shaft by 180/p degrees. p denotes the pole pairnumber.NEW/CHANGED (page 24): Type codeThe table below contains the valid option code definitions for the emergency s<strong>to</strong>p.CodeDescription+Q951 Emergency s<strong>to</strong>p, s<strong>to</strong>p category 0 with opening the main contac<strong>to</strong>r/breaker+Q952 Emergency s<strong>to</strong>p, s<strong>to</strong>p category 1 with opening the main contac<strong>to</strong>r/breaker+Q963 Emergency s<strong>to</strong>p, s<strong>to</strong>p category 0 without opening the main contac<strong>to</strong>r/breaker+Q964 Emergency s<strong>to</strong>p, s<strong>to</strong>p category 1 without opening the main contac<strong>to</strong>r/breaker SS1NEW (page 24): Type codeThe table below contains the new option code definition for the Safe <strong>to</strong>rque offfunction.CodeDescription+Q968 Safe <strong>to</strong>rque off (STO) with a safety relayNEW (page 47): Emergency s<strong>to</strong>pNote: If you add or modify the wiring in the drive safety circuits, ensure that theappropriate standards (e.g. IEC 61800-5-1, <strong>EN</strong> 62061, <strong>EN</strong>/ISO 13849-1 and -2) andthe ABB guidelines are met. After making the changes, verify the operation of thesafety function by testing it.NEW (page 50): Safe <strong>to</strong>rque offThe drive supports the Safe <strong>to</strong>rque off (STO) function according <strong>to</strong> standards<strong>EN</strong> 61800-5-2:20<strong>07</strong>; <strong>EN</strong>/ISO 13849-1:2008, IEC 61508, and <strong>EN</strong> 62061:2005. Thefunction also corresponds <strong>to</strong> an uncontrolled s<strong>to</strong>p in accordance with category 0 of<strong>EN</strong> 60204-1 and prevention of unexpected start-up of <strong>EN</strong> 1037.The STO may be used where power removal is required <strong>to</strong> prevent an unexpectedstart. The function disables the control voltage of the power semiconduc<strong>to</strong>rs of thedrive output stage, thus preventing the inverter from generating the voltage required<strong>to</strong> rotate the mo<strong>to</strong>r (see the diagram below). By using this function, short-timeoperations (like cleaning) and/or maintenance work on non-electrical parts of themachinery can be performed without switching off the power supply <strong>to</strong> the drive.Update Notice
3Update Notice
4WARNING! The Safe <strong>to</strong>rque off function does not disconnect the voltage of the mainand auxiliary circuits from the drive. Therefore maintenance work on electrical partsof the drive or the mo<strong>to</strong>r can only be carried out after isolating the drive system fromthe main supply.Note: The Safe <strong>to</strong>rque off function can be used for s<strong>to</strong>pping the drive in emergencys<strong>to</strong>p situations. In the normal operating mode, use the S<strong>to</strong>p command instead. If arunning drive is s<strong>to</strong>pped by using the function, the drive will trip and s<strong>to</strong>p by coasting.If this is not acceptable, e.g. causes danger, the drive and machinery must bes<strong>to</strong>pped using the appropriate s<strong>to</strong>pping mode before using this function.Note concerning permanent magnet mo<strong>to</strong>r drives in case of a multiple IGBTpower semiconduc<strong>to</strong>r failure: In spite of the activation of the Safe <strong>to</strong>rque offfunction, the drive system can produce an alignment <strong>to</strong>rque which maximally rotatesthe mo<strong>to</strong>r shaft by 180/p degrees. p denotes the pole pair number.Note: If you add or modify the wiring in the drive safety circuits, ensure that theappropriate standards (e.g. IEC 61800-5-1, <strong>EN</strong> 62061, <strong>EN</strong>/ISO 13849-1 and -2) andthe ABB guidelines are met. After making the changes, verify the operation of thesafety function by testing it.CHANGED (pages 72-73): Layout drawing of fac<strong>to</strong>ry installed optionalequipmentFrame sizes R5 and R6:A21 *Relay for Prevention of unexpected start (option +Q950) or Safe <strong>to</strong>rque off(option +Q968)Additional terminal blocks:*X9 Prevention of unexpected start (option +Q950) or Safe <strong>to</strong>rque off (option +Q968)Frame size R7 and R8:*Relay for Prevention of unexpected start (option +Q950) or Safe <strong>to</strong>rque off (option+Q968)NEW (page 84): On-load checksThe following information has been added <strong>to</strong> the procedure:ActionAdditional informationCheck the correct operation of the emergency s<strong>to</strong>pcircuits from each operating location.If the drive is equipped with the category 1emergency s<strong>to</strong>p function (option +Q952 or +Q964),adjust the delay time of the emergency s<strong>to</strong>p relayand the deceleration time of the drive emergencys<strong>to</strong>p function. The fac<strong>to</strong>ry default settings do notnecessarily meet the application needs.Update Notice
5NEW (page 84): On-load checksThe following information has been added <strong>to</strong> the procedure:ActionCheck that the Safe <strong>to</strong>rque off function (option+Q968, if installed) works:Additional informationOptional function. See deliveryspecific circuit diagrams.• Ensure that the drive can be run and s<strong>to</strong>ppedfreely during the commissioning.• S<strong>to</strong>p the drive (if running), switch the input poweroff and isolate the drive from the power line by adisconnec<strong>to</strong>r.• Check the STO circuit connections against thecircuit diagram.• Close the disconnec<strong>to</strong>r and switch the power on.• Test the operation of the STO function when themo<strong>to</strong>r is s<strong>to</strong>pped:- Give a s<strong>to</strong>p command for the drive (if running)and wait until the mo<strong>to</strong>r shaft is at standstill.- Activate the STO circuit and give a startcommand for the drive.- Ensure that the mo<strong>to</strong>r stays at standstill.- Deactivate the STO circuit.• Restart the drive and check that the mo<strong>to</strong>r runsnormally.• Test the operation of the STO function when themo<strong>to</strong>r is running:- Start the drive and ensure that the mo<strong>to</strong>r isrunning.- Activate the STO circuit.- Ensure that the mo<strong>to</strong>r s<strong>to</strong>ps and the drive trips.- Reset the fault and try <strong>to</strong> start the drive.- Ensure that the mo<strong>to</strong>r stays at standstill.- Deactivate the STO circuit.• Restart the drive and check that the mo<strong>to</strong>r runsnormally.Update Notice
6CHANGED (page 109): LEDsLEDV309 (red)When the led is litPrevention of unexpected start (option +Q950) or Safe <strong>to</strong>rque off (option +Q968) isON.NEW (page 132): Ambient conditionsCabinets with option +Q968: the installation site altitude in operation is 0 <strong>to</strong> 2000 m.Operationinstalled for stationary useInstallation site altitude [...]Cabinets with option +Q968:0 <strong>to</strong> 2000 mUpdate Notice
5Safety instructionsWhat this chapter containsThis chapter contains the safety instructions which you must follow when installing,operating and servicing the drive. If ignored, physical injury or death may follow, ordamage may occur <strong>to</strong> the drive, the mo<strong>to</strong>r or driven equipment. Read the safetyinstructions before you work on the unit.Use of warnings and notesThere are two types of safety instructions throughout this manual: warnings andnotes. Warnings caution you about conditions which can result in serious injury ordeath and/or damage <strong>to</strong> the equipment. They also tell you how <strong>to</strong> avoid the danger.Notes draw attention <strong>to</strong> a particular condition or fact, or give information on asubject. The warning symbols are used as follows:Dangerous voltage warning warns of high voltage which can causephysical injury and/or damage <strong>to</strong> the equipment.General warning warns about conditions, other than those caused byelectricity, which can result in physical injury and/or damage <strong>to</strong> theequipment.Electrostatic discharge warning warns of electrostatic discharge whichcan damage the equipment.Hot surface warning warns of hot surfaces which can cause physicalinjury.Safety instructions
6Installation and maintenance workThese warnings are intended for all who work on the drive, mo<strong>to</strong>r cable or mo<strong>to</strong>r.WARNING! Ignoring the following instructions can cause physical injury or death, ordamage <strong>to</strong> the equipment:.• Only qualified electricians are allowed <strong>to</strong> install and maintain the drive.• Never work on the drive, mo<strong>to</strong>r cable or mo<strong>to</strong>r when main power is applied.After switching off the power, always wait for 5 minutes <strong>to</strong> let the intermediatecircuit capaci<strong>to</strong>rs discharge before you start working on the drive, the mo<strong>to</strong>r orthe mo<strong>to</strong>r cable.Always ensure by measuring with a multimeter (impedance at least 1 Mohm)that:1. Voltage between drive input phases L1, L2 and L3 and the frame is close <strong>to</strong>0V.2. Voltage between terminals UDC+ and UDC- and the frame is close <strong>to</strong> 0 V.• Do not work on the control cables when power is applied <strong>to</strong> the drive or <strong>to</strong> theexternal control circuits. Externally supplied control circuits may causedangerous voltages inside the drive even when the main power on the drive isswitched off.• Do not make any insulation or voltage withstand tests on the drive or drivemodules.• When reconnecting the mo<strong>to</strong>r cable, always check that the phase order iscorrect.Note:• The disconnecting device (means) of the drive does not isolate the input cablesand busbars from the main AC supply. Before working inside the cabinet,isolate the input cables and busbars from the main supply with thedisconnecting device at the distribution board or with the disconnec<strong>to</strong>r of thesupply transformer.• The mo<strong>to</strong>r cable terminals on the drive are at a dangerously high voltage whenthe input power is on, regardless of whether the mo<strong>to</strong>r is running or not.• The brake control terminals (UDC+, UDC-, R+ and R- terminals) carry adangerous DC voltage (over 500 V).• Depending on the external wiring, dangerous voltages [115 V, 220 V or 230 V]may be present on the terminals of relay outputs RO1 <strong>to</strong> RO3 or on the optionalAGPS board (Prevention of Unexpected Start).• The Prevention of Unexpected Start function does not remove the voltage fromthe main and auxiliary circuits.Safety instructions
7• At installation sites above 2000 m (6562 ft), the terminals of the RMIO boardand optional modules attached <strong>to</strong> the board do not fulfil the Protective ExtraLow Voltage (PELV) requirements stated in <strong>EN</strong> 50178.GroundingThese instructions are intended for all who are responsible for the grounding of thedrive.WARNING! Ignoring the following instructions can cause physical injury, death orequipment malfunction and increase electromagnetic interference.• Ground the drive, the mo<strong>to</strong>r and adjoining equipment <strong>to</strong> ensure personnelsafety in all circumstances, and <strong>to</strong> reduce electromagnetic emission andinterference.• Make sure that grounding conduc<strong>to</strong>rs are adequately sized as required bysafety regulations.• In a multiple-drive installation, connect each drive separately <strong>to</strong> protectiveearth (PE).• Do not install a drive with EMC filter option +E202 on an ungrounded powersystem or a high resistance-grounded (over 30 ohms) power system.Note:• Power cable shields are suitable for equipment grounding conduc<strong>to</strong>rs onlywhen adequately sized <strong>to</strong> meet safety regulations.• As the normal leakage current of the drive is higher than 3.5 mA AC or 10 mADC (stated by <strong>EN</strong> 50178, 5.2.11.1), a fixed protective earth connection isrequired.Safety instructions
8Mechanical installation and maintenanceThese instructions are intended for all who install and service the drive.WARNING! Ignoring the following instructions can cause physical injury or death,or damage <strong>to</strong> the equipment:• Cover the drive when installing <strong>to</strong> ensure that dust from borings and grindingsor foreign objects do not enter the drive. Electrically conductive dust inside theunit may cause damage or lead <strong>to</strong> malfunction.• Ensure sufficient cooling.• Welding of the cabinet frame is not recommended. However, if electric weldingis the only way <strong>to</strong> mount the cabinet, follow the instructions given in chapterMechanical installation. Ensure that welding fumes are not inhaled. If thewelding return wire is connected improperly, the welding circuit may damageelectronic circuits in the cabinet.• When removing the module from the cabinet and manoeuvring it outside thecabinet, prevent it from <strong>to</strong>ppling over by securing it. The drive module is heavyand has a high centre of gravity.• Beware of hot surfaces. Some parts, such as heatsinks of powersemiconduc<strong>to</strong>rs, remain hot for a while after disconnection of the electricalsupply.Printed circuit boardsWARNING! Ignoring the following instructions can cause damage <strong>to</strong> the printedcircuit boards:• The printed circuit boards contain components sensitive <strong>to</strong> electrostaticdischarge. Wear a grounding wrist band when handling the boards. Do not<strong>to</strong>uch the boards unnecessarily.Fibre optic cablesWARNING! Ignoring the following instructions can cause equipment malfunctionand damage <strong>to</strong> the fibre optic cables:• Handle the fibre optic cables with care. When unplugging optic cables, alwaysgrab the connec<strong>to</strong>r, not the cable itself. Do not <strong>to</strong>uch the ends of the fibres withbare hands as the fibre is extremely sensitive <strong>to</strong> dirt. The minimum allowedbend radius is 35 mm (1.4 in.).Safety instructions
9OperationThese warnings are intended for all who plan the operation of the drive or operatethe drive.WARNING! Ignoring the instructions can cause physical injury or death or damage<strong>to</strong> the equipment.• Before adjusting the drive and putting it in<strong>to</strong> service, make sure that the mo<strong>to</strong>rand all driven equipment are suitable for operation throughout the speed rangeprovided by the drive. The drive can be adjusted <strong>to</strong> operate the mo<strong>to</strong>r atspeeds above and below the speed provided by connecting the mo<strong>to</strong>r directly<strong>to</strong> the power line.• Do not activate au<strong>to</strong>matic fault reset functions of the Standard ControlProgram if dangerous situations can occur. When activated, these functionswill reset the drive and resume operation after a fault.• Do not control the mo<strong>to</strong>r with the disconnecting device (disconnecting means);instead, use the control panel keys and , or commands via the I/Oboard of the drive. The maximum allowed number of charging cycles of the DCcapaci<strong>to</strong>rs (i.e. power-ups by applying power) is five in ten minutes.Note:• If an external source for start command is selected and it is ON, the drive (withStandard Control Program) will start immediately after fault reset unless thedrive is configured for 3-wire (a pulse) start/s<strong>to</strong>p.• When the control location is not set <strong>to</strong> Local (L not shown in the status row ofthe display), the s<strong>to</strong>p key on the control panel will not s<strong>to</strong>p the drive. To s<strong>to</strong>pthe drive using the control panel, press the LOC/REM key and then the s<strong>to</strong>pkey .Safety instructions
10Permanent magnet mo<strong>to</strong>rThese are additional warnings concerning permanent magnet mo<strong>to</strong>r drives. Ignoringthe instructions can cause physical injury or death, or damage <strong>to</strong> the equipment.Installation and maintenance workWARNING! Do not work on the drive when the permanent magnet mo<strong>to</strong>r is rotating.Also, when the supply power is switched off and the inverter is s<strong>to</strong>pped, a rotatingpermanent magnet mo<strong>to</strong>r feeds power <strong>to</strong> the intermediate circuit of the drive and thesupply connections become live.Before installation and maintenance work on the drive:• S<strong>to</strong>p the mo<strong>to</strong>r.• Ensure that the mo<strong>to</strong>r cannot rotate during work. Prevent the start-up of anydrives in the same mechanical group by opening the “prevention of unexpectedstart” switch and padlocking it. Make sure that no other system, like hydrauliccrawling drives, are able <strong>to</strong> rotate the mo<strong>to</strong>r directly or through any mechanicalconnection like felt, nip, rope, etc.• Ensure that there is no voltage on the drive power terminals:Alternative 1) Disconnect the mo<strong>to</strong>r from the drive with a safety switch or by othermeans. Measure that there is no voltage present on the drive input or outputterminals (L1, L2, L3, U2, V2, W2, UDC+, UDC-).Alternative 2) Measure that there is no voltage present on the drive input or outputterminals (L1, L2, L3, U2, V2, W2, UDC+, UDC-). Ground the drive outputterminals temporarily by connecting them <strong>to</strong>gether as well as <strong>to</strong> the PE.Alternative 3) If possible, both of the above.Start-up and operationWARNING! Do not run the mo<strong>to</strong>r over the rated speed. Mo<strong>to</strong>r overspeed leads <strong>to</strong>overvoltage which may damage or explode the capaci<strong>to</strong>rs in the intermediate circui<strong>to</strong>f the drive.Controlling a permanent magnet mo<strong>to</strong>r is only allowed using the control program forPermanent Magnet Synchronous Machine Drive, or other control programs in scalarcontrol mode.Safety instructions
11Table of contents<strong>ACS800</strong> Single Drive <strong>Manual</strong>s . . . . . . . . . . . . . . . . . . . . . . . . . . . . . . . . . . . . . . . . . . . . . . . . . . . . . 2Safety instructionsWhat this chapter contains . . . . . . . . . . . . . . . . . . . . . . . . . . . . . . . . . . . . . . . . . . . . . . . . . . . . . . . . 5Use of warnings and notes . . . . . . . . . . . . . . . . . . . . . . . . . . . . . . . . . . . . . . . . . . . . . . . . . . . . . . . . 5Installation and maintenance work . . . . . . . . . . . . . . . . . . . . . . . . . . . . . . . . . . . . . . . . . . . . . . . . . . 6Grounding . . . . . . . . . . . . . . . . . . . . . . . . . . . . . . . . . . . . . . . . . . . . . . . . . . . . . . . . . . . . . . . . 7Mechanical installation and maintenance . . . . . . . . . . . . . . . . . . . . . . . . . . . . . . . . . . . . . . . 8Printed circuit boards . . . . . . . . . . . . . . . . . . . . . . . . . . . . . . . . . . . . . . . . . . . . . . . . . . . . . . . 8Fibre optic cables . . . . . . . . . . . . . . . . . . . . . . . . . . . . . . . . . . . . . . . . . . . . . . . . . . . . . . . . . . 8Operation . . . . . . . . . . . . . . . . . . . . . . . . . . . . . . . . . . . . . . . . . . . . . . . . . . . . . . . . . . . . . . . . . . . . . . 9Permanent magnet mo<strong>to</strong>r . . . . . . . . . . . . . . . . . . . . . . . . . . . . . . . . . . . . . . . . . . . . . . . . . . . . . . . . 10Installation and maintenance work . . . . . . . . . . . . . . . . . . . . . . . . . . . . . . . . . . . . . . . . . . . . . 10Start-up and operation . . . . . . . . . . . . . . . . . . . . . . . . . . . . . . . . . . . . . . . . . . . . . . . . . . . . . . 10Table of contentsAbout this manualWhat this chapter contains . . . . . . . . . . . . . . . . . . . . . . . . . . . . . . . . . . . . . . . . . . . . . . . . . . . . . . . 17Target audience . . . . . . . . . . . . . . . . . . . . . . . . . . . . . . . . . . . . . . . . . . . . . . . . . . . . . . . . . . . . . . . 17Common chapter for four products . . . . . . . . . . . . . . . . . . . . . . . . . . . . . . . . . . . . . . . . . . . . . . . . . 17Categorization according <strong>to</strong> the frame size . . . . . . . . . . . . . . . . . . . . . . . . . . . . . . . . . . . . . . . . . . . 17Categorization according <strong>to</strong> the + code . . . . . . . . . . . . . . . . . . . . . . . . . . . . . . . . . . . . . . . . . . . . . . 17Contents . . . . . . . . . . . . . . . . . . . . . . . . . . . . . . . . . . . . . . . . . . . . . . . . . . . . . . . . . . . . . . . . . . . . . 18Installation and commissioning flowchart . . . . . . . . . . . . . . . . . . . . . . . . . . . . . . . . . . . . . . . . . . . 18Product and service inquiries . . . . . . . . . . . . . . . . . . . . . . . . . . . . . . . . . . . . . . . . . . . . . . . . . . . . . 19Product training . . . . . . . . . . . . . . . . . . . . . . . . . . . . . . . . . . . . . . . . . . . . . . . . . . . . . . . . . . . . . . . . 20Providing feedback on ABB Drives manuals . . . . . . . . . . . . . . . . . . . . . . . . . . . . . . . . . . . . . . . . . . 20Document library on the Internet . . . . . . . . . . . . . . . . . . . . . . . . . . . . . . . . . . . . . . . . . . . . . . . . . . . 20The <strong>ACS800</strong>-<strong>07</strong>/<strong>U7</strong>What this chapter contains . . . . . . . . . . . . . . . . . . . . . . . . . . . . . . . . . . . . . . . . . . . . . . . . . . . . . . . 21The <strong>ACS800</strong>-<strong>07</strong>/<strong>U7</strong> . . . . . . . . . . . . . . . . . . . . . . . . . . . . . . . . . . . . . . . . . . . . . . . . . . . . . . . . . . . . . 21Type code . . . . . . . . . . . . . . . . . . . . . . . . . . . . . . . . . . . . . . . . . . . . . . . . . . . . . . . . . . . . . . . . . . . . 23Main circuit and control . . . . . . . . . . . . . . . . . . . . . . . . . . . . . . . . . . . . . . . . . . . . . . . . . . . . . . . . . . 25Door switches . . . . . . . . . . . . . . . . . . . . . . . . . . . . . . . . . . . . . . . . . . . . . . . . . . . . . . . . . . . . 25Diagram . . . . . . . . . . . . . . . . . . . . . . . . . . . . . . . . . . . . . . . . . . . . . . . . . . . . . . . . . . . . . . . . . 26Operation . . . . . . . . . . . . . . . . . . . . . . . . . . . . . . . . . . . . . . . . . . . . . . . . . . . . . . . . . . . . . . . . 26Printed circuit boards . . . . . . . . . . . . . . . . . . . . . . . . . . . . . . . . . . . . . . . . . . . . . . . . . . . . . . . 27Mo<strong>to</strong>r control . . . . . . . . . . . . . . . . . . . . . . . . . . . . . . . . . . . . . . . . . . . . . . . . . . . . . . . . . . . . . 27Table of contents
12Mechanical installationWhat this chapter contains . . . . . . . . . . . . . . . . . . . . . . . . . . . . . . . . . . . . . . . . . . . . . . . . . . . . . . . .29Moving the unit . . . . . . . . . . . . . . . . . . . . . . . . . . . . . . . . . . . . . . . . . . . . . . . . . . . . . . . . . . . . . . . . .29Before installation . . . . . . . . . . . . . . . . . . . . . . . . . . . . . . . . . . . . . . . . . . . . . . . . . . . . . . . . . . . . . . .30Delivery check . . . . . . . . . . . . . . . . . . . . . . . . . . . . . . . . . . . . . . . . . . . . . . . . . . . . . . . . . . . . .30Requirements for the installation site . . . . . . . . . . . . . . . . . . . . . . . . . . . . . . . . . . . . . . . . . . .30Cooling air flow . . . . . . . . . . . . . . . . . . . . . . . . . . . . . . . . . . . . . . . . . . . . . . . . . . . . . . . . . . . .31Cable channel in the floor below the cabinet . . . . . . . . . . . . . . . . . . . . . . . . . . . . . . . . . . . . .31Fastening the cabinet <strong>to</strong> the floor and wall (non-marine units) . . . . . . . . . . . . . . . . . . . . . . . . . . . . .32Fastening the cabinet with the outside brackets . . . . . . . . . . . . . . . . . . . . . . . . . . . . . . . . . . .33Fastening the cabinet through the holes inside the cabinet . . . . . . . . . . . . . . . . . . . . . . . . . .34Fastening the cabinet <strong>to</strong> the floor and roof/wall (marine units) . . . . . . . . . . . . . . . . . . . . . . . . . . . . .35Electric welding . . . . . . . . . . . . . . . . . . . . . . . . . . . . . . . . . . . . . . . . . . . . . . . . . . . . . . . . . . . . . . . .36Planning the electrical installationWhat this chapter contains . . . . . . . . . . . . . . . . . . . . . . . . . . . . . . . . . . . . . . . . . . . . . . . . . . . . . . . .37To which products this chapter applies . . . . . . . . . . . . . . . . . . . . . . . . . . . . . . . . . . . . . . . . . . . . . .37Mo<strong>to</strong>r selection and compatibility . . . . . . . . . . . . . . . . . . . . . . . . . . . . . . . . . . . . . . . . . . . . . . . . . . .37Protecting the mo<strong>to</strong>r insulation and bearings . . . . . . . . . . . . . . . . . . . . . . . . . . . . . . . . . . . . .39Requirements table . . . . . . . . . . . . . . . . . . . . . . . . . . . . . . . . . . . . . . . . . . . . . . . . . . . . . . . . .40Permanent magnet synchronous mo<strong>to</strong>r . . . . . . . . . . . . . . . . . . . . . . . . . . . . . . . . . . . . . . . . . . . . . .43Supply connection . . . . . . . . . . . . . . . . . . . . . . . . . . . . . . . . . . . . . . . . . . . . . . . . . . . . . . . . . . . . . .44Disconnecting device (disconnecting means) . . . . . . . . . . . . . . . . . . . . . . . . . . . . . . . . . . . . .44<strong>ACS800</strong>-01, <strong>ACS800</strong>-U1, <strong>ACS800</strong>-11, <strong>ACS800</strong>-U11, <strong>ACS800</strong>-31, <strong>ACS800</strong>-U31,<strong>ACS800</strong>-02 and <strong>ACS800</strong>-U2 without enclosure extension, <strong>ACS800</strong>-04, <strong>ACS800</strong>-U4 .44<strong>ACS800</strong>-02 and <strong>ACS800</strong>-U2 with enclosure extension, <strong>ACS800</strong>-<strong>07</strong> and <strong>ACS800</strong>-<strong>U7</strong> .44EU . . . . . . . . . . . . . . . . . . . . . . . . . . . . . . . . . . . . . . . . . . . . . . . . . . . . . . . . . . . . . . . . .44US . . . . . . . . . . . . . . . . . . . . . . . . . . . . . . . . . . . . . . . . . . . . . . . . . . . . . . . . . . . . . . . . .44Fuses . . . . . . . . . . . . . . . . . . . . . . . . . . . . . . . . . . . . . . . . . . . . . . . . . . . . . . . . . . . . . . . . . . .44Main contac<strong>to</strong>r . . . . . . . . . . . . . . . . . . . . . . . . . . . . . . . . . . . . . . . . . . . . . . . . . . . . . . . . . . . . .44Thermal overload and short-circuit protection . . . . . . . . . . . . . . . . . . . . . . . . . . . . . . . . . . . . . . . . .<strong>45</strong>Thermal overload protection of the drive and the input and mo<strong>to</strong>r cables . . . . . . . . . . . . . . .<strong>45</strong>Thermal overload protection of the mo<strong>to</strong>r . . . . . . . . . . . . . . . . . . . . . . . . . . . . . . . . . . . . . . . .<strong>45</strong>Protection against short-circuit in the mo<strong>to</strong>r cable . . . . . . . . . . . . . . . . . . . . . . . . . . . . . . . . .<strong>45</strong>Protection against short-circuit inside the drive or in the supply cable . . . . . . . . . . . . . . . . . .46Ground fault protection . . . . . . . . . . . . . . . . . . . . . . . . . . . . . . . . . . . . . . . . . . . . . . . . . . . . . . . . . . .47Emergency s<strong>to</strong>p devices . . . . . . . . . . . . . . . . . . . . . . . . . . . . . . . . . . . . . . . . . . . . . . . . . . . . . . . . .47<strong>ACS800</strong>-02/U2 with enclosure extension and <strong>ACS800</strong>-<strong>07</strong>/<strong>U7</strong> . . . . . . . . . . . . . . . . . . . . . . . .47Restarting after an emergency s<strong>to</strong>p . . . . . . . . . . . . . . . . . . . . . . . . . . . . . . . . . . . . . . . .47Power-loss ride-through function . . . . . . . . . . . . . . . . . . . . . . . . . . . . . . . . . . . . . . . . . . . . . . . . . . .48<strong>ACS800</strong>-<strong>07</strong>/<strong>U7</strong> units with line contac<strong>to</strong>r (+F250) . . . . . . . . . . . . . . . . . . . . . . . . . . . . . . . . . .48Prevention of Unexpected Start . . . . . . . . . . . . . . . . . . . . . . . . . . . . . . . . . . . . . . . . . . . . . . . . . . . .49Table of contents
13Selecting the power cables . . . . . . . . . . . . . . . . . . . . . . . . . . . . . . . . . . . . . . . . . . . . . . . . . . . . . . . 50General rules . . . . . . . . . . . . . . . . . . . . . . . . . . . . . . . . . . . . . . . . . . . . . . . . . . . . . . . . . . . . . 50Alternative power cable types . . . . . . . . . . . . . . . . . . . . . . . . . . . . . . . . . . . . . . . . . . . . . . . . 51Mo<strong>to</strong>r cable shield . . . . . . . . . . . . . . . . . . . . . . . . . . . . . . . . . . . . . . . . . . . . . . . . . . . . . . . . . 51Additional US requirements . . . . . . . . . . . . . . . . . . . . . . . . . . . . . . . . . . . . . . . . . . . . . . . . . . 52Conduit . . . . . . . . . . . . . . . . . . . . . . . . . . . . . . . . . . . . . . . . . . . . . . . . . . . . . . . . . . . . . 52Armored cable / shielded power cable . . . . . . . . . . . . . . . . . . . . . . . . . . . . . . . . . . . . . 52Power fac<strong>to</strong>r compensation capaci<strong>to</strong>rs . . . . . . . . . . . . . . . . . . . . . . . . . . . . . . . . . . . . . . . . . . . . . . 52Equipment connected <strong>to</strong> the mo<strong>to</strong>r cable . . . . . . . . . . . . . . . . . . . . . . . . . . . . . . . . . . . . . . . . . . . . 53Installation of safety switches, contac<strong>to</strong>rs, connection boxes, etc. . . . . . . . . . . . . . . . . . . . . 53Bypass connection . . . . . . . . . . . . . . . . . . . . . . . . . . . . . . . . . . . . . . . . . . . . . . . . . . . . 53Before opening a contac<strong>to</strong>r (DTC control mode selected) . . . . . . . . . . . . . . . . . . . . . . . . . . . 53Protecting the relay output contacts and attenuating disturbances in case of inductive loads . . . . 54Selecting the control cables . . . . . . . . . . . . . . . . . . . . . . . . . . . . . . . . . . . . . . . . . . . . . . . . . . . . . . 55Relay cable . . . . . . . . . . . . . . . . . . . . . . . . . . . . . . . . . . . . . . . . . . . . . . . . . . . . . . . . . . . . . . 55Control panel cable . . . . . . . . . . . . . . . . . . . . . . . . . . . . . . . . . . . . . . . . . . . . . . . . . . . . . . . . 55Connection of a mo<strong>to</strong>r temperature sensor <strong>to</strong> the drive I/O . . . . . . . . . . . . . . . . . . . . . . . . . . . . . . 56Installation sites above 2000 metres (6562 feet) . . . . . . . . . . . . . . . . . . . . . . . . . . . . . . . . . . . . . . . 56Routing the cables . . . . . . . . . . . . . . . . . . . . . . . . . . . . . . . . . . . . . . . . . . . . . . . . . . . . . . . . . . . . . . 56Control cable ducts . . . . . . . . . . . . . . . . . . . . . . . . . . . . . . . . . . . . . . . . . . . . . . . . . . . . . . . . 57Electrical installationWhat this chapter contains . . . . . . . . . . . . . . . . . . . . . . . . . . . . . . . . . . . . . . . . . . . . . . . . . . . . . . . 59Before installation . . . . . . . . . . . . . . . . . . . . . . . . . . . . . . . . . . . . . . . . . . . . . . . . . . . . . . . . . . . . . . 59IT (ungrounded) systems . . . . . . . . . . . . . . . . . . . . . . . . . . . . . . . . . . . . . . . . . . . . . . . . . . . . 59Checking the insulation of the assembly . . . . . . . . . . . . . . . . . . . . . . . . . . . . . . . . . . . . . . . . . . . . . 59Drive . . . . . . . . . . . . . . . . . . . . . . . . . . . . . . . . . . . . . . . . . . . . . . . . . . . . . . . . . . . . . . . . . . . . 59Input cable . . . . . . . . . . . . . . . . . . . . . . . . . . . . . . . . . . . . . . . . . . . . . . . . . . . . . . . . . . . . . . . 59Mo<strong>to</strong>r and mo<strong>to</strong>r cable . . . . . . . . . . . . . . . . . . . . . . . . . . . . . . . . . . . . . . . . . . . . . . . . . . . . . . 59Brake resis<strong>to</strong>r assembly . . . . . . . . . . . . . . . . . . . . . . . . . . . . . . . . . . . . . . . . . . . . . . . . . . . . . 60Warning sticker . . . . . . . . . . . . . . . . . . . . . . . . . . . . . . . . . . . . . . . . . . . . . . . . . . . . . . . . . . . . . . . . 60Example wiring diagram . . . . . . . . . . . . . . . . . . . . . . . . . . . . . . . . . . . . . . . . . . . . . . . . . . . . . . . . . 61Power cable connection diagram . . . . . . . . . . . . . . . . . . . . . . . . . . . . . . . . . . . . . . . . . . . . . . . . . . 62Connecting the power cables . . . . . . . . . . . . . . . . . . . . . . . . . . . . . . . . . . . . . . . . . . . . . . . . . . . . . 63Additional instructions for frame size R6 . . . . . . . . . . . . . . . . . . . . . . . . . . . . . . . . . . . . . . . . 64Cable terminals R+ and R- . . . . . . . . . . . . . . . . . . . . . . . . . . . . . . . . . . . . . . . . . . . . . . 64Cable lug installations <strong>to</strong> R+ and R- screws . . . . . . . . . . . . . . . . . . . . . . . . . . . . . . . . . 64Connecting the control cables . . . . . . . . . . . . . . . . . . . . . . . . . . . . . . . . . . . . . . . . . . . . . . . . . . . . . 65Routing the cables (frame sizes R5 and R6) . . . . . . . . . . . . . . . . . . . . . . . . . . . . . . . . . . . . . 65Routing the cables (frame sizes R7 and R8) . . . . . . . . . . . . . . . . . . . . . . . . . . . . . . . . . . . . . 66360 degrees EMC grounding at the cable entry . . . . . . . . . . . . . . . . . . . . . . . . . . . . . . . . . . 67Special for <strong>to</strong>p entry . . . . . . . . . . . . . . . . . . . . . . . . . . . . . . . . . . . . . . . . . . . . . . . . . . . 68Connecting the cables <strong>to</strong> the I/O terminals . . . . . . . . . . . . . . . . . . . . . . . . . . . . . . . . . . . . . . 69Settings of the cooling fan transformer . . . . . . . . . . . . . . . . . . . . . . . . . . . . . . . . . . . . . . . . . . . . . . 70Installation of optional modules . . . . . . . . . . . . . . . . . . . . . . . . . . . . . . . . . . . . . . . . . . . . . . . . . . . . 70Cabling of I/O and fieldbus modules . . . . . . . . . . . . . . . . . . . . . . . . . . . . . . . . . . . . . . . . . . . 70Pulse encoder module cabling . . . . . . . . . . . . . . . . . . . . . . . . . . . . . . . . . . . . . . . . . . . . . . . 71Fibre optic link . . . . . . . . . . . . . . . . . . . . . . . . . . . . . . . . . . . . . . . . . . . . . . . . . . . . . . . . . . . . 71Table of contents
14Layout drawing of fac<strong>to</strong>ry installed optional equipment . . . . . . . . . . . . . . . . . . . . . . . . . . . . . . . . . .72Frame sizes R5 and R6 . . . . . . . . . . . . . . . . . . . . . . . . . . . . . . . . . . . . . . . . . . . . . . . . . . . . .72Additional terminal blocks . . . . . . . . . . . . . . . . . . . . . . . . . . . . . . . . . . . . . . . . . . . . . . . . . . .72Frame size R7 and R8 . . . . . . . . . . . . . . . . . . . . . . . . . . . . . . . . . . . . . . . . . . . . . . . . . . . . . .73Installation of brake resis<strong>to</strong>rs (units with brake chopper option) . . . . . . . . . . . . . . . . . . . . . . . . . . .73Mo<strong>to</strong>r control and I/O board (RMIO)What this chapter contains . . . . . . . . . . . . . . . . . . . . . . . . . . . . . . . . . . . . . . . . . . . . . . . . . . . . . . . .75Note for the <strong>ACS800</strong>-02 with enclosure extension and the <strong>ACS800</strong>-<strong>07</strong> . . . . . . . . . . . . . . . . . . . . .75Note on terminal labelling . . . . . . . . . . . . . . . . . . . . . . . . . . . . . . . . . . . . . . . . . . . . . . . . . . . . . . . . .75Note on external power supply . . . . . . . . . . . . . . . . . . . . . . . . . . . . . . . . . . . . . . . . . . . . . . . . . . . . .76Parameter settings . . . . . . . . . . . . . . . . . . . . . . . . . . . . . . . . . . . . . . . . . . . . . . . . . . . . . . . . .76External control connections (non-US) . . . . . . . . . . . . . . . . . . . . . . . . . . . . . . . . . . . . . . . . . .77External control connections (US) . . . . . . . . . . . . . . . . . . . . . . . . . . . . . . . . . . . . . . . . . . . . . .78RMIO board specifications . . . . . . . . . . . . . . . . . . . . . . . . . . . . . . . . . . . . . . . . . . . . . . . . . . . . . . . .79Analogue inputs . . . . . . . . . . . . . . . . . . . . . . . . . . . . . . . . . . . . . . . . . . . . . . . . . . . . . . . . . . .79Constant voltage output . . . . . . . . . . . . . . . . . . . . . . . . . . . . . . . . . . . . . . . . . . . . . . . . . . . . .79Auxiliary power output . . . . . . . . . . . . . . . . . . . . . . . . . . . . . . . . . . . . . . . . . . . . . . . . . . . . . . .79Analogue outputs . . . . . . . . . . . . . . . . . . . . . . . . . . . . . . . . . . . . . . . . . . . . . . . . . . . . . . . . . .79Digital inputs . . . . . . . . . . . . . . . . . . . . . . . . . . . . . . . . . . . . . . . . . . . . . . . . . . . . . . . . . . . . . .79Relay outputs . . . . . . . . . . . . . . . . . . . . . . . . . . . . . . . . . . . . . . . . . . . . . . . . . . . . . . . . . . . . .80DDCS fibre optic link . . . . . . . . . . . . . . . . . . . . . . . . . . . . . . . . . . . . . . . . . . . . . . . . . . . . . . . .8024 V DC power input . . . . . . . . . . . . . . . . . . . . . . . . . . . . . . . . . . . . . . . . . . . . . . . . . . . . . . . .80Installation checklist and start-upChecklist . . . . . . . . . . . . . . . . . . . . . . . . . . . . . . . . . . . . . . . . . . . . . . . . . . . . . . . . . . . . . . . . . . . . . .83Start-up procedure . . . . . . . . . . . . . . . . . . . . . . . . . . . . . . . . . . . . . . . . . . . . . . . . . . . . . . . . . . . . . .84Safety . . . . . . . . . . . . . . . . . . . . . . . . . . . . . . . . . . . . . . . . . . . . . . . . . . . . . . . . . . . . . . . . . . .84Checks with no voltage connected . . . . . . . . . . . . . . . . . . . . . . . . . . . . . . . . . . . . . . . . . . . . .84Starting the drive . . . . . . . . . . . . . . . . . . . . . . . . . . . . . . . . . . . . . . . . . . . . . . . . . . . . . . . . . . .84Control program set-up . . . . . . . . . . . . . . . . . . . . . . . . . . . . . . . . . . . . . . . . . . . . . . . . . . . . . .84On-load checks . . . . . . . . . . . . . . . . . . . . . . . . . . . . . . . . . . . . . . . . . . . . . . . . . . . . . . . . . . . .84MaintenanceWhat this chapter contains . . . . . . . . . . . . . . . . . . . . . . . . . . . . . . . . . . . . . . . . . . . . . . . . . . . . . . . .85Safety . . . . . . . . . . . . . . . . . . . . . . . . . . . . . . . . . . . . . . . . . . . . . . . . . . . . . . . . . . . . . . . . . . . . . . . .85Maintenance intervals . . . . . . . . . . . . . . . . . . . . . . . . . . . . . . . . . . . . . . . . . . . . . . . . . . . . . . . . . . .85Required <strong>to</strong>ols for maintenance . . . . . . . . . . . . . . . . . . . . . . . . . . . . . . . . . . . . . . . . . . . . . . .86Cabinet layout . . . . . . . . . . . . . . . . . . . . . . . . . . . . . . . . . . . . . . . . . . . . . . . . . . . . . . . . . . . . . . . . .87Frame sizes R5 and R6 . . . . . . . . . . . . . . . . . . . . . . . . . . . . . . . . . . . . . . . . . . . . . . . . . . . . .87Frame sizes R7 and R8 without du/dt filter . . . . . . . . . . . . . . . . . . . . . . . . . . . . . . . . . . . . . . .88Frame sizes R7 and R8 with du/dt filter . . . . . . . . . . . . . . . . . . . . . . . . . . . . . . . . . . . . . . . . .89Designations . . . . . . . . . . . . . . . . . . . . . . . . . . . . . . . . . . . . . . . . . . . . . . . . . . . . . . . . . . . . . .90Layout of the drive module . . . . . . . . . . . . . . . . . . . . . . . . . . . . . . . . . . . . . . . . . . . . . . . . . . . . . . . .91Checking and replacing the air filters . . . . . . . . . . . . . . . . . . . . . . . . . . . . . . . . . . . . . . . . . . . . . . . .92Heatsink . . . . . . . . . . . . . . . . . . . . . . . . . . . . . . . . . . . . . . . . . . . . . . . . . . . . . . . . . . . . . . . . . . . . . .92Table of contents
15Fans . . . . . . . . . . . . . . . . . . . . . . . . . . . . . . . . . . . . . . . . . . . . . . . . . . . . . . . . . . . . . . . . . . . . . . . . 92Replacing the drive module fan (R5 and R6) . . . . . . . . . . . . . . . . . . . . . . . . . . . . . . . . . . . . . 93Replacing the drive module fan (R7) . . . . . . . . . . . . . . . . . . . . . . . . . . . . . . . . . . . . . . . . . . . 94Replacing the drive module fan (R8) . . . . . . . . . . . . . . . . . . . . . . . . . . . . . . . . . . . . . . . . . . . 95Replacing the cabinet fans (R5 and R6) . . . . . . . . . . . . . . . . . . . . . . . . . . . . . . . . . . . . . . . . 96Replacing the fans at upper part of the cubicle . . . . . . . . . . . . . . . . . . . . . . . . . . . . . . 96Replacing the additional fan at the lower part of the cubicle (R6 with du/dtfilter, +E205) . . . . . . . . . . . . . . . . . . . . . . . . . . . . . . . . . . . . . . . . . . . . . . . . . . . . . . . . . 96Replacing the cabinet fans (frame size R8 only) . . . . . . . . . . . . . . . . . . . . . . . . . . . . . . . . . . 97Replacing the additional cabinet fan (frame sizes R7 and R8 only with IP 22 and IP 42when cabling: bot<strong>to</strong>m entry/exit) . . . . . . . . . . . . . . . . . . . . . . . . . . . . . . . . . . . . . . . . . . . . . . 98Replacing the additional cabinet fan (frame sizes R7 and R8 only with IP 22 and IP 42when cabling: <strong>to</strong>p entry and bot<strong>to</strong>m exit, bot<strong>to</strong>m entry and <strong>to</strong>p exit or <strong>to</strong>p entry/exit) . . . . . . 99Replacing the IP 54 (UL type 12) fan in frame size R6 . . . . . . . . . . . . . . . . . . . . . . . . . . . . 100Replacing the IP 54 (UL type 12) fan in frame sizes R7 and R8 . . . . . . . . . . . . . . . . . . . . . 101Capaci<strong>to</strong>rs . . . . . . . . . . . . . . . . . . . . . . . . . . . . . . . . . . . . . . . . . . . . . . . . . . . . . . . . . . . . . . . . . . . 102Reforming . . . . . . . . . . . . . . . . . . . . . . . . . . . . . . . . . . . . . . . . . . . . . . . . . . . . . . . . . . . . . . 102Replacing the capaci<strong>to</strong>r pack (R7) . . . . . . . . . . . . . . . . . . . . . . . . . . . . . . . . . . . . . . . . . . . . 102Replacing the capaci<strong>to</strong>r pack (R8) . . . . . . . . . . . . . . . . . . . . . . . . . . . . . . . . . . . . . . . . . . . . 103Replacing the drive module (R5 and R6) . . . . . . . . . . . . . . . . . . . . . . . . . . . . . . . . . . . . . . . . . . . 104Replacing the drive module (R7 and R8) . . . . . . . . . . . . . . . . . . . . . . . . . . . . . . . . . . . . . . . . . . . 106LEDs . . . . . . . . . . . . . . . . . . . . . . . . . . . . . . . . . . . . . . . . . . . . . . . . . . . . . . . . . . . . . . . . . . . . . . . 109Technical dataWhat this chapter contains . . . . . . . . . . . . . . . . . . . . . . . . . . . . . . . . . . . . . . . . . . . . . . . . . . . . . . 111IEC data . . . . . . . . . . . . . . . . . . . . . . . . . . . . . . . . . . . . . . . . . . . . . . . . . . . . . . . . . . . . . . . . . . . . 111Ratings . . . . . . . . . . . . . . . . . . . . . . . . . . . . . . . . . . . . . . . . . . . . . . . . . . . . . . . . . . . . . . . . . 111Symbols . . . . . . . . . . . . . . . . . . . . . . . . . . . . . . . . . . . . . . . . . . . . . . . . . . . . . . . . . . . . . . . . 113Sizing . . . . . . . . . . . . . . . . . . . . . . . . . . . . . . . . . . . . . . . . . . . . . . . . . . . . . . . . . . . . . . . . . . 113Derating . . . . . . . . . . . . . . . . . . . . . . . . . . . . . . . . . . . . . . . . . . . . . . . . . . . . . . . . . . . . . . . . 113Temperature derating . . . . . . . . . . . . . . . . . . . . . . . . . . . . . . . . . . . . . . . . . . . . . . . . . 114Altitude derating . . . . . . . . . . . . . . . . . . . . . . . . . . . . . . . . . . . . . . . . . . . . . . . . . . . . . 114Fuses . . . . . . . . . . . . . . . . . . . . . . . . . . . . . . . . . . . . . . . . . . . . . . . . . . . . . . . . . . . . . . . . . . 114Calculation example . . . . . . . . . . . . . . . . . . . . . . . . . . . . . . . . . . . . . . . . . . . . . . . . . . 114Notes concerning the fuse tables . . . . . . . . . . . . . . . . . . . . . . . . . . . . . . . . . . . . . . . . 115Ultrarapid (aR) fuses . . . . . . . . . . . . . . . . . . . . . . . . . . . . . . . . . . . . . . . . . . . . . . . . . 116Optional gG fuses . . . . . . . . . . . . . . . . . . . . . . . . . . . . . . . . . . . . . . . . . . . . . . . . . . . . 118Quick guide for selecting between gG and aR fuses . . . . . . . . . . . . . . . . . . . . . . . . . 120Cable types . . . . . . . . . . . . . . . . . . . . . . . . . . . . . . . . . . . . . . . . . . . . . . . . . . . . . . . . . . . . . 122Cable entries . . . . . . . . . . . . . . . . . . . . . . . . . . . . . . . . . . . . . . . . . . . . . . . . . . . . . . . . . . . . 123Dimensions, weights and noise . . . . . . . . . . . . . . . . . . . . . . . . . . . . . . . . . . . . . . . . . . . . . 123Table of contents
16NEMA data . . . . . . . . . . . . . . . . . . . . . . . . . . . . . . . . . . . . . . . . . . . . . . . . . . . . . . . . . . . . . . . . . . .124Ratings . . . . . . . . . . . . . . . . . . . . . . . . . . . . . . . . . . . . . . . . . . . . . . . . . . . . . . . . . . . . . . . . .124Symbols . . . . . . . . . . . . . . . . . . . . . . . . . . . . . . . . . . . . . . . . . . . . . . . . . . . . . . . . . . . . . . . .125Sizing . . . . . . . . . . . . . . . . . . . . . . . . . . . . . . . . . . . . . . . . . . . . . . . . . . . . . . . . . . . . . . . . . .125Derating . . . . . . . . . . . . . . . . . . . . . . . . . . . . . . . . . . . . . . . . . . . . . . . . . . . . . . . . . . . . . . . . .125Fuses . . . . . . . . . . . . . . . . . . . . . . . . . . . . . . . . . . . . . . . . . . . . . . . . . . . . . . . . . . . . . . . . . .126UL class T or L fuses . . . . . . . . . . . . . . . . . . . . . . . . . . . . . . . . . . . . . . . . . . . . . . . . . .127Cable types . . . . . . . . . . . . . . . . . . . . . . . . . . . . . . . . . . . . . . . . . . . . . . . . . . . . . . . . . . . . . .128Cable entries . . . . . . . . . . . . . . . . . . . . . . . . . . . . . . . . . . . . . . . . . . . . . . . . . . . . . . . . . . . . .129Dimensions, weights and noise . . . . . . . . . . . . . . . . . . . . . . . . . . . . . . . . . . . . . . . . . . . . .129Free space around the unit . . . . . . . . . . . . . . . . . . . . . . . . . . . . . . . . . . . . . . . . . . . . . . . . . . . . . .130Input power connection . . . . . . . . . . . . . . . . . . . . . . . . . . . . . . . . . . . . . . . . . . . . . . . . . . . . . . . . .131Mo<strong>to</strong>r connection . . . . . . . . . . . . . . . . . . . . . . . . . . . . . . . . . . . . . . . . . . . . . . . . . . . . . . . . . . . . . .131Efficiency . . . . . . . . . . . . . . . . . . . . . . . . . . . . . . . . . . . . . . . . . . . . . . . . . . . . . . . . . . . . . . . . . . . .131Cooling . . . . . . . . . . . . . . . . . . . . . . . . . . . . . . . . . . . . . . . . . . . . . . . . . . . . . . . . . . . . . . . . . . . . . .132Degrees of protection . . . . . . . . . . . . . . . . . . . . . . . . . . . . . . . . . . . . . . . . . . . . . . . . . . . . . . . . . . .132Ambient conditions . . . . . . . . . . . . . . . . . . . . . . . . . . . . . . . . . . . . . . . . . . . . . . . . . . . . . . . . . . . . .132Materials . . . . . . . . . . . . . . . . . . . . . . . . . . . . . . . . . . . . . . . . . . . . . . . . . . . . . . . . . . . . . . . . . . . . .133Applicable standards . . . . . . . . . . . . . . . . . . . . . . . . . . . . . . . . . . . . . . . . . . . . . . . . . . . . . . . . . . .133US patents . . . . . . . . . . . . . . . . . . . . . . . . . . . . . . . . . . . . . . . . . . . . . . . . . . . . . . . . . . . . . . . . . . .134CE marking . . . . . . . . . . . . . . . . . . . . . . . . . . . . . . . . . . . . . . . . . . . . . . . . . . . . . . . . . . . . . . . . . . .135Definitions . . . . . . . . . . . . . . . . . . . . . . . . . . . . . . . . . . . . . . . . . . . . . . . . . . . . . . . . . . . . . . .135Compliance with the EMC Directive . . . . . . . . . . . . . . . . . . . . . . . . . . . . . . . . . . . . . . . . . . .135Compliance with <strong>EN</strong> 61800-3 (2004) . . . . . . . . . . . . . . . . . . . . . . . . . . . . . . . . . . . . . . . . . .135First environment (drive of category C2) . . . . . . . . . . . . . . . . . . . . . . . . . . . . . . . . . . .135Second environment (drive of category C3) . . . . . . . . . . . . . . . . . . . . . . . . . . . . . . . .136Second environment (drive of category C4) . . . . . . . . . . . . . . . . . . . . . . . . . . . . . . . .136Machinery Directive . . . . . . . . . . . . . . . . . . . . . . . . . . . . . . . . . . . . . . . . . . . . . . . . . . . . . . . .136“C-tick” marking . . . . . . . . . . . . . . . . . . . . . . . . . . . . . . . . . . . . . . . . . . . . . . . . . . . . . . . . . . . . . . .137Definitions . . . . . . . . . . . . . . . . . . . . . . . . . . . . . . . . . . . . . . . . . . . . . . . . . . . . . . . . . . . . . . .137Compliance with IEC 61800-3 . . . . . . . . . . . . . . . . . . . . . . . . . . . . . . . . . . . . . . . . . . . . . . . .137First environment (drive of category C2) . . . . . . . . . . . . . . . . . . . . . . . . . . . . . . . . . . .137Second environment (drive of category C3) . . . . . . . . . . . . . . . . . . . . . . . . . . . . . . . .138Second environment (drive of category C4) . . . . . . . . . . . . . . . . . . . . . . . . . . . . . . . .138UL/CSA markings . . . . . . . . . . . . . . . . . . . . . . . . . . . . . . . . . . . . . . . . . . . . . . . . . . . . . . . . . . . . . .139Equipment warranty and liability . . . . . . . . . . . . . . . . . . . . . . . . . . . . . . . . . . . . . . . . . . . . . . . . . . .139Dimensional drawingsFrame sizes R5 and R6 . . . . . . . . . . . . . . . . . . . . . . . . . . . . . . . . . . . . . . . . . . . . . . . . . . . . . . . . .142Frame sizes R7 and R8 . . . . . . . . . . . . . . . . . . . . . . . . . . . . . . . . . . . . . . . . . . . . . . . . . . . . . . . . .143IP 54 and IP 54R units of frame sizes R7 and R8 . . . . . . . . . . . . . . . . . . . . . . . . . . . . . . . . . . . .144Resis<strong>to</strong>r brakingWhat this chapter contains . . . . . . . . . . . . . . . . . . . . . . . . . . . . . . . . . . . . . . . . . . . . . . . . . . . . . . .1<strong>45</strong>Availability of brake choppers and resis<strong>to</strong>rs . . . . . . . . . . . . . . . . . . . . . . . . . . . . . . . . . . . . . . . . . .1<strong>45</strong>How <strong>to</strong> select the correct drive/chopper/resis<strong>to</strong>r combination . . . . . . . . . . . . . . . . . . . . . . . . . . . .1<strong>45</strong>Optional brake chopper and resis<strong>to</strong>r(s) . . . . . . . . . . . . . . . . . . . . . . . . . . . . . . . . . . . . . . . . . . . . .146Resis<strong>to</strong>r installation and wiring . . . . . . . . . . . . . . . . . . . . . . . . . . . . . . . . . . . . . . . . . . . . . . . . . . . .149Table of contents
17Protection of frame size R5 . . . . . . . . . . . . . . . . . . . . . . . . . . . . . . . . . . . . . . . . . . . . . . . . . . . . . . 149Protection of frame sizes R6, R7 and R8 . . . . . . . . . . . . . . . . . . . . . . . . . . . . . . . . . . . . . . . . . . . 150Brake circuit commissioning . . . . . . . . . . . . . . . . . . . . . . . . . . . . . . . . . . . . . . . . . . . . . . . . . . . . . 150Table of contents
18Table of contents
17About this manualWhat this chapter containsTarget audienceThis chapter describes the intended audience and contents of the manual. Itcontains a flowchart of steps in checking the delivery, installing and commissioningthe drive. The flowchart refers <strong>to</strong> chapters/sections in this manual and othermanuals.This manual is intended for people who plan the installation, install, commission, useand service the drive. Read the manual before working on the drive. The reader isexpected <strong>to</strong> know the fundamentals of electricity, wiring, electrical components andelectrical schematic symbols.The manual is written for readers worldwide. Both SI and imperial units are shown.Special US instructions for installations within the United States that must beperformed per the National Electrical Code and local codes are marked with (US).Common chapter for four productsChapter Planning the electrical installation applies <strong>to</strong> the <strong>ACS800</strong>-01/U1, <strong>ACS800</strong>-02/U2, <strong>ACS800</strong>-04/U4, and <strong>ACS800</strong>-<strong>07</strong>/<strong>U7</strong>.Categorization according <strong>to</strong> the frame sizeSome instructions, technical data and dimensional drawings which concern onlycertain frame sizes are marked with the symbol of the frame size R2, R3... or R8.The frame size is not marked on the drive designation label. To identify the framesize of your drive, see the rating tables in chapter Technical data.Categorization according <strong>to</strong> the + codeThe instructions, technical data and dimensional drawings which concern onlycertain optional selections are marked with + codes, e.g. +E205. The optionsincluded in the drive can be identified from the + codes visible on the typedesignation label of the drive. The + code selections are listed in chapter The<strong>ACS800</strong>-<strong>07</strong>/<strong>U7</strong> under Type code.About this manual
18ContentsThe chapters of this manual are briefly described below.Safety instructions give safety instructions for the installation, commissioning,operation and maintenance of the drive.About this manual introduces this manual.The <strong>ACS800</strong>-<strong>07</strong>/<strong>U7</strong> describes the drive.Mechanical installation shows how <strong>to</strong> move and unpack the delivery and how <strong>to</strong>fasten the cabinet <strong>to</strong> the floor.Planning the electrical installation instructs on the mo<strong>to</strong>r and cable selection, theprotections and the cable routing.Electrical installation instructs how <strong>to</strong> wire the drive.Mo<strong>to</strong>r control and I/O board (RMIO) shows external control connections <strong>to</strong> the mo<strong>to</strong>rcontrol and I/O board and its specifications.Installation checklist and start-up helps in checking the mechanical and electricalinstallation of the drive.Maintenance contains preventive maintenance instructions.Technical data contains the technical specifications of the drive, e.g. the ratings,sizes and technical requirements, provisions for fulfilling the requirements for CEand other markings and warranty policy.Dimensional drawings contains the dimensional drawings of the drive.Resis<strong>to</strong>r braking describes how <strong>to</strong> select, protect and wire optional brake choppersand resis<strong>to</strong>rs. The chapter also contains technical data.Installation and commissioning flowchartTaskIdentify the frame size of your drive: R6, R7 or R8.SeeTechnical data / IEC data or NEMA dataPlan the installation.Check the ambient conditions, ratings, requiredcooling air flow, input power connection, compatibilityof the mo<strong>to</strong>r, mo<strong>to</strong>r connection, and other technicaldata.Select the cables.Technical dataPlanning the electrical installationOption manual (if optional equipment isincluded)About this manual
19TaskUnpack and check the units.Check that all necessary optional modules andequipment are present and correct.Only intact units may be started up.SeeMechanical installation: Moving the unit, BeforeinstallationIf the converter has been non-operational formore than one year, the converter DC linkcapaci<strong>to</strong>rs need <strong>to</strong> be reformed. Ask ABB forinstructions.Check the installation site.Mechanical installation: Before installationTechnical dataIf the drive is about <strong>to</strong> be connected <strong>to</strong> an IT(ungrounded) system, check that the drive is notequipped with EMC filter +E202.The <strong>ACS800</strong>-<strong>07</strong>/<strong>U7</strong>: Type code. Forinstructions on how <strong>to</strong> disconnect the EMCfiltering, contact ABB.Route the cables.Planning the electrical installation: Routing thecablesCheck the insulation of the mo<strong>to</strong>r and the mo<strong>to</strong>rcable.Electrical installation: Checking the insulation ofthe assemblyInstall the drive. Connect the power cables. Connectthe control and the auxiliary control cables.Mechanical installation, Electrical installation,Resis<strong>to</strong>r braking (optional)Check the installation.Installation checklist and start-upCommission the drive.Installation checklist and start-up, appropriatefirmware manualCommission the optional brake chopper (if present).Resis<strong>to</strong>r brakingProduct and service inquiriesAddress any inquiries about the product <strong>to</strong> your local ABB representative, quotingthe type code and serial number of the unit in question. A listing of ABB sales,support and service contacts can be found by navigating <strong>to</strong> www.abb.com/drives andselecting Sales, Support and Service network.About this manual
20Product trainingFor information on ABB product training, navigate <strong>to</strong> www.abb.com/drives and selectTraining courses.Providing feedback on ABB Drives manualsYour comments on our manuals are welcome. Go <strong>to</strong> www.abb.com/drivesand selectDocument Library – <strong>Manual</strong>s feedback form (LV AC drives).Document library on the InternetYou can find manuals and other product documents in PDF format on the Internet.Go <strong>to</strong> www.abb.com/drives and select Document Library. You can browse the libraryor enter selection criteria, for example a document code, in the search field.About this manual
21The <strong>ACS800</strong>-<strong>07</strong>/<strong>U7</strong>What this chapter containsThe <strong>ACS800</strong>-<strong>07</strong>/<strong>U7</strong>This chapter describes the construction and operating principle of the drive in short.The <strong>ACS800</strong>-<strong>07</strong>/<strong>U7</strong> is a cabinet-installed drive for controlling AC mo<strong>to</strong>rs.IP 21/22 (UL type 1)*Line contac<strong>to</strong>rControl panelSwitch fuse (mainswitch / disconnec<strong>to</strong>r)Switch fuse handleAuxiliary circuit fuses*Emergency S<strong>to</strong>p and Start/S<strong>to</strong>pswitches*Brake resis<strong>to</strong>r cubicle with +D151Drive control unit(RDCU, RMIO)DrivemoduleInputU1,V1,W1InputOutputSwing-out frameFor layout of optionalequipment on theswing-out frame, seeElectrical installation /Layout drawing offac<strong>to</strong>ry installed optionalequipmentPEOutputU2,V2,W2*du/dt filter (+E205)behind the swing-outframeBrakeresis<strong>to</strong>r(R-, R+)*EMC filter cubicle with +E202* Denotes optional equipment not present onall units.View of frame size R8Cableentries+E205Power and signal cable terminals, and du/dtfilter (+E205), behind the swing-out frameNote: The input terminals are located in theEMC filter cubicle with +E202.The <strong>ACS800</strong>-<strong>07</strong>/<strong>U7</strong>
22IP 21/22See page72.DrivemoduleRMIOAdditionalfan (not inall types)View of frame size R6 without shroudsPower cable terminalsSee page72.DrivemoduleRMIOView of frame size R5 without shroudsPower cable terminalsThe <strong>ACS800</strong>-<strong>07</strong>/<strong>U7</strong>
23Type codeThe type code contains information on the specifications and configuration of thedrive. The first digits from left express the basic configuration (e.g. <strong>ACS800</strong>-<strong>07</strong>-0170-5). The optional selections are given thereafter, separated by + signs (e.g.+E202). The main selections are described below. Not all selections are available forall types. For more information, refer <strong>to</strong> <strong>ACS800</strong> Ordering Information (<strong>EN</strong> code:6<strong>45</strong>56568, available on request).SelectionAlternativesProduct series<strong>ACS800</strong> product seriesType <strong>07</strong> cabinet built. When no options are selected: 6-pulse diode inputbridge, IP 21, switch fuse with aR fuses, control panel CDP312R,no EMC filter, Standard Control Program, bot<strong>to</strong>m entry and exit ofcables, boards without coating, one set of manuals.<strong>U7</strong> cabinet built (USA). When no options are selected: 6-pulse diodebridge, UL type 1, switch fuse with class T or L fuses, controlpanel CDP312R, no EMC filter, US version of the StandardControl Program (three-wire start/s<strong>to</strong>p as default setting), cableconduit entry, common mode filter in frame size R8, boardswithout coating, one set of manuals.SizeSee Technical data: IEC data or NEMA data.Voltage range(nominal rating in bold)3 380/400/415 VAC5 380/400/415/440/460/480/500 VAC7 525/575/600/690 VAC+ optionsDegree of protection B053 IP 22 (UL type 1)B054 IP 42 (UL type 2)B055 IP 54 (UL type 12)B059 IP 54R with connection <strong>to</strong> air outlet ductConstruction C121 marine construction (reinforced mechanics and fastening,marking of conduc<strong>to</strong>rs according <strong>to</strong> class A1, door handles, selfextinctivematerials)C129 UL listed (for <strong>ACS800</strong>-<strong>07</strong> units only): US type main switch fuse,115 VAC control voltage, US cable conduit entry, all componentsUL listed/recognized, max. supply voltage 600 V.C134 CSA marked. US/CSA type main switch fuse, bot<strong>to</strong>m entry andexit, 115 VAC control voltage, all components UL/CSA listed/recognized, max. supply voltage 600 V.Resis<strong>to</strong>r braking D150 brake chopper (external resis<strong>to</strong>r)D151 brake chopper and resis<strong>to</strong>rFilter E200 EMC/RFI filter for second environment TN (grounded) systemE202 EMC/RFI filter for first environment TN (grounded) system,restricted (A limits)E210 EMC/RFI filter for second environment TN/IT (grounded/ungrounded) systemE205 du/dt filterE206 sine filterE208 common mode filterLine options F250 line contac<strong>to</strong>rF251 gG line fusesThe <strong>ACS800</strong>-<strong>07</strong>/<strong>U7</strong>
24SelectionAlternativesCabinet options G300 cabinet heater (external supply)G304 115 VAC control voltageG3<strong>07</strong> terminals for external control voltage (UPS)G313 output for mo<strong>to</strong>r heater (external supply)G330 halogen-free materials and control wiringCabling H351 <strong>to</strong>p entryH353 <strong>to</strong>p exitH358 cable conduit entry (US and UK version)Fieldbus K... Refer <strong>to</strong> <strong>ACS800</strong> Ordering Information (<strong>EN</strong> code: 6<strong>45</strong>56568).I/O L504 additional terminal block X2L505 thermis<strong>to</strong>r relay (1 or 2 pcs)L506 Pt100 relay (3, 5 or 8 pcs)L... Refer <strong>to</strong> <strong>ACS800</strong> Ordering Information (<strong>EN</strong> code: 6<strong>45</strong>56568).Starter for auxiliary mo<strong>to</strong>rfanM600 1...1.6 AM601 1.6...2.5 AM602 2.5...4 AM603 4...6.3 AM604 6.3...10 AM605 10...16 AControl program N... Refer <strong>to</strong> <strong>ACS800</strong> Ordering Information (<strong>EN</strong> code: 6<strong>45</strong>56568).Language of manual R...Specialities P901 coated boardsP902 cus<strong>to</strong>mizedP904 extended warrantyP913 special colourSafety features Q950 prevention of unexpected startQ951 emergency s<strong>to</strong>p of category 0 (+F250 required)Q952 emergency s<strong>to</strong>p of category 1 (+F250 required)Q954 earth fault moni<strong>to</strong>ring for IT (ungrounded) systemsThe <strong>ACS800</strong>-<strong>07</strong>/<strong>U7</strong>
25Main circuit and controlDoor switchesThe following switches are mounted on the cabinet door:Operating switch (units with maincontac<strong>to</strong>r only)“START” position closes the maincontac<strong>to</strong>r; “ON” position keeps the maincontac<strong>to</strong>r closed; “OFF” position opensthe main contac<strong>to</strong>r.Emergency s<strong>to</strong>p but<strong>to</strong>n(optional)The <strong>ACS800</strong>-<strong>07</strong>/<strong>U7</strong>
26DiagramThis diagram shows the control interfaces and the main circuit of the drive.External control viaanalogue/digitalinputs and outputsMo<strong>to</strong>rcontrol andI/O board(RMIO)Optional module 1: RMBA, RAIO,RDIO, RDNA, RLON, RIBA, RPBA,RCAN, RCNA, RMBP, RETA, RRIA orRTACOptional module 2: RTAC, RAIO, RRIAor RDIODDCS communication option module:RDCO-01, RDCO-02 or RDCO-03Input power~ = ~ =Output powerBrake chopper (optional)R- UDC+ UDC-R+OperationThis table describes the operation of the main circuit in short.Componentsix-pulse rectifiercapaci<strong>to</strong>r banksix-pulse IGBT inverterDescriptionconverts the three-phase AC voltage <strong>to</strong> DC voltageenergy s<strong>to</strong>rage which stabilizes the intermediate circuit DC voltageconverts the DC voltage <strong>to</strong> AC voltage and vice versa. The mo<strong>to</strong>roperation is controlled by switching the IGBTs.The <strong>ACS800</strong>-<strong>07</strong>/<strong>U7</strong>
27Printed circuit boardsThe drive contains the following printed circuit boards as standard:• main circuit board (AINT)• mo<strong>to</strong>r control and I/O board (RMIO) with a fibre optic link <strong>to</strong> the AINT board• input bridge control board (AINP)• input bridge protection board (AIBP) which includes varis<strong>to</strong>rs and snubbers forthe thyris<strong>to</strong>rs• power supply board (APOW)• gate driver control board (AGDR)• diagnostics and panel interface board (ADPI)• EMC filter boards (NRFC) with option +E202• brake chopper control board (ABRC) with option +D150Mo<strong>to</strong>r controlThe mo<strong>to</strong>r control is based on the Direct Torque Control (DTC) method. Two phasecurrents and DC link voltage are measured and used for the control. The third phasecurrent is measured for earth fault protection.The <strong>ACS800</strong>-<strong>07</strong>/<strong>U7</strong>
28The <strong>ACS800</strong>-<strong>07</strong>/<strong>U7</strong>
29Mechanical installationWhat this chapter containsMoving the unitThis chapter describes the mechanical installation procedure of the drive.Move the transport package by truck and pallet truck <strong>to</strong> the installation site.Max 30°Cabinet back panelSupportView of cabinet laid on its backIt is allowed <strong>to</strong> tilt the drive if required, or move it on its backwhen supported properly from below. Note: It is not allowed<strong>to</strong> move a unit with sine filter (+E206) on its back.WARNING! Lift the drive by the upper part only using the lifting lugs/bars attached <strong>to</strong>the <strong>to</strong>p of the unit.Mechanical installation
30Before installationDelivery checkThe drive delivery contains:• drive cabinet including fac<strong>to</strong>ry installed options such as optional modules(inserted on<strong>to</strong> the RMIO board in the RDCU unit)• residual voltage warning stickers• hardware manual• appropriate firmware manuals and guides• appropriate optional module manuals• delivery documents.Check that there are no signs of damage. Before attempting installation andoperation, check the information on the type designation label of the drive <strong>to</strong> verifythat the unit is of the correct type. The label includes an IEC and NEMA rating, C-ULUS, and CSA markings, a type code and a serial number, which allow individualrecognition of each unit. The first digit of the serial number refers <strong>to</strong> themanufacturing plant. The next four digits refer <strong>to</strong> the unit’s manufacturing year andweek respectively. The remaining digits complete the serial number so that there areno two units with the same serial number.The type designation label is located on the front cover and the serial number labelinside the unit. Example labels are shown below.Type designation labelSerial number labelRequirements for the installation siteCheck the installation site according <strong>to</strong> the requirements below. See <strong>ACS800</strong>-<strong>07</strong>/<strong>U7</strong>Dimensional Drawings [3AFE64775421 (English)] for frame details. See Technicaldata for the allowed operation conditions of the drive.Mechanical installation
31Cooling air flowProvide the drive with the amount of clean cooling air given in Technical data / IECdata or NEMA data.Cable channel in the floor below the cabinetA cable channel can be constructed below the 400 mm wide middle part of thecabinet. The cabinet weight lies on the two 100 mm wide transverse sections whichthe floor must carry.Viewed from aboveSide viewWith heavycabinets,support thestructural C-sections fromThis area can be used for acable channelPrevent the cooling air flow from the cable channel <strong>to</strong>the cabinet by bot<strong>to</strong>m plates. To ensure the degree ofprotection for the cabinet use the original bot<strong>to</strong>m platesdelivered with the unit. With user-defined cable entriestake care of the degree of protection, fire protection andEMC compliance.CablesMechanical installation
32Fastening the cabinet <strong>to</strong> the floor and wall (non-marine units)Fasten the cabinet <strong>to</strong> the floor either with the outside fastening brackets from frontand back, or by the fastening holes inside the cabinet. When fastening at the back isnot possible, fasten the cabinet at the <strong>to</strong>p using L-brackets bolted <strong>to</strong> the holes of thelifting lugs (M16 bolt). The cabinet can be fastened against a wall or back <strong>to</strong> backwith another cabinet. See chapter Dimensional drawings for the horizontal andvertical fastening points. Height adjustment can be done by using metal shimsbetween the bot<strong>to</strong>m frame and floor.Fastening points when installedback against wallFastening points when installedback against back320 mm (12.28 in.) for fan replacementin frame sizes R7 and R8> 400 mm(15.75 in.)IP 21/22/42> 400 mm(15.75 in.)IP54Top clearanceL-bracketM16 boltCabinet <strong>to</strong>pFastening the cabinet at the <strong>to</strong>pby using L-brackets (side view)Mechanical installation
33Fastening the cabinet with the outside bracketsInsert the bracket in<strong>to</strong> the longitudinal hole in the edge of the cabinet frame body andfasten it with a bolt <strong>to</strong> the floor.Dimensions of the fastening bracket:Cabinet frame bodyCubiclewidthmm [in.]200 [7.87]Fastening hole distance in mm [in.]a b aCabinet frame body46 [1.81]400 [15.75] a: 250 [9.84]600 [23.62] a: <strong>45</strong>0 [17.71]800 [31.50] a: 650 [25.29]1000 [39.37] a: 350 [13.78], b: 150 [5.91], a: 350 [13.78]1200 [47.24] a: <strong>45</strong>0 [17.71], b: 150 [5.91], a: <strong>45</strong>0 [17.71]Fastening bolt: M10 <strong>to</strong> M12 (3/8” <strong>to</strong> 1/2”).Mechanical installation
34Fastening the cabinet through the holes inside the cabinetThe cabinet can be fastened <strong>to</strong> the floor using the fastening holes inside the cabinet,if they are available and accessible. The maximum allowed distance between thefastening points is 800 mm (31.50 in.).Side plates of the cabinet: 15 mmBack plate of the cabinet: 10 mmGap between the 200 mm, 400 mm, 600 mm,800 mm, 1000 mm and 1500 mm cubicles:25 [0.98]IP 20...42≈ 0.5IP 54≈ 1aCubicle width Fastening hole distance in mm [in.]∅ 31 mm [1.22]a b amm [in.]200 [7.87] a: 50 [1.97]400 [15.75] a: 250 [9.84]600 [23.62] a: <strong>45</strong>0 [17.71]800 [31.50] a: 650 [25.29]1000 [39.37] a: 350 [13.78], b: 150 [5.91], a: 350 [13.78]1200 [47.24] a: <strong>45</strong>0 [17.71], b: 150 [5.91], a: <strong>45</strong>0 [17.71]Fastening bolt: M10 <strong>to</strong> M12 (3/8” <strong>to</strong> 1/2”).Mechanical installation
35Fastening the cabinet <strong>to</strong> the floor and roof/wall (marine units)See <strong>ACS800</strong>-<strong>07</strong> Dimensional Drawings [3AFE64775421 (English)] for the locationsof the fastening holes in the flat bars below the cabinet and for fastening points at the<strong>to</strong>p of the cabinet. Top fastening brackets are included in the delivery.Fasten the cabinet <strong>to</strong> the floor and roof (wall) as follows:1. Bolt the unit <strong>to</strong> the floor through the holes in each flat bar at the base of thecabinet using M10 or M12 screws.2. If there is not enough room behind the cabinet for installation, clamp the rear endsof the flat bars.3. Remove the lifting lugs and bolt the fastening brackets in<strong>to</strong> the lifting lug holes (a).Fasten the <strong>to</strong>p of the cabinet <strong>to</strong> the rear wall and/or roof with brackets (b).3a3aIP 54 roof3a3bFastening bracketM16 bolt3aCabinetFastening bracketFastening the cabinet at the <strong>to</strong>p with brackets (side view)2111ClampsBack panel ofcabinetFlat bars at base of cabinetClamping the cabinet <strong>to</strong> the floor at the backMechanical installation
36Electric weldingIt is not recommended <strong>to</strong> fasten the cabinet by welding.Cabinets without flat bars at the base (non-marine versions)If the preferred fastening methods (clamping or bolting through the holes inside thecabinet) cannot be used, proceed as follows:• Connect the return conduc<strong>to</strong>r of the welding equipment <strong>to</strong> the cabinet frame atthe bot<strong>to</strong>m within 0.5 metres of the welding point.Cabinets with flat bars at the base (marine versions)If the fastening cannot be done using screws, proceed as follows:• Weld only on the flat bar under the cabinet, not the cabinet frame itself.• Clamp the welding electrode on<strong>to</strong> the flat bar about <strong>to</strong> be welded or on<strong>to</strong> the floorwithin 0.5 metres of the welding point.WARNING! If the welding return wire is connected improperly, the welding circuitmay damage electronic circuits in the cabinet. The thickness of the zinc coating ofthe cabinet frame is 100 <strong>to</strong> 200 micrometres; on the flat bars the coating isapproximately 20 micrometres. Ensure that the welding fumes are not inhaled.Mechanical installation
37Planning the electrical installationWhat this chapter containsThis chapter contains the instructions that you must follow when selecting the mo<strong>to</strong>r,cables, protections, cable routing and way of operation for the drive system.Note: The installation must always be designed and made according <strong>to</strong> applicablelocal laws and regulations. ABB does not assume any liability whatsoever for anyinstallation which breaches the local laws and/or other regulations. Furthermore, ifthe recommendations given by ABB are not followed, the drive may experienceproblems that the warranty does not cover.To which products this chapter appliesThis chapter applies <strong>to</strong> the <strong>ACS800</strong>-01/U1, <strong>ACS800</strong>-11/U11, <strong>ACS800</strong>-31/U31,<strong>ACS800</strong>-02/U2, <strong>ACS800</strong>-04/U4, and <strong>ACS800</strong>-<strong>07</strong>/<strong>U7</strong> types up <strong>to</strong> -0610-x.Note: All options described in this chapter are not available for all products. Checkthe availability from section Type code on page 23.Mo<strong>to</strong>r selection and compatibility1. Select the mo<strong>to</strong>r according <strong>to</strong> the rating tables in chapter Technical Data. Use theDriveSize PC <strong>to</strong>ol if the default load cycles are not applicable.2. Check that the mo<strong>to</strong>r ratings lie within the allowed ranges of the drive controlprogram:• mo<strong>to</strong>r nominal voltage is 1/2 ... 2 · U N of the drive• mo<strong>to</strong>r nominal current is 1/6 ... 2 · I 2hd of the drive in DTC control and0 ... 2 · I 2hd in scalar control. The control mode is selected by a drive parameter.Planning the electrical installation
383. Check that the mo<strong>to</strong>r voltage rating meets the application requirements:If the drive is equippedwith …diode supply<strong>ACS800</strong>-01, -U1, -02, -U2,-04, -04M, -U4 -<strong>07</strong>, -<strong>U7</strong>IGBT supply<strong>ACS800</strong>-11, -U11, -31,-U31, -17, -37… and …no resis<strong>to</strong>r braking is in usefrequent or long term brake cycles willbe usedDC link voltage will not be increasedfrom nominal (parameter setting)DC link voltage will be increased fromnominal (parameter setting)… then the mo<strong>to</strong>r voltagerating should be …U NU ACeq1U NU ACeq2U N = rated input voltage of the driveU ACeq1 = U DC /1.35U ACeq2 = U DC /1.41U ACeq is the equivalent AC power source voltage of the drive in V AC.U DC is the maximum DC link voltage of the drive in V DC.For resis<strong>to</strong>r braking: U DC = 1.21 × nominal DC link voltage.For units with IGBT supply: See the parameter value.(Note: Nominal DC link voltage is U N × 1.35 or U N × 1.41 in V DC.)See notes 6 and 7 below the Requirements table, page 42.4. Consult the mo<strong>to</strong>r manufacturer before using a mo<strong>to</strong>r in a drive system where themo<strong>to</strong>r nominal voltage differs from the AC power source voltage.5. Ensure that the mo<strong>to</strong>r insulation system withstands the maximum peak voltage inthe mo<strong>to</strong>r terminals. See the Requirements table below for the required mo<strong>to</strong>rinsulation system and drive filtering.Example 1: When the supply voltage is 440 V and a drive with a diode supply isoperating in mo<strong>to</strong>r mode only, the maximum peak voltage in the mo<strong>to</strong>r terminalscan be approximated as follows: 440 V · 1.35 · 2 = 1190 V. Check that the mo<strong>to</strong>rinsulation system withstands this voltage.Example 2: When the supply voltage is 440 V and the drive is equipped with anIGBT supply, the maximum peak voltage in the mo<strong>to</strong>r terminals can beapproximated as follows: 440 V · 1.41 · 2 = 1241 V. Check that the mo<strong>to</strong>rinsulation system withstands this voltage.Planning the electrical installation
39Protecting the mo<strong>to</strong>r insulation and bearingsThe output of the drive comprises – regardless of output frequency – pulses ofapproximately 1.35 times the equivalent mains network voltage with a very short risetime. This is the case with all drives employing modern IGBT inverter technology.The voltage of the pulses can be almost double at the mo<strong>to</strong>r terminals, depending onthe attenuation and reflection properties of the mo<strong>to</strong>r cable and the terminals. This inturn can cause additional stress on the mo<strong>to</strong>r and mo<strong>to</strong>r cable insulation.Modern variable speed drives with their fast rising voltage pulses and high switchingfrequencies can generate current pulses that flow through the mo<strong>to</strong>r bearings, whichcan gradually erode the bearing races and rolling elements.The stress on mo<strong>to</strong>r insulation can be avoided by using optional ABB du/dt filters.du/dt filters also reduce bearing currents.To avoid damage <strong>to</strong> mo<strong>to</strong>r bearings, the cables must be selected and installedaccording <strong>to</strong> the instructions given in the hardware manual. In addition, insulated N-end (non-drive end) bearings and output filters from ABB must be used according <strong>to</strong>the following table. Two types of filters are used individually or in combinations:• optional du/dt filter (protects mo<strong>to</strong>r insulation system and reduces bearingcurrents).• common mode filter (mainly reduces bearing currents).Planning the electrical installation
40Requirements tableThe following table shows how <strong>to</strong> select the mo<strong>to</strong>r insulation system and when an optional ABB du/dtfilter, insulated N-end (non-drive end) mo<strong>to</strong>r bearings and ABB common mode filters are required. Themo<strong>to</strong>r manufacturer should be consulted regarding the construction of the mo<strong>to</strong>r insulation andadditional requirements for explosion-safe (EX) mo<strong>to</strong>rs. Failure of the mo<strong>to</strong>r <strong>to</strong> fulfil the followingrequirements or improper installation may shorten mo<strong>to</strong>r life or damage the mo<strong>to</strong>r bearings and voidsthe warranty.ManufacturerABBMo<strong>to</strong>r typeRandomwoundM2_and M3_Form-woundHX_ and AM_Old* formwoundHX_and modularRandomwoundHX_and AM_ **Nominal mainsvoltage (AC linevoltage)Mo<strong>to</strong>r insulationsystemRequirement forABB du/dt filter, insulated N-end bearing and ABB common modefilterP N < 100 kWandframe size < IEC 315P N < 134 HPand frame size IEC 315134 HP < P N < 469 HPor frame size >NEMA 500P N > 350 kWorframe size > IEC 400P N > 469 HPor frame size >NEMA 580U N < 500 V Standard - + N + N + CMF500 V < U N < 600 V Standard + du/dt + du/dt + N + du/dt + N + CMForReinforced - + N + N + CMF600 V < U N < 690 V Reinforced + du/dt + du/dt + N + du/dt + N + CMF380 V < U N < 690 V Standard n.a. + N + CMF P N < 500 kW: + N +CMFP N > 500 kW: + N +CMF + du/dt380 V < U N < 690 V Check with themo<strong>to</strong>rmanufacturer.0 V < U N < 500 V Enamelled wire + N + CMF500 V < U N < 690 Vwith fibre glasstaping+ du/dt + N + CMF+ du/dt with voltages over 500 V + N + CMFPlanning the electrical installation
41ManufacturerMo<strong>to</strong>r typeNominal mainsvoltage (AC linevoltage)Mo<strong>to</strong>r insulationsystemRequirement forABB du/dt filter, insulated N-end bearing and ABB common modefilterP N < 100 kWandframe size < IEC 315100 kW < P N < 350 kWorframe size > IEC 315P N > 350 kWorframe size > IEC 400P N < 134 HPand frame size NEMA 500P N > 469 HPor frame size >NEMA 580NON-ABBRandomwoundandform-woundU N < 420 V Standard: Û LL =1300 V420 V < U N < 500 V Standard: Û LL =1300 VorReinforced: Û LL =1600 V, 0.2microsecond risetime- + N or CMF + N + CMF+ du/dt + du/dt + N + du/dt + N + CMFor+ du/dt + CMF- + N or CMF + N + CMF500 V < U N < 600 V Reinforced: Û LL =1600 V+ du/dt + du/dt + N + du/dt + N + CMFor+ du/dt + CMForReinforced: Û LL =1800 V- + N or CMF + N + CMF600 V < U N < 690 V Reinforced: Û LL =1800 V+ du/dt + du/dt + N + du/dt + N + CMFReinforced: Û LL =2000 V, 0.3microsecond risetime ***- N + CMF N + CMF* manufactured before 1.1.1998** For mo<strong>to</strong>rs manufactured before 1.1.1998, check for additional instructions with the mo<strong>to</strong>r manufacturer.*** If the intermediate DC circuit voltage of the drive is increased from the nominal level by resis<strong>to</strong>r braking or by theIGBT Supply Control Program (parameter selectable function), check with the mo<strong>to</strong>r manufacturer if additionaloutput filters are needed in the applied drive operation range.Note 1: The abbreviations used in the table are defined below.Abbreviation DefinitionU Nnominal voltage of the supply networkÛ LLpeak line-<strong>to</strong>-line voltage at mo<strong>to</strong>r terminals which the mo<strong>to</strong>r insulation must withstandP Nmo<strong>to</strong>r nominal powerdu/dt du/dt filter at the output of the drive +E205CMF common mode filter +E208NN-end bearing: insulated mo<strong>to</strong>r non-drive end bearingn.a.Mo<strong>to</strong>rs of this power range are not available as standard units. Consult the mo<strong>to</strong>r manufacturer.Planning the electrical installation
42Note 2: Explosion-safe (EX) mo<strong>to</strong>rsThe mo<strong>to</strong>r manufacturer should be consulted regarding the construction of the mo<strong>to</strong>r insulation andadditional requirements for explosion-safe (EX) mo<strong>to</strong>rs.Note 3: High-output mo<strong>to</strong>rs and IP 23 mo<strong>to</strong>rsFor mo<strong>to</strong>rs with higher rated output than what is stated for the particular frame size in <strong>EN</strong> 50347 (2001)and for IP 23 mo<strong>to</strong>rs, the requirements of ABB random-wound mo<strong>to</strong>r series M3AA, M3AP, M3BP aregiven below. For other mo<strong>to</strong>r types, see the Requirements table above. Apply the requirements ofrange 100 kW < P N < 350 kW <strong>to</strong> mo<strong>to</strong>rs with P N < 100 kW. Apply the requirements of range P N >350 kW <strong>to</strong> mo<strong>to</strong>rs within the range 100 kW < P N < 350 kW. In other cases, consult the mo<strong>to</strong>rmanufacturer.ManufacturerMo<strong>to</strong>r typeNominal mainsvoltage (AC linevoltage)Mo<strong>to</strong>r insulationsystemRequirement forABB du/dt filter, insulated N-end bearing and ABB common modefilterP N < 55 kW 55 kW < P N < 200 kW P N > 200 kWP N < 74 HP 74 HP < P N < 268 HP P N > 268 HPABBRandomwoundM3AA,M3AP, M3BPU N < 500 V Standard - + N + N + CMF500 V < U N < 600 V Standard + du/dt + du/dt + N + du/dt + N + CMForReinforced - + N + N + CMF600 V < U N < 690 V Reinforced + du/dt + du/dt + N + du/dt + N + CMFNote 4: HXR and AMA mo<strong>to</strong>rsAll AMA machines (manufactured in Helsinki) for drive systems have form-wound windings. All HXRmachines manufactured in Helsinki starting 1.1.1998 have form-wound windings.Note 5: ABB mo<strong>to</strong>rs of types other than M2_, M3_, HX_ and AM_Use the selection criteria given for non-ABB mo<strong>to</strong>rs.Note 6: Resis<strong>to</strong>r braking of the driveWhen the drive is in braking mode for a large part of its operation time, the intermediate circuit DCvoltage of the drive increases, the effect being similar <strong>to</strong> increasing the supply voltage by up <strong>to</strong>20 percent. The voltage increase should be taken in<strong>to</strong> consideration when determining the mo<strong>to</strong>rinsulation requirement.Example: Mo<strong>to</strong>r insulation requirement for a 400 V application must be selected as if the drive weresupplied with 480 V.Note 7: Drives with an IGBT supply unitIf voltage is raised by the drive (this is a parameter selectable function), select the mo<strong>to</strong>r insulationsystem according <strong>to</strong> the increased intermediate circuit DC voltage level, especially in the 500 V supplyvoltage range.Planning the electrical installation
43Note 8: Calculating the rise time and the peak line-<strong>to</strong>-line voltageThe peak line-<strong>to</strong>-line voltage at the mo<strong>to</strong>r terminals generated by the drive as well as the voltage risetime depend on the cable length. The requirements for the mo<strong>to</strong>r insulation system given in the tableare “worst case” requirements covering installations with 30 metre and longer cables. The rise time canbe calculated as follows: t = 0.8 · Û LL /(du/dt). Read Û LL and du/dt from the diagrams below. Multiplythe values of the graph by the supply voltage (U N ). In case of drives with an IGBT supply unit or resis<strong>to</strong>rbraking, the Û LL and du/dt values are approximately 20% higher.3.02.5Û LL /U N5.55.04.5du/dt------------(1/μs)U N2.04.01.51.00.5du/dt------------(1/μs)U N3.53.02.52.01.5Û LL /U N0.0100 200 3001.0100 200 300Cable length (m)Cable length (m)With du/dt FilterWithout du/dt FilterNote 9: Sine filters protect the mo<strong>to</strong>r insulation system. Therefore, du/dt filter can be replaced with asine filter. The peak phase-<strong>to</strong>-phase voltage with the sine filter is approximately 1.5 × U N .Note 10: Common mode filter is available as a plus code option (+E208) or as a separate kit (one boxincluding three rings for one cable).Permanent magnet synchronous mo<strong>to</strong>rOnly one permanent magnet mo<strong>to</strong>r can be connected <strong>to</strong> the inverter output.It is recommended <strong>to</strong> install a safety switch between the permanent magnetsynchronous mo<strong>to</strong>r and the drive output. The switch is needed <strong>to</strong> isolate the mo<strong>to</strong>rduring any maintenance work on the drive.Planning the electrical installation
44Supply connectionDisconnecting device (disconnecting means)<strong>ACS800</strong>-01, <strong>ACS800</strong>-U1, <strong>ACS800</strong>-11, <strong>ACS800</strong>-U11, <strong>ACS800</strong>-31, <strong>ACS800</strong>-U31,<strong>ACS800</strong>-02 and <strong>ACS800</strong>-U2 without enclosure extension, <strong>ACS800</strong>-04, <strong>ACS800</strong>-U4Install a hand-operated input disconnecting device (disconnecting means) betweenthe AC power source and the drive. The disconnecting device must be of a type thatcan be locked <strong>to</strong> the open position for installation and maintenance work.<strong>ACS800</strong>-02 and <strong>ACS800</strong>-U2 with enclosure extension, <strong>ACS800</strong>-<strong>07</strong> and <strong>ACS800</strong>-<strong>U7</strong>These units are equipped with a hand-operated input disconnecting device(disconnecting means) which isolates the drive and the mo<strong>to</strong>r from the AC power asstandard. The disconnecting device does not, however, isolate the input busbarsfrom the AC power. Therefore, during installation and maintenance work on thedrive, the input cables and busbars must be isolated from the input power with adisconnec<strong>to</strong>r at the distribution board or at the supplying transformer.EUTo meet the European Union Directives, according <strong>to</strong> standard <strong>EN</strong> 60204-1, Safetyof Machinery, the disconnecting device must be one of the following types:• switch-disconnec<strong>to</strong>r of utilization category AC-23B (<strong>EN</strong> 60947-3)• disconnec<strong>to</strong>r that has an auxiliary contact that in all cases causes switchingdevices <strong>to</strong> break the load circuit before the opening of the main contacts of thedisconnec<strong>to</strong>r (<strong>EN</strong> 60947-3)• circuit breaker suitable for isolation in accordance with <strong>EN</strong> 60947-2.USThe disconnecting means must conform <strong>to</strong> the applicable safety regulations.FusesSee section Thermal overload and short-circuit protection.Main contac<strong>to</strong>rIf used, dimension the contac<strong>to</strong>r according <strong>to</strong> the nominal voltage and current of thedrive. The utilization category (IEC 947-4) is AC-1.Planning the electrical installation
<strong>45</strong>Thermal overload and short-circuit protectionThermal overload protection of the drive and the input and mo<strong>to</strong>r cablesThe drive protects itself and the input and mo<strong>to</strong>r cables against thermal overloadwhen the cables are dimensioned according <strong>to</strong> the nominal current of the drive. Noadditional thermal protection devices are needed.WARNING! If the drive is connected <strong>to</strong> multiple mo<strong>to</strong>rs, a separate thermal overloadswitch or a circuit breaker must be used for protecting each cable and mo<strong>to</strong>r. Thesedevices may require a separate fuse <strong>to</strong> cut off the short-circuit current.Thermal overload protection of the mo<strong>to</strong>rAccording <strong>to</strong> regulations, the mo<strong>to</strong>r must be protected against thermal overload andthe current must be switched off when overload is detected. The drive includes amo<strong>to</strong>r thermal protection function that protects the mo<strong>to</strong>r and switches off the currentwhen necessary. Depending on a drive parameter value, the function either moni<strong>to</strong>rsa calculated temperature value (based on a mo<strong>to</strong>r thermal model) or an actualtemperature indication given by mo<strong>to</strong>r temperature sensors. The user can tune thethermal model further by feeding in additional mo<strong>to</strong>r and load data.The most common temperature sensors are:• mo<strong>to</strong>r sizes IEC180…225: thermal switch (e.g. Klixon)• mo<strong>to</strong>r sizes IEC200…250 and larger: PTC or Pt100.See the firmware manual for more information on the mo<strong>to</strong>r thermal protection, andthe connection and use of the temperature sensors.Protection against short-circuit in the mo<strong>to</strong>r cableThe drive protects the mo<strong>to</strong>r cable and mo<strong>to</strong>r in a short-circuit situation when themo<strong>to</strong>r cable is dimensioned according <strong>to</strong> the nominal current of the drive. Noadditional protection devices are needed.Planning the electrical installation
46Protection against short-circuit inside the drive or in the supply cableArrange the protection according <strong>to</strong> the following guide lines.Distributionboard1)2)I >Circuit diagram Drive type Short-circuitprotectionDRIVE IS NOT EQUIPPED WITH INPUT FUSESInput cableDrive or drivemodule~ ~ M3~~ ~ M3~<strong>ACS800</strong>-01<strong>ACS800</strong>-U1<strong>ACS800</strong>-02<strong>ACS800</strong>-U2+0C111<strong>ACS800</strong>-11<strong>ACS800</strong>-U11<strong>ACS800</strong>-31<strong>ACS800</strong>-U31<strong>ACS800</strong>-04<strong>ACS800</strong>-U4Protect the drive andinput cable with fusesor a circuit breaker.See footnotes 1) and2).DistributionboardInput cable3) 4)DRIVE IS EQUIPPED WITH INPUT FUSES<strong>ACS800</strong>-02+C111<strong>ACS800</strong>-U2Drive<strong>ACS800</strong>-<strong>07</strong>~ ~ M3~<strong>ACS800</strong>-<strong>U7</strong>Protect the input cablewith fuses or a circuitbreaker according <strong>to</strong>local regulations. Seefootnotes 3) and 4).DriveI >4)~ ~ M3~1) Size the fuses according <strong>to</strong> instructions given in chapter Technical data. The fuses will protect the inputcable in short-circuit situations, restrict drive damage and prevent damage <strong>to</strong> adjoining equipment incase of a short-circuit inside the drive.Planning the electrical installation
472) Circuit breakers which have been tested by ABB with the <strong>ACS800</strong> can be used. Fuses must be usedwith other circuit breakers. Contact your local ABB representative for the approved breaker types andsupply network characteristics.The protective characteristics of circuit breakers depend on the type, construction and settings of thebreakers. There are also limitations pertaining <strong>to</strong> the short-circuit capacity of the supply network.WARNING! Due <strong>to</strong> the inherent operating principle and construction of circuit breakers,independent of the manufacturer, hot ionized gases may escape from the breakerenclosure in case of a short-circuit. To ensure safe use, special attention must be paid <strong>to</strong>the installation and placement of the breakers. Follow the manufacturer’s instructions.Note: Circuit breakers must not be used without fuses in the USA.3) Size the fuses according <strong>to</strong> local safety regulations, appropriate input voltage and the rated current ofthe drive (see chapter Technical data).4) <strong>ACS800</strong>-02 units and <strong>ACS800</strong>-<strong>07</strong> units with enclosure extension are equipped with aR fuses asstandard. <strong>ACS800</strong>-U2 and <strong>ACS800</strong>-<strong>U7</strong> units are equipped with T/L fuses as standard. The fusesrestrict drive damage and prevent damage <strong>to</strong> adjoining equipment in case of a short-circuit inside thedrive.Ground fault protectionThe drive is equipped with an internal ground fault protective function <strong>to</strong> protect theunit against ground faults in the mo<strong>to</strong>r and mo<strong>to</strong>r cable. This is not a personal safetyor a fire protection feature. The ground fault protective function can be disabled witha parameter, refer <strong>to</strong> the appropriate <strong>ACS800</strong> Firmware <strong>Manual</strong>.The EMC filter of the drive includes capaci<strong>to</strong>rs connected between the main circuitand the frame. These capaci<strong>to</strong>rs and long mo<strong>to</strong>r cables increase the ground leakagecurrent and may cause fault current circuit breakers <strong>to</strong> function.Emergency s<strong>to</strong>p devicesFor safety reasons, install the emergency s<strong>to</strong>p devices at each opera<strong>to</strong>r controlstation and at other operating stations where emergency s<strong>to</strong>p may be needed.Note: Pressing the s<strong>to</strong>p key ( ) on the control panel of the drive does not generatean emergency s<strong>to</strong>p of the mo<strong>to</strong>r or separate the drive from dangerous potential.<strong>ACS800</strong>-02/U2 with enclosure extension and <strong>ACS800</strong>-<strong>07</strong>/<strong>U7</strong>An emergency s<strong>to</strong>p function is optionally available for s<strong>to</strong>pping and switching off thewhole drive. Two s<strong>to</strong>p categories according <strong>to</strong> IEC/<strong>EN</strong> 60204-1 (1997) are available:immediate removal of power (Category 0 for <strong>ACS800</strong>-02/U2 and <strong>ACS800</strong>-<strong>07</strong>/<strong>U7</strong>)and controlled emergency s<strong>to</strong>p (Category 1 for <strong>ACS800</strong>-<strong>07</strong>/<strong>U7</strong>).Restarting after an emergency s<strong>to</strong>pAfter an emergency s<strong>to</strong>p, the emergency s<strong>to</strong>p but<strong>to</strong>n must be released and the drivestarted by turning the operating switch of the drive from position “ON” <strong>to</strong> “START”.Planning the electrical installation
48Power-loss ride-through functionThe power-loss ride-through function is activated when parameter20.06 UNDERVOLTAGE CTRL is set <strong>to</strong> ON (default in Standard Control Program).<strong>ACS800</strong>-<strong>07</strong>/<strong>U7</strong> units with line contac<strong>to</strong>r (+F250)The power-loss ride-through funtion is enabled by connecting RMIO board terminalsX22:8 and X22:11 with a jumper.K132221X2 / RMIO boardX22123<strong>45</strong>67891011Planning the electrical installation
49Prevention of Unexpected StartThe <strong>ACS800</strong>-01/U1, <strong>ACS800</strong>-04/04M, <strong>ACS800</strong>-11/U11 and <strong>ACS800</strong>-<strong>07</strong>/<strong>U7</strong> can beequipped with an optional Prevention of Unexpected Start function according <strong>to</strong>standards IEC/<strong>EN</strong> 60204-1: 1997; ISO/DIS 14118: 2000 and <strong>EN</strong> 1037: 1996.The Prevention of Unexpected Start function disables the control voltage of thepower semiconduc<strong>to</strong>rs, thus preventing the inverter from generating the AC voltagerequired <strong>to</strong> rotate the mo<strong>to</strong>r. By using this function, short-time operations (likecleaning) and/or maintenance work on non-electrical parts of the machinery can beperformed without switching off the AC power supply <strong>to</strong> the drive.The opera<strong>to</strong>r activates the Prevention of Unexpected Start function by opening aswitch on a control desk. An indicating lamp on the control desk will light, signallingthat the prevention is active. The switch can be locked out.The user must install on a control desk near the machinery:• switching/disconnecting device for the circuitry. “Means shall be provided <strong>to</strong>prevent inadvertent, and/or mistaken closure of the disconnecting device.”<strong>EN</strong> 60204-1: 1997.• indicating lamp; on = starting the drive is prevented, off = drive is operative.• <strong>ACS800</strong>-01/U1, <strong>ACS800</strong>-04/U4, <strong>ACS800</strong>-11/U11: safety relay (type BD5935 hasbeen approved by ABB)For connections <strong>to</strong> the drive, see chapter Installation of AGPS board (Prevention ofUnexpected Start, +Q950) or the circuit diagram delivered with the drive (<strong>ACS800</strong>-<strong>07</strong>/<strong>U7</strong>). For <strong>ACS800</strong>-04 from <strong>45</strong> <strong>to</strong> <strong>560</strong> kW, refer <strong>to</strong> <strong>ACS800</strong>-04/04M/U4 CabinetInstallation [3AFE68360323 (English)].WARNING! The Prevention of Unexpected Start function does not disconnect thevoltage of the main and auxiliary circuits from the drive. Therefore maintenance workon electrical parts of the drive or the mo<strong>to</strong>r can only be carried out after isolating thedrive system from the main supply.Note: If a running drive is s<strong>to</strong>pped by using the Prevention of Unexpected Startfunction, the drive will cut off the mo<strong>to</strong>r supply voltage and the mo<strong>to</strong>r will coast <strong>to</strong>s<strong>to</strong>p.Planning the electrical installation
50Selecting the power cablesGeneral rulesDimension the mains (input power) and mo<strong>to</strong>r cables according <strong>to</strong> localregulations:• The cable must be able <strong>to</strong> carry the drive load current. See chapter Technicaldata for the rated currents.• The cable must be rated for at least 70 °C maximum permissible temperature ofconduc<strong>to</strong>r in continuous use. For US, see Additional US requirements.• The inductance and impedance of the PE conduc<strong>to</strong>r/cable (grounding wire) mustbe rated according <strong>to</strong> permissible <strong>to</strong>uch voltage appearing under fault conditions(so that the fault point voltage will not rise excessively when a ground faul<strong>to</strong>ccurs).• 600 V AC cable is accepted for up <strong>to</strong> 500 V AC. 750 V AC cable is accepted forup <strong>to</strong> 600 V AC. For 690 V AC rated equipment, the rated voltage between theconduc<strong>to</strong>rs of the cable should be at least 1 kV.For drive frame size R5 and larger, or mo<strong>to</strong>rs larger than 30 kW (40 HP),symmetrical shielded mo<strong>to</strong>r cable must be used (figure below). A four-conduc<strong>to</strong>rsystem can be used up <strong>to</strong> frame size R4 with up <strong>to</strong> 30 kW (40 HP) mo<strong>to</strong>rs, butshielded symmetrical mo<strong>to</strong>r cable is always recommended. The shield(s) of mo<strong>to</strong>rcable(s) must have 360° bonding at both ends.Note: When continuous metal conduit is employed, shielded cable is not required.The conduit must have bonding at both ends as with cable shield.A four-conduc<strong>to</strong>r system is allowed for input cabling, but shielded symmetrical cableis recommended. To operate as a protective conduc<strong>to</strong>r, the shield conductivity mustbe as follows when the protective conduc<strong>to</strong>r is made of the same metal as the phaseconduc<strong>to</strong>rs:Cross-sectional area of the phaseconduc<strong>to</strong>rsS (mm 2 )S < 16Minimum cross-sectional area of thecorresponding protective conduc<strong>to</strong>rS p (mm 2 )S16 < S < 35 1635 < S S/2Compared <strong>to</strong> a four-conduc<strong>to</strong>r system, the use of symmetrical shielded cablereduces electromagnetic emission of the whole drive system as well as the stress onmo<strong>to</strong>r insulation, bearing currents and wear.The mo<strong>to</strong>r cable and its PE pigtail (twisted shield) should be kept as short aspossible in order <strong>to</strong> reduce high-frequency electromagnetic emission, as well asstray currents outside the cable and capacitive current (relevant in power rangebelow 20 kW).Planning the electrical installation
51Alternative power cable typesPower cable types that can be used with the drive are represented below.RecommendedSymmetrical shielded cable: three phase conduc<strong>to</strong>rsand a concentric or otherwise symmetricallyconstructed PE conduc<strong>to</strong>r, and a shieldPE conduc<strong>to</strong>rand shieldShieldA separate PE conduc<strong>to</strong>r is required if the conductivityof the cable shield is < 50% of the conductivity of thephase conduc<strong>to</strong>r.ShieldPEPEA four-conduc<strong>to</strong>r system:three phase conduc<strong>to</strong>rsand a protectiveconduc<strong>to</strong>rP<strong>EN</strong>ot allowed for mo<strong>to</strong>r cablesShieldNot allowed for mo<strong>to</strong>r cables with phaseconduc<strong>to</strong>r cross section larger than 10 mm 2[mo<strong>to</strong>rs > 30 kW (40 HP)].Mo<strong>to</strong>r cable shieldTo effectively suppress radiated and conducted radio-frequency emissions, theshield conductivity must be at least 1/10 of the phase conduc<strong>to</strong>r conductivity. Therequirements are easily met with a copper or aluminium shield. The minimumrequirement of the mo<strong>to</strong>r cable shield of the drive is shown below. It consists of aconcentric layer of copper wires with an open helix of copper tape or copper wire.The better and tighter the shield, the lower the emission level and bearing currents.Insulation jacketCopper wire screenHelix of copper tapeor copper wireInner insulationCable corePlanning the electrical installation
52Additional US requirementsType MC continuous corrugated aluminum armor cable with symmetrical grounds orshielded power cable must be used for the mo<strong>to</strong>r cables if metallic conduit is notused. For the North American market, 600 V AC cable is accepted for up <strong>to</strong>500 V AC. 1000 V AC cable is required above 500 V AC (below 600 V AC). Fordrives rated over 100 amperes, the power cables must be rated for 75 °C (167 °F).ConduitSeparate parts of a conduit must be coupled <strong>to</strong>gether, bridge the joints with a groundconduc<strong>to</strong>r bonded <strong>to</strong> the conduit on each side of the joint. Bond the conduits also <strong>to</strong>the drive enclosure and mo<strong>to</strong>r frame. Use separate conduits for input power, mo<strong>to</strong>r,brake resis<strong>to</strong>r, and control wiring. When conduit is employed, type MC continuouscorrugated aluminium armor cable or shielded cable is not required. A dedicatedground cable is always required.Note: Do not run mo<strong>to</strong>r wiring from more than one drive in the same conduit.Armored cable / shielded power cableSix conduc<strong>to</strong>r (3 phases and 3 ground) type MC continuous corrugated aluminumarmor cable with symmetrical grounds is available from the following suppliers (tradenames in parentheses):• Anixter Wire & Cable (Philsheath)• BICC General Corp (Philsheath)• Rockbes<strong>to</strong>s Co. (Gardex)• Oaknite (CLX).Shielded power cables are available from Belden, LAPPKABEL (ÖLFLEX) andPirelli.Power fac<strong>to</strong>r compensation capaci<strong>to</strong>rsPower fac<strong>to</strong>r compensation is not needed with AC drives. However, if a drive is <strong>to</strong> beconnected in a system with compensation capaci<strong>to</strong>rs installed, note the followingrestrictions.WARNING! Do not connect power fac<strong>to</strong>r compensation capaci<strong>to</strong>rs or harmonicfilters <strong>to</strong> the mo<strong>to</strong>r cables (between the drive and the mo<strong>to</strong>r). They are not meant <strong>to</strong>be used with AC drives and can cause permanent damage <strong>to</strong> the drive orthemselves.Planning the electrical installation
53If there are power fac<strong>to</strong>r compensation capaci<strong>to</strong>rs in parallel with the three phaseinput of the drive:1. Do not connect a high-power capaci<strong>to</strong>r <strong>to</strong> the power line while the drive isconnected. The connection will cause voltage transients that may trip or evendamage the drive.2. If capaci<strong>to</strong>r load is increased/decreased step by step when the AC drive isconnected <strong>to</strong> the power line: Ensure that the connection steps are low enough not<strong>to</strong> cause voltage transients that would trip the drive.3. Check that the power fac<strong>to</strong>r compensation unit is suitable for use in systems withAC drives i.e. harmonic generating loads. In such systems, the compensation unitshould typically be equipped with a blocking reac<strong>to</strong>r or harmonic filter.Equipment connected <strong>to</strong> the mo<strong>to</strong>r cableInstallation of safety switches, contac<strong>to</strong>rs, connection boxes, etc.To minimize the emission level when safety switches, contac<strong>to</strong>rs, connection boxesor similar equipment are installed in the mo<strong>to</strong>r cable between the drive and themo<strong>to</strong>r:• EU: Install the equipment in a metal enclosure with 360 degrees grounding for theshields of both the incoming and outgoing cable, or connect the shields of thecables otherwise <strong>to</strong>gether.• US: Install the equipment in a metal enclosure in a way that the conduit or mo<strong>to</strong>rcable shielding runs consistently without breaks from the drive <strong>to</strong> the mo<strong>to</strong>r.Bypass connectionWARNING! Never connect the supply power <strong>to</strong> the drive output terminals U2, V2and W2. If frequent bypassing is required, employ mechanically connected switchesor contac<strong>to</strong>rs. Mains (line) voltage applied <strong>to</strong> the output can result in permanentdamage <strong>to</strong> the unit.Before opening a contac<strong>to</strong>r (DTC control mode selected)S<strong>to</strong>p the drive and wait for the mo<strong>to</strong>r <strong>to</strong> s<strong>to</strong>p before opening a contac<strong>to</strong>r between theoutput of the drive and the mo<strong>to</strong>r when the DTC control mode is selected. See theappropriate <strong>ACS800</strong> control program firmware manual for the required parametersettings. Otherwise, the contac<strong>to</strong>r will be damaged. In scalar control, the contac<strong>to</strong>rcan be opened with the drive running.Planning the electrical installation
54Protecting the relay output contacts and attenuating disturbances in caseof inductive loadsInductive loads (relays, contac<strong>to</strong>rs, mo<strong>to</strong>rs) cause voltage transients when switchedoff.The relay contacts on the RMIO board are protected with varis<strong>to</strong>rs (250 V) agains<strong>to</strong>vervoltage peaks. In spite of this, it is highly recommended <strong>to</strong> equip inductive loadswith noise attenuating circuits [varis<strong>to</strong>rs, RC filters (AC) or diodes (DC)] in order <strong>to</strong>minimize the EMC emission at switch-off. If not suppressed, the disturbances mayconnect capacitively or inductively <strong>to</strong> other conduc<strong>to</strong>rs in the control cable and forma risk of malfunction in other parts of the system.Install the protective component as close <strong>to</strong> the inductive load as possible. Do notinstall protective components at the RMIO board terminal block.Relay outputsRMIO230 V AC230 V AC24 V DCVaris<strong>to</strong>rRC filterDiodeX251 RO12 RO13 RO1X261 RO22 RO23 RO2X271 RO32 RO33 RO3Planning the electrical installation
55Selecting the control cablesAll control cables must be shielded.Use a double-shielded twisted pair cable (Figure a, e.g. JAMAK by Draka NKCables, Finland) for analogue signals. This type of cable is recommended for thepulse encoder signals also. Employ one individually shielded pair for each signal. Donot use common return for different analogue signals.A double-shielded cable is the best alternative for low-voltage digital signals butsingle-shielded twisted pair cable (Figure b) is also usable.aA double-shielded twistedpair cablebA single-shielded twistedpair cableRun analogue and digital signals in separate, shielded cables.Relay-controlled signals, providing their voltage does not exceed 48 V, can be run inthe same cables as digital input signals. It is recommended that the relay-controlledsignals be run as twisted pairs.Never mix 24 V DC and 115/230 V AC signals in the same cable.Relay cableThe cable type with braided metallic screen (e.g. ÖLFLEX by LAPPKABEL,Germany) has been tested and approved by ABB.Control panel cableIn remote use, the cable connecting the control panel <strong>to</strong> the drive must not exceed 3metres (10 ft). The cable type tested and approved by ABB is used in control paneloption kits.Planning the electrical installation
56Connection of a mo<strong>to</strong>r temperature sensor <strong>to</strong> the drive I/OWARNING! IEC 60664 requires double or reinforced insulation between live partsand the surface of accessible parts of electrical equipment which are either nonconductiveor conductive but not connected <strong>to</strong> the protective earth.To fulfil this requirement, the connection of a thermis<strong>to</strong>r (and other similarcomponents) <strong>to</strong> the digital inputs of the drive can be implemented in three alternateways:1. There is double or reinforced insulation between the thermis<strong>to</strong>r and live parts ofthe mo<strong>to</strong>r.2. Circuits connected <strong>to</strong> all digital and analogue inputs of the drive are protectedagainst contact and insulated with basic insulation (the same voltage level as thedrive main circuit) from other low voltage circuits.3. An external thermis<strong>to</strong>r relay is used. The insulation of the relay must be rated forthe same voltage level as the main circuit of the drive. For connection, see<strong>ACS800</strong> Firmware <strong>Manual</strong>.Installation sites above 2000 metres (6562 feet)WARNING! Protect against direct contact when installing, operating and servicingthe RMIO board wiring and optional modules attached <strong>to</strong> the board. The ProtectiveExtra Low Voltage (PELV) requirements stated in <strong>EN</strong> 50178 are not fulfilled ataltitudes above 2000 m (6562 ft).Routing the cablesRoute the mo<strong>to</strong>r cable away from other cable routes. Mo<strong>to</strong>r cables of several drivescan be run in parallel installed next <strong>to</strong> each other. It is recommended that the mo<strong>to</strong>rcable, input power cable and control cables be installed on separate trays. Avoidlong parallel runs of mo<strong>to</strong>r cables with other cables in order <strong>to</strong> decreaseelectromagnetic interference caused by the rapid changes in the drive outputvoltage.Where control cables must cross power cables make sure they are arranged at anangle as near <strong>to</strong> 90 degrees as possible. Do not run extra cables through the drive.The cable trays must have good electrical bonding <strong>to</strong> each other and <strong>to</strong> thegrounding electrodes. Aluminium tray systems can be used <strong>to</strong> improve localequalizing of potential.Planning the electrical installation
57A diagram of the cable routing is shown below.DriveMo<strong>to</strong>r cablePower cablemin 300 mm (12 in.)Input power cablemin 200 mm (8 in.)90 °Control cablesMo<strong>to</strong>r cablemin 500 mm (20 in.)Control cable ducts24 V230 V(120 V)24 V230 V(120 V)Not allowed unless the 24 V cable isinsulated for 230 V (120 V) or insulatedwith an insulation sleeving for 230 V(120 V).Lead 24 V and 230 V (120 V) controlcables in separate ducts inside thecabinet.Planning the electrical installation
58Planning the electrical installation
59Electrical installationWhat this chapter containsThis chapter describes the electrical installation procedure of the drive.WARNING! Only qualified electricians are allowed <strong>to</strong> carry out the work described inthis chapter. Follow the Safety instructions on the first pages of this manual. Ignoringthe safety instructions can cause injury or death.Before installationIT (ungrounded) systemsA drive equipped with no EMC filter or with EMC filter +E210 is suitable for IT(ungrounded systems). If the drive is equipped with EMC filter +E202, disconnectthe filter before connecting the drive <strong>to</strong> an ungrounded system. For detailedinstructions on how <strong>to</strong> do this, please contact your local ABB representative.WARNING! If a drive with EMC filter +E202 is installed on an IT system [anungrounded power system or a high resistance-grounded (over 30 ohms) powersystem], the system will be connected <strong>to</strong> earth potential through the EMC filtercapaci<strong>to</strong>rs of the drive. This may cause danger or damage the unit.Checking the insulation of the assemblyDriveEvery drive module has been tested for insulation between the main circuit and thechassis (2500 V rms 50 Hz for 1 second) at the fac<strong>to</strong>ry. Therefore, do not make anyvoltage <strong>to</strong>lerance or insulation resistance tests (e.g. hi-pot or megger) on any part ofthe drive.Input cableCheck the insulation of the input cable according <strong>to</strong> local regulations beforeconnecting it <strong>to</strong> the drive.Mo<strong>to</strong>r and mo<strong>to</strong>r cable1. Check that the mo<strong>to</strong>r cable is disconnected from the drive output terminals U2,V2 and W2.Electrical installation
602. Measure the insulation resistance between each phase conduc<strong>to</strong>r and theProtective Earth conduc<strong>to</strong>r using a measuring voltage of 500 V DC. Theinsulation resistance of an ABB mo<strong>to</strong>r must exceed 10 Mohm (reference value at25 °C or 77 °F). For the insulation resistance of other mo<strong>to</strong>rs, please consult themanufacturer’s instructions. Note: Moisture inside the mo<strong>to</strong>r casing will reducethe insulation resistance. If moisture is suspected, dry the mo<strong>to</strong>r and repeat themeasurement.ohmU1MV13~W1 PEBrake resis<strong>to</strong>r assemblyCheck the insulation of the brake resis<strong>to</strong>r assembly (if present) as follows:1. Check that the resis<strong>to</strong>r cable is connected <strong>to</strong> the resis<strong>to</strong>r, and disconnected fromthe drive output terminals R+ and R-.2. At the drive end, connect the R+ and R- conduc<strong>to</strong>rs of the resis<strong>to</strong>r cable <strong>to</strong>gether.Measure the insulation resistance between the combined conduc<strong>to</strong>rs and the PEconduc<strong>to</strong>r by using a measuring voltage of 1 kV DC. The insulation resistancemust be higher than 1 Mohm.R+ohmR-PEWarning stickerA multi-language sticker is attached on<strong>to</strong> the drive module cover. Attach the warningsticker in the local language on<strong>to</strong> the cover of the drive module.Electrical installation
61Example wiring diagramThe diagram below presents an example for the main wiring. Note that the diagramincludes optional components (marked *) which are not always included in thedelivery.CDP312R control panelRDCURMIO*Mo<strong>to</strong>r temperaturesupervisionSignal/controlAlarm360 degrees groundingSupplyCabinet*Main contac<strong>to</strong>rSwitch fusedisconnec<strong>to</strong>r*Commonmode filter*du/dt filter or*sine filter3 ~Mo<strong>to</strong>rTemperature sensorsfor mo<strong>to</strong>r protectionDrive module*Externalbrakeresis<strong>to</strong>r*Internalbrakeresis<strong>to</strong>rElectrical installation
62Power cable connection diagramDrive1)PE2) INPUTL1 L2 L3R-R+OUTPUTU2 V2 W23) 4) 4)(PE) PE (PE)L1 L2 L3External brakeresis<strong>to</strong>r(optional)U1 V13 ~Mo<strong>to</strong>rW15)1), 2)If shielded cable is used (not required butrecommended), use a separate PE cable (1) or acable with a grounding conduc<strong>to</strong>r (2) if theconductivity of the input cable shield is < 50% of theconductivity of the phase conduc<strong>to</strong>r.Ground the other end of the input cable shield or PEconduc<strong>to</strong>r at the distribution board.3) 360 degrees grounding recommended if shieldedcable4) 360 degrees grounding required5) Use a separate grounding cable if the conductivity ofthe cable shield is < 50% of the conductivity of thephase conduc<strong>to</strong>r and there is no symmetricallyconstructed grounding conduc<strong>to</strong>r in the cable (seePlanning the electrical installation / Selecting thepower cables).Note:If there is a symmetrically constructed groundingconduc<strong>to</strong>r in the mo<strong>to</strong>r cable in addition <strong>to</strong> theconductive shield, connect the grounding conduc<strong>to</strong>r <strong>to</strong>the grounding terminal at the drive and mo<strong>to</strong>r ends.Do not use an asymmetrically constructed mo<strong>to</strong>r cable.Connecting its fourth conduc<strong>to</strong>r at the mo<strong>to</strong>r endincreases bearing currents and causes extra wear.Grounding of the mo<strong>to</strong>r cable shield at the mo<strong>to</strong>r endFor minimum radio frequency interference:• ground the cable shield 360 degrees at the lead-through ofthe mo<strong>to</strong>r terminal boxConductive gaskets360 degrees grounding• or ground the cable by twisting the shield as follows:flattened width > 1/5 · length.abb > 1/5 · aElectrical installation
63Connecting the power cables1. Open the swing-out frame.2 Remove the additional cabinet cooling fan (if any). See Replacing the additionalfan at the lower part of the cubicle (R6 with du/dt filter, +E205) on page 96.3. If fire insulation is used, make an opening in the mineral wool sheet according <strong>to</strong>the diameter of the cable.4. Cut adequate holes <strong>to</strong> the rubber grommet (if present) in the lead-through plateand lead the cable through the grommet and the conductive sleeve (if present)in<strong>to</strong> the cabinet.5. Strip the cable.6. Connect the twisted shield of the cable <strong>to</strong> the PE terminal of the cabinet.7. Connect the phase conduc<strong>to</strong>rs of the input cable <strong>to</strong> the L1, L2 and L3 terminalsand the phase conduc<strong>to</strong>rs of the mo<strong>to</strong>r cable <strong>to</strong> the U2, V2 and W2 terminals.8. Peel off 3 <strong>to</strong> 5 cm of the outer insulation of the cable above the lead-throughplate for the 360° high-frequency earthing.9. Fasten the conductive sleeve <strong>to</strong> the cable shield with cable ties.10. Seal the slot between the cable and mineral wool sheet (if used) with sealingcompound (e.g. CSD-F, ABB brand name DXXT-11, code 35080082).11. Tie up the unused conductive sleeves with cable ties.Cable shieldStrain reliefPE terminalEMC sleeveStrip this part ofthe cableFor control cablesBase plateLead-through plateElectrical installation
64Additional instructions for frame size R6Cable terminals R+ and R-Power cable conduc<strong>to</strong>rs of sizes 95 <strong>to</strong> 185 mm 2 (3/0 <strong>to</strong> 350 AWG) are connected <strong>to</strong>the cable terminals as follows:• Undo the fastening screw of the terminal.• Connect the conduc<strong>to</strong>r <strong>to</strong> the terminal.• Screw the terminal <strong>to</strong> the original location.Cable terminalWARNING! If the wire size is less than95 mm 2 (3/0 AWG), a cable lug mustbe used. A cable of wire size less than95 mm 2 (3/0 AWG) connected <strong>to</strong> thisterminal will loosen and may damagethe drive.Cable lug installations <strong>to</strong> R+ and R- screwsCables of sizes 16 <strong>to</strong> 70 mm 2 (6 <strong>to</strong> 2/0 AWG) can be connected <strong>to</strong> the screws withcable lugs. Isolate the ends of the cable lugs with insulating tape or shrink tubing. Tomeet UL requirements, use UL listed cable lugs and <strong>to</strong>ols given below orcorresponding.Wire size Compression lug Crimping <strong>to</strong>olkcmil/AWG Manufacturer Type Manufacturer Type No. of crimps6 Burndy YAV6C-L2 Burndy MY29-3 1Ilsco CCL-6-38 Ilsco ILC-10 24 Burndy YA4C-L4BOX Burndy MY29-3 1Ilsco CCL-4-38 Ilsco MT-25 12 Burndy YA2C-L4BOX Burndy MY29-3 2Ilsco CRC-2 Ilsco IDT-12 1Ilsco CCL-2-38 Ilsco MT-25 11 Burndy YA1C-L4BOX Burndy MY29-3 2Ilsco CRA-1-38 Ilsco IDT-12 1Ilsco CCL-1-38 Ilsco MT-25 1Thomas & Betts 54148 Thomas & Betts TBM-8 31/0 Burndy YA25-L4BOX Burndy MY29-3 2Ilsco CRB-0 Ilsco IDT-12 1Ilsco CCL-1/0-38 Ilsco MT-25 1Thomas & Betts 54109 Thomas & Betts TBM-8 32/0 Burndy YAL26T38 Burndy MY29-3 2Ilsco CRA-2/0 Ilsco IDT-12 1Ilsco CCL-2/0-38 Ilsco MT-25 1Thomas & Betts 54110 Thomas & Betts TBM-8 3Electrical installation
65Connecting the control cablesRouting the cables (frame sizes R5 and R6)Run the cables <strong>to</strong> the inside of the cabinet through the grommets (1) and the EMIconductive cushions (2) <strong>to</strong> the swing-out frame or the RMIO board as shown below.Use sleeving wherever the cables are laid against sharp edges. Leave some slack inthe cable at the hinge (3) <strong>to</strong> allow the frame <strong>to</strong> open fully. Tie the cables <strong>to</strong> thebraces (4) <strong>to</strong> provide strain relief.43RMIO4 Strain relief at the leftside of the cabinet4321Electrical installation
66Routing the cables (frame sizes R7 and R8)Run the cables <strong>to</strong> the inside of the cabinet through the grommets (1) and the EMIconductive cushions (2) <strong>to</strong> the swing-out frame as shown below.Use sleeving wherever the cables are laid against sharp edges. Leave some slack inthe cable at the hinge (3) <strong>to</strong> allow the frame <strong>to</strong> open fully. Tie the cables <strong>to</strong> thebraces (4) <strong>to</strong> provide strain relief.344421Electrical installation
67360 degrees EMC grounding at the cable entry1. Loosen the fastening screws of the EMI conductive cushions and pull thecushions apart.2. Cut adequate holes <strong>to</strong> the rubber grommets in the lead-through plate and lead thecables through the grommets and the cushions in<strong>to</strong> the cabinet.StrainreliefEMI conductivecushion1 1GrommetLead-throughplateSide viewView from above3. Strip off the cable plastic sheath above the lead-through plate just enough <strong>to</strong>ensure proper connection of the bare shield and the EMI conductive cushions.4. Tighten the two fastening screws (1) so that the EMI conductive cushions presstightly round the bare shield.Note: If the outer surface of the shield is non-conductive:• Cut the shield at the midpoint of the bare part. Be careful not <strong>to</strong> cut theconduc<strong>to</strong>rs or the grounding wire (if present).• Turn the shield inside out <strong>to</strong> expose its conductive surface.• Cover the turned shield and the stripped cable with copper foil <strong>to</strong> keep theshielding continuous.Copper foilCable shieldShielded twisted pairGrounding wireStripped cableConductive surface ofthe shield exposedStripped part coveredwith copper foilElectrical installation
68Special for <strong>to</strong>p entryWhen each cable has its own rubber grommet, sufficient IP and EMC protection canbe achieved. However, if very many control cables come <strong>to</strong> one cabinet, plan theinstallation beforehand as follows:1. Make a list of the cables coming <strong>to</strong> the cabinet.2. Sort the cables going <strong>to</strong> the left in<strong>to</strong> one group and the cables going <strong>to</strong> the rightin<strong>to</strong> another group <strong>to</strong> avoid unnecessary crossing of cables inside the cabinet.3. Sort the cables in each group according <strong>to</strong> size.4. Group the cables for each grommet as follows ensuring that each cable has aproper contact <strong>to</strong> the cushions on both sides.Cable diameter in mm Max. number of cables per grommet< 13 4< 17 3< 25 2> 25 15. Divide the bunches so that cables will be arranged according <strong>to</strong> size between theEMI conductive cushions.View from aboveThickest cableThinnest cable6. If more than one cable go through a grommet, the grommet must be sealed byLoctite 5221 (catalogue number 25551).Side viewApply Loctite5221 inside thegrommet.Attach controlcables <strong>to</strong> thesupporting plate.Connect the earthing wire <strong>to</strong>the PE busbar.Electrical installation
69Connecting the cables <strong>to</strong> the I/O terminalsConnect the conduc<strong>to</strong>rs <strong>to</strong> the appropriate detachable terminals of the RMIO boardor optional terminal X2 [see chapter Mo<strong>to</strong>r control and I/O board (RMIO)]. Tightenthe screws <strong>to</strong> secure the connection.Insulation1234Double-shielded cableSingle-shielded cableSingle-shielded cable: Twist the grounding wires of the outer shield and connectthem <strong>to</strong> the nearest grounding clamp. Double-shielded cable: Connect the innershields and the grounding wires of the outer shield <strong>to</strong> the nearest grounding clamp.Do not connect shields of different cables <strong>to</strong> the same grounding clamp.Leave the other end of the shield unconnected or ground it indirectly via a fewnanofarads high-frequency capaci<strong>to</strong>r (e.g. 3.3 nF / 630 V). The shield can also begrounded directly at both ends if they are in the same ground line with no significantvoltage drop between the end points.Keep the signal wire pairs twisted as close <strong>to</strong> the terminals as possible. Twisting thewire with its return wire reduces disturbances caused by inductive coupling.Electrical installation
70Settings of the cooling fan transformerThe voltage transformer of the cooling fan is located at the <strong>to</strong>p right-hand corner ofthe drive module. Remove the front cover for adjusting the settings and replace thecover after setting.Set <strong>to</strong> 220 V if the supply frequency is 60 Hz. Set <strong>to</strong>230 V if the supply frequency is 50 Hz.Set according <strong>to</strong> the supply voltage:380 V, 400 V, 415 V, 440 V, 480 V or 500 V; or525 V, 575 V, 600 V, 660 V or 690 V.Installation of optional modulesThe optional module (such as a fieldbus adapter, an I/O extension module and thepulse encoder interface) is inserted in the optional module slot of the RMIO board inthe RDCU unit and fixed with two screws. See the appropriate optional modulemanual for the cable connections.Cabling of I/O and fieldbus modulesGrounding wire of the outer shieldAlternative <strong>to</strong> a)As short as possible1234a)ShieldModuleElectrical installation
8F0171Pulse encoder module cablingClamp as close <strong>to</strong> the terminals aspossible.Alternative <strong>to</strong> a)1234+24VAs short aspossible1 2 3 4 5 6 7 8 1 2 3 4 5 6V INV OUTX1+15V0 V0 VCHB-CHZ-CHZ+NODE IDCHA-CHB+X2WD/INITCHBCHA+CHAASHLDCD5 7 9 BEa)SHLDGNDCHASSISRTAC-01PULSE <strong>EN</strong>CODER INTERFAC<strong>EN</strong>ote 1: If the encoder is of unisolatedtype, ground the encoder cable at thedrive end only. If the encoder isgalvanically isolated from the mo<strong>to</strong>rshaft and the sta<strong>to</strong>r frame, ground theencoder cable shield at the drive andthe encoder end.Note 2: Twist the pair cable wires.Note 3: The grounding wire of the outershield of the cable can alternatively beconnected <strong>to</strong> the SHLD terminal of theRTAC module.6432Fibre optic linkA DDCS fibre optic link is provided via the RDCO optional module for PC <strong>to</strong>ols,master/follower link, NDIO, NTAC, NAIO, AIMA I/O module adapter and fieldbusadapter modules of type Nxxx. See RDCO User’s <strong>Manual</strong> [3AFE64492209(English)] for the connections. Observe colour coding when installing fibre opticcables. Blue connec<strong>to</strong>rs go <strong>to</strong> blue terminals, and grey connec<strong>to</strong>rs <strong>to</strong> grey terminals.When installing multiple modules on the same channel, connect them in a ring.Electrical installation
72Layout drawing of fac<strong>to</strong>ry installed optional equipmentFrame sizes R5 and R6******* Main contac<strong>to</strong>r control relays* Mo<strong>to</strong>r auxiliary fan circuit breaker* Mo<strong>to</strong>r auxiliary fan contac<strong>to</strong>r*Thermis<strong>to</strong>r/Pt100 relays*Thermis<strong>to</strong>r/Pt100 control relays*Relay for Prevention of Unexpected Start***Emergency s<strong>to</strong>p of Category 1*Earth faultprotectiondeviceSwing-out frame (front view)*Circuit breakers for cabinet heaters*Circuit breakers for mo<strong>to</strong>r heaters* Denotes optional equipment not present on all units.68328861 BAdditional terminal blocks*X1 line contac<strong>to</strong>r control and auxiliary voltage supply*X2 RMIO/RDCU*X4 temperature supervision*X5 cabinet heaters*X6 mo<strong>to</strong>r auxiliary fan supply*X7 mo<strong>to</strong>r heater*X8 emergency s<strong>to</strong>p of Category 1*X9 prevention of unexpected start*X10 earth fault protectionElectrical installation
73Frame size R7 and R8Grounding clamps forRMIO*X2RDCU,RMIOGrounding clamps forX2*X5*X1*X7* Main contac<strong>to</strong>rcontrol relays* Mo<strong>to</strong>r auxiliary fandevices*X8*X4*X9*Thermis<strong>to</strong>r/Pt100relays*X10*X6*AIMA board*Relay for Prevention ofUnexpected Start*Emergency s<strong>to</strong>p ofCategory 1*Circuit breakers for mo<strong>to</strong>rand cabinet heaters*Earth fault protection device+24 V external powersupply* Denotes optional equipment not present onall units.Swing-out frame (front view)64744291 AFor additional terminal blocks X1 <strong>to</strong> X10, see Additional terminal blocks.Installation of brake resis<strong>to</strong>rs (units with brake chopper option)See chapter Resis<strong>to</strong>r braking. Connect the resis<strong>to</strong>r as shown in section Power cableconnection diagram above.Electrical installation
74Electrical installation
75Mo<strong>to</strong>r control and I/O board (RMIO)What this chapter containsThis chapter shows• external control connections <strong>to</strong> the RMIO board for the <strong>ACS800</strong> Standard ControlProgram (Fac<strong>to</strong>ry Macro)• specifications of the inputs and outputs of the board.Note for the <strong>ACS800</strong>-02 with enclosure extension and the <strong>ACS800</strong>-<strong>07</strong>The connections for the RMIO board shown below apply also <strong>to</strong> optional terminalblock X2 available for the <strong>ACS800</strong>-02 and <strong>ACS800</strong>-<strong>07</strong>. The terminals of the RMIOboard are wired <strong>to</strong> terminal block X2 internally.Terminals of X2 accept cables from 0.5 <strong>to</strong> 4.0 mm 2 (22 <strong>to</strong> 12 AWG). Tightening<strong>to</strong>rque for screw terminals is 0.4 <strong>to</strong> 0.8 Nm (0.3 <strong>to</strong> 0.6 lbf ft). For disconnecting wiresfrom spring terminals, use a screw driver with a blade thickness of 0.6 mm(0.024 in.) and width of 3.5 mm (0.138 in.), e.g. PHO<strong>EN</strong>IX CONTACT SZF 1-0,6X3,5.Note on terminal labellingOptional modules (Rxxx) may have identical terminal designations with the RMIOboard.Mo<strong>to</strong>r control and I/O board (RMIO)
76Note on external power supplyExternal +24 V power supply for the RMIO board is recommended if• the application requires a fast start after connecting the input power supply• fieldbus communication is required when the input power supply is disconnected.The RMIO board can be supplied from an external power source via terminal X23 orX34 or via both X23 and X34. The internal power supply <strong>to</strong> terminal X34 can be leftconnected when using terminal X23.WARNING! If the RMIO board is supplied from an external power source viaterminal X34, the loose end of the cable removed from the RMIO board terminalmust be secured mechanically <strong>to</strong> a location where it cannot come in<strong>to</strong> contact withelectrical parts. If the screw terminal plug of the cable is removed, the wire endsmust be individually insulated.WARNING! If the RMIO board is powered from two power supplies (connected <strong>to</strong>X23 and X34), and the external power supply connected <strong>to</strong> X23 is also used <strong>to</strong>power external equipment, equip the RMIO branch of the circuit with a diode asshown below. The diode ensures that the RMIO board will not be damaged byovercurrent in case the external power supply fails.RMIOX3423+-External orinternal powersupply+24 V DC+-X231 +24V Auxiliary voltage output2 GNDand input, non-isolated,24 V DC 250 mAOtherequipmentParameter settingsIn Standard Control Program, set parameter 16.09 CTRL BOARD SUPPLY <strong>to</strong>EXTERNAL 24V if the RMIO board is powered from an external supply.Mo<strong>to</strong>r control and I/O board (RMIO)
77External control connections (non-US)External control cable connections <strong>to</strong> the RMIO board for the <strong>ACS800</strong> StandardControl Program (Fac<strong>to</strong>ry Macro) are shown below. For external control connectionsof other control macros and programs, see the appropriate Firmware <strong>Manual</strong>.X2* RMIOX20 X20RMIO1 1 VREF- Reference voltage -10 V DC, 1 kohm < R LTerminal block size:2 2 AGND < 10 kohmcables 0.3 <strong>to</strong> 3.3 mm 2 (22 <strong>to</strong> 12 AWG)X21 X21Tightening <strong>to</strong>rque:1 1 VREF+ Reference voltage 10 V DC, 1 kohm < R L
78External control connections (US)External control cable connections <strong>to</strong> the RMIO board for the <strong>ACS800</strong> StandardControl Program (Fac<strong>to</strong>ry Macro US version) are shown below. For external controlconnections of other control macros and programs, see the appropriate Firmware<strong>Manual</strong>.X2* RMIORMIOX20 X20Terminal block size:1 1 VREF- Reference voltage -10 V DC, 1 kohm < R Lcables 0.3 <strong>to</strong> 3.3 mm 2 (22 <strong>to</strong> 12 AWG)2 2 AGND < 10 kohmTightening <strong>to</strong>rque:X21 X210.2 <strong>to</strong> 0.4 Nm (0.2 <strong>to</strong> 0.3 lbf ft)1 1 VREF+ Reference voltage 10 V DC, 1 kohm < R L
79RMIO board specificationsAnalogue inputsInsulation test voltageMax. common mode voltagebetween the channelsCommon mode rejection ratioWith Standard Control Program two programmable differential current inputs (0 mA /4 mA ... 20 mA, R in = 100 ohm) and one programmable differential voltage input (-10 V / 0 V / 2 V ... +10 V, R in = 200 kohm).The analogue inputs are galvanically isolated as a group.500 V AC, 1 min±15 V DC> 60 dB at 50 HzResolution 0.025% (12 bit) for the -10 V ... +10 V input. 0.5% (11 bit) for the 0 ... +10 V and 0 ...20 mA inputs.Inaccuracy±0.5% (Full Scale Range) at 25 °C (77 °F). Temperature coefficient: ±100 ppm/°C(±56 ppm/°F), max.Constant voltage outputVoltageMaximum loadApplicable potentiometerAuxiliary power outputVoltageMaximum currentAnalogue outputsResolutionInaccuracy+10 V DC, 0, -10 V DC ± 0.5% (Full Scale Range) at 25 °C (77 °F). Temperaturecoefficient: ±100 ppm/°C (±56 ppm/°F) max.10 mA1 kohm <strong>to</strong> 10 kohm24 V DC ± 10%, short circuit proof250 mA (shared between this output and optional modules installed on the RMIO)Two programmable current outputs: 0 (4) <strong>to</strong> 20 mA, R L < 700 ohm0.1% (10 bit)±1% (Full Scale Range) at 25 °C (77 °F). Temperature coefficient: ±200 ppm/°C(±111 ppm/°F) max.Digital inputsWith Standard Control Program six programmable digital inputs (common ground:24 V DC, -15% <strong>to</strong> +20%) and a start interlock input. Group isolated, can be divided intwo isolated groups (see Isolation and grounding diagram below).Thermis<strong>to</strong>r input: 5 mA, < 1.5 kohm “1” (normal temperature), > 4 kohm “0”(high temperature), open circuit “0” (high temperature).Internal supply for digital inputs (+24 V DC): short-circuit proof. An external 24 V DCsupply can be used instead of the internal supply.Insulation test voltage500 V AC, 1 minLogical thresholds < 8 V DC “0”, > 12 V DC “1”Input currentDI1 <strong>to</strong> DI 5: 10 mA, DI6: 5 mAFiltering time constant1 msMo<strong>to</strong>r control and I/O board (RMIO)
80Relay outputsSwitching capacityMinimum continuous currentMaximum continuous currentInsulation test voltageThree programmable relay outputs8 A at 24 V DC or 250 V AC, 0.4 A at 120 V DC5 mA rms at 24 V DC2 A rms4 kV AC, 1 minuteDDCS fibre optic linkWith optional communication adapter module RDCO. Pro<strong>to</strong>col: DDCS (ABBDistributed Drives Communication System)24 V DC power inputVoltage 24 V DC ± 10%Typical current consumption 250 mA(without optional modules)Maximum current consumption 1200 mA (with optional modules inserted)The terminals on the RMIO board as well as on the optional modules attachable <strong>to</strong> the board fulfil the Protective ExtraLow Voltage (PELV) requirements stated in <strong>EN</strong> 50178 provided that the external circuits connected <strong>to</strong> the terminals alsofulfil the requirements and the installation site is below 2000 m (6562 ft). Above 2000 m (6562 ft), see page 56.Mo<strong>to</strong>r control and I/O board (RMIO)
81Isolation and grounding diagramX201 VREF-2 AGNDX211 VREF+2 AGND3 AI1+4 AI1-5 AI2+6 AI2-7 AI3+8 AI3-Common modevoltage betweenchannels ±15 V(Test voltage: 500 V AC)9 AO1+10 AO1-11 AO2+12 AO2-X221 DI12 DI23 DI34 DI49 DGND1Jumper J1 settings:Ground5 DI56 DI67 +24VD8 +24VD11 DIIL10 DGND2X231 +24 V2 GNDX251 RO12 RO13 RO1X261 RO22 RO23 RO2X271 RO32 RO33 RO3J1(Test voltage:4kVAC)All digital inputs share a commonground. This is the default setting.orGrounds of input groupsDI1…DI4 and DI5/DI6/DIILare separate (insulationvoltage 50 V).Mo<strong>to</strong>r control and I/O board (RMIO)
82Mo<strong>to</strong>r control and I/O board (RMIO)
83Installation checklist and start-upChecklistCheck the mechanical and electrical installation of the drive before start-up. Gothrough the checklist below <strong>to</strong>gether with another person. Read the Safetyinstructions on the first pages of this manual before you work on the unit.CheckMECHANICAL INSTALLATIONThe ambient operating conditions are allowed. See Mechanical installation, Technical data: IEC data or NEMAdata, Ambient conditions.The unit is fixed properly on floor and a vertical non-flammable wall. See Mechanical installation.The cooling air will flow freely.ELECTRICAL INSTALLATION See Planning the electrical installation, Electrical installation.The mo<strong>to</strong>r and the driven equipment are ready for start. See Planning the electrical installation: Mo<strong>to</strong>r selectionand compatibility, Technical data: Mo<strong>to</strong>r connection.The +E202 EMC filter capaci<strong>to</strong>rs are disconnected if the drive is connected <strong>to</strong> an IT (ungrounded) system.The capaci<strong>to</strong>rs are reformed if s<strong>to</strong>red over one year, refer <strong>to</strong> ACS 600/800 Capaci<strong>to</strong>r Reforming Guide[64059629 (English)].The drive is grounded properly.The mains (input power) voltage matches the drive nominal input voltage.The mains (input power) connections at L1, L2 and L3 and their tightening <strong>to</strong>rques are OK. See Technical data /Cable entries.Appropriate mains (input power) fuses and disconnec<strong>to</strong>r are installed.The mo<strong>to</strong>r connections at U2, V2 and W2 and their tightening <strong>to</strong>rques are OK. See Technical data / Cable entries.The mo<strong>to</strong>r cable is routed away from other cables.Voltage setting of the cooling fan transformerSetting of the auxiliary voltage transformer T10 (if present). For location, see Maintenance / Cabinet layout.Voltage setting of the IP 54 fan transformer T15 (if present). For location, see Maintenance / Cabinet layout.Voltage setting of the brake resis<strong>to</strong>r fan transformer (if present).There are no power fac<strong>to</strong>r compensation capaci<strong>to</strong>rs in the mo<strong>to</strong>r cable.The external control connections inside the drive are OK.There are no <strong>to</strong>ols, foreign objects or dust from drilling inside the drive.Mains (input power) voltage cannot be applied <strong>to</strong> the output of the drive (with bypass connection).Drive, mo<strong>to</strong>r connection box and other covers are in place.Installation checklist and start-up
84Start-up procedureSafetyActionOnly qualified electricians are allowed <strong>to</strong> start-up the drive. The safetyinstructions must be followed during the start-up procedure.Additional informationSee chapter Safety instructions.Checks with no voltage connectedCheck the tuning of the insulation moni<strong>to</strong>ring device.Pt 100 settings (if present)Starting the driveClose the switch fuse (main disconnec<strong>to</strong>r).Units with line contac<strong>to</strong>r: Close the contac<strong>to</strong>r by turning the start switchon the cabinet door from OFF in<strong>to</strong> START position for 2 seconds. Leavethe switch <strong>to</strong> ON position.Control program set-upFollow the instructions in the Firmware <strong>Manual</strong> <strong>to</strong> start up the drive and<strong>to</strong> set the drive parameters.On-load checksCheck that the Prevention of Unexpected Start function (if installed)works:• Start and S<strong>to</strong>p the drive and wait until the mo<strong>to</strong>r has s<strong>to</strong>pped.• Open the Prevention of Unexpected Start switch (mounted on a controldesk). The indicating lamp should light.• Give a Start command. The drive should not start.• Reset the drive from the control panel.Check that the cooling fans rotate freely in the right direction, and the airflows upwards.Check the direction of rotation of the mo<strong>to</strong>r.Check the correct operation of the emergency-s<strong>to</strong>p circuits from eachoperating location.Optional device. See deliveryspecific circuit diagrams andIRDH265 Operating <strong>Manual</strong> byBender (code: TGH1249).Optional function. See deliveryspecific circuit diagrams.A paper sheet set on the intake(door) gratings stays. The fans runnoiselessly.Installation checklist and start-up
85MaintenanceWhat this chapter containsSafetyThis chapter contains preventive maintenance instructions.WARNING! Read the Safety instructions on the first pages of this manual beforeperforming any maintenance on the equipment. Ignoring the safety instructions cancause injury or death.Maintenance intervalsIf installed in an appropriate environment, the drive requires very little maintenance.This table lists the routine maintenance intervals recommended by ABB.Interval Maintenance For instruction, see sectionEvery year whens<strong>to</strong>redCapaci<strong>to</strong>r reformingReformingEvery year IP 54 air filter change Checking and replacing the air filtersIP 42 air filter check and change if necessaryIP 22 air filter check and change if necessaryEvery 6 yearsCleanliness checkCabinet cooling fan change (frame sizes R5and R6)HeatsinkReplacing the cabinet fans (R5 and R6)Every 6 years Cabinet cooling fan change (frame size R8) Replacing the cabinet fans (frame size R8 only)Every 6 yearsEvery 6 yearsEvery 6 yearsEvery 6 yearsChange of additional cabinet cooling fan onthe roof (frame sizes R7 and R8)Change of additional cabinet cooling fan atthe bot<strong>to</strong>m (frame sizes R7 and R8)Change of optional brake resis<strong>to</strong>r (1xSAFURand 2xSAFUR) cabinet fan, optional du/dtfilter fan of types <strong>ACS800</strong>-<strong>07</strong>-0120-3 and -0140-5IP 54 and IP 54R fan change(frame sizes R6, R7 and R8)Replacing the additional cabinet fan (frame sizesR7 and R8 only with IP 22 and IP 42 when cabling:bot<strong>to</strong>m entry/exit)Replacing the additional cabinet fan (frame sizesR7 and R8 only with IP 22 and IP 42 when cabling:<strong>to</strong>p entry and bot<strong>to</strong>m exit, bot<strong>to</strong>m entry and <strong>to</strong>p exi<strong>to</strong>r <strong>to</strong>p entry/exit)-Replacing the IP 54 (UL type 12) fan in frame sizeR6 orReplacing the IP 54 (UL type 12) fan in frame sizesR7 and R8Maintenance
86Every 6 yearsEvery 6 yearsEvery 6 yearsDrive module cooling fan change (framesizes R5 and R6)Drive module cooling fan change (frame sizeR7)Drive module cooling fan change (frame sizeR8)Replacing the drive module fan (R5 and R6)Replacing the drive module fan (R7)Replacing the drive module fan (R8)Every 10 years Capaci<strong>to</strong>r change Capaci<strong>to</strong>rsConsult your local ABB Service representative for more details on the maintenance.On the Internet, go <strong>to</strong> http://www.abb.com/drives and select Drive Services –Maintenance and Field Services.Required <strong>to</strong>ols for maintenance• 3 mm screw driver• <strong>to</strong>rque wrench with 500 mm (20 in.) or 2 x 250 mm (2 x 10 in.) extension bar• 19 mm socketfor frame size R7: 13 mm magnetic end socketfor frame size R8: 17 mm magnetic end socket.Screw Grade Tool Tightening <strong>to</strong>rquemm Nm lbf ftM4 8.8 7 2 1.46M5 8.8 8 4 3M6 8.8 10 6...9 4...7M8 8.8 13 15...22 11...16M10 8.8 17 30...44 22...32M12 8.8 19 50...75 37...55Maintenance
87Cabinet layoutCabinet layout stickers are shown below. The symbols are described underDesignations.Frame sizes R5 and R6The options included are marked with x at the fac<strong>to</strong>ry.IP54 ROOFOPTION 1OPTION 2OPTION 3Maintenance
88Frame sizes R7 and R8 without du/dt filterThe options included are marked with x at the fac<strong>to</strong>ry.IP22/42 BOTTOM <strong>EN</strong>TRY/EXITIP22/42 TOP <strong>EN</strong>TRY/EXITMaintenance
89Frame sizes R7 and R8 with du/dt filterThe options included are marked with x at the fac<strong>to</strong>ry.IP22/42IP22/42BOTTOMBOTTOM<strong>EN</strong>TRY/EXIT<strong>EN</strong>TY/EXITIP22/42 TOP <strong>EN</strong>TRY/EXITMaintenance
90DesignationsDesignation ComponentA48,49 Control panel mounting platform, control panelC1, C3 Fan capaci<strong>to</strong>rE1Cabinet heaterF10.1-2 Auxiliary voltage transformer fusesF11Circuit breakerF15.1-2 IP 22/42/54 fan fusesF30.1-3 Mo<strong>to</strong>r auxiliary fan fusesF51Circuit breakerG10+24 VDC external power supplyK1Line contac<strong>to</strong>rQ1, F1.1 -3 Switch fuseS11Start/S<strong>to</strong>p switchS20Emergency S<strong>to</strong>p switchS21Emergency S<strong>to</strong>p resetS90Earth fault resetT10Auxiliary voltage transformerT15IP 54 fan transformerU1drive moduleX2Additional terminal block for RMIO boardY1.1 IP 54 fanY2Additional cabinet fanY3.1 IP 22/42 fanZ2du/dt filterMaintenance
91Layout of the drive moduleThe layout stickers of the drive module are shown below. The stickers show allpossible components. Not all of them are present in each delivery. Components thatneed <strong>to</strong> be changed regularly are listed below:DesignationY41C_Cooling fanCapaci<strong>to</strong>rsComponentR7R8Code: 6<strong>45</strong>72261 Code: 64601423Maintenance
92Checking and replacing the air filtersCheck the air filters and replace if necessary (see Technical data for the correct filtertypes). The inlet (door) filters can be accessed by removing the fastener(s) at the <strong>to</strong>pof the grating, then lifting the grating and pulling it away from the door. The outlet(roof) filter in IP 54 units can be accessed by pulling the grating upwards.Air filter matHeatsinkFansCheck the cleanliness of the cabinet and the surroundings. When necessary, cleanthe interior of the cabinet with a soft brush and a vacuum cleaner.The module heatsink fins pick up dust from the cooling air. The drive runs in<strong>to</strong>overtemperature warnings and faults if the heatsink is not clean. When necessary,contact ABB for cleaning of the heatsink (frame sizes R7 and R8).In frame size R6, proceed as follows:1. Remove the cooling fan (see section Fans).2. Remove the drive module from the cabinet.3. Blow dry clean compressed air from bot<strong>to</strong>m <strong>to</strong> <strong>to</strong>p and simultaneously use avacuum cleaner at the air outlet <strong>to</strong> trap the dust. Note: Prevent dust from enteringadjoining equipment.4. Replace the cooling fan.The lifespan of the cooling fan of the drive module is about 50 000 hours. The actuallifespan depends on the running time of the fan, ambient temperature and dustconcentration. See the appropriate <strong>ACS800</strong> firmware manual for the actual signalwhich indicates the running time of the cooling fan.Replacement fans are available from ABB. Do not use other than ABB specifiedspare parts.Maintenance
93Replacing the drive module fan (R5 and R6)To remove the fan, undo the fixing screws. Disconnect the cable. Install the fan inreverse order.12Bot<strong>to</strong>m view1Maintenance
94Replacing the drive module fan (R7)1. Remove the front cover.2. Disconnect the discharging resis<strong>to</strong>r wire(s).3. Remove the DC capaci<strong>to</strong>r pack by undoing the red fixing screws and pulling thepack out.4. Disconnect the fan supply wires (detachable connec<strong>to</strong>r).5. Disconnect the fan capaci<strong>to</strong>r wires.6. Disconnect the AINP board wires from connec<strong>to</strong>rs X1 and X2.7. Undo the red fixing screws of the fan cassette.8. Press the snap-on holders <strong>to</strong> release the side cover.9. Lift the handle and pull the fan cassette out.10. Install the new fan and fan capaci<strong>to</strong>r in reverse order <strong>to</strong> the above.33347622 pcs in690 Vunits983587333DC+DC-Maintenance
95Replacing the drive module fan (R8)1. Remove the front cover.2. Disconnect the fan capaci<strong>to</strong>r and power supply wires.3. Undo the red fastening screws of the plastic side cover of the fan. Shift the cover<strong>to</strong> the right <strong>to</strong> free its right-hand edge and lift the cover off.4. Undo the red fastening screws of the fan.5. Lift the fan out of the cabinet.6. Install the new fan and fan capaci<strong>to</strong>r in reverse order <strong>to</strong> the above.2432534Maintenance
96Replacing the cabinet fans (R5 and R6)Replacing the fans at upper part of the cubicle1. Remove the fan cassette from the cabinet as shown in Replacing the drivemodule (R5 and R6).2. Undo the fastening screws of the fans.3. Install the new fans in reverse order <strong>to</strong> the above.2222Fan cassette(view from below)2222Replacing the additional fan at the lower part of the cubicle (R6 with du/dt filter, +E205)1. Remove the screws that mount the support frame of the fan <strong>to</strong> the cabinet frame.2. Pull the fan support frame outwards and disconnect the fan supply wires(detachable connec<strong>to</strong>r).3. Remove the fan frame from the cabinet.4. Remove the screws that mount the fan <strong>to</strong> the fan frame.5. Install a new fan in reverse order.Maintenance
97Replacing the cabinet fans (frame size R8 only)For location of the cabinet fans, see Cabinet layout.1. Undo the fastening screws.2. Disconnect the fan supply wires (detachable connec<strong>to</strong>r at the back edge of thefan cassette).3. Pull the fan cassette out.4. Disconnect the fan wires from the terminal.5. Undo the fastening screws of the fans.6. Install the new fans in reverse order <strong>to</strong> the above.1 125 55555 5 54Maintenance
98Replacing the additional cabinet fan (frame sizes R7 and R8 only with IP 22 andIP 42 when cabling: bot<strong>to</strong>m entry/exit)1. Remove the <strong>to</strong>p plate of the cabinet roof by undoing the fastening screws.2. Remove the fan cover by undoing the fastening screws.3. Disconnect the fan supply wires (detachable connec<strong>to</strong>r) and undo the cable tieson the fan cover.4. Remove the fan capaci<strong>to</strong>r by undoing the fastening screw of the clamp.5. Pull the fan out.6. Install the new fan and fan capaci<strong>to</strong>r in reverse order <strong>to</strong> the above.111 1111111111122222222Cabinet front3 4Pro/E: 6469 4952 (cab-r7-8_roof_fan_bot-ee.asm), 6471 7154Maintenance
99Replacing the additional cabinet fan (frame sizes R7 and R8 only with IP 22 andIP 42 when cabling: <strong>to</strong>p entry and bot<strong>to</strong>m exit, bot<strong>to</strong>m entry and <strong>to</strong>p exit or <strong>to</strong>pentry/exit)1. Remove the shroud by undoing the fastening screws.2. Disconnect the fan supply wires (detachable connec<strong>to</strong>r).3. Remove the fan capaci<strong>to</strong>r by undoing the fastening screw of the clamp.4. Install the new fan and fan capaci<strong>to</strong>r in reverse order <strong>to</strong> the above.21111111 Pro/E: 6828 4759Maintenance
100Replacing the IP 54 (UL type 12) fan in frame size R61. Remove the front grating of the fan cubicle by lifting it upwards.2. Remove the shroud by undoing the fastening screws.3. Disconnect the fan supply wires (detachable terminal).4. Undo the fastening screws of the fan.5. Install the new fan in reverse order <strong>to</strong> the above.122442 4324Cabinet frontPro/E: 64784803A_ip54_roof-400,64784803I_ip54_roof-400_b-eeMaintenance
101Replacing the IP 54 (UL type 12) fan in frame sizes R7 and R81. Remove the front and back gratings of the fan cubicle by lifting them upwards.2. Remove the shrouds by undoing the fastening screws.3. Undo the fastening screws of the side/<strong>to</strong>p cover of the fan.4. Lift the side/<strong>to</strong>p cover of the fan off.5. Disconnect the fan supply wire connec<strong>to</strong>r from the cabinet roof (on <strong>to</strong>p andinside the cabinet).6. Undo the fastening screws of the fan cassette at each corner.7. Lift the fan cassette off.8. Undo the cable ties on the <strong>to</strong>p of the fan cassette.9. Disconnect the cables (detachable terminals).10. Remove the fan capaci<strong>to</strong>r by undoing the fastening screw of the clamp.11. Undo the fastening screws of the fan.12. Pull the fan out.13. Install the new fan and fan capaci<strong>to</strong>r in reverse order <strong>to</strong> the above. Ensure thatthe fan is centred and rotates freely.224123326557Maintenance
10210998888111112Capaci<strong>to</strong>rsThe drive intermediate circuit employs several electrolytic capaci<strong>to</strong>rs. Their lifespanis at least 90 000 hours depending on the operating time of the drive, loading andambient temperature. Capaci<strong>to</strong>r life can be prolonged by lowering the ambienttemperature.It is not possible <strong>to</strong> predict a capaci<strong>to</strong>r failure. Capaci<strong>to</strong>r failure is usually followed bydamage <strong>to</strong> the unit and an input cable fuse failure, or a fault trip. Contact ABB ifcapaci<strong>to</strong>r failure is suspected. Replacements are available from ABB. Do not useother than ABB specified spare parts.ReformingReform (re-age) spare part capaci<strong>to</strong>rs once a year according <strong>to</strong> ACS 600/800Capaci<strong>to</strong>r Reforming Guide [code: 64059629 (English)].Replacing the capaci<strong>to</strong>r pack (R7)Replace the capaci<strong>to</strong>r pack as described in section Replacing the drive module fan(R7).Maintenance
103Replacing the capaci<strong>to</strong>r pack (R8)1. Remove the module from the cabinet as described in section Replacing the drivemodule (R7 and R8).2. Remove the front cover. Remove the profiled side plate.3. Disconnect the discharging resis<strong>to</strong>r wires.4. Undo the red fastening screws.5. Lift the capaci<strong>to</strong>r pack out.6. Install the new capaci<strong>to</strong>r pack in reverse order <strong>to</strong> the above.4At the rear side (view frombelow)4433352 pcs in690 Vunits442 pcsM6x12 combi screw4M104M6Maintenance
104Replacing the drive module (R5 and R6)1. Open the swing-out frame. Undo screw (1) <strong>to</strong> open the swing-out frame wide.2. Disconnect the control panel cable.3. Disconnect the fan wires (detachable terminal).4. Undo the fastening screws of the air baffle and fan cassette, and pull the airbaffle out.5. Pull the fan cassette out.6. Remove the shroud at the <strong>to</strong>p of the module by undoing the fastening screws.7. Remove the shrouds in the lower part of the cabinet.8. Remove the additional fan (if any). See Replacing the additional fan at the lowerpart of the cubicle (R6 with du/dt filter, +E205) on page 96.9. Disconnect the control cables by detaching the RMIO board terminals.10. Disconnect the power busbars and cables.6 3612510 10 10 10 10 10 10 104410 104 410 10 10Maintenance
10511. Fasten the slide rails at the bot<strong>to</strong>m of the cabinet <strong>to</strong> the sides of the cabinet.12. Undo the fastening screws of the module. Use a <strong>to</strong>rque wrench with an extensionbar.13. R5: Lift the module out. R6: Slide the module out on<strong>to</strong> a pallet truck.14. Install the new module in reverse order <strong>to</strong> the above.111112 121312 12Maintenance
106Replacing the drive module (R7 and R8)1. Remove the shroud.2. Undo the fastening screws.3. Disconnect the input power busbars from the module.4. Disconnect the power supply cable from the APOW board.5. Disconnect the door wires.6. Remove the air guide.7. Remove the fastening bracket.8. Remove the front cover of the module.9. Disconnect the fibre optic cables from the AINT board and mark down theterminals for reconnecting.123347586View when themodule cover isremoved9Pho<strong>to</strong>s of frame size R8Maintenance
1<strong>07</strong>10. Disconnect the pedestal from the module by undoing the fastening (a) andbusbar connecting (b) screws.Frame size R7aabbbbbbaaa M6 combi screwTightening <strong>to</strong>rque: 5 Nm (3.7 lbf ft)b M8x25 combi screwTightening <strong>to</strong>rque: 15...22 Nm(11...16 lbf ft)Frame size R8aaaab b b b ba M6x16 combi screwsTightening <strong>to</strong>rque: 5 Nm (3.7 lbf ft)b M10x25 combi screwsTightening <strong>to</strong>rque: 30...44 Nm (22...32 lbf ft)Maintenance
10811. Secure the module <strong>to</strong> a fork lift.12. Pull the module from the cabinet on<strong>to</strong> the fork lift.WARNING! Secure the moduleproperly. The module of frame sizeR7 weighs 90 kg (198 lb). Themodule of frame size R8 weighs200 kg (441 lb). The centre ofgravity of the module is high.111213. Install the new module in reverse order <strong>to</strong> the above.The module is slid in on the pedestal rails(view from back, the back plate of thecabinet removed)WARNING! Fastening of screws (a) is important because the screws are requiredfor the grounding of the drive.Maintenance
109LEDsThis table describes LEDs of the drive.Where LED When the LED is litRMIO board Red Drive in fault stateGreenControl panel mounting platform Red Drive in fault stateGreenThe power supply on the board is OK.The main + 24 V power supply for the control panel and theRMIO board is OK.AINT board V204 (green) +5 V voltage of the board is OK.V309 (red)V310 (green)Prevention of unexpected start is ON.IGBT control signal transmission <strong>to</strong> the gate driver controlboards is enabled.Maintenance
110Maintenance
111Technical dataWhat this chapter containsThis chapter contains the technical specifications of the drive, e.g. the ratings, sizesand technical requirements, provisions for fulfilling the requirements for CE andother markings, and warranty policy.IEC dataRatingsThe IEC ratings for the <strong>ACS800</strong>-<strong>07</strong> with 50 Hz and 60 Hz supplies are given below.The symbols are described below the table.<strong>ACS800</strong>-<strong>07</strong> size Nominal ratings NooverloaduseLight-overload use Heavy-duty use FramesizeAir flowHeatdissipationI cont.maxAI maxAP cont.maxkWI 2NAP NkWI 2hdAP hdkW m 3 /h WThree-phase supply voltage 380 V, 400 V or 415 V-0<strong>07</strong>5-3 1<strong>45</strong> 170 75 141 75 100 <strong>45</strong> R5 405 1440-0100-3 166 202 90 155 75 115 55 R6 405 1940-0120-3 202 282 110 184 90 141 75 R6 405 2310-0135-3 225 326 110 220 110 163 90 R6 405 2810-0165-3 260 326 132 254 132 215 110 R6 405 3260-0205-3 290 351 160 285 160 234 132 R6 405 4200-0260-3 4<strong>45</strong> 588 200 440 200 340 160 R8 1220 6600-0320-3 521 588 250 516 250 370 200 R8 1220 7150-0400-3 602 840 315 590 315 477 250 R8 1220 8100-0440-3 693 1017 355 679 355 590 2) 315 R8 1220 8650-0490-3 720 1017 400 704 400 635 3) 355 R8 1220 9100Technical data
112<strong>ACS800</strong>-<strong>07</strong> size Nominal ratings NooverloaduseLight-overload use Heavy-duty use FramesizeAir flowHeatdissipationI cont.maxAI maxAP cont.maxkWI 2NAThree-phase supply voltage 380 V, 400 V, 415 V, 440 V, 460 V, 480 V or 500 V-0105-5 1<strong>45</strong> 170 90 141 90 100 55 R5 405 2150-0120-5 157 202 90 1<strong>45</strong> 90 113 75 R6 405 2310-0140-5 180 282 110 163 110 141 90 R6 405 2810-0165-5 225 326 132 220 132 163 110 R6 405 3260-0205-5 260 326 160 254 160 215 132 R6 405 3800-0255-5 290 351 200 285 200 234 160 R6 405 <strong>45</strong>00-0320-5 440 588 250 435 250 340 200 R8 1220 6850-0400-5 515 588 315 510 315 370 250 R8 1220 7800-0440-5 550 840 355 5<strong>45</strong> 355 490 315 R8 1220 7600-0490-5 602 840 400 590 400 515 2) 355 R8 1220 8100-0550-5 684 1017 <strong>45</strong>0 670 <strong>45</strong>0 590 2) 400 R8 1220 9100-0610-5 718 1017 500 704 500 632 3) <strong>45</strong>0 R8 1220 9700Three-phase supply voltage 525 V, 550 V, 575 V, 600 V, 660 V or 690 V-0<strong>07</strong>0-7 79 104 75 73 55 54 <strong>45</strong> R6 405 1220-0100-7 93 124 90 86 75 62 55 R6 405 1650-0120-7 113 172 110 108 90 86 75 R6 405 1960-01<strong>45</strong>-7 134 190 132 125 110 95 90 R6 405 2660-0175-7 166 2<strong>45</strong> 160 155 132 131 110 R6 405 3470-0205-7 190 2<strong>45</strong> 160 180 160 147 132 R6 405 4180-0260-7 175/230* 326 160/200* 175/212* 160/200* 163 160 R7 540 4800-0320-7 315 433 315 290 250 216 200 R8 1220 6150-0400-7 353 548 355 344 315 274 250 R8 1220 6650-0440-7 396 656 400 387 355 328 315 R8 1220 7400-0490-7 4<strong>45</strong> 775 <strong>45</strong>0 426 400 387 355 R8 1220 8<strong>45</strong>0-0550-7 488 853 500 482 <strong>45</strong>0 426 400 R8 1220 8300-0610-7 <strong>560</strong> 964 <strong>560</strong> 537 500 482 <strong>45</strong>0 R8 1220 9750TYPES BEING PHASED OUT **Three-phase supply voltage 380 V, 400 V or 415 V-0<strong>07</strong>0-3 141 164 75 132 55 97 <strong>45</strong> R6 405 1440-0140-3 206 326 110 202 110 163 90 R7 540 3000-0170-3 248 404 132 243 132 202 110 R7 540 3650-0210-3 289 432 160 284 160 240 1) 132 R7 540 4300Three-phase supply voltage 380 V, 400 V, 415 V, 440 V, 460 V, 480 V or 500 V-0100-5 124 164 75 115 75 88 55 R6 405 1940-0170-5 196 326 132 192 132 162 110 R7 540 3000-0210-5 2<strong>45</strong> 384 160 240 160 192 132 R7 540 3800-0260-5 289 432 200 284 200 224 160 R7 540 <strong>45</strong>00Three-phase supply voltage 525 V, 550 V, 575 V, 600 V, 660 V or 690 V-0140-7 134 190 132 125 110 95 90 R7 540 2800-0170-7 166 263 160 155 132 131 110 R7 540 3550-0210-7 166/203* 294 160 165/195* 160 147 132 R7 540 4250P NkWI 2hdAP hdkW m 3 /h WPDM code: 00096931-JTechnical data
1131)50% overload is available for one minute every 5 minutes if ambient temperature is less than 25 °C.If ambient temperature is 40 °C, max. available overload is 37%.2)50% overload is available for one minute every 5 minutes if ambient temperature is less than 30 °C.If ambient temperature is 40 °C, max. available overload is 40%.3)50% overload is available one minute every 5 minutes if ambient temperature is less than 20 °C. Ifambient temperature is 40 °C, max. available overload is 30%.4)Higher value is valid if ambient temperature is less than 35 °C.*higher value applicable if output frequency is above 41 Hz**MANUFACTURED ON SPECIAL ORDER ONLYSymbolsSizingNominal ratingsI cont.max continuous rms output current. No overload capability at 40 °C.I max maximum output current. Available for 10 s at start, otherwise as long as allowed by drivetemperature.Typical ratings:No-overload useP cont.max typical mo<strong>to</strong>r power. The power ratings apply <strong>to</strong> most IEC 34 mo<strong>to</strong>rs at the nominal voltage,400 V, 500 V or 690 V.Light-overload use (10% overload capability)I 2N continuous rms current. 10% overload is allowed for one minute every 5 minutes.P N typical mo<strong>to</strong>r power. The power ratings apply <strong>to</strong> most IEC 34 mo<strong>to</strong>rs at the nominal voltage,400 V, 500 V or 690 V.Heavy-duty use (50% overload capability)I 2hd continuous rms current. 50% overload is allowed for one minute every 5 minutes.P hd typical mo<strong>to</strong>r power. The power ratings apply <strong>to</strong> most IEC 34 mo<strong>to</strong>rs at the nominal voltage,400 V, 500 V or 690 V.The current ratings are the same regardless of the supply voltage within one voltage range. To achievethe rated mo<strong>to</strong>r power given in the table, the rated current of the drive must be higher than or equal <strong>to</strong>the rated mo<strong>to</strong>r current.Note 1: The maximum allowed mo<strong>to</strong>r shaft power is limited <strong>to</strong> 1.5 · P hd , 1.1 · P N or P cont.max (whichevervalue is greatest). If the limit is exceeded, mo<strong>to</strong>r <strong>to</strong>rque and current are au<strong>to</strong>matically restricted. Thefunction protects the input bridge of the drive against overload. If the condition exists for 5 minutes, thelimit is set <strong>to</strong> P cont.max .Note 2: The ratings apply at an ambient temperature of 40 °C (104 °F). At lower temperatures theratings are higher (except I max ).Note 3: Use the DriveSize PC <strong>to</strong>ol for a more accurate dimensioning if the ambient temperature isbelow 40 °C (104 °F) or the drive is loaded cyclically.DeratingThe load capacity (current and power) decreases if the installation site altitude exceeds 1000 metres(3281 ft), or if the ambient temperature exceeds 40 °C (104 °F).Technical data
114Temperature deratingIn the temperature range +40 °C (+104 °F) <strong>to</strong> +50 °C (+122 °F), the rated output current is decreased1 % for every additional 1 °C (1.8 °F). The output current is calculated by multiplying the current givenin the rating table by the derating fac<strong>to</strong>r.Example If the ambient temperature is 50 °C (+122 °F), the derating fac<strong>to</strong>r is 100% - 1%· 10 °C =90% or 0.90. The output current is then 0.90 · I 2N , 0.90 · I 2hd or 0.90 · I cont.max . °CAltitude deratingAt altitudes from 1000 <strong>to</strong> 4000 m (3281 <strong>to</strong> 13123 ft) above sea level, the derating is 1% for every 100 m(328 ft). For a more accurate derating, use the DriveSize PC <strong>to</strong>ol. See Installation sites above 2000metres (6562 feet) on page 56.FusesThe drive is equipped with aR fuses as standard. Standard aR fuses and optional gGfuses for protection against short-circuit in the input power cable or drive are listedbelow. Either fuse type may be used if it operates rapidly enough. Choose betweengG and aR fuses according <strong>to</strong> the table under Quick guide for selecting between gGand aR fuses on page 120, or verify the operating time by checking that the shortcircuitcurrent of the installation is at least the value given in the fuse table.The short-circuit current can be calculated as follows:I k2-ph =U2 · R c 2 + (Z k + X c ) 2whereI k2-ph = short-circuit current in symmetrical two-phase short-circuitU = network line-<strong>to</strong>-line voltage (V)R c = cable resistance (ohm)Z k = z k · U 2 N /S N = transformer impedance (ohm)z k = transformer impedance (%)U N = transformer rated voltage (V)S N = nominal apparent power of the transformer (kVA)X c = cable reactance (ohm).Calculation exampleDrive:• <strong>ACS800</strong>-<strong>07</strong>-0260-3• supply voltage U = 410 VTransformer:• rated power S N = 3000 kVA• rated voltage (drive supply voltage) U N = 430 V• transformer impedance z k = 7.2%.Technical data
115Supply cable:• length = 170 m• resistance/length = 0.112 ohm/km• reactance/length = 0.0273 ohm/km.Z k = z k · UN 2= 0.<strong>07</strong>2 ·S N(430 V) 23000 kVA= 4.438 mohmR c = 170m · 0.112 ohmkm= 19.04 mohmX c = 170m · 0.0273 ohmkm= 4.641 mohmI k2-ph=410 V= 9.7 kA2 · (19.04 mohm) 2 + (4.438 mohm + 4.641 mohm) 2The calculated short-circuit current 9.7 kA is higher than the minimum short-circuit current of the drivegG fuse type OFAF3H500 (8280 A). -> The 500 V gG fuse (ABB Control OFAF3H500) can be used.Notes concerning the fuse tablesNote 1: See also Planning the electrical installation: Thermal overload and short-circuit protection. ForUL recognized fuses, see NEMA data on page 124.Note 2: In multicable installations, install only one fuse per phase (not one fuse per conduc<strong>to</strong>r).Note 3: Larger fuses than the recommended ones must not be used.Note 4: Fuses from other manufacturers can be used if they meet the ratings and the melting curve ofthe fuse does not exceed the melting curve of the fuse mentioned in the table.Technical data
116Ultrarapid (aR) fuses<strong>ACS800</strong>-<strong>07</strong>sizeInputcurrentAMin. shortcircuitcurrent 1)FuseA A A 2 s V Manufacturer Type DIN 43620 SizeThree-phase supply voltage 380 V, 400 V or 415 V-0<strong>07</strong>5-3 142 1630 315 80 500 690 Bussmann 170M1572 DIN000-0100-3 163 1280 315 46 500 690 Bussmann 170M3817 DIN1*-0120-3 198 1810 400 105 000 690 Bussmann 170M3819 DIN1*-0135-3 221 2210 500 1<strong>45</strong> 000 690 Bussmann 170M5810 DIN2*-0165-3 254 2620 550 190 000 690 Bussmann 170M5811 DIN2*-0205-3 286 2620 550 190 000 690 Bussmann 170M5811 DIN2*-0260-3 438 4000 800 465 000 690 Bussmann 170M6812 DIN3-0320-3 501 5550 1000 9<strong>45</strong> 000 690 Bussmann 170M6814 DIN3-0400-3 581 7800 1250 1 950 000 690 Bussmann 170M8554 DIN3-0440-3 674 8850 1400 3 900 000 690 Bussmann 170M8555 DIN3-0490-3 705 8850 1400 3 900 000 690 Bussmann 170M8555 DIN3Three-phase supply voltage 380 V, 400 V, 415 V, 440 V, 460 V, 480 V or 500 V-0105-5 142 1630 315 80500 690 Bussmann 170M1572 DIN000-0120-5 155 1280 315 46 500 690 Bussmann 170M3817 DIN1*-0140-5 180 1810 400 105 000 690 Bussmann 170M3819 DIN1*-0165-5 222 2210 500 1<strong>45</strong> 000 690 Bussmann 170M5810 DIN2*-0205-5 256 2620 550 190 000 690 Bussmann 170M5811 DIN2*-0255-5 286 2620 550 190 000 690 Bussmann 170M5811 DIN2*-0320-5 424 4000 800 465 000 690 Bussmann 170M6812 DIN3-0400-5 498 5550 1000 9<strong>45</strong> 000 690 Bussmann 170M6814 DIN3-0440-5 543 7800 1250 1 950 000 690 Bussmann 170M8554 DIN3-0490-5 590 7800 1250 1 950 000 690 Bussmann 170M8554 DIN3-0550-5 669 8850 1400 3 900 000 690 Bussmann 170M8555 DIN3-0610-5 702 8850 1400 3 900 000 690 Bussmann 170M8555 DIN3Three-phase supply voltage 525 V, 550 V, 575 V, 600 V, 660 V or 690 V-0<strong>07</strong>0-7 79 520 125 8 500 690 Bussmann 170M1568 000-0100-7 91 695 160 16 000 690 Bussmann 170M1569 000-0120-7 112 750 200 15 000 690 Bussmann 170M3815 1*-01<strong>45</strong>-7 131 1520 350 68 500 690 Bussmann 170M3818 DIN1*-0175-7 162 1520 350 68 500 690 Bussmann 170M3818 DIN1*-0205-7 186 1610 400 74 000 690 Bussmann 170M5808 DIN2*-0260-7 217 1610 400 74 000 690 Bussmann 170M5808 DIN2*-0320-7 298 3010 630 275 000 690 Bussmann 170M5812 DIN2*-0400-7 333 2650 630 210 000 690 Bussmann 170M6810 DIN3-0440-7 377 4000 800 465 000 690 Bussmann 170M6812 DIN3-0490-7 423 4790 900 670 000 690 Bussmann 170M6813 DIN3-0550-7 468 4790 900 670 000 690 Bussmann 170M6813 DIN3-0610-7 533 5550 1000 9<strong>45</strong> 000 690 Bussmann 170M6814 DIN3Technical data
117<strong>ACS800</strong>-<strong>07</strong>sizeInputcurrentAMin. shortcircuitcurrent 1)FuseA A A 2 s V Manufacturer Type DIN 43620 SizeTYPES BEING PHASED OUTThree-phase supply voltage 380 V, 400 V or 415 V-0<strong>07</strong>0-3 138 1630 315 80 500 690 Bussmann 170M1572 DIN000-0140-3 196 1810 400 105 000 690 Bussmann 170M3819 DIN1*-0170-3 237 2210 500 1<strong>45</strong> 000 690 Bussmann 170M5810 DIN2*-0210-3 286 2620 550 190 000 690 Bussmann 170M5811 DIN2*Three-phase supply voltage 380 V, 400 V, 415 V, 440 V, 460 V, 480 V or 500 V-0100-5 121 1630 315 80 500 690 Bussmann 170M1572 DIN000-0170-5 191 1810 400 105 000 690 Bussmann 170M3819 DIN1*-0210-5 243 2210 500 1<strong>45</strong> 000 690 Bussmann 170M5810 DIN2*-0260-5 291 2620 550 190 000 690 Bussmann 170M5811 DIN2*Three-phase supply voltage 525 V, 550 V, 575 V, 600 V, 660 V or 690 V-0140-7 126 1520 350 68 500 690 Bussmann 170M3818 DIN1*-0170-7 156 1520 350 68 500 690 Bussmann 170M3818 DIN1*-0210-7 191 1610 400 74 000 690 Bussmann 170M5808 DIN2*PDM code: 00096931-H.22, 00556489A 2 s value for -7 units at 660 V1) minimum short-circuit current of the installationTechnical data
118<strong>ACS800</strong>-<strong>07</strong>sizeOptional gG fusesInput currentMin. shortcircuitcurrent 1)A A A A 2 s V Manufacturer Type IEC sizeThree-phase supply voltage 380 V, 400 V or 415 V-0<strong>07</strong>5-3 142 2400 160 200000 500 ABB Control OFAF00H160 00-0100-3 163 2850 200 350 000 500 ABB Control OFAF1H200 1-0120-3 198 3300 224 420 000 500 ABB Control OFAF1H224 1-0135-3 221 3820 250 550 000 500 ABB Control OFAF1H250 1-0165-3 254 <strong>45</strong>10 315 1100000 500 ABB Control OFAF2H315 2-0205-3 286 <strong>45</strong>10 315 1100000 500 ABB Control OFAF2H315 2-0260-3 438 8280 500 2 900 000 500 ABB Control OFAF3H500 3-0320-3 501 10200 630 4 000 000 500 ABB Control OFAF3H630 3-0400-3 581 10200 630 4 000 000 500 ABB Control OFAF3H630 3-0440-3 674 13500 800 7 400 000 500 ABB Control OFAF3H800 3-0490-3 705 13500 800 7 400 000 500 ABB Control OFAF3H800 3Three-phase supply voltage 380 V, 400 V, 415 V, 440 V, 460 V, 480 V or 500 V-0105-5 142 2400 160 200000 500 ABB Control OFAF00H160 00-0120-5 155 2850 200 350 000 500 ABB Control OFAF1H200 1-0140-5 180 2850 200 350 000 500 ABB Control OFAF1H200 1-0165-5 222 3820 250 550 000 500 ABB Control OFAF1H250 1-0205-5 256 <strong>45</strong>10 315 1100000 500 ABB Control OFAF2H315 2-0255-5 286 <strong>45</strong>10 315 1100000 500 ABB Control OFAF2H315 2-0320-5 424 8280 500 2 900 000 500 ABB Control OFAF3H500 3-0400-5 498 10200 630 4 000 000 500 ABB Control OFAF3H630 3-0440-5 543 10200 630 4 000 000 500 ABB Control OFAF3H630 3-0490-5 590 10200 630 4 000 000 500 ABB Control OFAF3H630 3-0550-5 669 13500 800 7 400 000 500 ABB Control OFAF3H800 3-0610-5 702 13500 800 7 400 000 500 ABB Control OFAF3H800 3Three-phase supply voltage 525 V, 550 V, 575 V, 600 V, 660 V or 690 V-0<strong>07</strong>0-7 79 1050 80 52200 690 ABB Control OFAA0GG80 0-0100-7 91 1480 100 93000 690 ABB Control OFAA1GG100 1-0120-7 112 1940 125 126000 690 ABB Control OFAA1GG125 1-01<strong>45</strong>-7 131 2400 160 220000 690 ABB Control OFAA1GG160 1-0175-7 162 2850 200 350000 690 ABB Control OFAA1GG200 1-0205-7 186 3820 250 700000 690 ABB Control OFAA2GG250 2-0260-7 217 3820 250 700 000 690 ABB Control OFAA2GG250 2-0320-7 298 <strong>45</strong>10 315 820 000 690 ABB Control OFAA2GG315 2-0400-7 333 6180 400 1 300 000 690 ABB Control OFAA3GG400 3-0440-7 377 8280 500 3 800 000 690 ABB Control OFAA3H500 3-0490-7 423 8280 500 3 800 000 690 ABB Control OFAA3H500 3-0550-7 468 8280 500 3 800 000 690 ABB Control OFAA3H500 3-0610-7 533 10800 630 10 000 000 690 Bussmann 630NH3G-690 * 3FuseTechnical data
119<strong>ACS800</strong>-<strong>07</strong>sizeInput currentMin. shortcircuitcurrent 1)A A A A 2 s V Manufacturer Type IEC sizeTYPES BEING PHASED OUTThree-phase supply voltage 380 V, 400 V or 415 V-0<strong>07</strong>0-3 138 2400 160 200 000 500 ABB Control OFAF00H160 00-0140-3 196 3820 250 550 000 500 ABB Control OFAF1H250 1-0170-3 237 <strong>45</strong>10 315 1 100 000 500 ABB Control OFAF2H315 2-0210-3 286 <strong>45</strong>10 315 1 100 000 500 ABB Control OFAF2H315 2Three-phase supply voltage 380 V, 400 V, 415 V, 440 V, 460 V, 480 V or 500 V-0100-5 121 2400 160 200 000 500 ABB Control OFAF00H160 00-0170-5 191 3820 250 550 000 500 ABB Control OFAF1H250 1-0210-5 243 <strong>45</strong>10 315 1 100 000 500 ABB Control OFAF2H315 2-0260-5 291 <strong>45</strong>10 315 1 100 000 500 ABB Control OFAF2H315 2Three-phase supply voltage 525 V, 550 V, 575 V, 600 V, 660 V or 690 V-0140-7 126 2400 160 220 000 690 ABB Control OFAA1GG160 1-0170-7 156 2850 200 350 000 690 ABB Control OFAA1GG200 1-0210-7 191 3820 250 700 000 690 ABB Control OFAA2GG250 2PDM code: 00096931-H.22, 00556489* rated breaking capacity only up <strong>to</strong> 50 kA1) minimum short-circuit current of the installationFuseTechnical data
120Quick guide for selecting between gG and aR fusesThe table below is a short cut in selecting between gG and aR fuses. Thecombinations (cable size, cable length, transformer size and fuse type) in the tablefulfil the minimum requirements for the proper operation of the fuse.<strong>ACS800</strong>-<strong>07</strong> size Cable type Supply transformer minimum apparent power S N (kVA)Copper Aluminium Maximum cable length with gG fuses Maximum cable length with aR fuses10 m 50 m 100 m 10 m 100 m 200 mThree-phase supply voltage 380 V, 400 V or 415 V-0<strong>07</strong>5-3 3×70 Cu 3×95 Al 130 140 160 99 99 140-0100-3 3×95 Cu 3×120 Al 150 160 190 120 120 140-0120-3 3×120 Cu 3×185 Al 170 190 210 140 140 140-0130-3 3×150 Cu 3×240 Al 200 220 250 160 160 160-0165-3 3×185 Cu 3×240 Al 240 260 310 180 180 200-0205-3 3×240 Cu 2 × (3x120) Al 240 260 310 200 200 200-0260-3 3 × (3×70) Cu 3 × (3×120) Al 430 460 <strong>560</strong> 310 310 310-0320-3 3 × (3×95) Cu 2 × (3×240) Al 530 600 750 350 350 440-0400-3 3 × (3×120) Cu 3 × (3×185) Al 530 600 750 410 470 660-0440-3 3 × (3×150) Cu 3 × (3×240) Al 700 770 930 470 530 730-0490-3 3 × (3×150) Cu 3 × (3×240) Al 700 770 930 490 530 730Three-phase supply voltage 380 V, 400 V, 415 V, 440 V, 460 V, 480 V or 500 V-0105-5 3×70 Cu 3×95 Al 160 170 190 130 130 150-0120-5 3×95 Cu 3×120 Al 190 200 220 140 140 150-0140-5 3×95 Cu 3×150 Al 190 200 220 160 160 160-0150-5 3×120 Cu 3×185 Al 220 230 250 180 180 180-0165-5 3x150 Cu 3x240 Al 250 260 290 200 200 200-0205-5 3×185 Cu 3×240 Al 290 320 360 230 230 230-0255-5 3×240 Cu 2 × (3×120) Al 290 320 360 250 250 250-0320-5 2 × (3×120) Cu 3 × (3×95) Al 530 570 670 370 370 370-0400-5 2 × (3×150) Cu 2 × (3×240) Al 660 720 840 440 440 480-0440-5 3 × (3×95) Cu 3 × (3×150) Al 660 720 840 500 570 760-0490-5 3 × (3×120) Cu 3 × (3×185) Al 660 720 840 520 570 760-0550-5 2 × (3×240) Cu 3 × (3×240) Al 880 980 1200 580 670 880-0610-5 3 × (3×150) Cu 3 × (3×240) Al 880 980 1200 610 670 880Three-phase supply voltage 525 V, 550 V, 575 V, 600 V, 660 V or 690 V-0<strong>07</strong>0-7 3×25 Cu 3×50 Al 95 95 99 95 95 95-0100-7 3×35 Cu 3×50 Al 130 140 150 110 110 110-0120-7 3×50 Cu 3×70 Al 180 180 190 140 140 140-01<strong>45</strong>-7 3×70 Cu 3×95 Al 220 220 240 160 160 160-0175-7 3×95 Cu 3×120 Al 260 260 280 200 200 200-0205-7 3×95 Cu 3×150 Al 340 360 390 230 230 230-0260-7 3×150 Cu 3×185 Al 340 360 390 260 260 260-0320-7 3×240 Cu 2 × (3×120) Al 400 410 430 360 360 360-0400-7 3×240 Cu 3 × (3×70) Al 550 570 610 400 400 400-0440-7 2 × (3×120) Cu 2 × (3×150) Al 730 780 860 460 460 460-0490-7 2 × (3×120) Cu 3 × (3×95) Al 730 780 860 510 510 510-0550-7 2 × (3×150) Cu 3 × (3×120) Al 730 780 860 <strong>560</strong> <strong>560</strong> <strong>560</strong>-0610-7 3 × (3×95) Cu 3 × (3×150) Al 960 1000 1100 640 640 640Technical data
121<strong>ACS800</strong>-<strong>07</strong> size Cable type Supply transformer minimum apparent power S N (kVA)Copper Aluminium Maximum cable length with gG fuses Maximum cable length with aR fuses10 m 50 m 100 m 10 m 100 m 200 mTYPES BEING PHASED OUTThree-phase supply voltage 380 V, 400 V or 415 V-0<strong>07</strong>0-3 3×70 Cu 3×95 Al 130 140 160 96 96 140-0170-3 3×150 Cu 3×240 Al 240 260 310 170 170 170-0210-3 3×240 Cu 2 × (3×120) Al 240 260 310 200 200 200Three-phase supply voltage 380 V, 400 V, 415 V, 440 V, 460 V, 480 V or 500 V-0100-5 3×70 Cu 3×95 Al 160 170 190 110 120 150-0170-5 3×120 Cu 3×150 Al 250 270 310 200 200 200-0210-5 3×150 Cu 3×240 Al 290 320 360 220 220 220-0260-5 3×240 Cu 2 × (3×120) Al 290 320 360 260 260 260Three-phase supply voltage 525 V, 550 V, 575 V, 600 V, 660 V or 690 V-0140-7 3×70 Cu 3×95 Al 220 220 240 160 160 160-0170-7 3×95 Cu 3×120 Al 260 260 280 190 190 190-0210-7 3×120 Cu 3×150 Al 340 360 390 230 230 230PDM code: 00556489 ANote 1: The supply transformer minimum power in kVA is calculated with a z k value of 6% andfrequency 50 Hz.Note 2: The table is not intended for transformer selection - that must be done separately.The following parameters can effect on the correct operation of the protection:• cable length, i.e. the longer the cable the weaker the fuse protection, as the long cable limits thefault current• cable size, i.e. the smaller the cable cross-section the weaker the fuse protection, as the small cablesize limits the fault current• transformer size, i.e the smaller the transformer the weaker the fuse protection, as the smalltransformer limits the fault current• transformer impedance, i.e. the higher the z k the weaker the fuse protection as high impedancelimits the fault current.The protection can be improved by installing a larger supply transformer and/or bigger cables, and inmost cases by selecting aR fuses instead of gG fuses. Selection of smaller fuses improves theprotection, but may also affect the fuse life time and lead <strong>to</strong> unnecessary operation of the fuses.In case of any uncertainty regarding the drive protection, please contact your local ABB.Technical data
122Cable typesThe table below gives copper and aluminium cable types for different load currents.Cable sizing is based on max. 9 cables laid on a cable ladder side by side, threeladder type trays one on <strong>to</strong>p of the other, ambient temperature 30 °C, PVCinsulation, surface temperature 70 °C (<strong>EN</strong> 60204-1 and IEC 60364-5-52/2001). Forother conditions, size the cables according <strong>to</strong> local safety regulations, appropriateinput voltage and the load current of the drive.Copper cables with concentriccopper shieldMax. load Cable typecurrentAmm 2Aluminium cables with concentriccopper shieldMax. load Cable typecurrentAmm 256 3×16 69 3×3571 3×25 83 3×5088 3×35 1<strong>07</strong> 3×701<strong>07</strong> 3×50 130 3×95137 3×70 151 3×120167 3×95 174 3×150193 3×120 199 3×185223 3×150 235 3×240255 3×185 214 2 × (3×70)301 3×240 260 2 × (3×95)274 2 × (3×70) 302 2 × (3×120)334 2 × (3×95) 348 2 × (3×150)386 2 × (3×120) 398 2 × (3×185)446 2 × (3×150) 470 2 × (3×240)510 2 × (3x185) 522 3 × (3×150)602 2 × (3×240) 597 3 × (3×185)579 3 × (3×120) 705 3 × (3×240)669 3 × (3×150)765 3 × (3×185)903 3 × (3×240)3BFA 01051905 CTechnical data
123FramesizeCable entriesMains, mo<strong>to</strong>r and brake resis<strong>to</strong>r cable terminal sizes (per phase), maximumaccepted cable and tightening <strong>to</strong>rques are given below.Number ofholes perphaseL1, L2, L3, U2, V2, W2, UDC+/R+, UDC-, R- Earthing PEHole Max. wire size Screw Tightening Screwdiameter<strong>to</strong>rqueTightening<strong>to</strong>rquemm mm 2 Nm NmR5 1) 1 60 185 M10 20...40 M10 30...44R6 2) 1 60 185 M10 20...40 M10 30...44R7 3 60 1×240 or M12 50...75 M10 30...442×185R8 3 60 3×240 M12 50...75 M10 30...441)2)external brake resis<strong>to</strong>r (+D150) and DC connection terminals: wire size 6…70 mm 2 , screw M8,tightening <strong>to</strong>rque 15 Nmexternal brake resis<strong>to</strong>r (+D150) and DC connection terminals: wire size 95…185 mm 2 , screw M10,tightening <strong>to</strong>rque 40 NmDimensions, weights and noiseFrame size Height 1) Width 2) Depth 5) Weight NoiseIP 21/22/42 IP 54mm mm mm mm kg dBR5 2130 2315 430 689 300 63R6 2130 2315 430 689 300 63R7 2130 2315 830 3) 689 400 71R8 2130 2315 830 4) 689 500 7200184674 -J1) in marine applications (+C121) extra height: 10 mm from the fastening bar at the bot<strong>to</strong>m of thecabinet2) extra width for units with brake resis<strong>to</strong>rs (+D151): SAFURxxxFxxx 400 mm, 2xSAFURxxxFxxx800 mm, 4xSAFURxxxFxxx 1600 mm3)extra width for units with EMC filter (+E202): 200 mm4)extra width for units with EMC filter (+E202): 400 mm5)in marine applications (+C121) depth with fastening bars: 700 mmTechnical data
124NEMA dataRatingsThe NEMA ratings for the <strong>ACS800</strong>-<strong>U7</strong> and <strong>ACS800</strong>-<strong>07</strong> with 60 Hz supplies aregiven below. The symbols are described below the table. For sizing, derating and50 Hz supplies, see IEC data.<strong>ACS800</strong>-<strong>U7</strong> size<strong>ACS800</strong>-<strong>07</strong> sizeI max Normal use Heavy-duty use FramesizeAir flowHeatdissipationAI 2NAP NHPI 2hdAP hdHP ft 3 /min BTU/HrThree-phase supply voltage 380 V, 400 V, 415 V, 440 V, 460 V, 480 V-0100-5 164 124 100 96 75 R6 238 6610-0120-5 202 157 125 124 100 R6 238 7890-0140-5 282 180 150 156 125 R6 238 9600-0165-5 326 220 150 165 125 R6 238 11140-0205-5 326 2<strong>45</strong> 200 215 150 R6 238 12980-0270-5 ** 480 316 250 240 200 R8 718 15350-0300-5 ** 568 361 300 302 250 R8 718 18050-0320-5 588 435 350 340 250 R8 718 23250-0400-5 588 510 400 370 300 R8 718 26650-0440-5 840 5<strong>45</strong> <strong>45</strong>0 490 400 R8 718 25950-0490-5 840 590 500 515 3) <strong>45</strong>0 R8 718 27600-0550-5 1017 670 550 590 3) 500 R8 718 31100-0610-5 1017 718 4) 600 590 3) 500 R8 718 33000Three-phase supply voltage 525 V, 575 V or 600 V-0<strong>07</strong>0-7 104 73 60 54 50 R6 238 4200-0100-7 124 86 75 62 60 R6 238 5650-0120-7 172 108 100 86 75 R6 238 6700-01<strong>45</strong>-7 190 125 125 99 100 R6 238 9100-0175-7 2<strong>45</strong> 155 150 131 125 R6 238 11850-0205-7 2<strong>45</strong> 192 200 147 150 R6 238 14300-0260-7 326 175/212* 150/200* 163 150 R7 318 16400-0320-7 433 290 300 216 200 R8 718 21050-0400-7 548 344 350 274 250 R8 718 22750-0440-7 656 387 400 328 350 2) R8 718 25300-0490-7 775 426 <strong>45</strong>0 387 400 R8 718 28900-0550-7 853 482 500 426 <strong>45</strong>0 R8 718 28350-0610-7 964 537 500 482 500 R8 718 33300Technical data
125<strong>ACS800</strong>-<strong>U7</strong> size<strong>ACS800</strong>-<strong>07</strong> sizeI max Normal use Heavy-duty use FramesizeAir flowHeatdissipationAI 2NAP NHPTYPES BEING PHASED OUTThree-phase supply voltage 380 V, 400 V, 415 V, 440 V, 460 V, 480 V-0170-5 326 192 150 162 125 R7 318 10100-0210-5 384 240 200 192 150 R7 318 12900-0260-5 432 289 1) 250 2) 224 150 R7 318 15300Three-phase supply voltage 525 V, 575 V or 600 V-0140-7 190 125 125 95 100 2) R7 318 9600-0170-7 263 155 150 131 125 R7 318 12150-0210-7 294 165/195* 150/200* 147 150 R7 318 1<strong>45</strong>50I 2hdAP hdHP ft 3 /min BTU/HrPDM code: 00096931-G1)available if ambient temperature is less than 30 °C (86 °F). If ambient temperature is 40 °C (104 °F),I 2N is 286 A.2)special 4-pole high-efficiency NEMA mo<strong>to</strong>r3)50% overload is allowed for one minute every five minutes if ambient temperature is less than 30 °C(86 °F). 40% overload is allowed if ambient temperature is 40 °C (104 °F).4)available if ambient temperature is less than 30 °C (86 °F). If ambient temperature is 40 °C(104 °F), I 2N is 704 A.*higher value available if output frequency is above 41 Hz** <strong>ACS800</strong>-<strong>U7</strong> types onlySymbolsI max maximum output current. Available for 10 s at start, otherwise as long as allowed by drivetemperature.Normal use (10% overload capability)I 2N continuous rms current. 10% overload is typically allowed for one minute every 5 minutes.P N typical mo<strong>to</strong>r power. The power ratings apply <strong>to</strong> most 4-pole NEMA rated mo<strong>to</strong>rs (460 V or575 V).Heavy-duty use (50% overload capability)I 2hd continuous rms current. 50% overload is typically allowed for one minute every 5 minutes.P hd typical mo<strong>to</strong>r power. The power ratings apply <strong>to</strong> most 4-pole NEMA rated mo<strong>to</strong>rs (460 V or575 V).Note: The ratings apply at an ambient temperature of 40 °C (104 °F). At lower temperatures the ratingsare higher.SizingSee page 113.DeratingSee page 113.Technical data
126FusesFor branch circuit protection per NEC, the drive is equipped with UL class T or Lfuses listed below. Fast acting class T/L or faster fuses are recommended in theUSA.Check from the fuse time-current curve that the operating time of the fuse isbelow 0.1 seconds. The operating time depends on the supply network impedanceand the cross-sectional area and length of the supply cable. The short-circuit currentcan be calculated as shown in section Fuses on page 114.Note 1: See also Planning the electrical installation: Thermal overload and short-circuit protection.Note 2: In multicable installations, install only one fuse per phase (not one fuse per conduc<strong>to</strong>r).Note 3: Larger fuses than the recommended ones must not be used.Note 4: Fuses from other manufacturers can be used if they meet the ratings and the melting curve ofthe fuse does not exceed the melting curve of the fuse mentioned in the table.Note 5: Circuit breakers must not be used without fuses.Technical data
127UL class T or L fuses<strong>ACS800</strong>-<strong>U7</strong> type InputFusecurrentA A V Manufacturer Type UL classThree-phase supply voltage 380 V, 400 V, 415 V, 440 V, 460 V or 480 V-0100-5 121 150 600 Bussmann JJS-150 T-0120-5 155 200 600 Bussmann JJS-200 T-0140-5 179 225 600 Bussmann JJS-225 T-0165-5 218 300 600 Bussmann JJS-300 T-0205-5 243 350 600 Bussmann JJS-350 T-0270-5 293 500 600 Bussmann JJS-500 T-0300-5 331 500 600 Bussmann JJS-500 T-0320-5 397 500 600 Bussmann JJS-500 T-0400-5 467 600 600 Bussmann JJS-600 T-0440-5 501 800 600 Ferraz A4BY800 L-0490-5 542 800 600 Ferraz A4BY800 L-0550-5 614 800 600 Ferraz A4BY800 L-0610-5 661 800 600 Ferraz A4BY800 LThree-phase supply voltage 525 V, 575 V or 600 V-0<strong>07</strong>0-7 70 100 600 Bussmann JJS-100 T-0100-7 82 125 600 Bussmann JJS-125 T-0120-7 103 150 600 Bussmann JJS-150 T-01<strong>45</strong>-7 121 200 600 Bussmann JJS-200 T-0175-7 150 200 600 Bussmann JJS-200 T-0205-7 188 250 600 Bussmann JJS-250 T-0260-7 199 300 600 Bussmann JJS-300 T-0320-7 273 500 600 Bussmann JJS-500 T-0400-7 325 500 600 Bussmann JJS-500 T-0440-7 370 500 600 Bussmann JJS-500 T-0490-7 4<strong>07</strong> 600 600 Bussmann JJS-600 T-0550-7 463 600 600 Bussmann JJS-600 T-0610-7 513 700 600 Ferraz A4BY700 LTYPES BEING PHASED OUTThree-phase supply voltage 380 V, 400 V, 415 V, 440 V, 460 V or 480 V-0170-5 175 250 600 Bussmann JJS-250 T-0210-5 220 300 600 Bussmann JJS-300 T-0260-5 267 400 600 Bussmann JJS-400 TThree-phase supply voltage 525 V, 575 V or 600 V-0140-7 117 200 600 Bussmann JJS-200 T-0170-7 146 200 600 Bussmann JJS-200 T-0210-7 184 250 600 Bussmann JJS-250 TPDM code: 00096931-GTechnical data
128Cable typesCable sizing is based on NEC Table 310-16 for copper wires, 75 °C (167 °F) wire insulation at 40 °C(104 °F) ambient temperature. Not more than three current-carrying conduc<strong>to</strong>rs in raceway or cable orearth (directly buried). For other conditions, dimension the cables according <strong>to</strong> local safety regulations,appropriate input voltage and the load current of the drive.Copper cables with concentric copper shieldMax. loadCable typecurrentAAWG/kcmil57 675 488 3101 2114 1132 1/0154 2/0176 3/0202 4/0224 250 MCM or 2 × 1251 300 MCM or 2 × 1/0273 350 MCM or 2 × 2/0295 400 MCM or 2 × 2/0334 500 MCM or 2 × 3/0370 600 MCM or 2 × 4/0 or 3 × 1/0405 700 MCM or 2 × 4/0 or 3 × 2/0449 2 × 250 MCM or 3 × 2/0502 2 × 300 MCM or 3 × 3/0546 2 × 350 MCM or 3 × 4/0590 2 × 400 MCM or 3 × 4/0669 2 × 500 MCM or 3 × 250 MCM739 2 × 600 MCM or 3 × 300 MCM810 2 × 700 MCM or 3 × 350 MCM884 3 × 400 MCM or 4 × 250 MCM1003 3 × 500 MCM or 4 × 300 MCM1109 3 × 600 MCM or 4 × 400 MCM1214 3 × 700 MCM or 4 × 500 MCMTechnical data
129FramesizeCable entriesInput, mo<strong>to</strong>r and brake resis<strong>to</strong>r cable terminal sizes (per phase) and tightening<strong>to</strong>rques are given below. Two-hole 1/2 inch diameter cable lugs can be used.L1, L2, L3, U2, V2, W2, UDC+/R+, UDC-, R- Earthing PEMax. cable Screw Tightening <strong>to</strong>rque Screw Tightening <strong>to</strong>rquekcmil/AWG lbf ft lbf ftR6 350 MCM 3/8 14.8...29.5 3/8 22...32R7 2 × 250 MCM 1/2 37...55 3/8 22...32R8 3 × 700 MCM 1/2 37...55 3/8 22...32Dimensions, weights and noiseFrame size Height 1) Width 2) Depth 5) Weight NoiseUL type 1 UL type 12in. in. in. in. lb dBR6 84.22 91.08 16.93 27.28 700 63R7 84.22 91.08 32.92 3) 27.28 900 71R8 84.22 91.08 32.92 4) 27.28 1100 721) in marine applications (+C121) extra height: 0.39 in. from the fastening bar at the bot<strong>to</strong>m of thecabinet2)extra width for units with brake resis<strong>to</strong>rs (+D151): SAFURxxxFxxx 15.75 in., 2xSAFURxxxFxxx19.68 in., 4xSAFURxxxFxxx 62.99 in.3)extra width for units with EMC filter (+E202): 7.87 in.4)extra width for units with EMC filter (+E202): 15.75 in.5)in marine applications (+C121) depth with fastening bars: 27.56 in.Technical data
130Free space around the unitFrame Required free space around the unit for coolingsizeFront Side Above*mm in. mm in. mm in.R5 150 5.91 - - 400 15.75R6 150 5.91 - - 400 15.75R7 150 5.91 - - 400 15.75R8 150 5.91 - - 400 15.75* measured from the base plate of the cabinet <strong>to</strong>p320 mm (12.28 in.) for fan replacementin frame sizes R7 and R8> 400 mm(15.75 in.)IP 21/22/42> 400 mm(15.75 in.)IP54Space requirement for the door opening:Frame sizes R5 and R6: 400 mm (15.75 in.)Frame sizes R7 and R8: 800 mm (31.5 in.)Technical data
131Input power connectionVoltage (L 1 )380/400/415 VAC 3-phase ± 10% for 400 VAC units380/400/415/440/460/480/500 VAC 3-phase ± 10% for 500 VAC units525/550/575/600/660/690 VAC 3-phase ± 10% for 690 VAC unitsRated short-time and peakwithstand currentIEC 60439-1 I cw / 1 sec. I pk50 kA 105 kAUL 508A,CSA C22.2 No. 14-05FrequencyImbalanceFundamental power fac<strong>to</strong>r(cos phi 1 )US and Canada: The drive is suitable for use in a circuit capable of delivering not morethan 100,000 symmetrical amperes (rms) at 600 V maximum.48 <strong>to</strong> 63 Hz, maximum rate of change 17%/sMax. ± 3% of nominal phase <strong>to</strong> phase input voltage0.98 (at nominal load)Mo<strong>to</strong>r connectionVoltage (U 2 )Frequency0 <strong>to</strong> L 1 , 3-phase symmetrical, U max at the field weakening pointDTC mode: 0 <strong>to</strong> 3.2 · f FWP . Maximum frequency 300 Hz.f FWP =U NmainsU Nmo<strong>to</strong>r· f Nmo<strong>to</strong>rFrequency resolutionCurrentPower limitField weakening pointSwitching frequencyMaximum recommendedmo<strong>to</strong>r cable lengthEfficiencyf FWP : frequency at field weakening point; U Nmains : mains (input power) voltage;U Nmo<strong>to</strong>r : rated mo<strong>to</strong>r voltage; f Nmo<strong>to</strong>r : rated mo<strong>to</strong>r frequency0.01 HzSee section IEC data.1.5 · P hd , 1.1 · P N or P cont.max (whichever value is greatest)8 <strong>to</strong> 300 Hz3 kHz (average). In 690 V units 2 kHz (average).Type code (EMC equipment)Max. mo<strong>to</strong>r cable lengthDTC controlScalar control- 300 m (984 ft) 300 m (984 ft)+E202 *, +E210 * 100 m (328 ft) 100 m (328 ft)* Mo<strong>to</strong>r cable longer than 100 m (328 ft) is allowed but then the EMC Directive requirements may notbe fulfilled.Approximately 98% at nominal power levelTechnical data
132CoolingMethodInternal fan, flow direction from front <strong>to</strong> <strong>to</strong>pFilter material Inlet (door) Outlet (roof)IP22 / IP 42 unitsairTex G150288mmx292mm688 mm x 521 mm-Free space around the unitCooling air flowDegrees of protectionAmbient conditionsInstallation site altitudeAir temperatureIP 54 units Luftfilter/airComp 300-50288 mm x 292 mm688 mm x 521 mmSee Free space around the unit.See IEC data.Luftfilter/airTex G1502 pcs: 398 mm x 312 mmIP 21 (UL type 1), IP 22 (UL type 1), IP 42 (UL type 2), IP 54 (UL type 12 for indoor useonly), IP 54REnvironmental limits for the drive are given below. The drive is <strong>to</strong> be used in a heated,indoor, controlled environment.Operationinstalled for stationary use0 <strong>to</strong> 4000 m (13123 ft) abovesea level [above 1000 m(3281 ft), see sectionDerating]-15 <strong>to</strong> +50 °C (5 <strong>to</strong> 122 °F).No frost allowed. Seesection Derating.S<strong>to</strong>ragein the protective package- --40 <strong>to</strong> +70 °C (-40 <strong>to</strong>+158 °F)Transportationin the protective package-40 <strong>to</strong> +70 °C (-40 <strong>to</strong>+158 °F)Relative humidity 5 <strong>to</strong> 95% Max. 95% Max. 95%No condensation allowed. Maximum allowed relative humidity is 60% in the presence ofcorrosive gases.Contamination levels(IEC 6<strong>07</strong>21-3-3, IEC 6<strong>07</strong>21-3-2, IEC 6<strong>07</strong>21-3-1)Atmospheric pressureVibration (IEC 60068-2)No conductive dust allowed.Boards without coating:Chemical gases: Class 3C1Solid particles: Class 3S2Boards with coating:Chemical gases: Class 3C2Solid particles: Class 3S270 <strong>to</strong> 106 kPa0.7 <strong>to</strong> 1.05 atmospheresMax. 1 mm (0.04 in.)(5 <strong>to</strong> 13.2 Hz),max. 7 m/s 2 (23 ft/s 2 )(13.2 <strong>to</strong> 100 Hz) sinusoidalBoards without coating:Chemical gases: Class 1C2Solid particles: Class 1S3Boards with coating:Chemical gases: Class 1C2Solid particles: Class 1S370 <strong>to</strong> 106 kPa0.7 <strong>to</strong> 1.05 atmospheresMax. 1 mm (0.04 in.)(5 <strong>to</strong> 13.2 Hz),max. 7 m/s 2 (23 ft/s 2 )(13.2 <strong>to</strong> 100 Hz) sinusoidalShock (IEC 60068-2-29) Not allowed Max. 100 m/s 2 (330 ft./s 2 ),11 msFree fall Not allowed 100 mm (4 in.) for weigh<strong>to</strong>ver 100 kg (220 lb)Boards without coating:Chemical gases: Class 2C2Solid particles: Class 2S2Boards with coating:Chemical gases: Class 2C2Solid particles: Class 2S260 <strong>to</strong> 106 kPa0.6 <strong>to</strong> 1.05 atmospheresMax. 3.5 mm (0.14 in.)(2 <strong>to</strong> 9 Hz),max. 15 m/s 2 (49 ft/s 2 )(9 <strong>to</strong> 200 Hz) sinusoidalMax. 100 m/s 2 (330 ft./s 2 ),11 ms100 mm (4 in.) for weigh<strong>to</strong>ver 100 kg (220 lb)Technical data
133MaterialsCabinet Hot-dip zinc coated 1.5 mm thick steel sheet (thickness of coating approximately 20micrometres). Polyester thermosetting powder coating (thickness approximately 80micrometres) on visible surfaces. Colour RAL 7035 light beige semigloss.BusbarsTin-plated copperFire safety of materials Insulating materials and non-metallic items mostly self-extinctive(IEC 60332-1)PackageWood. Plastic covering of the package: PE-LD, bands PP or steel.DisposalThe drive contains raw materials that should be recycled <strong>to</strong> preserve energy and naturalresources. The package materials are environmentally compatible and recyclable. Allmetal parts can be recycled. The plastic parts can either be recycled or burned undercontrolled circumstances, according <strong>to</strong> local regulations. Most recyclable parts are markedwith recycling marks.If recycling is not feasible, all parts excluding electrolytic capaci<strong>to</strong>rs and printed circuitboards can be landfilled. The DC capaci<strong>to</strong>rs (C1-1 <strong>to</strong> C1-x) contain electrolyte and theprinted circuit boards contain lead, both of which are classified as hazardous waste withinthe EU. They must be removed and handled according <strong>to</strong> local regulations.For further information on environmental aspects and more detailed recycling instructions,please contact your local ABB distribu<strong>to</strong>r.Applicable standardsThe drive complies with the standards below. The compliance with the European LowVoltage Directive is verified according <strong>to</strong> standards <strong>EN</strong> 61800-5-1 and <strong>EN</strong> 60204-1.• <strong>EN</strong> 61800-5-1 (2003) Adjustable speed electrical power drive systems. Part 5-1: Safety requirements –electrical, thermal and energy• <strong>EN</strong> 60204-1 (2006) Safety of machinery. Electrical equipment of machines. Part 1: General requirements.Provisions for compliance: The final assembler of the machine is responsible for installingemergency-s<strong>to</strong>p device.• <strong>EN</strong> 60529: 1991 (IEC 529) Degrees of protection provided by enclosures (IP code)• IEC 60664-1 (20<strong>07</strong>) Insulation coordination for equipment within low-voltage systems. Part 1: Principles,requirements and tests.• <strong>EN</strong> 61800-3 (2004) Adjustible speed electrical power drive systems. Part 3: EMC requirements and specifictest methods• UL 508C (2002)UL Standard for Safety, Power Conversion Equipment, second edition• UL 508AUL Standard for Industrial Control Panels, first edition• NEMA 250 (2003)Enclosures for Electrical Equipment (1000 Volts Maximum)• CSA C22.2 No. 14-05 Industrial control equipment(2005)Technical data
134US patentsThis product is protected by one or more of the following US patents:4,920,306 5,301,085 5,463,302 5,521,483 5,532,568 5,589,75<strong>45</strong>,612,604 5,654,624 5,799,805 5,940,286 5,942,874 5,952,6136,094,364 6,147,887 6,175,256 6,184,740 6,195,274 6,229,3566,252,436 6,265,724 6,305,464 6,313,599 6,316,896 6,335,6<strong>07</strong>6,370,049 6,396,236 6,448,735 6,498,<strong>45</strong>2 6,552,510 6,597,1486,600,290 6,741,059 6,774,758 6,844,794 6,856,502 6,859,3746,922,883 6,940,253 6,934,169 6,956,352 6,958,923 6,967,<strong>45</strong>36,972,976 6,977,449 6,984,958 6,985,371 6,992,908 6,999,3297,023,160 7,034,510 7,036,223 7,0<strong>45</strong>,987 7,057,908 7,059,39<strong>07</strong>,067,997 7,082,374 7,084,604 7,098,623 7,102,325 7,109,78<strong>07</strong>,164,562 7,176,779 7,190,599 7,215,099 7,221,152 7,227,3257,2<strong>45</strong>,197 7,250,739 7,262,577 7,271,505 7,274,573 7,279,8027,280,938 7,330,095 7,349,814 7,352,220 7,365,622 7,372,6967,388,765 D503,931 D510,319 D510,320 D511,137 D511,150D512,026 D512,696 D521,466 D541,743S D541,744S D541,7<strong>45</strong>SD548,182S D548,183STechnical data
135CE markingA CE mark is attached <strong>to</strong> the drive <strong>to</strong> verify that the unit follows the provisions of the European LowVoltage and EMC Directives (Directive 73/23/EEC, as amended by 93/68/EEC and Directive 89/336/EEC, as amended by 2004/108EC).DefinitionsEMC stands for Electromagnetic Compatibility. It is the ability of electrical/electronic equipment <strong>to</strong>operate without problems within an electromagnetic environment. Likewise, the equipment must notdisturb or interfere with any other product or system within its locality.First environment includes establishments connected <strong>to</strong> a low-voltage network which supplies buildingsused for domestic purposes.Second environment includes establishments connected <strong>to</strong> a network not supplying domestic premises.Drive of category C2: drive of rated voltage less than 1000 V and intended <strong>to</strong> be installed andcommissioned only by a professional when used in the first environment. Note: A professional is aperson or organisation having necessary skills in installing and/or commissioning power drive systems,including their EMC aspects.Drive of category C3: drive of rated voltage less than 1000 V and intended for use in the secondenvironment and not intended for use in the first environment.Drive of category C4: drive of rated voltage equal <strong>to</strong> or above 1000 V, or rated current equal <strong>to</strong> or above400 A, or intended for use in complex systems in the second environment.Compliance with the EMC DirectiveThe EMC Directive defines the requirements for immunity and emissions of electrical equipment usedwithin the European Union. The EMC product standard [<strong>EN</strong> 61800-3 (2004)] covers requirementsstated for drives.Compliance with <strong>EN</strong> 61800-3 (2004)First environment (drive of category C2)The drive complies with the standard with the following provisions:1. The drive is equipped with EMC filter E202.2. The mo<strong>to</strong>r and control cables are selected as specified in the <strong>Hardware</strong> <strong>Manual</strong>.3. The drive is installed according <strong>to</strong> the instructions given in the <strong>Hardware</strong> <strong>Manual</strong>.4. Maximum cable length is 100 metres.WARNING! The drive may cause radio interference if used in a residential or domestic environment.The user is required <strong>to</strong> take measures <strong>to</strong> prevent interference, in addition <strong>to</strong> the requirements for CEcompliance listed above, if necessary.Note: It is not allowed <strong>to</strong> install a drive equipped with EMC filter E202 on IT (unearthed) systems. Thesupply network becomes connected <strong>to</strong> earth potential through the EMC filter capaci<strong>to</strong>rs which maycause danger or damage the unit.Technical data
136Second environment (drive of category C3)The drive complies with the standard with the following provisions:1. The drive is equipped with EMC filter E200 [suitable for TN (earthed) systems] or E210 [suitable forTN (earthed) and IT (unearthed) systems].2. The mo<strong>to</strong>r and control cables are selected as specified in the <strong>Hardware</strong> <strong>Manual</strong>.3. The drive is installed according <strong>to</strong> the instructions given in the <strong>Hardware</strong> <strong>Manual</strong>.4. Maximum cable length is 100 metres.WARNING! A drive of category C3 is not intended <strong>to</strong> be used on a low-voltage public network whichsupplies domestic premises. Radio frequency interference is expected if the drive is used on such anetwork.Second environment (drive of category C4)If the provisions under Second environment (drive of category C3) cannot be met, the requirements ofthe standard can be met as follows:1. It is ensured that no excessive emission is propagated <strong>to</strong> neighbouring low-voltage networks. Insome cases, the natural suppression in transformers and cables is sufficient. If in doubt, the supplytransformer with static screening between the primary and secondary windings can be used.Medium voltage networkSupply transformerNeighbouring networkStatic screenPoint of measurementLow voltageEquipment(victim)Low voltageDriveEquipmentEquipment2. An EMC plan for preventing disturbances is drawn up for the installation. A template is availablefrom the local ABB representative.3. The mo<strong>to</strong>r and control cables are selected as specified in the <strong>Hardware</strong> <strong>Manual</strong>.4. The drive is installed according <strong>to</strong> the instructions given in the <strong>Hardware</strong> <strong>Manual</strong>.WARNING! A drive of category C4 is not intended <strong>to</strong> be used on a low-voltage public network whichsupplies domestic premises. Radio frequency interference is expected if the drive is used on such anetwork.Machinery DirectiveThe drive complies with the European Union Machinery Directive (98/37/EC) requirements for anequipment intended <strong>to</strong> be incorporated in<strong>to</strong> machinery.Technical data
137“C-tick” marking“C-tick” marking is required in Australia and New Zealand. A “C-tick” mark is attached <strong>to</strong> each drive inorder <strong>to</strong> verify compliance with the relevant standard (IEC 61800-3 (2004) – Adjustable speed electricalpower drive systems – Part 3: EMC product standard including specific test methods), mandated by theTrans-Tasman Electromagnetic Compatibility Scheme.DefinitionsEMC stands for Electromagnetic Compatibility. It is the ability of electrical/electronic equipment <strong>to</strong>operate without problems within an electromagnetic environment. Likewise, the equipment must notdisturb or interfere with any other product or system within its locality.The Trans-Tasman Electromagnetic Compatibility Scheme (EMCS) was introduced by the AustralianCommunication Authority (ACA) and the Radio Spectrum Management Group (RSM) of the NewZealand Ministry of Economic Development (NZMED) in November 2001. The aim of the scheme is <strong>to</strong>protect the radio frequency spectrum by introducing technical limits for emission from electrical/electronic products.First environment includes establishments connected <strong>to</strong> a low-voltage network which supplies buildingsused for domestic purposes.Second environment includes establishments connected <strong>to</strong> a network not supplying domestic premises.Drive of category C2: drive of rated voltage less than 1000 V and intended <strong>to</strong> be installed andcommissioned only by a professional when used in the first environment. Note: A professional is aperson or organisation having necessary skills in installing and/or commissioning power drive systems,including their EMC aspects.Drive of category C3: drive of rated voltage less than 1000 V and intended for use in the secondenvironment and not intended for use in the first environment.Drive of category C4: drive of rated voltage equal <strong>to</strong> or above 1000 V, or rated current equal <strong>to</strong> or above400 A, or intended for use in complex systems in the second environment.Compliance with IEC 61800-3First environment (drive of category C2)The drive complies with the limits of IEC 61800-3 with the following provisions:1. The drive is equipped with EMC filter E202.2. The drive is installed according <strong>to</strong> the instructions given in the <strong>Hardware</strong> <strong>Manual</strong>.3. The mo<strong>to</strong>r and control cables used are selected as specified in the <strong>Hardware</strong> <strong>Manual</strong>.4. Maximum cable length is 100 metres.WARNING! The drive may cause radio interference if used in a residential or domestic environment.The user is required <strong>to</strong> take measures <strong>to</strong> prevent interference, in addition <strong>to</strong> the requirements for CEcompliance listed above, if necessary.Note: The drive must not be equipped with the EMC filter E202 when installed <strong>to</strong> IT (unearthed)systems. The mains becomes connected <strong>to</strong> earth potential through the EMC filter capaci<strong>to</strong>rs. In ITsystems this may cause danger or damage the unit.Technical data
138Second environment (drive of category C3)The drive complies with the standard with the following provisions:1. The drive is equipped with EMC filter E200 [suitable for TN (earthed) systems] or E210 [suitable forTN (earthed) and IT (unearthed) systems].2. The mo<strong>to</strong>r and control cables are selected as specified in the <strong>Hardware</strong> <strong>Manual</strong>.3. The drive is installed according <strong>to</strong> the instructions given in the <strong>Hardware</strong> <strong>Manual</strong>.4. Maximum cable length is 100 metres.WARNING! A drive of category C3 is not intended <strong>to</strong> be used on a low-voltage public network whichsupplies domestic premises. Radio frequency interference is expected if the drive is used on such anetwork.Second environment (drive of category C4)If the provisions under Second environment (drive of category C3) cannot be met, the requirements ofthe standard can be met as follows:1. It is ensured that no excessive emission is propagated <strong>to</strong> neighbouring low-voltage networks. Insome cases, the natural suppression in transformers and cables is sufficient. If in doubt, the supplytransformer with static screening between the primary and secondary windings is stronglyrecommended.Medium voltage networkSupply transformerNeighbouring networkStatic screenPoint of measurementLow voltageEquipment(victim)Low voltageDriveEquipmentEquipment2. An EMC plan for preventing disturbances is drawn up for the installation. A template is availablefrom the local ABB representative.3. The drive is installed according <strong>to</strong> the instructions given in the <strong>Hardware</strong> <strong>Manual</strong>.4. The mo<strong>to</strong>r and control cables used are selected as specified in the <strong>Hardware</strong> <strong>Manual</strong>.WARNING! A drive of category C4 is not intended <strong>to</strong> be used on a low-voltage public network whichsupplies domestic premises. Radio frequency interference is expected if the drive is used on such anetwork.Technical data
139UL/CSA markingsThe <strong>ACS800</strong>-<strong>U7</strong> and the <strong>ACS800</strong>-<strong>07</strong>+C129 are C-UL US listed. The <strong>ACS800</strong>-<strong>07</strong>+C134 is CSAmarked. The approvals are valid with rated voltages (up <strong>to</strong> 600 V).The drive is suitable for use on a circuit capable of delivering not more than 100,000 rms symmetricalamperes at the drive nominal voltage (600 V maximum for 690 V units) when protected by fuses givenin the NEMA data fuse table. The ampere rating is based on tests done according <strong>to</strong> UL 508A.The drive provides overload protection in accordance with the National Electrical Code (US) andCanadian Electrical Code (Canada). See <strong>ACS800</strong> Firmware <strong>Manual</strong> for setting. Default setting is off;the setting must be activated at start-up.The drives are <strong>to</strong> be used in a heated indoor controlled environment. See section Ambient conditionsfor specific limits.ABB brake choppers, when applied with appropriately sized brake resis<strong>to</strong>rs, will allow the drive <strong>to</strong>dissipate regenerative energy (normally associated with quickly decelerating a mo<strong>to</strong>r). Properapplication of the brake chopper is defined in chapter Resis<strong>to</strong>r braking. This can be applied <strong>to</strong> a singledrive or multiple drives with DC bus connected <strong>to</strong> allow a sharing of regenerative energy.Equipment warranty and liabilityThe manufacturer warrants the equipment supplied against defects in design, materials andworkmanship for a period of twelve (12) months after installation or twenty-four (24) months from dateof manufacturing, whichever first occurs. The local ABB office or distribu<strong>to</strong>r may grant a warranty perioddifferent <strong>to</strong> the above and refer <strong>to</strong> local terms of liability as defined in the supply contract.The manufacturer is not responsible for• any costs resulting from a failure if the installation, commissioning, repair, alternation, or ambientconditions of the drive do not fulfil the requirements specified in the documentation delivered withthe unit and other relevant documentation.• units subjected <strong>to</strong> misuse, negligence or accident• units comprised of materials provided or designs stipulated by the purchaser.In no event shall the manufacturer, its suppliers or subcontrac<strong>to</strong>rs be liable for special, indirect,incidental or consequential damages, losses or penalties.If you have any questions concerning your ABB drive, please contact the local distribu<strong>to</strong>r or ABB office.The technical data, information and specifications are valid at the time of printing. The manufacturerreserves the right <strong>to</strong> modifications without prior notice.Technical data
140Technical data
141Dimensional drawingsExample dimensional drawings with dimensions in milllimetres and [inches] areshown below.See <strong>ACS800</strong>-<strong>07</strong>/<strong>U7</strong> Dimensional Drawings [3AFE 64775421 (English)] for• location of cable connection terminals• units with EMC filter, du/dt filter and brake resis<strong>to</strong>rs• marine units• US drawings.Dimensional drawings
142Frame sizes R5 and R664778340_1/5 KDimensional drawings
143Frame sizes R7 and R868749930_1/7 CDimensional drawings
144IP 54 and IP 54R units of frame sizes R7 and R868749930_6/6 CDimensional drawings
1<strong>45</strong>Resis<strong>to</strong>r brakingWhat this chapter containsThis chapter describes how <strong>to</strong> select, protect and wire brake choppers and resis<strong>to</strong>rs.The chapter also contains the technical data.Availability of brake choppers and resis<strong>to</strong>rsBrake choppers are optionally available as built-in units, indicated in the type codeby +D150.Resis<strong>to</strong>rs are available as add-on kits or fac<strong>to</strong>ry installed (+D151).How <strong>to</strong> select the correct drive/chopper/resis<strong>to</strong>r combination1. Calculate the maximum power (P max ) generated by the mo<strong>to</strong>r during braking.2. Select a suitable drive / brake chopper / brake resis<strong>to</strong>r combination for theapplication according <strong>to</strong> the following tables (take account of other fac<strong>to</strong>rs in thedrive selection also). The following condition must be met:P br > P maxwhereP brdenotes P br5 , P br10 , P br30 , P br60 , or P brcont depending on the duty cycle.3. Check the resis<strong>to</strong>r selection. The energy generated by the mo<strong>to</strong>r during a 400-second period must not exceed the resis<strong>to</strong>r heat dissipation capacity E R .If the E R value is not sufficient, it is possible <strong>to</strong> use a four-resis<strong>to</strong>r assembly in which two standardresis<strong>to</strong>rs are connected in parallel, two in series. The E R value of the four-resis<strong>to</strong>r assembly is fourtimes the value specified for the standard resis<strong>to</strong>r.Note: A resis<strong>to</strong>r other than the standard resis<strong>to</strong>r can be used provided that:• its resistance is not lower than the resistance of the standard resis<strong>to</strong>r.WARNING! Never use a brake resis<strong>to</strong>r with a resistance below the value specifiedfor the particular drive / brake chopper / resis<strong>to</strong>r combination. The drive and thechopper are not able <strong>to</strong> handle the overcurrent caused by the low resistance.Resis<strong>to</strong>r braking
146• the resistance does not restrict the braking capacity needed, i.e.,whereP max
147<strong>ACS800</strong>-<strong>07</strong>/<strong>U7</strong>type690 V unitsFramesizeBraking power of the chopper andthe drive5/60 s 10/60 s 30/60 sP br5(kW)P br10(kW)P br30(kW)P brcont(kW)Brake resis<strong>to</strong>r(s)-0<strong>07</strong>0-7 R6 - - - <strong>45</strong> SAFUR90F575 8.00 1800 4.5-0100-7 R6 - - - 55 SAFUR80F500 6.00 2400 6-0120-7 R6 - - - 75 SAFUR80F500 6.00 2400 6-01<strong>45</strong>-7 R6 - - - 160 SAFUR80F500 6.00 2400 6-0175-7 R6 - - - 160 SAFUR80F500 6.00 2400 6-0205-7 R6 - - - 160 SAFUR80F500 6.00 2400 6-0260-7 R7 135 5) 120 100 80 SAFUR80F500 6.00 2400 6-0320-7 R8 300 300 300 260 SAFUR200F500 2.70 5400 13.5-0400-7 R8 375 375 375 375 SAFUR200F500 2.70 5400 13.5-0440-7 R8 430 430 430 385 SAFUR200F500 2.70 5400 13.5-0490-7 R8 550 400 315 225 2xSAFUR125F500 2.00 7200 18-0550-7 R8 550 400 315 225 2xSAFUR125F500 2.00 7200 18-0610-7 R8 550 400 315 225 2xSAFUR125F500 2.00 7200 18TYPES BEING PHASED OUT400 V units-0<strong>07</strong>0-3 R6 - - - 68 SAFUR80F500 6 2400 6-0140-3 R7 135 135 100 80 SAFUR200F500 2.70 5400 13.5-0170-3 R7 165 150 100 80 SAFUR200F500 2.70 5400 13.5-0210-3 R7 165 150 100 80 SAFUR200F500 2.70 5400 13.5500 V units-0100-5 R6 - - - 83 SAFUR125F500 4 3600 9-0170-5* R7 165 132 2) 120 200 SAFUR200F500 2.7 5400 13.5-0210-5 R7 198 132 2) 120 80 SAFUR200F500 2.70 5400 13.5-0260-5 R7 198 1) 132 2) 120 80 SAFUR200F500 2.70 5400 13.5690 V units-0140-7 R7 125 5) 110 90 75 SAFUR80F500 6.00 2400 6-0170-7 R7 125 6) 110 90 75 SAFUR80F500 6.00 2400 6-0210-7 R7 125 6) 110 90 75 SAFUR80F500 6.00 2400 6PDM code 00096931-JTypeR(ohm)E R(kJ)P Rcont(kW)P br5 Maximum braking power of the drive with the specified resis<strong>to</strong>r(s). The drive and the chopper will withstand thisbraking power for 5 seconds per minute.P br10 The drive and the chopper will withstand this braking power for 10 seconds per minute.P br30 The drive and the chopper will withstand this braking power for 30 seconds per minute.P brcon The drive and the chopper will withstand this continuous braking power. The braking is considered continuous if thet braking time exceeds 30 s.Note: Check that the braking energy transmitted <strong>to</strong> the specified resis<strong>to</strong>r(s) in 400 seconds does not exceed E R .R Resistance value for the resis<strong>to</strong>r assembly. Note: This is also the minimum allowed resistance for the brakeresis<strong>to</strong>r.E R Short energy pulse that the resis<strong>to</strong>r assembly withstands every 400 seconds. This energy will heat the resis<strong>to</strong>relement from 40 °C (104 °F) <strong>to</strong> the maximum allowable temperature.P Rcont Continuous power (heat) dissipation of the resis<strong>to</strong>r when placed correctly. Energy E R dissipates in 400 seconds.* <strong>ACS800</strong>-0x types only** <strong>ACS800</strong>-Ux types only1) 240 kW possible if ambient temperature is below 33 °C (91 °F)Resis<strong>to</strong>r braking
1482)160 kW possible if ambient temperature is below 33 °C (91 °F)3)630 kW possible if ambient temperature is below 33 °C (91 °F)4) <strong>45</strong>0 kW possible if ambient temperature is below 33 °C (91 °F)5) 160 kW possible if ambient temperature is below 33 °C (91 °F)Combined braking cycles for R7:ExamplesP brmax 5 s or 10 sP br5 or P br10P br30No brakingP brcontmin. 30 s max 30 s min. 30 smax 30 smin. 30 st• After P br5 , P br10 or P br30 braking, the drive and the chopper will withstand P brcont continuously.• P br5 , P br10 or P br30 braking is allowed once every minute.• After P brcont braking, there has <strong>to</strong> be a pause of at least 30 seconds without any braking if the subsequent braking poweris greater than P brcont .• After P br5 or P br10 braking, the drive and the chopper will withstand P br30 within a <strong>to</strong>tal braking time of 30 seconds.• P br10 braking is not acceptable after P br5 braking.Combined braking cycles for R8:ExamplesP brP br5 , P br10 or P br30max 5 s, 10 s or 30 sP brcontNo brakingtmin. 60 smin. 60 s• After P br5 , P br10 or P br30 braking, the drive and the chopper will withstand P brcont continuously. (P brcont is the onlyallowed braking power after P br5 , P br10 or P br30 .)• P br5 , P br10 or P br30 braking is allowed once every minute.• After P brcont braking, there has <strong>to</strong> be a pause of at least 60 seconds without any braking if the subsequent braking poweris greater than P brcont .All braking resis<strong>to</strong>rs must be installed outside the converter module. The resis<strong>to</strong>rs are built in an IP 00 metal frame. The2xSAFUR and 4xSAFUR resis<strong>to</strong>rs are connected in parallel. Note: The SAFUR resis<strong>to</strong>rs are not UL listed.Resis<strong>to</strong>r braking
149Resis<strong>to</strong>r installation and wiringAll resis<strong>to</strong>rs must be installed outside the drive module in a place where they willcool.WARNING! The materials near the brake resis<strong>to</strong>r must be non-flammable. Thesurface temperature of the resis<strong>to</strong>r is high. Air flowing from the resis<strong>to</strong>r is ofhundreds of degrees Celsius. Protect the resis<strong>to</strong>r against contact.Use the cable type used for drive input cabling (refer <strong>to</strong> chapter Technical data) <strong>to</strong>ensure the input fuses will also protect the resis<strong>to</strong>r cable. Alternatively, twoconduc<strong>to</strong>rshielded cable with the same cross-sectional area can be used. Themaximum length of the resis<strong>to</strong>r cable(s) is 10 m (33 ft). For the connections, see thepower connection diagram of the drive.If ordered, the resis<strong>to</strong>rs are fac<strong>to</strong>ry installed in a cubicle(s) next <strong>to</strong> the drive cabinet.Protection of frame size R5It is highly recommended <strong>to</strong> equip the drive with a main contac<strong>to</strong>r for safety reasons.Wire the contac<strong>to</strong>r so that it opens in case the resis<strong>to</strong>r overheats. This is essentialfor safety since the drive will not otherwise be able <strong>to</strong> interrupt the main supply if thechopper remains conductive in a fault situation.Below is a simple example wiring diagram.L1 L2 L31FusesOFF213513324614ON4<strong>ACS800</strong>U1 V1 W1K1ΘThermal switch(standard in ABB resis<strong>to</strong>rs)Resis<strong>to</strong>r braking
150Protection of frame sizes R6, R7 and R8A main contac<strong>to</strong>r is not required for protecting against resis<strong>to</strong>r overheating when theresis<strong>to</strong>r is dimensioned according <strong>to</strong> the instructions and the internal brake chopperis in use. The drive will disable power flow through the input bridge if the chopperremains conductive in a fault situation. Note: If an external brake chopper (outsidethe drive module) is used, a main contac<strong>to</strong>r is always required.A thermal switch (standard in ABB resis<strong>to</strong>rs) is required for safety reasons. Thecable must be shielded and not longer than the resis<strong>to</strong>r cable.With Standard Control Program, wire the thermal switch as shown below. By default,the drive will s<strong>to</strong>p by coasting when the switch opens.Thermal switch(standard in ABB resis<strong>to</strong>rs)ΘRMIO:X22 or X2: X221 DI12 DI23 DI34 DI<strong>45</strong> DI56 DI67 +24VD8 +24VD9 DGND110 DGND211 DIILFor other control programs, the thermal switch may be wired <strong>to</strong> a different digitalinput. Programming of the input <strong>to</strong> trip the drive by “EXTERNAL FAULT” may beneeded. See the appropriate firmware manual.Brake circuit commissioningFor Standard Control Program:• Enable the brake chopper function (parameter 27.01).• Switch off the overvoltage control of the drive (parameter 20.05).• Check the resistance value setting (parameter 27.03).• Frame sizes R6, R7 and R8: Check the setting of parameter 21.09. If s<strong>to</strong>p bycoasting is required, select OFF2 STOP.For the use of the brake resis<strong>to</strong>r overload protection (parameters 27.02...27.05),consult an ABB representative.WARNING! If the drive is equipped with a brake chopper but the chopper is notenabled by parameter setting, the brake resis<strong>to</strong>r must be disconnected because theprotection against resis<strong>to</strong>r overheating is then not in use.For settings of other control programs, see the appropriate firmware manual.Resis<strong>to</strong>r braking
3AFE64702165 Rev G <strong>EN</strong>EFFECTIVE: 19.1.2009ABB OyAC DrivesP.O. Box 184FI-00381 HELSINKIFINLANDTelephone +358 10 22 11Fax +358 10 22 22681Internet www.abb.comABB Inc.Au<strong>to</strong>mation TechnologiesDrives & Mo<strong>to</strong>rs16250 West Glendale DriveNew Berlin, WI 53151USATelephone 262 785-3200800-HELP-365Fax 262 780-5135ABB Beijing Drive Systems Co. Ltd.No. 1, Block D, A-10 Jiuxianqiao BeiluChaoyang DistrictBeijing, P.R. China, 100015Telephone +86 10 5821 7788Fax +86 10 5821 7618Internet www.abb.com