

Micra ADJ Layout - Aberdeen Watersports
Micra ADJ Layout - Aberdeen Watersports
Micra ADJ Layout - Aberdeen Watersports

You also want an ePaper? Increase the reach of your titles
YUMPU automatically turns print PDFs into web optimized ePapers that Google loves.
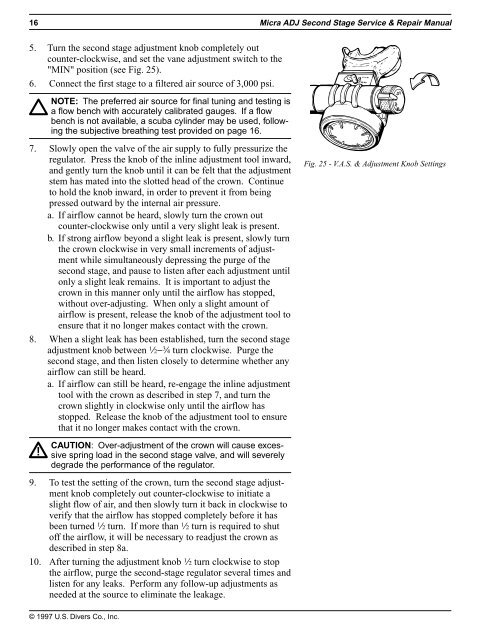
16 <strong>Micra</strong> <strong>ADJ</strong> Second Stage Service & Repair Manual5. Turn the second stage adjustment knob completely outcounter-clockwise, and set the vane adjustment switch to the"MIN" position (see Fig. 25).6. Connect the first stage to a filtered air source of 3,000 psi.NOTE: The preferred air source for final tuning and testing isa flow bench with accurately calibrated gauges. If a flowbench is not available, a scuba cylinder may be used, followingthe subjective breathing test provided on page 16.7. Slowly open the valve of the air supply to fully pressurize theregulator. Press the knob of the inline adjustment tool inward,and gently turn the knob until it can be felt that the adjustmentstem has mated into the slotted head of the crown. Continueto hold the knob inward, in order to prevent it from beingpressed outward by the internal air pressure.a. If airflow cannot be heard, slowly turn the crown outcounter-clockwise only until a very slight leak is present.b. If strong airflow beyond a slight leak is present, slowly turnthe crown clockwise in very small increments of adjustmentwhile simultaneously depressing the purge of thesecond stage, and pause to listen after each adjustment untilonly a slight leak remains. It is important to adjust thecrown in this manner only until the airflow has stopped,without over-adjusting. When only a slight amount ofairflow is present, release the knob of the adjustment tool toensure that it no longer makes contact with the crown.8. When a slight leak has been established, turn the second stageadjustment knob between 2-w turn clockwise. Purge thesecond stage, and then listen closely to determine whether anyairflow can still be heard.a. If airflow can still be heard, re-engage the inline adjustmenttool with the crown as described in step 7, and turn thecrown slightly in clockwise only until the airflow hasstopped. Release the knob of the adjustment tool to ensurethat it no longer makes contact with the crown.Fig. 25 - V.A.S. & Adjustment Knob SettingsCAUTION: Over-adjustment of the crown will cause excessivespring load in the second stage valve, and will severelydegrade the performance of the regulator.9. To test the setting of the crown, turn the second stage adjustmentknob completely out counter-clockwise to initiate aslight flow of air, and then slowly turn it back in clockwise toverify that the airflow has stopped completely before it hasbeen turned 2 turn. If more than 2 turn is required to shutoff the airflow, it will be necessary to readjust the crown asdescribed in step 8a.10. After turning the adjustment knob 2 turn clockwise to stopthe airflow, purge the second-stage regulator several times andlisten for any leaks. Perform any follow-up adjustments asneeded at the source to eliminate the leakage.© 1997 U.S. Divers Co., Inc.


