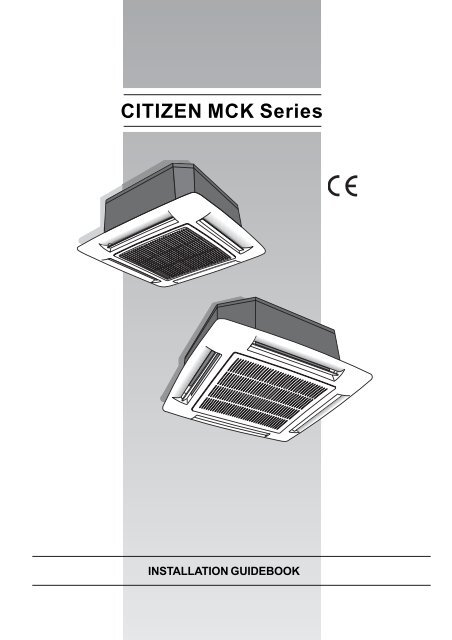
CITIZEN MCK Series - Intax.ro
CITIZEN MCK Series - Intax.ro CITIZEN MCK Series - Intax.ro
- Page 2 and 3: IndexDimensions and weight………
- Page 4 and 5: Cassette Fan Coil Installation Guid
- Page 6 and 7: Cassette Fan Coil Installation Guid
- Page 8 and 9: Cassette Fan Coil Installation Guid
- Page 10 and 11: Cassette Fan Coil Installation Guid
- Page 12 and 13: Cassette Fan Coil Installation Guid
- Page 14 and 15: Cassette Fan Coil Installation Guid
- Page 16 and 17: Cassette Fan Coil Installation Guid
<st<strong>ro</strong>ng>CITIZEN</st<strong>ro</strong>ng> <st<strong>ro</strong>ng>MCK</st<strong>ro</strong>ng> <st<strong>ro</strong>ng>Series</st<strong>ro</strong>ng>INSTALLATION GUIDEBOOK
IndexDimensions and weight………………………………………………………….1Physical data……………………………………………………………………..2Electrical data……………………………………………………………………2Operating limits………………………………………………………………….3Warning avoid……………………………………………………………………3Installation………………………………………………………………………..6Water connection…………………………………………………………………7Electrical connections……………………………………………………………8Cont<strong>ro</strong>l……………………………………………………………………………8Wiring diagram…………………………………………………………………...9Maintenance……………………………………………………………………..10
Cassette Fan Coil Installation Guide BookInstallation InstructionDimensions and weightsTechnical dataTable I Nominal dataModelFan Motor CoilType Qty Type Qty Power input(w) Current input(A) Water flow(l/s) Pressure d<strong>ro</strong>p(Kpa)<st<strong>ro</strong>ng>MCK</st<strong>ro</strong>ng>200 Forward 1 PSC(Permanet 1 35 0.16 0.178 28<st<strong>ro</strong>ng>MCK</st<strong>ro</strong>ng>300 slope 1 <st<strong>ro</strong>ng>Series</st<strong>ro</strong>ng> 1 40 0.18 0.238 49<st<strong>ro</strong>ng>MCK</st<strong>ro</strong>ng>400 multi-wings 2 Capacitor) 1 50 0.22 0.28 82<st<strong>ro</strong>ng>MCK</st<strong>ro</strong>ng>600 centrifugal 2 1 105 0.45 0.326 111<st<strong>ro</strong>ng>MCK</st<strong>ro</strong>ng>800 type 4 2 115 0.51 0.344 38<st<strong>ro</strong>ng>MCK</st<strong>ro</strong>ng>1000 4 2 155 0.68 0.399 81<st<strong>ro</strong>ng>MCK</st<strong>ro</strong>ng>120042 210 0.92 0.454 65ModelCapacity(Kw) Air Volume m 3 /hCooling Heating High Medium LowNoise (dB(A))<st<strong>ro</strong>ng>MCK</st<strong>ro</strong>ng>200 2 3 350 260 220 20<st<strong>ro</strong>ng>MCK</st<strong>ro</strong>ng>300 2.8 4.2 500 450 330 22<st<strong>ro</strong>ng>MCK</st<strong>ro</strong>ng>400 3.5 5.25 710 620 540 25<st<strong>ro</strong>ng>MCK</st<strong>ro</strong>ng>600 5.5 8.25 1020 840 660 26<st<strong>ro</strong>ng>MCK</st<strong>ro</strong>ng>800 6.6 9.9 1250 950 720 27<st<strong>ro</strong>ng>MCK</st<strong>ro</strong>ng>1000 8.5 12.75 1600 1250 900 30<st<strong>ro</strong>ng>MCK</st<strong>ro</strong>ng>1200 11 16.5 2000 1600 1320 301
Cassette Fan Coil Installation Guide BookTable II: Dimension mmPlate dimension Unit dimension Suspended install dimensionA B L S H K<st<strong>ro</strong>ng>MCK</st<strong>ro</strong>ng>200 650 650 580 580 612 612<st<strong>ro</strong>ng>MCK</st<strong>ro</strong>ng>300 650 650 580 580 612 612<st<strong>ro</strong>ng>MCK</st<strong>ro</strong>ng>400 800 800 670 670 618 618<st<strong>ro</strong>ng>MCK</st<strong>ro</strong>ng>600 800 800 670 670 618 618<st<strong>ro</strong>ng>MCK</st<strong>ro</strong>ng>800 950 950 832 832 810 810<st<strong>ro</strong>ng>MCK</st<strong>ro</strong>ng>1000 950 950 832 832 810 810<st<strong>ro</strong>ng>MCK</st<strong>ro</strong>ng>1200 950 950 832 832 810 810Table III: Wire section of connecting cable mm 2MODEL L/R N/C<st<strong>ro</strong>ng>MCK</st<strong>ro</strong>ng>200 1 1<st<strong>ro</strong>ng>MCK</st<strong>ro</strong>ng>300 1 1<st<strong>ro</strong>ng>MCK</st<strong>ro</strong>ng>400 1 1<st<strong>ro</strong>ng>MCK</st<strong>ro</strong>ng>600 1 1<st<strong>ro</strong>ng>MCK</st<strong>ro</strong>ng>800 1 1<st<strong>ro</strong>ng>MCK</st<strong>ro</strong>ng>1000 1 1<st<strong>ro</strong>ng>MCK</st<strong>ro</strong>ng>1200 1 1• The power cable to the electrical heaters must be type H07 RN-F.• The unit power cable must be type H07 RN-F.Table III: Operating limitsWater circuit Water- side maximum pressure Minimum entering water temperature: + 4℃Room air1400 kPa (142 m w.c.) Maximum entering water temperature: + 65℃Minimum temperature: 5℃ (1)Maximum temperature 32℃Power supply Nominal single phase voltage 230V ~ 50 Hz 60Hz Special Export MarketOperating voltage limits min. 198V - max. 264V min. 187V – max. 253VNominal three phase voltage 400V 3N~ - 50 HzOperating voltage limits min. 342V – max. 462VNotes: If the <strong>ro</strong>om temperature can go down to 0C, it is advisable to empty the water circuit toavoid damage caused by ice.2
Cassette Fan Coil Installation Guide BookUnit installationRead this instruction manual tho<strong>ro</strong>ughly before starting installation.• The installation should be carried out by a qualified installer.• Follow all current national safety code requirements. In particular ensure that a p<strong>ro</strong>perly sizedand connected g<strong>ro</strong>und wire is in place.• Check that the voltage and frequency of the mains power supply are as required for the unit to beinstalled; the available power source must be adequate to operate all other appliances connectedto the same line. Also ensure that national safety code requirements have been followed for themain supply circuit.• Where necessary, use field-supplied 25 mm I.D. PVC pipe of app<strong>ro</strong>priate length and with thecorrect thermal insulation for the condensate drain extension.• After installation tho<strong>ro</strong>ughly test system operation and explain all system functions to the owner.• Use this unit only for factory app<strong>ro</strong>ved applications: the unit cannot be used in laundry or steampressing premises.WARNING: Disconnect the mains power supply switch before servicing the system orhandling any internal parts of the unit.• The manufacturer declines any liability for damage resulting f<strong>ro</strong>m modifications or er<strong>ro</strong>rs in theelectrical or water connections.Failure to observe the installation instructions, or use of the unit under conditions other thanthose indicated in Table "Operating limits" of the unit installation manual, will immediatelyinvalidate the unit warranty.• Failure to observe electric safety codes may cause a fire hazard in the event of short circuits.• Inspect equipment for damage during transport. In case of damage file an immediate claim withthe shipping company. Do not install or use damaged units.• In case of malfunction turn the unit off, disconnect the mains power supply and contact aqualified service engineer.• Maintenance must only be carried out by qualified personnel.Choosing the installation sitePositions to avoid:• Exposure to direct sunlight.• Areas close to heat sources.• On damp walls or in positions that may be exposed to water hazard.• Where curtains or furniture may obstruct free air circulation.Recommendations:• Choose an area free f<strong>ro</strong>m obstructions which may cause uneven air distribution and/or return.• Consider using an area where installation is easy.• Choose a position that allows for the clearances required.• Look for a position in the <strong>ro</strong>om which ensures the best possible air distribution.• Install unit in a position where condensate can easily be piped to an app<strong>ro</strong>priate drain.3
Cassette Fan Coil Installation Guide BookAvoid…... any obstruction of the unit air intake or supply grilles.... exposure to oil vapours.... installation in areas with high frequency waves.... ascending sections of condensate drain piping. These may only be used near the unit with amaximum height difference of 200 mm f<strong>ro</strong>m the top of the unit.4
Cassette Fan Coil Installation Guide Book... horizontal sections or curves of condensate drain piping with less than 2% slope.... exposure to direct sunshine, when the unit is operating in the cooling mode; always use shuttersor shades.... positions too close to heating sources which may damage the unit... connecting condensate piping to sewage system drain without app<strong>ro</strong>priate trap. Trap heightmust be calculated according to the unit discharge head in order to allow sufficient and continuouswater evacuation.5
Cassette Fan Coil Installation Guide Book... only partial insulation of the piping. Non-level installation which will cause condensatedripping.... flattening or kinking the refrigerant pipes or condensate pipes....slack on electrical connections.6
Cassette Fan Coil Installation Guide BookInstallation•Install the unit as centrally as possible in the <strong>ro</strong>om, the air flow direction can be cont<strong>ro</strong>lled bymanually regulating the louvers position, according to the operating mode (cooling or heating):this will ensure optimum distribution of the air in the <strong>ro</strong>om.•During cooling mode operation the best position for the deflecting louvres is one which allowsair diffusion close to the ceiling. In heating mode, the louvres should be positioned so that the airis directed towards the floor, in order to prevent layers of hot air forming in the upper part of the<strong>ro</strong>om.•In order to allow easy and rapid installation and maintenance, make sure that in the selectedposition it is possible to remove the ceiling panels or, if the ceiling is constructed of masonry,that access to the unit is guaranteed.Prior to installationIt is advisable to place the unit as close as possible to the installation site before removing it f<strong>ro</strong>mthe packaging. The grille panel and the cont<strong>ro</strong>l are separately packed for maximum p<strong>ro</strong>tection.7
Cassette Fan Coil Installation Guide BookInstallationMark the position of the hangers, connection lines and condensate drain pipe, power supply cablesand remote cont<strong>ro</strong>l cable (see dimensions); the cardboard template (supplied with the kit) maybeof assistance for this operation. Depending on the type of ceiling the hangers can be fixed asshown in the drawing.Once the threaded hangers have been positioned, do not tighten the nuts, and insert the washers asshown in the drawing.First position the connection lines , as described in the chapter "Water connections". Remove the"T" bar in order to facilitate installation operations.8
Cassette Fan Coil Installation Guide BookCarefully lift the unit (without the frame) using the four suspension brackets (or the four corners),inserting it into the false ceiling. If the "T" bar cannot be removed the unit may need to be tilted(this operation may only be carried out with false ceilings with a minimum height of 300 mm).Align and level the unit by adjusting the nuts and locknuts on the threaded hangers, maintaining adistance of 25 -30 mm between the sheet metal body and the underside of the false ceiling.Reposition the "T" bar and align the unit in relation to the bar by tightening the nuts and locknuts.After connection of the condensate drain line and the refrigerant lines, carry out a final check tomake sure that the unit is level.9
Cassette Fan Coil Installation Guide BookCondensate drain pipe•To ensure correct condensate water flow, the drain pipe should have a gradient of 2% withoutobstructions. Further more an odour trap of at least 50 mm depth should be made to preventunpleasant odours f<strong>ro</strong>m reaching the <strong>ro</strong>om.•Condensate may be discharged at a maximum height of 200 mm above the unit, as long as theascending tube is vertical and aligned with the drainage flange.•If it is necessary to discharge the condensate f<strong>ro</strong>m a level above 200 mm, install an auxiliarywater discharge pump and float valve. A float valve is recommended to stop the flow switch ifthere is a fault at the auxiliary pump.•The condensate pipe must be insulated with a condensation-p<strong>ro</strong>of material such as polyurethane,p<strong>ro</strong>pylene or neoprene of 5 to 10 mm thickness.•If more than one unit is installed in the <strong>ro</strong>om, the drain system can be made as shown in thedrawing.10
Cassette Fan Coil Installation Guide BookEnsure that the frame is not distorted by excessive tightening; that it is aligned with the falseceiling and above all that there is a seal between the air inlet and outlet. In the drawing gasket "A"prevents return air f<strong>ro</strong>m mixing with the supply air and gasket "B" prevents the supply air f<strong>ro</strong>mleaking into the ceiling void. On completion, the gap between the unit frame and the false ceilingmust not be more than 5 mm.It is necessary, when the installation is made, to insulate the valve and the connection pipes withanti-condensate material of polyethylene type or expanded neoprene.CheckingBefore unit operation pour a quantity of water into the external auxiliary drain pan. Verify that thewater flows into the internal condensate drain pan and that the pump regularly drains the liquid.Otherwise check the pipe slope and look for possible obstructions. Water connections are fixed tothe unit body to avoid damage when pipes are connected; it is advisable to tighten theconnection with a spanner.Motorized valve and cont<strong>ro</strong>lWARNING :The valve is not only necessary to cont<strong>ro</strong>l the <strong>ro</strong>om temperature, but also tostop the cold water flow to the coil in case of an abnormal condensing water level rise in thedrain pan.If there is an abnormal condensing water rise in the drain pan (for example: possible defectivedrain, pump malfunction, fan motor not working) causing the opening of the float switch contact(FS), the cont<strong>ro</strong>l circuit either operates the condensate drain pump, or at the same time closes theregulating valve, stopping the cold water flow towards the coil and avoiding further condensation.11
Cassette Fan Coil Installation Guide BookCont<strong>ro</strong>lThe water flow has to be cont<strong>ro</strong>lled:• by installing the motorized thermo-electric valves supplied as accessoryOr• by installing motorized field supplied valves.Operation of the thermo-electric valve• This 3-way valve is an ON-OFF type with a very slow st<strong>ro</strong>ke. It is not a modulating valve so ithas no PTC. This valve is driven, as a sensible element, by the ambient thermostat of the“cassette” unit.•The thermo-electric valve is normally closed towards the coil and open towards the by pass.When the <strong>ro</strong>om temperature does not satisfy the thermostat, an electric heater activates theheating of a thermostatic element which causes the down-st<strong>ro</strong>ke of the piston; the valve opensafter about 3 minutes about to allow water to circulate in the coil.•If the <strong>ro</strong>om temperature satisfies the thermostat or if the electric power has been switched off, thevalve is closed after about 3 minutes towards the coil and is opened towards the by pass.•If an emergency occurs, the valve may be manually opened, removing the electric head,unscrewing the ring nut.When the emergency ends, remember to reset the valve to automatic operation,repositioning the electric head; failure to do this can result in condensate formation duethe water pipes, even if the unit is switched off.Instructions for field supplied valvesWater connection•Install valves following manufacturer's instructions; refer to the relevant figures for connection to12
Cassette Fan Coil Installation Guide Bookthe unit.•Carefully insulate pipes, valve assemblies and coil connections (cold water side) to avoidcondensation forming on the pipes and dripping on the false ceiling.Electrical wiring•Connect the <strong>ro</strong>om cont<strong>ro</strong>l following instructions for the cont<strong>ro</strong>l used.WARNING: Pass cables th<strong>ro</strong>ugh the cont<strong>ro</strong>l panel cable-conduit.• Connect valves as per the following instructions, using the wiring diagram in this chapter.• Valves, closing the unit water inlet when there is no power supply, must be used.FM fan motorC capacitorSM Condensate water pumpSW Water level switcherMaintenance and owner's guideMaintenanceCleaning and maintenance operations must be carried out by specially trained personnel.Before performing any service or maintenance operations, turn OFF the main power switch.To open the unit grille:13
Cassette Fan Coil Installation Guide BookFilter cleaningClean filters in accordance with the actual operating conditions and times (app<strong>ro</strong>ximately every 6months).• The acrylic air filter is washable in water.Elect<strong>ro</strong>static and active carbon filters (which can be used on the unit) are not washable but mustbe replaced.First vacuum clean the filter, then wash under tap water and finally dry.Replace the filter in the correct position.P<strong>ro</strong>longed shutdown:•Before starting the air conditioner:-clean or replace the unit air filters.-check and clean the drain pan and the condensate discharge of the unit-check tightness of electric connections.14
Cassette Fan Coil Installation Guide BookAdditional maintenanceThe electric panel is easily accessible by removing the cover panel.The inspection or replacement of internal components such as: fan motor, coil, condensatedischarge pump, float switch, electric heater (if fitted), involve the removal of the condensatedrain pan.Condensate drain pan removal•During the removal operation of the condensate drain pan p<strong>ro</strong>tect the floor with a plastic sheetunder the unit.•Remove the frame-grille assembly by loosening the screws; drain the condensate water containedin the drain pan into a bucket of at least 10 liters capacity, using the special drain with a rubberplug.•Remove the electrical panel cover and disconnect the electric connections, connectors CV, CG,CP and the yellow-green g<strong>ro</strong>und wire (see drawing in “electrical connections” section).Remove the four fixing screws on the side of the drain pan and carefully remove the condensatedrain pan.Guide for the ownerWhen installation and tests are completed instruct the Owner on the main operating modes of theair conditioner, such as:• Turning the unit ON and OFF.• Changing the operation modes.• Temperature selection.• Leave the installation manual with the owner for future use during maintenance operations or forany other needs.15


