Section 2: Air Brakes - Virginia Department of Motor Vehicles
Section 2: Air Brakes - Virginia Department of Motor Vehicles
Section 2: Air Brakes - Virginia Department of Motor Vehicles

Create successful ePaper yourself
Turn your PDF publications into a flip-book with our unique Google optimized e-Paper software.
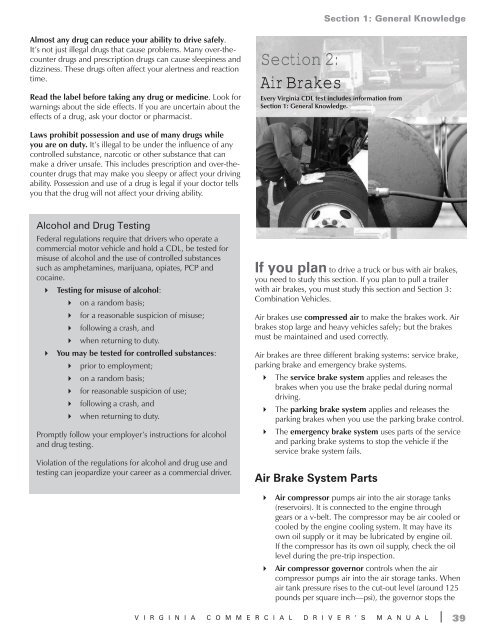
On large buses, the low pressure warning signal <strong>of</strong>tencomes on at 80-85 psi.Stop light switch turns on the brake lights when youput on the air brakes.Front brake limiting valves were used in vehicles madebefore 1975 to reduce the chance <strong>of</strong> the front wheelsskidding on slippery surfaces. Actually, the limitingvalves reduce the stopping power <strong>of</strong> the vehicle. Thecontrol is usually marked “normal” and “slippery.”When you put the control in the slippery position, thelimiting valve cuts the air pressure to the front brakes byhalf.Front wheel braking is good under all conditions. Testshave shown that front wheel skids from braking arenot likely even on ice. Make sure the control is in thenormal position so that you will have normal stoppingpower.Many vehicles have automatic front wheel limitingvalves. These valves reduce air to the front brakesexcept when the brakes are put on very hard (60 psior more application pressure). These valves cannot becontrolled by the driver.Spring brakes are used for emergency and parkingbrakes. Emergency and parking brakes must be held bya mechanical force because air pressure can leak away.When driving, powerful springs are held back by airpressure. If the air pressure is removed, the springs puton the brakes. A parking brake control in the cab allowsthe driver to let the air out <strong>of</strong> the spring brakes. This letsthe springs put on the brakes. A leak in the air brakesystem which causes all air to be lost will also cause thesprings to put on the brakes.Tractor and straight truck spring brakes will come onfully when air pressure drops to a range <strong>of</strong> 20 to 40 psi.Do not wait for the brakes to come on automatically.When the low air pressure warning light and buzzerfirst come on, bring the vehicle to a safe stop while youcan still control the brakes. The braking power <strong>of</strong> springbrakes depends on the brakes being in adjustment. Ifthe brakes are not adjusted right, the regular brakes andthe emergency/parking brakes will not work correctly.Parking brake controls. In newer vehicles with airbrakes, you put on the parking brakes with a diamondshaped, yellow, push-pull control knob. You pull theknob out to put on the parking brakes (spring brakes)and you push the knob in to release them. On oldervehicles, parking brakes may be controlled by a lever.Never push down the brake pedal when the springbrakes are on. The brakes could be damaged by thecombined force <strong>of</strong> the springs and air pressure.Modulating control valves may be used to applythe spring brakes gradually. A control handle on thedashboard is spring loaded so you have a feel for thebraking action. The more you move the control lever,the harder the brakes come on. This allows you tocontrol the spring brakes if the service brakes fail. Whenparking a vehicle with a modulating control valve, movethe lever as far as it will go and hold it in place with thelocking device.Dual parking control valves. If the main air pressure islost, the springs brakes come on. Some vehicles, suchas buses, have a separate air tank which can be used torelease the spring brakes. This allows you to move thevehicle in an emergency.One <strong>of</strong> the valves is a push-pull type and puts on the springbrakes for parking. The other valve is spring-loaded in the“out” position. When you push the control in, air from theseparate air tank releases the spring brakes so you can move.When you release the button, the spring brakes come onagain. There is only enough air in the separate tank to do thisa few times. So, plan carefully when moving.Use the parking brakes whenever you park.Dual <strong>Air</strong> Brake SystemsMost newer heavy-duty vehicles use dual air brake systemsfor safety. A dual air brake system has two separate air brakesystems which use a single set <strong>of</strong> controls. Each system hasits own air tank, hoses, lines, etc. One system operates theregular brakes on the rear axle or axles. The other systemoperates the regular brakes on the front axle and possiblyone rear axle. Both systems supply air to the trailer if there isone. The first system is called the primary system. The other iscalled the secondary system.Before driving a vehicle with a dual air system:<strong>Section</strong> 2: <strong>Air</strong> <strong>Brakes</strong>Allow time for the air compressor to build up aminimum <strong>of</strong> 100 psi pressure in both the primary andsecondary systems.Watch the primary and secondary air pressure gauges(or needles if the system has two needles in one gauge).Pay attention to the low-air warning light and buzzer.The warning light and buzzer should shut <strong>of</strong>f whenair pressure in both systems rises to a value set by themanufacturer. This value must be greater than 60 psi.The warning light and buzzer should come on beforethe air pressure drops below 60 psi in either system.If this happens, stop driving right away and park thevehicle.If one air system is low on pressure, either the front orrear brakes will not operate fully. This means it will takeyou longer to stop. Bring the vehicle to a safe stop andhave the air brake system fixed.V I R G I N I A C O M M E R C I A L D R I V E R ’ S M A N U A L | 41
<strong>Section</strong> 2: <strong>Air</strong> <strong>Brakes</strong>Inspecting <strong>Air</strong> Brake SystemsUse inspection method described in <strong>Section</strong> 1 to inspectyour vehicle. However, remember that there are more thingsto inspect on a vehicle with air brakes than on one withoutthem.Engine Compartment CheckCheck the air compressor drive belt if thecompressor is belt driven. Check the conditionand tightness <strong>of</strong> the belt.Walk-Around InspectionCheck the manual slack adjusters on the S-Cambrakes.Park on level ground and chock the wheels.Turn <strong>of</strong>f the parking brakes so you can move theslack adjusters.Use gloves and pull hard on each slack adjusterthat you can reach.If a slack adjuster moves more than aboutone inch where the push rod attaches to it, itprobably needs adjustment.Adjust it or have it adjusted. <strong>Vehicles</strong> with toomuch brake slack can be hard to stop. Out<strong>of</strong>-adjustmentbrakes are the most commonproblem found in roadside inspections.Check the brake drums (or discs), linings andhoses.Brake drums or discs cannot have cracks longerthan half the width <strong>of</strong> the friction area.Linings (friction material) cannot be loose,soaked with oil or grease. They cannot bedangerously thin.Mechanical parts must be in place and shouldnot be broken or missing.Check the air hoses connected to the brakechambers to make sure they are not cut or worndue to rubbing.Check the <strong>Air</strong> Brake System.Checking the air brake system is different from thehydraulic brake check shown in <strong>Section</strong> 1: GeneralKnowledge.Test the low pressure warning signal.Shut <strong>of</strong>f the engine when you have enoughair pressure so that the low pressure warningsignal is <strong>of</strong>f.Turn on the electrical power and step onand <strong>of</strong>f the brake pedal to reduce air tankpressure.The low air pressure warning signal mustcome on before the pressure drops to lessthan 60 psi in the air tank (or tank with thelowest air pressure in dual air systems).If the warning signal doesn’t work, you couldlose air pressure without knowing it. Thiscould cause sudden emergency braking.In dual systems, the stopping distance willbe increased. Only limited breaking can bedone before the spring brakes come on.Be sure that spring brakes come on automatically.Chock the wheels, release the parking brakeswhen you have enough air pressure and shut<strong>of</strong>f the engine.Step on and <strong>of</strong>f the brake pedal to reducethe air tank pressure.The parking brake knob should popout when the air pressure falls to themanufacturer’s specification (usuallybetween 20 and 40 psi). This causes thespring brakes to come on.Check the rate <strong>of</strong> air pressure build-up.When the engine is at operating RPM(check the manufacturer’s specifications todetermine the correct operating RPM), thepressure should build from 85 to 100 psiwithin 45 seconds in dual air systems.If the vehicle has larger than minimum airtanks, the buildup time can be longer. Checkthe manufacturer’s specifications. In single air systems (built before 1975),pressure typically builds from 50 to 90 psiwithin 3 minutes with the engine at an idlespeed <strong>of</strong> 600-900 RPM.If air pressure does not build fast enough,your pressure may drop too low duringdriving. This will require an emergency stop.Don’t drive until you get the problem fixed.Test the air leakage rate.When the air system is fully charged(between 120 and 125 psi), turn <strong>of</strong>f theengine, release the service brake and timethe air pressure drop. The loss rate shouldbe less than 2 psi in one minute for singlevehicles. It should be less than 3 psi in oneminute for combination vehicles.Apply 90 psi or more with the brake pedal.After the initial pressure drop, if air pressurefalls more than 3 psi in one minute for singlevehicles (4 psi for combination vehicles), theair loss rate is too high.Check for air leaks and fix them beforedriving or you could lose your brakes whiledriving.Check the air compressor governor cut-in andcut-out pressures. <strong>Air</strong> compressor pumping should start atabout 100 psi and stop at about 125 psi.42 | Check the manufacturer’s specifications.V I R G I N I A C O M M E R C I A L D R I V E R ’ S M A N U A L
<strong>Section</strong> 2: <strong>Air</strong> <strong>Brakes</strong>Run the engine at a fast idle. The airgovernor should cut out the air compressorat the manufacturer’s specified pressure. Theair pressure shown by your gauge(s) will stoprising.With the engine idling, step on and <strong>of</strong>fthe brake to reduce the air tank pressure.The compressor should cut in at themanufacturer’s specified cut-in pressure. Thepressure should begin to riseIf the air governor does not work asdescribed above, it may need to be repaired.A governor that does not work correctlymay not keep enough air pressure for safedriving.Test the parking brake.Stop the vehicle, put on the parking brake.Put the vehicle in low gear and gentlyrelease the clutch until you feel the vehiclepulling against the brake. The vehicle shouldnot move.Test the service brakes.Using <strong>Air</strong> <strong>Brakes</strong>To Brake NormallyWait for normal air pressure to build, releasethe parking brake, move the vehicle forwardslowly (about 5 mph) and apply the brakesfirmly using the brake pedal.Watch to see if the vehicle pulls to one side,feels unusual or stops slowly.This test can show you problems which youwould not know about until you used thebrakes on the road.Push down the brake pedal;Control the pressure so that the vehicle comes to asmooth, safe stop;If you have a manual transmission, don’t push in theclutch until the engine RPM is down close to idle;When stopped, select a starting gear.To Brake in an EmergencyBrake so that you keep your vehicle in a straight line.This will allow you to turn if it becomes necessary. Usethe controlled braking or stab braking method describedin <strong>Section</strong> 1: General Knowledge.Braking On DowngradesOn a long and steep downgrade, use your brakes only as asupplement to the braking effect <strong>of</strong> the engine.Apply the brakes just hard enough to feel a slowdown.When your speed is approximately 5 mph below yoursafe speed, release the brakes.When your speed has increased to your safe speed,repeat steps 1 and 2.Repeat these steps until you reach the end <strong>of</strong> thedowngrade.Stopping Distance<strong>Air</strong> brakes increase your stopping distance. Hydraulic brakes(used on cars and light/medium trucks) work instantly. <strong>Air</strong>brakes take half second or more for the air to flow throughthe lines to the brakes. Thus vehicles with air brakes requiremore stopping distance than vehicles with hydraulic brakes.Stopping distance for vehicles with air brakes is made up <strong>of</strong>four different factors:Perception distance – the distance your vehicle travelsfrom the time your eyes see a hazard until your brainrecognizes it.Reaction distance – the distance your vehicle travelsfrom the time your brain tells your foot to move fromthe accelerator until the time your foot pushes thebrake.Brake lag distance – the distance your vehicle travelsfrom the time your foot pushes the air brake until thebrake takes hold.Braking distance – the distance your vehicle travelsbetween the time the brakes take hold and the vehiclestops.The air brake lag distance at 55 mph on dry pavement addsabout 32 feet. At 55 mph with good traction and brakingconditions, the total stopping distance for a vehicle with airbrakes is more than 313 feet. That’s longer than a footballfield.Brake Fading or FailureExcessive use <strong>of</strong> the service brakes causes overheating andleads to brake fade. Excessive heat in the brakes causeschemical changes in the lining which reduces friction andcauses the brake drums to expand. As the overheated drumsexpand, the brake shoes and linings have to move farther tocontact the drums. The force <strong>of</strong> contact between the shoesand drums is also reduced. Overuse may increase brake fadeuntil the vehicle cannot be slowed or stopped at all.V I R G I N I A C O M M E R C I A L D R I V E R ’ S M A N U A L | 43
<strong>Section</strong> 2: <strong>Air</strong> <strong>Brakes</strong><strong>Brakes</strong> that are out <strong>of</strong> adjustment may also cause brake fade.To safely control the vehicle, every brake must do its share<strong>of</strong> the work. <strong>Brakes</strong> out <strong>of</strong> adjustment stop doing their sharebefore brakes that are in adjustment. This causes the otherbrakes to overheat and fade. <strong>Brakes</strong> can get out <strong>of</strong> adjustmentquickly especially when they are hot. Therefore, brakeadjustment must be checked frequently.Low <strong>Air</strong> PressureIf the low pressure warning comes on, stop and safely parkyour vehicle as soon as possible. You could have an airleak in the system. Controlled braking is possible only whileenough air remains in the air tanks. Once air pressure dropsbetween 20 and 40 psi, the spring brakes will come on.A heavily loaded vehicle will take a long distance to stopbecause the spring brakes do not work on all axles. Lightlyloaded vehicles or vehicles on slippery roads may skid out<strong>of</strong> control when the spring brakes come on. Therefore, it ismuch safer to stop while there is enough air in the tanks touse the foot brakes.<strong>Section</strong> 3:Combination <strong>Vehicles</strong>Every <strong>Virginia</strong> CDL test includes information from<strong>Section</strong> 1: General Knowledge.Parking <strong>Brakes</strong>Use the parking brakes any time that you park except:if the brakes are very hot (from having just come downa steep grade); orif the brakes are very wet in freezing temperatures.If the brakes are hot, they could be damaged by the heat. Letthe brakes cool before using the parking brakes. Use wheelchocks to hold the vehicle.If the brakes are wet and the temperatures are freezing, theycan freeze so that the vehicle cannot move. Use the brakeslightly while driving in a low gear to heat and dry them. Or,use wheel chocks to hold the vehicle.Study this section if you plan to drive combinationvehicles (tractor-trailers, doubles, triples or a straight truckwith a trailer). The information in this section gives you theminimum knowledge that you need to drive combinationvehicles. Study <strong>Section</strong> 4: Doubles and Triples if you plan todrive these vehicles.Combination Vehicle <strong>Air</strong> <strong>Brakes</strong>Study <strong>Section</strong> 2: <strong>Air</strong> <strong>Brakes</strong> before you read this section. Incombination vehicles, the braking system has parts to controlthe trailer brakes. This section describes the parts that controlthe trailer brakes.Never leave your vehicle unattended without applyingthe parking brakes or chocking the wheels. The vehiclecould roll, causing injury and damage.Trailer Hand ValveThe trailer hand valve is also called the trolley valve orJohnson bar. It only operates the trailer brakes. Not alltowing vehicles (trucks or tractors) have trailer handvalves.Use the hand valve to test the brakes. Do not use itwhen driving because it could make the trailer skid.When you are driving, use the foot brake. The footbrake sends air to all brakes on the vehicle, includingthe trailer(s).Never use the hand valve for parking. All the air mightleak out and unlock the brakes in trailers that don’t havespring brakes. This would allow the vehicle to roll away.Always use the parking brakes when parking. If thetrailer does not have spring brakes, use wheel chocks tokeep the trailer from moving.Turn <strong>of</strong>f the tractor engine and put the transmission inthe lowest forward gear or reverse for parking.44 | V I R G I N I A C O M M E R C I A L D R I V E R ’ S M A N U A L
<strong>Section</strong> 3: Combination <strong>Vehicles</strong>Tractor Protection ValveIf the trailer breaks away or develops a bad leak, thetractor protection valve closes and keeps air in thetractor or truck.The tractor protection valve is controlled by the trailerair supply control in the cab.The trailer air supply valve allows you to open and shutthe tractor protection valve.The tractor protection valve will close automatically ifair pressure is low (in the range <strong>of</strong> 20 to 40 psi)When the tractor protection valve closes, it stops airfrom going out <strong>of</strong> the tractor. It also lets air out <strong>of</strong> thetrailer emergency line. This causes the trailer emergencybrakes to come on.Trailer <strong>Air</strong> Supply ControlOn newer vehicles, the trailer air supply control is a red8-sided knob. You use this knob to control the tractorprotection valve.Push it in to supply air to the trailer. Pull it out to shut<strong>of</strong>f the air and put on the trailer emergency brakes.If air pressure drops into the range <strong>of</strong> 20 to 40 psi, thevalve will pop out and close the tractor protection valve.On older vehicles, tractor protection valve controls oremergency valves may not operate automatically.You may have a lever rather than a knob.Use the normal position for pulling the trailer.Use the emergency position to shut <strong>of</strong>f air and put onthe trailer emergency brakes.Trailer <strong>Air</strong> LinesEvery combination vehicle has two air lines: the serviceline and the emergency line. They run between eachvehicle—tractor to trailer, trailer to dolly, dolly tosecond trailer.The service line is also called the control line or signalline. It carries air which is controlled by the foot brakeor the trailer hand brake.Pressure in the service line changes depending on howhard you press the foot brake or hand valve.The service line is connected to relay valves. Thesevalves allow the trailer brakes to be applied morequickly.The emergency line is also called the supply line. It hastwo purposes;First, it supplies air to the trailer air tanks;Second, it controls the emergency brakes oncombination vehicles.Loss <strong>of</strong> air pressure in the emergency line causesthe trailer brakes to come on. Loss <strong>of</strong> pressurecould be caused by the trailer braking loose andtearing apart the emergency air hose. It couldalso be caused by a hose, metal tubing or otherpart which breaks and lets out the air.When the emergency line loses pressure, it alsocauses the tractor protection valve to close.When this happens, the air supply knob will popout.Emergency lines are <strong>of</strong>ten coded with the colorred—red hose, red couplers. This keeps themfrom getting mixed up with the blue service line.Hose Couplers or Glad HandsGlad hands are coupling devices. They connect theservice and emergency air lines from the truck or tractorto the trailer.Couplers have a rubber seal which prevents air fromescaping.Clean the couplers and rubber seals before connectingthe lines.When you connect the glad hands, press the two sealstogether with the couplers at a 90 degree angle to eachother. A turn <strong>of</strong> the glad hand attached to the hose willjoin and lock the couplers.Some vehicles have dead end or dummy couplers.Attach hoses to these when they are not in use. Thisprevents water and dirt from getting into the couplerand the air lines. If the vehicle does not have dummycouplers, the glad hands can sometimes be lockedtogether.When coupling, make sure that you couple the rightglad hands together. To help avoid mistakes, somevehicles have color-coded hoses and couplers. Blueis used for the service lines and red is used for theemergency (supply) lines. Sometimes metal tags withthe words “service” and “emergency” are attached tothe lines.If you cross the air lines, supply air will be sent to theservice line and will not charge the trailer air tanks. <strong>Air</strong>will not be available to release the trailer spring brakes(parking brakes). If the spring brakes don’t release whenyou push the trailer air supply control, check the air lineconnections.Older trailers do not have spring brakes. If the air supplyin the trailer air tank has leaked away, there will beno emergency brakes and the trailer wheels will turnfreely. If you crossed the air lines, you could drive away,but you would not have trailer brakes. This is verydangerous.Always test the trailer brakes before driving. Usethe hand valve or pull the air supply control (tractorprotection valve control). Pull gently against the trailerin a low gear to make sure the brakes work.V I R G I N I A C O M M E R C I A L D R I V E R ’ S M A N U A L | 45
<strong>Section</strong> 3: Combination <strong>Vehicles</strong>Trailer <strong>Air</strong> TanksEach trailer and converter dolly has one or more airtanks.These air tanks are filled by the emergency (supply)line from the tractor.The tanks provide the air pressure used to operate thetrailer brakes.<strong>Air</strong> pressure is sent from the air tanks to the brakes bythe relay valves.Pressure in the service line tells how much pressurethe relay valves should send to the trailer brakes. Thepressure in the service line is controlled by the brakepedal and the trailer hand brake.Don’t let water and oil build up in the air tanks. If youdo, the brakes may not work.Each tank has a drain valve on it. Drain each tank everyday.If your tanks have automatic drains, they will keep themoisture out. But open the drains to make sure.Shut-<strong>of</strong>f ValvesShut-<strong>of</strong>f valves are also called cut-out cocks. They areused in the service and emergency air lines at the back<strong>of</strong> trailers that tow other trailers.These valves let you close the air lines when anothertrailer is not being towed.Check that all shut-<strong>of</strong>f valves are in the open positionexcept the ones at the back <strong>of</strong> the last trailer. The valvesat the back <strong>of</strong> the last trailer must be closed.Trailer Service, Parking and Emergency <strong>Brakes</strong>New trailers have spring brakes just like trucks andtruck tractors.Converter dollies and trailers built before 1975 arenot required to have spring brakes.Trailers that do not have spring brakes haveemergency brakes which work from the airstored in the trailer air tank.The emergency brakes come on whenever airpressure in the emergency line is lost.These trailers do not have a parking brake.The emergency brakes come on whenever theair supply knob is pulled out or the trailer isdisconnected. But, the brakes will not hold ifthere is not sufficient air pressure in the trailer airtank.Eventually, the air will leak away and there willbe no brake.Therefore, always use wheel chocks when youpark trailers without spring brakes.A major leak in the emergency line will causethe tractor protection valve to close and the traileremergency brakes to come on.You may not notice a leak in the service line untilyou put the brakes on. Then, the air loss from the leakwill lower the air tank pressure quickly. If it goes lowenough, the trailer emergency brakes will come on.Inspecting a Combination VehicleUse the inspection procedure described in <strong>Section</strong> 1: GeneralKnowledge to inspect your combination vehicle. You will alsohave some new things to check. Make the following checks inaddition to the ones already listed in <strong>Section</strong> 1.Coupling System and Landing GearCheck the lower fifth wheel.Mounting to the frame should be secure.Check to be sure there are no missing ordamaged parts.Be sure there is enough grease (if the trailer is nothooked up).You should not see space between the upper andlower fifth wheel.Locking jaws should be around the shank, notthe head <strong>of</strong> the kingpin.The release arm should be properly seated andthe safety latch/lock engaged.Check the upper fifth wheel.Be sure the glide plate is securely mounted tothe trailer frame.Be sure that the kingpin is not damaged.Check the sliding fifth wheel.There should not be any damaged or missingparts.It should be properly greased.All locking pins should be present and locked inplace.If air powered, there should be no air leaks.Check that the fifth wheel is not so far forwardthat the tractor frame will hit the landing gear orthat the cab will hit the trailer during turns.Check the air and electric lines to the trailer.Be sure that the electrical cord is plugged in andsecured.<strong>Air</strong> lines should be properly connected to thegland hands. You should not have air leaks. <strong>Air</strong>lines should be secured with enough slack forturns.All lines should be free from damage.46 | V I R G I N I A C O M M E R C I A L D R I V E R ’ S M A N U A L
Check the landing gear.Be sure that the landing gear is fully raised. Checkfor missing, bent or damaged parts.Make sure the crank handle is in place andsecured.If the landing gear is power operated, make surethat there are no air or hydraulic leaks.<strong>Air</strong> <strong>Brakes</strong>Make these checks in addition to the pre-trip checks thatyou make for your air brakes. Check the airbrakes on adouble or triple trailer the same way you check them for anycombination vehicle.Be sure air flows to all trailers.Use the tractor parking brake or chock the wheelsto hold the vehicle.Wait for the air pressure to reach normal, thenpush the red trailer air supply knob. This will sendair to the emergency (supply) lines.Use the trailer handbrake to send air to theservice line.Go to the back <strong>of</strong> the last trailer. You should hearair escaping. This shows that the entire system ischarged.Close the emergency line valve.Be sure that either the trailer handbrake or theservice brake pedal is on. Open the service linevalve to check that service pressure goes throughall trailers. Then, close the valve. If you do nothear air escaping from both lines, be sure thatthe shut-<strong>of</strong>f valves on the trailer(s) and dolly(s) areopen. You must have air all the way to the backfor all the brakes to work.Test the tractor protection valve.Charge the trailer air brake system. Build upnormal air pressure and push in the air supplyknob.Turn <strong>of</strong>f the engine.Step on the brake pedal several times to reduceair pressure in the tanks.When the air pressure falls into the pressurerange specified by the manufacturer (usuallywithin the range <strong>of</strong> 20 to 40 psi), the trailer airsupply control should pop out or go from thenormal position to the emergency position. Thetrailer air supply control may also be called thetractor protection valve control.If the tractor protection valve doesn’t workcorrectly, an air hose or trailer brake leak coulddrain all the air from the tractor. This would causethe emergency brakes to come on and you couldlose control.<strong>Section</strong> 3: Combination <strong>Vehicles</strong>Test the trailer emergency brakes.Charge the trailer air brake system and check thatthe trailer rolls freely.Stop and pull out the trailer air supply control(tractor protection valve control or traileremergency valve) or place it in the emergencyposition.Pull the trailer gently with the tractor to be surethat the trailer emergency brakes are on.Test the trailer service brakes.Check for normal air pressure.Release the parking brakes and move the vehicleforward slowly.Apply trailer brakes with the hand control (trolleyvalve). You should feel the brakes come on. This tellsyou that the trailer brakes are connected andworking.Note: The trailer brakes should be tested with the hand valve.In normal operation, however, control the trailer brakes withthe foot pedal. The foot pedal applies air to the service brakesat all wheels.Coupling and UncouplingCombination <strong>Vehicles</strong>Coupling and uncoupling is basic to the safe operation <strong>of</strong>combination vehicles. Wrong coupling and uncoupling canbe dangerous. The makes and models <strong>of</strong> rigs are different. So,learn the details <strong>of</strong> coupling and uncoupling for the trucks thatyou will operate.Coupling Tractor-SemitrailersInspect the fifth wheel.Check for damaged or missing parts.Check to see that the mounting to the tractoris secure. Make sure there are no cracks in theframe.Be sure that the fifth wheel plate is greased.Failure to keep the fifth wheel plate greasedcould cause steering problems because <strong>of</strong> frictionbetween the tractor and trailer.Make sure the fifth wheel is in the proper positionfor coupling:The wheel should be tilted down toward therear <strong>of</strong> the tractor.The jaws should be open.The safety unlocking handle should be in theautomatic lock position.If you have a sliding fifth wheel, make sure it islocked.V I R G I N I A C O M M E R C I A L D R I V E R ’ S M A N U A L | 47
<strong>Section</strong> 3: Combination <strong>Vehicles</strong>Make sure that the trailer kingpin is not bent orbroken.Inspect the area and chock the wheels.Make sure the area around the vehicle is clear.Be sure the trailer wheels are chocked or thespring brakes are on.Be sure that cargo is secured so that it will notmove while the tractor is being coupled to thetrailer.Position the tractor.Back slowly.Put the tractor directly in front <strong>of</strong> the trailer. Neverback under the trailer at an angle. You might pushthe trailer sideways and break the landing gear.Use your mirrors to check your position bylooking down both sides <strong>of</strong> the trailer.Back until the fifth wheel touches the trailer.Don’t hit the trailer.Secure the tractor.Put on the parking brake.Put the transmission in neutral.Check the trailer height.The trailer should be low enough that it is raisedslightly by the tractor when you back the tractorunder it.Raise or lower the trailer as needed. If the traileris too low, the tractor may strike and damage thenose <strong>of</strong> the trailer. If the trailer is too high, it maynot couple correctly. This can result in damageto the back <strong>of</strong> the cab and could require heavyequipment to move the tractor from the trailer.Connect the air lines to the trailer.Check the glad hand seals and connect the tractoremergency air line to the trailer emergency gladhand.Check the glad hand seals and connect the tractorservice air line to the trailer service glad hand.Make sure the air lines are safely supported sothat they won’t be crushed or caught while youback the tractor under the trailer.Supply air to the trailer.From the cab, push in the trailer air supply knobor move the tractor protection valve control fromthe emergency to the normal position. This willsupply air to the trailer brake system.Wait until the air pressure is normal.Check the brake system for crossed air lines.Shut <strong>of</strong>f the engine so you can hear thebrakes.Apply and release the trailer brakes andlisten for the sound <strong>of</strong> the trailer brakes beingapplied and released. You should hear thebrakes move when applied and air escapewhen the brakes are released.Check the air brake system pressure gauge forsigns <strong>of</strong> major air loss.When you are sure the trailer brakes are working,start the engine.Make sure the air pressure is up to normal.Lock the trailer brakes.Pull out the trailer air supply knob or movethe tractor protection valve from normal toemergency.Back under the trailer.Use the lowest reverse gear.Back the tractor slowly under the trailer to avoidhitting the kingpin too hard.Stop when the kingpin locks into the fifth wheel.Check the connection for security.Raise the trailer landing gear slightly <strong>of</strong>f theground.Pull the tractor gently forward while the trailerbrakes are locked to be sure that the trailer islocked onto the tractor.Secure the vehicle.Put the transmission in neutral.Put on the parking brakes.Shut <strong>of</strong>f the engine. Take the key with you sosomeone else won’t move the truck while you areunder it.Inspect the coupling.Use a flashlight if necessary.Make sure that there is no space between theupper and lower fifth wheel. If there is space,something is wrong. The kingpin may be on top<strong>of</strong> closed fifth wheel jaws and the trailer wouldcome loose very easily.Go underthe trailerand lookinto theback <strong>of</strong> thefifth wheel.Make surethe fifthwheel jawshave closedaround theshank <strong>of</strong>the kingpin.Refer to thediagram.48 | V I R G I N I A C O M M E R C I A L D R I V E R ’ S M A N U A L
<strong>Section</strong> 3: Combination <strong>Vehicles</strong>Check that the locking lever is in the lockposition.Check that the safety latch is in the position overthe locking lever. On some fifth wheels the catchmust be put in place by hand.If the coupling isn’t right, don’t drive the coupled unit.Get it fixed.Connect the electrical cord and check the air lines.Plug the electrical cord into the trailer and fastenthe safety catch.Check the air lines and electrical lines for signs <strong>of</strong>damage.Make sure the air and electrical lines will not hitany moving parts <strong>of</strong> the vehicle.Raise the front trailer supports (landing gear).Use low gear range to begin raising the landinggear. Once free <strong>of</strong> weight, switch to the high gearrange.Raise the landing gear all the way up. Neverdrive with the landing gear part <strong>of</strong> the way up. Itcould catch on railroad tracks or other things.After raising the landing gear, secure the crankhandle.When the full weight <strong>of</strong> the trailer is resting onthe tractor:Check for enough clearance between therear <strong>of</strong> the tractor frame and the landinggear. When the tractor turns sharply, it mustnot hit the landing gear.Check for enough clearance between thetop <strong>of</strong> the tractor tires and the nose <strong>of</strong> thetrailer.Remove the trailer wheel chocks.Uncoupling Tractor-SemitrailersPosition the rig.Make sure the surface <strong>of</strong> the parking area cansupport the weight <strong>of</strong> the trailer.Line up the tractor with the trailer. Pulling out atan angle can damage the landing gear.Ease the pressure on the locking jaws.Shut <strong>of</strong>f the trailer air supply to lock the trailerbrakes.Ease pressure on the fifth wheel locking jaws bybacking up gently. This will help you release thefifth wheel locking lever.Put the parking brakes on while the tractor ispushing against the kingpin. This will hold the rigwith pressure <strong>of</strong>f the locking jaws.Chock the trailer wheels.Chock the trailer wheels if the trailer doesn’thave spring brakes or if you aren’t sure. The aircould leak out <strong>of</strong> the trailer air tank and releasethe emergency brakes. Without chocks, thetrailer could move.Lower the landing gear.If the trailer is empty, lower the landing gearuntil it makes firm contact with the ground.If the trailer is loaded, turn the crank in lowgear a few extra turns after the landing gearmakes firm contact with the ground. This will liftsome weight <strong>of</strong>f the tractor. This makes it easierto unlatch the fifth wheel. It also makes it easierto couple next time.Disconnect the air lines and electrical cable.Disconnect the air lines from the trailer. Connectthe glad hands to the dummy couplers at theback <strong>of</strong> the cab or couple them together.Hang the electrical cable with the plug down toprevent moisture from entering it.Make sure the lines are supported so they won’tbe damaged while driving the tractor.Unlock the fifth wheel.Raise the release handle lock.Pull the release handle to the open position.Keep your feet and legs clear <strong>of</strong> the rear tractorwheels to avoid serious injury in case the vehiclemoves.Pull the tractor partly clear <strong>of</strong> the trailer.Pull the tractor forward until the fifth wheelcomes out from under the trailer.Stop with the tractor frame under the trailer. Thisprevents the trailer from falling to the ground ifthe landing gear collapses or sinks.Secure the tractor.Apply the parking brake.Place the transmission in neutral.Inspect the trailer supports.Make sure the ground is supporting the trailer.Make sure the landing gear is not damaged.Pull the tractor clear <strong>of</strong> the trailer.Release the parking brakes.Check the area and drive the tractor forwarduntil it clears the trailer.V I R G I N I A C O M M E R C I A L D R I V E R ’ S M A N U A L | 49
<strong>Section</strong> 3: Combination <strong>Vehicles</strong>Driving Combination <strong>Vehicles</strong>RolloversMore than half <strong>of</strong> truck driver deaths in crashes result fromtruck rollovers. Piling up cargo in the truck moves the center<strong>of</strong> gravity higher from the road. A higher center <strong>of</strong> gravitymakes it easier for the truck to turn over. A fully loaded rig is10 times more likely to roll over in a crash than an empty rig.Two things can help keep you from rolling your vehicle:Keep the cargo as close to the ground as possible. Also,load the cargo so that it is centered on your rig. Cargothat is loaded to one side can make the trailer lean andcould cause the vehicle to roll over.Drive slowly around turns. Reduce your speed on onand<strong>of</strong>f-ramps. Avoid quick lane changes, especiallywhen fully loaded.Read <strong>Section</strong> 6: Transporting Cargo for importantinformation about loading your rig.Rearward Amplification and theCrack-the-Whip EffectThe effects <strong>of</strong> motion increase as the motion travels fromthe front <strong>of</strong> the truck to the rear. This is called rearwardamplification and causes the crack-the-whip effect or fishtailing.When you make a quick lane change, the crack-thewhipeffect can turn over the trailer.The chart shows eight types <strong>of</strong> combination vehicles and therearward amplification <strong>of</strong> each when it makes a quick lanechange. Rigs with the greatest rearward amplification areshown at the bottom <strong>of</strong> the chart.Rearward amplification <strong>of</strong> 2.0 in the chart means that the reartrailer is twice as likely to turn over as the tractor. Triples havea rearward amplification <strong>of</strong> 3.5 and are 3 and one-half timesas likely to turn over as a five-axle tractor and trailer.SteeringTo avoid the crack-the-whip effect, steer gently and smoothlywhen you pull a trailer or trailers.BrakingFollow far enough behind other vehicles—at least onesecond for each 10 feet <strong>of</strong> your vehicle length plusanother second if you are going over 40 mph.Look far enough down the road to avoid having tomake a sudden lane change.At night, drive slowly enough to see obstacles soonenough that you can change lanes or stop gently.Always slow down to a safe speed before going into aturn.Control your speed to avoid having to make suddenstops.Large combination vehicles take longer to stop whenthey are empty than when they are fully loadedWhen lightly loaded, the stiff suspension springs andstrong brakes make it easy to lock the wheels. Yourtrailer can swing out and strike other vehicles. Yourtractor can jackknife very quickly.Bobtail tractors (tractors without semitrailers) can behard to stop smoothly. It takes longer to stop a bobtailthan it takes to stop a tractor-semitrailer loaded to themaximum gross weight.In any combination rig, allow plenty <strong>of</strong> followingdistance. Look far enough ahead so that you can brakeearly.Preventing SkidsWhen the wheels <strong>of</strong> a trailer lock up, the trailer tends to swingaround. This is called a trailer jackknife. This is more likely tohappen when the trailer is empty or loaded lightly. To stop askid, follow these steps:Recognize theskid. You cancheck for a skidby looking inyour mirrors. Anytime that youapply the brakeshard, check themirrors to makesure the trailer isstaying straightbehind yourvehicle. Oncethe trailer swingsout <strong>of</strong> your lane,it’s very difficultto prevent ajackknife.50 | V I R G I N I A C O M M E R C I A L D R I V E R ’ S M A N U A L
<strong>Section</strong> 4: Doubles and TriplesStop using the brake. Release the brakes to gettraction. Do not use the trailer hand brake to straightenthe trailer. This is the wrong thing to do since brakeson the trailer wheels caused the skid in the first place.Once the trailer wheels grip the road again, the trailerwill start to follow the tractor and straighten out.OfftrackingWhen a vehicle goes around a corner, the rear wheelsfollow a different path than the front wheels. This is called“<strong>of</strong>ftracking” or “cheating.”<strong>Section</strong> 4:Doubles and TriplesEvery <strong>Virginia</strong> CDL test includes information from<strong>Section</strong> 1: General Knowledge.Because <strong>of</strong> <strong>of</strong>ftracking, the path followed by a tractor-semi iswider than the rig itself. See the figure below. The rear wheels<strong>of</strong> the powered unit will <strong>of</strong>ftrack some. The rear wheels <strong>of</strong>the trailer will <strong>of</strong>ftrack even more. If there is more than onetrailer, the rear wheels <strong>of</strong> the last trailer will <strong>of</strong>ftrack the most.The longer the vehicle, the greater the amount <strong>of</strong> <strong>of</strong>ftracking.Use the inspection procedure describedin <strong>Section</strong> 1: General Knowledge to inspect your combinationvehicle. Remember, that there is a lot more to inspect on acombination vehicle than on a single vehicle—more wheels,tires, lights, reflectors, etc. There are also some new things tocheck.Inspecting Doubles and TriplesSteeringSteer the front end <strong>of</strong> your vehicle wide enough arounda corner so that the rear end does not run over thecurb, pedestrians and other vehicles.At the same time, keep the rear end <strong>of</strong> your vehicleclose to the curb. This will stop other drivers frompassing you on the right.If you cannot complete the turn without enteringanother traffic lane, turn wide as you complete the turn.Refer to the diagram below.Coupling System, Landing Gear andDouble/Triple TrailersCheck the lower fifth wheel.Mounting to the frame should be secure.Check to be sure there are no missing or damagedparts.Be sure there is enough grease.You should not see space between the upper andlower fifth wheel.Locking jaws should be around the shank, not thehead <strong>of</strong> the kingpin.The release arm should be properly seated andthe safety latch/lock engaged.Check the upper fifth wheel.Be sure the glide plate is securely mounted to thetrailer frame.Be sure that the kingpin is not damaged.Check the sliding fifth wheel.There should not be any damaged or missing parts.It should be properly greased.V I R G I N I A C O M M E R C I A L D R I V E R ’ S M A N U A L | 51
<strong>Section</strong> 4: Doubles and TriplesAll locking pins should be present and locked inplace.If air powered, there should be no air leaks.Check that the fifth wheel is not so far forwardthat the tractor frame will hit the landing gear orthat the cab will hit the trailer during turns.Check the air and electric lines to the trailer.Be sure that the electrical cord is plugged in andsecured.<strong>Air</strong> lines should be properly connected to the gladhands. You should not have air leaks. <strong>Air</strong> linesshould be secured with enough slack for turns.All lines should be free from damage.Check the landing gear.Be sure that the landing gear is fully raised. Checkfor missing, bent or damaged parts.Make sure the crank handle is in place andsecured.If the landing gear is power operated, make surethat there are no air or hydraulic leaks.Inspect the double and triple trailers.Make sure that all shut-<strong>of</strong>f valves are in the correctposition. Shut-<strong>of</strong>f valves are located at the rear <strong>of</strong>the trailer and in the service and emergency lines.Shut-<strong>of</strong>f valves should be open/closed as follows:Shut-<strong>of</strong>f valves at the rear <strong>of</strong> the front trailersshould be open.Shut-<strong>of</strong>f valves at the rear <strong>of</strong> the last trailershould be closed.Converter dolly air tank drain valve should beclosed.Be sure the air lines are supported and glad handsare properly connected.If the spare tire is carried on the converter dolly,make sure it’s secured.Make sure the pintle hook is latched. The pintlehook locks one trailer to another.Make sure that the safety chains are secured tothe trailers.Be sure light cords are firmly in the sockets on thetrailers. The light cords run from the battery andoperate the lights.<strong>Air</strong> <strong>Brakes</strong>Make these checks in addition to the pre-trip checks that youmake for your air brakes. Check the air brakes on a double ortriple trailer the same way you check them for any combinationvehicle.Be sure air flows to all trailers.Use the tractor parking brake or chock the wheelsto hold the vehicle.Wait for the air pressure to reach normal, thenpush the red trailer air supply knob. This will sendair to the emergency (supply) lines.Use the trailer handbrake to send air to the serviceline.Go to the back <strong>of</strong> the last trailer. You should hearair escaping. This shows that the entire system ischarged.Close the emergency line valve.Be sure that either the trailer handbrake or theservice brake pedal is on. Open the service linevalve to check that service pressure goes throughall trailers. Then, close the valve. If you do nothear air escaping from both lines, be sure thatthe shut-<strong>of</strong>f valves on the trailer(s) and dolly(s) areopen. You must have air all the way to the backfor all the brakes to work.Test the tractor protection valve.Charge the trailer air brake system. Build upnormal air pressure and push in the trailer airsupply knob.Turn <strong>of</strong>f the engine.Step on the brake pedal several times to reduceair pressure in the tanks.When the air pressure falls into the pressure rangespecified by the manufacturer (usually within therange <strong>of</strong> 20 to 40 psi), the trailer air supply controlshould pop out or go from the normal positionto the emergency position. The trailer air supplycontrol may also be called the tractor protectionvalve control.If the tractor protection valve doesn’t workcorrectly, an air hose or trailer brake leak coulddrain all the air from the tractor. This would causethe emergency brakes to come on and you couldlose control.Test the trailer emergency brakes.Charge the trailer air brake system and check thatthe trailer rolls freely.Stop and pull out the trailer air supply control(tractor protection valve control or traileremergency valve) or place it in the emergencyposition.Pull the trailer gently with the tractor to be surethat the trailer emergency brakes are on.Test the trailer service brakes.Check for normal air pressure.Release the parking brakes and move the vehicleforward slowly.Apply trailer brakes with the hand control (trolleyvalve).You should feel the brakes come on. This tells youthat the trailer brakes are connected and working.52 | V I R G I N I A C O M M E R C I A L D R I V E R ’ S M A N U A L
<strong>Section</strong> 4: Doubles and TriplesNote: The trailer brakes should be tested with the hand valve.In normal operation, however, control the trailer brakes withthe foot pedal. The foot pedal applies air to the service brakesat all wheels.Coupling and UncouplingDoubles and TriplesCoupling (connecting) and uncoupling is basic to the safeoperation <strong>of</strong> combination vehicles. Wrong coupling anduncoupling can be dangerous. The makes and models <strong>of</strong> rigsare different. So, learn the details <strong>of</strong> coupling and uncouplingthe trucks that you will operate.Coupling Twin TrailersSecure the second (rear) trailer.If the second trailer doesn’t have spring brakes,drive the tractor close to the trailer.Connect the emergency line and charge the trailerair tank.Disconnect the emergency line.If the slack adjusters are set correctly, this will setthe trailer emergency brakes.If you aren’t sure about the trailer brakes, chockthe wheels.Couple the tractor and first semi-trailer.To couple the tractor and first semi-trailer, followthe steps in <strong>Section</strong> 3: Combination <strong>Vehicles</strong>.Caution: The semi-trailer with the heaviest load should bebehind the tractor. The lighter trailer should be in the rear.Definition: A converter gear or dolly is a coupling devicewith one or two axles and a fifth wheel. It is used to couplea semi-trailer to the rear <strong>of</strong> a tractor trailer combination,forming twin trailers.Position the converter dolly in front <strong>of</strong> the second(rear) trailer.Release the dolly brakes by opening the dolly airtank petcock. If the dolly has spring brakes, usethe dolly parking brake control.If it isn’t too far, wheel the dolly into position byhand. Line it up with the kingpin.Or, use the tractor and first semi-trailer to pick upthe converter dolly.Position the combination (tractor and firstsemi-trailer) as close as possible to theconverter dolly.Move the dolly to the rear <strong>of</strong> the first semitrailerand couple it to the trailer.Lock the pintle hook.Secure the dolly support in the raisedposition.Pull the dolly into position as close as possibleto the nose <strong>of</strong> the second semi-trailer.Lower the dolly support.Unhook the dolly from the first trailer.Wheel the dolly into position in front <strong>of</strong> thesecond trailer in line with the kingpin.Connect the converter dolly to the front trailer.Back the first semi-trailer into position in front <strong>of</strong>the dolly tongue.Hook the dolly to the front trailer.Lock the pintle hook.Secure the converter gear support in theraised position.Be sure that the trailer brakes are locked or thatthe wheels are chocked.Make sure the trailer height is correct. It must beslightly lower than the center <strong>of</strong> the fifth wheel sothat the trailer is raised slightly when the dolly ispushed under it.Back the converter dolly under the rear trailer.Raise the landing gear slightly <strong>of</strong>f the ground toprevent damage if the trailer moves.Test the coupling by pulling against the pin <strong>of</strong> therear semi-trailer.Make a visual check <strong>of</strong> the coupling.Make sure that there is no space betweenthe upper and lower fifth wheel. If there is,something is wrong.Make sure the fifth wheel jaws have closedaround the shank <strong>of</strong> the kingpin.Connect the safety chains, air hoses and light cords.Close the converter dolly air tank petcock andshut-<strong>of</strong>f valves at the rear <strong>of</strong> the second trailer.The service and emergency line shut-<strong>of</strong>f valve atthe rear <strong>of</strong> the second trailer should be closed.Open the shut-<strong>of</strong>f valves at the rear <strong>of</strong> the firsttrailer and on the dolly.Raise the landing gear.Charge the trailers’ air supply.Push in the trailer air supply knob.Check for air at the rear <strong>of</strong> the second trailerby opening the emergency line shut-<strong>of</strong>f valve.If there is no air pressure there, something iswrong and the brakes won’t work.V I R G I N I A C O M M E R C I A L D R I V E R ’ S M A N U A L | 53
<strong>Section</strong> 4: Doubles and TriplesUncoupling Twin TrailersUncoupling the rear trailerPark the rig in a straight line on firm level ground.Apply the parking brakes so that the rig won’tmove.Chock the wheels on the second trailer if itdoesn’t have spring brakes.Lower the landing gear <strong>of</strong> the second trailerenough to remove some weight from the dolly.Close the air shut-<strong>of</strong>f valve at the rear <strong>of</strong> the firsttrailer and on the dolly.Disconnect all dolly air and electric lines andsecure them.Release the dolly brakes.Release the converter dolly fifth wheel latch.Slowly pull the tractor, first trailer and dollyforward to pull the dolly from under the secondtrailer.Uncouple the converter dolly.Lower the dolly landing gear.Disconnect the safety chains.Apply the converter gear spring brakes or chockthe wheels.Release the pintle hook on the first trailer.Slowly pull clear <strong>of</strong> the dolly.Caution: Never unlock the pintle hook with the dolly stillunder the rear trailer. The dolly tow bar could fly up. Thiscould cause injury and would make it very difficult tore-couple.Coupling and Uncoupling Triple TrailersCouple the second and third trailers.Couple second and third trailers using the method<strong>of</strong> coupling doubles.Uncouple the tractor and pull away from thesecond and third trailers.Couple the tractor and first trailer to the second andthird trailers.Couple the tractor to the first trailer. Use the stepsoutlined in <strong>Section</strong> 3: Combination <strong>Vehicles</strong>.Move the converter dolly into position and couplethe first trailer to the second trailer using the stepsoutlined for coupling doubles. The triple rig is nowcomplete.Uncouple the triple rig.Uncouple the third trailer by pulling out the dolly.Then unhitch the dolly using the steps outlined foruncoupling doubles.Uncouple the rest <strong>of</strong> the rig the same way youwould uncouple a double-bottom rig. Follow thesteps already outlined.Pulling Doubles/Triples TrailersPrevent roll-overs.Double and triple tractor-trailer combinationsare less stable than other commercial vehicles.Therefore, steer gently and go slowly aroundcurves, corners and on-and <strong>of</strong>f ramps.Remember, a safe speed on a curve for a straighttruck or a single trailer combination vehicle maybe too fast for a set <strong>of</strong> double or triple trailers.Beware <strong>of</strong> the crack-the-whip effect.Look ahead.Doubles and triples are more likely to turn overthan other combination vehicles because <strong>of</strong> thecrack the whip effect. You must steer gently whenpulling trailers. The last trailer in a combination isthe most likely one to turn over.Study <strong>Section</strong> 3: Combination <strong>Vehicles</strong> to makesure you fully understand the crack-the-whipeffect.You must drive doubles and triples very smoothlyto prevent a rollover or jackknife. Therefore, lookfar ahead so you can slow down or change lanesgradually if necessary.Manage your space.Doubles and triples take up more space thanother commercial vehicles. They are longer andalso need more space because you cannot turn orstop them suddenly.Allow more following distance.Make sure you have large enough gaps beforeentering or crossing traffic.Be sure you are clear on the side before youchange lanes.Be even more careful in adverse conditions.In bad weather, slippery conditions or whendriving in the mountains, you must be very carefulwhen driving doubles and triples.You have greater length and more dead axles topull with your drive axles than with other vehicles.There is more chance for skids and loss <strong>of</strong> traction.54 | V I R G I N I A C O M M E R C I A L D R I V E R ’ S M A N U A L
<strong>Section</strong> 5: School Buses<strong>Section</strong> 5:School BusesEvery <strong>Virginia</strong> CDL test includes information from<strong>Section</strong> 1: General Knowledge.If you plan to drive a school bus designed to carry fewerthan 16 passengers, including the driver, you do not need toobtain a CDL, or the passenger bus endorsement. However,you must have the school bus endorsement on your driver’slicense. Therefore, you will need to pass the school busknowledge and skills tests. You will be restricted to drivingbuses designed to carry fewer than 16 passengers includingthe driver and this restriction will be printed on your license.Fees are not charged for a school bus endorsement on thedriver’s license or the commercial driver’s license. The fee fora driver’s license with a school bus endorsement is $4.00 peryear.If you wish to operate a school bus that is designed to carry16 or more passengers, you must obtain a commercial driver’slicense. You will need to pass the CDL general knowledgetest, the passenger knowledge test, school bus knowledge test,and the air brake knowledge test if the vehicle is equippedwith air brakes. In addition to the written tests, you must passthe road skills test in a commercial vehicle representative <strong>of</strong>the type you propose to operate.To drive a school bus, you must be atleast 18 years <strong>of</strong> age. You must also hold a valid commercialdriver’s license. Depending on the weight and size <strong>of</strong> thebus that you will drive, you will be issued a Class B or ClassC license. Additionally you must have a passenger busendorsement and a school bus endorsement on your CDL.Individuals required to register with the <strong>Virginia</strong> State Police SexOffender and Crimes Against Children registry are prohibitedfrom obtaining a school bus endorsement during any period inwhich registration is required.School Bus EndorsementTo get your CDL and the endorsement to drive a school bus,you must pass:the written general knowledge testthe written passenger bus testthe written school bus testthe written air brakes test if your vehicle is equippedwith air brakes.the skills test required for the class <strong>of</strong> vehicle that youplan to drive. If you plan to drive a bus equippedwith air brakes, you must take the skills test in a busequipped with air brakes.To prepare for these tests, study:<strong>Section</strong> 1: General Knowledge<strong>Section</strong> 2: <strong>Air</strong> <strong>Brakes</strong> (if your vehicle will be equippedwith air brakes)<strong>Section</strong> 5: School Buses<strong>Section</strong> 8: Transporting PassengersIf you operate only a school and/or activity bus, you mayhave commercial license privileges restricted for this purposeand pay only the driver’s license fee <strong>of</strong> $4.00 per year or$20.00 for a 5-year license. However, if you intend to operatecommercial vehicles other than the school or school activitybus, or if you have a class A CDL or add other endorsement,you will have to pay the fees for the CDL and the additionalendorsements.Pre-Trip InspectionBefore driving, make sure your bus is safe.Conduct a pre-trip inspection. Follow the inspection method outlined in <strong>Section</strong> 1:General Knowledge.Also:Make sure all lettering is clean and easy to read.Check the school bus traffic warning lights to make surethey are working.Check the operation <strong>of</strong> the traffic warning sign (stoparm) and crossing control arm if your bus is equippedwith these features.Clean and adjust the mirrors.Check emergency equipment such as flag, flares orreflectors, first aid kit, fire extinguishers.Check all gauges on the instrument panel.Check for exhaust leaks.Do not drive the bus if:the oil or water level is LOW or ADD;V I R G I N I A C O M M E R C I A L D R I V E R ’ S M A N U A L | 55
<strong>Section</strong> 5: School Busesthe turn signals, flashing traffic warning lights or brakelights do not operate;there are problems with the brakes or steering; or, thereare noticeable exhaust leaks.Operating the Bus Safely<strong>Virginia</strong> law requires all school bus drivers to wear safetybelts.<strong>Virginia</strong> law prohibits the use <strong>of</strong> hand-held or hands-free cellphones or other wireless devices while operating a schoolbus. The only exceptions are in an emergency situation orwhen the vehicle is lawfully parked and for the purposes <strong>of</strong>dispatching.School bus drivers may use two-way radio devices authorizedby the owner <strong>of</strong> the school bus.Danger Zones and Use <strong>of</strong> MirrorsThe danger zone is the area on all sides <strong>of</strong> the bus wherechildren are in the most danger. The danger zones mayextend as much as 30 feet from the front bumper with thefirst 10 feet being the most dangerous, 10 feet from the leftand right sides <strong>of</strong> the bus and 10 feet behind the rear bumper<strong>of</strong> the bus. In addition, the area to the left <strong>of</strong> the bus is alwaysconsidered dangerous because <strong>of</strong> passing cars.Correct Mirror AdjustmentProper adjustment and use <strong>of</strong> all mirrors is vital to the safeoperation <strong>of</strong> the school bus in order to observe the dangerzone around the bus and look for students, traffic, and otherobjects in this area. You should always check each mirrorbefore operating the school bus to obtain maximum viewingarea. If necessary, have the mirrors adjusted.Outside Left and Right Side Flat MirrorsThese mirrors are mounted at the left and right front corners<strong>of</strong> the bus at the side or front <strong>of</strong> the windshield. They are usedto monitor traffic, check clearances and students on the sidesand to the rear <strong>of</strong> the bus. There is a blind spot immediatelybelow and in front <strong>of</strong> each mirror and directly in back <strong>of</strong> therear bumper. The blind spot behind the bus extends 5o to150 feet and could extend up to 400 feet depending on thelength and width <strong>of</strong> the bus.Ensure that the mirrors are properly adjusted so you can see:200 feet or 4 bus lengths behind the bus.Along the sides <strong>of</strong> the bus.The rear tires touching the ground.Outside Left and Right Side Convex MirrorsThe convex mirrors are located below the outside flat mirrors.They are used to monitor the left and right sides at a wideangle. They provide a view <strong>of</strong> traffic, clearances, and studentsat the side <strong>of</strong> the bus. These mirrors present a view <strong>of</strong> peopleand objects that does not accurately reflect their size anddistance from the bus.You should position these mirrors to see:The entire side <strong>of</strong> the bus up to the mirror mounts.Front <strong>of</strong> the rear tires touching the ground.At least one traffic lane on either side <strong>of</strong> the bus.Outside Left and Right Side Crossover MirrorsThese mirrors are mounted on both left and right front corners<strong>of</strong> the bus. They are used to see the front bumper “dangerzone” area directly in front <strong>of</strong> the bus that is not visible bydirect vision, and to view the “danger zone” area to the leftside and right side <strong>of</strong> the bus, including the service door andfront wheel area. The mirror presents a view <strong>of</strong> people andobjects that does not accurately reflect their size and distancefrom the bus. The driver must ensure that these mirrors areproperly adjusted.Ensure that the mirrors are properly adjusted so you can see:The entire area in front <strong>of</strong> the bus from the frontbumper at ground level to a point where direct visionis possible. Direct vision and mirror view vision shouldoverlap.The right and left front tires touching the ground.The area from the front <strong>of</strong> the bus to the service door.These mirrors, along with the convex and flat mirrors,should be viewed in a logical sequence to ensure that achild or object is not in any <strong>of</strong> the danger zones.Overhead Inside Rearview MirrorThis mirror is mounted directly above the windshield on thedriver’s side area <strong>of</strong> the bus. This mirror is used to monitorpassenger activity inside the bus. It may provide limitedvisibility directly in back <strong>of</strong> the bus if the bus is equipped witha glass-bottomed rear emergency door. There is a blind spotarea directly behind the driver’s seat as well as a large blindspot area that begins at the rear bumper and could extend upto 400 feet or more behind the bus. You must use the exteriorside mirrors to monitor traffic that approaches and enters thisarea.You should position the mirror to see:The top <strong>of</strong> the rear window in the top <strong>of</strong> the mirror.All <strong>of</strong> the students, including the heads <strong>of</strong> the studentsright behind you.56 | V I R G I N I A C O M M E R C I A L D R I V E R ’ S M A N U A L
<strong>Section</strong> 5: School BusesLoading and Unloading PassengersTurn on your school bus traffic warning lights.You must turn on the warning lights in accordancewith state law before you stop to load or unloadstudents.If the posted speed limit is less than 35 mph, turnon the warning lights at least 100 feet before thestop.If the posted speed is 35 mph or more, turn onthe warning lights at least 200 feet before the stop.Do not use the warning lights except whenloading and unloading passengers.Extend the warning sign (stop arm) and crossingcontrol arm.Extend the warning sign and crossing control armonly when the bus is stopped to load and unloadpassengers.When loading or unloading students:Check your mirrors continuously.Do not use the emergency four-way hazard flashers.Stop in the right lane <strong>of</strong> the road.On divided highways, five lane roads where the middlelane is used for turning, or heavily traveled roads, unloadthe students on the side <strong>of</strong> the road where they live.Stop only when the bus can be seen clearly at a safedistance.Make sure all students are on the bus and seated beforemoving.Before backing the bus, make sure all students are on thebus and seated.When unloading, make sure all students are clear <strong>of</strong> thebus before moving. Most injuries occur when the bus isstopped to load or unload students.Never park the bus so that the emergency exit will beblocked while students are on board.Report drivers who illegally pass a bus stopped to load orunload passengers. Make a note <strong>of</strong>:Backing the Busthe license plate number and state;the make, type and color <strong>of</strong> the vehicle; and,date, time and location <strong>of</strong> the incident.Do not back the bus unless there is no other safe wayto move the vehicle. Drive around the block or make adetour rather than backing the bus.Pick up passengers before backing or turning.Post a lookout on the inside, back <strong>of</strong> the bus to warn <strong>of</strong>obstacles, approaching persons or other vehicles.Check your mirrors constantly while backing.Only unload passengers after you have completed thebacking maneuver.Passing and TurningAvoid passing or driving side-by-side with another bus onthe highway.Keep a safe distance between vehicles if you must pass.When turning left, get into the left lane (if there is one) inplenty <strong>of</strong> time to make the turn safely.Following Other <strong>Vehicles</strong>Always leave at least a bus length between you and thevehicle in front <strong>of</strong> you.Outside <strong>of</strong> cities and towns, keep at least 200 feetbetween you and the vehicle in front <strong>of</strong> you.Railroad CrossingsAs you approach a railroad crossing, tap your brakeslightly to warn other drivers that the bus is about to stop.Turn on your four-way hazard lights at least 200 feetbefore a railroad crossing.Come to a full stop at least 15 feet from the nearest rail.Open the entrance door and driver’s window.Turn <strong>of</strong>f the warning lights unless you are loading andunloading passengers.Listen and look carefully in both directions.When it is safe to cross, close the entrance door and turn<strong>of</strong>f the four-way hazard lights.Cross the railroad tracks in a gear which allows you tocross the rails completely without changing gears.If the gate comes down as you are starting across therailroad highway crossing, drive through the gate.Speed Limits for BusesWhen traveling on highways where the maximum speedlimit is 55 mph or less, you must not exceed 45 mph orthe minimum speed limit, if one is posted, whichever isgreater.When traveling on interstate or other highways where themaximum speed limit is more than 55 mph, you mustnot exceed 60 mph.In school, business, and residential areas, you must notexceed the posted speed limit. If no speed limit is posted,drive 25 mph.When traveling on a highway designated as a rural rusticroad, you must not exceed the posted speed limit. If nospeed limit is posted, you must not exceed 35 mph.Remember, weather, road and traffic conditions may requireyou to travel slower than these speed limits. When in doubt,slow down.V I R G I N I A C O M M E R C I A L D R I V E R ’ S M A N U A L | 57
<strong>Section</strong> 5: School BusesAntilock Braking Systems (ABS)Your school bus will have a yellow ABS malfunction lamp onthe instrument panel if it is equipped with ABS.How ABS Helps YouWhen you brake hard on slippery surfaces in a vehiclewithout ABS, your wheels may lock up. When your steeringwheels lock up, you lose steering control. When your otherwheels lock up, you may skid or even spin the vehicle.ABS helps you avoid wheel lock up and maintain control.You may or may not be able to stop faster with ABS, but youshould be able to steer around an obstacle while braking, andavoid skids caused by over braking.Braking with ABSWhen you drive a vehicle with ABS, you should brake as youalways have. In other words:Use only the braking force necessary to stop safely andstay in control.Brake the same way, regardless <strong>of</strong> whether you haveABS on the bus. However, in emergency braking, donot pump the brakes on a bus with ABS.As you slow down, monitor your bus and back <strong>of</strong>f thebrakes (if it is safe to do so) to stay in control.Braking if ABS is Not WorkingWithout ABS, you still have normal brake functions. Drive andbrake as you always have.<strong>Vehicles</strong> with ABS have yellow malfunction lamps to tell you ifsomething is not working. The yellow ABS malfunction lampis on the bus’s instrument panel. As a system check on newervehicles, the malfunction lamp comes on at start-up for a bulbcheck and then goes out quickly. On older systems, the lampcould stay on until you are driving over five mph. If the lampstays on after the bulb check, or goes on once you are underway, you may have lost ABS control at one or more wheels.Remember, if your ABS malfunctions, you still have regularbrakes. Drive normally, but get the system serviced soon.Student ManagementDon’t Deal with On-bus Problems WhenLoading and UnloadingIn order to get students to and from school safely and ontime, you need to be able to concentrate on the driving task.Loading and unloading requires all your concentration. Don’ttake your eyes <strong>of</strong>f what is happening outside the bus. If thereis a behavior problem on the bus, wait until the studentsunloading are safely <strong>of</strong>f the bus and have moved away. Ifnecessary, pull the bus over to handle the problem.Handling Serious ProblemsFollow your school’s procedures for discipline or refusal<strong>of</strong> rights to ride the bus.Stop the bus. Park in a safe location <strong>of</strong>f the road,perhaps a parking lot or a driveway.Secure the bus. Take the ignition key with you if youleave your seat.Stand up and speak respectfully to the <strong>of</strong>fender or<strong>of</strong>fenders. Speak in a courteous manner with a firmvoice. Remind the <strong>of</strong>fender <strong>of</strong> the expected behavior.Do not show anger, but do show that you meanbusiness.If a change <strong>of</strong> seating is needed, request that thestudent move to a seat near you.Never put a student <strong>of</strong>f the bus except at school or athis or her designated school bus stop. If you feel thatthe <strong>of</strong>fense is serious enough that you cannot safelydrive the bus, call for a school administrator or thepolice to come and remove the student. Always followyour state or local procedures for requesting assistance.Handling EmergenciesEmergency Drills<strong>Virginia</strong> law requires that you hold an emergency exit drill atleast once during the first 90 calendar days <strong>of</strong> the school yearor more <strong>of</strong>ten if needed. Your local school board or board <strong>of</strong>education may require more frequent drills.Emergency SituationsBus crashesDo not move the bus until police or school<strong>of</strong>ficials arrive. Check the bus for injured students. Protect the crash scene by setting out flares orreflectors.58 | V I R G I N I A C O M M E R C I A L D R I V E R ’ S M A N U A L
<strong>Section</strong> 5: School BusesDo not leave students unattended. Have aresponsible student or passing motorist notify theauthorities.Keep students on the bus unless there is extensivedamage or danger <strong>of</strong> further injury or fire.If another vehicle is involved, get theBreak Downsdriver’s name, address, phone number,driver’s license number, insurance companyname and policy number;vehicle’s license plate number and the stateand the type <strong>of</strong> vehicle;name, address and phone number <strong>of</strong> witnessesor other drivers involved in the crash.Set out flares or reflectors.Turn on the emergency four-way hazard lights.Keep the students on the bus until other transportationarrives unless there is danger <strong>of</strong> injury.EvacuationsAn evacuation situation can happen to anyone, anytime,anywhere. Knowing what to do before, during and after anevacuation can mean the difference between life and death.Determine Need to Evacuate the Bus. The first and mostimportant consideration is for you to recognize the hazard. Iftime permits, contact your dispatcher to explain the situationbefore making a decision to evacuate the school bus. Thedecision to evacuate the bus must be timely. A decisionshould include consideration <strong>of</strong> the following conditions:Is there a fire or danger <strong>of</strong> fire?Is there a smell <strong>of</strong> raw or leaking fuel?Is there a chance the bus could be hit by other vehicles?Is the bus in the path <strong>of</strong> a sighted tornado or risingwaters?Are there downed power lines?Would removing students expose them to speedingtraffic, severe weather, or a dangerous environment?Would moving students complicate injuries?Is there a hazardous materials spill involved?Sometimes, it may be safer to remain on the bus andnot come in contact with the material.The position <strong>of</strong> the bus may change and increase thedanger.There is imminent danger <strong>of</strong> collision.There is a need to quickly evacuate because <strong>of</strong> ahazardous materials spill.General Procedures. Determine if evacuation is in the bestinterest <strong>of</strong> safety.Determine the best type <strong>of</strong> evacuation:Front, rear or side door evacuation, or somecombination <strong>of</strong> doors.Ro<strong>of</strong> or window evacuation.Secure the bus by:Placing the transmission in park, or if there is noshift point, in neutral.Setting parking brakes.Shutting <strong>of</strong>f the engine.Removing the ignition key.Activating hazard warning lights.If time allows, notify dispatch <strong>of</strong>fice <strong>of</strong> evacuationlocation, conditions, and type <strong>of</strong> assistance needed.Dangle radio microphone or telephone out <strong>of</strong> driver’swindow for later use, if operable.If no radio, or radio is inoperable, dispatch a passingmotorist or are resident to call for help. As a last resort,dispatch two older, responsible students to go for help.Order the evacuation.Evacuate students from the busDo not move a student you believe may havesuffered a next or spinal injury unless his or herlife is in immediate danger.Special procedures must be used to move neckspinal injury victims to prevent further injury.Direct a student assistant to lead students to the nearestsafe place.Walk through the bus to ensure no students remain onthe bus. Retrieve emergency equipment.Join waiting students. Account for all students andcheck for their safety.Protect the scene. Set out emergency warning devicesas necessary and appropriate.Prepare information for emergency responders.Mandatory Evacuations. You must evacuate the bus when:The bus is on fire or there is a threat <strong>of</strong> fire.The bus is stalled on or adjacent to a railroad highwaycrossing. Steer students away from the track on an angletoward the oncoming train.V I R G I N I A C O M M E R C I A L D R I V E R ’ S M A N U A L | 59
<strong>Section</strong> 6: Transporting Cargo<strong>Section</strong> 6:Transporting CargoEvery <strong>Virginia</strong> CDL test includes information from<strong>Section</strong> 1: General Knowledge.Federal, state and local regulations cover commercial vehicleweight, where you can drive large vehicles and requirementsfor securing and covering cargo. These regulations vary fromplace to place. Know the regulations for the areas where youplan to drive.Cargo Weight and BalanceDefinitions <strong>of</strong> WeightGross vehicle weight (GVW) The total weight <strong>of</strong> a singlevehicle plus the cargo.Gross combination weight (GCW) The total weight <strong>of</strong> apowered unit (tractor) plus the trailer or trailers plus thecargo.Gross vehicle weight rating (GVWR) The maximumGVW specified by the manufacturer for a single vehicleplus the cargo (maximum scale weight).This section tells you about hauling cargosafely. You must understand basic cargo safety rules to geta CDL.Cargo that is loaded wrong or that is not secured is a dangerto others and you. Loose cargo can:fall from the vehicle and cause a crashhurt or kill you if you stop quickly or crashmake it difficult for you to steer the vehicleAdditionally, loose cargo can be damaged by sliding back andforth and can damage the vehicle. You may load and securethe cargo yourself or someone else may load and secure it. Ineither case, you must:inspect the cargo, unless it is a sealed load or themanner <strong>of</strong> handling makes inspection impractical.recognize overloads and poorly balanced weight.ensure that the cargo is properly secured.If you plan to carry hazardous materials that require placardson your vehicle, you must have a hazardous materialsendorsement. You must be at least 21 years <strong>of</strong> age. <strong>Section</strong> 9<strong>of</strong> this manual gives you the information that you need to passthe hazardous materials test.Inspecting CargoAs part <strong>of</strong> the pre-trip inspection, make sure that the truckis not overloaded. Be sure that the cargo is balanced andsecured properly. Inspect the cargo before you begin yourtrip. Make any adjustments needed. Check the cargo andsecuring devices as <strong>of</strong>ten as necessary during the trip to keepthe load secure.Axle weight The weight transferred to the ground by oneaxle or one set <strong>of</strong> axles.Legal Weight LimitsYou must keep weights within the legal limits. States havemaximum GVWs, GCWs and axle weights. Often, maximumaxle weights are set by a formula. This bridge formula governsgross weight independently <strong>of</strong> axle weight. This helps preventoverloading bridges and roadways. You’ll find the maximumweights on the shipping bill.Overloading Affects SafetyOverloading a vehicle can affect steering, braking and speedcontrol. Overloaded trucks may gain too much speed ondowngrades and the stopping distance increases.If you are driving in bad weather or in the mountains, it maynot be safe to drive at the legal maximum weights. Considerthis before you drive.Don’t Be Top HeavyYour vehicle’s center <strong>of</strong> gravity affects safe handling. If cargois piled high or if heavy cargo is loaded on top, the center<strong>of</strong> gravity will be high. Your vehicle will be more likely to tipover. A high center <strong>of</strong> gravity is most dangerous on curves or ifyou swerve to miss a hazard.Cargo that is piled high can also shift to the side or fall <strong>of</strong>f.Distribute your cargo so that it is as low as possible. Load theheaviest parts <strong>of</strong> the cargo on the bottom.60 | V I R G I N I A C O M M E R C I A L D R I V E R ’ S M A N U A L
Balance the WeightWeight that is poorly balanced will make vehicle handlingunsafe. Too much weight on the steering axle will make itdifficult to steer. It can also damage the steering axle and tires.Shifting the weight to the back <strong>of</strong> the vehicle can make thesteering axle weight too light. This makes steering unsafe.Too little weight on the driving axles can cause poor traction.Drive wheels may spin. During bad weather the truck maynot be able to keep going.<strong>Section</strong> 6: Transporting CargoCargo should have at least one tiedown for each10 linear feet <strong>of</strong> cargo. No matter how small thecargo, you should use at least two tiedowns tohold it.There are special requirements for securingheavy pieces <strong>of</strong> metal. Find out what they are ifyou plan to carry these materials. You find thisinformation in the Code <strong>of</strong> Federal Regulations. Refer to the Code <strong>of</strong> Federal Regulations, 49CFR Part 393.100 for additional load securingrequirements.Header boards or headache racks protect you fromyour cargo if you crash or make an emergency stop.Make sure that the header board structure is in goodcondition. The structure should block the forwardmovement <strong>of</strong> any cargo that you are carrying.Cargo covers protect other people from spilled cargoand protect the cargo from the weather. Many statesrequire cargo covers for spill protection. Be familiar withthe cargo cover laws in the states where you drive.Use your mirrors to check the cargo covers whileyou are driving. A flapping cover can tear loose,uncovering the cargo and blocking your view orsomeone else’s view.Sealed and containerized loads are generally usedfor freight that is carried part way by rail or ship. Somecontainers have their own tiedown devices or locksthat attach directly to a special frame. Others must beloaded onto flat bed trailers. These containers must beproperly secured just like any other cargo.Securing CargoBlocking is used in the front, back and on the sides<strong>of</strong> a piece <strong>of</strong> cargo to keep it from sliding. Blocking isshaped to fit snugly against the cargo. It is secured tothe cargo deck to keep the cargo from moving.Bracing also prevents cargo movement. Bracing goesfrom the floor to the upper part <strong>of</strong> the cargo. It can alsogo to the walls <strong>of</strong> the cargo compartment.Cargo tiedowns are used on flatbed trailers withoutsides. The tiedowns keep the cargo from shifting orfalling <strong>of</strong>f the vehicle. In closed vans, tiedowns keep thecargo from shifting.You must use the correct type <strong>of</strong> tiedownsand correct strength tiedowns. The combinedstrength <strong>of</strong> all cargo tiedowns must be strongenough to lift 1 ½ times the weight <strong>of</strong> the cargothat is tied down. Use chains and tensioningdevices (winches, ratchets and clinchingcomponents). You must attach the tiedowns tothe vehicle correctly using hooks, bolts, railsand rings.Other Cargo Requiring Special CareDry bulk tanks require special care because they <strong>of</strong>tenhave a high center <strong>of</strong> gravity which can cause the loadto shift or the trailer to flip over. Be careful when drivingaround curves and making sharp turns.Hanging meat in a refrigerated truck is a very unstableload with a high center <strong>of</strong> gravity. Be very careful whendriving on sharp curves, such as ramps and exit ramps.Drive slowly.Livestock can move around in a trailer causing a shift inweight and balance. If you are carrying less than a fullload, use false bulkheads to keep the livestock bunchedtogether. Even when bunched together, live stock maylean on curves. This shifts the center <strong>of</strong> gravity andmakes rollover more likely.Over-length, over-width and/or over-weight loadsrequire special transit permits. These permits are issuedby the <strong>Virginia</strong> <strong>Department</strong> <strong>of</strong> <strong>Motor</strong> <strong>Vehicles</strong>. Driving isusually limited to certain times. Special equipment maybe necessary, such as signs, flashing lights, flags, etc.Over-sized loads may require a police escort or pilotvehicles with warning signs and flashing lights.V I R G I N I A C O M M E R C I A L D R I V E R ’ S M A N U A L | 61
<strong>Section</strong> 7: Tank <strong>Vehicles</strong><strong>Section</strong> 7:Tank <strong>Vehicles</strong>Every <strong>Virginia</strong> CDL test includes information from<strong>Section</strong> 1: General Knowledge.A tank vehicle is a vehicle used to carry anyliquid or liquid gas in a tank <strong>of</strong> 1,000 gallons or more. Aportable tank is a bulk container that is not permanentlyattached to the vehicle.Inspecting Tank <strong>Vehicles</strong>In addition to the pre-trip inspection outlined in <strong>Section</strong> 1:General Knowledge, you must inspect additional special itemsfound on a tank vehicle. Since tank vehicles come in manytypes and sizes, check the vehicle’s operator’s manual tomake sure you know how to inspect your tank vehicle. On alltank vehicles, however, leaks are the most important thing tocheck for. Don’t carry liquids or gases in a leaking tank.When checking your vehicle, be sure to check the following:Check the tank’s body or shell for dents and leaks.Check the intake, discharge and cut-<strong>of</strong>f valves. Makesure the valves are in the correct position beforeloading, unloading or moving the vehicle.Check the pipes, connections and hoses for leaks,especially around joints.Check manhole covers and vents. Make sure the covershave gaskets and that they close correctly. Keep thevents clear so that they work correctly.Check special purpose equipment. If your vehicle hasthe following equipment, be sure it works:vapor recovery kitsgrounding and bonding cablesemergency shut-<strong>of</strong>f systemsbuilt-in fire extinguisherCheck the emergency equipment required for yourvehicle. Find out what equipment you are requiredto carry and make sure you have it and know how itworks.Driving Tank <strong>Vehicles</strong>Hauling liquids in tanks requires special skills because <strong>of</strong> thevehicle’s high center <strong>of</strong> gravity and the movement <strong>of</strong> theliquid.Tank vehicles have a high center <strong>of</strong> gravity. Becausemuch <strong>of</strong> the vehicle’s weight is carried high <strong>of</strong>f theroad, this makes the vehicle top-heavy and easy to rollover. Tankers carrying liquids are particularly easy to rollover. Tests have shown that tankers can turn over at thespeed limits posted for curves. Take curves and onramp/<strong>of</strong>f-rampcurves well below the posted speeds.Watch out for liquid surge. Liquid surge results fromthe movement <strong>of</strong> liquid in partially filled tanks. Forexample, when you stop, the liquid will surge backand forth. When the wave hits the end <strong>of</strong> the tank, ittends to push the truck in the direction that the waveis moving. If the truck is on a slippery surface such asice, the wave can shove the stopped truck out into theintersection. When driving a tanker carrying liquid, youmust be familiar with the vehicle’s handling.Some tankers may have bulkheads or baffles to helpcontrol the liquid surge. However, unbaffled tanks,also known as smooth bore tanks, have nothing insideto slow down the flow <strong>of</strong> the liquid. Therefore, theforward and back surge can be very strong. Unbaffledtanks are usually those used to carry food products,such as milk. Sanitation regulations forbid the use <strong>of</strong>baffles because it is difficult to clean the inside <strong>of</strong> thetank. Therefore, be very cautious when driving smoothbore tanks. Start and stop slowly and smoothly.Watch out for side-to-side surge. Baffled liquid tankshave bulkheads with holes that let the liquid flowbetween the smaller tanks. The baffles help control theforward/backward liquid surge; however, the liquid canstill surge side-to-side. This can cause the vehicle to rollover.Distribute the weight evenly when loading yourvehicle. Some liquid tanks are divided into severalsmaller tanks by bulkheads. When loading andunloading the smaller tanks, pay attention to the weightdistribution. Don’t put too much weight on the front orrear <strong>of</strong> the vehicle.Never load a cargo tank totally full. Liquids expandas they warm. This is called outage. You must leaveroom for the liquid to expand. Different liquids expandby different amounts and require different amounts <strong>of</strong>outage. You must know the outage requirement for theliquids that you haul.62 | V I R G I N I A C O M M E R C I A L D R I V E R ’ S M A N U A L
Know how full to load your vehicle. A full tank <strong>of</strong>dense liquid, such as some acids, may exceed legalweight limits. Therefore, you may only partially fill tankswith heavy liquids. The amount <strong>of</strong> liquid that you canload into a tank depends on:the amount that the liquid will expand duringtransit;the weight <strong>of</strong> the liquid; and,the legal weight limits.Drive smoothly. Because your tank vehicle has a highcenter <strong>of</strong> gravity and because <strong>of</strong> liquid surge, you muststart, slow down and stop smoothly. You must also makesmooth turns. Otherwise, your vehicle could roll over.Use controlled or stab braking. If you must stopquickly to avoid a crash, use controlled or stab braking.Remember, if you steer quickly while braking, yourvehicle could roll over.<strong>Section</strong> 8: Transporting Passengers<strong>Section</strong> 8:Transporting PassengersEvery <strong>Virginia</strong> CDL test includes information from<strong>Section</strong> 1: General Knowledge.Safe Driving RulesSlow down before curves. Then, accelerate slightlythrough the curve. The posted speed for a curve may betoo fast for a tank vehicle. Stay below the posted speed.Maintain a safe stopping distance between you andthe vehicle ahead. Remember, wet roads double thenormal stopping distance. Empty tank vehicles may takelonger to stop than loaded ones.Don’t over-steer, over-accelerate or over-brake.This could cause your vehicle to skid or roll over. Ifyour drive wheels or trailer wheels begin to skid, yourvehicle may jackknife. If your vehicle starts to skid, takeimmediate action to restore traction to the wheels.You must have a commercial driver’slicense if you plan to drive a vehicle designed to carry 16or more passengers including the driver. You must alsohave a passenger endorsement on your CDL. To get theendorsement, you must pass:the written general knowledge exam;the written passenger bus exam;the written air brakes exam if your vehicle is equippedwith air brakes; the skills test required for the class <strong>of</strong> vehicle that youplan to drive.Note: If you hold a CDL with a Passenger endorsement andare required to be registered with the <strong>Virginia</strong> State PoliceSex Offenders and Crimes Against Children registry, you areprohibited from operating a commercial motor vehicle totransport children to or from activities sponsored by a schoolor by a child day care facility licensed, regulated, or approvedby the <strong>Virginia</strong> <strong>Department</strong> <strong>of</strong> Social Services. Your CDL willdisplay a Q restriction.Pre-trip InspectionBefore driving your bus, make sure it is safe.Review the inspection report made by the previousdriver. Sign the previous driver’s report only if thedefects reported earlier have been certified as repairedor certified as not needing repair. By signing this report,you certify that the defects reported earlier have beenfixed.Conduct a pre-trip inspection. Follow the inspectionmethod outlined in <strong>Section</strong> 1: General Knowledge.V I R G I N I A C O M M E R C I A L D R I V E R ’ S M A N U A L | 63