Notes for Lab instructors
Notes for Lab instructors
Notes for Lab instructors

You also want an ePaper? Increase the reach of your titles
YUMPU automatically turns print PDFs into web optimized ePapers that Google loves.
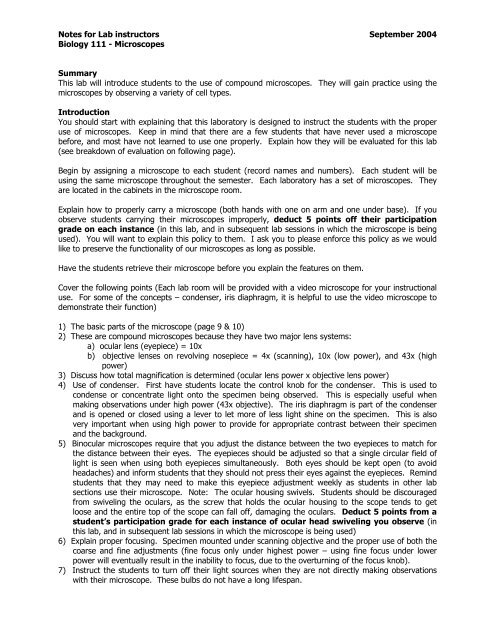
<strong>Notes</strong> <strong>for</strong> <strong>Lab</strong> <strong>instructors</strong> September 2004Biology 111 - MicroscopesSummaryThis lab will introduce students to the use of compound microscopes. They will gain practice using themicroscopes by observing a variety of cell types.IntroductionYou should start with explaining that this laboratory is designed to instruct the students with the properuse of microscopes. Keep in mind that there are a few students that have never used a microscopebe<strong>for</strong>e, and most have not learned to use one properly. Explain how they will be evaluated <strong>for</strong> this lab(see breakdown of evaluation on following page).Begin by assigning a microscope to each student (record names and numbers). Each student will beusing the same microscope throughout the semester. Each laboratory has a set of microscopes. Theyare located in the cabinets in the microscope room.Explain how to properly carry a microscope (both hands with one on arm and one under base). If youobserve students carrying their microscopes improperly, deduct 5 points off their participationgrade on each instance (in this lab, and in subsequent lab sessions in which the microscope is beingused). You will want to explain this policy to them. I ask you to please en<strong>for</strong>ce this policy as we wouldlike to preserve the functionality of our microscopes as long as possible.Have the students retrieve their microscope be<strong>for</strong>e you explain the features on them.Cover the following points (Each lab room will be provided with a video microscope <strong>for</strong> your instructionaluse. For some of the concepts – condenser, iris diaphragm, it is helpful to use the video microscope todemonstrate their function)1) The basic parts of the microscope (page 9 & 10)2) These are compound microscopes because they have two major lens systems:a) ocular lens (eyepiece) = 10xb) objective lenses on revolving nosepiece = 4x (scanning), 10x (low power), and 43x (highpower)3) Discuss how total magnification is determined (ocular lens power x objective lens power)4) Use of condenser. First have students locate the control knob <strong>for</strong> the condenser. This is used tocondense or concentrate light onto the specimen being observed. This is especially useful whenmaking observations under high power (43x objective). The iris diaphragm is part of the condenserand is opened or closed using a lever to let more of less light shine on the specimen. This is alsovery important when using high power to provide <strong>for</strong> appropriate contrast between their specimenand the background.5) Binocular microscopes require that you adjust the distance between the two eyepieces to match <strong>for</strong>the distance between their eyes. The eyepieces should be adjusted so that a single circular field oflight is seen when using both eyepieces simultaneously. Both eyes should be kept open (to avoidheadaches) and in<strong>for</strong>m students that they should not press their eyes against the eyepieces. Remindstudents that they may need to make this eyepiece adjustment weekly as students in other labsections use their microscope. Note: The ocular housing swivels. Students should be discouragedfrom swiveling the oculars, as the screw that holds the ocular housing to the scope tends to getloose and the entire top of the scope can fall off, damaging the oculars. Deduct 5 points from astudent’s participation grade <strong>for</strong> each instance of ocular head swiveling you observe (inthis lab, and in subsequent lab sessions in which the microscope is being used)6) Explain proper focusing. Specimen mounted under scanning objective and the proper use of both thecoarse and fine adjustments (fine focus only under highest power – using fine focus under lowerpower will eventually result in the inability to focus, due to the overturning of the focus knob).7) Instruct the students to turn off their light sources when they are not directly making observationswith their microscope. These bulbs do not have a long lifespan.
<strong>Notes</strong> <strong>for</strong> <strong>Lab</strong> <strong>instructors</strong> September 2004Biology 111 - Microscopes8) Make sure the students understand to return their microscope to the appropriate space in themicroscope storage room when they are finished. They should follow the procedure described inSection II (Care of the Microscope), #2. At the end of the lab, check each microscope <strong>for</strong> properstorage. Deduct 5 points from a student’s participation points <strong>for</strong> not properly storing themicroscope (in this lab, and in subsequent lab sessions in which the microscope is being used).9) Discuss the measuring of microscopic objects (exercise 6 of Chapter 2). Explain the relationshipbetween µm and larger units of measurement. There is a helpful table on page 27.10) Student troubleshooting. Three easily solved problems prevent students from properly observingtheir specimens:a) Dirty high power objective. Instruct students on the use of lens paper to clean their objective ifnecessary.b) Specimen out of focus range. Stress the importance of beginning each observation focusingunder the scanning objective be<strong>for</strong>e using the low or high power objectives. Stress that only minimaladjustment should be needed using the fine focus knob if the specimen has been properly set underthe scanning lens (i.e. The microscopes are nearly parfocal.)c) Improper adjustment of condenser/iris diaphragm – either too little/too much light, or thecondenser is spaced too far from the bottom of the stage.Instructor troubleshooting of microscopes. Problems with microscope functioning will arise. In mostinstances they are problems that you as the instructor should correct.-Students will complain that their microscope will "slide" out of focus. This is an easy problem tocorrect and will be demonstrated during lab meeting. It involves a loose screw on the focusing knob-Sometimes dried on material is difficult to remove from an objective with dry lens paper. In thiscase, use 95% ethanol to wet the lens paper <strong>for</strong> cleaning.-Some microscopes will not focus, as the focus knobs cannot be turned any further. This is the resultof improper use of the fine focus knob, and is an easy fix, as will be demonstrated during the labmeeting (it basically requires turning the specimen out of focus using the coarse adjustment, thenturning back in focus using the fine focus)-Field of view may look gray or not completely round and clear. Once again, an easy problem to fix.There are two screws mounted above the iris diaphragm and under the stage that move thecondenser (there is a third screw—slightly behind the other two-- that secures the condenser to thescope, so be careful which screws you are using)-Burn out light sources: You should have plenty of time to replace a light source at the end of thelab (it is easy enough to per<strong>for</strong>m while the lab is in session, if necessary). A screwdriver and bulbsare located in the microscope room, in the top & second drawers closest to Room 202. Minimizetouching of the new bulb (the glass part of the bulb).-Students should not loosen the screw that allows the ocular housing to rotate. The entireocular housing can fall off the microscope and be damaged (it is heavy and inner components willbreak on impact). Occasionally the ocular housing (after having been played with) is not set flush ontop of the microscope and only a partial field of view is visible that cannot be corrected <strong>for</strong> with thecondenser adjustment screws. Carefully, unscrew the ocular housing, and make sure that it ismounted flat on top of the microscope.-Rule of thumb: Some students tend to play with various microscope knobs out of curiosity, orconfusion about which knob/screw controls what. Know your microscope knobs and adjustmentscrews and what they do, and make sure your students do too!If you encounter a problem with a microscope that you cannot correct (which should not usuallyhappen), please leave a note attached to the microscope explaining what the problem is, and your name.Unlabeled microscopes should not be left sitting out <strong>for</strong> someone else to try to figure out what is wrong.
<strong>Notes</strong> <strong>for</strong> <strong>Lab</strong> <strong>instructors</strong> September 2004Biology 111 - MicroscopesActivitiesThis is a very interactive lab <strong>for</strong> you. You will need to verify that each student has correctly mountedtheir specimens <strong>for</strong> microscopic observation (this week: spirogyra, or other organism TBA). Part of theirevaluation will be whether or not they can get the specimen into focus at high power (43x). All exercisesin Chapter 2 will be per<strong>for</strong>med.Demonstrate the preparation of a wet mount (especially proper placement of coverslip to avoid airbubbles), and show the wet mount on the video microscope. Have students refer to the wet mountprocedure under Section III-4.• Instruct the students that they will be graded <strong>for</strong> the mounting and viewing of a biologicalspecimen.• Make sure the students use the letter “E” viewing exercise to clear up any difficulties in focusing.• Allow the students to practice their spirogyra mount prior to their graded attempt.Evaluation (It is recommended that you use a score sheet, in order to keep track of microscopehandling deductions, and <strong>for</strong> assessment of wet mounts, <strong>for</strong> this, and subsequent microscope labs)20 points - Participation - this includes participation in any discussions (being attentive can be regardedas constructive participation) as well as attitude in class. I would take off points from studentswho are not paying attention during lecture, sharing of answers, being disruptive, etc. Pointdeductions <strong>for</strong> improper microscope handling (5 points each occurrence) are required.Make sure to check <strong>for</strong> proper storage of microscopes at the end of the lab.32 points - Completing the assigned notebook exercises and questions. The completed pages shouldbe handed in <strong>for</strong> grading. There are 16 total responses @ 2 points each.15 points – Mounting & viewing spirogyra. You will have to observe a wet mount <strong>for</strong> each student.• Mounting – 5 points (5-excellent; 4–good; 3-fair; 2-poor; 1-unacceptable).• Focused views of Spirogyra mount (using 43x objective) – 10 points. Typical errors: specimenout of focus, viewing at wrong magnification. 10=in focus, proper magnification on first attempt.5 point deduction <strong>for</strong> incorrect magnification. 5 point deduction <strong>for</strong> unobservable specimen (<strong>for</strong>example, focus on a bubble, but no spirogyra in field of view). 3 point deduction <strong>for</strong> specimen inview, but out of focus.33 points - Quiz. Design your own questions to cover the following items:-the functions of microscope parts (feel free to use a microscope diagram)-determining total magnifications of images-conversions between µm to mm and mm to µm.-the relationship of magnification with size of field of view-the relationship of magnification with light intensity and how they can alter light intensity to facilitateviewing their specimensPlease design college level questions. If you need any suggestions, please ask.