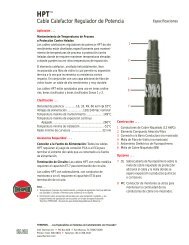
TerminatorTM ZS/ZE
TerminatorTM ZS/ZE
TerminatorTM ZS/ZE

You also want an ePaper? Increase the reach of your titles
YUMPU automatically turns print PDFs into web optimized ePapers that Google loves.
<strong>TerminatorTM</strong><strong>ZS</strong>/<strong>ZE</strong>In Line Splice/End Termination KitINSTALLATION PROCEDURESFor In-Line Splice Connection and End Termination Applications
Terminator TM <strong>ZS</strong>/<strong>ZE</strong>Kit Contents . . .Dimensions . . .INSTALLATION PROCEDURES1 234Item Quantity Description1 1Expediter AssemblyGrommet CompressorGrommetSupport Base with O-Ring2 1 Splice Cap3 1 Banding Guide4 1 BandingOrder Separately for End TerminationPETK Power and End Termination Kits (per cable)PETK-1 for BSX, RSX, VSXPETK-2 for KSX, HTSX,PETK-3 for FP, HPT12 3 45Item Quantity Description1 1 RTV Tube2 1 Power Connection Boot3 1 End Cap4 1 Tape Strip 6" (PETK-3 only)5 1 End Termination Caution Label6 1 GRW-G Grommet (PETK-3 only)Order Separately for Inline SpliceSCTK Splice Connection Termination Kits (per cable)SCTK-1 for BSX, RSX, VSXSCTK-2 for KSX, HTSX,SCTK-3 for FP, HPT1 2 3 4 5 676Installation Precautions . . .• To minimize the potential for arcing and fi re caused by productdamage or improper installation use ground-fault protection.The National Electrical Code (NEC) and Canadian ElectricalCode (CEC) require ground-fault protection of equipment foreach branch circuit supplying electric heat tracing.• Installation must comply with Thermon requirements andbe installed in accordance with the NEC, CEC, or any otherapplicable national and local codes.• Component approvals and performance ratings are based onthe use of Thermon specifi ed parts only. User supplied powerconnection fi ttings must be listed or certifi ed for intendeduse.• De-energize all power sources before opening enclosure.• Avoid electrostatic charge. Clean only with a damp cloth.• Keep ends of heating cable and kit components dry before andduring installation.• Individuals installing these products are responsible forcomplying with all applicable safety and health guidelines.Proper personal protective equipment, or PPE, should be utilizedduring installation. Contact Thermon if you have any additionalquestions.Tools Required . . .Item Quantity Description1 3 Splice Connection Boots2 2 Small Crimps3 1 Large Crimp4 2 Small Crimp Insulators5 2 Silicone Caps6 3 Ground Sleeves7 1 RTV TubeCertifications/Approvals . . .IP66/Type 4X -60°C Ta +55°CListed Heat Tracing Cable System 137MOrdinary & Hazardous LocationsClass I, Division 2, Groups A, B, C, & DClass II, Division 2, Groups F & G, Class IIIClass I, Zone 1, AEx eb IIC T4-T609.2238691,-G,-S, Ex e IIC T4-T6FMG 10.0022X Ex eb IIC T4-T6, Ex tb IIIC T135°C-T85°C1725 II 2 GD Ex eb IIC T4-T6, Ex tb IIIC T135°C-T85°C FM 10ATEX0058X2
Terminator TM <strong>ZS</strong>/<strong>ZE</strong>INSTALLATION PROCEDURES1. Locate bus connection (HPT and FP only) andcable as shown. Cut end of cable at angle to aidin piercing grommet. Leave additional cable forexpansion loop. See page 4 for multiple cableinstallation tips.2. Insert cable into expediter. If mounted onbottom or side of pipe, punch out weep hole.Note: For HPT and FP cable, exchange grommetin Terminator with GRW-G provided inPETK-3.3. Slide expediter toward pipe and route cablethrough support base entry.4. Insert banding guide into expediter and snapinto place..5. Mount expediter to pipe using pipe band. Donot band over cable.6. Cut off end of cable. .7. Terminate cable with appropriate SCTK or PETKtermination kit. Refer to SCTK or PETK installationinstructions.8. Push excess cable back through expediter.Tighten cap securely. Tape cable expansionloop to pipe.9. Connect bus wires using small crimps andconnect ground wires using large crimp. Seepage 4 for wiring details. Trim excess wire ifnecessary.3
Terminator TM <strong>ZS</strong>/<strong>ZE</strong>Two Cable Layout TipsINSTALLATION PROCEDURESLocate bus connection (HPT and FP only) and cableas shown. Cut end of cable at angle to aid in piercinggrommet. Leave additional cable for expansion loop.Insert two cables into expediter.Note: For HPT and FP cable, exchange grommetin Terminator with GRW-G provided in PETK-3.10. Snap on crimp insulators 11. Slide silicone caps over crimp insulators.12. Tighten cap securely.Wiring Details13. Completed splice/tee kit. Make sure latchmechanism is in the locked position.14. To remove cap, lift latch mechanism andunscrew cap.In-Line SpliceTHERMON . . . The Heat Tracing Specialists ®www.thermon.comCorporate Headquarters100 Thermon Dr. • PO Box 609San Marcos, TX 78667-0609 • USAPhone: +1 512-396-5801Specifi cations and information are subject to change without notice.Form PN50847-0212For the Thermon offi ce nearest youvisit us at . . .www.thermon.com