You also want an ePaper? Increase the reach of your titles
YUMPU automatically turns print PDFs into web optimized ePapers that Google loves.
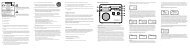
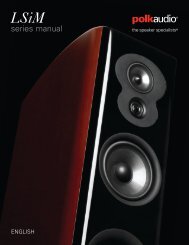
DIM - STANDBYDIM - STANDBYBRIGHT - ONBRIGHT - ONTrue SubwooferSignature andStandard EditionUser's <strong>Manual</strong>
Safety In struc tions1. Read In struc tions -– All the safe ty andop er a tion instructions should be read beforethe Sunfi re Com po nent is operated.2. Retain Instructions — The safety andoperating in struc tions should be kept forfuture reference.3. Heed Warnings — All warnings on theCom po nent and in these op er at ing in struc -tions should be followed.4. Follow Instructions — All operating andother in struc tions should be followed.5. Water and Moisture — The Componentshould not be used near water - forexample, near a bathtub, wash bowl, kitchensink, laundry tub, in a wet base ment, or neara swim ming pool, etc. This Component isintended for use in Moderate climates. Donot use in Tropical climates.6. Ventilation — The Component shouldbe situated so that its location or positiondoes not interfere with its proper ven ti la tion.Ensure a minimum distance of 2 inches(5 cm) around the Component for suffi cientventilation. For example, the Componentshould not be situated on a bed, sofa, rug,or similar surface that may block any ven ti -la tion; or placed in a built-in installation suchas a bookcase or cabinet that may impedethe fl ow of air. Ensure that the ventilation isnot impeded by covering the control panelwith items such as newspapers, table-cloths,curtains, shaggy dogs, sleeping cats etc.7. Heat and Flames — The Com po nentshould be situated away from heat sourcessuch as radiators, or other devices whichproduce heat. Do not place naked fl amesources, such as lighted candles on top of,or near the Component.8. Power Sources — The Com po nent shouldbe con nect ed to a power supply only of thetype de scribed in these op er a tion in struc -tions or as marked on the Com po nent.9. Power Cord Protection — Power-supplycords should be routed so that they arenot likely to be walked upon or pinched byitems placed upon or against them, payingparticular at ten tion to cords at plugs, convenience re cep tacles, and the point wherethey exit the Com po nent.10. Cleaning — The Com po nent shouldbe cleaned only as recommended in thismanual.11. Non-use Pe ri ods—The pow er cord ofthe Com po nent should be un plugged fromthe outlet when unused for a long pe ri odof time.12. Ob ject and Liq uid En try — Careshould be taken so that objects do not fallinto and liquids are not spilled into the insideof the Com po nent. Do not expose theComponent to dripping or splashing fromliquids. Do not place objects fi lled withliquids on top of, or near the Component.For example, no vases, glasses of wine,or cans of pop.13. Damage Re quir ing Service — TheCom po nent should be serviced only byqualifi ed service per son nel when:A. The power-supply cord or the plug hasbeen dam aged; orB. Objects have fallen, or liquid has spilledinto the Component; orC. The Com po nent has been exposed torain; orD. The Com po nent does not appear to operatenormally or exhibits a marked changein per for mance; orE. The Component has been dropped, or itscabinet damaged.14. Servicing — The user should not attemptto service the Component beyondthose means de scribed in this op er at ingmanual. All other ser vic ing should bereferred to qualifi ed service personnel.2
15. To Prevent Electric Shock, do notuse this polarized plug with an extensioncord, re cep ta cle or other outlet unless theblades can be fully inserted to preventblade ex po sure.Pour préevenir les chocs électriques nepas utiliser cette fi che polariseé avec unprolongateur, un prise de courant ou uneautre sortie de courant, sauf si les lamespeuvent être insérées à fond sans laisseraucune pariie à découvert.16. Grounding or Po lari za tion — Pre cau -tions should be taken so that the groundingor polarization means of the Component is not defeated.This apparatus does not exceed the ClassA/Class B (which ev er is ap pli ca ble) limitsfor radio noise emis sions from digital apparatusas set out in the radio interferenceregulations of the Canadian De part ment ofCom mu ni ca tions.ATTENTION — Le présent appareil numériquen'émet pas de bruits radioélectriquesdépassant las limites applicables aux appareilsnumériques de class A/de class B(selon le cas) prescrites dans le règlementsur le brouillage radioélectrique édictépar les ministere des com mu ni ca tions duCanada.WARNING:THIS SUBWOOFER IS CAPABLE OF PRO DUC INGVERY HIGH SOUND PRESSURE LEVELS. YOU MUST TAKEEVERY PRECAUTION TO PROTECT YOUR HEAR ING FROMPER MA NENT DAM AGE.ContentsSafety Instructions.........................................2Introduction ...................................................4Features........................................................4Unpacking and Care .....................................4Overview .......................................................5Control Panel Features .................................6Installation.....................................................9Connections ................................................10Location ......................................................11Room Equalization Procedure ....................12System Confi gurations................................14Adjusting the Controls .................................18Specifi cations (Signature Edition) ...............19Specifi cations (Standard Edition)................20Troubleshooting Guide................................21Limited Warranty .........................................23Service Assistance......................................23To fi nd out more about this and other Sunfi re products,please visit our website: www.sunfire.com 3
IntroductionThank you for purchasing this Sunfi reTrue Subwoofer EQ. We hope you enjoyit and the music it makes as much as wehave enjoyed creating it for you.The big breakthrough features ofthe subwoofer are its uncanny trackingdownconverter, its long throw, highback-electromotive force driver, and itsfully automatic room equalizer. Takentogether, they provide this sub woof er withas much bass as you could get from several15 inch drivers mount ed in a cabinetthe size of a small re frig er a tor.UnpackingYour Sunfi re Subwoofer should reachyou in perfect con di tion. If you do noticeany ship ping dam age, please contactyour Sunfi re Dealer im me di ate ly.Gently lift out the unit and remove allthe packing material. It is im por tant tosave all the packing ma te ri als and thebox in case your subwoofer ever needsto be moved or shipped for repair.Make sure that you keep your salesreceipt. It is the only way to establishthe duration of your Limited Warrantyand it may come in useful for insurancepur pos es.Please take a moment to fi ll out andmail the Sunfi re Customer Responsecard. Also read the serial num ber locatedon the control panel and record it here:Serial Number:Purchased from:Features• 2,700 watt, high efficiency amplifier• High gloss, dark rosewood fi nish (alsoreferred to as Deep Bing Cherry Lacquer)• Automatic Room Equalization mode• Measurement Microphone included• Very low distortion• Long throw, premium quality drivers• Stunning output from a small cube!• Automatic signal-sensing turn-on andstandby mode• 12 VDC trigger input for remote turn-on• Balanced XLR input• Line level unbalanced inputs• Speaker level binding post inputs• Line level high-pass outputs• Continuously variable phase control• Continuously variable crossover frequencyadjustment, 35 to 100 Hz• Continuously variable volume levelcontrol• Soft clipping circuit allows gracefuloverload and prevents speaker dam agedue to clipping• Gold-plated inputs and outputs.CareTo maintain the speaker cabinet’s fi n-ish, fi rst unplug the power cord and thenuse a soft cloth to clean the sur fac es.If your Sunfi re Subwoofer needs servicing, please read the Trou ble shoot ingsection on page 21. If a problem stillpersists, contact your near est au tho rizedSunfi re Dealer.Date:4
OverviewYour Sunfi re True Subwoofer EQ isdesigned to give you the best possiblelow-fre quen cy sound quality for yourHome Theater ex pe ri ence. It in cor po ratesa tre men dous ly powerful built-in am pli fi erand a pair of drivers to produce tight,fl oor-rumbling, denture-rattling bass thatyou can feel as well as hear.The subwoofer is available in two versions,and this manual covers both:Signature Edition is a 13 inch cube, withan output greater than 116 dB peakSPL, 16 Hz to 100 Hz.Standard Edition is an 11 inch cube,with an output greater than 110 dBpeak SPL, 18 Hz to 100 Hz.The subwoofer has an automaticequalization system which will tailor thesubwoofer output to compensate for anyroom effects. It also has a manual equalizationmode.The subwoofer has an adjustable highcut filter and a choice of speaker-levelor line-level inputs for easy in cor po ra tioninto existing systems, or as part of asubwoofer/satellite speaker com bi na tion.Controls for adjusting the volume,crossover frequency and phase, allowthe subwoofer to be perfectly matchedto any listening environment and audiocomponents.The DriversTo have lots of bass requires movinglots of air. Your Sunfi re Subwoofer incorporatestwo drivers that can move backand forth ap prox i mate ly fi ve times morethan a normal sub woof er. This gives it alot of air moving capacity which allows formajestic bass per for mance.Two drivers share the acoustic output.Sometimes one driver appears to bemoving more than the other. They bothmove the same amount only when operatingat the limit of their ex cur sion andpower output, or when bass requirementsand music re quire ments demand maximumoutput from the system. Otherwise,the power is shared between the twodrivers in a way that depends on the momentaryam pli tude and the mo men tarymusical spectrum. It is normal for one orthe other to move more or less than itsmate during operation.The Amplifi erThe large movement range of the driverscreates greater air pressure insidethe box than a con ven tion al subwoofer.There fore, the drive am pli fi er must bemuch more powerful than an or di narysubwoofer amplifi er. In fact, it has to beso powerful, it is almost hard to believe.The power amplifi er within your Sunfi reSubwoofer is capable of de liv er ing over2,700 watts into a 3.3 ohm resistor (thedriver voice coil re sis tance). When thesame full output is applied to the driver,however, the enor mous back-elec tro -mo tive force gen er at ed as a con se -quence of its large motion and giant magnet,causes the current fl ow to be muchless than if it were a 3.3 ohm resistor. Itis this singular property of the driver thatallows the subwoofer to be ap prox i mate lyten times more effi cient than a subwooferthis size would nor mal ly be.A compressor circuit kicks in au to mat i-cal ly if the input signal level reaches alevel that would overload the driver. Thismaintains a ceiling on the output withoutclip ping. If the input signal is driven evenfurther, a ‘soft clipping’ circuit is enabled.This allows the subwoofer to put moresound into the room to satiate the powerhungry user, but without distortion ordamage to the subwoofer. Thus, for explosivescenes in movies, this pro duc esextremely high sound pressure levels(SPL) in your room without the driversbanging against the mechanical stops.For more details of the subwoofer design,please call us or view our website:www.sunfi re.com. 5
Control Panel Features1514131211109DIM - STANDBYBRIGHT - ON123456781. VolumeThis control lets you match the outputlevel of the subwoofer to the levelof your sat el lite/main speak ers. Thesubwoofer output will increase as thiscontrol is rotated clockwise. When youhave just installed your system, turnthis down fi rst before turning on yoursub woof er. This will prevent any loudsurprises.2. Crossover FrequencyThis controls the high frequency cutoffpoint. With the control set to the 100Hz mark, the sub woof er will reproducefre quen cies up to 100 Hz. If the controlis set fully clockwise, the crossover isbypassed and the subwoofer will reproduce a wide frequency range. Withthe control fully counter-clock wise thesub woof er re pro duc es a narrow range,up to 30 Hz.Rotate the control until the bass soundsnatural. If the mid-bass sounds naturalbut you want more low bass, turn thiscontrol down a little, then turn theVolume control up by about the sameamount. This increases the low-bassoutput while leaving the mid-bassoutput the same.3. Phase ControlThis control changes the relative phaseof the sub woof er with respect to yourother speakers. Use this control to helpblend the sub woof er with the rest ofyour sys tem. This is accomplished byad just ing the control in small in cre -ments as you listen for the most bassat your lis ten ing position. As a fi nal trim,readjust the Crossover Frequency andVolume controls after the Phase hasbeen set.4. Trigger InputsThese two inputs can be used to automaticallyturn on the subwoofer. To dothis, connect 12 VDC to either of theseterminals. Some Home Theater preamplifiers, such as the Sunfi re TheaterGrand II and III, have matching 12 VDCTrigger outputs. When they are turnedon, the subwoofer will turn on.5. OutputsLine level high-pass output signalsare available at these jacks. Theseoutputs are active whenever a signalis hooked up to the line level inputsof the sub woof er. This crossover is a6
passive network with a fi xed crossoverfrequency of 70 Hz and a 6 dB peroctave slope.We rec om mend using this high-passfunction with main/satellite speak ersthat are small and not designed toreproduce low fre quen cies. If your mainspeakers are capable of op er at ing fullrange, then you will not need to use thehigh-pass function.To use the high-pass outputs, connectthe preamp outs on your preamp/receiver to the subwoofer’s line level inputsusing good quality RCA type patchcords. Then connect a second patchcord from the subwoofer’s outputs tothe inputs of your main amplifi er. Thiswill allow your main speak ers to operateat fre quen cies above 70 Hz and thesub woof er to operate at fre quen ciesbelow 70 Hz (see page 16).6. Line Level InputsConnect these unbalanced inputs withRCA type patch cords to the line leveloutputs of your receiver or preamp.If your preamplifi er or receiver has asingle sub/LFE output, connect it tothe sub woof er’s left input jack (seepage 14). There is no need to use thesubwoofer’s right input jack.If you want to run your main/satellitespeakers full range, use a “Y” adapterat the preamplifi er outputs (see page15). In this way, you can send thepreamplifi er’s output signal to yourmain amplifi er and to the subwoofer atthe same time.7. Balanced (XLR) InputUse this balanced input to connectto the balanced line-level output of aHome Theater preamplifi er or othersource. Balanced connections offersuperior noise cancellation over unbalancedconnections, so if your preamphas an XLR subwoofer output, werecommend using it.8. Speaker Level InputsUnder normal conditions, the preferredconnection is through the line levelinputs. If this is diffi cult or not possiblein your system, then you can use thespeaker level inputs. Also, if you ex pe -ri ence ex ces sive noise or hum with theline level inputs, often a simple changeto the speaker level inputs will result ina lower back ground noise level.Connect the speaker level inputs to thespeak er-level outputs of your am pli fi eror receiver using speaker wire. Thebinding posts can accept bare wire,banana, dual-banana or spade connections.Your amplifi er or receiver MUSThave com mon grounded outputs,or it will be dam aged if con nect edto the subwoofer’s speaker levelinputs.9. Line FuseThe subwoofer is supplied with a conserva tive slow-blow type fuse to protectthe elec tron ics.Always unplug the power cordbefore inspecting or changing thefuse. Never use a fuse with a largercurrent rating than shown on themarkings next to the fuseholder.10. IEC Linecord socketThe subwoofer comes with a detachablelinecord which connects here.US (120 VAC) MODEL: Connectthe linecord to the subwoofer beforeconnecting the other end to an 120Volt, 60 Hz AC outlet. The outlet musthave a cir cuit rating of 8 amps or more(a typical home circuit is rated at 15amps).Never plug the US (120 VAC)Model subwoofer directly into220-240 Volts AC as this will causecat a stroph ic circuit failure. 7
Control Panel Features continued15141312DIM - STANDBYBRIGHT - ON11EURO (230 VAC) MODEL: Connectthe linecord to the subwoofer beforeconnecting the other end to a 230 Volt,50/60 Hz AC outlet. The outlet musthave a cir cuit rating of 8 amps or more.Never plug the Euro (230 VAC)model subwoofer directly into 120-130 Volts AC.11. Power SwitchThe power switch is a CE requirementfor international shipments. Leave itswitched on at all times for normaloperation.After a period of inactivity (i.e. withno input signal), the subwoofer willautomatically turn itself to Standbymode, where it is effectively off. It canhowever, turn back on automaticallywhen an input signal is applied, if a12 VDC trigger voltage is applied to theTrigger inputs, or if the Start button ispressed.12.Start buttonPress this once to enter the Auto EQmode (if the sub is out of Standbymode). Press and hold down forseveral seconds to enter the <strong>Manual</strong>EQ mode. See page 12 for moredetails on this and the following EQcontrols.13.Microphone InputThis is where you plug in the suppliedlinear measurement microphone whenyou want to use the Auto EQ mode.14.LED displayThese LEDs are used during the AutoEQ and <strong>Manual</strong> EQ procedures.15.Equalizer AuthorityThis control's primary purpose is toadjust the EQ Authority. During normallistening, you can adjust the overall EQfrom none (ccw, 0%), to fully equalized(cw, 100%). For example, if your fi rstband has a 6 dB boost, setting thiscontrol to 50% would make it boostonly 3 dB.This control is also used during the<strong>Manual</strong> EQ mode to adjust each of thefour internal EQ bands, and allow youto add "color" to the sound as desired.8
InstallationObserve the following general pre cau -tions and read the safety in struc tions onpages 2 and 3 before using your Sunfi reSubwoofer.• Never open the cabinet or removethe metal control panel as thismight result in an electrical shock toyou, or dam age to the unit.• Protect it from prolonged ex po sureto direct sunlight and other directsources of heat, such as heatingvents and ra di a tors.• To prevent fi re or shock, do notexpose the unit to rain or moisture.If fl uid or a foreign object shouldenter the unit, immediately turn offthe power and contact your Sunfi reDealer.• Avoid excessive exposure toextreme cold or dust.• Do not place heavy objects on topof the unit.• Do not place the subwoofer with itscontrol panel against the fl oor.• If you wish to place your subwooferso the drivers face the fl oor andceiling, thereby moving up anddown, use at least 1-1/2 inch highspikes or feet for support. Theymay be attached either with screwsor self-stick backing. This ar range -ment will impart substantial houseand fl oor shaking motion.• Four extra heavy, shock absorbingrubber mounting feet have beenincluded. If your subwoofer tendsto wander about slightly while inuse, place these feet just insidethe existing feet positions. Theseshock absorbing mounts will letthe subwoofer rock freely, therebyabsorbing low frequency rockingenergy, allowing it to adhere solidlyto the fl oor. • To move the subwoofer along thefl oor, rotate it onto one edge onto aplastic sheet or bag, and it will slidealong easier.Heat rise• Allow adequate ventilation aroundthe metal control panel of thesubwoofer.• Do not let anything come intocontact with the panel and keepat least two inches away from anywalls.The metal control plate serves as theam pli fi er heat sink and also as a conduitto remove internal heat to the outsideand into the atmosphere. It can reachtem per a tures of 60 degrees C, whichwill feel hot to the touch, using nerves offl esh and blood as tem per a ture sensors.As uncomfortable as it may feel, 60degrees C cannot burn you, and in fact isalmost cool to copper, silicon, steel, andaluminum, the materials from which yoursubwoofer is con struct ed.AC Power ConsiderationsEnsure that the unit is plugged into anoutlet capable of supplying the correctvoltage specifi ed for your model.Unplug your subwoofer’s power cordfrom the electrical outlet if it will be leftunused for a long period of time.Route the power-supply cord so it is notlikely to be walked on or pinched by itemsplaced upon or against it, es pe cial ly atplugs, con ve nience re cep ta cles, and thepoint where it exits from the unit.Magnetic FieldsWe recommend that you place yoursubwoofer further than two feet awayfrom your TV, VCR, tape deck or computer,so the speak er’s magnet won’tdistort the colors of your TV picture orerase your video tapes, audio tapes orcomputer discs.9
ConnectionsPlease consider the following when settingup your new system :• Before making or changing anyconnec tions, ALWAYS make surethat the subwoofer and your othercomponents are turned OFF. Alsoturn down the volume control of thesub woof er and your pream pli fi er orreceiver.Tape DeckDVDPreamplifierPower stripAmplifierAC outlets on the same circuit breakerSubwoofer• This diagram shows all the lowpower com po nents sharing a powerstrip which is con nect ed to the sameout let used by the amplifi er.• The sub woof er is con nect ed to anout let on the same cir cuit break er,pro vid ed that the total sys temcur rent draw does not exceed thebreaker current rating.• This arrangement will reduce thepos si bil i ty of an audible hum in yoursystem caused by a ground loop.• Whenever possible, keep thepower cords away from the signalcables or speaker wires to pre ventany hum or in ter fer ence beingheard in the speak ers.• Choose reliable, high quality in ter -con nect cables, also called patchcords or RCA cables. They shouldbe fully shield ed and as short aspos si ble for the job. The longestcable in your system will likely be tothe sub woof er, so choose a goodquality brand.• Some patch cords can be a verytight fi t and there is usually apreferred method of getting themoff. Some have to be re moved witha twisting action. Be gentle or youmay dam age the jacks of the subwoofer or your other com po nents.Speaker Level connections• The subwoofer’s speaker levelinputs can accept speaker wireswith banana, dual-banana, barewire or spade terminals. If you havebanana type con nec tors on yourspeaker wire, make sure that youtighten the binding posts beforeinserting.• Make sure that the negativespeaker wires never touch the positivewires as this will short out andpossibly damage your amplifi er orreceiver.The subwoofer’s two negativeposts are joined in ter nal ly (common-grounded). Your am pli fi ermust also be internally commongroundedor you cannot use thisconnection. Contact the man u fac -tur er of your amplifi er to make sureits outputs are common grounded.10
Locationyou might be able to place thesubwoofer. Try crouching down,and try the corners. Find the placewhere the subwoofer's bass outputsounds the loudest.Your subwoofer is designed to beplaced in a corner and this will produceoptimum performance.#1 is very good positioning.#2 is also excellent but may shakethe back wall too much and causethings on or along the wall to rattletoo much. If this occurs, use the #3position:#3 Move the subwoofer ap prox i mate lythree feet away from the right walland place it along the back wallas shown. This will substantiallyreduce the rattling of the back walland will still pres sur ize the roomwith lots of bass.Ex per i ment with at least two cornersand decide which is the best, or you cantry the following procedure:1. Start by placing the subwoofer righton the seat of your favorite couchor easy chair. Take care to positionit so it is not likely to fall off. (Thismethod may seem a bit odd, but itis based on principles of acousticphysics.)2. If you are using the subwoofer aspart of a Home Theater system,you can either run a calibrationtest (noise) signal through thesubwoofer, or simply plug theanalog outputs of a CD player directlyinto the subwoofer’s line levelinputs. Turn down the subwoofer'svolume level before turning on theCD, then play some of your favoritemusic samples with heavy bass.4. Shut things down and install thesubwoofer in this position. Makesure the control panel is not touchinganything, and that it can receivegood ventilation.Although low frequencies are non-direction al, factors such as room re fl ec -tions, standing waves, resonance and absorption will strongly affect your subwoofer’sper for mance. Moving the subwooferfrom one location to another can have amajor effect on the bass response.The Auto EQ mode will let you adjustfor the room effects, but you should fi ndthe best location fi rst.Remember to keep the subwooferat least two or three feet away fromany TV screen, computer, VCR ormag net ic tapes and discs. This willreduce the chance of the magnetic fi eldsupsetting the TV screen or erasing yourmagnetic media.Using Two SubwoofersIf you wish to use two subwoofers, thesound output will double (an increase of6 dB). Locate the subwoofers with onein each corner and ex per i ment with thelocation and phase control to achieve thebest bass response.Always drive each subwoofer throughthe Left/Mon input even though you aredriving one subwoofer with a right channeldrive and the other with a left channeldrive. If your pream pli fi er has a singlesub/LFE output, use a Y cable to split itinto two outputs.3. Walk around the room, listening,and stand in all the positions where 11
DIM - STANDBYBRIGHT - ONRoom Equalization ProcedureSubwoofer performance is greatly affectedby the room in which it is situated,and the positioning within the room. Theroom effects will boost and cut the outputlevels reaching your listening position.This gives a "Room EQ" effect which canoften be far from wonderful.The Sunfi re True Sub EQ can automaticallyadjust for the effects of Room EQ. Itmeasures the actual frequency responseusing the supplied measurement microphone.Then it automatically compensatesfor peaks or dips and smooths outthe response.For best results it is recommended thatthe subwoofer crossover in your receiveror processor be set to its maximum setting(or “bypass”). This ensures that thesubwoofer will be properly matched to therest of the speakers in your system.The following procedure will help youstart the automatic equalization:Automatic EQ Mode1. Install the True Sub EQ in the best locationyou can fi nd (see previous page).2. The calibration must be done while thelistening room is quiet. Please turn offany noisy machinery, including heatingor cooling systems during this process.Have the kids play in the backyard andgive the dog a treat to have him stopbarking. A small amount of noise, suchas quiet talking or whispering, is OK.3. Place the microphone in the listeningposition (on the couch, for example),pointing in the direction you’ll normallybe facing while listening to your system.Only use the microphone supplied bySunfi re.4. Plug the microphone into the subwoofer'smicrophone jack.5. Set these controls:• Volume to 0 dB.• Crossover to "Bypass."• Phase to "Normal."• Equalizer Authority to "Normal"6. Turn on the subwoofer AC power switchand press the Start button to go fromstandby to play mode. The yellow LEDsshould light up. Press Start again to startthe calibration.7. The subwoofer will generate a test tonesweep, slowly increasing up the frequencyscale; the microphone will takemeasurements of the sound arriving atyour listening position. The LEDs willfl ash randomly for a while, then the pairswill gradually glow constantly as eachband is measured. This sequence willrepeat twice until the measurements arecomplete. The LEDs will all blink onceand stay on, and the test tones will stop.If you fi nd that the fi rst test tone playslouder and louder, and never leaves thefi rst band, then either the microphone istoo far away from the subwoofer, or it isnot plugged in correctly.8. The procedure may take severalminutes. Do not make any loud noiseduring this process, as it may affect theaccuracy and/or make it take longer.12
9. The sub automatically calculates thebest equalization, based on the measuredfrequency response at your listeningposition. This will be saved, beforereturning to the normal listening mode.10. In normal listening, you can adjust theoverall effect of the saved EQ settingswith the Equalizer Authority control.Normally you would turn it to 100% forfull equalization. You can turn it to 0%to judge the effect of no equalization, orvary it to suit your taste.11. Repeat the Auto EQ procedure if youchange the location of the subwoofer, orif you rearrange your furniture.<strong>Manual</strong> EQ ModeThis mode allows you to manuallyadjust the room equalization to suit yourtaste. Some rooms may sound fl at or lifelesswithout a touch of color to the sound.adjust for the room effects. Then followthis manual procedure if you think theequalization might still need a tweak:1. Set these controls:• Volume to 0 dB.• Crossover to "Bypass."• Phase to "Normal."• Equalizer Authority to "50%"2. Turn on the subwoofer AC power switch.3. Press and hold down the Start buttonfor several seconds, until the fi rst pair ofyellow LEDs light up.4. A low frequency test tone will sound tohelp you adjust the lowest band.5. Adjust the volume by turning the EqualizerAuthority control (or press Start toskip and move on to the next band).You will have to sit back in your listeningposition each time to listen for the effect,or seek the help of a loved one or kindfriend to turn the control while you listen.6. Press the Start button to move on to thenext band, and then adjust the EqualizerAuthority control as needed. When youreach the last band, the next press willbring up the fi rst band again.The subwoofer has four EQ bands,each represented by two yellow LEDs.Each band is fi xed in frequency andbandwidth, but each can be adjusted involume level using the Equalizer Authoritycontrol during the <strong>Manual</strong> equalizationmode. This is similar tohaving sliders ona 4-band graphicequalizer. except thesettings for each bandare stored digitally.The subwoofer saves the setting of theEqualizer Authority control for each band,so adjusting it for one band does not alterthe adjustment for the other bands.First, you should follow the AutomaticEQ procedure, so the subwoofer will7. When all bands have been equalized toyour satisfaction, press and hold downthe Start button for several secondsuntil all the yellow LEDS come on, andthe test tone turns off. The EqualizerAuthority settings will be saved for eachband. and the subwoofer will return to itsnormal listening mode.8. Use the Equalizer Authority to adjust theeffects level of your equalization.Resetting the EQ• Turn off the subwoofer using the ACpower switch.• Hold down the Start button and turn onthe AC power switch.• Keep the Start button held down for 10seconds while the yellow LEDs fl ash.• When the LEDS go out, the EQ is resetto the fl at factory setting.13
System Confi gurationsThe following pages show some typicalcon nec tions that you might make in yourin stal la tion. They show how the inputsand outputs of the Sunfi re Subwooferare con nected to your pream pli fi er orreceiver.Connections to a preamplifi er’s subwoofer outputIf your preamplifi er has asubwoofer output (often labeled LFEfor Low Fre quen cy Ef fects), it can becon nect ed to the sub woof er’s Left(Mono) input as shown. This is thesimplest and rec om mend ed connection.A receiver with a sub/LFEoutput can be con nect ed in thesame way.DIM - STANDBYBRIGHT - ONThe sub woof er will play the lowfrequency range and the otherspeakers will play the frequencyrange delivered to them by youramplifi er.If you have a HomeTheater pream pli fi er,it may have an in de -pen dent subwoofer volumecontrol. Make surethis is correctly ad just ed,and that the Sunfi reSubwoofer’s cross overfrequency is set to 100Hz. This is by no meansan iron-clad rule, rather itis a good starting point.(See the cross over frequencycontrol details onpage 6 and ad just mentson page 18).PREAMPLIFIERLSUB/LFE OUTAMPLIFIERLINPUTSRRMAINOUTPUTSYou can set the sub woof er’s Volumecontrol to 0 dB, and then use thepreamplifi er’s sub woof er level control fornormal and routine ad just ments.TO FRONT SPEAKERS14
Connections to a preamplifi er using Y cablesIf your preamplifi er does nothave a sub/LFE output, you canuse “Y” cables to send its mainoutputs to both the sub woof er andyour am pli fi er.The subwoofer will play the lowfrequency range and your frontspeak ers will play the full range.Although bass is com mon ly distribut ed evenly between left andright chan nels (L+R bass), moviesoundtracks often contain differential(L-R) bass. The openingscene in “Top Gun”, for example,has loads of L-R bass in for -ma tion. If this is notpreserved, the bassin these scenessounds anemic. TheSunfire Subwooferutilizes dif fer en tialgain on the left andright inputs to retainboth the L+R andL-R in for ma tion.There fore, sys temswhich do not have adedicated sub/LFEoutput should useboth the left and thePREAMPLIFIERSUB/LFE OUTAMPLIFIERright inputs as shown, for the great estbass impact.LINPUTSRLDIM - STANDBYBRIGHT - ONRMAINOUTPUTSAn alternative connection methodwithout using Y cables is shown on thenext page.If your preamp/receiver has a dedicatedsub/LFE output, then only the Left(Mono) input is used, as shown on theprevious page.TO FRONT SPEAKERS 15
DIM - STANDBYBRIGHT - ONUsing the line level high-pass outputsIf you are using a pream pli fi erwhich does not have a sub/LFEoutput, you can send its leftand right front output into thesub woof er’s Line Level inputsand then connect the sub woof -er’s High-Pass outputs to theinputs of your amplifi er.The subwoofer will playthe low frequencies and youramplifi er and front speakerswill play the fre quen cy rangeabove the subwoofer’s fi xedhigh-pass crossover point.The signals comingout of the subwoofer’shigh-passoutputs are notaffected by any ofthe controls. Theyare just a copy ofthe signals goingin except that thelow bass is fi lteredout. This usesthe sub woof er’spassive crossovernetwork, rather thanthe active networkand con trols.PREAMPLIFIERLAMPLIFIERLINPUTSRRMAINOUTPUTSThis is an excellent method if yourspeakers are small satellites or minimonitors,and/or your power amplifi er isof limited power, such as a tube amp.TO FRONT SPEAKERS16
DIM - STANDBYBRIGHT - ONUsing the speaker level inputsIf you are using a receiverwhich does not have a subwoofer output or line leveloutputs (pre-outs), you canconnect its speak er outputsto the subwoofer’s speakerlevelinputs. The front speak erscan still be con nect ed to yourreceiver.The subwoofer’s internalamplifi er supplies the power toreproduce the low fre quen cyrange. It receives a sample ofthe signal going to your frontspeakers. (An in sig nifi cant fractionof your receiver’s power istrans ferred to the subwoofer).There is noneed to use thespeaker levelinputs if you areusing a sep a rateam pli fi er and preampli fi er. Suchsystems arebest con nect edusing the line levelinputs as shown in the pre vi ousdiagrams.RECEIVERMAINOUTPUTSL RIf you are using the linelevel inputs and there is aexcessive amount of noiseor hum present, using thespeak er level inputs may yield alower background noise level.TO FRONT SPEAKERSYour receiver MUST have com mongrounded outputs, or it will be damagedif con nect ed to the sub woof -er’s speaker level inputs. 17
Adjusting the controlsThere are two main methods for adjustingthe level, crossover frequency andphase of the Sunfi re Subwoofer to matcha sys tem:• Bob Carver’s preferred method:By listening and making theadjustments to suit your taste.• Laboratory method: By measuringthe output and adjusting for a fl atfrequency response.Excellent results can be obtained if youmake the adjustments based on simplylistening. This is Sunfi re’s preferred methodas it allows the system to be voicedbased on what sounds the best, whereaslab o ra to ry-fl at frequency response canoften be clinical and less than ex cit ing.Step 4. Use the phase control to makethe response even smoother. It has itsbiggest effect at the crossover fre quen cy.You can iterate between the crossoverand the phase controls. Keep your handsoff the level control! It was set correctlyin step 2.Step 5. Listen to the subwoofer.Resist all temptations to turn up the levelcontrol. Play something with really deepbass to confi rm that your subwoofer isworking.”Control settingsUse this drawing to record some ofyour favorite settings.The following procedure is for thosewho prefer a more methodical and scientific ap proach. This excerpt is from “TheAudio Critic,” issue 24, page 31, writtenby con trib ut ing editor David Rich, and isreprinted here with their kind permission.You will need a test CD with low-frequency warble tones, and a sound pressure-levelmeter. The Radio Shack ® SPLmeter will do fi ne, as will the <strong>Stereo</strong>phile ®test CD.“Step 1. Disconnect the subwoofer andrun the main speaker with a tone in itspass band (80-100Hz). Measure the level.Step 2. Disconnect the main speakerand reconnect the subwoofer. Set thesub woof er to its highest crossoverfrequency. Set the level control of thesubwoofer to give the same sound pressurelevel with the same tone you usedin Step 1.Step 3. With both the subwoofer andthe main speaker connected, measurethe level of the tones at the availablefre quen cies. Because the crossoveris set too high, you will have a peakedresponse. Adjust the cross over control toget the smoothest response.18
Specifi cations (Signature Edition)Amplifi er Output2,700 watts rms (3.3 Ω impedance)High Cut Filter30 Hz - 100 Hz adjustable, with a"Bypass" position.Frequency Response16 Hz - 100 HzPower Line VoltageUS model120 VAC 50/60 HzInternational model230 VAC 50/60 HzDimensions13" x 13" x 13"Weight53 lbsFinishHigh gloss, dark rosewood fi nish (alsoreferred to as Deep Bing Cherry Lacquer).Line Power Consumption:800 watts average, at maximum continuousoutput. 8 watts at idle.2,700 watts peak, time limited basisOutput Levels:Greater than 116 dB peak SPL (includesroom gain) from 16 Hz to 100 Hz. Measurementis one meter, anechoic.A typical Sunfi re subwoofer can beex pect ed to ‘best’ its spec i fi ed minimumpeak SPL by several decibels.Total Harmonic DistortionTypically less than 1/10 of the fun da -men tal between 18 to 80 Hz.Input Sensitivity (full output):250 mVrms from left input with volumecontrol at 0 dB, 60 mVrms volume controlfully clockwise*0.75 Vrms from right input with volumecontrol at 0 dB, 200 mVrms volumecontrol fully clockwise*Input Impedance:30 kΩ for Line-Level inputs56 kΩ for Hi-Level inputs40 kΩ for XLR input, each leg balancedto groundXLR InputPin 1Pin 2Pin 3GroundPositiveNegativeDriver: 12 inchExtra large magnet and long throwme chan i cal design yield very highback-emf. The result is ex traor di nar i lyhigh operating effi ciency – that is, moreacoustic output for each watt of input.Internal System Gain:50 dB from left input jack to speakerwith volume control at 0 dB, 62 dB withcontrol fully clockwise*40 dB from right input jack to speakerwith volume control at 0 dB, 52 dB withcontrol fully clockwise*The Sunfi re True Sub woof er utilizes* differential gain on the left and rightinputs to retain both L+R and L-Rinformation.12 VDC Trigger InputInput voltage range: 5 -18 VDCImpedance: approx 600 Ω(20 mA @ 12 V)Removable terminal block, and one 1/8”Mono minijack, tip positive. 19
Specifi cations (Standard Edition)Amplifi er Output2,700 watts rms (3.3Ω impedance)High Cut Filter35 Hz - 100 Hz adjustable, with a "Bypass"position.Frequency Response18 Hz - 100 HzPower Line VoltageUS model120 VAC 50/60 HzInternational model230 VAC 50/60 HzDimensions11" x 11" x 11"Weight48 lbsFinishHigh gloss, dark rosewood fi nish (alsoreferred to as Deep Bing Cherry Lacquer).Line Power Consumption:600 watts average, at maximum continuousoutput. 8 watts at idle.2,700 watts peak, time limited basisOutput Levels:Greater than 110 dB peak SPL (includesroom gain) from 18 Hz to 80 Hz. Measurementis one meter, anechoic.A typical Sunfi re subwoofer can beex pect ed to ‘best’ its spec i fi ed minimumpeak SPL by several decibels.Total Harmonic DistortionTypically less than 1/10 of the fun da -men tal between 18 to 80 Hz.Input Sensitivity (full output):250 mVrms from left input with volumecontrol at 0 dB, 60 mVrms volume controlfully clockwise*0.75 Vrms from right input with volumecontrol at 0 dB, 200 mVrms volumecontrol fully clockwise*Input Impedance:30 kΩ for Line-Level inputs56 kΩ for Hi-Level inputs40 kΩ for XLR input, each leg balancedto groundXLR InputPin 1Pin 2Pin 3GroundPositiveNegativeDriver: 10 inchExtra large magnet and long throwme chan i cal design yield very highback-emf. The result is ex traor di nar i lyhigh operating effi ciency – that is, moreacoustic output for each watt of input.Internal System Gain:50 dB from left input jack to speakerwith volume control at 0 dB, 62 dB withcontrol fully clockwise*40 dB from right input jack to speakerwith volume control at 0 dB, 52 dB withcontrol fully clockwise*The Sunfi re True Sub woof er utilizes* differential gain on the left and rightinputs to retain both L+R and L-Rinformation.12 VDC Trigger InputInput voltage range: 5 -18 VDCImpedance: approx 600 Ω(20 mA @ 12 V)Removable terminal block, and one 1/8”Mono minijack, tip positive.© 2006 Sunfi re Corporation.All rights reserved. Sunfi re Corporationre serves the right to improve its productsat any time. Therefore, specifi cations aresubject to change without notice.<strong>Manual</strong> 913-103-00 Rev D20
TroubleshootingThe Sunfi re Subwoofer is expertlyde signed and built to provide years oftrou ble-free per for mance. Most problemsthat occur can usually be solved bychecking your setup or making surethat the com po nents con nect ed to theam pli fi er are on and fully op er a tion al.The following information will help youdeal with common problems you may experi ence during normal use. If a problemstill persists, please contact your Sunfi reDealer for assistance.Not enough bass• Check that your preamplifi er’s outputsare connected to the sub woof er’s linelevel inputs and not to the line level highpass outputs. If they are con nect ed tothe outputs by mis take, the bass will beweak but the sub woof er will still function.• If your preamplifi er has a singlesub woof er/LFE output jack, make sureit con nects to the subwoofer’s Left(Mono) input. If the bass is still notenough after check ing all the re main ingpoints, use a Y cable to connect thepream pli fi er’s single sub woof er/LFEoutput to the sub woof er’s right and leftinputs.• Make certain the subwoofer is in acorner location, fi ring at 45 degreesinto the walls formed by the corner.This is not ab so lute ly essential, but willmaximize the bass output and give thesmooth est possible re sponse. If youplace the unit so one of the drivers isfi ring into one of the walls, leave threeinches of clear ance between the driverand the wall.• Home Theater preamplifi ers usuallyhave a way of ad just ing the level of thesub woof er/LFE output, either using aremote control or with a small volumeknob on the back panel. Make sure thatthis is ad just ed correctly. • Check that your preamplifi er orreceiver’s sub output is turned on. Somesystems only have a sub output signalwhen the front speakers are set to“small.”• If the preamplifi er’s subwoofer/LFEoutput has an ad just able crossoverfrequency, make sure that the Sunfi resub woof er’s own crossover point is sethigher or part of the bass range will bemissing.Not enough bass in a 5.1sys tem• 5.1 Home Theater preamplifi ers usuallyhave a bass management system whichallows the bass to be redirected amongyour speakers. For example, the bassnormally present in the front speakerscan be redirected to play in thesubwoofer, or the sub woof er can playthe bass from all the speakers, in additionto its dedicated LFE (low frequencyeffects) channel. Make sure that all ofthe bass man age ment options are correctlyset. The preamplifi er may have away of turning the sub woof er output offentirely, so check that it is always on.• Check that the preamplifi er calibrationprocedure is correctly adjusted. Usually,the preamp will send a test tone throughall the speakers in your system, allowingyou to adjust (trim) the volume of eachchan nel until they are all playing at thesame level.• If the bass is weak only when playing5.1 surround sources, check that yourpream pli fi er is correctly set to decodethe 5.1 sur round modes, such as DolbyDigital or DTS.• DVD discs have a menu which allowsyou to select which soundtrack to play.Check that the correct 5.1 surroundaudio soundtrack is selected, otherwiseit may just play stereo into your preampand you won’t get the true LFE signalinto the subwoofer.21
HumAdding any component such as a subwoofer to an existing system will oftengive rise to a hum which wasn’t therebefore. Your fi rst thought may be thatthe sub woof er has a problem, but this ismore than likely caused by a “groundloop”in your system.Follow these steps to isolate the maincause of the ground-loop hum (theremay even be more than one cause).• Try to have all of your equip ment onthe same electrical outlet or circuit, seepage 10 for more details.• If your sub woof er is a fair dis tanceaway from your other equip ment, youmay use a 15 amp extension cord aslong as it has a ground con nec tion.NOTE: Never remove the groundpin from any power cords. This isvery dan ger ous.• Turn off all components in your system,including the sub woof er, amplifi ers andthe preamplifi er, before dis con nect ingor connecting cables.• First remove every connection from thesubwoofer to the rest of your system.Plug the subwoofer power cord back inand check for the hum. If it is still there,try plugging it into a different outlet incase it is picking up interference on theAC line.• If you have followed the above guidelinesfor the power connections and ahum is still present, then there is onevery com mon problem to consider: a“ground-loop” in tro duced by con nect inga cable TV line to a VCR or TV, which isthen con nect ed to the preamp. This canbe addressed as follows:• Dis con nect all cables which come fromoutside the room, such as cable TV,satellite TV, or roof top an ten nas. Makesure that they are dis con nect ed wherethey fi rst enter the room, so they aremaking no con nec tion to your pream pli -fi er, TV, or any other component. If thehum is caused by the cable TV line, thenyou will need a “ground-loop iso la tor.”This is an in ex pen sive device fi tted inline with the coaxial cable feed.• If the hum persists, disconnect all thesource components one at a time fromthe back of the preamplifi er until youidentify the problem.• If you are using the subwoofer’s linelevel inputs and there is a excessiveamount of noise or hum present, usingthe speak er level inputs may yield alower background noise level.• Ground-loop isolators are available foraudio lines and video. Once you haveidentifi ed which components are causinga problem, you can fi t the isolators betweenthe component and the preamplifier.The subwoofer won’t turn off• The subwoofer should turn itself off afterap prox i mate ly fi fteen min utes with noaudio signal present. If not, check thereis no back ground hum. The sub woof ermay sense hum as a small signal andstay on. See the above hints to eliminatethe hum.The subwoofer won’t turn onautomaticallyThe subwoofer should turn on when anaudio signal is applied, or 12 VDC is appliedto the Trigger inputs, or if the Startbutton is pressed. If it does not turn on,check the following:• The subwoofer’s volume control maybe turned down, or no signal is receivedfrom your preamplifi er.• Check the input connections.• Check the Mode switch or menu on surroundsystems to be certain that a basssignal is being sent to the subwoofer.• Use the 12V Trigger for the most reliableon/off operation.22
Limited WarrantySunfi re Corporation is proud of itsprod ucts which have been built with careusing ad vanced technology and premiumcom po nent parts. Your unit has beencrafted to perform properly for manyyears. Sunfi re Corporation offers thefollowing Warranty to you, the owner of anew Sunfi re product:The Sunfi re Corporation Warrantyfor the True Subwoofer EQ is in effectfor TWO years from the date of originalretail pur chase. The Sunfi re Cor po ra tionWar ran ty covers defects in materials andwork man ship. The following, however,are excluded:a) Damage caused during shipment.b) Damage caused by accident, misuse,abuse of op er a tion contraryto the in struc tions specifi ed in theSunfi re Cor po ra tion user’s manualc) Units where the serial numberhas been defaced, modifi ed orremoved,d) Damage re sult ing from mod i fi ca tionor attempted repair by any personnot authorized in writing by Sunfi reCor po ra tion.e) Units purchased from unauthorizeddealers.The Sunfi re Corporation Warranty extendsto the original owner or subsequentowner(s) during the two year warrantyperiod so long as the original datedpur chase receipt is pre sent ed wheneverwarranty service is required.All implied warranties, including warranties or merchantability and fi tnessfor par tic u lar purposes, are limited induration to the two year length of thisWarranty, unless otherwise provided bystate law.Sunfi re Corporation’s liability is limitedto the repair or replacement, at our option,of any defective product and shallnot in any event include property or anyother in ci den tal or consequential damageswhich may result from the failure ofthis product. Some states do not allow limitations onhow long an implied warranty lasts and/ordo not allow the exclusion or limitation ofin ci den tal or con se quen tial damages, sothe above lim i ta tions or exclusions may notapply to you.This Warranty gives you specifi c legalrights, and you may also have otherrights which vary from state to state. Wesuggest that you attach your purchasereceipt to this War ran ty and keep these ina safe place. Thank you for your choiceof a Sunfi re Cor po ra tion product.Service AssistanceWe suggest that you read the LimitedWar ran ty completely to fully un der standyour Warranty/Service coverage.If your Sunfi re Corporation product everrequires service, write to us, or call:Sunfi re CorporationTechnical Services De part mentP.O. Box 1589Snohomish, WA 98290Tel (425) 335-4748Fax (425) 335-4746You will be directed to an authorizedSunfi re Corporation Service Station orreceive instructions to ship the unit to thefactory. Please save the original shippingcarton and packing materials in caseship ping is required. Always use the originalcloth bag and packaging materialsand method, or the fi nish may be damaged.Please do not ship Parcel Post.NOTE: Before sending in your unit forrepair, you must call Sunfi re for returnauthorization.Include a complete de scrip tion of theproblem, in di cat ing how you have itcon nect ed, the associated equipment inyour system and a copy of your purchasereceipt. Initial shipping costs are not paidby Sunfi re Corporation; return groundshipping costs will be prepaid if repairswere covered by the scope of this Warranty.23
DIM - STANDBYBRIGHT - ON<strong>Manual</strong> part number 913-103-00 Rev D