

Rapier 250 Manual.pdf - CML Distribution
Rapier 250 Manual.pdf - CML Distribution
Rapier 250 Manual.pdf - CML Distribution

You also want an ePaper? Increase the reach of your titles
YUMPU automatically turns print PDFs into web optimized ePapers that Google loves.
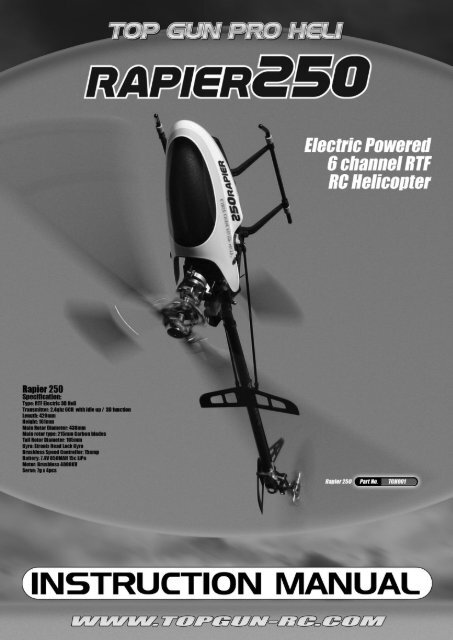
<strong>Rapier</strong> <strong>250</strong>ELECTRIC POWERED 6 CHANNEL RTF RC HELICOPTERWARNINGS BEFORE USEINSTRUCTION MANUALAs the user of this product, you are solelyresponsible for operating it in a manner that doesnot endanger yourself and others or result indamage to the product or the property of others.This model is controlled by a radio signal that issubject to interference from many sources outsideyour control. This interference can causemomentary loss of control so it is advisable toalways keep a safe distance in all directions aroundyour model, as this margin will help to avoidcollisions or injury.1. Never operate your model with low transmitterbatteries.2. Avoid operating your model in the street whereinjury or damage can occur. Always operate yourmodel in an open area away from cars, traffic, orpeople. Never operate the model out into thestreet or populated areas for any reason.3. Carefully follow the directions and warnings for2All pictured Helicopters are of the 450 versionCONGRATULATIONS ON PURCHASING THE TOP GUN PRO HELI RAPIERthis and any optional support equipment(chargers, rechargeable battery packs, etc.) thatyou use.4. Keep all chemicals, small parts and anythingelectrical out of the reach of children Moisturecauses damage to electronics. Avoid waterexposure to all equipment not specificallydesigned and protected for this purpose.5. Never lick or place any portion of your model inyour mouth as it could cause serious injury oreven death.6. This RC helicopter is not a toy! Incorrectoperation may cause serious injury or damage. Ifyou are a novice pilot we strongly suggest thatyou should find an experienced pilot in RChelicopters to assist you.7. It is absolutely necessary to read the manual ofthe helicopter before operation ,it is mandatoryto check all control systems and mechanicallinkages for proper operation before every flight.Safety first!
8. Since the helicopter can fly very fast, it maycause potential danger, so the choice of the flightfield is of great importance.9. Do not fly near crowds, high voltage cables ortrees to ensure the safely of yourself and others.10. Do not fly in bad weather such as rain orthunder storms to ensure the safety of yourself.11. It is suggested to fly at an open field forbeginners, and fly with a training set to practiceBATTERY & CHARGING WARNINGIt is important that you only charge the included3S 11.1V 2200mAh Li-Po Battery with the included3S 11.1V 1.0-Amp Li-Po Balancing Charger. Yourbattery is equipped with special Charge ProtectionCircuitry and Balance Charge Leads with connectorthat are only compatible with this charger.Attempting to charge the battery using another Li-Po charger or non Li-Po compatible charger couldresult in serious damage.Please familiarize yourself thoroughly with theBattery Warnings and Guidelines section beforecontinuing. A detailed Guideline and Safety page onhanding and charging LiPo batteries can be found atthe rear of the manual. The included 3S 11.1V 1.0-Amp Li-Po Balancing Charger will charge a nearfully discharged (not over-discharged) 3S 11.1V2200mAh Li-Po battery in approximately 1.5-2.0hours. Insome cases the charge time may be shorterdepending on the actual amount of capacity left inthe battery after a flight.NEVER charge the battery unattended.NEVER charge the battery by flammable material.ALWAYS charge the battery in a tin or LiPo safesack, away from combustable material to containany possible fire risk.NOTICEThe Li-Po battery includedwith your <strong>Rapier</strong> 3D willarrive partially charged. For this reason the initialcharge may only take approximately 30-50 minutes.The charger requires up to 3-Amps of 11.515 VoltDC input power that can be supplied by the optionalAC to 12V DC, 3-Amp Power Supply for convenientcharging anywhere an AC outlet is available. NEVERattempt to power the charger from an AC outletwithout the use of a proper AC to DC adapter/powersupply.QUICK START GUIDETRANSMITTER & RECEIVER BINDINSTRUCTIONSPlease Note: The <strong>Rapier</strong> features automatic bindingwhen the TX & RX are turned on. If you happen to beflying with a friend or colleague using the sameradio system, please ensure that one is properlybound before binding another, as it could bepossible for one TX to be bound to two <strong>Rapier</strong>receivers if by chance they are turned on at exactlythe same time.OVERVIEWWe have put together a quick start guide to getyou up and running with your <strong>Rapier</strong> ASAP. If youare not a novice you can be up and running with inthe hour.These models are set up and factory tested to flyout of the box. Minor trimming may be required andsome basic set up tips are advised for the moreadvanced pilot.Out of the box your <strong>Rapier</strong> will hover and in the3D Fly mode is more than capable of basic 3D, witha tweak or two to the settingsit is even capable of the more advanced 3D. Wehave tested many of them out of the box and havethem flying inverted as well as flipping about withno changes at all to the out of the box set up.If you are a first time modeller it isrecommended you use a flight simulator tofamiliarise your self with the basic controls, theRealityCraft RC Helimaster SIM is a good startingpoint.Once you are familiar crack on with our quickstart check over and 10 step check:1. First of all set up your flight battery to beinstalled in the machine using the suppliedVelcro to hold the battery in position in thebattery tray, make sure it is secure and not likelyto come loose during flight.2. Put the battery on charge using the suppliedbalancing charger, this should take no more thanan hour (FOLLOW ALL SAFETY GUIDES)3. Put the 8AA batteries in to the transmitter (notsupplied).4. Check all the switches on the transmitter are inthe away / up position when ever you turn it onand the throttle is at the low position, the most3
important note here is to ensure the FLY switchin the up / away position or NOR. The transmitterhas a safety feature to stop it turning on at fullthrottle but treat it like a loaded weapon whenthe model and the heli are turned on.5. Check the model over paying important attentionto make sure all ball links are connected, alsocheck the main and tail blades as well as givingthe model a good once over for anything obvious6. Put your fully charged battery back in to placeand secure it in the model with velcro.7. Put the throttle at the low position and turn onthe transmitter.8. Now plug the battery into the speed controllerand put the canopy back on – be careful as thehelicopter is now armed and dangerous9. Put the model in a safe place to take off and takea few step back and test the control surfaces,right aileron for right aileron, backward forbackward and left tail command will send thelower tail blade turning clockwise when viewingthe model from behind, although this is not anissue out of the box it is worth a quick sanitycheck each time you go out to fly.10. Slowly lift off and enjoy.3D Switchbottom of the box the throttle is reduced. Thisintroduction of negative pitch and more power willmean you can start to fly the model inverted, roll,loop and general fly the model around with a littlemore vigour.When you get to the stage where you want to domore 3D flying you may want to introduce morethrottle a the mid stick throttle position.We would recommend to use the followingthrottle settings, 100% at low stick, 80% at midstick and 100% at high stick position. To achievethis you will need to follow the next steps:NOTE: disconnect the three bullet connectorsbetween the motor and ESC.1. Flip dip switch EXP to the ON position, with dipswitch PLT/PITCH and RUDD/GYRO SENS (dips 9and 10) in the off position.2. Now turn the rotational dial on the front top rightof the transmitter clockwise to the + position.3. Now turn the dip switch EXP (dip 8) to the OFFposition and turn the transmitter off and on.COMMON REPLACEMENT PARTS:Should you be unfortunate enough to bump younew <strong>Rapier</strong> you will be pleased to know there is afull range of well priced spares available. Shouldyou have a crash or an impact be sure to check thefollowing to get the best from the model and tokeep it and you safe from harm. If you have anywobbles you can normally relate it to these spinningparts:• Main blades• Tail Blades• Main rotor shaft• Feathering spindle• Tail output shaft• BoomADVANCED SET UP TIPSWhen flying inverted or flying around you maywant to increase the throttle at the mid point withthe FLY switch in the 3D position.The basics of flying inverted involve introducingnegative pitch while increasing the throttle, this isunlike the normal throttle setting (in the up / awayposition) where when you bring the stick to theThe <strong>Rapier</strong> is a great model offering someamazing performance and great value. Here are acouple of things to ‘DO’ to make sure you can enjoyit for as long as possible:• Do check the model over before and after everyflight, pay special attention to the blades andcontrol rods / balls.• Check for a full charged transmitter and mainbattery pack.4
DETAILED SET-UP & FUNCTIONGUIDESWhen the stick is pushed up, the swashplateshould raise, increasing the pitch of the mainblades.HELICOPTER LIPO BATTERY CONNECT1. First turn the transmitter on and lower thethrottle/collective stick completely, also makesure the FLY mode switch is in NOR or awaypsosition.fly modeswitch inNOR2. Once the battery has been properly positioned,fasten the hook and loop strap around thebattery for added security. Then, plug the batteryinto the battery leads of the ESC.With the stick pulled back down, the swashplateshould lower, decreasing the pitch of the mainblades.CONTROL TESTAlthough each <strong>Rapier</strong> 3D is control tested at thefactory, it is a good idea to test the controls prior tothe first flight to ensure none of the servos, linkagesor other parts were damaged during shipping andhandling. Before proceeding, disconnect the threebullet connectors between the motor and ESC. It isnot safe to perform the control test with the motorconnected to the ESC.Position the helicopter to view it from the left orright side. Move the left-hand stick up and down tocheck the collective pitch control.5
Again viewing the helicopter from the left or rightside, move the right-hand stick forward and aft tocheck elevator pitch control. When the stick ispushed forward, the swashplate should also tiltforward.While viewing the helicopter from the rear (tailboom toward you), move the right-hand stick leftand right to check aileron roll control. When thestick is pushed to the right, the swashplate shouldalso tilt right.With the stick pulled back, the swashplate willtilt toward the rear.With the stick pushed left, the swashplate will tiltto the left.6
While viewing the helicopter from the rear (tailboom toward you), move the left-hand stick left andright to check rudder/tail rotor pitch control. Whenthe stick is pushed to the right, the tail pitch slidershould move to the left.GYRO ADJUSTMENT AND RUDDERMIXING.With modern day gyros you have the option toadjust the gain (the amount of correction it gives)both up and down. The more you have the morestable the tail and easier it is to control, but if youhave too much the tail / nose can wag. Out of thefactory there is no need to adjust anything, howeverif you make tweaks, change the servos or changethe head speed you may need to adjust this.Another feature of this transmitter is ruddermixing which compensates for RPM changes butwith the Gyro in this machine you wont be needingthat so when following the instructions belowplease ensure dial V1 in the top right is turned anticlockwise to the negative value position.1. Flip the RUDD MIX ./GYRO SENSE dip to the onposition.With the stick pushed left, the tail pitch slidershould move to the right.2. Turn the V2 dial, top left of the transmitter to the12 O’clock position, this is approximately 50%and should be a starting point, if its too lively,turn it up (clockwise) and if it wags turn it down(counter clockwise). It is possible to adjust thison the bench or whilst flying (obviously oncelanded).7
3. When the required gain is achieved flip to DIPback to off.MAIN ROTOR BLADE TRACKINGADJUSTMENTCaution: Be sure to maintain a safe distance fromthe helicopter (20-25 feet) when tracking the mainrotor blades.Blade tracking is a critical element tothe flight performance of just about any helicopter,Main rotor blades that are out of track may causevibration, instability, and loss of power due toincreased drag. Although the main rotor blades ofeach <strong>Rapier</strong> 3D helicopter are tracked at the factory,minor adjustments to blade tracking may berequired after blade changes, linkage adjustmentsor repairs. To check main rotor blade tracking andmake any required adjustments, please note thefollowing tips: Before proceeding with the test flightof a new model, or any model to which changes orrepairs have been made, be certain that the mainrotor blades have been properly installed andsecured. The main rotor blade mounting boltsshould be tightened so that the blades can pivot inthe blade grip when moderate pressure is applied.Never allow the main rotor blades to swing freely intheir grips.After powering the model on and allowing theESC and gyro to properly arm and initialize, bringthe main rotor blades of your <strong>Rapier</strong> 3D up to speed.You can check the blade tracking either on theground or in the air at approximately eye level. Itmight be a good idea to have an assistant on handto help sight the blades. Again, be certain tomaintain a safe distance of (20-25 feet) from thehelicopter when checking the tracking of the mainrotor blades.Once the main rotor blades have been brought upto speed, note which blade is running low andwhich blade is running high (by the colored trackingtape). Helicopters with variable pitch on the mainrotor blade all have pitch control links .You onlyneed to turn the control link of the higher or lowerblade to bring it in line. With the <strong>Rapier</strong> theadjustment to the main blade holder is on thetrailing edge, if the blade you are adjusting is thehigh blade in the tracking excersise detailed abovethen you need to bring this down, so unscrew theball link to the trailing edge by 1 turn andremeasure, if you need further adjustment and go tothe lower blade and bring this up by screwing theballink on the linkage rod by one complete turn.When making a rod longer ensure you leave enoughthread into the ball link. So as an overview the bestway is to adjust both pitch control link is at thesame time.Blades out of trackneed adjustment8
If the main rotor blades are still out of track, youneed to adjust another blade, and repeat theprocess to check the blade tracking and makeadjustment until both blades run in track. Withproper adjustment ,the helicopter will fly stably andsmoothly.TRANSMITTER PITCH ADJUSTMENT.The pitch travel and factory set up for this modelis perfect for most peoples tastes right out of thebox and should not need changing. However shouldyou be experienced or wish to tweak this or shouldyou need to change this at a later date do a rebuildthen the following steps can be taken to check andcorrect / check the pitch range.Before starting this process please disconnectthe motor from the speed controller:1. Check the speed controller is not connected tothe motor to avoid any unwanted spinning up ofthe main blades.2. You can now turn the transmitter and model on.3. With the FLY switch in 3D mode (towards thepilot) put the pitch stick to the middle, this willcentre the servos, please make sure all servoarms are centred and horizontal, also running upthe swash plate to the control arms these tooshould be horizontal / flat. In turn this shouldgive 0 degrees pitch out put on the blades, ifneeded adjust the rod links equally each side toget it level – this is the first check and a greatbench mark for a rebuild.PITCH ADJUSTMENT1. Check the speed controller is not connected tothe motor to avoid any unwanted spinning up ofthe main blades.2. Flip dip switch PLT / PIT to the ON position, thiswill enable the pitch travel adjustment function3. in FLY mode Normal or the away position, both ofthe dials V1 and V2 function, V2 will adjust thewhole range available, i.e. +/-12 degrees down to-0 and dial V1 will just lower the bottom end,adjust as needed.4. Flick in to FLY 3D mode and the V2 dial is theonly one that functions allowing top and bottompitch adjustment only.5. Once complete flick the DIP switch PLT/PIT to offand restart the model and TX.6. Once set up is complete reconnect the motor.9
Please Note. Some parts will appear the same but listed as Sport or Pro. Pro <strong>Rapier</strong> features all Aluminium Head Assembly)10
IMPORTANT SAFETY INSTRUCTIONS AND WARNINGS – READ BEFORE USE• Lithium Polymer batteries can be volatile. Whilst some of the instances listed below are rare, they can occur and it isimportant for you to be aware of how to handle such situations. Failure to read and follow the below instructions mayresult in fire, personal injury and damage to property if charged or used improperly.• Top Gun Heli Pro, its distributors or retailers assume no liability for failures to comply with these warnings and safetyguidelines.• By using this battery, the buyer assumes all risks associated with lithium batteries. If you do not agree with theseconditions, return the battery immediately before use.• The final use and preparation of the battery pack is ultimately beyond our control and those of our representatives andretaillers. Your decision to use this product incorporates your agreement that you have read and understood the safetyprecautions listed below and on each battery pack, and that you agree to accept full responsibility for any injury, loss ordamage resulting from all circumstances surrounding your use or misuse of this product.GENERAL GUIDELINES AND WARNINGS1) Only use the supplied specific Lithium Polymer charger. Do not use a NiMH or NiCd charger - Failure to do so may a cause fire, whichmay result in personal injury and property damage.2) Never charge batteries unattended. When charging LiPo batteries you should always remain in constant observation to monitor thecharging process and react to potential problems that may occur.4) If at any time you witness a battery starting to balloon or swell up, discontinue charging process immediately, disconnect the batteryand observe it in a safe place for approximately 15 minutes. This may cause the battery to leak, and the reaction with air may cause thechemicals to ignite, resulting in fire.5) Since delayed chemical reaction can occur, it is best to observe the battery as a safety precaution. Battery observation should occur in asafe area outside of any building or vehicle and away from any combustible material.6) Wire lead shorts can cause fire! If you accidentally short the wires, the battery must be placed in a safe area for observation forapproximately 15 minutes. Additionally, if a short occurs and contact is made with metal (such as rings on your hand), severe injuriesmay occur due to the conductibility of electric current.7) A battery can still ignite even after 10 minutes.8) In the event of a crash, you must remove battery for observation and place in a safe open area away from any combustible material forapproximately 15 minutes.11) Never store or charge battery pack inside your car in extreme temperatures, since extreme temperature could ignite fire.CHARGING PROCESS1) Never charge batteries unattended.2) Charge in an isolated area, preferably inside a tin and away from other flammable materials.3) Let battery cool down to ambient temperature before charging.DISCHARGEEnsure that you adhere to the warning beeps on your transmitter and land the model accordingly. Do not fly until the battery is completelydischarged as damage will occur.STORAGE & TRANSPORTATION1) Store battery at room temperature between 40 and 80 degrees F for best results.2) Do not expose battery pack to direct sunlight (heat) for extended periods.3) When transporting or temporarily storing in a vehicle, temperature range should be greater than 20 degrees F but no more than 150degrees F.4) Storing battery at temperatures greater than 170 degrees F for extended periods of time (more than 2 hours) may cause damage tobattery and possible fire.BATTERY LIFEBatteries that lose 20% of their capacity must be removed from service and disposed of properly. Discharge the battery to 3V/Cell, making sureoutput wires are insulated, then wrap battery in a bag for disposal.PRODUCT WARRANTYProduct warranty is limited to original defects in material and workmanship. Warranty does not cover collateral damage. Due to the nature anduse of the battery there is no term warranty. Misuse, abuse, incorrect charging and other inappropriate use of this product are not coveredunder warranty.13
<strong>Rapier</strong> <strong>250</strong>ELECTRIC POWERED 6 CHANNEL RTF RC HELICOPTERDISTRIBUTORS OF QUALITY MODEL & HOBBY PRODUCTSSaxon House, Saxon Business Park, Hanbury Road, Bromsgrove, Worcestershire. B60 4AD. EnglandTel: +44 (0) 1527 575349 Fax: + 44 (0) 1527 570536E-mail: info@cmldistribution.co.ukWeb site: www.cmldistribution.co.uk16


