WatchGuard Firebox Vclass QuickStart Guide
WatchGuard Firebox Vclass QuickStart Guide
WatchGuard Firebox Vclass QuickStart Guide
Create successful ePaper yourself
Turn your PDF publications into a flip-book with our unique Google optimized e-Paper software.
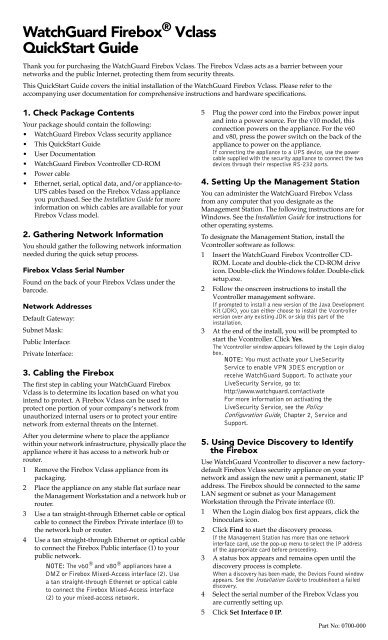
<strong>WatchGuard</strong> <strong>Firebox</strong> ® <strong>Vclass</strong><strong>QuickStart</strong> <strong>Guide</strong>Thank you for purchasing the <strong>WatchGuard</strong> <strong>Firebox</strong> <strong>Vclass</strong>. The <strong>Firebox</strong> <strong>Vclass</strong> acts as a barrier between yournetworks and the public Internet, protecting them from security threats.This <strong>QuickStart</strong> <strong>Guide</strong> covers the initial installation of the <strong>WatchGuard</strong> <strong>Firebox</strong> <strong>Vclass</strong>. Please refer to theaccompanying user documentation for comprehensive instructions and hardware specifications.1. Check Package ContentsYour package should contain the following:• <strong>WatchGuard</strong> <strong>Firebox</strong> <strong>Vclass</strong> security appliance• This <strong>QuickStart</strong> <strong>Guide</strong>• User Documentation• <strong>WatchGuard</strong> <strong>Firebox</strong> Vcontroller CD-ROM• Power cable• Ethernet, serial, optical data, and/or appliance-to-UPS cables based on the <strong>Firebox</strong> <strong>Vclass</strong> applianceyou purchased. See the Installation <strong>Guide</strong> for moreinformation on which cables are available for your<strong>Firebox</strong> <strong>Vclass</strong> model.2. Gathering Network InformationYou should gather the following network informationneeded during the quick setup process.<strong>Firebox</strong> <strong>Vclass</strong> Serial NumberFound on the back of your <strong>Firebox</strong> <strong>Vclass</strong> under thebarcode.Network AddressesDefault Gateway:Subnet Mask:Public Interface:Private Interface:3. Cabling the <strong>Firebox</strong>The first step in cabling your <strong>WatchGuard</strong> <strong>Firebox</strong><strong>Vclass</strong> is to determine its location based on what youintend to protect. A <strong>Firebox</strong> <strong>Vclass</strong> can be used toprotect one portion of your company’s network fromunauthorized internal users or to protect your entirenetwork from external threats on the Internet.After you determine where to place the appliancewithin your network infrastructure, physically place theappliance where it has access to a network hub orrouter.1 Remove the <strong>Firebox</strong> <strong>Vclass</strong> appliance from itspackaging.2 Place the appliance on any stable flat surface nearthe Management Workstation and a network hub orrouter.3 Use a tan straight-through Ethernet cable or opticalcable to connect the <strong>Firebox</strong> Private interface (0) tothe network hub or router.4 Use a tan straight-through Ethernet or optical cableto connect the <strong>Firebox</strong> Public interface (1) to yourpublic network.NOTE: The v60 ® and v80 ® appliances have aDMZ or <strong>Firebox</strong> Mixed-Access interface (2). Usea tan straight-through Ethernet or optical cableto connect the <strong>Firebox</strong> Mixed-Access interface(2) to your mixed-access network.5 Plug the power cord into the <strong>Firebox</strong> power inputand into a power source. For the v10 model, thisconnection powers on the appliance. For the v60and v80, press the power switch on the back of theappliance to power on the appliance.If connecting the appliance to a UPS device, use the powercable supplied with the security appliance to connect the twodevices through their respective RS-232 ports.4. Setting Up the Management StationYou can administer the <strong>WatchGuard</strong> <strong>Firebox</strong> <strong>Vclass</strong>from any computer that you designate as theManagement Station. The following instructions are forWindows. See the Installation <strong>Guide</strong> for instructions forother operating systems.To designate the Management Station, install theVcontroller software as follows:1 Insert the <strong>WatchGuard</strong> <strong>Firebox</strong> Vcontroller CD-ROM. Locate and double-click the CD-ROM driveicon. Double-click the Windows folder. Double-clicksetup.exe.2 Follow the onscreen instructions to install theVcontroller management software.If prompted to install a new version of the Java DevelopmentKit (JDK), you can either choose to install the Vcontrollerversion over any existing JDK or skip this part of theinstallation.3 At the end of the install, you will be prompted tostart the Vcontroller. Click Yes.The Vcontroller window appears followed by the Login dialogbox.NOTE: You must activate your LiveSecurityService to enable VPN 3DES encryption orreceive <strong>WatchGuard</strong> Support. To activate yourLiveSecurity Service, go to:http:\\www.watchguard.com\activateFor more information on activating theLiveSecurity Service, see the PolicyConfiguration <strong>Guide</strong>, Chapter 2, Service andSupport.5. Using Device Discovery to Identifythe <strong>Firebox</strong>Use <strong>WatchGuard</strong> Vcontroller to discover a new factorydefault<strong>Firebox</strong> <strong>Vclass</strong> security appliance on yournetwork and assign the new unit a permanent, static IPaddress. The <strong>Firebox</strong> should be connected to the sameLAN segment or subnet as your ManagementWorkstation through the Private interface (0).1 When the Login dialog box first appears, click thebinoculars icon.2 Click Find to start the discovery process.If the Management Station has more than one networkinterface card, use the pop-up menu to select the IP addressof the appropriate card before proceeding.3 A status box appears and remains open until thediscovery process is complete.When a discovery has been made, the Devices Found windowappears. See the Installation <strong>Guide</strong> to troubleshoot a faileddiscovery.4 Select the serial number of the <strong>Firebox</strong> <strong>Vclass</strong> youare currently setting up.5 Click Set Interface 0 IP.Part No: 0700-000
6 Enter the IP address assigned to the <strong>Firebox</strong> <strong>Vclass</strong>Private (0) interface.7 Enter the subnet mask for the local network onwhich the <strong>Firebox</strong> <strong>Vclass</strong> resides.8 Click Update.9 Click Apply All. Click Yes to confirm the Interface 0IP.10 Record any information in the Result window notalready taken down and click Close.The <strong>Firebox</strong> automatically reboots. Once the restart sequenceis complete, you can use the Vcontroller Login dialog box toconnect to the <strong>Firebox</strong> and start the configuration process.6. Configuring the <strong>Firebox</strong>The Vcontroller Installation Wizard configures a newlydiscovered <strong>Firebox</strong> <strong>Vclass</strong> with a basic configurationwhile simultaneously updating the Vcontrollermanagement software for use with this and other<strong>Firebox</strong> <strong>Vclass</strong> appliances.NOTE: Use the Vcontroller Installation Wizardafter you successfully complete the DeviceDiscovery process.1 Use the Vcontroller Login dialog box to connect tothe <strong>Firebox</strong> using the IP address or domain namerepresenting the new unit. Type admin in both theLogin and Password fields, then click OK toproceed.The Installation Wizard Welcome window appears.2 Click Next to proceed with configuration. Enter thefollowing General information:System NameIdentify the <strong>Firebox</strong> by a name ofyour choosing. This is a requiredfield.Example: SeattleFirewallSystem Location Brief description of where the<strong>Firebox</strong> will be located or usedsuch as a building or floornumber.Example: LANRoomSystem Contact: Name and contact information ofthe principal systemadministrator or departmentresponsible for maintenance ofthe <strong>Firebox</strong>.Example: jay_le@company.comSystem Time Set <strong>Firebox</strong> date, time, and timezone. Click Change to configure.3 Click Next to continue. Enter the Private interfaceinformation:IP Address Enter the private, trusted IPaddress.Network Mask Enter the network mask of theprivate IP address, usually255.255.255.0.4 Select Static, DHCP, or PPPoE to define how the<strong>Firebox</strong> receives its public, external IP address.Selecting an option results in fields appearing toconfigure that option. Complete the addressingfields.For example, when you select Static, fields appear promptingfor the IP address and network mask.5 Click Next to proceed. Click Save Only. Click OK.If you select Apply, the <strong>Firebox</strong> will reboot immediately withthe information entered thus far.6 If you want, you can configure routing at this time.To configure a default gateway, enter the public(interface 0) IP address in the Specify Default Routefield. To configure additional routes, click Add andcomplete the Add Route dialog box. For moreinformation on configuring routes, see theInstallation <strong>Guide</strong>. When you complete addingroutes, click Next and then OK.7 If you want, you can configure a DNS server at thistime. You must provide the <strong>Firebox</strong> domain nameand insert the IP addresses of any DNS servers.Click Next to continue.8 If you want, you can automatically implementdefault firewall policies.We recommend that you review the defaults against thesecurity policy preferences of your organization. For moreinformation, see the Installation <strong>Guide</strong>. For example, youmight want to deselect Allow Ping to the Device to preventinternal “Ping of Death” exploits.7. Deploying the <strong>Firebox</strong> into YourNetworkThe <strong>Firebox</strong> can now be used as a basic firewall. If youhave not already done so, you should now deploy the<strong>Firebox</strong> in its permanent network location.• Complete a software shutdown of the <strong>Firebox</strong>.Launch Vcontroller and connect to the <strong>Firebox</strong> using the<strong>Firebox</strong> name or IP and the system administrator password.From the main Vcontroller window, select Shut Down. ClickOK.• Place the <strong>Firebox</strong> in its permanent location.• Connect the <strong>Firebox</strong> to your network and a powersource.• Change the default gateway setting on all desktopsto the <strong>Firebox</strong> Trusted interface IP address.8. What’s Next?Congratulations! You have successfully installed,configured, and deployed your new <strong>Firebox</strong> <strong>Vclass</strong>security appliance on your network. What’s next? Hereare some things to remember as a new customer:Customizing your security policyYou customize your security policy by adding trafficactions that expand what you allow in and out of yourfirewall. Every action brings trade-offs betweennetwork security and accessibility. When selectingactions, balance the needs of your organization with therequirement that the computer assets be protected fromattack.Please refer to the Policy Configuration <strong>Guide</strong> and SystemAdministration <strong>Guide</strong> for more information andassistance on configuring traffic actions.What to expect from your LiveSecurity ServiceYour <strong>Firebox</strong> includes a 3-month subscription to ouraward-winning LiveSecurity Service. Your subscription:• Enables 3DES encryption and/or High Availability.• Provides up-to-date network protection with thelatest software upgrades.• Solves problems with comprehensive technicalsupport resources including known issues andFrequently Asked Questions.• Reduces downtime with alerts and configurationtips to combat the newest threats andvulnerabilities.• Keeps you prepared for upcoming security threatswith editorials and analysis from industry experts.• Extends your network security with bundledsoftware, utilities, and special offers.Part No: 0700-000


