FTXS30_36H SkyAir Wall Operation Manual.pdf - Daikin AC
FTXS30_36H SkyAir Wall Operation Manual.pdf - Daikin AC
FTXS30_36H SkyAir Wall Operation Manual.pdf - Daikin AC

You also want an ePaper? Increase the reach of your titles
YUMPU automatically turns print PDFs into web optimized ePapers that Google loves.
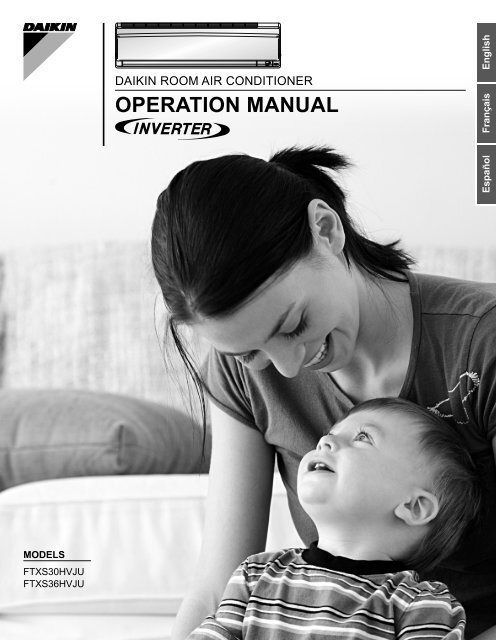
DAIKIN ROOM AIR CONDITIONEROPERATION MANUALEnglishEspañolFrançaisMODELS<strong>FTXS30</strong>HVJUFTXS<strong>36H</strong>VJU
CONTENTSREAD BEFORE OPERATIONSafety Precautions ....................................................................2Name of Parts ...........................................................................4Preparation before <strong>Operation</strong> ...................................................8EnglishOPERATIONAUTO · DRY · COOL · HEAT · FAN <strong>Operation</strong> .......................10Adjusting the Airfl ow Direction ................................................12COMFORT AIRFLOW <strong>Operation</strong> ............................................14INTELLIGENT EYE <strong>Operation</strong> ................................................15POWERFUL <strong>Operation</strong> ...........................................................17OUTDOOR UNIT QUIET <strong>Operation</strong> .......................................18ECONO <strong>Operation</strong> ..................................................................19TIMER <strong>Operation</strong> ....................................................................20WEEKLY TIMER <strong>Operation</strong> ....................................................22CARECare and Cleaning ..................................................................28TROUBLE SHOOTINGTrouble Shooting .....................................................................321
Safety Precautions• Keep this manual where the operator can easily fi nd it.• Read this manual carefully before starting the unit.• For safety reason, the operator must read the following cautions carefully.• This manual classifi es precautions into DANGER, WARNING and CAUTION. Be sure to follow all precautions below: they are allimportant for ensuring safety.DANGER WARNING CAUTIONIndicates an imminently hazardoussituation which, if not avoided, will resultin death or serious injury.If you do not follow these instructionsexactly, the unit may cause propertydamage, personal injury or loss of life.If you do not follow these instructions exactly,the unit may cause minor or moderateproperty damage or personal injury.Never do.Be sure to follow the instructions.Be sure to ground the air conditioner.Never touch the air conditioner (including the remotecontroller) with a wet hand.Never cause the air conditioner (including the remotecontroller) to get wet.DANGER• For refrigerant leakage, consult your dealer.Refrigerant gas is heavier than air and replaces oxygen. A massive leak could lead to oxygen depletion, especially inbasements, and an asphyxiation hazard could occur leading to serious injury or death.• Refrigerant gas may produce a toxic gas if it comes in contact with fi re such as from a fan heater, stove or cookingdevice. Exposure to this gas could cause severe injury or death.• Any abnormalities in the operation of the air conditioner such as smoke or fi re could result in severe injury or death.Turn off the power and contact your dealer immediately for instructions.• Do not install the unit in an area where fl ammable materials are present due to risk of explosion resulting in serious injury or death.• If equipment utilizing a burner is used in the same room as the air conditioner, there is the danger of oxygen defi ciencywhich could lead to an asphyxiation hazard resulting in serious injury or death.Be sure to ventilate the room suffi ciently to avoid this hazard.• Safely dispose of the packing materials.Packing materials, such as nails and other metal or wooden parts, may cause stabs or other injuries. Tear apart andthrow away plastic packaging bags so that children will not play with them. Children playing with plastic bags face thedanger of death by suffocation.WARNING• It is not good for health to expose your body to the air fl ow for a long time.• Do not put your fi nger, a rod or other objects into the air outlet or inlet. As the fan is rotating at a high speed and could,cause injury. Always keep small children away from the unit during operation.• Do not attempt to repair, relocate, modify or reinstall the air conditioner by yourself. Incorrect work or modifi cations couldcause electric shocks, fi re or other damage.For repairs and reinstallation, consult your <strong>Daikin</strong> dealer for advice and information.• If the air conditioner is not cooling (heating) properly, the refrigerant may be leaking, contact your authorized dealer orqualified service repairman.When making repairs which requires adding refrigerant, consult with your authorized dealer or qualified service repairman.• Do not attempt to install the air conditioner by yourself. Improper installation could result in water leakage, electric shocksor fi re. For installation, consult your authorized dealer or a qualifi ed technician.2
CAUTIONEnglish• The air conditioner must be grounded to the earth. Improper grounding may result in electric shocks. Do not connect the earthgrounding wire to a gas pipe, water pipe, lightning rod, or a telephone ground line. Follow all local and state electrical codes.• Do not use this unit for cooling precision instruments, food, plants, animals or works of art.• Never expose little children, plants or animals directly to the air fl ow.• Do not block air inlets nor outlets. Impaired air fl ow may result in poor performance or equipment problems.• Do not stand, sit, or place objects on the outdoor unit. To avoid injury, do not remove the fan guard.• Do not place anything under the indoor or outdoor unit that must be kept away from moisture , such as electrical orelectronic equipment. In certain conditions, moisture in the air may condense and drip.• Check the unit stand and fi ttings for damage annually.• Do not touch the air inlet and aluminum fins of outdoor unit. It may cause injury and/or damage the heat transfer surface.• This appliance is NOT intended for use by young children or impaired persons without proper supervision.• Young children should be supervised to ensure that they DO NOT play with or near the air fl ow of this appliance.• Do not pull at the conduit or hang anything on it. Otherwise it will cause fi re or electric shock.• Do not touch the heat exchanger fi ns. Improper handling may result in injury.• Do not turn off the power immediately after stopping operation. Always wait at least fi ve minutes before turning off thepower. Otherwise, water leakage and trouble may occur.• To avoid personal injury or equipment damage be sure to stop the operation, turn the breaker off or pull out the supplycord before cleaning or servicing the unit. NOTE: More than one disconnect may be required to shut off all power.• Do not connect the air conditioner to a power supply different from the one specified. It may cause improper operation or fire.• Depending on the environment, state and local electrical codes, a ground fault circuit interrupter may be required.Improper grounding or lack of a ground fault circuit interrupter may result in electrical shock, injuries, or death.• Arrange the drain hose to ensure smooth drainage. Improper drainage may cause water damage to the building, or it’s furnishing.• Depending on the usage environment, water may leak from the air conditioner. If this happens, contact your <strong>Daikin</strong> Dealer.• The remote controller should be installed in such away that children cannot play with it.• Do not place objects in direct proximity of the outdoor unit and do not let leaves and other debris accumulate around the unit.Leaves are a hotbed for small animals which can enter the unit. Once in the unit, such animals can cause malfunctions,smoke or fire when making contact with electrical parts.• Do not operate the air conditioner with wet hands.• Do not wash the indoor unit with excessive water, only use a slightly wet cloth.• Do not place things such as vessels containing water or anything else on top of the unit. Water may penetrate into theunit and degrade electrical insulations, resulting in an electric shock.Installation site.• To install the air conditioner in the following types of environments, consult the dealer.• Places with an oily ambient or where steam or soot occurs.• Salty environment such as coastal areas.• Places where sulfi de gas occurs such as hot springs.• Places where snow may block the outdoor unit.The drain from the outdoor unit must be discharged to a place of good drainage.Consider nuisance to your neighbours from noises.• For installation, choose a place as described below.• A place solid enough to bear the weight of the unit which does not amplify the operation noise or vibration.• A place from where the air discharged from the outdoor unit or the operation noise will not annoy your neighbours.Electrical work.• For power supply, be sure to use a separate power circuit dedicated to the air conditioner. Follow all local and state electrical codes.System relocation.• Relocating the air conditioner requires specialized knowledge and skills. Please consult the dealer if relocation is necessary formoving or remodeling.3
Name of PartsIndoor UnitTitanium Apatite PhotocatalyticAir-Purifying FilterAir filterAir inletFront panelPanel tabAir outletFlaps (horizontal blades)Page 12Louvers (vertical blades)• The louvers are inside of the airoutlet. Page 12INTELLIGENT EYEsensor• It detects the movements ofpeople and automaticallyswitches between normaloperation and energy savingoperation. Page 15Room temperaturesensor• It senses the air temperaturearound the unit.Display<strong>Operation</strong> lamp (green)TIMER lamp (yellow) Page 20INTELLIGENT EYE lamp(green) Page 15Signal receiver• It receives signals from the remote controller.• When the unit receives a signal, you will hear ashort beep.• <strong>Operation</strong> start......... beep-beep• Settings changed..... beep• <strong>Operation</strong> stop ......... beeeeepIndoor unit ON/OFF switch• Push this switch once to start operation.Push once again to stop it.• The operation mode refer to the following table.Mode Temperature setting Airfl ow rateAUTO 77°F(25°C) AUTO• This switch is useful when the remote controller ismissing.4
Open the front panelEnglishAir filterTitanium Apatite PhotocatalyticAir-Purifying FilterOutdoor Unit• Appearance of the outdoor unit may differ from some models.Air inlet: (Back and side)Air outletEarth terminal• It is inside of this cover.Refrigerant piping andinter-unit cableDrain hose5
Name of PartsRemote Controller: ARC452A6Signal transmitterReceiver• To use the remote controller, aim thetransmitter at the indoor unit. If thereis anything to block signals betweenthe unit and the remote controller,such as a curtain, the unit will notoperate.• Do not drop the remote controller. Donot get it wet.• The maximum distance forcommunication is approximately23ft(7m).Display (LCD)• It displays the current settings.(In this illustration, each section isshown with all its displays ON for thepurpose of explanation.)TEMPERATUREadjustment buttons• It changes the temperature setting.Page 10FAN setting button• It selects the airfl ow rate setting.Page 11ON/OFF button• Press this button once to startoperation.Press once again to stop it. Page 10POWERFUL button• POWERFUL operation Page 17Front cover• Open the front cover. Page 76
Open the front coverEnglishMODE selector button• It selects the operation mode.(AUTO/DRY/COOL/HEAT/FAN) Page 10ECONO button• ECONO operation Page 19SWING button• Adjusting the Airfl ow DirectionPage 12QUIET button• OUTDOOR UNIT QUIEToperation Page 18COMFORT/SENSORbutton• COMFORT AIRFLOW andINTELLIGIENT EYEoperetion Page 14,15,16OFF TIMER buttonPage 20: WEEKLY button: PROGRAM buttonTIMER CANCELbutton• It cancels the timer setting.Page 20,21• It cannot be used for theWEEKLY TIMER operation.: COPY button: B<strong>AC</strong>K button: NEXT button• WEEKLY TIMER operationPage 22SELECT button• It changes the ON/OFFTIMER and WEEKLY TIMERsettings. Page 20,21,23ON TIMER buttonPage 21CLOCK button Page 97
Preparation before <strong>Operation</strong>12Position + and– correctly!3• To set the batteries1. Slide the front cover to take it off.2. Set 2 dry batteries AAA.LR03 (alkaline).3. Set the front cover as before.Set.Pull.Remote controllerholder• To fix the remote controller holder on the wall1. Choose a place from where the signals reachthe unit.2. Fix the holder to a wall, a pillar, etc. with thescrews supplied with the holder.3. Place the remote controller in the remotecontroller holder.• Celsius/Fahrenheit display switch• The Celsius or Fahrenheit display is selectable with the following buttons.Press and buttons simultaneouslyfor 5 seconds.8ATTENTION• The temperature will be displayed in Fahrenheit if it is presently displayed in Celsius, andvice versa.• About batteries• When replacing the batteries, use batteries of the same type, and replace the 2 old batteries together.• When the system is not used for a long time, take the batteries out.• The batteries will last for approximately 1 year. If the remote controller display begins to fade and the degradation of reception performance occurswithin a year, however, replace both 2 batteries with new, size AAA.LR03 (alkaline).• The attached batteries are provided for the initial use of the system.The usable period of the batteries may be short depending on the manufactured date of the air conditioner.• About remote controller• Never expose the remote controller to direct sunlight.• Dust on the signal transmitter or receiver will reduce the sensitivity. Wipe off dust with soft cloth.• Signal communication may be disabled if an electronic-starter-type fl uorescent lamp (such as inverter-type lamps) is in the room. Consult the shopif that is the case.• If the remote controller signals happen to operate another appliance, move that appliance to somewhere else, or consult the service shop.• Celsius/Fahrenheit display change function of remote controller• The set temperature may increase when the display is changed to Celsius from Fahrenheit, because a fraction of 0.5°C is rounded up.• Example: A set temperature of 65°F (equivalent to 18.5°C) will be converted into 19°C.When the display is changed to Fahrenheit again, the set temperature will be converted into 66°F (equivalent to 19°C) instead of theoriginal set temperature (65°F) but a set temperature of 66°F (equivalent to 19°C) will be converted into 19°C with no temperature change.• A reception sound will go off for the transmission of set temperature to the indoor unit at the time of setting the Celsius/Fahrenheit display change function.
• Turn the breaker ON• Turning ON the breaker closes the fl ap. (This is a normal procedure.)English• To set the clock1. Press .““” is displayed.” and “ ” blinks.2. Press to set the current day of the week.3. Press .“ ” blinks.4. Press to set the clock to the present time.• Holding down button rapidly increases or decreases the time display.5. Press .• Always point the remote controller at the indoor unit when pushing the buttons when setting theindoor unit’s internal clock.“ ” blinks.NOTE• If the indoor unit’s internal clock is not set to the correct time, the WEEKLY TIMER will not operate punctually.• Tips for saving energyRecommended temperature setting• Be careful not to cool (heat) the room too much.Keeping the temperature setting at a moderate level helps save energy.For cooling: 78°F – 82°F (26°C – 28°C)• Cover windows with a blind or a curtain.For heating: 68°F – 75°F (20°C – 24°C)Blocking sunlight and air from outdoors increases the cooling (heating) effect.• Clogged air fi lters cause ineffi cient operation and waste energy. Clean them once in about every 2 weeks.• Please note• The air conditioner always consumes 50-120 btu/h (15-35 watts) of electricity even while it is not operating.• If you are not going to use the air conditioner for a long period, for example in spring or autumn, turn the breaker OFF.• Use the air conditioner in the following conditions.Mode Operating conditions If operation is continued out of this rangeCOOLHEATDRYOutdoor temperature : 50 to 115°F (10 to 46°C)Indoor temperature : 64 to 90°F (18 to 32°C)Indoor humidity : 80% max.Outdoor temperature : 5 to 75°F (–15 to 24°C)Indoor temperature : 50 to 86°F (10 to 30°C)Outdoor temperature : 50 to 115°F (10 to 46°C)Indoor temperature : 64 to 90°F (18 to 32°C)Indoor humidity : 80% max.• A safety device may work to stop the operation.• Condensation may occur on the indoor unit and drip.• A safety device may work to stop the operation.• A safety device may work to stop the operation.• Condensation may occur on the indoor unit and drip.• <strong>Operation</strong> outside this humidity or temperature range may cause a safety device to disable the system.9
AUTO · DRY · COOL · HEAT · FAN <strong>Operation</strong>The air conditioner operates with the operation mode of your choice.From the next time on, the air conditioner will operate with the same operation mode.• To start operation1. Press and select a operation mode.• Each pressing of the button advances the mode setting in sequence.AUTO DRY COOL HEAT FAN2. Press .• “ ” is displayed on the LCD.• The OPERATION lamp lights up.Control panel• To stop operationPressagain.• “ ” is displayed on the LCD.• Then OPERATION lamp goes off.• To change the temperature settingPress or .• The displayed items on the LCD will change whenever either one of the buttons is pressed.DRY or FAN mode COOL mode HEAT mode AUTO modeThe temperature setting is notvariable.64 – 90°F(18 – 32°C)50 – 86°F(10 – 30°C)64 – 86°F(18 – 30°C)Press to raise the temperature and press to lower thetemperature.10
• To change the airflow rate settingPress .DRY modeAUTO or COOL or HEAT or FAN modeEnglishThe airfl ow rate setting is not variable.Five levels of airfl ow rate setting from“ ” to “ ” plus “ ” and “ ” are available.• Indoor unit quiet operationWhen the airfl ow is set to “ ”, the noise from the indoor unit will become quieter.Use this when making the noise quieter.The unit might lose capacity when the airfl ow rate is set to a weak level.• Each pressing of the button advances the airfl ow rate setting in sequence.NOTE• Note on HEAT operation• Since this air conditioner heats the room by taking heat from outdoor air to indoors, the heating capacity becomes smaller in lower outdoortemperatures. If the heating effect is insuffi cient, it is recommended to use another heating appliance in combination with the air conditioner.• The heat pump system heats the room by circulating hot air around all parts of the room. After the start of heating operation, it takes some timebefore the room gets warmer.• In heating operation, frost may occur on the outdoor unit and lower the heating capacity. In that case, the system switches into defrostingoperation to take away the frost.• During defrosting operation, hot air does not fl ow out of indoor unit.• Note on COOL operation• This air conditioner cools the room by blowing the hot air in the room outside, so if the outside temperature is high, the performance of the airconditioner drops.• Note on DRY operation• The computer chip works to rid the room of humidity while maintaining the temperature as much as possible. It automatically controls temperatureand airfl ow late, so manual adjustment of these functions is unavailable.• Note on AUTO operation• In AUTO operation, the system selects a temperature setting and an appropriate operation mode (COOL or HEAT) based on the roomtemperature at the start of the operation.• The system automatically reselects setting at a regular interval to bring the room temperature to user-setting level.• If you do not like AUTO operation, manually change the set temperature.• Note on FAN operation• This mode is valid for fan only.• Note on airflow rate setting• At smaller airfl ow rates, the cooling (heating) effect is also smaller.11
Adjusting the Airflow DirectionYou can adjust the airfl ow direction to increase your comfort.Adjusting the upper and lower airflow direction• To adjust the flaps (horizontal blades)1. Press .• “ ” is displayed on the LCD and the fl aps will begin to swing.2. When the flaps have reached the desired position,press once more.• The fl aps will stop moving.• “ ” disappears from the LCD.Adjusting the right and left airflow direction• To adjust the louvers (vertical blades)3. Press .• “ ” is displayed on the LCD.4. When the louvers have reached the desiredposition, press the once more.• The louvers will stop moving.• “ ” disappears from the LCD.12
Adjusting the 3-D airflow directionEnglish• To start 3-D Airflow1. 3. Press the and the :the “ ” and “ ” display will light up and the flapand louvers will move in turn.• To cancel 3-D Airflow2. 4. Press either the or the .• COMFORT AIRFLOW operation• Check COMFORT AIRFLOW operation in the section of “COMFORT AIRFLOW <strong>Operation</strong>” and“INTELLIGENT EYE <strong>Operation</strong>”. Page 14,15NOTE• Notes on flaps and louvers angles• When “ SWING button” is selected, the fl aps swinging range depends on the operation mode. (See thefi gure.)Three-Dimensional (3-D) Airflow• Using three-dimensional airfl ow circulates cold air, which tends to collected at the bottom of the room, andhot air, which tends to collect near the ceiling, throughout the room, preventing areas of cold and hotdeveloping.• ATTENTION• Always use a remote controller to adjust the angles of the fl aps and louvers. If you attempt to move itforcibly with hand when it is swinging, the mechanism may be broken.• Always use a remote controller to adjust the louvers angles. In side the air outlet, a fan is rotating at a highspeed.STOPOPERATIONCOMFORTAIRFLOW (40°)UPPERLIMIT (45°)LOWERLIMIT (80°)STOPOPERATIONUPPERLIMIT (60°)LOWERLIMIT (100°)COOL AND DRY MODEHEAT MODECOMFORTAIRFLOW (105°)FAN MODESTOPOPERATIONUPPERLIMIT (45°)LOWERLIMIT (100°)13
COMFORT AIRFLOW <strong>Operation</strong>The fl ow of air will be in the upward direction while in cooling mode and in thedownward direction while in heating mode, which will provide a comfortable windthat will not come in direct contact with people.• To start COMFORT AIRFLOW operation1. Press and select “ ” on the LCD.• Each time the is pressed a different setting option is displayed on the LCD.• By selecting “ ” from the following icons, the air conditioner will be in COMFORTAIRFLOW operation combined with INTELLIGENT EYE operation. Page 16Blank• To cancel COMFORT AIRFLOW operation2. Press .• Press the button to select “Blank”.NOTE• Notes on “COMFORT AIRFLOW <strong>Operation</strong>”• The fl ap position will change, preventing air from blowing directly on the occupants of the room.• POWERFUL operation and COMFORT AIRFLOW operation cannot be used at the same time.• The volume of air will be set to AUTO. If the upward and downward airfl ow direction is selected, theCOMFORT AIRFLOW function will be canceled.• Priority is given to the function of whichever button is pressed last.• The COMFORT AIRFLOW function makes the following airfl ow direction adjustments.The fl aps will move upward while cooling so that the airfl ow will be directed upward.The fl aps will move downward while heating so that the airfl ow will be directed downward.Cooling operationHeating operation14
INTELLIGENT EYE <strong>Operation</strong>“INTELLIGENT EYE” is the infrared sensor which detects the human movement.English• To start INTELLIGENT EYE operation1. Press and select “ ” on the LCD.• Each time the is pressed a different setting option is displayed on the LCD.• By selecting “ ” from the following icons, the air conditioner will be in INTELLIGENT EYEoperation combined with COMFORT AIRFLOW operation. Page 16Blank• When the fl aps (horizontal blades) are swinging, the operating as abobe will stop movement ofthem.• To cancel the INTELLIGENT EYE operation2. Press .• Press the button to select “Blank”.[EX.]When somebody in the room• Normal operationThe air conditioner is in normaloperation while the sensor isdetecting the movement of people.When nobody in the room• 20 min. after, start energysaving operation.The set temperature is shifted in±3.6ºF (±2ºC) steps.Somebody back in the room• Back to normal operation.The air conditioner will return tonormal operation when the sensordetects the movement of peopleagain.15
INTELLIGENT EYE <strong>Operation</strong>“INTELLIGENT EYE” is useful for Energy Saving• Energy saving operation• Change the temperature –3.6F°(–2°C) in heating / +3.6°F(+2°C) in cooling / +3.6°F(+2°C) in dry mode from set temperature.• Decrease the airfl ow rate slightly in FAN mode only.• If no presence detected in the room for 20 minutes.NOTE• Notes on “INTELLIGENT EYE”• Application range is as follows.Vertical angle 90°(Side View)Horizontal angle 110°(Top View)23ft (7m)90°55°23ft(7m)55°• Sensor may not detect moving objects further than 23ft(7m) away. (Check the application range)• Sensor detection sensitivity changes according to indoor unit location, the speed of passersby, temperature range, etc.• The sensor also mistakenly detects pets, sunlight, fl uttering curtains and light refl ected off of mirrors as passersby.• INTELLIGENT EYE operatipon will not go on during powerful operation.• NIGHT SET MODE Page 20 will not go on during use of INTELLIGENT EYE operation.• To combine “COMFORT AIRFLOW <strong>Operation</strong>” and “INTELLIGENT EYE<strong>Operation</strong>”1. Press and select “ ” on the LCD.• Each time the is pressed a different setting option is displayed on the LCD.Blank2. Press .• Press the button to select “Blank”.• The air conditioner can go into operation with the COMFORT AIRFLOW and INTELLIGENT EYE functions combined.• The volume of air will be set to AUTO. If the upward and downward airfl ow direction is selected, the CONFORT AIRFLOW operation will becanceled.Priority is given to the function of whichever button is pressed last.16CAUTION• Do not place large objects near the sensor.Also keep heating units or humidifi ers outside the sensor’s detection area. This sensor can detect undesirable objects.• Do not hit or violently push the INTELLIGENT EYE sensor. This can lead to damage and malfunction.
OUTDOOR UNIT QUIET <strong>Operation</strong>OUTDOOR UNIT QUIET operation lowers the noise level of the outdoor unit bychanging the frequency and fan speed on the outdoor unit. This function isconvenient during night.• To start OUTDOOR UNIT QUIET operationPress .• “ ” is displayed on the LCD.• To cancel OUTDOOR UNIT QUIET operationPressagain.• “ ” disappears from the LCD.NOTE• Note on OUTDOOR UNIT QUIET operation• This function is available in COOL, HEAT, and AUTO modes.(This is not available in FAN and DRY mode.)• POWERFUL operation and OUTDOOR UNIT QUIET operation cannot be used at the same time.Priority is given to the function of whichever button is pressed last.18If operation is stopped using the remote controller or the main unit ON/OFF switch when using OUTDOOR UNIT QUIET operation, “• ” willremain on the remote controller display.• OUTDOOR UNIT QUIET <strong>Operation</strong> will drop neither the frequency nor fan speed if the frequency and fan speed have been already dropped lowenough.
• To use ON TIMER operation• Check that the clock is correct.If not, set the clock to the present time. Page 9English1. Press .““” is displayed.” blinks.• “ ” and day of the week disappears from LCD.2. Press until the time setting reaches the pointyou like.• Every pressing of either button increases or decreases the time setting by 10 minutes. Holdingdown either button changes the setting rapidly.3. Press again.• “ ” and setting time are displayed on the LCD.• The TIMER lamp lights up.Control panel• To cancel OFF TIMER <strong>Operation</strong>Press .• “ ” and setting time disappears from LCD.• “ ” and day of the week are displayed on the LCD.• The TIMER lamp goes off.ATTENTION• In the following cases, set the timer again.• After a breaker has turned OFF.• After a power failure.• After replacing batteries in the remote controller.• To combine ON TIMER and OFF TIMER• A sample setting for combining the 2 timers is shown below.(Example)Present time: 23:00 (The unit operating)OFF TIMER at 0:00CombinedON TIMER at 14:0021
WEEKLY TIMER <strong>Operation</strong>Up to 4 timer settings can be saved for each day of the week. It is convenient if the WEEKLY TIMER is setaccording to the family’s life style.• Using in these cases of WEEKLY TIMERAn example of WEEKLY TIMER settings is shown below.Example: The same timer settings are made for the week from Monday through Friday while different timer settings are made forthe weekend.[Monday] Make timer settings up to programs 1-4. Page 23Program 1 Program 2 Program 3 Program 4ON OFF ON OFF77°F (25°C) 81°F (27°C)6:00 8:30 17:30 22:0025°C27°CON OFFON OFF[Tuesday]to[Friday][Saturday]Use the copy mode to make settings for Tuesday to Friday, because these settings are the same as those forMonday. Page 25Program 1 Program 2 Program 3 Program 4ON OFF ON OFF77°F (25°C) 81°F (27°C)6:00 8:30 17:30 22:00No timer settings[Sunday] Make timer settings up to programs 1-4. Page 23Program 1 Program 2 Program 3 Program 4ON OFF OFF ON77°F (25°C)81°F (27°C) 81°F (27°C)8:00 10:00 19:00 21:0025°C27°CONOFFOFFON• Up to 4 reservations per day and 28 reservations per week can be set in the WEEKLY TIMER. The effective use of the copymode ensures ease of making reservations.• The use of ON-ON-ON-ON settings, for example, makes it possible to schedule operating mode and set temperature changes.Furthermore, by using OFF-OFF-OFF-OFF settings, only the turn-OFF time of each day can be set. This will turn OFF the airconditioner automatically if the user forgets to turn it OFF.22
• Using copy mode• A reservation made once can be easily copied and the same settings used for another day ofthe week.Program 1 Program 2 Program 3 Program 4ON OFF ON OFF[Monday] 77°F (25°C) 81°F (27°C)6:00 8:30 17:30 22:00EnglishCOPYProgram 1 Program 2 Program 3 Program 4ON OFF ON OFF[Tuseday]to 77°F (25°C) 81°F (27°C)[Friday]6:00 8:30 17:30 22:00Setting DisplaysConfirmation display Copy display Paste display Normal display1. Press .2. Press to confirm the day of the week to be copied.3. Press .• This activates copy mode.• Copy whole reservation of the selected day of the week.4. Press to select the destination day of the week.5. Press .• The reservation will be copied to the selected day of the week. The whole reservation of theselected day of the week will be copied.• To continue copying the settings to other days of the week, repeat STEP 4 and STEP 5.6. Press .• Exit copy mode.25
NOTE• <strong>Operation</strong> with dirty fi lters:1) cannot deodorize the air.2) cannot clean the air.3) results in poor heating or cooling.4) may cause odour.• To order Titanium Apatite Photocatalytic Air-Purifying Filter contact to the service shop there you bought the air conditioner.• Dispose of old fi lters as non-fl ammable waste.ItemPart No.Titanium Apatite Photocatalytic Air-Purifying Filter (without frame) 1 setKAF970A48EnglishATENTION• Do not throw away the fi lter frame. Reuse the fi lter frame when replacing the Titanium Apatite Photocatalytic Air-Purifying Filter.CHECK• Check that the base, stand and other fi ttings of the outdoor unit are not decayed or corroded.• Check that nothing blocks the air inlets and the outlets of the indoor unit and the outdoor unit.• Check that the drain comes smoothly out of the drain hose during COOL or DRY operation.• If no drain water is seen, water may be leaking from the indoor unit. Stop operation and consult the service shop if this is thecase.Before a long idle period.1. Operate the “FAN only” for several hours on a fine day to dry outthe inside.• Press and select “ ” operation.Press • and start operation.2. After operation stops, turn off the breaker for the room airconditioner.3. Clean the air filters and set them again.4. Take out batteries from the remote controller.31
Check again.Please check again before calling a repair person.EnglishCaseThe air conditioner does not operate.(OPERATION lamp is off.)Check• Hasn’t a breaker turned OFF or a fuse blown?• Isn’t it a power failure?• Are batteries set in the remote controller?• Is the timer setting correct?Cooling (Heating) effect is poor.• Are the air fi lters clean?• Is there anything to block the air inlet or the outlet of the indoor and the outdoor units?• Is the temperature setting appropriate?• Are the windows and doors closed?• Are the airfl ow rate and the air direction set appropriately?<strong>Operation</strong> stops suddenly.(OPERATION lamp flashes.)• Are the air fi lters clean?• Is there anything to block the air inlet or the outlet of the indoor and the outdoor units?Clean the air fi lters or take all obstacles away and turn the breaker OFF. Then turn it ONagain and try operating the air conditioner with the remote controller. If the lamp stillfl ashes, call the service shop where you bought the air conditioner.An abnormal functioning happens duringoperation.• The air conditioner may malfunction with lightning or radio waves. Turn the breaker OFF,turn it ON again and try operating the air conditioner with the remote controller.The flap does not start swingingimmediately.• The air conditioner is adjusting the fl ap position. The fl ap will start moving soon.33
Trouble Shooting• Call the service shop immediately.WARNING• When an abnormality (such as a burning smell) occurs, stop operation and turn the breaker OFF.Continued operation in an abnormal condition may result in troubles, electric shocks or fi re.Consult the service shop where you bought the air conditioner.• Do not attempt to repair or modify the air conditioner by yourself.Incorrect work may result in electric shocks or fi re.Consult the service shop where you bought the air conditioner.If one of the following symptoms takes place, call the service shop immediately.• The power cord is abnormally hot or damaged.• An abnormal sound is heard during operation.• The safety breaker, a fuse, or the earth leakage breakercuts off the operation frequently.• A switch or a button often fails to work properly.• There is a burning smell.• Water leaks from the indoor unit.Turn the breaker OFF and call the service shop.• After a power failureThe air conditioner automatically resumes operation in about 3 minutes. You should just wait for a while.• LightningIf lightning may strike the neighbouring area, stop operation and turn the breaker OFF for system protection.• We recommend periodical maintenance.In certain operating conditions, the inside of the air conditioner may get foul after several seasons of use, resulting in poorperformance. It is recommended to have periodical maintenance by a specialist aside from regular cleaning by the user.For specialist maintenance, contact the service shop where you bought the air conditioner.The maintenance cost must be born by the user.34
Fault diagnosis.FAULT DIAGNOSIS BY REMOTE CONTROLLERIn the ARC452A series, the temperature display sections on the main unit indicate corresponding codes.1. When the TIMER CANCEL button is held down for 5 seconds, a “ ” indication flashes on the temperature display section.EnglishTIMER CANCEL buttonIt cancels the timer setting.2. Press the TIMER CANCEL button repeatedly until a continuous beep is produced.• The code indication changes as shown below, and notifi es with a long beep.CODEMEANING00 NORMALSYSTEMU0REFRIGERANT SHORTAGEU2DROP VOLTAGE OR MAIN CIRCUIT OVERVOLTAGEU4FAILURE OF TRANSMISSION (BETWEEN INDOOR UNIT AND OUTDOOR UNIT)A1INDOOR PCB DEFECTIVENESSA5HIGH PRESSURE CONTROL OR FREEZE-UP PROTECTORINDOORA6FAN MOTOR FAULTUNITC4FAULTY HEAT EXCHANGER TEMPERATURE SENSORC9FAULTY SUCTION AIR TEMPERATURE SENSORE<strong>AC</strong>OOLING-HEATING SWITCHING ERRORE5OL STARTEDE6FAULTY COMPRESSOR START UPE7DC FAN MOTOR FAULTE8OPERATION HALT DUE TO DETECTION OF INPUT OVER CURRENTF3HIGH TEMPERATURE DISCHARGE PIPE CONTROLOUTDOOR H6OPERATION HALT DUE TO FAULTY POSITION DETECTION SENSORUNITH8CT ABNORMALITYH9FAULTY SUCTION AIR TEMPERATURE SENSORJ3FAULTY DISCHARGE PIPE TEMPERATURE SENSORJ6FAULTY HEAT EXCHANGER TEMPERATURE SENSORL4HIGH TEMPERATURE AT INVERTER CIRCUIT HEATSINKL5OUTPUT OVERCURRENTP4FAULTY INVERTER CIRCUIT HEATSINK TEMPERATURE SENSORNOTE1. A short beep and two consecutive beeps indicate non-corresponding codes.2. To cancel the code display, hold the TIMER CANCEL button down for 5 seconds. The code display also cancel itself if the button isnot pressed for 1 minute.35
MEMO36
Two-dimensional bar code is a codefor manufacturing.3P228444-2B M08B127 (0812) HT