GPT SERIES (2006 Release) - Maxon
GPT SERIES (2006 Release) - Maxon GPT SERIES (2006 Release) - Maxon
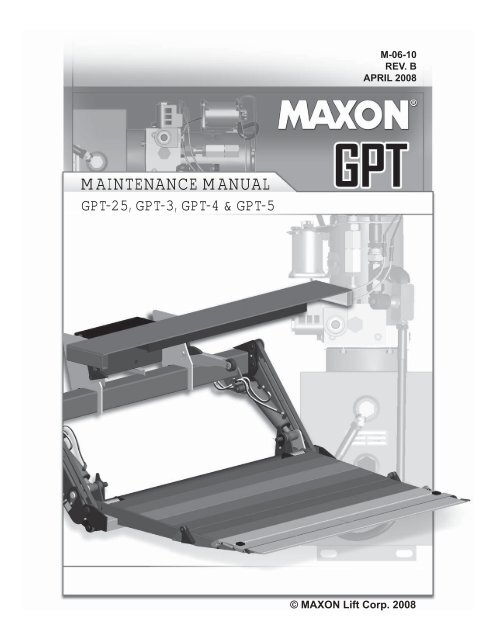
M-06-10REV. BAPRIL 2008MAINTENANCE MANUALGPT-25, GPT-3, GPT-4 & GPT-5© MAXON Lift Corp. 2008
- Page 3 and 4: LIFT CORP.11921 Slauson Ave.Santa F
- Page 5 and 6: SYSTEM DIAGRAMS ...................
- Page 7 and 8: • If an emergency situation arise
- Page 9 and 10: LIFTGATE TERMINOLOGYDOCKBUMPERPLATF
- Page 11 and 12: PERIODIC MAINTENANCE CHECKLISTNOTE:
- Page 13 and 14: CHANGING HYDRAULIC FLUIDCAUTIONKeep
- Page 15 and 16: PLATFORM ADJUSTMENTNOTE: Before doi
- Page 17 and 18: PARTS BREAKDOWNMAIN ASSEMBLY (ALUMI
- Page 19 and 20: ITEM QTY. PART NO. DESCRIPTION1 8 0
- Page 21 and 22: ITEM QTY. PART NO. DESCRIPTION15 2
- Page 23 and 24: ITEM QTY. PART NO. DESCRIPTION1 4 0
- Page 25 and 26: ITEM QTY. PART NO. DESCRIPTION21 2
- Page 27 and 28: PLATFORM & FLIPOVER ASSEMBLY WITH C
- Page 29 and 30: THIS PAGE INTENTIONALLY LEFT BLANK1
- Page 31 and 32: ITEM QTY. PART NO. DESCRIPTION1 1 2
- Page 33 and 34: ITEM QTY. PART NO. DESCRIPTION1 1 2
- Page 35 and 36: THIS PAGE INTENTIONALLY LEFT BLANK1
- Page 37 and 38: ITEM QTY. PART NO. DESCRIPTION26603
- Page 39 and 40: ITEM QTY. PART NO. DESCRIPTIONREF 1
- Page 41 and 42: CONTROL SWITCH AND POWER CABLENOTE:
- Page 43 and 44: (See TABLE 43-1)DECAL SHEETFIG. 43-
- Page 45 and 46: THIS PAGE INTENTIONALLY LEFT BLANK1
- Page 47 and 48: ELECTRICAL SCHEMATIC - POWER DOWNCA
- Page 49 and 50: 1. Check if lowering solenoid valve
- Page 51 and 52: LIFTGATE WILL NOT LIFT RATED CAPACI
M-06-10REV. BAPRIL 2008MAINTENANCE MANUAL<strong>GPT</strong>-25, <strong>GPT</strong>-3, <strong>GPT</strong>-4 & <strong>GPT</strong>-5© MAXON Lift Corp. 2008
LIFT CORP.11921 Slauson Ave.Santa Fe Springs, CA. 90670CUSTOMER SERVICE:TELEPHONE (562) 464-0099 TOLL FREE (800) 227-4116FAX: (888) 771-7713NOTE: For latest version of all Manuals (and replacements), download theManuals from <strong>Maxon</strong>’s website at www.maxonlift.com.WARRANTY/ RMA POLICY & PROCEDURELIFTGATE WARRANTYType of Warranty:Term of Warranty:Full Parts and LaborStandard Liftgates - 2 years from ship date or 6,000 cyclesPremium Liftgates - 2 years from ship date or 10,000 cyclesThis warranty shall not apply unless the product is installed, operated and maintained in accordance with MAXON Lift’s specifi cations as set forth inMAXON Lift’s Installation, Operation and Maintenance manuals. This warranty does not cover normal wear, maintenance or adjustments, damage ormalfunction caused by improper handling, installation, abuse, misuse, negligence, or carelessness of operation. In addition, this warranty does notcover equipment that has had unauthorized modifi cations or alterations made to the product.MAXON agrees to replace any components which are found to be defective during the fi rst 2 years of service, and will reimburse for labor based onMAXON’s Liftgate Warranty Flat Rate Schedule. (Copy of the Flat Rate is available at www.maxonlift.com.)All warranty repairs must be performed by an authorized MAXON warranty facility. For any repairs that may exceed $500, including parts and labor,MAXON’s Technical Service Department must be notifi ed and an “Authorization Number” obtained.All claims for warranty must be received within 30 Days of the repair date, and include the following information:1. Liftgate Model Number and Serial Number2. The End User must be referenced on the claim3. Detailed Description of Problem4. Corrective Action Taken, and Date of Repair5. Parts used for Repair, Including MAXON Part Number(s)6. MAXON R.M.A. # and/or Authorization # if applicable (see below)7. Person contacted at MAXON if applicable8. Claim must show detailed information i.e. Labor rate and hours of work performedWarranty claims can also be placed online at www.maxonlift.com. Online claims will be given priority processing.All claims for warranty will be denied if paperwork has not been received or claim submitted via <strong>Maxon</strong> website for processing by MAXON’s WarrantyDepartment within 30 days of repair date.All components may be subject to return for inspection, prior to the claim being processed. MAXON products may not be returned without prior writtenapproval from MAXON’s Technical Service Department. Returns must be accompanied by a copy of the original invoice or reference with originalinvoice number and are subject to a credit deduction to cover handling charges and any necessary reconditioning costs. Unauthorized returns will berefused and will become the responsibility of the returnee.Any goods being returned to MAXON Lift must be pre-approved for return, and have the R.M.A. number written on the outside of the package in plainview, and returned freight prepaid. All returns are subject to a 15% handling charge if not accompanied by a detailed packing list. Returned partsare subject to no credit and returned back to the customer. Defective parts requested for return must be returned within 30 days of the claim date forconsideration to:MAXON Lift Corp.10321 Greenleaf Ave., Santa Fe Springs, CA 90670Attn: RMA#__MAXON’s warranty policy does not include the reimbursement for travel time, towing, vehicle rental, service calls, oil, batteries or loss of income due todowntime. Fabrication or use of non <strong>Maxon</strong> parts, which are available from MAXON, are also not covered.MAXON’s Flat Rate Labor Schedule takes into consideration the time required for diagnosis of a problem.All Liftgates returned are subject to inspection and a 15% restocking fee. Any returned Liftgates or components that have been installed or not returnedin new condition will be subject to an additional reworking charge, which will be based upon the labor and material cost required to return the Liftgate orcomponent to new condition.PURCHASE PART WARRANTYTerm of Warranty: 1 Year from Date of Purchase.Type of Warranty: Part replacement only. MAXON will guarantee all returned genuine MAXON replacement parts upon receipt and inspection of partsand original invoice.All warranty replacements parts will be sent out via ground freight. If a rush shipment is requested, all freight charges will be billed to the requestingparty.
TABLE OF CONTENTSWARNINGS ........................................................................................................................... 6SAFETY INSTRUCTIONS .................................................................................................... 6LIFTGATE TERMINOLOGY .................................................................................................. 9PERIODIC MAINTENANCE ................................................................................................ 10PERIODIC MAINTENANCE CHECKS ................................................................................ 10PERIODIC MAINTENANCE CHECKLIST ............................................................................11CHECK HYDRAULIC FLUID ............................................................................................... 12CHANGING HYDRAULIC FLUID ........................................................................................ 13REPLACING PLATFORM TORSION SPRING ................................................................... 14PLATFORM ADJUSTMENT ................................................................................................ 15PARTS BREAKDOWN ....................................................................................................... 17MAIN ASSEMBLY (ALUMINUM PLATFORM) ..................................................................... 17MAIN FRAME ASSEMBLY: <strong>GPT</strong>-25 & <strong>GPT</strong>-3 ..................................................................... 18MAIN FRAME ASSEMBLY: <strong>GPT</strong>-4 & <strong>GPT</strong>-5 ....................................................................... 22PLATFORM & FLIPOVER ASSEMBLY (ALUMINUM)......................................................... 26PLATFORM & FLIPOVER ASSEMBLY WITH CART STOPS (ALUMINUM)....................... 27PLATFORM ASSEMBLY (ALUMINUM)............................................................................... 28FLIPOVER WITH SINGLE CART STOP (ALUMINUM) ...................................................... 30FLIPOVER WITH DUAL CART STOPS (ALUMINUM)........................................................ 32DOCK BUMPER .................................................................................................................. 34HYDRAULIC COMPONENTS - POWER DOWN ................................................................ 36PUMP ASSEMBLY - POWER DOWN ................................................................................. 38PUMP BOX ASSEMBLY - POWER DOWN......................................................................... 40CONTROL SWITCH AND POWER CABLE ........................................................................ 41DECALS .............................................................................................................................. 42
SYSTEM DIAGRAMS ......................................................................................................... 46HYDRAULIC SCHEMATIC - POWER DOWN ..................................................................... 46ELECTRICAL SCHEMATIC - POWER DOWN ................................................................... 47TROUBLESHOOTING ........................................................................................................ 48PLATFORM WILL NOT RAISE ............................................................................................ 48PLATFORM RAISES BUT LEAKS DOWN .......................................................................... 49PLATFORM RAISES PARTIALLY AND STOPS .................................................................. 50LIFTGATE WILL NOT LIFT RATED CAPACITY .................................................................. 51PLATFORM RAISES SLOWLY ........................................................................................... 52PLATFORM WILL NOT LOWER, LOWERS TOO SLOWLY OR TOO QUICKLY ................ 54PLATFORM WON’T TILT DOWN TO THE GROUND ......................................................... 56
Comply with the following WARNINGS and SAFETY INSTRUCTIONS while maintainingLiftgates. See Operation Manual for operating safety requirements.WARNINGS!WARNING• Do not stand, or allow obstructions, under the platform when lowering the Liftgate. Be sure yourfeet are clear of the Liftgate.• Keep fingers, hands, arms, legs, and feet clear of moving Liftgate parts (and platformedges) when operating the Liftgate.• Correctly stow platform when not in use. Extended platforms could create a hazard forpeople and vehicles passing by.11921 Slauson Ave. Santa Fe Springs, CA. 90670 (800) 227-4116 FAX (888) 771-7713• Disconnect Liftgate power cable from battery before repairing or servicing Liftgate.• If it is necessary to stand on the platform while maintaining the Liftgate, keep your feet and anyobjects clear of the inboard edge of the platform. Your feet or objects on the platform can becometrapped between the platform and the Liftgate extension plate.• Recommended practices for welding on steel parts are contained in the current AWS (AmericanWelding Society) D1.1 Structural Welding Code - Steel. Damage to Liftgate and/or vehicle, andpersonal injury could result from welds that are done incorrectly.• Recommended practices for welding on aluminum parts are contained in the current AWS(American Welding Society) D2.1 Structural Welding Code - Aluminum. Damage to Liftgateand/or vehicle, and personal injury could result from welds that are done incorrectly.SAFETY INSTRUCTIONSSAFETY INSTRUCTIONS• Read and understand the instructions in this Maintenance Manual before performing maintenanceon the Liftgate.• Before operating the Liftgate, read and understand the operating instructions in OperationManual.• Comply with all WARNING and instruction decals attached to the Liftgate.• Keep decals clean and legible. If decals are illegible or missing, replace them. Free replacementdecals are available from <strong>Maxon</strong> Customer Service.• Consider the safety and location of bystanders and location of nearby objects when operating theLiftgate. Stand to one side of the platform while operating the Liftgate• Do not allow untrained persons to operate the Liftgate.• Wear appropriate safety equipment such as protective eyeglasses, faceshield and clothing whileperforming maintenance on the Liftgate and handling the battery. Debris from drilling and contactwith battery acid may injure unprotected eyes and skin.• Be careful working by an automotive type battery. Make sure the work area is well ventilated andthere are no fl ames or sparks near the battery. Never lay objects on the battery that can short theterminals together. If battery acid gets in your eyes, immediately seek fi rst aid. If acid gets on yourskin, immediately wash it off with soap and water.6
• If an emergency situation arises (vehicle or Liftgate) while operating the Liftgate, release the controlswitch to stop the Liftgate.• A correctly installed Liftgate operates smoothly and reasonably quiet. The only noticeable noiseduring operation comes from the power unit while the platform is raised. Listen for scraping, gratingand binding noises and correct the problem before continuing to operate Liftgate.• Use only <strong>Maxon</strong> Authorized Parts for replacement parts. Provide Liftgate model and serial numberinformation with your parts order. Order replacement parts from:MAXON LIFT CORP. Customer Service11921 Slauson Ave., Santa Fe Springs, CA 90670Online: www.maxonlift.comExpress Parts Ordering: Phone (800) 227-4116 ext. 4345Email: Ask your Customer Service representative11921 Slauson Ave. Santa Fe Springs, CA. 90670 (800) 227-4116 FAX (888) 771-77137
11921 Slauson Ave. Santa Fe Springs, CA. 90670 (800) 227-4116 FAX (888) 771-7713THIS PAGE INTENTIONALLY LEFT BLANK8
LIFTGATE TERMINOLOGYDOCKBUMPERPLATFORMLIFTCYLINDEREXTENSIONPLATEPARALLELARMWEDGE FLIPOVERSADDLEPUMP BOXCONTROLSWITCHTORSIONSPRINGPLATFORMOPENERMAINFRAMELIFTARM11921 Slauson Ave. Santa Fe Springs, CA. 90670 (800) 227-4116 FAX (888) 771-77139
PERIODIC MAINTENANCEPERIODIC MAINTENANCE CHECKS!WARNINGNever operate the Liftgate if parts are loose or missing.11921 Slauson Ave. Santa Fe Springs, CA. 90670 (800) 227-4116 FAX (888) 771-7713NOTE: Make sure vehicle is parked on level ground while performing themaintenance checks.Quarterly or 1250 Cycles (whichever occurs first)Check the hydraulic fl uid level in the pump reservoir. Refer to the CHECKING HYDRAULICFLUID procedure in the PERIODIC MAINTENANCE section.If hydraulic fl uid appears contaminated, refer to the CHANGING HYDRAULIC FLUIDprocedure in the PERIODIC MAINTENANCE section.Keep track of the grade of hydraulic fl uid in the pump reservoir and never mix two differentgrades of fl uid.Check all hoses and fi ttings for chafi ng and fl uid leaks. Tighten loose fi ttings or replaceparts as required.Check electrical wiring for chafi ng and make sure wiring connections are tight and free ofcorrosion. Use dielectric grease to protect electrical connections.Check that all WARNING and instruction decals are in place. Also, make sure decals arelegible, clean and undamaged.Check that all bolts, nuts, and roll pins are in place. Make sure roll pins protrude evenlyfrom both sides of hinge pin collar. Replace fasteners and roll pins if necessary.CAUTIONDamaged cylinder seals and contaminated hydraulic fluid can result from paintingthe polished portion of the cylinder rod. To prevent damage, protect theexposed polished portion of the cylinder rod while painting.Check for rust and oily surfaces on Liftgate. If there is rust or oil on Liftgate, clean it off.Touch up the paint where bare metal is showing. MAXON recommends using the aluminumprimer touchup paint kit, P/N 908119-01.Semi-annually or 2500 Cycles (whichever occurs first)Visually check the platform hinge pins for excessive wear and broken welds. See PARTSBREAKDOWN section for replacement parts. Also, do the Quarterly or 1250 Cyclesmaintenance checks.10
PERIODIC MAINTENANCE CHECKLISTNOTE: Make sure vehicle is parked on level ground while performing maintenancechecks.Quarterly or 1250 Cycles (whichever occurs first)Check the level and condition of the hydraulic fl uid.Visually check all hoses and fi ttings for chafi ng and fl uid leaks. Tighten loose fi ttings orreplace parts as required.Check electrical wiring for chafi ng and make sure wiring connections are tight and freeof corrosion. Use dielectric grease to protect electrical connections.Check that all WARNING and instruction decals are in place. Also, make sure decalsare legible, clean, and undamaged.Check that all bolts, nuts, and roll pins are in place. Make sure roll pins protrude evenlyfrom both sides of hinge pin collar. Replace fasteners and roll pins if necessary.Check for rust and oily surfaces on Liftgate. If there is rust or oil on Liftgate or if theLiftgate is dirty, clean it off. Touch up the paint where bare metal is showing. Refer tothe paint system CAUTION and recommended touchup kit on the preceding page.Semi-annually or 2500 Cycles (whichever occurs first)Visually check the platform hinge pins for excessive wear and broken welds.Do the Quarterly or 1250 Cycles Checks on this checklist.11921 Slauson Ave. Santa Fe Springs, CA. 90670 (800) 227-4116 FAX (888) 771-771311
PERIODIC MAINTENANCECHECK HYDRAULIC FLUIDCAUTIONKeep dirt, water and other contaminants from entering the hydraulic system.Before opening the hydraulic fluid reservoir filler cap, drain plug and hydrauliclines, clean up contaminants that can get in the openings. Also, protect theopenings from accidental contamination.11921 Slauson Ave. Santa Fe Springs, CA. 90670 (800) 227-4116 FAX (888) 771-7713NOTE: Use correct grade of hydraulic fl uid for your location.+50 to +120 Degrees F - Grade ISO 32Below + 70 Degrees F - Grade ISO 15 or MIL-H-5606See TABLES 12-1 & 12-2 for recommended brands.1. Remove the fi ller cap (FIG. 12-1).PUMPRESERVOIRDECAL(FLUID LEVEL)CHECKING HYDRAULIC FLUID LEVELFIG. 12-12. Check the hydraulic fl uid level in thepump reservoir (FIG. 12-1). If fl uidis below FILL LEVEL shown on decalon the pump reservoir (FIG. 12-1), add fl uid to the FILL LEVEL.FILLERCAPNOTE: If the hydraulic fl uid in thereservoir is contaminated, dothe CHANGING HYDRAULICFLUID procedure in this section.ISO 32 HYDRAULIC OILRECOMMENDEDBRANDSPART NUMBERAMSOILAWH-05CHEVRON HIPERSYN 32KENDALLGOLDEN MVSHELL TELLUS T-32EXXON UNIVIS N-32MOBILTABLE 12-1TABLE 12-2DTE-13M, DTE-24,HYDRAULIC OIL-13ISO 15 OR MIL-H-5606 HYDRAULIC OILRECOMMENDEDBRANDSPART NUMBERAMSOILAWF-05CHEVRONFLUID A, AW-MV-15KENDALLGLACIAL BLUSHELL TELLUS T-15EXXONUNIVIS HVI-13MOBILDTE-11MROSEMEAD THS FLUID 171113. Reinstall the fi ller cap (FIG. 12-1).12
CHANGING HYDRAULIC FLUIDCAUTIONKeep dirt, water and other contaminants from entering the hydraulic system.Before opening the hydraulic fluid reservoir filler cap, drain plug and hydrauliclines, clean up contaminants that can get in the openings. Also, protect theopenings from accidental contamination.NOTE: Use correct grade of hydraulic fl uid for your location.+50 to +120 Degrees F - Grade ISO 32Below + 70 Degrees F - Grade ISO 15 or MIL-H-5606See TABLES 12-1 & 12-2 for recommended brands.NOTE: To prevent spills, drain used hydraulic fluid through a funnel into waste fluid container.1. Place empty 5 gallon bucket under drain plug.2. Open and raise platform to vehicle bed height.Remove the drain plug (FIG. 13-1). Drainhydraulic fl uid.3. Disconnect the white wire (FIG. 13-2) frommotor solenoid. Lower the platform whiledraining the remaining hydraulic fl uid fromsystem. Reinstall drain plug. Reconnect thewhite wire to motor solenoid.4. Remove fi ller cap (FIG. 13-2) and refi llreservoir to the level shown on decal.5. Raise platform to vehicle bedheight. Check hydraulic fl uid againand, if needed, add more hydraulicfl uid (FIG. 13-2).WHITEWIRE6. Reinstall fi ller cap (FIG. 13-2).PUMP BOXFIG. 13-1DRAINPLUGFILLERCAP11921 Slauson Ave. Santa Fe Springs, CA. 90670 (800) 227-4116 FAX (888) 771-7713MOTORSOLENOIDDECAL(FLUID LEVEL)FIG. 13-213
PERIODIC MAINTENANCEREPLACING PLATFORM TORSION SPRINGNOTE: The following procedure shows how to replace torsion spring on RH side ofplatform. Use this procedure for replacing torsion spring on the LH side.1. Manually fold fl ipover onto platform.11921 Slauson Ave. Santa Fe Springs, CA. 90670 (800) 227-4116 FAX (888) 771-77132. Raise platform to a convenient work heightto gain access and release tension on thetorsion spring.!CAUTIONTo prevent injury and equipment damage,make sure there is no tension ontorsion spring before removing hinge pin.3. Unbolt hinge pin from hinge bracket(FIG. 14-1). Remove bolt and lock nut.Drive the hinge pin inboard toward theshackle with a hammer and pin punch,just enough to free the torsion spring(FIG. 14-1). Remove spring from shackle.4. Install the torsion spring as shown inFIG. 14-2. Make sure the long legof the spring is inserted in the bracketlocated on shackle (FIG. 14-2). Makesure the short end of the spring is visibleand resting against the edge of thehinge bracket (FIG. 14-2).5. Drive the hinge pin into correct position(FIG. 13-2) through the hingebracket with a hammer and pinpunch. Line up the bolt hole in thehinge pin with the hole in the hingebracket. Bolt the hinge pin to hingebracket with bolt and lock nut (FIG.13-2).6. Operate the Liftgate to makesure it operates correctly.PLATFORM(REFERENCE)BOLTPLATFORM(REFERENCE)BOLT &LOCK NUTSHORTLEGHINGE PINHINGE PINFIG. 14-1TORSIONSPRINGLOCKNUTLONGLEGBRACKETFIG. 14-2HINGEBRACKETSHACKLEHINGEBRACKETSHACKLE14
PLATFORM ADJUSTMENTNOTE: Before doing the following procedure,make sure vehicle is parkedon level ground.1. With the platform and fl ipover unfolded,raise platform to bed level (FIG. 15-1).Measure how much the outboard edgeof platform rises above bed level (FIG.15-1). The outboard edge must be levelor a maximum of 2” above bed level (FIG.15-1). If indication is correct, Liftgateis installed correctly and no adjustmentis needed. If the outboard edge is belowbed level, do instructions 2, 3, and 6. Ifoutboard edge is higher than 2”, do instructions4 through 6.2. Compare measurement “A” (FIG.15-2) with the distances and shimsin TABLE 15-1. For example: Ifmeasurement “A” (FIG. 15-2) is1” below level and you want to raiseoutboard edge of platform 1” abovelevel, use 1/8” shim to raise 2”(TABLE 15-1).RAISE PLATFORMEDGE (OUTBOARD)THIS DISTANCE (“A”)REQUIRED SHIMTHICKNESSWELD SIZE“W”1” 1/16” 1/16”2” 1/8” 1/8”3” 3/16” 3/16”4” 1/4” 1/4”EXTENSIONPLATE (REF)OUTBOARD EDGE0” (LEVEL) - 2” MAX.LEVEL LINE“A”LEVEL LINEVEHICLEFLOOR (REF)PLATFORM EDGE AT ORABOVE BED LEVELFIG. 15-1PLATFORM EDGE BELOW BED LEVELFIG. 15-2SHACKLE(REF)EXTENSIONPLATE (REF)VEHICLEFLOOR (REF)11921 Slauson Ave. Santa Fe Springs, CA. 90670 (800) 227-4116 FAX (888) 771-7713TABLE 15-13. Weld shims (parts bag item) on bothplatform stops (FIG. 15-3) to raiseoutboard edge of platform to correctposition.15NEW SHIM(TABLE 15-1)2 PLACES“W”(TABLE 15-1)WELDING SHIMS (CURBSIDE SHOWN)FIG. 15-3
11921 Slauson Ave. Santa Fe Springs, CA. 90670 (800) 227-4116 FAX (888) 771-77134. Compare measurement “B” (FIG.16-1) with distances and grindingdepths in TABLE 16-1. For example:If measurement “B” (FIG. 16-1) is 3”above bed level and you want to lowerthe outboard edge of platform to 1”above bed level, grind 1/8” from eachplatform stop (TABLE 16-1).LOWER PLATFORMEDGE (OUTBOARD)THIS DISTANCE(“B”)GRIND METALFROM PLATFORMSTOP1” 1/16”2” 1/8”3” 3/16”4” 1/4”TABLE 16-15. Grind metal from platform stops (FIG.16-2) to lower outboard edge of platformto correct position.6. Lower the platform, then raise it to bedlevel. The outboard edge of platform shouldbe level or up to 2” maximum above bedlevel (FIG. 16-3).“B”LEVEL LINEPLATFORM EDGE ABOVE BED LEVELFIG. 16-1SHACKLE(REF)GRIND THIS FACE(SEE TABLE 16-1)GRINDING PLATFORM STOPS(CURBSIDE SHOWN)FIG. 16-2OUTBOARD EDGE0” (LEVEL) - 2” MAX.LEVEL LINEEXTENSIONPLATE (REF)VEHICLEFLOOR (REF)EXTENSIONPLATE (REF)VEHICLEFLOOR (REF)PLATFORM EDGE ABOVE BED LEVELFIG. 16-316
PARTS BREAKDOWNMAIN ASSEMBLY (ALUMINUM PLATFORM)5REFER TO HYDRAULIC COMPONENTS& PUMP BOX ASSEMBLYREFER TO MAINFRAME ASSEMBLYREFER TO PLATFORM &FLIPOVER ASSEMBLYITEM QTY. PART NO. DESCRIPTION1 1 226938 EYE, DROP FORGED PAD, 3/4” X 1-1/2”2 1 227700 HOOK ASSEMBLY3 4 900014-4 CAP SCREW, HEX HEAD, 3/8”-16 X 1” LG, GRADE 84 2 901011-5 NUT, HEX HEAD 3/8”-165 1 226355 EXTENSION PLATE6 2 902001-2 WASHER, FLAT 3/8”7 4 902011-4 WASHER, LOCK 3/8”8 1 265994-01 OPENER ASSEMBLY8A 1 030805 COTTER PIN, 1/8” X 1” LG8B 1 280082-01 ROLLER8C 1 905202-03 PIN3674378B8A128C811921 Slauson Ave. Santa Fe Springs, CA. 90670 (800) 227-4116 FAX (888) 771-771317
MAIN FRAME ASSEMBLY: <strong>GPT</strong>-25 & <strong>GPT</strong>-311921 Slauson Ave. Santa Fe Springs, CA. 90670 (800) 227-4116 FAX (888) 771-771310A111110710B61258(6 PLACES)66914A1626 29B 9C9A114169A134229C9B9614A11143 4665136110A1010B18
ITEM QTY. PART NO. DESCRIPTION1 8 030034 BOLT, 3/8”-24 X 1” LG2 4 030035 BOLT, 3/8”-24 X 1-1/4” LG3 2 040103-5 LOOM, SPLIT 1/2” X 5” LG4 14 205780 PLASTIC TIE, 7” LG5 2 221416 ROLL PIN, 3/8” X 2” LG6 10 226941 LOCK NUT, 3/8”-247 1 050175 MAXON PLATE8 6 207644 RIVET, 3/16” X .40” GRIP9 2 253085-01 ROLLER PIN, ASSEMBLY9A 1 221416 PIN, ROLL 3/8” X 2” LG9B 1 261793-01 ROLLER9C 1 264272 FLAT WASHER, 1-1/4” I.D. X 2-1/4” O.D.10 2 261788-01 PARALLEL ARM10A 2 905112-05 BEARING, SELF LUBE 1-3/8” X 1-5/8” LG10B 2 905114-04 BEARING, SELF LUBE 1-1/4” X 1-1/2” LG11 2 262280 PIN WELDMENT12 1 262322-01 LIFT ARM WELDMENT, LH13 1 262322-02 LIFT ARM WELDMENT, RH14 1 262396 LIFT FRAME WELDMENT14A 2 263473 ROLLER, KNUCKLE DOWN11921 Slauson Ave. Santa Fe Springs, CA. 90670 (800) 227-4116 FAX (888) 771-771319
MAIN FRAME ASSEMBLY: <strong>GPT</strong>-25 & <strong>GPT</strong>-3 - Continued31323111921 Slauson Ave. Santa Fe Springs, CA. 90670 (800) 227-4116 FAX (888) 771-771321222329242318A18271730201634171526253333343028 2025151619A23 2419 213223222920
ITEM QTY. PART NO. DESCRIPTION15 2 262437 BUSHING WELDMENT HOSE CLAMP16 2 262440 PIN WELDMENT17 2 265807-01 PIN WELDMENT, 1-3/8” X 13-1/8” LG18 1 265815-01 SHACKLE ASSEMBLY, LH18A 2 905112-06 BEARING, SELF LUBE, 1-3/8” X 3/8” LG19 1 265815-02 SHACKLE ASSEMBLY, RH19A 2 905112-06 BEARING, SELF LUBE, 1-3/8” X 3/8” LG20 2 266035-01 PIN, WELDMENT21 2 902011-4 LOCK WASHER, 3/8”22 2 902013-20 FLAT WASHER, 1-1/4”23 4 905114-04 BEARING, SELF LUBE 1-1/4” X 1-1/2” LG24 2 905115-02 BEARING, SELF LUBE 1-1/2” X 1-1/2” LG25 2 907026 ROLL PIN, 3/16” X 2-1/4” LG26 1 226363-01 TORSION SPRING, RH, 1/2” X 5-3/4”27 1 226363-02 TORSION SPRING, LH, 1/2” X 5-3/4”28 1 281561-01 MAIN FRAME29 2 229657 PIN WELDMENT30 2 250310 PIN WELDMENT31 2 281539-01 SADDLE32 4 901024-3 HEX BOLT, 2-1/4” LG33 4 901023 FLANGE LOCK NUT34 2 090300-12 FLAT, 3/4” X 1” X 6” LG11921 Slauson Ave. Santa Fe Springs, CA. 90670 (800) 227-4116 FAX (888) 771-771321
MAIN FRAME ASSEMBLY: <strong>GPT</strong>-4 & <strong>GPT</strong>-511921 Slauson Ave. Santa Fe Springs, CA. 90670 (800) 227-4116 FAX (888) 771-771318A1132181417618A1698(6 PLACES)19161791710 31517 221211714177543215216171191613 17101717517792014218A1818A22
ITEM QTY. PART NO. DESCRIPTION1 4 030034 BOLT, 3/8”-24 X 1” LG2 6 030035 BOLT, 3/8”-24 X 1-1/4” LG3 2 030038 BOLT, 3/8”-24 X 1-1/2” LG4 2 030414 COTTER PIN, 1/8” DIA X 2-1/2” LG5 2 040103-5 LOOM, SPLIT 1/2 X 5” LG6 1 050175 MAXON PLATE7 14 205780 PLASTIC TIE, 7” LG8 6 207644 RIVET, 3/16” X .40” GRIP9 4 221416 ROLL PIN, 3/8” X 2” LG10 2 226358 PIN WELDMENT11 1 226363-01 TORSION SPRING, RH, 1/2” X 5-3/4”12 1 226363-02 TORSION SPRING, LH, 1/2” X 5-3/4”13 2 226365 PIN WELDMENT14 2 226368 PIN WELDMENT15 2 226372 ROUND TUBE X 1/4” (2” X 5/16”W)16 4 226375 ROLLER (1” WIDE, 3-1/8” O.D.)17 10 226941 LOCK NUT, 3/8”-2418 2 261785-01 PARALLEL ARM18A 4 905112-07 BEARING, SELF LUBE 1-3/8” X 1-3/4” LG19 1 262332-01 LIFT ARM WELDMENT, RH20 1 262332-02 LIFT ARM WELDMENT, LH11921 Slauson Ave. Santa Fe Springs, CA. 90670 (800) 227-4116 FAX (888) 771-771323
MAIN FRAME ASSEMBLY: <strong>GPT</strong>-4 & <strong>GPT</strong>-5 - Continued35343711921 Slauson Ave. Santa Fe Springs, CA. 90670 (800) 227-4116 FAX (888) 771-77132925303225A 3131212428233637362822272221233326A 31322426 2935313024
ITEM QTY. PART NO. DESCRIPTION21 2 262435 PIN WELDMENT22 2 262437 BUSHING WELDMENT HOSE CLAMP23 2 262462 PIN WELDMENT24 2 265807-01 PIN WELDMENT, 1-3/8” X 13-1/8” LG25 1 265813-01 SHACKLE ASSEMBLY, LH25A 2 905112-06 BEARING SELF LUBE 1-3/8” X 3/8” LG26 1 265813-02 SHACKLE ASSEMBLY, RH26A 2 905112-06 BEARING SELF LUBE 1-3/8” X 3/8” LG27 1 281562-01 MAIN FRAME28 2 266033-01 PIN WELDMENT29 2 902011-4 LOCK WASHER, 3/8”30 2 902013-21 FLAT WASHER, 1-3/8”31 4 905112-07 BEARING, SELF LUBE 1-3/8” X 1-3/4” LG32 2 905113-03 BEARING, SELF LUBE 1-3/4” X 1-3/4” LG33 1 262397 LIFT FRAME WELDMENT34 2 281539-01 SADDLE, LOW PROFILE HINGE35 4 901024-3 HEX BOLT, 1/2”-13 X 2-1/4” LG36 4 901023 FLANGE LOCK NUT, 1/2”-1337 2 090300-12 FLAT, 3/4” X 1” X 6” LG.11921 Slauson Ave. Santa Fe Springs, CA. 90670 (800) 227-4116 FAX (888) 771-771325
PLATFORM & FLIPOVER ASSEMBLY (ALUMINUM)11921 Slauson Ave. Santa Fe Springs, CA. 90670 (800) 227-4116 FAX (888) 771-771342311AREFER TO PLATFORMASSEMBLYITEM QTY. PART NO. DESCRIPTION1 1 281512-01 FLIPOVER WELDMENT, 30”1A 1 265819-01 HANDLE WELDMENT2 2 263602 HINGE PIN WELDMENT3 4 902020-1 FLAT WASHER, NYLON, 3/4” I.D., 1-5/16” O.D.4 2 905033-2 ROLL PIN, 1/4” X 1-1/4” LG43226
PLATFORM & FLIPOVER ASSEMBLY WITH CART STOPS (ALUMINUM)312REFER TO FLIPOVER WITH SINGLECART STOP OR FLIPOVER WITH DUALCART STOPS (SINGLE IS SHOWN)REFER TO PLATFORMASSEMBLYITEM QTY. PART NO. DESCRIPTION1 2 263602 HINGE PIN WELDMENT2 4 902020-1 FLAT WASHER, NYLON, 3/4” I.D., 1-5/16” O.D.3 2 905033-2 ROLL PIN, 1/4” X 1-1/4” LG32111921 Slauson Ave. Santa Fe Springs, CA. 90670 (800) 227-4116 FAX (888) 771-771327
PLATFORM ASSEMBLY (ALUMINUM)6(2 PLACES)5 491, 1A11921 Slauson Ave. Santa Fe Springs, CA. 90670 (800) 227-4116 FAX (888) 771-771337(2 PLACES)28ITEM QTY. PART NO. DESCRIPTION1 1 281510-01 PLATFORM ASSEMBLY, 30”1A 1 281508-01 PLATFORM WELDMENT, 30”2 2 263608 HINGE BRACKET, INSIDE3 2 263609 HINGE BRACKET, OUTSIDE4 2 902011-6 LOCK WASHER, 1/2”5 2 900033-9 CAP SCREW, 1/2”-20 X 2” LG6 4 900035-10 CAP SCREW, 1/2”-13 X 3-1/2” LG7 4 902013-13 FLAT WASHER, 1/2”8 2 040066 LOCK NUT, 1/2”-139 4 260917-04 SELF LUBE BEARING, 1/2” LG829347(2 PLACES)56(2 PLACES)28
THIS PAGE INTENTIONALLY LEFT BLANK11921 Slauson Ave. Santa Fe Springs, CA. 90670 (800) 227-4116 FAX (888) 771-771329
FLIPOVER WITH SINGLE CART STOP (ALUMINUM)716 (4 PLACES)13211921 Slauson Ave. Santa Fe Springs, CA. 90670 (800) 227-4116 FAX (888) 771-7713147(4 PLACES)1, 1A91016 (4 PLACES)1B1314748856 3615114121130
ITEM QTY. PART NO. DESCRIPTION1 1 281533-01 FLIPOVER ASSEMBLY SINGLE CART STOP 30”1A 1 281513-01 FLIPOVER WELDMENT, SINGLE CART STOP1B 1 265819-01 HANDLE WELDMENT2 1 262508-02 SINGLE CART STOP RAMP WELDMENT3 1 262481-02 OPENING AND CLOSING ARM, RH4 2 262515 METAL EYELET END FITING5 1 262513-01 PIN, 80-5/8” LG6 2 905122-02 SELF LUBE BEARING, 1/2” X 5/16” LG7 6 253542 SELF LUBE BEARING, 1/2” X 1/2” LG8 2 905135 CLEVIS PIN, 5/16” X 7/8” LG9 1 030406 ROLL PIN, 1/8” X 1” LG10 1 262536 TORSION SPRING11 2 030805 COTTER PIN, 1/8” X 1” LG12 1 262514 GAS SPRING, 90 LBS13 2 281536-01 STOP BLOCK14 2 902022 WASHER, 1/2”15 1 900047 SHOULDER SCREW,1/2” X 3/4” LG16 8 903705-02 RIVET, BLIND, 1/4” X 5/8” LG11921 Slauson Ave. Santa Fe Springs, CA. 90670 (800) 227-4116 FAX (888) 771-771331
FLIPOVER WITH DUAL CART STOPS (ALUMINUM)11921 Slauson Ave. Santa Fe Springs, CA. 90670 (800) 227-4116 FAX (888) 771-77139131347111014461211(4 PLACES)141617 (4 PLACES)121, 1A155217 (4 PLACES)161011121B413128314149134732
ITEM QTY. PART NO. DESCRIPTION1 1 281532-01 FLIPOVER ASSEMBLY DUAL CART STOP 30”1A 1 281513-02 FLIPOVER WELDMENT, DUAL CART STOP1B 1 265819-01 HANDLE WELDMENT2 1 262509-06 DUAL CART STOP RAMP WELDMENT, RH3 1 262481-02 OPENING AND CLOSING ARM, RH4 4 262515 METAL EYELET END FITING5 1 262509-05 DUAL CART STOP RAMP WELDMENT, LH6 1 262481-01 OPENING AND CLOSING ARM, LH7 2 262514 GAS SPRING, 90 LBS8 1 262513-01 PIN, 80-5/8” LG.9 2 900047 SHOULDER SCREW, 1/2” X 3/4” LG10 2 902022 WASHER, 1/2”11 6 253542 SELF LUBE BEARING, 1/2” X 1/2” LG12 4 905135 CLEVIS PIN, 5/16” X 7/8” LG.13 4 030805 COTTER PIN, 1/8” X 1” LG.14 4 905122-02 SELF LUBE BEARING, 1/2” X 5/16” LG15 1 030406 ROLL PIN, 1/8” X 1” LG16 2 281536-01 STOP BLOCK17 8 903705-02 RIVET, BLIND,1/4” X 5/8” LG11921 Slauson Ave. Santa Fe Springs, CA. 90670 (800) 227-4116 FAX (888) 771-771333
DOCK BUMPEREXTENSION PLATE(REFERENCE)11921 Slauson Ave. Santa Fe Springs, CA. 90670 (800) 227-4116 FAX (888) 771-77135 (2 PLACES)47(2 PLACES)18(2 PLACES)26(2 PLACES)MAIN FRAME(REFERENCE)ITEM QTY. PART NO. DESCRIPTION1 2 226856 DOCK BUMPER ANGLE X 23-1/2” LG2 1 266019-03 BRACE ANGLE L/H3 1 266019-04 BRACE ANGLE R/H4 2 222988 BUMPER5 4 900033-5 CAP SCREW, 1/2”-20 X 2” LG6 4 901011-10 NUT, 1/2”7 4 902000-14 FLAT WASHER, 1/2”8 4 902011-6 LOCK WASHER, 1/2”45(2 PLACES)7(2 PLACES)138(2 PLACES)6(2 PLACES)34
THIS PAGE INTENTIONALLY LEFT BLANK11921 Slauson Ave. Santa Fe Springs, CA. 90670 (800) 227-4116 FAX (888) 771-771335
HYDRAULIC COMPONENTS - POWER DOWNCAUTIONIf the Liftgate is equipped with a bumper (ICC-type), replacement hydraulichoses must be routed with sufficient clearance from the bumper. The clearanceprevents the hoses from rubbing or getting caught on the bumper.11921 Slauson Ave. Santa Fe Springs, CA. 90670 (800) 227-4116 FAX (888) 771-7713113151610RH18201941432321722REFER TOPUMP ASSEMBLY(POWER DOWN)166 15 915 12 7 5NOTE: Replacement face seal fi ttings comewith required O-rings.1121810LH1151336
ITEM QTY. PART NO. DESCRIPTION266037-01 CYLINDER, 2-3/4” DIA. x 10” STROKE (<strong>GPT</strong>-25 & <strong>GPT</strong>-3)1 2 266038-01 CYLINDER, 3” DIA. x 10” STROKE (<strong>GPT</strong>-4)266039-01 CYLINDER, 3-1/2” DIA. x 10” STROKE (<strong>GPT</strong>-5)2 1 265846-01 HOSE ASSY, 3/8”HP SAE#8F,#6M, 21” LG3 1 265863-01 HOSE ASSY, 3/8”HP SAE#6- #8 F-F, 26” LG4 1 265888-01 HOSE ASSY, 3/8”HP SAE#8 F-F, 57” LG5 1 265888-02 HOSE ASSY, 3/8”HP SAE#8 F-F, 83” LG6 1 265889-01 HOSE ASSY, 3/8”HP SAE#6 F-F, 55” LG7 1 265889-02 HOSE ASSY, 3/8”HP SAE#6 F-F, 77” LG8 1 906709-01 VALVE, FLOW REGULATOR #6 SAE, 4 GPM9 1 905150 TEE, UNION, 3/8” FACE SEAL MALE, 6-JLO10 2 906704-01 ELBOW, STRAIGHT THR. #8 FACE SEAL O-RING M-M11 1 906771-01 CONNECTOR, STRAIGHT, #6 - #8, M-M, O-RING F/S12 1 906706-01 TEE, UNION SAE#8 F/S M-M13 2 906707-01 ELBOW, STRAIGHT THD. #6 FACE SEAL O-RING M-M14 1 906770-01 ELBOW, MALE PIPE, #8 O-RING FACE SEAL-NPTF15 5 906712-02 O-RING #6 (3/8” FACE SEAL TUBE-END)16 5 906712-03 O-RING #8 (1/2” FACE SEAL TUBE-END)17 1 050207 FITTING, SWIVEL ELBOW18 1 226948-09 HOSE ASSY, 1/4” HP X 18-1/2” LG., M-M 1/4” NPTF19 1 260490 NEEDLE VALVE, F-F 3/8” NPTF11921 Slauson Ave. Santa Fe Springs, CA. 90670 (800) 227-4116 FAX (888) 771-771320 1 800183 BUSHING, 3/8”-1/4”21 1 906751-01 FITTING, STRAIGHT O-RING, SAE#6 M (WITH SWIVEL)22 1 906769-01 BRANCH TEE, SWIVEL NUT, SAE#8 M-M/F23 1 906772-01 CONNECTOR, STR. SWIVEL, #8, M-F, O-RING FACE SEAL37
PUMP ASSEMBLY - POWER DOWNCAUTIONDo not over-tighten the terminal nuts on starter solenoid. For the loadterminals, torque nuts to 40 lbs.-in. max. Torque the nuts on #10-32 controlterminals 15-20 lbs.-in.11921 Slauson Ave. Santa Fe Springs, CA. 90670 (800) 227-4116 FAX (888) 771-77131CAUTIONTo prevent damage when installing 2-way valves, torque valve cartridgenut to 30 lbs.-in. max.132A,2B142C,2D412211MANIFOLDBLOCK (REF)109STEELBALL8SPRING5O-RINGADJUSTINGSCREWSPRINGGUIDEPLUG3 (4 PLACES)6738
ITEM QTY. PART NO. DESCRIPTIONREF 1 262256 PUMP ASSEMBLY, POWER DOWN1 1 250093 MOTOR, HEAVY DUTY, 12 VDC2 1 260275 MANIFOLD BLOCK ASSEMBLY2A 1 260276 VALVE, 4-WAY SOLENOID2B 1 226595 O-RING KIT, 4-WAY VALVE (NOT SHOWN)2C 1 253353 VALVE, 2-WAY SOLENOID2D 1 226594 O-RING KIT, 2-WAY VALVE (NOT SHOWN)3 4 229202 CAP SCREW, HEX HEAD, WASHER HEAD (NOT SHOWN)4 1 268026-01 WIRE ASSEMBLY, 18GA5 1 260229 RELIEF VALVE KIT6 1 260263 RESERVOIR, 2.5 GAL.7 1 229193 FILLER/BREATHER CAP8 1 260250 FILTER9 1 290003 3-PIECE GEAR PUMP10 1 251884 O-RING11 1 REF. ONLY DRIVE PLATE ASSY, 5”12 1 260261 OIL SEAL13 1 280404 CABLE ASSEMBLY14 1 268030-01 SWITCH, SOLENOID (12 VDC)11921 Slauson Ave. Santa Fe Springs, CA. 90670 (800) 227-4116 FAX (888) 771-771339
PUMP BOX ASSEMBLY - POWER DOWN2A(LATCH)11921 Slauson Ave. Santa Fe Springs, CA. 90670 (800) 227-4116 FAX (888) 771-77132A(LATCH) 2342A(CATCH)REFER TOPUMP ASSYITEM QTY. PART NO. DESCRIPTIONREF 1 260157 PUMP BOX ASSEMBLY1 1 260156 PUMP BOX WELDMENT2 1 229383 PUMP BOX COVER2A 2 215139 CATCH & FASTENER3 1 251097 RUBBER GROMMET, 7/8” I.D., 1-5/8” O.D.4 1 093209-10 EDGE TRIM, 8-1/2” LG.1REFER TODECALS2A(CATCH)40
CONTROL SWITCH AND POWER CABLENOTE: Use switch to raise and lower Liftgate to make sure switchoperates as shown on the decal.(FOR REFERENCE-SEE DECALS)2SHORT END TOVEHICLE BATTERY3NOTE: MAXON recommends using dielectricgrease on all electrical connections.15WHITEREDBLACKGREEN(TO PUMP BOX)ITEM QTY. PART NO. DESCRIPTION1 1 264951-01 SWITCH & CABLE ASSEMBLY2 2 900057-5 SCREW, SELF-TAPPING #10-24 X 1” LG.3 1 905206 SWITCH BOOT SEAL4 1 264422 CABLE ASSEMBLY, 200 AMPS, 38’ LG.5 1 264687 KIT, MEGAFUSE (200 AMP FUSE & HEATSHRINK TUBING)TABLE 41-1FIG. 41-111921 Slauson Ave. Santa Fe Springs, CA. 90670 (800) 227-4116 FAX (888) 771-77134WARNING!Do not attach cable to battery untilLiftgate repairs are completed.LONG END TO PUMPMOTOR SOLENOIDFIG. 41-241
DECALSDECAL “H” (2 PLACES)P/N 268308-0111921 Slauson Ave. Santa Fe Springs, CA. 90670 (800) 227-4116 FAX (888) 771-7713PAINT DECALP/N 267338-01PLATFORM WARNING DECAL(2 PLACES)P/N 281189-01FIG. 42-1DECAL “D”DECAL “I”DECAL “F”DECAL “E”DECAL “B”DECAL “C”DECAL “G”DECAL “A”PLATFORM LOADING DECAL(2 PLACES)P/N 281326-0142
(See TABLE 43-1)DECAL SHEETFIG. 43-111921 Slauson Ave. Santa Fe Springs, CA. 90670 (800) 227-4116 FAX (888) 771-7713MODEL DECAL SHEET P/N DECAL “B”<strong>GPT</strong>-25 268308-01 2500 POUNDS<strong>GPT</strong>-3 268308-02 3000 POUNDS<strong>GPT</strong>-4 268308-03 4000 POUNDS<strong>GPT</strong>-5 268308-04 5000 POUNDSDECAL SHEETTABLE 43-143
DECALS - Continued11921 Slauson Ave. Santa Fe Springs, CA. 90670 (800) 227-4116 FAX (888) 771-7713FLUID LEVEL DECALP/N 265330-03FIG. 44-144
THIS PAGE INTENTIONALLY LEFT BLANK11921 Slauson Ave. Santa Fe Springs, CA. 90670 (800) 227-4116 FAX (888) 771-771345
SYSTEM DIAGRAMSHYDRAULIC SCHEMATIC - POWER DOWNHYDRAULIC CYLINDERS11921 Slauson Ave. Santa Fe Springs, CA. 90670 (800) 227-4116 FAX (888) 771-7713ADJUSTABLENEEDLE VALVEPORT B-LOWER(PWR DN)CHECK VALVEMOTOR(REFERENCE)MFILTERPUMPPORT A-RAISERELIEFVALVE(SET AT2200 PSI)RESERVOIR4 GPM FLOWCONTROL VALVEVALVE “A”VALVE “E”FILL HOLE(PLUGGED)FILTERHAND PUMPPORTHAND PUMPPORTFIG. 46-1DRAIN HOLE(PLUGGED)46
ELECTRICAL SCHEMATIC - POWER DOWNCABLEASSEMBLYREDSOLENOID,VALVE ECONTROL SWITCHWHITESTARTERSOLENOIDMOTORGREENBLACKSOLENOID,VALVE A11921 Slauson Ave. Santa Fe Springs, CA. 90670 (800) 227-4116 FAX (888) 771-7713CABLE WITH200 AMP FUSEBATTERYFIG. 47-147
TROUBLESHOOTINGPLATFORM WILL NOT RAISE1. Connect voltmeter between motor solenoid terminal “B” and ground wires connectionon pump (FIG. 48-1). Verify that battery power is getting to “B”. Recharge the battery ifvoltmeter indicates less than 12.6 volts dc.11921 Slauson Ave. Santa Fe Springs, CA. 90670 (800) 227-4116 FAX (888) 771-7713Keep dirt, water and other contaminants from entering the hydraulic system. Beforeopening the hydraulic fl uid reservoir fi ller cap, drain plug and hydraulic lines, clean upcontaminants that can get in the openings. Also, protect the openings from accidentalcontamination during maintenance.2. Do the CHECK HYDRAULIC FLUID procedure in this manual. If necessary add hydraulicfl uid.3. Touch a jumper wire to terminals “B” & “D” (FIG. 48-1). If motor runs check switch,the switch connections, and white wire. Check and correct wiring connections or replacethe switch.4. Touch heavy jumper cables to terminals “A” & “B” (FIG. 48-1).a. If motor runs, replace the motor solenoid.b. If motor does not run, repair or replace the pump motor.5. Check for structural damage andreplace worn parts.6. Check fi lter in the pump reservoir.Replace fi lter if necessary.7. Check if pump relief valve is dirty.Clean if necessary or replace wornout parts.CAUTIONNOTE: In most cases, you can avoid having to manually bleed hydraulic system bycorrectly positioning Liftgate platform before disconnecting any lifting cylinderhigh pressure hydraulic lines. The following procedure can save time andprevent accidental fl uid spills and hazards.TERMINAL “A”MOTOR (+)TERMINAL “C”GROUND (-)MOTORSOLENOIDTERMINAL “B”BATTERY (+)FIG. 48-1(VOLTMETER - LEAD )GROUND (-)WIRESCONNECTIONTERMINAL “D”SWITCHEDBATTERY (+)48
1. Check if lowering solenoid valve isconstantly energized. Connect voltmeternegative (-) lead to ground(-) wires connection on pump andpositive (+) lead to terminal “D” (FIG.49-1). If voltmeter reads battery voltage(+12.6 volts dc minimum) withoutpushing the toggle switch, the controlcircuit is operating incorrectly. Check iftoggle switch, wiring or coil are faulty.PLATFORM RAISES BUT LEAKS DOWNMOTOR2. Check the valve stem by removing the coil assembly(Item 1, FIG. 49-2). With platform onground, unscrew the valve stem (Item 2, FIG.49-2) from the pump. Push on the plunger thatis located inside the valve stem by inserting asmall screwdriver blade in the end. If the plungerdoes not move freely (approximately 1/8”), replacethe valve stem. When reinstalling valvestem, torque hex nut to 30 in-lbs.FIG. 49-11/8”FIG. 49-23. Check the hydraulic cylinder. With the platformon the ground, remove the hydraulicRAISE PORTline from the lower port of the cylinder (FIG.49-3). Raise the platform even with thebed. Allow pump motor to run two secondsLOWERPORTmore while you watch for hydraulic fl uid atthe lower port. A few drops of hydraulic fl uidescaping the port is normal; however, if itstreams out, piston seals are worn. Replaceseals. FIG. 49-31LOWERINGSOLENOIDVALVEGROUND (-)WIRECONNECTIONTERMINAL “D”SWITCHEDBATTERY (+)CAUTIONKeep dirt, water and other contaminants from entering the hydraulic system. Beforeopening the hydraulic fl uid reservoir fi ller cap, drain plug and hydraulic lines, clean upcontaminants that can get in the openings. Also, protect the openings from accidentalcontamination during maintenance.NOTE: In most cases, you can avoid having to manually bleed hydraulic system bycorrectly positioning Liftgate platform before disconnecting any lifting cylinderhigh pressure hydraulic lines. The following procedure can save time andprevent accidental fl uid spills and hazards.211921 Slauson Ave. Santa Fe Springs, CA. 90670 (800) 227-4116 FAX (888) 771-771349
PLATFORM RAISES PARTIALLY AND STOPSCAUTIONKeep dirt, water and other contaminants from entering the hydraulic system. Beforeopening the hydraulic fl uid reservoir fi ller cap, drain plug and hydraulic lines, clean upcontaminants that can get in the openings. Also, protect the openings from accidentalcontamination during maintenance.11921 Slauson Ave. Santa Fe Springs, CA. 90670 (800) 227-4116 FAX (888) 771-77131. Lower the opened platform to the ground. Do the CHECK HYDRAULIC FLUID procedurein this manual. If necessary, add hydraulic fl uid.2. Use voltmeter to verify the battery voltage is 12.6 volts or more.3. Check for structural damage and poor lubrication. Replace worn parts.NOTE: In most cases, you can avoid having to manually bleed hydraulic system bycorrectly positioning Liftgate platform before disconnecting any lifting cylinderhigh pressure hydraulic lines. The following procedure can save time andprevent accidental fl uid spills and hazards.4. Check the hydraulic cylinder. With the platform on theground, remove line from the lower port of the cylinder(FIG. 50-1). Allow pump motor to run two secondsmore while you watch for hydraulic fl uid at the lowerport. A few drops of hydraulic fl uid escaping the portis normal; however, if it streams out, piston seals areworn. Replace seals.5. Check fi lter in the pump reservoir. Replace fi lter if necessary.6. Check if pump relief valve is dirty. Clean if necessaryor replace worn out parts.RAISE PORTLOWERPORTFIG. 50-150
LIFTGATE WILL NOT LIFT RATED CAPACITY1. Use voltmeter to verify the battery voltage is 12.6 volts or more under load from pumpmotor.2. Check for structural damage or lack of lubrication. Replace worn parts.CAUTIONKeep dirt, water and other contaminants from entering the hydraulic system. Beforeopening the hydraulic fl uid reservoir fi ller cap, drain plug and hydraulic lines, clean upcontaminants that can get in the openings. Also, protect the openings from accidentalcontamination during maintenance.NOTE: In most cases, you can avoid having to manually bleed hydraulic system bycorrectly positioning Liftgate platform before disconnecting any lifting cylinderhigh pressure hydraulic lines. The following procedure can save time andprevent accidental fl uid spills and hazards.3. With platform on the ground, remove the pressurehose and fi tting from the pump and replace it witha 0-3000 PSI pressure gauge. Hold the switch inthe “UP” position. Adjust the relief valve on the sideof the pump until the gauge shows 2200 PSI (FIG.51-2). Remove guage and reinstall pressurehose.4. Check if pump relief valve is dirty. Clean if necessaryor replace worn out parts.5. Check the hydraulic cylinder. With the platformon the ground, remove the hydraulic line from thelower port of the cylinder (FIG. 51-1). Raise theplatform even with the bed. Allow pump motor torun two seconds more while you watch for hydraulicfl uid at the lower port. A few drops of hydraulicfl uid escaping the port is normal; however, if itstreams out, piston seals are worn. Replace seals.RAISE PORTLOWERPORTFIG. 51-1RELIEF VALVEADJUST SCREWPRESSUREGAUGE11921 Slauson Ave. Santa Fe Springs, CA. 90670 (800) 227-4116 FAX (888) 771-77136. If pump cannot produce 2200 PSI or lift the loadcapacity with a minimum of 12.6 volts available, thepump is worn and needs to be replaced.DECREASEINCREASEFIG. 51-2ADJUSTMENTCOVER51
11921 Slauson Ave. Santa Fe Springs, CA. 90670 (800) 227-4116 FAX (888) 771-7713PLATFORM RAISES SLOWLY1. Connect voltmeter between motor solenoid terminal“B” and ground (-) wires connection on pump (FIG.52-1). Verify that battery power is getting to “B”.Recharge the battery if voltmeter indicates less than12.6 volts dc.CAUTIONKeep dirt, water and other contaminants fromentering the hydraulic system. Before opening thehydraulic fluid reservoir fi ller cap, drain plug andhydraulic lines, clean up contaminants that can getin the openings. Also, protect the openings from accidentalcontamination during maintenance.3. Check and clean fl ow control valve (FIG. 52-3). Wheninstalling fl ow control valve, make sure arrow on valve isoriented as shown in FIG. 52-3.TERMINAL “B”BATTERY (+) GROUND (-)WIRESCONNECTIONFIG. 52-12. Check the hydraulic cylinder. With the platform on the ground, remove the hydraulicline from the lower port of the cylinder (FIG. 52-2). Raise the platform even with thebed. Allow pump motor to run two seconds more while you watch for hydraulic fl uid atthe lower port. A few drops of hydraulic fl uid escaping the port is normal; however, if itstreams out, piston seals are worn. Replace seals.NOTE: In most cases, you can avoid having to manually bleed hydraulic system bycorrectly positioning Liftgate platform before disconnecting any lifting cylinderhigh pressure hydraulic lines. The following procedure can save time andprevent accidental fl uid spills and hazards.RAISE PORTLOWERPORTFIG. 52-2FLOW CONTROLVALVEFIG. 52-352
4. Verify the pump motor is grounded to vehicle frame.5. Check for leaking hoses and fi ttings. Tighten or replaceas required.6. Check for structural damage and poor lubrication.Replace worn parts.7. Check the fi lter in the pump reservoir. Replace ifnecessary.8. With platform on the ground, remove the pressurehose and fi tting from the pump and replaceit with a 0-3000 PSI pressure gauge. Hold thecontrol switch in the UP position. Adjust the reliefvalve on the side of the pump until the gaugeshows 2200 PSI (FIG. 53-1). Remove guageand reinstall pressure hose.DECREASERELIEF VALVEADJUST SCREWINCREASEFIG. 53-1PRESSUREGAUGEADJUSTMENTCOVER11921 Slauson Ave. Santa Fe Springs, CA. 90670 (800) 227-4116 FAX (888) 771-771353
PLATFORM WILL NOT LOWER, LOWERS TOO SLOWLY OR TOO QUICKLY1. Connect voltmeter between motor solenoidterminal “B” and ground wires connectionon pump (FIG. 54-1). Verify that batterypower is getting to “B”. Recharge the batteryif voltmeter indicates less than 12.6volts dc.LOWERINGSOLENOIDVALVE11921 Slauson Ave. Santa Fe Springs, CA. 90670 (800) 227-4116 FAX (888) 771-77132. Check for structural damage or poor lubrication.Replace worn parts.3. Check if lowering solenoid valve is gettingpower. Connect voltmeter betweenground (-) wires connection on pump andterminal “B” (FIG. 54-1). Push controlswitch to DOWN position to energizelowering solenoid. If voltmeter reads batteryvoltage (+12.6 volts dc minimum),control circuit is operating correctly(replace lowering solenoid). If voltmeterreads 0 volts, check if toggle switch andwiring are faulty.4. Check the valve stem by removing the coil assembly(Item 1, FIG. 54-2). With platform supported,unscrew the valve stem (Item 2, FIG. 54-2) fromthe pump. Push on the plunger located inside thevalve stem by inserting a small screwdriver blade inthe end. If the plunger does not move freely (approximately1/8”) replace the valve stem.5. Check if fi ltering screen on solenoid valve isplugged. Clean carefully if required.MOTORTERMINAL “B”BATTERY (+)FIG. 54-11FIG. 54-2TERMINAL “D”SWITCHEDBATTERY (+)GROUND (- )WIRECONNECTIONCAUTIONKeep dirt, water and other contaminants from entering the hydraulic system. Beforeopening the hydraulic fl uid reservoir fi ller cap, drain plug and hydraulic lines, clean upcontaminants that can get in the openings. Also, protect the openings from accidentalcontamination during maintenance.NOTE: In most cases, you can avoid having to manually bleed hydraulic system bycorrectly positioning Liftgate platform before disconnecting any lifting cylinderhigh pressure hydraulic lines. The following procedure can save time andprevent accidental fl uid spills and hazards.1/8”254
6. Check and clean fl ow control valve (FIG.55-1) in the high pressure hydraulic lineconnected to pump.7. Check if fl ow control valve (FIG. 55-1) ispointing to the direction of restricted fl uidfl ow (back toward pump). If required, removefl ow control valve and install it correctly (FIG.55-1).FLOW CONTROLVALVEFIG. 55-111921 Slauson Ave. Santa Fe Springs, CA. 90670 (800) 227-4116 FAX (888) 771-771355
PLATFORM WON’T TILT DOWN TO THE GROUNDNOTE: If the Liftgate is not damaged, the adjustable fl ow control valve on power unitmay need to be adjusted as follows.1. Unhook safety chain. Lower the platform untilshackles touch the ground (FIG. 56-1).11921 Slauson Ave. Santa Fe Springs, CA. 90670 (800) 227-4116 FAX (888) 771-7713CAUTIONTo prevent damage to adjustable flowcontrol valve, loosen locking screw beforeturning knob.2. Open the pump box (FIG. 56-2A) to access theadjustment knob on the adjustable fl ow controlvalve (FIG. 56-2B).LOCKINGSCREWUNLOCKING/LOCKINGADJUSTMENT KNOBFIG. 56-2BADJUSTMENTKNOB3. Loosen locking screw on the fl ow control valveadjustment knob (FIG. 56-2B).SAFETYCHAINSHACKLES TOUCHINGTHE GROUNDFIG. 56-1ADJUSTABLE FLOWCONTROL VALVEPOWER UNIT (REF)PUMP BOX & POWER UNITFIG. 56-2ASHACKLE56
4. First, close the adjustable fl ow control valve (FIG.57-1A) by turning adjustment knob full clockwise(CW) (FIG. 57-1B).CW TO CLOSEVALVEFIG. 57-1B1/4-1/2 TURNCCW TO OPEN &ADJUST VALVEFIG. 57-1C5. Next, open the fl ow control valve a little by turningthe adjustment knob 1/4 to 1/2 turn counter-clockwise(CCW) (FIG. 57-1C).6. Push the control switch to DOWN position. Verifythat platform tilts down to the ground (FIG. 57-2).ADJUSTABLE FLOWCONTROL VALVEPOWER UNIT (REF)PUMP BOX & POWER UNITFIG. 57-1A11921 Slauson Ave. Santa Fe Springs, CA. 90670 (800) 227-4116 FAX (888) 771-77137. Tighten locking screw on the fl ow control valveadjustment knob (FIG. 48-2B).PLATFORM TILTED DOWNFIG. 57-257


