KR C2 sr - KUKA Robotics
KR C2 sr - KUKA Robotics
KR C2 sr - KUKA Robotics

Create successful ePaper yourself
Turn your PDF publications into a flip-book with our unique Google optimized e-Paper software.
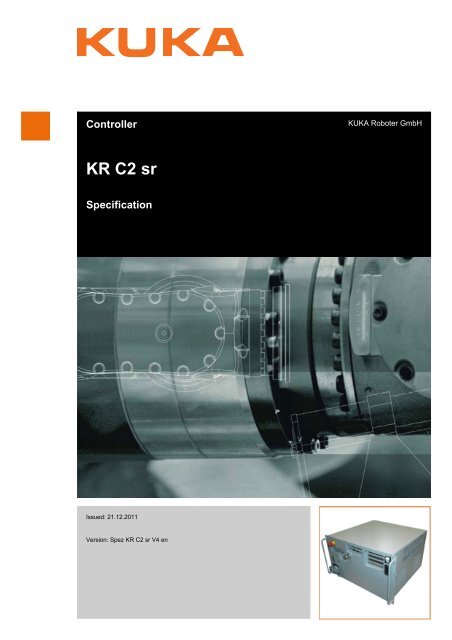
Controller<strong>KUKA</strong> Roboter GmbH<strong>KR</strong> <strong>C2</strong> <strong>sr</strong>SpecificationIssued: 21.12.2011Version: Spez <strong>KR</strong> <strong>C2</strong> <strong>sr</strong> V4 en
<strong>KR</strong> <strong>C2</strong> <strong>sr</strong>© Copyright 2011<strong>KUKA</strong> Roboter GmbHZugspitzstraße 140D-86165 AugsburgGermanyThis documentation or excerpts therefrom may not be reproduced or disclosed to third parties withoutthe express permission of <strong>KUKA</strong> Roboter GmbH.Other functions not described in this documentation may be operable in the controller. The user hasno claims to these functions, however, in the case of a replacement or service work.We have checked the content of this documentation for conformity with the hardware and softwaredescribed. Nevertheless, discrepancies cannot be precluded, for which reason we are not able toguarantee total conformity. The information in this documentation is checked on a regular basis, however,and necessary corrections will be incorporated in the subsequent edition.Subject to technical alterations without an effect on the function.Translation of the original documentationKIM-PS5-DOCPublication:Pub Spez <strong>KR</strong> <strong>C2</strong> <strong>sr</strong> (PDF) enBookstructure: Spez <strong>KR</strong> <strong>C2</strong> <strong>sr</strong> V5.1Version:Spez <strong>KR</strong> <strong>C2</strong> <strong>sr</strong> V4 en2 / 73 Issued: 21.12.2011 Version: Spez <strong>KR</strong> <strong>C2</strong> <strong>sr</strong> V4 en
ContentsContents1 Product description ..................................................................................... 51.1 Overview of the industrial robot ................................................................................. 51.2 Overview of the robot controller ................................................................................. 51.3 Description of the control PC ..................................................................................... 61.3.1 Riser Cage ............................................................................................................ 71.4 Description of the power unit ..................................................................................... 81.5 Description of the <strong>KUKA</strong> Control Panel (KCP) ........................................................... 91.5.1 Front view ............................................................................................................. 101.5.2 Rear view .............................................................................................................. 111.6 KCP coupler (optional) ............................................................................................... 111.7 Description of interfaces ............................................................................................ 131.7.1 Conveyor interface X31 (optional) ........................................................................ 141.7.2 Wiring example X11 .............................................................................................. 141.8 Category of the safety-oriented circuits ..................................................................... 152 Technical data .............................................................................................. 172.1 Dimensions ................................................................................................................ 183 Safety ............................................................................................................ 213.1 General ...................................................................................................................... 213.1.1 Liability .................................................................................................................. 213.1.2 Intended use of the industrial robot ...................................................................... 213.1.3 EC declaration of conformity and declaration of incorporation ............................. 223.1.4 Terms used ........................................................................................................... 233.2 Personnel ................................................................................................................... 233.3 Workspace, safety zone and danger zone ................................................................. 253.4 Triggers for stop reactions ......................................................................................... 253.5 Safety functions ......................................................................................................... 263.5.1 Overview of safety functions ................................................................................. 263.5.2 ESC safety logic ................................................................................................... 263.5.3 Mode selector switch ............................................................................................ 273.5.4 Operator safety ..................................................................................................... 283.5.5 EMERGENCY STOP device ................................................................................ 293.5.6 External EMERGENCY STOP device .................................................................. 293.5.7 Enabling device .................................................................................................... 303.6 Additional protective equipment ................................................................................. 303.6.1 Jog mode .............................................................................................................. 303.6.2 Software limit switches ......................................................................................... 313.6.3 Labeling on the industrial robot ............................................................................. 313.6.4 External safeguards .............................................................................................. 313.7 Overview of operating modes and safety functions ................................................... 323.8 Safety measures ........................................................................................................ 323.8.1 General safety measures ...................................................................................... 323.8.2 Transportation ....................................................................................................... 333.8.3 Start-up and recommissioning .............................................................................. 343.8.4 Virus protection and network security ................................................................... 353.8.5 Manual mode ........................................................................................................ 36Issued: 21.12.2011 Version: Spez <strong>KR</strong> <strong>C2</strong> <strong>sr</strong> V4 en3 / 73
<strong>KR</strong> <strong>C2</strong> <strong>sr</strong>3.8.6 Simulation ............................................................................................................. 363.8.7 Automatic mode ................................................................................................... 373.8.8 Maintenance and repair ........................................................................................ 373.8.9 Decommissioning, storage and disposal .............................................................. 383.8.10 Safety measures for “single point of control” ........................................................ 383.9 Applied norms and regulations .................................................................................. 394 Planning ........................................................................................................ 414.1 Installation conditions ................................................................................................ 414.2 Connection conditions ............................................................................................... 424.3 Power supply connection ........................................................................................... 434.4 EMERGENCY STOP circuit and safeguard .............................................................. 434.5 Interface X11 ............................................................................................................. 454.6 Configuring mini I/O X12 ........................................................................................... 494.7 Configuring wrist I/O X32 ........................................................................................... 524.8 PE equipotential bonding ........................................................................................... 524.9 Visualization of the KCP coupler option .................................................................... 534.10 Performance level ...................................................................................................... 534.10.1 PFH values of the safety functions ....................................................................... 535 Transportation ............................................................................................. 555.1 Transporting the robot controller ............................................................................... 556 Start-up and recommissioning ................................................................... 576.1 Start-up overview ....................................................................................................... 576.2 Installing the robot controller ..................................................................................... 586.3 Connecting the connecting cables ............................................................................. 586.4 Connecting the KCP .................................................................................................. 596.5 Connecting the PE equipotential bonding ................................................................. 596.6 Connecting the robot controller to the power supply ................................................. 596.7 Configuring and connecting connector X11 ............................................................... 596.8 Configuring and connecting mini I/O connector X12 ................................................. 596.9 Configuring and connecting wrist I/O connector X32 ................................................ 607 <strong>KUKA</strong> Service ............................................................................................... 617.1 Requesting support ................................................................................................... 617.2 <strong>KUKA</strong> Customer Support ........................................................................................... 61Index ............................................................................................................. 694 / 73 Issued: 21.12.2011 Version: Spez <strong>KR</strong> <strong>C2</strong> <strong>sr</strong> V4 en
1 Product description1 Product description1.1 Overview of the industrial robotThe industrial robot consists of the following components:• Manipulator• Robot controller• Teach pendant• Connecting cables• Software• Options, accessoriesFig. 1-1: Example of an industrial robot1 Manipulator 3 Teach pendant2 Robot controller 4 Connecting cables1.2 Overview of the robot controllerThe robot controller is used for controlling the following systems:• <strong>KUKA</strong> robotsThe robot controller consists of the following components:• Control PC• Power unit• KCP teach pendant• Safety logic• KCP coupler (optional)• Connection panel• Riser Cage with Ether CATThe robot controller can be installed in a 19" rack.Issued: 21.12.2011 Version: Spez <strong>KR</strong> <strong>C2</strong> <strong>sr</strong> V4 en5 / 73
<strong>KR</strong> <strong>C2</strong> <strong>sr</strong>Fig. 1-2: Overview of the robot controller1 Control PC 7 KCP coupler control and indicatorelements (optional)2 KCP coupler card (optional) 8 EMERGENCY STOP pushbutton3 Batteries 9 Connection panel4 Riser Cage 10 Power unit5 Main switch 11 KCP6 Power supply connection1.3 Description of the control PCFunctionsOverviewWith its fitted components, the PC performs all the functions of the robot controller.• Windows user interface with visual display and input• Program creation, correction, archiving, and maintenance• Sequence control• Path planning• Transmission of the axis data to the Small Robot• Monitoring• Parts of the ESC safety circuit• Communication with external periphery (other controllers, host computers,PCs, network)The control PC includes the following components:• Motherboard with interfaces• Processor and main memory• Hard drive• MFC3 Tech• KVGA• UPS module with batteries6 / 73 Issued: 21.12.2011 Version: Spez <strong>KR</strong> <strong>C2</strong> <strong>sr</strong> V4 en
1 Product descriptionFig. 1-3: Overview of the control PC1 Processor 7 PC fan2 Hard drive 8 Riser Cage3 PC power supply 9 Motherboard4 Batteries 10 Interface X125 UPS module 11 Interface X116 24 V DC power supplyConnectors X11 and X12 must only be connected anddisconnected with the controller switched off.1.3.1 Riser CageDescriptionThe Riser Cage provides space for 5 PCI plug-in cards. The integrated networkcard forms the interface between the control unit and the power unit.The following PC cards are plugged into the left-hand side of the Riser Cage:• KVGA• MFC3 Tech cardOn the right-hand side of the Riser Cage are 3 PCI slots. The following PCcards can optionally be plugged in:• Interbus PCI master• Profibus PCI• 3COM network card (Ethernet)• DeviceNet card• LPDN scanner cardIssued: 21.12.2011 Version: Spez <strong>KR</strong> <strong>C2</strong> <strong>sr</strong> V4 en7 / 73
<strong>KR</strong> <strong>C2</strong> <strong>sr</strong>Fig. 1-4: Riser Cage configurationSlotsItem Interface Item Interface1 Interbus Master/Slave card(optional)2 Real-time or Windows networkcard (optional)3 • Profibus card (optional)• Windows network card(optional)• DeviceNet card (optional)• LPDN scanner card4 Internal communicationsinterface5 MFC3 Tech card6 KVGA1.4 Description of the power unitOverviewThe power unit includes the following components:• Power supply unit• IPM boards• Mini I/O board• ESC Safety I/O <strong>sr</strong>• Fans (2 units at bottom)• Motherboard• Mains filter8 / 73 Issued: 21.12.2011 Version: Spez <strong>KR</strong> <strong>C2</strong> <strong>sr</strong> V4 en
1 Product descriptionFig. 1-5: <strong>KR</strong> <strong>C2</strong> <strong>sr</strong> power unit1 Mains filter 8 IPM board 22 Power supply unit 9 IPM board 13 Fans 10 ESC Safety I/O <strong>sr</strong>4 IPM board 6 11 Mini I/O board5 IPM board 5 12 Connector Print CP36 IPM board 4 13 Motherboard for the drives7 IPM board 3 14 Memory backup battery1.5 Description of the <strong>KUKA</strong> Control Panel (KCP)FunctionThe KCP (<strong>KUKA</strong> Control Panel) is the teach pendant for the robot system. TheKCP has all the control and display functions required for operating and programmingthe robot system.Issued: 21.12.2011 Version: Spez <strong>KR</strong> <strong>C2</strong> <strong>sr</strong> V4 en9 / 73
<strong>KR</strong> <strong>C2</strong> <strong>sr</strong>1.5.1 Front viewOverviewFig. 1-6: Front view of KCP1 Mode selector switch 10 Numeric keypad2 Drives ON 11 Softkeys3 Drives OFF / SSB GUI 12 Start backwards key4 EMERGENCY STOP button 13 Start key5 Space Mouse 14 STOP key6 Right-hand status keys 15 Window selection key7 Enter key 16 ESC key8 Arrow keys 17 Left-hand status keys9 Keypad 18 Menu keys10 / 73 Issued: 21.12.2011 Version: Spez <strong>KR</strong> <strong>C2</strong> <strong>sr</strong> V4 en
1 Product description1.5.2 Rear viewOverviewFig. 1-7: Rear view of KCP1 Identification plate 4 Enabling switch2 Start key 5 Enabling switch3 Enabling switchDescriptionElementIdentificationplateStart keyEnablingswitchKCP rating plateDescriptionThe Start key is used to start a program.The enabling switch has 3 positions:• Not pressed• Center position• Panic positionThe enabling switch must be held in the center positionin operating modes T1 and T2 in order to be ableto jog the robot.In the operating modes Automatic and Automatic External,the enabling switch has no function.1.6 KCP coupler (optional)DescriptionThe KCP coupler allows the KCP to be connected and disconnected with therobot controller running.Issued: 21.12.2011 Version: Spez <strong>KR</strong> <strong>C2</strong> <strong>sr</strong> V4 en11 / 73
<strong>KR</strong> <strong>C2</strong> <strong>sr</strong>OverviewFig. 1-8: KCP coupler LEDs and request button1 Fault LED (red), KCP coupler2 Request LED (green)3 Request buttonKCP coupler cardFig. 1-9: KCP coupler cardConnectionsItem Connecto Descriptionr1 X7 Request button LED connection2 X5 ESC to the KCP3 X20 SafeRobot to the KCP4 X2 CI3 connection5 X21 CAN bus to the KCP6 X3 Debug connector B7 X4 Debug connector AThe LEDs on the door and on the KCP coupler card indicate the operating status.12 / 73 Issued: 21.12.2011 Version: Spez <strong>KR</strong> <strong>C2</strong> <strong>sr</strong> V4 en
1 Product description1.7 Description of interfacesOverviewThe connection panel of the robot controller consists as standard of connectionsfor the following cables:• Power supply cable• Motor/data cable• Wrist I/O cable• KCP cable• Ground conductorThe configuration of the connection panel varies according to the specific option<strong>sr</strong>equired.Connection panelFig. 1-10: InterfacesItem Interface Item Interface1 X11 interface, 37-pin SUB-D contact strip2 X31 conveyor interface(option), 25-contact SUB-Dfemale socket12 X801 from MFC, DeviceNetbus13 X805 from KVGA, not used.3 X32 wrist I/O interface, 25- 14 X2 from MFC, not used.pin SUB-D contact strip4 Mouse connection 15 X821 external monitor(KVGA)5 Keyboard connection 16 Slots for options6 2x USB 17 X1 power supply connection7 COM2 serial interface 18 M5 ground conductor connection8 LPT1 parallel interface 19 X19 KCP connection9 COM1 serial interface 20 M5 ground conductor connection10 X804 Ethernet (Windows) 21 X20 motor/data connector11 2x USB 22 X12 mini I/O interface, 37-contact SUB-D femalesocketIssued: 21.12.2011 Version: Spez <strong>KR</strong> <strong>C2</strong> <strong>sr</strong> V4 en13 / 73
<strong>KR</strong> <strong>C2</strong> <strong>sr</strong>All contactor, relay and valve coils that are connected to the robotcontroller by the user must be equipped with suitable suppressor diodes.RC elements and VCR resistors are not suitable.1.7.1 Conveyor interface X31 (optional)Connector pinallocationFig. 1-11: Connector pin allocation <strong>KR</strong> <strong>C2</strong> <strong>sr</strong> X31FastMeasurementPins 24 ($IN15) and 12 ($IN16) are Fast Measurement inputs with a responsetime of 125 μs.1.7.2 Wiring example X11Connector X11 is a 37-contact SUB-D female socket.14 / 73 Issued: 21.12.2011 Version: Spez <strong>KR</strong> <strong>C2</strong> <strong>sr</strong> V4 en
1 Product descriptionConnector pinallocationFig. 1-12: <strong>KR</strong> <strong>C2</strong> <strong>sr</strong> wiring exampleIf wiring example X11 is used for start-up or troubleshooting,the connected safety components of the robotsystem are disabled.1.8 Category of the safety-oriented circuitsThe following circuits correspond to Category 3 in accordance with EN 954-1:• EMERGENCY STOP systems• Enabling switches• Operator safety• Operating modes• Qualifying inputsIssued: 21.12.2011 Version: Spez <strong>KR</strong> <strong>C2</strong> <strong>sr</strong> V4 en15 / 73
<strong>KR</strong> <strong>C2</strong> <strong>sr</strong>16 / 73 Issued: 21.12.2011 Version: Spez <strong>KR</strong> <strong>C2</strong> <strong>sr</strong> V4 en
2 Technical data2 Technical dataBasic dataControl cabinet type<strong>KR</strong> <strong>C2</strong> <strong>sr</strong>Housing materialStainless steelNumber of axes max. 6Weightapprox. 34 kgProtection classification IP 20Max. power dissipation350 WPower consumption without a load 380 Wand with the robot brakes appliedPower supplyconnectionRated supply voltagePermissible tolerance of rated voltageMains frequencyRated power inputMains-side fusingEquipotential bonding230 V AC, single-phase230 V +/- 10 %49...61 Hz2.35 kVA2x 16 A slow-blowing, type CThe housing is the reference pointfor the equipotential bonding conductorsand all protective groundconductors.Single-phasetransformerIf there is no 230 V power supply available, a single-phase transformer withthe following data can be used:Input voltageDependent on the country of useRegulationsProtection classificationRated output power2.75 kVAOutput voltage230 VOutput current12 AMains frequency50 to 60HzImpedance drop approx. 4%Power dissipation<strong>KR</strong> 5 sixx<strong>KR</strong> 5 scara<strong>KR</strong> 10 scara2.1 kVA2.05 kVA2.7 kVAEnvironmentalconditionsAmbient temperature during operationAmbient temperature during storage/transportation(without battery)Temperature change+10 °C to +40 °C (283 K to 313 K)-10 °C to +60 °C (263 K to 333 K)max. 1.1 K/minHumidity class 3k3 acc. to DIN EN 60721-3-3;1995Altitude • up to 1000 m above mean sealevel with no reduction in power• 1000 to 4000 m above meansea level with a reduction inpower of 5%/1000 mIssued: 21.12.2011 Version: Spez <strong>KR</strong> <strong>C2</strong> <strong>sr</strong> V4 en17 / 73
<strong>KR</strong> <strong>C2</strong> <strong>sr</strong>Vibration resistance<strong>KUKA</strong> ControlPanelCable lengthsVibration resistance according to: ASTM D4728-91Shock resistance according to: EN 60068-2-27Dimensions W x H x D approx. 33x26x8 cm 3VGA display resolutionVGA display size 8"Weight640x480 pixels1.4 kgThe designations and standard and optional lengths may be noted from thefollowing table.Cable Standard length Optional lengthPower supply cable 3 m -Motor/data cable 4 m 6/12 mKCP cable 10 m 20 mWrist I/O cable (optional) 4 m 6/12 m2.1 DimensionsRobot controllerFig. 2-1: Dimensions1 Front view 3 Top view with filter mat2 Side view 4 Top view18 / 73 Issued: 21.12.2011 Version: Spez <strong>KR</strong> <strong>C2</strong> <strong>sr</strong> V4 en
2 Technical dataFixing bracketFig. 2-2: Dimensions of fixing bracket1 Front view2 Rear viewIssued: 21.12.2011 Version: Spez <strong>KR</strong> <strong>C2</strong> <strong>sr</strong> V4 en19 / 73
<strong>KR</strong> <strong>C2</strong> <strong>sr</strong>20 / 73 Issued: 21.12.2011 Version: Spez <strong>KR</strong> <strong>C2</strong> <strong>sr</strong> V4 en
3 Safety3 Safety3.1 General3.1.1 LiabilityThe device described in this document is either an industrial robot or a componentthereof.Components of the industrial robot:• Manipulator• Robot controller• Teach pendant• Connecting cables• External axes (optional)e.g. linear unit, turn-tilt table, positioner• Software• Options, accessoriesThe industrial robot is built using state-of-the-art technology and in accordancewith the recognized safety rules. Nevertheless, misuse of the industrialrobot may constitute a risk to life and limb or cause damage to the industrialrobot and to other material property.The industrial robot may only be used in perfect technical condition in accordancewith its intended use and only by safety-conscious persons who are fullyaware of the risks involved in its operation. Use of the industrial robot issubject to compliance with this document and with the declaration of incorporationsupplied together with the industrial robot. Any functional disorders affectingthe safety of the industrial robot must be rectified immediately.Safety informationSafety information cannot be held against <strong>KUKA</strong> Roboter GmbH. Even if allsafety instructions are followed, this is not a guarantee that the industrial robotwill not cause personal injuries or material damage.No modifications may be carried out to the industrial robot without the authorizationof <strong>KUKA</strong> Roboter GmbH. Additional components (tools, software,etc.), not supplied by <strong>KUKA</strong> Roboter GmbH, may be integrated into the industrialrobot. The user is liable for any damage these components may cause tothe industrial robot or to other material property.In addition to the Safety chapter, this document contains further safety instructions.These must also be observed.3.1.2 Intended use of the industrial robotThe industrial robot is intended exclusively for the use designated in the “Purpose”chapter of the operating instructions or assembly instructions.Further information is contained in the “Purpose” chapter of the operating instructionsor assembly instructions of the component.Using the industrial robot for any other or additional purpose is considered impermissiblemisuse. The manufacturer cannot be held liable for any damageresulting from such use. The risk lies entirely with the user.Operating the industrial robot and its options within the limits of its intendeduse also involves observance of the operating and assembly instructions forIssued: 21.12.2011 Version: Spez <strong>KR</strong> <strong>C2</strong> <strong>sr</strong> V4 en21 / 73
<strong>KR</strong> <strong>C2</strong> <strong>sr</strong>the individual components, with particular reference to the maintenance specifications.MisuseAny use or application deviating from the intended use is deemed to be impermissiblemisuse. This includes e.g.:• Transportation of persons and animals• Use as a climbing aid• Operation outside the permissible operating parameters• Use in potentially explosive environments• Operation without additional safeguards• Outdoor operation3.1.3 EC declaration of conformity and declaration of incorporationThis industrial robot constitutes partly completed machinery as defined by theEC Machinery Directive. The industrial robot may only be put into operation ifthe following preconditions are met:• The industrial robot is integrated into a complete system.Or: The industrial robot, together with other machinery, constitutes a completesystem.Or: All safety functions and safeguards required for operation in the completemachine as defined by the EC Machinery Directive have been addedto the industrial robot.• The complete system complies with the EC Machinery Directive. This hasbeen confirmed by means of an assessment of conformity.Declaration ofconformityDeclaration ofincorporationThe system integrator must issue a declaration of conformity for the completesystem in accordance with the Machinery Directive. The declaration of conformityforms the basis for the CE mark for the system. The industrial robot mustbe operated in accordance with the applicable national laws, regulations andstandards.The robot controller is CE certified under the EMC Directive and the Low VoltageDirective.The industrial robot as partly completed machinery is supplied with a declarationof incorporation in accordance with Annex II B of the EC Machinery Directive2006/42/EC. The assembly instructions and a list of essentialrequirements complied with in accordance with Annex I are integral parts ofthis declaration of incorporation.The declaration of incorporation declares that the start-up of the partly completedmachinery remains impermissible until the partly completed machineryhas been incorporated into machinery, or has been assembled with other partsto form machinery, and this machinery complies with the terms of the EC MachineryDirective, and the EC declaration of conformity is present in accordancewith Annex II A.The declaration of incorporation, together with its annexes, remains with thesystem integrator as an integral part of the technical documentation of thecomplete machinery.22 / 73 Issued: 21.12.2011 Version: Spez <strong>KR</strong> <strong>C2</strong> <strong>sr</strong> V4 en
3 Safety3.1.4 Terms usedTermAxis rangeStopping distanceWorkspaceOperator(User)Danger zoneKCPManipulatorSafety zoneStop category 0Stop category 1Stop category 2System integrator(plant integrator)T1T2External axisDescriptionRange of each axis, in degrees or millimeters, within which it may move.The axis range must be defined for each axis.Stopping distance = reaction distance + braking distanceThe stopping distance is part of the danger zone.The manipulator is allowed to move within its workspace. The workspaceis derived from the individual axis ranges.The user of the industrial robot can be the management, employer ordelegated person responsible for use of the industrial robot.The danger zone consists of the workspace and the stopping distances.The KCP (<strong>KUKA</strong> Control Panel) teach pendant has all the operator controland display functions required for operating and programming theindustrial robot.The robot arm and the associated electrical installationsThe safety zone is situated outside the danger zone.The drives are deactivated immediately and the brakes are applied. Themanipulator and any external axes (optional) perform path-orientedbraking.Note: This stop category is called STOP 0 in this document.The manipulator and any external axes (optional) perform path-maintainingbraking. The drives are deactivated after 1 s and the brakes areapplied.Note: This stop category is called STOP 1 in this document.The drives are not deactivated and the brakes are not applied. Themanipulator and any external axes (optional) are braked with a normalbraking ramp.Note: This stop category is called STOP 2 in this document.System integrators are people who safely integrate the industrial robotinto a complete system and commission it.Test mode, Manual Reduced Velocity ( 250 mm/s permissible)Motion axis which is not part of the manipulator but which is controlledusing the robot controller, e.g. <strong>KUKA</strong> linear unit, turn-tilt table, Posiflex.3.2 PersonnelThe following persons or groups of persons are defined for the industrial robot:• User• PersonnelAll persons working with the industrial robot must have read and understoodthe industrial robot documentation, including the safety chapter.UserPersonnelThe user must observe the labor laws and regulations. This includes e.g.:• The user must comply with his monitoring obligations.• The user must carry out instructions at defined intervals.Personnel must be instructed, before any work is commenced, in the type ofwork involved and what exactly it entails as well as any hazards which may ex-Issued: 21.12.2011 Version: Spez <strong>KR</strong> <strong>C2</strong> <strong>sr</strong> V4 en23 / 73
<strong>KR</strong> <strong>C2</strong> <strong>sr</strong>ist. Instruction must be carried out regularly. Instruction is also required afterparticular incidents or technical modifications.Personnel includes:• System integrator• Operators, subdivided into:• Start-up, maintenance and service personnel• Operating personnel• Cleaning personnelInstallation, exchange, adjustment, operation, maintenance and repair mustbe performed only as specified in the operating or assembly instructions forthe relevant component of the industrial robot and only by personnel speciallytrained for this purpose.System integratorOperatorExampleThe industrial robot is safely integrated into a complete system by the systemintegrator.The system integrator is responsible for the following tasks:• Installing the industrial robot• Connecting the industrial robot• Performing risk assessment• Implementing the required safety functions and safeguards• Issuing the declaration of conformity• Attaching the CE mark• Creating the operating instructions for the complete systemThe operator must meet the following preconditions:• The operator must be trained for the work to be carried out.• Work on the industrial robot must only be carried out by qualified personnel.These are people who, due to their specialist training, knowledge andexperience, and their familiarization with the relevant standards, are ableto assess the work to be carried out and detect any potential hazards.The tasks can be distributed as shown in the following table.Tasks Operator ProgrammerSwitch robot controlleron/offSystem integratorx x xStart program x x xSelect program x x xSelect operating mode x x xCalibration(tool, base)Master the manipulator x xConfiguration x xProgramming x xStart-upMaintenanceRepairDecommissioningTransportationxxxxxxx24 / 73 Issued: 21.12.2011 Version: Spez <strong>KR</strong> <strong>C2</strong> <strong>sr</strong> V4 en
3 SafetyWork on the electrical and mechanical equipment of the industrial robot mayonly be carried out by specially trained personnel.3.3 Workspace, safety zone and danger zoneWorkspaces are to be restricted to the necessary minimum size. A workspacemust be safeguarded using appropriate safeguards.The safeguards (e.g. safety gate) must be situated inside the safety zone. Inthe case of a stop, the manipulator and external axes (optional) are brakedand come to a stop within the danger zone.The danger zone consists of the workspace and the stopping distances of themanipulator and external axes (optional). It must be safeguarded by means ofphysical safeguards to prevent danger to persons or the risk of material damage.Fig. 3-1: Example of axis range A11 Workspace 3 Stopping distance2 Manipulator 4 Safety zone3.4 Triggers for stop reactionsTriggers for stopreactionsStop reactions of the industrial robot are triggered in response to operator actionsor as a reaction to monitoring functions and error messages. The followingtable shows the different stop reactions according to the operating modethat has been set.STOP 0, STOP 1 and STOP 2 are the stop definitions according to DIN EN60204-1:2006.Trigger T1, T2 AUT, AUTEXTSafety gate opened - STOP 1EMERGENCY STOP pressed STOP 0 STOP 1Enabling withdrawn STOP 0 -Issued: 21.12.2011 Version: Spez <strong>KR</strong> <strong>C2</strong> <strong>sr</strong> V4 en25 / 73
<strong>KR</strong> <strong>C2</strong> <strong>sr</strong>Trigger T1, T2 AUT, AUTEXTStart key released STOP 2 -“Drives OFF” key pressed STOP 0STOP key pressed STOP 2Operating mode changed STOP 0Encoder errorSTOP 0(DSE-RDC connection broken)Motion enable canceled STOP 2Robot controller switched offSTOP 0Power failure3.5 Safety functions3.5.1 Overview of safety functionsSafety functions:• Mode selection• Operator safety (= connection for the guard interlock)• Local EMERGENCY STOP device (= EMERGENCY STOP button on theKCP)• External EMERGENCY STOP device• Enabling deviceThese circuits conform to the requirements of Performance Level d and category3 according to EN ISO 13849-1. This only applies under the followingconditions, however:• The EMERGENCY STOP is not triggered more than once a day on average.• The operating mode is not changed more than 10 times a day on average.• Number of switching cycles of the main contactors:• Max. 100 per day• At least once every 6 monthsIf these conditions are not met, <strong>KUKA</strong> Roboter GmbH must be contacted.In the absence of operational safety functions and safeguards,the industrial robot can cause personal injury ormaterial damage. If safety functions or safeguards are dismantled or deactivated,the industrial robot may not be operated.3.5.2 ESC safety logicThe function and triggering of the electronic safety functions are monitored bythe ESC safety logic.The ESC (Electronic Safety Circuit) safety logic is a dual-channel computeraidedsafety system. It permanently monitors all connected safety-relevantcomponents. In the event of a fault or interruption in the safety circuit, the powersupply to the drives is shut off, thus bringing the industrial robot to a standstill.26 / 73 Issued: 21.12.2011 Version: Spez <strong>KR</strong> <strong>C2</strong> <strong>sr</strong> V4 en
3 SafetyThe ESC safety logic triggers different stop reactions, depending on the operatingmode of the industrial robot.The ESC safety logic monitors the following inputs:• Operator safety• Local EMERGENCY STOP (= EMERGENCY STOP button on the KCP)• External EMERGENCY STOP• Enabling device• Drives OFF• Drives ON• Operating modes• Qualifying inputsThe ESC safety logic monitors the following outputs:• Operating mode• Local E-STOP3.5.3 Mode selector switchThe industrial robot can be operated in the following modes:• Manual Reduced Velocity (T1)• Manual High Velocity (T2)• Automatic (AUT)• Automatic External (AUT EXT)The operating mode is selected using the mode selector switch on the KCP.The switch is activated by means of a key which can be removed. If the key i<strong>sr</strong>emoved, the switch is locked and the operating mode can no longer bechanged.If the operating mode is changed during operation, the drives are immediatelyswitched off. The manipulator and any external axes (optional) are stoppedwith a STOP 0.Fig. 3-2: Mode selector switch1 T2 (Manual High Velocity)2 AUT (Automatic)Issued: 21.12.2011 Version: Spez <strong>KR</strong> <strong>C2</strong> <strong>sr</strong> V4 en27 / 73
<strong>KR</strong> <strong>C2</strong> <strong>sr</strong>3 AUT EXT (Automatic External)4 T1 (Manual Reduced Velocity)The operator safety input is used for interlocking physical safeguards. Safetyequipment, such as safety gates, can be connected to the dual-channel input.If nothing is connected to this input, operation in Automatic mode is not possible.Operator safety is not active in the test modes T1 (Manual Reduced Velocity)and T2 (Manual High Velocity).In the event of a loss of signal during Automatic operation (e.g. safety gate isopened), the manipulator and the external axes (optional) stop with a STOP 1.Once the signal is active at the input again, automatic operation can be resumed.Operator safety can be connected via the peripheral interface on the robotcontroller.OperatingmodeT1T2AUTAUT EXTUseFor test operation, programmingand teachingFor test operationFor industrial robotswithout higher-levelcontrollersOnly possible with aconnected safety circuitFor industrial robotswith higher-level controllers,e.g. PLCOnly possible with aconnected safety circuitVelocities• Program verification:Programmed velocity, maximum250 mm/s• Jog mode:Jog velocity, maximum 250 mm/s• Program verification:Programmed velocity• Program mode:Programmed velocity• Jog mode: Not possible• Program mode:Programmed velocity• Jog mode: Not possible3.5.4 Operator safetyWarning!It must be ensured that the operator safety signal is not automatically resetwhen the safeguard (e.g. safety gate) is closed, but only after an additionalmanual acknowledgement signal has been given. Only in this way can it beensured that automatic operation is not resumed inadvertently while thereare still persons in the danger zone, e.g. due to the safety gate closing accidentally.Failure to observe this precaution may result in death, severe physical injuriesor considerable damage to property.28 / 73 Issued: 21.12.2011 Version: Spez <strong>KR</strong> <strong>C2</strong> <strong>sr</strong> V4 en
3 Safety3.5.5 EMERGENCY STOP deviceThe EMERGENCY STOP device for the industrial robot is the EMERGENCYSTOP button on the KCP. The button must be pressed in the event of a hazardoussituation or emergency.Reactions of the industrial robot if the EMERGENCY STOP button is pressed:• Manual Reduced Velocity (T1) and Manual High Velocity (T2) modes:The drives are switched off immediately. The manipulator and any externalaxes (optional) are stopped with a STOP 0.• Automatic modes (AUT and AUT EXT):The drives are switched off after 1 second. The manipulator and any externalaxes (optional) are stopped with a STOP 1.Before operation can be resumed, the EMERGENCY STOP button must beturned to release it and the stop message must be acknowledged.Fig. 3-3: EMERGENCY STOP button on the KCPWarning!Tools and other equipment connected to the manipulator must be integratedinto the EMERGENCY STOP circuit on the system side if they could constitutea potential hazard.Failure to observe this precaution may result in death, severe physical injuriesor considerable damage to property.3.5.6 External EMERGENCY STOP deviceThere must be EMERGENCY STOP devices available at every operator stationthat can initiate a robot motion or other potentially hazardous situation.The system integrator is responsible for ensuring this.There must always be at least one external EMERGENCY STOP device installed.This ensures that an EMERGENCY STOP device is available evenwhen the KCP is disconnected.External EMERGENCY STOP devices are connected via the customer interface.External EMERGENCY STOP devices are not included in the scope ofsupply of the industrial robot.Issued: 21.12.2011 Version: Spez <strong>KR</strong> <strong>C2</strong> <strong>sr</strong> V4 en29 / 73
<strong>KR</strong> <strong>C2</strong> <strong>sr</strong>3.5.7 Enabling deviceThe enabling devices of the industrial robot are the enabling switches on theKCP.There are 3 enabling switches installed on the KCP. The enabling switcheshave 3 positions:• Not pressed• Center position• Panic positionIn the test modes, the manipulator can only be moved if one of the enablingswitches is held in the central position. If the enabling switch is released orpressed fully down (panic position), the drives are deactivated immediatelyand the manipulator stops with a STOP 0.Warning!The enabling switches must not be held down by adhesive tape or othermeans or manipulated in any other way.Death, serious physical injuries or major damage to property may result.Fig. 3-4: Enabling switches on the KCP3.6 Additional protective equipment3.6.1 Jog modeIn the operating modes T1 (Manual Reduced Velocity) and T2 (Manual HighVelocity), the robot controller can only execute programs in jog mode. Thismeans that it is necessary to hold down an enabling switch and the Start keyin order to execute a program.30 / 73 Issued: 21.12.2011 Version: Spez <strong>KR</strong> <strong>C2</strong> <strong>sr</strong> V4 en
3 SafetyIf the enabling switch is released or pressed fully down (panic position), thedrives are deactivated immediately and the manipulator and any external axes(optional) stop with a STOP 0.Releasing only the Start key causes the industrial robot to be stopped with aSTOP 2.3.6.2 Software limit switchesThe axis ranges of all manipulator and positioner axes are limited by means ofadjustable software limit switches. These software limit switches only serve asmachine protection and must be adjusted in such a way that the manipulator/positioner cannot hit the mechanical end stops.The software limit switches are set during commissioning of an industrial robot.Further information is contained in the operating and programming instructions.3.6.3 Labeling on the industrial robotAll plates, labels, symbols and marks constitute safety-relevant parts of the industrialrobot. They must not be modified or removed.Labeling on the industrial robot consists of:• Rating plates• Warning labels• Safety symbols• Designation labels• Cable markings• Identification platesFurther information is contained in the technical data of the operating instructionsor assembly instructions of the components of the industrial robot.3.6.4 External safeguardsSafeguardsThe access of persons to the danger zone of the manipulator must be preventedby means of safeguards.Physical safeguards must meet the following requirements:• They meet the requirements of EN 953.• They prevent access of persons to the danger zone and cannot be easilycircumvented.• They are sufficiently fastened and can withstand all forces that are likelyto occur in the course of operation, whether from inside or outside the enclosure.• They do not, themselves, represent a hazard or potential hazard.• The prescribed minimum clearance from the danger zone is maintained.Safety gates (maintenance gates) must meet the following requirements:• They are reduced to an absolute minimum.• The interlocks (e.g. safety gate switches) are linked to the operator safetyinput of the robot controller via safety gate switching devices or safetyPLC.Issued: 21.12.2011 Version: Spez <strong>KR</strong> <strong>C2</strong> <strong>sr</strong> V4 en31 / 73
<strong>KR</strong> <strong>C2</strong> <strong>sr</strong>• Switching devices, switches and the type of switching conform to the requirementsof category 3 according to EN 954-1.• Depending on the risk situation: the safety gate is additionally safeguardedby means of a locking mechanism that only allows the gate to be openedif the manipulator is safely at a standstill.• The button for acknowledging the safety gate is located outside the spacelimited by the safeguards.Further information is contained in the corresponding standards andregulations. These also include EN 953.Other safetyequipmentOther safety equipment must be integrated into the system in accordance withthe corresponding standards and regulations.3.7 Overview of operating modes and safety functionsThe following table indicates the operating modes in which the safety functionsare active.Safety functions T1 T2 AUT AUT EXTOperator safety - - active activeEMERGENCY STOP device active active active activeEnabling device active active - -Reduced velocity during programverificationactive - - -Jog mode active active - -Software limit switches active active active active3.8 Safety measures3.8.1 General safety measuresThe industrial robot may only be used in perfect technical condition in accordancewith its intended use and only by safety-conscious persons. Operatorerrors can result in personal injury and damage to property.It is important to be prepared for possible movements of the industrial roboteven after the robot controller has been switched off and locked. Incorrect installation(e.g. overload) or mechanical defects (e.g. brake defect) can causethe manipulator or external axes to sag. If work is to be carried out on aswitched-off industrial robot, the manipulator and external axes must first bemoved into a position in which they are unable to move on their own, whetherthe payload is mounted or not. If this is not possible, the manipulator and externalaxes must be secured by appropriate means.Danger!In the absence of operational safety functions and safeguards, the industrialrobot can cause personal injury or material damage. If safety functions orsafeguards are dismantled or deactivated, the industrial robot may not be operated.Warning!Standing underneath the robot arm can cause death or serious physical injuries.For this reason, standing underneath the robot arm is prohibited!32 / 73 Issued: 21.12.2011 Version: Spez <strong>KR</strong> <strong>C2</strong> <strong>sr</strong> V4 en
3 SafetyWarning!The motors reach temperatures during operation which can cause burns tothe skin. Contact must be avoided. Appropriate safety precautions must betaken, e.g. protective gloves must be worn.KCPThe user must ensure that the industrial robot is only operated with the KCPby authorized persons.If more than one KCP is used in the overall system, it must be ensured thateach KCP is unambiguously assigned to the corresponding industrial robot.They must not be interchanged.Warning!The operator must ensure that decoupled KCPs are immediately removedfrom the system and stored out of sight and reach of personnel working onthe industrial robot. This serves to prevent operational and non-operationalEMERGENCY STOP facilities from becoming interchanged.Failure to observe this precaution may result in death, severe physical injuriesor considerable damage to property.Externalkeyboard,external mouseAn external keyboard and/or external mouse may only be used if the followingconditions are met:• Start-up or maintenance work is being carried out.• The drives are switched off.• There are no persons in the danger zone.The KCP must not be used as long as an external keyboard and/or externalmouse are connected.The external keyboard and/or external mouse must be removed as soon asthe start-up or maintenance work is completed or the KCP is connected.FaultsModificationsThe following tasks must be carried out in the case of faults in the industrialrobot:• Switch off the robot controller and secure it (e.g. with a padlock) to preventunauthorized persons from switching it on again.• Indicate the fault by means of a label with a corresponding warning (tagout).• Keep a record of the faults.• Eliminate the fault and carry out a function test.After modifications to the industrial robot, checks must be carried out to ensurethe required safety level. The valid national or regional work safety regulationsmust be observed for this check. The correct functioning of all safety circuitsmust also be tested.New or modified programs must always be tested first in Manual Reduced Velocitymode (T1).After modifications to the industrial robot, existing programs must always betested first in Manual Reduced Velocity mode (T1). This applies to all componentsof the industrial robot and includes modifications to the software andconfiguration settings.3.8.2 TransportationManipulatorThe prescribed transport position of the manipulator must be observed. Transportationmust be carried out in accordance with the operating instructions orassembly instructions of the manipulator.Issued: 21.12.2011 Version: Spez <strong>KR</strong> <strong>C2</strong> <strong>sr</strong> V4 en33 / 73
3 SafetyA function test must be carried out for the following safety-oriented circuits toensure that they are functioning correctly:• Local EMERGENCY STOP device (= EMERGENCY STOP button on theKCP)• External EMERGENCY STOP device (input and output)• Enabling device (in the test modes)• Operator safety (in the automatic modes)• Qualifying inputs (if connected)• All other safety-relevant inputs and outputs usedTest of reduced velocity control:This test is to be carried out as follows:1. Program a straight path with the maximum possible velocity.2. Calculate the length of the path.3. Execute the path in T1 mode with the override set to 100% and time themotion with a stopwatch.It must be ensured that no persons are present within thedanger zone during path execution. Death or severephysical injuries may result.4. Calculate the velocity from the length of the path and the time measuredfor execution of the motion.Control of reduced velocity is functioning correctly if the following results areachieved:• The calculated velocity does not exceed 250 mm/s.• The robot executes the path as programmed (i.e. in a straight line, withoutdeviations).Machine dataIt must be ensured that the rating plate on the robot controller has the samemachine data as those entered in the declaration of incorporation. The machinedata on the rating plate of the manipulator and the external axes (optional)must be entered during start-up.The industrial robot must not be moved if incorrect machinedata are loaded. Death, severe physical injuries orconsiderable damage to property may otherwise result. The correct machinedata must be loaded.3.8.4 Virus protection and network securityThe user of the industrial robot is responsible for ensuring that the software isalways safeguarded with the latest virus protection. If the robot controller is integratedinto a network that is connected to the company network or to the Internet,it is advisable to protect this robot network against external risks bymeans of a firewall.For optimal use of our products, we recommend that our customerscarry out a regular virus scan. Information about security updates canbe found at www.kuka.com.Issued: 21.12.2011 Version: Spez <strong>KR</strong> <strong>C2</strong> <strong>sr</strong> V4 en35 / 73
<strong>KR</strong> <strong>C2</strong> <strong>sr</strong>3.8.5 Manual modeManual mode is the mode for setup work. Setup work is all the tasks that haveto be carried out on the industrial robot to enable automatic operation. Setupwork includes:• Jog mode• Teaching• Programming• Program verificationThe following must be taken into consideration in manual mode:• If the drives are not required, they must be switched off to prevent the manipulatoror the external axes (optional) from being moved unintentionally.New or modified programs must always be tested first in Manual ReducedVelocity mode (T1).• The manipulator, tooling or external axes (optional) must never touch orproject beyond the safety fence.• Components, tooling and other objects must not become jammed as a resultof the industrial robot motion, nor must they lead to short-circuits or beliable to fall off.• All setup work must be carried out, where possible, from outside the safeguardedarea.If the setup work has to be carried out inside the safeguarded area, the followingmust be taken into consideration:In Manual Reduced Velocity mode (T1):• If it can be avoided, there must be no other persons inside the safeguardedarea.If it is necessary for there to be several persons inside the safeguarded area,the following must be observed:• Each person must have an enabling device.• All persons must have an unimpeded view of the industrial robot.• Eye-contact between all persons must be possible at all times.• The operator must be so positioned that he can see into the danger areaand get out of harm’s way.In Manual High Velocity mode (T2):• This mode may only be used if the application requires a test at a velocityhigher than Manual Reduced Velocity.• Teaching and programming are not permissible in this operating mode.• Before commencing the test, the operator must ensure that the enablingdevices are operational.• The operator must be positioned outside the danger zone.• There must be no other persons inside the safeguarded area. It is the responsibilityof the operator to ensure this.3.8.6 SimulationSimulation programs do not correspond exactly to reality. Robot programs createdin simulation programs must be tested in the system in Manual ReducedVelocity mode (T1). It may be necessary to modify the program.36 / 73 Issued: 21.12.2011 Version: Spez <strong>KR</strong> <strong>C2</strong> <strong>sr</strong> V4 en
3 Safety3.8.7 Automatic modeAutomatic mode is only permissible in compliance with the following safetymeasures:• All safety equipment and safeguards are present and operational.• There are no persons in the system.• The defined working procedures are adhered to.If the manipulator or an external axis (optional) comes to a standstill for no apparentreason, the danger zone must not be entered until an EMERGENCYSTOP has been triggered.3.8.8 Maintenance and repairAfter maintenance and repair work, checks must be carried out to ensure therequired safety level. The valid national or regional work safety regulationsmust be observed for this check. The correct functioning of all safety circuitsmust also be tested.The purpose of maintenance and repair work is to ensure that the system iskept operational or, in the event of a fault, to return the system to an operationalstate. Repair work includes troubleshooting in addition to the actual repairitself.The following safety measures must be carried out when working on the industrialrobot:• Carry out work outside the danger zone. If work inside the danger zone isnecessary, the user must define additional safety measures to ensure thesafe protection of personnel.• Switch off the industrial robot and secure it (e.g. with a padlock) to preventunauthorized persons from switching it on again. If it is necessary to carryout work with the robot controller switched on, the user must define additionalsafety measures to ensure the safe protection of personnel.• If it is necessary to carry out work with the robot controller switched on, thismay only be done in operating mode T1.• Label the system with a sign indicating that work is in progress. This signmust remain in place, even during temporary interruptions to the work.• The EMERGENCY STOP systems must remain active. If safety functionsor safeguards are deactivated during maintenance or repair work, theymust be reactivated immediately after the work is completed.Faulty components must be replaced using new components with the samearticle numbers or equivalent components approved by <strong>KUKA</strong> Roboter GmbHfor this purpose.Cleaning and preventive maintenance work is to be carried out in accordancewith the operating instructions.Robot controllerEven when the robot controller is switched off, parts connected to peripheraldevices may still carry voltage. The external power sources must therefore beswitched off if work is to be carried out on the robot controller.The ESD regulations must be adhered to when working on components in therobot controller.Voltages in excess of 50 V (up to 600 V) can be present in various componentsfor several minutes after the robot controller has been switched off! To preventlife-threatening injuries, no work may be carried out on the industrial robot inthis time.Water and dust must be prevented from entering the robot controller.Issued: 21.12.2011 Version: Spez <strong>KR</strong> <strong>C2</strong> <strong>sr</strong> V4 en37 / 73
<strong>KR</strong> <strong>C2</strong> <strong>sr</strong>HazardoussubstancesThe following safety measures must be carried out when handling hazardoussubstances:• Avoid prolonged and repeated intensive contact with the skin.• Avoid breathing in oil spray or vapors.• Clean skin and apply skin cream.To ensure safe use of our products, we recommend that our customers regularlyrequest up-to-date safety data sheets from the manufacturers of hazardoussubstances.3.8.9 Decommissioning, storage and disposalThe industrial robot must be decommissioned, stored and disposed of in accordancewith the applicable national laws, regulations and standards.3.8.10 Safety measures for “single point of control”OverviewIf certain components in the industrial robot are operated, safety measuresmust be taken to ensure complete implementation of the principle of “singlepoint of control”.Components:• Submit interpreter• PLC• OPC Server• Remote control tools• External keyboard/mouseThe implementation of additional safety measures may be required. Thismust be clarified for each specific application; this is the responsibility of thesystem integrator, programmer or user of the system.Since only the system integrator knows the safe states of actuators in the peripheryof the robot controller, it is his task to set these actuators to a safestate, e.g. in the event of an EMERGENCY STOP.Submit interpreter,PLCOPC server,remote controltoolsIf motions, (e.g. drives or grippers) are controlled with the Submit interpreteror the PLC via the I/O system, and if they are not safeguarded by other means,then this control will take effect even in T1 and T2 modes or while an EMER-GENCY STOP is active.If variables that affect the robot motion (e.g. override) are modified with theSubmit interpreter or the PLC, this takes effect even in T1 and T2 modes orwhile an EMERGENCY STOP is active.Safety measures:• Do not modify safety-relevant signals and variables (e.g. operating mode,EMERGENCY STOP, safety gate contact) via the Submit interpreter orPLC.• If modifications are nonetheless required, all safety-relevant signals andvariables must be linked in such a way that they cannot be set to a dangerousstate by the Submit interpreter or PLC.These components can be used with write access to modify programs, outputsor other parameters of the robot controller, without this being noticed by anypersons located inside the system.38 / 73 Issued: 21.12.2011 Version: Spez <strong>KR</strong> <strong>C2</strong> <strong>sr</strong> V4 en
3 SafetySafety measures:• <strong>KUKA</strong> stipulates that these components are to be used exclusively for diagnosisand visualization.Programs, outputs or other parameters of the robot controller must not bemodified using these components.Externalkeyboard/mouseThese components can be used to modify programs, outputs or other parametersof the robot controller, without this being noticed by any persons locatedinside the system.Safety measures:• Only use one operator console at each robot controller.• If the KCP is being used for work inside the system, remove any keyboardand mouse from the robot controller beforehand.3.9 Applied norms and regulationsName Definition Edition2006/42/EC Machinery Directive:Directive 2006/42/EC of the European Parliament and ofthe Council of 17 May 2006 on machinery, and amendingDirective 95/16/EC (recast)20062004/108/EC97/23/ECEN ISO 13850EN ISO 12100-1EN ISO 12100-2EN ISO 10218-1EN 954-1EN 614-1EN 61000-6-2EMC Directive:Directive 2004/108/EC of the European Parliament and ofthe Council of 15 December 2004 on the approximation ofthe laws of the Member States relating to electromagneticcompatibility and repealing Directive 89/336/EEC.Pressure Equipment Directive:Directive 97/23/EC of the European Parliament and of theCouncil of 29 May 1997 on the approximation of the lawsof the Member States concerning pressure equipmentSafety of machinery:Emergency stop - Principles for designSafety of machinery:Basic concepts, general principles for design - Part 1:Basic terminology, methodologySafety of machinery:Basic concepts, general principles for design - Part 2:Technical principlesIndustrial robots:SafetySafety of machinery:Safety-related parts of control systems - Part 1: Generalprinciples of designSafety of machinery:Ergonomic design principles - Part 1: Terms and generalprinciplesElectromagnetic compatibility (EMC):Part 6-2: Generic standards; Immunity for industrial environments200419972008200320032008199720062005Issued: 21.12.2011 Version: Spez <strong>KR</strong> <strong>C2</strong> <strong>sr</strong> V4 en39 / 73
<strong>KR</strong> <strong>C2</strong> <strong>sr</strong>Name Definition EditionEN 61000-6-4EN 60204-1Electromagnetic compatibility (EMC):Part 6-4: Generic standards; Emission standard for industrialenvironmentsSafety of machinery:Electrical equipment of machines - Part 1: Generalrequirements2007200640 / 73 Issued: 21.12.2011 Version: Spez <strong>KR</strong> <strong>C2</strong> <strong>sr</strong> V4 en
4 Planning4 Planning4.1 Installation conditionsThe robot controller can be installed in a 19" rack or as a standalone device.If the robot controller is to be installed in a 19" rack, the depth must be at least800 mm.If the robot controller is to be installed in a 19" rack, it must be fastenedin the rack by appropriate means (preferably angle plates)along the entire side edge in order to prevent distortion of the housing.Both sides of the robot controller must be accessible to the cooling air. Clearanceof 70 mm on each side.Fig. 4-1: <strong>KR</strong> <strong>C2</strong> <strong>sr</strong> installation positionIssued: 21.12.2011 Version: Spez <strong>KR</strong> <strong>C2</strong> <strong>sr</strong> V4 en41 / 73
<strong>KR</strong> <strong>C2</strong> <strong>sr</strong>DimensionsFig. 4-2: Dimensions1 Front view 3 Side view2 Top view 4 Top view with filter mat4.2 Connection conditionsPower supplyconnectionRated supply voltagePermissible tolerance of rated voltageMains frequencyRated power inputMains-side fusingEquipotential bonding230 V AC, single-phase230 V +/- 10 %49...61 Hz2.35 kVA2x 16 A slow-blowing, type CThe housing is the reference pointfor the equipotential bonding conductorsand all protective groundconductors.Cable lengthsThe designations and standard and optional lengths may be noted from thefollowing table.Cable Standard length Optional lengthPower supply cable 3 m -Motor/data cable 4 m 6/12 mKCP cable 10 m 20 mWrist I/O cable (optional) 4 m 6/12 m42 / 73 Issued: 21.12.2011 Version: Spez <strong>KR</strong> <strong>C2</strong> <strong>sr</strong> V4 en
4 Planning4.3 Power supply connectionDescriptionThe robot controller is connected to the mains via a power plug.Fig. 4-3: Power supply connection1 Power supply connection on the robot controller2 Plug-in connection to the robot controller3 Power plug4.4 EMERGENCY STOP circuit and safeguardThe following examples show how the EMERGENCY STOP circuit and safeguardof the robot system can be connected to other robot systems or the periphery.Issued: 21.12.2011 Version: Spez <strong>KR</strong> <strong>C2</strong> <strong>sr</strong> V4 en43 / 73
<strong>KR</strong> <strong>C2</strong> <strong>sr</strong>ExampleFig. 4-4: Robot with periphery and internal power supply44 / 73 Issued: 21.12.2011 Version: Spez <strong>KR</strong> <strong>C2</strong> <strong>sr</strong> V4 en
4 PlanningExampleFig. 4-5: Robot with periphery and external power supply4.5 Interface X11DescriptionEMERGENCY STOP devices must be connected via interface X11 or linkedtogether by means of higher-level controllers (e.g. PLC).Wiring Take the following points into consideration when wiring interface X11:• System concept• Safety conceptDetailed information about integration into higher-level controllers iscontained in the Operating and Programming Instructions for SystemIntegrators, in the chapter “Automatic External signal diagrams”.Issued: 21.12.2011 Version: Spez <strong>KR</strong> <strong>C2</strong> <strong>sr</strong> V4 en45 / 73
<strong>KR</strong> <strong>C2</strong> <strong>sr</strong>Connector pinallocationFig. 4-6Signal Pin Description Comments+24 V ESC withoutbattery back-up0 V ESC withoutbattery back-up1937ESC power supply, max. 1.3 A -24 V external0 V external33 / 3415 / 16In the absence of an externalpower supply, 24 V / 0 V mustbe jumpered internally.An external power supply i<strong>sr</strong>ecommended for interlinkedsystems.46 / 73 Issued: 21.12.2011 Version: Spez <strong>KR</strong> <strong>C2</strong> <strong>sr</strong> V4 en
4 PlanningSignal Pin Description CommentsTest output A(test signal)Test output B(test signal)Local E-STOP,channel ALocal E-STOP,channel BExternal E-STOP,channel AExternal E-STOP,channel BSafeguard channelASafeguard channelBMotor contactormonitorOperating modegroup AutomaticOperating modegroup Test1351224613Makes the pulsed voltageavailable for the individualinterface inputs of channel A.Makes the pulsed voltageavailable for the individualinterface inputs of channel B.8 / 27 Output, floating contacts frominternal E-STOP, max. 0.15 A /9 / 28 24 V.20 E-STOP, dual-channel input,max. 24 V.2124 For dual-channel connectionof a safety gate locking mechanism,max. 24 25V.29 / 10 Floating contact signals“Drives ON”, max. 0.15 A at24 V.11 / 30 Floating contacts signal theoperating mode.7 / 26E2S channel A 22 E2 keyswitch, dual-channel,E2S channel B 23 max. 24 V.Qualifying input,channel AQualifying input,channel B31 These inputs have no function.32Connection example: safetygate locking mechanism isconnected under channel A topin 3 (TA_A) and pin 24.Connection example: safetygate locking mechanism isconnected under channel B topin 4 (TA_B) and pin 25.In the non-activated state, thecontacts are closed.Only effective in the AUTO-MATIC modes.Is closed if the “Drives ON”contactor is energized.This contact is not safetyoriented.The input is at 0 V if keyswitchoff.If the E2 keyswitch is notused, pin 22 must be jumperedto test output 3, and pin23 to test output 4.Pin 31 must be jumpered totest output 12, and pin 32 totest output 13.ESC IN, channel A 35 -- If there are no other ESC circuitnodes present, the follow-ESC IN, channel B 17 -ing pins must be jumpered:ESC OUT, channel36 -A• Pin 35 / 36ESC OUT, channelB18 -• Pin 17 / 18--In the cabling for the input signals and test signals in the system, suitablemeasures must be taken to prevent a cross-connection betweenthe voltages (e.g. separate cabling of input signals and test signals).Issued: 21.12.2011 Version: Spez <strong>KR</strong> <strong>C2</strong> <strong>sr</strong> V4 en47 / 73
<strong>KR</strong> <strong>C2</strong> <strong>sr</strong>In the cabling for the output signals and test signals in the system,suitable measures must be taken to prevent a cross-connection betweenthe output signals of a channel (e.g. separate cabling).I/OsI/Os can be configured using the following components:• DeviceNet (master) via MFC• Optional field bus cards• Interbus• PROFIBUS• DeviceNet• Specific customer interfaces48 / 73 Issued: 21.12.2011 Version: Spez <strong>KR</strong> <strong>C2</strong> <strong>sr</strong> V4 en
4 Planning4.6 Configuring mini I/O X12Connector pinallocationFig. 4-7: Mini I/O connector pin allocation X12The outputs of the mini I/O interface X12 each have a maximum capacityof 70 mA (24 V).Internal powersupplyIf an internal power supply is used, the following jumpers must be connected:Issued: 21.12.2011 Version: Spez <strong>KR</strong> <strong>C2</strong> <strong>sr</strong> V4 en49 / 73
<strong>KR</strong> <strong>C2</strong> <strong>sr</strong>Fig. 4-8: X12 jumpers In the case of internal power supply50 / 73 Issued: 21.12.2011 Version: Spez <strong>KR</strong> <strong>C2</strong> <strong>sr</strong> V4 en
4 PlanningCircuit exampleFig. 4-9: <strong>KR</strong> <strong>C2</strong> <strong>sr</strong> X12 wiringIssued: 21.12.2011 Version: Spez <strong>KR</strong> <strong>C2</strong> <strong>sr</strong> V4 en51 / 73
<strong>KR</strong> <strong>C2</strong> <strong>sr</strong>4.7 Configuring wrist I/O X32Connector pinallocationFig. 4-10: Wrist I/O connector pin allocation X32The outputs of the wrist I/O interface X32 each have a maximum capacityof 70 mA (24 V).4.8 PE equipotential bondingDescriptionA cable with a cross-section of at least 4 mm 2 must be used as equipotentialbonding between the robot and the robot controller.52 / 73 Issued: 21.12.2011 Version: Spez <strong>KR</strong> <strong>C2</strong> <strong>sr</strong> V4 en
4 PlanningFig. 4-11: Equipotential bonding between the robot and the robot controller1 M5 bolt, equipotential bondingto the robot3 M5 bolt, ground conductor connectionof the robot controller2 Equipotential bonding, min. 4 Equipotential bonding connectionon the 4 mm 2 robot4.9 Visualization of the KCP coupler optionDescriptionIf the robot controller is operated with a detachable KCP, the following systemvariables must be visualized:• $T1 (T1 mode)• $T2 (T2 mode)• $EXT (External mode)• $AUT (Automatic mode)• $ALARM_STOP• $PRO_ACT (program active)The display can be configured using I/Os or a PLC. The system variables canbe configured in the file: STEU/$MACHINE.DAT.Warning!If the KCP is disconnected, the system can no longer be deactivated bymeans of the EMERGENCY STOP button on the KCP. An external E-STOPmust be connected to interface X11 to prevent personal injury and materialdamage.4.10 Performance levelThe safety functions of the robot controller conform to category 3 and PerformanceLevel d according to EN ISO 13849-1.4.10.1 PFH values of the safety functionsThe safety values are based on a service life of 20 years.The PFH value classification of the controller is only valid if:• the E-STOP button is tested at least once every 6 monthsIssued: 21.12.2011 Version: Spez <strong>KR</strong> <strong>C2</strong> <strong>sr</strong> V4 en53 / 73
<strong>KR</strong> <strong>C2</strong> <strong>sr</strong>• the number of switching cycles of the main contactors does not exceed100 per day• the main contactors are switched at least twice a yearWhen evaluating system safety functions, it must be remembered that thePFH values for a combination of multiple controllers may have to be taken intoconsideration more than once. The PFH value determined for the safety functionat system level must not exceed the limit for PL d.The PFH values relate to the specific safety functions of the different controllervariants.Safety function groups:• Standard safety functions• Operating mode selection• Operator safety• EMERGENCY STOP device• Enabling device• External safe operational stop• External safety stop 1• External safety stop 2• Velocity monitoring in T1Overview of controller variant PFH values:Robot controller variantPFH value<strong>KR</strong> <strong>C2</strong> <strong>sr</strong> < 1 x 10 -7For controller variants that are not listed here, please contact <strong>KUKA</strong>Roboter GmbH.54 / 73 Issued: 21.12.2011 Version: Spez <strong>KR</strong> <strong>C2</strong> <strong>sr</strong> V4 en
5 Transportation5 Transportation5.1 Transporting the robot controllerPreconditions • The housing of the robot controller must be closed.• No cables may be connected to the robot controller.• The robot controller must be transported in a horizontal position.Procedure • Transport the robot controller using a pallet truck or a fork lift truck. Therobot controller must be laid on a pallet.Fig. 5-1: Transport by fork lift truckIf the robot controller is installed in an electrical enclosure duringtransportation, this may result in vibrations (oscillations). Such vibrationscan cause contact problems on the PC plug-in cards.Issued: 21.12.2011 Version: Spez <strong>KR</strong> <strong>C2</strong> <strong>sr</strong> V4 en55 / 73
<strong>KR</strong> <strong>C2</strong> <strong>sr</strong>56 / 73 Issued: 21.12.2011 Version: Spez <strong>KR</strong> <strong>C2</strong> <strong>sr</strong> V4 en
6 Start-up and recommissioning6 Start-up and recommissioning6.1 Start-up overviewThis is an overview of the most important steps during start-up. Theprecise sequence depends on the application, the manipulator type,the technology packages used and other customer-specific circumstances.For this reason, the overview does not claim to be comprehensive.This overview refers to the start-up of the industrial robot. The startupof the overall system is not within the scope of this documentation.RobotStep Description Information1 Carry out a visual inspection of the robot. Detailed information is contained2 Install the robot.in the robot operating instructions,in the chapter “Start-up”.Electrical systemStep Description Information3 Carry out a visual inspection of the robot controller.-4 Install the robot controller. (>>> 6.2 "Installing the robot controller"Page 58)5 Connect the connecting cables. (>>> 6.3 "Connecting the connectingcables" Page 58)6 Connect the KCP. (>>> 6.4 "Connecting the KCP"Page 59)7 Establish the equipotential bonding betweenthe robot and the robot controller.8 Connect the robot controller to the power supply.9 Configure and connect interface X11.Note: If interface X11 has not been wired, therobot cannot be jogged.(>>> 6.5 "Connecting the PEequipotential bonding" Page 59)(>>> 6.6 "Connecting the robotcontroller to the power supply"Page 59)(>>> 4.5 "Interface X11" Page 45)10 Configure and connect mini I/O interface X12. (>>> 4.6 "Configuring mini I/OX12" Page 49)11 Configure and connect wrist I/O interface X32. (>>> 6.9 "Configuring and connectingwrist I/O connector X32"Page 60)Detailed information is containedin the robot operating instructions,in the chapter “Description of theelectrical installations (robot)”.12 Switch on the robot controller.Issued: 21.12.2011 Version: Spez <strong>KR</strong> <strong>C2</strong> <strong>sr</strong> V4 en57 / 73
<strong>KR</strong> <strong>C2</strong> <strong>sr</strong>Step Description InformationSoftware13 Check the safety equipment. Detailed information is containedin the operating instructions for therobot controller, in the chapter“Safety”.14 Configure the inputs/outputs between the robotcontroller and the periphery.Detailed information can be foundin the field bus documentation.Step Description Information15 Check the machine data. Detailed information is contained16 Mount the tool.in the operating and programminginstructions17 Check the software limit switches and adaptthem if required.18 Calibrate the tool.In the case of a fixed tool: calibrate externalTCP.19 Enter the load data.20 Calibrate the base (optional).In the case of a fixed tool: calibrate workpiece(optional).21 If the robot is to be controlled from a host computeror PLC: configure Automatic Externalinterface.Detailed information is containedin the Operating and ProgrammingInstructions for System Integrators.Long text names of inputs/outputs, flags, etc., can be saved in a textfile and imported after a reinstallation. In this way, the long texts donot need to be re-entered manually for each manipulator. Furthermore,the long text names can be updated in application programs.6.2 Installing the robot controllerProcedure 1. Install the robot controller horizontally. The minimum clearances to walls,other controllers, etc. must be observed. (>>> 4.1 "Installation conditions"Page 41)2. Check the robot controller for any damage caused during transportation.3. Check that components are fitted securely.4. Secure any modules that have come loose.6.3 Connecting the connecting cablesOverviewA cable set is supplied with the robot system. The basic version consists of:• Motor/data cable• Wrist I/O cable (optional)The following cables may be provided for additional applications:• Peripheral cables58 / 73 Issued: 21.12.2011 Version: Spez <strong>KR</strong> <strong>C2</strong> <strong>sr</strong> V4 en
6 Start-up and recommissioningThe robot controller is preconfigured for the specific industrialrobot. If cables are interchanged, the manipulatorand the external axes (optional) may receive incorrect data and can thuscause personal injury or material damage. If a system consists of more thanone manipulator, always connect the connecting cables to the manipulatorsand their corresponding robot controllers.Procedure 1. Route motor/data cable from X20 on the robot controller to the robot junctionbox and plug in connector CN22.2. Route I/O cable from X32 on the robot controller to the robot junction boxand plug in connector CN20 (optional).3. Connect the peripheral cables.6.4 Connecting the KCPProcedure • Connect the KCP to X19 on the robot controller.6.5 Connecting the PE equipotential bondingProcedure 1. Route and connect a 4 mm 2 cable as equipotential bonding between therobot and the robot controller at the installation site. (>>> 4.8 "PE equipotentialbonding" Page 52)Route the equipotential bonding by the shortest route from the robot controllerto the robot.2. Ground the robot controller at the installation site.3. Carry out a ground conductor check for the entire robot system in accordancewith DIN EN 60204-1.6.6 Connecting the robot controller to the power supplyProcedure • Connect the robot controller to the mains via power plug X1.(>>> 4.3 "Power supply connection" Page 43)6.7 Configuring and connecting connector X11Preconditions • The robot controller must be switched off.If connector X11 is connected or disconnected with therobot controller switched on, the UPS module may be destroyed.Connector X11 must only be connected or disconnected with the robotcontroller switched off.Procedure 1. Configure connector X11 in accordance with the system and safety concepts.(>>> 4.5 "Interface X11" Page 45)2. Connect interface connector X11 to the robot controller.6.8 Configuring and connecting mini I/O connector X12Procedure 1. Configure connector X12 in accordance with the system and safety concepts.(>>> 4.6 "Configuring mini I/O X12" Page 49)2. Connect interface connector X12 to the robot controller.Issued: 21.12.2011 Version: Spez <strong>KR</strong> <strong>C2</strong> <strong>sr</strong> V4 en59 / 73
<strong>KR</strong> <strong>C2</strong> <strong>sr</strong>6.9 Configuring and connecting wrist I/O connector X32Procedure 1. Configure connector X32 in accordance with the system and safety concepts.(>>> 4.7 "Configuring wrist I/O X32" Page 52)2. Connect interface connector X32 to the robot controller.60 / 73 Issued: 21.12.2011 Version: Spez <strong>KR</strong> <strong>C2</strong> <strong>sr</strong> V4 en
7 <strong>KUKA</strong> Service7 <strong>KUKA</strong> Service7.1 Requesting supportIntroductionInformationThe <strong>KUKA</strong> Roboter GmbH documentation offers information on operation andprovides assistance with troubleshooting. For further assistance, please contactyour local <strong>KUKA</strong> subsidiary.The following information is required for processing a support request:• Model and serial number of the robot• Model and serial number of the controller• Model and serial number of the linear unit (if applicable)• Version of the <strong>KUKA</strong> System Software• Optional software or modifications• Archive of the software• Application used• Any external axes used• Description of the problem, duration and frequency of the fault7.2 <strong>KUKA</strong> Customer SupportAvailability<strong>KUKA</strong> Customer Support is available in many countries. Please do not hesitateto contact us if you have any questions.ArgentinaRuben Costantini S.A. (Agency)Luis Angel Huergo 13 20Parque Industrial2400 San Francisco (CBA)ArgentinaTel. +54 3564 421033Fax +54 3564 428877ventas@costantini-sa.comAustraliaMarand Precision Engineering Pty. Ltd. (Agency)153 Keys RoadMoorabbinVictoria 31 89AustraliaTel. +61 3 8552-0600Fax +61 3 8552-0605robotics@marand.com.auBelgium<strong>KUKA</strong> Automatisering + Robots N.V.Centrum Zuid 10313530 HouthalenBelgiumTel. +32 11 516160Fax +32 11 526794info@kuka.bewww.kuka.beIssued: 21.12.2011 Version: Spez <strong>KR</strong> <strong>C2</strong> <strong>sr</strong> V4 en61 / 73
<strong>KR</strong> <strong>C2</strong> <strong>sr</strong>Brazil<strong>KUKA</strong> Roboter do Brasil Ltda.Avenida Franz Liszt, 80Parque Novo MundoJd. GuançãCEP 02151 900 São PauloSP BrazilTel. +55 11 69844900Fax +55 11 62017883info@kuka-roboter.com.brChileRobotec S.A. (Agency)Santiago de ChileChileTel. +56 2 331-5951Fax +56 2 331-5952robotec@robotec.clwww.robotec.clChina<strong>KUKA</strong> Flexible Manufacturing Equipment (Shanghai) Co., Ltd.Shanghai Qingpu Industrial ZoneNo. 502 Tianying Rd.201712 ShanghaiP.R. ChinaTel. +86 21 5922-8652Fax +86 21 5922-8538Franz.Poeckl@kuka-sha.com.cnwww.kuka.cnGermany<strong>KUKA</strong> Roboter GmbHZugspitzstr. 14086165 AugsburgGermanyTel. +49 821 797-4000Fax +49 821 797-1616info@kuka-roboter.dewww.kuka-roboter.deFrance<strong>KUKA</strong> Automatisme + Robotique SASTechvallée6, Avenue du Parc91140 Villebon S/YvetteFranceTel. +33 1 6931660-0Fax +33 1 6931660-1commercial@kuka.frwww.kuka.fr62 / 73 Issued: 21.12.2011 Version: Spez <strong>KR</strong> <strong>C2</strong> <strong>sr</strong> V4 en
7 <strong>KUKA</strong> ServiceIndia<strong>KUKA</strong> <strong>Robotics</strong>, Private Limited621 Galleria TowersDLF Phase IV122 002 GurgaonHaryanaIndiaTel. +91 124 4148574info@kuka.inwww.kuka.inItaly<strong>KUKA</strong> Roboter Italia S.p.A.Via Pavia 9/a - int.610098 Rivoli (TO)ItalyTel. +39 011 959-5013Fax +39 011 959-5141kuka@kuka.itwww.kuka.itJapan<strong>KUKA</strong> <strong>Robotics</strong> Japan K.K.Daiba Garden City Building 1F2-3-5 Daiba, Minato-kuTokyo135-0091JapanTel. +81 3 6380-7311Fax +81 3 6380-7312info@kuka.co.jpKorea<strong>KUKA</strong> Robot Automation Korea Co. Ltd.4 Ba 806 Sihwa Ind. ComplexSung-Gok Dong, Ansan CityKyunggi Do425-110KoreaTel. +82 31 496-9937 or -9938Fax +82 31 496-9939info@kukakorea.comMalaysia<strong>KUKA</strong> Robot Automation Sdn BhdSouth East Asia Regional OfficeNo. 24, Jalan TPP 1/10Taman Industri Puchong47100 PuchongSelangorMalaysiaTel. +60 3 8061-0613 or -0614Fax +60 3 8061-7386info@kuka.com.myIssued: 21.12.2011 Version: Spez <strong>KR</strong> <strong>C2</strong> <strong>sr</strong> V4 en63 / 73
<strong>KR</strong> <strong>C2</strong> <strong>sr</strong>Mexico<strong>KUKA</strong> de Mexico S. de R.L. de C.V.Rio San Joaquin #339, Local 5Colonia Pensil SurC.P. 11490 Mexico D.F.MexicoTel. +52 55 5203-8407Fax +52 55 5203-8148info@kuka.com.mxNorway<strong>KUKA</strong> Sveiseanlegg + RoboterBryggeveien 92821 GjövikNorwayTel. +47 61 133422Fax +47 61 186200geir.ul<strong>sr</strong>ud@kuka.noAustria<strong>KUKA</strong> Roboter Austria GmbHVertriebsbüro ÖsterreichRegensburger Strasse 9/14020 LinzAustriaTel. +43 732 784752Fax +43 732 793880office@kuka-roboter.atwww.kuka-roboter.atPoland<strong>KUKA</strong> Roboter Austria GmbHSpółka z ograniczoną odpowiedzialnościąOddział w PolsceUl. Porcelanowa 1040-246 KatowicePolandTel. +48 327 30 32 13 or -14Fax +48 327 30 32 26ServicePL@kuka-roboter.dePortugal<strong>KUKA</strong> Sistemas de Automatización S.A.Rua do Alto da Guerra n° 50Armazém 042910 011 SetúbalPortugalTel. +351 265 729780Fax +351 265 729782kuka@mail.telepac.pt64 / 73 Issued: 21.12.2011 Version: Spez <strong>KR</strong> <strong>C2</strong> <strong>sr</strong> V4 en
7 <strong>KUKA</strong> ServiceRussiaOOO <strong>KUKA</strong> <strong>Robotics</strong> RusWebnaja ul. 8A107143 MoskauRussiaTel. +7 495 781-31-20Fax +7 495 781-31-19kuka-robotics.ruSweden<strong>KUKA</strong> Svetsanläggningar + Robotar ABA. Odhners gata 15421 30 Västra FrölundaSwedenTel. +46 31 7266-200Fax +46 31 7266-201info@kuka.seSwitzerland<strong>KUKA</strong> Roboter Schweiz AGRiedstr. 78953 DietikonSwitzerlandTel. +41 44 74490-90Fax +41 44 74490-91info@kuka-roboter.chwww.kuka-roboter.chSpain<strong>KUKA</strong> Robots IBÉRICA, S.A.Pol. IndustrialTorrent de la PasteraCarrer del Bages s/n08800 Vilanova i la Geltrú (Barcelona)SpainTel. +34 93 8142-353Fax +34 93 8142-950Comercial@kuka-e.comwww.kuka-e.comSouth AfricaJendamark Automation LTD (Agency)76a York RoadNorth End6000 Port ElizabethSouth AfricaTel. +27 41 391 4700Fax +27 41 373 3869www.jendamark.co.zaIssued: 21.12.2011 Version: Spez <strong>KR</strong> <strong>C2</strong> <strong>sr</strong> V4 en65 / 73
<strong>KR</strong> <strong>C2</strong> <strong>sr</strong>Taiwan<strong>KUKA</strong> Robot Automation Taiwan Co. Ltd.136, Section 2, Huanjung E. RoadJungli City, TaoyuanTaiwan 320Tel. +886 3 4371902Fax +886 3 2830023info@kuka.com.twwww.kuka.com.twThailand<strong>KUKA</strong> Robot Automation (M)SdnBhdThailand Officec/o Maccall System Co. Ltd.49/9-10 Soi Kingkaew 30 Kingkaew RoadTt. Rachatheva, A. BangpliSamutprakarn10540 ThailandTel. +66 2 7502737Fax +66 2 6612355atika@ji-net.comwww.kuka-roboter.deCzech Republic<strong>KUKA</strong> Roboter Austria GmbHOrganisation Tschechien und SlowakeiSezemická 2757/2193 00 PrahaHorní PočerniceCzech RepublicTel. +420 22 62 12 27 2Fax +420 22 62 12 27 0support@kuka.czHungary<strong>KUKA</strong> <strong>Robotics</strong> Hungaria Kft.Fö út 1402335 TaksonyHungaryTel. +36 24 501609Fax +36 24 477031info@kuka-robotics.huUSA<strong>KUKA</strong> <strong>Robotics</strong> Corp.22500 Key DriveClinton Township48036MichiganUSATel. +1 866 8735852Fax +1 586 5692087info@kukarobotics.comwww.kukarobotics.com66 / 73 Issued: 21.12.2011 Version: Spez <strong>KR</strong> <strong>C2</strong> <strong>sr</strong> V4 en
7 <strong>KUKA</strong> ServiceUK<strong>KUKA</strong> Automation + <strong>Robotics</strong>Hereward RiseHalesowenB62 8ANUKTel. +44 121 585-0800Fax +44 121 585-0900sales@kuka.co.ukIssued: 21.12.2011 Version: Spez <strong>KR</strong> <strong>C2</strong> <strong>sr</strong> V4 en67 / 73
<strong>KR</strong> <strong>C2</strong> <strong>sr</strong>68 / 73 Issued: 21.12.2011 Version: Spez <strong>KR</strong> <strong>C2</strong> <strong>sr</strong> V4 en
IndexIndexNumbers19" rack 412004/108/EC 392006/42/EC 3989/336/EEC 3995/16/EC 3997/23/EC 39AAccessories 5, 21Applied norms and regulations 39Arrow keys 10AUT 27AUT EXT 28Automatic 27Automatic External 28Automatic mode 37Axis range 23BBasic data 17Brake defect 32Braking distance 23CCategory 3 15CE mark 22Circuit example X12 51Circuits, safety-oriented 15Cleaning work 37Connecting cables 5, 21Connecting cables, connecting 58Connecting the KCP 59Connecting the power supply 59Connection conditions 42Connection panel 5Connector pin allocation X11 46Connector pin allocation X12 49Connector pin allocation X31 14Connector pin allocation X32 52Connector X12, mini I/O, configuration 59Connector X32, wrist I/O, configuration 60Control PC 5, 6Conveyor 14DDanger zone 23Declaration of conformity 22Declaration of incorporation 21, 22Decommissioning 38Dimensions 18Disposal 38Drives OFF 10, 27Drives ON 10, 27EEC declaration of conformity 22EMC Directive 22, 39EMERGENCY STOP 10, 25EMERGENCY STOP button 26, 27, 29, 35EMERGENCY STOP circuit 43EMERGENCY STOP device 29, 32EMERGENCY STOP, external 26, 27, 29, 35EMERGENCY STOP, local 26, 27, 35EN 60204-1 40EN 61000-6-2 39EN 61000-6-4 40EN 614-1 39EN 954-1 15, 39EN ISO 10218-1 39EN ISO 12100-1 39EN ISO 12100-2 39EN ISO 13850 39Enabling device 27, 30, 32Enabling switch 11Enabling switches 30Enter key 10Environmental conditions 17ESC 26ESC key 10ESC power supply 46External axes 21, 23FFans 8Fast Measurement 14Faults 33Firewall 35Function test 34GGeneral safety measures 32Guard interlock 28HHazardous substances 38IIdentification plate 11Industrial robot 21Industrial robot, overview 5Installation conditions 41Installing the robot controller 58Intended use 21Interface X11 45Interface X31 14Interfaces 13Internal power supply X12 49IPM board 8JJog mode 30, 32KKCP 23, 33KCP cable 13Issued: 21.12.2011 Version: Spez <strong>KR</strong> <strong>C2</strong> <strong>sr</strong> V4 en69 / 73
<strong>KR</strong> <strong>C2</strong> <strong>sr</strong>KCP coupler 11KCP coupler, visualization 53Keyboard, external 33Keypad 10<strong>KUKA</strong> Control Panel 9, 18<strong>KUKA</strong> Customer Support 61LLabeling 31Liability 21Linear unit 21Low Voltage Directive 22MMachine data 35Machinery Directive 22, 39Mains filter 8Maintenance 37Manipulator 5, 21, 23, 25Manual High Velocity 27Manual mode 36Manual Reduced Velocity 28Menu keys 10Mini I/O, X12, configuration 49Mode selector switch 10, 27Motor cable, data cable 13Mouse, external 33NNetwork security 35Numeric keypad 10OOperating modes 27Operator 23, 24Operator safety 27, 28, 32Options 5, 21Overload 32Overview of the robot controller 5Overview, start-up 57PPanic position 30PE equipotential bonding 52PE equipotential bonding, connecting 59Performance level 53Performance Level 26Personnel 23PFH values 53PL 53Plant integrator 23Positioner 21Power cable 13Power dissipation 17Power supply connection 43Power supply unit 8Power unit 5, 8Pressure Equipment Directive 39Preventive maintenance work 37Product description 5Protective equipment 30QQualifying inputs 27, 35RReaction distance 23Recommissioning 34, 57Repair 37Riser Cage 7Robot controller 5, 21, 35SSafeguard 43Safeguards, external 31Safety 21Safety functions 32Safety logic 5, 26Safety zone 23, 25Safety-oriented circuits 15Safety, general 21Service, <strong>KUKA</strong> Roboter 61Signal diagrams 45Simulation 36Single point of control 38Softkeys 10Software 5, 21Software limit switches 31, 32Space Mouse 10SSB GUI 10Start backwards key 10Start key 10, 11Start-up 34, 57Start-up overview 57Status keys 10STOP 0 23, 25STOP 1 23, 25STOP 2 23, 25Stop category 0 23Stop category 1 23Stop category 2 23STOP key 10Stop reactions 25Stopping distance 23, 25Storage 38Support request 61System integrator 22, 23, 24TT1 23, 28T2 23, 27Teach pendant 5, 21Technical data 17Terms used, safety 23Transport position 33, 34Transportation 33, 55Turn-tilt table 21UUse, contrary to intended use 21Use, improper 21User 2370 / 73 Issued: 21.12.2011 Version: Spez <strong>KR</strong> <strong>C2</strong> <strong>sr</strong> V4 en
IndexVVirus protection 35WWindow selection key 10Wiring example X11 14Workspace 23, 25Wrist I/O, X32, configuration 52XX11, configuring and connecting 59Issued: 21.12.2011 Version: Spez <strong>KR</strong> <strong>C2</strong> <strong>sr</strong> V4 en71 / 73
<strong>KR</strong> <strong>C2</strong> <strong>sr</strong>72 / 73 Issued: 21.12.2011 Version: Spez <strong>KR</strong> <strong>C2</strong> <strong>sr</strong> V4 en
<strong>KR</strong> <strong>C2</strong> <strong>sr</strong>Issued: 21.12.2011 Version: Spez <strong>KR</strong> <strong>C2</strong> <strong>sr</strong> V4 en73 / 73