Create successful ePaper yourself
Turn your PDF publications into a flip-book with our unique Google optimized e-Paper software.
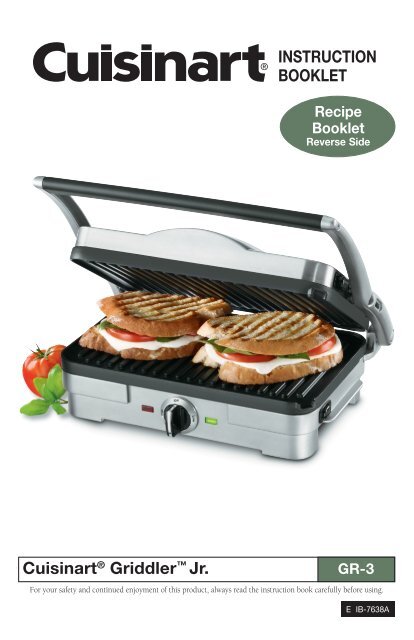
INSTRUCTIONBOOKLETRecipeBookletReverse Side<strong>Cuisinart</strong> ® Griddler Jr.GR-3For your safety and continued enjoyment of this product, always read the instruction book carefully before using.E IB-7638A
ImportantSafeguardS1. READ ALL INSTRUCTIONS.2. Do not touch hot surfaces; use handlesor knobs.3. To protect against fire, electric shock,and injury to persons, DO NOTIMMERSE CORD OR PLUG in water orother liquids.4. This should not be used by or nearchildren.5. Unplug from outlet when not in use andbefore cleaning. Allow to cool beforeputting on or taking off parts, andbefore cleaning appliance.6. Do not operate any appliance with adamaged cord or plug, or after theappliance has malfunctioned or hasbeen damaged in any manner. Returnthe appliance to the nearest CustomerService (see warranty) for examination,repair or adjustment.7. The use of accessory attachments notrecommended by <strong>Cuisinart</strong> may resultin fire, electrical shock, or risk of injuryto persons.8. Do not use outdoors.9. Do not let power cord hang over edgeof table or counter, or touch hot surfaces.10. Do not place on or near hot gas or electricburner, or in a heated oven.11. Unplug the unit when finished using.12. Do not use appliance for otherthan intended use.13. Extreme caution must be exercisedwhen moving an appliance containinghot oil or other hot liquids.14. To disconnect, turn control to OFF setting,then remove plug from wall outlet.15. WARNING: TO REDUCE THE RISK OFFIRE OR ELECTRIC SHOCK, ONLYAUTHORIZED PERSONNEL SHOULDDO REPAIRS.SAVE THESEINSTRUCTIONSFOR HOUSEHOLDUSE ONLYSPecial cord setinstructionsA short power-supply cord is provided toreduce the risks resulting from becomingentangled in or tripping over a longer cord.Longer extension cords are available andmay be used if care is exercised in their use.If a long extension cord is used, the markedelectrical rating of the extension cord shouldbe at least as great as the electrical rating ofthe appliance, and the longer cord shouldbe arranged so that it will not drape over thecountertop or tabletop where it can bepulled on by children or animals, or trippedover.NOTICEThis appliance has a polarized plug (oneblade is wider than the other) to reduce therisk of electric shock. This plug will fit in apolarized outlet only one way. If the plugdoes not fit fully in the outlet, reverse theplug. If it still does not fit, contact a qualifiedelectrician. Do not modify the plug in anyway.CONTENTSIntroduction............................................. 3Parts and Features.................................. 3Before the First Use................................ 3The Griddler Jr. Does it All.................... 3Assembly Instructions............................. 5Operating Instructions............................. 6User Maintenance................................... 7Storage.................................................... 7Cleaning and Care................................... 7Storage.....................................................7Cooked Food Temperature Chart............7Warranty.................................................. 8
INTRODUCTIONCongratulations on your purchase of the<strong>Cuisinart</strong> ® Griddler Jr. This product is actuallythree appliances in one. A hinged, floatingcover, and one set of removable cookingplates turn the Griddler Jr. into a contactgrill, a panini press or a large, double opengrill. Temperature controls and indicatorlights make it easy to use. Dish- washersafegrill plates, drip cups and a cleaning/scraping tool clean up in seconds.37289PARTS AND FEATURES1. Base and CoverSolid construction with stainless steelself-adjusting cover.2. Panini-Style HandleSturdy cast metal handle adjusts coverto accommodate thickness of food.3. Removable Grill PlatesNonstick and dishwasher safe for easycleanup. Perfect for grilling steak, burgers,chicken and vegetables.4. Indicator LightsSignal “power on” and “ready to cook.”5. Temperature KnobChoose low, medium, high.6. Drip Cups (2)Collect grease and are dishwasher safe.7. Cleaning/Scraping ToolHelps clean grill plates after cooking.8. Plate Release ButtonsPush in to release and removecooking plates.9. Hinge Release LeverAllows the cover to lie back forcooking in the flat position.before thefirst useRemove all packaging materials and anypromotional labels or stickers from your grill.Be sure all parts (listed under Parts andFeatures) of your new appliance have beenincluded before discarding any packagingmaterials. You may want to keep the boxand packing materials for use at a later date.7Note: Drip cups are located on outside ofleft polyfoam insert. Scraper is onoutside of right polyfoam insert.Before using your <strong>Cuisinart</strong> ® Griddler Jr.for the first time, wipe the base, cover andcontrols with a damp cloth. Thoroughlyclean cooking plates, drip cups and scrapingtool. The grill plates, drip cups andcleaning tool are dishwasher safe. Refer toAssembly Instructions for plate removal.the Griddler JR.does it allThe Griddler Jr. is the ultimate kitchenappliance, offering you three separate cookingoptions. Simply adjust the hinge to useas a contact grill, panini press, or open grill.See Assembly Instructions and OperatingInstructions.Contact Grill4 5Use the Griddler Jr. as a contact grill tocook burgers, boneless pieces of meat andthin cuts of meat and vegetables.The contact grill function works best whenyou want to cook something in a shortamount of time or when you are looking fora healthy method of grilling. When cookedon the contact grill, food will cook quicklybecause you are grilling both sides of thefood at the same time. The ribs on the grillplates combined with the grease spout atthe corner of the plate allow the grease to16
to a locking position.The unit willstay in this positionuntil you closethe cover or continueto open it tothe flat position.The cover will stayin the upright position until you lower thehandle for cooking. When this is done, thehinge will release itself so that the upperplate lies flat on the top of the food you arepreparing. This allows you to cook your foodevenly from both top and bottom. When youlift the handle to open the Griddler aftercooking the cover will remain in the flatposition, parallel with the lower plate. Inorder to lock the cover back into the uprightposition, you must close the Griddler Jr.,without any food in place, and open it again.Flat Position –Upper plate/cover is levelwith lowerplate/base. Theupper andlower platesline up to createone large cooking surface. The Griddler Jr. is in this position when it is used as anopen grill.To adjust the Griddler Jr. to this position,locate the hinge release lever on the rightarm. (see diagram below)With your lefthand on thehandle, use yourright hand toslide the leverHingereleaselevertoward you. Push the handle back until thecover rests flat on the counter. The unit willstay in this position until you lift the handleand cover to return it to the closed position.If the Griddler Jr. is already in the openposition and you wish to adjust it to the flatposition, pull the handle slightly toward youand then lift the hinge release lever. Pushthe handle back until the cover rests in theflat position. Pulling the handle forwardslightly before lifting the hinge release leverwill take some of the pressure off of thehinge and you will be able to adjust theGriddler Jr. more easily.To insert cooking platesAdjust the Griddler Jr. to the flat position(see below) with the controls directly in frontof you. Insert one plate at a time. Each plateis designed to fit in either the upper housingor the lower housing of the Griddler Jr. Theword “lower” or “upper”is embossed into each grill plate to let youknow where to attach the plate. Pick up thelower grill plate with the cutouts for theheating element facing down.If you are facing the Griddler Jr. the dripspouts should be at the forward corners ofthe plate. Locate the metal brackets at thecenter of the housing. Tilt the back end ofthe plate and line up the cutouts at the backof the plate with the metal brackets. Slidethe plate underneath the brackets and pushdown the front end of the plate. It will snapinto place. Turn the Griddler Jr. around andinsert the matching grill plate into the upperhousing as you did with the first plate.To remove cooking platesAdjust Griddler Jr. to flat position. Locatethe plate release buttons on one side of theunit. Press firmly on button and the plate willpop up slightlyfrom theUpper platebase. Grasprelease buttonthe plate withtwo hands,Lower plateslide it outrelease buttonfrom underthe metal brackets, and lift it out of thebase. Press on the other plate release buttonto remove the other cooking plate in thesame manner.To position drip cupsWhen using the Griddler Jr. as a contactgrill or panini press place the cup directlybelow the grease spout while cooking.Grease from the food will run off the platesthrough the grease spout and into the dripcup. Grease should be safely disposed ofafter cooking. The drip cups can be cleanedin the dishwasher.When using the Griddler Jr. as an opengrill, place the cups at either end of the unitdirectly below the grease spouts.
OPERATINGINSTRUCTIONSOnce the Griddler Jr. is assembled properly,plug the cord into a standard electricaloutlet. You are now ready to begin cooking.When the temperature knob is turned onlow, medium, or high the red indicator lightwill illuminate to indicate that the power ison.If you intend to use the Griddler Jr. as acontact grill, panini press or flat grill, turnthe Grill/Panini control to the desired temperaturefor cooking. Settings range fromLow (150°F) to High (450°F).If you intend to use the Griddler Jr. as a flatgrill, but you do not need the entire surface,it is recommended to use the bottom plate.It may take upto 6 minutesto reach operatingtemperature,depending onthe temperature level that was set. When thethermostat has reached operating temperature,the green indicator light will indicatethat the Griddler Jr. is ready for cooking.During operation, the light will continue toturn on and off as the thermostat regulatesthe temperature. This is normal.The temperature controls are used to set andmaintain the temperature of the cooking surface.You may vary the setting of the controlknob at any time during cooking, and maywish to do so depending on the types offoods on the cooking plate. Refer to theCooked Food Temperature Chart on page 7for recommendations.Always exercise caution when handling theGriddler Jr. during cooking, as the housingwill become hot during use. To open theGriddler Jr. grasp the black plastic area ofthe handle. This part of the handle stayscool to the touch while cooking. The armsare made of die-cast aluminum and willbecome hot during use. Do not touch themduring or immediately following cooking.The cover is made of stainless steel and willbecome very hot and should not be touchedduring or immediately following cooking. Ifyou need to adjust the cover be sure to usean oven mitt toprevent burns.The lower housingis made ofplastic, andwhile it willbecome verywarm it will not burn you. If you need tomove the Griddler Jr. during cooking besure to handle it from the base only. Do nottouch the cover.Allow the Griddler Jr. to cool down beforehandling (at least 30 minutes).NOTE: The first time you use the Griddler Jr., it may have a slight odor and may smokea bit. This is normal and common to applianceswith nonstick surfaces.The Griddler Jr. comes with a black cleaning/scrapingtool. This can be used forcleaning the grill plates after you have finishedcooking and the unit has cooled downcompletely (at least 30 minutes). Using thecleaning tool on a hot surface for too longwill cause the plastic to melt.User Maintenance• Never use metal utensils, as they willscratch the nonstick plates. Instead, useonly wooden or heat-proof plastic utensils.• Never leave plastic utensils in contact withthe hot grill plates. This includes the providedcleaning tool.• In between recipes, scrape excess foodbuildup through grease channels and intodrip cup, then wipe off any residue with apaper towel before proceeding with nextrecipe.• Allow the Griddler Jr. to cool down completely(at least 30 minutes) before cleaning.
CLEANING AND CARECAUTION: BEFORE CLEANINGAPPLIANCE, MAKE SURE IT ISUNPLUGGED AND COOLEDDOWN COMPLETELY.Once you have finished cooking, turn theSelector control to the Off position andunplug the power cord from the wall outlet.Allow the unit to cool down for at least 30minutes before handling.Use the cleaning/scraping tool to removeany leftover food from the cooking plate.The scraping tool can be washed by handor in the dishwasher.Dispose of grease from drip cups. The dripcups can be cleaned by hand or in the dishwasher.Press the Plate Release buttons to removeplates from the housing. Be sure that theplates have cooled completely before handling(at least 30 minutes). The cookingplates can be washed in the dishwasher. Donot use metallic objects such as knives orforks for cleaning. Do not use a scouringpad for cleaning. The nonstick coating canbe damaged.If you have been cooking seafood, wipe thecooking plate with lemon juice to preventseafood flavor transferring to the next recipe.The housing base, cover and control knobscan be wiped clean with a soft, dry cloth.For tough stains, dampen cloth. Never usean abrasive cleaner or harsh pad.STORAGEAlways make sure the Griddler Jr. is cooland dry before storing.The power cord can be wrapped around theback of the base for storing.COOKED FOODTEMPERATURE CHARTCheck internal temperature, using aninstant-read thermometer.BeefThe USDA recommends cooking allground beef to at least Medium (160°F)doneness, or until center is no longer pink.PorkAlways grill using an instant-readthermometer until the internal temperaturereaches 160°F when tested.PoultryBoneless poultry breast should be cookedto an internal temperature of 170°F.Ground poultry should be cooked to aninternal temperature of 165-170°F.SeafoodFish–Cook until opaque and easilyflaked with a fork.Scallops – Cook until opaque and firm.ShrimpBacon– Cook until shrimp turn orange/red and flesh is pearly opaque.Cook bacon until crispy to taste(½ lb. at a time)Hot Dogs/Smoked SausagesAlthough they are precooked, werecommend cooking hot dogs and smokedsausages until the internal temperature is165°F when tested with an instant readthermometer.BeefRareMediumWelldoneBright red center,lighter pink to outside 140°FLight pink center,brown to outsideBrown consistentlythroughout160°F170°F+
WARRANTYLimited Three-YearWarrantyThis warranty is available to consumers only. Youare a consumer if you own a <strong>Cuisinart</strong> ® Griddler Jr.that was purchased at retail for personal, family orhousehold use. Except as otherwise required underapplicable law, this warranty is not available toretailers or other commercial purchasers or owners.We warrant that your <strong>Cuisinart</strong> ® Griddler Jr. willbe free of defects in materials and workmanshipunder normal home use for 3 years from the date oforiginal purchase.We suggest you complete and return the enclosedproduct registration card promptly to facilitate verificationof the date of original purchase. However,return of the product registration card does noteliminate the need for the consumer to maintainthe original proof of purchase in order to obtainthe warranty benefits. In the event that you do nothave proof of purchase date, the purchase datefor purposes of this warranty will be the date ofmanufacture.If your <strong>Cuisinart</strong> ® Griddler Jr. should prove to bedefective within the warranty period, we will repairit, or if we think necessary, replace it. To obtainwarranty service, simply call our toll-free number1-800-726-0190 for additional information fromour Customer Service Representatives or send thedefective product to Customer Service at <strong>Cuisinart</strong>,150 Milford Road, East Windsor, NJ 08520.To facilitate the speed and accuracy of your return,please enclose $10.00 for shipping and handling ofthe product.Please pay by check or money order (Californiaresidents need only supply proof of purchase andshould call 1-800-726-0190 for shipping instructions).NOTE: For added protection and secure handlingof any <strong>Cuisinart</strong> ® product that is being returned, werecommend you use a traceable, insured deliveryservice. <strong>Cuisinart</strong> cannot be held responsible forin-transit damage or for packages that are notdelivered to us. Lost and/or damaged products arenot covered under warranty.Please be sure to include your return address,daytime phone number, description of the productdefect, product model # (located on bottom ofproduct), original date of purchase, and any otherinformation pertinent to the product’s return.Your <strong>Cuisinart</strong> ® Griddler Jr. has been manufacturedto the strictest specifications and has beendesigned for use with the authorized accessoriesand replacement parts.This warranty expressly excludes any defects ordamages caused by accessories, replacementparts, or repair service other than those that havebeen authorized by <strong>Cuisinart</strong>.This warranty does not cover any damage causedby accident, misuse, shipment or other ordinaryhousehold use.This warranty excludes all incidental or consequentialdamages. Some states do not allow the exclusionor limitation of these damages, so they maynot apply to you.CALIFORNIA RESIDENTS ONLYCalifornia law provides that for In-Warranty Service,California residents have the option of returning anonconforming product (A) to the store where it waspurchased or (B) to another retail store which sells<strong>Cuisinart</strong> products of the same type.The retail store shall then, at its discretion, eitherrepair the product, refer the consumer to an independentrepair facility, replace the product, orrefund the purchase price less the amount directlyattributable to the consumer’s prior usage of theproduct. If the above two options do not result inthe appropriate relief to the consumer, the consumermay then take the product to an independentrepair facility if service or repair can be economicallyaccomplished. <strong>Cuisinart</strong> and not the consumerwill be responsible for the reasonable cost of suchservice, repair, replacement, or refund for nonconformingproducts under warranty.California residents may also, according to theirpreference, return nonconforming products directlyto <strong>Cuisinart</strong> for repair, or if necessary, replacement,by calling our Consumer Service Center toll-free at1-800-726-0190.<strong>Cuisinart</strong> will be responsible for the cost of therepair, replacement, and shipping and handlingfor such products under warranty.Before returning yourcuisinart ® productIf you are experiencing problems with your<strong>Cuisinart</strong> ® product, we suggest that you call our<strong>Cuisinart</strong> ® Service Center at1-800-726-0190 before returning the productserviced. If servicing is needed, a Representativecan confirm whether the product is under warrantyand direct you to the nearest service location.Important: If the nonconforming product is tobe serviced by someone other than <strong>Cuisinart</strong>’sAuthorized Service Center, please remind theservicer to call our Consumer Service Center at1-800-726-0190 to ensure that the problem isproperly diagnosed, the product is serviced withthe correct parts, and the product is still underwarranty.
CoffeemakersFoodProcessorsToastersRiceCookersCookwareGrills<strong>Cuisinart</strong> offers an extensive assortment of top quality products to make life in thekitchen easier than ever. Try some of our other countertop appliances andcookware, and Savor the Good Life ® .www.cuisinart.com©2007 <strong>Cuisinart</strong><strong>Cuisinart</strong>® is a registeredtrademark of <strong>Cuisinart</strong>150 Milford RoadEast Windsor, NJ 08520Printed in China07CU26395Any other trademarks or service marks of third parties referred toherein are the trademarks or service marks of their respective owners.
Version no.: GR3 IB-7638ASize : 140mm(W) X 216mm(H)Material: Cover:157gam Matt art paper, inside: 120gsm Gloss art paperCoating: Cover:Gloss varnishingColor (Front): 4C+1C(CMYK+PMS8501C)(Back): 1C+1C(Black)Date: 23/08/07Co-ordinator :Astor YouXieFaXing Des cription : IB-7638A OPER ATOR: XuXieFaXing Code : E-IB-7638APANTONE 8501 CPMS8501C10


