INSTALLATION INSTRUCTIONS - Firestone Industrial Products
INSTALLATION INSTRUCTIONS - Firestone Industrial Products
INSTALLATION INSTRUCTIONS - Firestone Industrial Products

You also want an ePaper? Increase the reach of your titles
YUMPU automatically turns print PDFs into web optimized ePapers that Google loves.
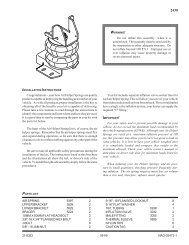
4108 / 4110 / 4113 / 4114 / 4115 / 41164129 / 4136 / 4143 / 4145 / 4147 / 4149<strong>INSTALLATION</strong> <strong>INSTRUCTIONS</strong>Read installation instructions in its entirety before installing your Coil-Rite KitNOTE 1:If your vehicle is equipped with vibration dampersbetween the turns of the coil, it is necessary that thesebe removed before installing the air springs.NOTE 2:Some mid-size General Motors vehicles have asolid surface located on the lower spring seat whichwill not allow the air line to exit the coil. Removalof this cup is mandatory before installing the Coil-Rite air helper springs. The cup is spot welded andcan be removed by using a chisel.NOTE 3:1991 and up Ford Crown Victoria, Mercury GrandMarquis, Chevy Suburban, Tahoe, GMC Yukon, HondaPassport and Isuzu Amigo, Rodeo, Trooper, andNissan Patrol use Step 2B.VEHICLE PREPERATIONWith the vehicle on a solid level surface chock thefront wheels. Raise the vehicle using a lift orplatform jack rated for your vehicle weight to lift therear wheels off the surface. Remove the rear wheels.Lower the vehicle onto jack stands rated for yourvehicles weight making sure the suspension is fullyextended. (Do NOT use wood or concrete blocks tosupport the weight of the vehicle.)HEAT SHIELDBefore beginning the installation of your Coil-Ritekit, check the clearance from the coil spring to theexhaust. If there is less than two inches you will needto move the exhaust pipe for additional clearance.Heat shield instructions are on a supplemental sheetincluded with your kit. (Note: Heat shield is notused in the 4110 kit)SHOCK ABSORBERSIf necessary, additional clearance between the coilspring turns may be obtained by removing the shockabsorbers from the lower mounts and lowering thesuspension an additional one to two inches.(CAUTION: Do not put strain or tension on theflexible brake line.)PARTS LISTDESCRIPTION QTY.AIR SPRINGS 2LOWER SUPPORTS 218' AIR LINE 1NYLON TIE 6PUSH-TO-CONNECTINFLATION VALVE 25/16" FLAT WASHER 4RECOMMENDED OPERATING PRESSURESPASSENGER CARS 5-35 p.s.i.1/2 TON VEHICLES 5-45 p.s.i.SUV's 5-25 p.s.i.23-8508 10-05 NCD-5848-6
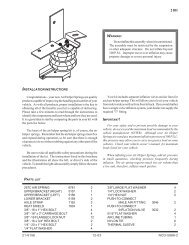
COIL-RITE <strong>INSTALLATION</strong> PROCEDUREWARNINGDo not inflate this assembly when it isunrestricted. The assembly must berestricted by a coil spring. Do not everinflate beyond recommended operatingpressures for your specific vehicle. Improperuse or over inflation may causeproperty damage or severe personal injury.AIR INLETSTEP 1 AIR SPRING PREPARATIONCut a section of air line tubing 3 inches in lengthand install into the push-to-connect fitting on the airspring. Exhaust the air from the air spring by rollingit up toward the air inlet. Install the plug into thetubing coming out of the air spring.STEP 2A INSTALLING THE AIR SPRINGInsert the flattened air spring into the coil springthrough the lowest opening with the push-to-connectair inlet at the bottom of the coil spring refer toFigure "AA".STEP 2B INSTALLING THE AIR SPRINGAIRINLETBLUNT TOOLInsert the flattened air spring into the coil springthrough the lowest opening with the push-to-connectair inlet at the top of the coil spring as shown inFigure "AB".STEP 3 ADJUSTING THE AIR SPRINGFigure "AA"Figure "AB"Push the air spring up into the coil spring by handor with a blunt tool, such as a spoon shaped tire ironor 1/2" extension. Do NOT use anything with sharpedges or corners as this may damage the air spring.STEP 4 PLACING SUPPORTSAIR LINE IN FRONTOF THE AXLEAIR LINE BEHINDTHE AXLEWhen the air spring is completely within the coilspring, remove the plug and short piece of air line bypushing the collar of the fitting towards the air spring.Allow the air spring to return to its normal shape.Push the air spring to the top of the coil spring. Insertthe support between the air spring and the coil springseat as shown in Figures "BA", "BB" and "C".Figure "BA"GM 1967-1972 vehicles,Ford 1966-1978 vehiclesair line behind the axle.Figure "BB"GM 1973 & up PassengerCars, Ford 1979-1990vehicles air line behind theaxle.STEP 5 REATTACH THE SHOCK ABSORBERAttach shock absorbers if removed earlier in theinstallation.Please take all necessary safety precautionswhen installing your Coil-Rite kit.
EXTENSION HOSE <strong>INSTALLATION</strong>Read instructions completely before installation.UPPER SPRING SEATSTEP 6 ROUTE THE AIR LINECut the air line tubing into two equal lengths(cut the tubing as squarely as possible). Select alocation for the inflation valves in a protected area,such as: on the bumper or body (Note: The inflationvalve will be installed in step 8).Insert the air line tubing into the push-to-connectfitting on the air spring as far as possible.Route the air line from the air spring to the desiredinflation valve location.Figure "C"1991 and up Ford Crown Victoria1991 and up Mercury Grand MarquisSTEP 7 HOSE ATTACHMENT TO THE VEHICLEWith the tubing routed from the air spring to thelocation of the inflation valve. Use the nylon tiessupplied to secure the air line tubing to the vehicleas shown in Figure "D". Be careful to avoid heatand sharp edges when fastening the tubing to thevehicle. Route the tubing away from the exhaustsystem.AIR LINEPUSH-TO-CONNECTINFLATION VALVEBODY OFVEHICLENYLON TIESAIR LINEFigure "D"FLAT WASHERHEX NUTVALVE CAPFigure "E"STEP 8 INSTALLING THE INFLATION VALVEDrill a 5/16" hole where you wish to mount theinflation valve. Remember to keep the inflationvalve in a protected area that is easily accessible.Attach the inflation valve to the bumper or body ofthe vehicle as shown in Figure "E". Tighten allnuts at this time.Cut the excess air line tubing so that it will fiteasily into the inflation valve, making sure the endis cut squarely (a "saw" cut with a sharp knife ispreferred). Push the end of the tubing into theinflation valve as far as possible. NOTE: DO NOTCUT THEFollow steps 1-8 for the other air spring.STEP 9 INFLATE AND TESTInflate the air springs to recommended maximumoperating pressure (see page 1 for operatingpressures). With a soap and water solution, checkfor air leaks around the fittings and valve core.Jack up the vehicle, remove the jack stands andlower the vehicle to the ground. We recommendinflating and deflating in 5 p.s.i. increments to findthe ideal riding condition for your vehicle.NOTE: Check air pressure on a monthly basis.
Limited Warranty forCOIL-RITE Air Helper Springs and Accessories<strong>Firestone</strong> <strong>Industrial</strong> <strong>Products</strong> Company warrants that Coil-Rite products will befree from defects in workmanship or materials for a period of 24 months or24,000 miles (whichever occurs first) from date of installation. This does notinclude installation or other service charges for replacement.For an adjustment under this warranty, contact your dealer or call <strong>Firestone</strong>.TO THE EXTENT PERMITTED BY LAW, WE DISCLAIM CONSEQUENTIAL DAMAGES.SOME STATES DO NOT ALLOW THE EXCLUSION OR LIMITATION OF INCIDENTAL ORCONSEQUENTIAL DAMAGES, SO THE ABOVE LIMITATION OR EXCLUSION MAY NOTAPPLY TO YOU.This warranty gives you specific legal rights and you may also have other rightswhich vary from state to state.For more information or technicalassistance call:1-800-888-0650
NOTICE:Avalanche, Escalade, Escalade EXT,Suburban 1500, Tahoe, Yukon 1500Your vehicle will require the use of two heat shields. Make sure thatthe first heat shield is forward of the Coil-Rite spring and thesecond heat shield is next the the first heat shield.FRONTEXHAUSTHEAT SHIELDSTRAPSHEAT SHIELDHEAT SHIELDMaximum pressure is 25 psi23-8246