Rigitone Fix Adhesive Set - Rigips
Rigitone Fix Adhesive Set - Rigips
Rigitone Fix Adhesive Set - Rigips

Create successful ePaper yourself
Turn your PDF publications into a flip-book with our unique Google optimized e-Paper software.
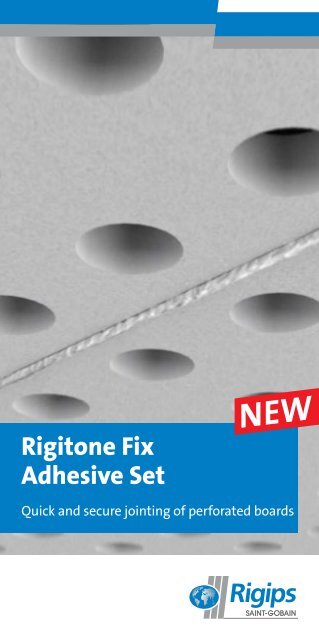
<strong>Rigitone</strong> <strong>Fix</strong><strong>Adhesive</strong> <strong>Set</strong>NEWQuick and secure jointing of perforated boards
<strong>Rigitone</strong> perforated boards and jointing techniques<strong>Rigitone</strong> perforated boards represent a wide range of highquality,acoustically effective perforated boards made ofgypsum – an environmentally friendly raw material. Thecontinuous perforation and jointless installation of <strong>Rigitone</strong>perforated boards make them real eye-catchers, giving roomsa unique character while providing optimum acoustics.Two proven techniques, which both ensure a flawless appearanceand long-lasting results, can be used to install <strong>Rigitone</strong>perforated boards:• <strong>Rigitone</strong> <strong>Fix</strong> Joint Filling TechniqueThe specially developed <strong>Rigitone</strong> <strong>Fix</strong> Joint Filling <strong>Set</strong> enablesquick and secure installation.• <strong>Rigitone</strong> <strong>Fix</strong> <strong>Adhesive</strong> Joint TechniqueThe main advantages of the <strong>Adhesive</strong> Joint Technique arethe very high joint strength and resistance to cracking. Withour newly developed <strong>Rigitone</strong> <strong>Fix</strong> <strong>Adhesive</strong> <strong>Set</strong> installationis now even quicker and thus more cost-effective.3
<strong>Rigitone</strong> <strong>Fix</strong> <strong>Adhesive</strong> <strong>Set</strong>3 412654
1 <strong>Rigitone</strong> <strong>Fix</strong> <strong>Adhesive</strong> Pistol2 <strong>Rigitone</strong> <strong>Fix</strong> <strong>Adhesive</strong> Adapter (x2)3 <strong>Rigitone</strong> <strong>Fix</strong> <strong>Adhesive</strong> Nozzles (x3)4 Round Nozzles (x3)5 <strong>Rigitone</strong> <strong>Fix</strong> Scraper6 Screw Head TemplateThe <strong>Rigitone</strong> Joint <strong>Adhesive</strong> and <strong>Rigitone</strong> FinishingCompound are both available in 600 ml bags.5
≤ 250 mm<strong>Rigitone</strong> installation instructionsx900 mm≤ 100 mm≤ 500 mmSub-structurel≤ 335 mmy1,000 mmMount and align the sub-structure comprising base andsupporting profiles (CD profiles) so that the <strong>Rigitone</strong> boardscan be fastened at right angles to the supporting profiles. Asupporting profile should always be located at the transversejoints of the boards.Fastening<strong>Rigitone</strong> SN 3.5 x 30 mm perforated panel screws should beattached at intervals ≤ 170 mm; always fasten the ends of the<strong>Rigitone</strong> boards first, then the long edges.6
Board mountingMount the first board in thecentre of the room. Use analignment line or preferablya fixed edge guide to ensurethe board is properly alignedbefore screwing it into place.Work outwards from thecentre of the room in a starpattern when mounting subsequentboards, making surethat they are all laid in thesame direction (see markingson the ends and lettering onthe long edges of the boards).Expansion joints should beadded at approx. 10 metreintervals.Installation tips• To compensate for construction tolerances, a non-perforatedplasterboard strip (plain border) should be fitted around theperimeter. If a <strong>Rigips</strong> perforated board ceiling is to be fittedflush to a <strong>Rigips</strong> wall, structural separation of the twopanelling levels is recommended, e.g. through addition of ashadow gap.• Expansion joints should be added at approx. 10 m intervals.• <strong>Set</strong>tlement joints in the shell must be continued in thestructure of the suspended ceiling.7
<strong>Rigitone</strong> installation instructionsInstallationUse a hand grinder or sandpaperto sand off/bevel theboard edges slightly.1 mm45°1 mmUse the new <strong>Rigitone</strong> <strong>Fix</strong><strong>Adhesive</strong> <strong>Set</strong> to bond the<strong>Rigitone</strong> perforated boardjoints. Insert the <strong>Rigitone</strong>Joint <strong>Adhesive</strong> bag into the<strong>Rigitone</strong> <strong>Fix</strong> <strong>Adhesive</strong> Pistol.The <strong>Rigitone</strong> <strong>Fix</strong> <strong>Adhesive</strong>Nozzle enables optimumapplication of the <strong>Rigitone</strong>Joint <strong>Adhesive</strong> to the edgesof the board as its specialshape ensures the adhesiveis applied evenly.8
<strong>Rigips</strong> noteThe special <strong>Rigitone</strong> <strong>Fix</strong> <strong>Adhesive</strong> Adapter will pierce the topend of the bag once sufficient pressure has been built up viathe trigger of the pistol. This eliminates the need to cut the bagopen manually.Apply the <strong>Rigitone</strong> Joint<strong>Adhesive</strong> to the wetted boardedges. The edges of theboards which have alreadybeen installed must also bewetted.The boards should be buttjoined, ensuring that theperforation pattern is alignedhorizontally and diagonally.This creates a strong joint0.5 - 1 mm wide.Installation tips<strong>Rigitone</strong> Joint <strong>Adhesive</strong> can also easily be applied to the edge ofa board which has already been installed. These edges must alsobe wetted beforehand.9
<strong>Rigitone</strong> installation instructionsFinishing the <strong>Rigitone</strong> joints30min.Once the <strong>Rigitone</strong> Joint<strong>Adhesive</strong> has begun to harden(approx. 30 minutes), removeany excess carefully with ascraper. Allow a drying timeof approx. 4 hours beforefinishing.To finish the joints, apply the<strong>Rigitone</strong> Finishing Compoundusing the <strong>Rigitone</strong> <strong>Adhesive</strong>Pistol fitted with a standardround nozzle.The bevelling of the boardedges during preparation nowallows optimum applicationof the <strong>Rigitone</strong> FinishingCompound in the joint area.Then smooth off the jointsusing the <strong>Rigitone</strong> <strong>Fix</strong> Scraper,leaving approx. 1 mm of thematerial.10
Once the <strong>Rigitone</strong> FinishingCompound is fully dry(approx. 24 hours), the jointscan be sanded and the ceilingprepared for the final coating.11
© Saint-Gobain <strong>Rigips</strong> GmbH.1st edition, August 2011.All details in this publication are aimed at trained specialists and equate to the state of theart. They are correct to the best of our knowledge but do not represent any guarantees. Weendeavour to provide you with the best possible solutions at all times and therefore reservethe right to make changes as a result of application or production improvements. No illustrationof activities being performed may be deemed to constitute a set of instructions forperformance unless expressly indicated as such. Please note that the information providedcannot replace any specialist structural planning that may be necessary. We assume thatrelated tasks are properly executed.Please check the website at www.rigips.de/infomaterial (German only) to ensure that youhave the latest version. Printing errors cannot be ruled out.Please also note that our business relationships are conducted exclusively on the basis of thelatest version of our General Terms and Conditions of Sale, Delivery and Payment.Our General Terms and Conditions of Sale, Delivery and Payment can be obtained on requestor downloaded from www.rigips.de/AGB (German only)We look forward to successful collaboration and wish you every success with our systemsolutions.All rights reserved.No responsibility shall be taken for the correctness of this information.Saint-Gobain <strong>Rigips</strong> GmbHSaint-Gobain <strong>Rigips</strong> GmbHHead officeSchanzenstraße 84D-40549 DüsseldorfPhone +49 (0)211 5503-0Fax +49 (0)211 5503-208info@rigips.dewww.rigips.deD/08.11/PH/Rev. 0 - digital