10 Cool LEGO Mindstorms-Ultimate Builders Projects.pdf - Profe Saul
10 Cool LEGO Mindstorms-Ultimate Builders Projects.pdf - Profe Saul
10 Cool LEGO Mindstorms-Ultimate Builders Projects.pdf - Profe Saul

Create successful ePaper yourself
Turn your PDF publications into a flip-book with our unique Google optimized e-Paper software.
solutions@syngress.comWith more than 1,500,000 copies of our MCSE, MCSD, CompTIA, and Ciscostudy guides in print, we continue to look for ways we can better serve theinformation needs of our readers. One way we do that is by listening.Readers like yourself have been telling us they want an Internet-based servicethat would extend and enhance the value of our books. Based onreader feedback and our own strategic plan, we have created a Web sitethat we hope will exceed your expectations.Solutions@syngress.com is an interactive treasure trove of useful informationfocusing on our book topics and related technologies. The siteoffers the following features:■ One-year warranty against content obsolescence due to vendorproduct upgrades. You can access online updates for any affectedchapters.■ “Ask the Author” customer query forms that enable you to postquestions to our authors and editors.■ Exclusive monthly mailings in which our experts provide answers toreader queries and clear explanations of complex material.■ Regularly updated links to sites specially selected by our editors forreaders desiring additional reliable information on key topics.Best of all, the book you’re now holding is your key to this amazing site.Just go to www.syngress.com/solutions, and keep this book handy whenyou register to verify your purchase.Thank you for giving us the opportunity to serve your needs. And be sureto let us know if there’s anything else we can do to help you get themaximum value from your investment. We’re listening.www.syngress.com/solutions
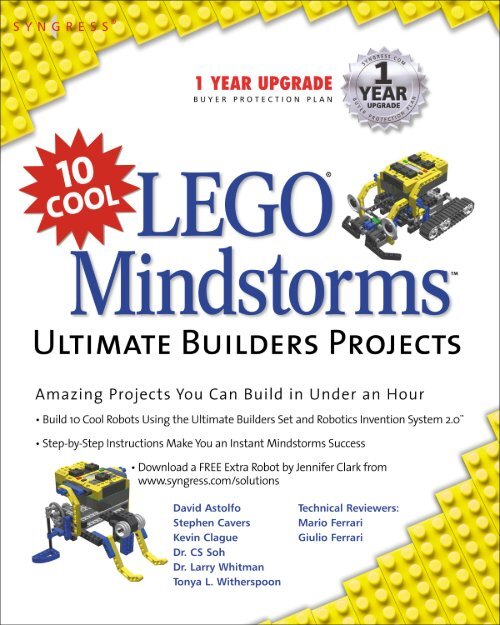
1 YEAR UPGRADEBUYER PROTECTION PLAN<strong>LEGO</strong><strong>Mindstorms</strong><strong>Ultimate</strong> <strong>Builders</strong> <strong>Projects</strong>®
Syngress Publishing, Inc., the author(s), and any person or firm involved in the writing, editing, orproduction (collectively “Makers”) of this book (“the Work”) do not guarantee or warrant the results to beobtained from the Work.There is no guarantee of any kind, expressed or implied, regarding the Work or its contents.The Work issold AS IS and WITHOUT WARRANTY. You may have other legal rights, which vary from state to state.In no event will Makers be liable to you for damages, including any loss of profits, lost savings, or otherincidental or consequential damages arising out from the Work or its contents. Because some states do notallow the exclusion or limitation of liability for consequential or incidental damages, the above limitationmay not apply to you.You should always use reasonable care, including backup and other appropriate precautions, when workingwith computers, networks, data, and files.Syngress Media®, Syngress®,“Career Advancement Through Skill Enhancement®,” and “Ask the AuthorUPDATE®,” are registered trademarks of Syngress Publishing, Inc. “Mission Critical,”“Hack Proofing®,”and “The Only Way to Stop a Hacker is to Think Like One” are trademarks of Syngress Publishing, Inc.Brands and product names mentioned in this book are trademarks or service marks of their respectivecompanies.KEY SERIAL NUMBER001 66YH7V43GY002 RT5N7TF6CV003 QASHF35TXA004 XC4H8976NY005 H74PR33T5S006 UJF7NCES64007 EC34EQ2APK008 A2DMRDKJ67009 V8NKP7HV6F0<strong>10</strong> W6XF79UM3ZPUBLISHED BYSyngress Publishing, Inc.800 Hingham StreetRockland, MA 02370<strong>10</strong> <strong>Cool</strong> <strong>LEGO</strong>® MINDSTORMS <strong>Ultimate</strong> Buider <strong>Projects</strong>Copyright © 2002 by Syngress Publishing, Inc. All rights reserved. Printed in the United States of America.Except as permitted under the Copyright Act of 1976, no part of this publication may be reproduced ordistributed in any form or by any means, or stored in a database or retrieval system, without the priorwritten permission of the publisher, with the exception that the program listings may be entered, stored,and executed in a computer system, but they may not be reproduced for publication.Printed in the United States of America1 2 3 4 5 6 7 8 9 0ISBN: 1-931836-60-4Technical Reviewers: Mario Ferrari and Giulio Ferrari Cover Designer: Michael KavishAcquisitions Editors: Catherine B. Nolan andPage Layout and Art by: Shannon TozierJonathan E. BabcockCopy Editor: Kate GlennonDistributed by Publishers Group West in the United States and Jaguar Book Group in Canada.
AcknowledgmentsWe would like to acknowledge the following people for their kindness and support inmaking this book possible.A special thanks to Matt Gerber at Brickswest for his help and support for our books.Karen Cross, Lance Tilford, Meaghan Cunningham, Kim Wylie, Harry Kirchner, Kevin Votel,Kent Anderson, Frida Yara, Jon Mayes, John Mesjak, Peg O’Donnell, Sandra Patterson, BettyRedmond, Roy Remer, Ron Shapiro, Patricia Kelly, Andrea Tetrick, Jennifer Pascal, Doug Reil,David Dahl, Janis Carpenter, and Susan Fryer of Publishers Group West for sharing theirincredible marketing experience and expertise.Duncan Enright, AnnHelen Lindeholm, David Burton, Febea Marinetti, and Rosie Moss ofElsevier Science for making certain that our vision remains worldwide in scope.David Buckland, Wendi Wong, Daniel Loh, Marie Chieng, Lucy Chong, Leslie Lim, AudreyGan, and Joseph Chan of Transquest Publishers for the enthusiasm with which they receiveour books.Kwon Sung June at Acorn Publishing for his support.Jackie Gross, Gayle Voycey, Alexia Penny, Anik Robitaille, Craig Siddall, Darlene Morrow,Iolanda Miller, Jane Mackay, and Marie Skelly at Jackie Gross & Associates for all their helpand enthusiasm representing our product in Canada.Lois Fraser, Connie McMenemy, Shannon Russell, and the rest of the great folks at JaguarBook Group for their help with distribution of Syngress books in Canada.David Scott, Annette Scott, Delta Sams, Geoff Ebbs, Hedley Partis, and Tricia Herbert ofWoodslane for distributing our books throughout Australia, New Zealand, Papua NewGuinea, Fiji Tonga, Solomon Islands, and the Cook Islands.Winston Lim of Global Publishing for his help and support with distribution of Syngressbooks in the Philippines.v
ContributorsStephen Cavers began his secret life as a <strong>LEGO</strong> MINDSTORMS builder inMarch 2001, when he bought the Robotics Invention System 1.5. Since then, hehas been slowly expanding his <strong>LEGO</strong> collection and his skills at building littleplastic robots.Before his MINDSTORMS addiction took hold, Steven received a bachelor’sdegree in Theatre at the University of British Columbia. His longtime interest incomputers and technology led him into the software industry, where he hasworked as a technical writer since 1994.Stephen currently lives in Vancouver, Canada, and enjoys consuming copiousamounts of sushi between <strong>LEGO</strong> projects.Stephen is the creator of Robot 1: The WideBot, Robot 2: SumoBug, Robot 3:Hopper, and Robot 4: HunterBot.Dr. Soh Chio Siong (commonly known as CSSoh on the Internet) is a PublicHealth Physician who has a penchant for things scientific, mechanical, and electronic.Since he was a child, he has built crystal sets, microscopes, telescopes,steam engines, digital clocks, and computers, among other things.Dr. Soh became interested in using <strong>LEGO</strong> as a tool for creative learning in1998, with the purchase of some <strong>LEGO</strong> Dacta sets and, later on, the MIND-STORMS RIS set. He developed a special interest in pneumatics, particularlypneumatic engines, and is author of the world-renowned site on <strong>LEGO</strong>Pneumatics (www.geocities.com/cssoh1). He is an active member of the LUGNETcommunity and has led many interesting discussion threads.His current interest is the use of <strong>LEGO</strong> in the teaching of science and creativity.He thinks robotics should be the fifth R, after Reading, wRiting,aRithmetic, and computeR. He lives with his wife and daughter in Singapore.Other <strong>LEGO</strong> claims to fame for Dr. Soh include:In September 1999, Dr. Soh’s RCX Controlled Air Compressor Tester(www.lugnet.com/robotics/?n=7407) created quite a stir on the LUGNET RoboticsDiscussion list.CSSoh’s <strong>LEGO</strong> Pneumatics Page (www.geocities.com/cssoh1) was votedLUGNET’s <strong>Cool</strong> <strong>LEGO</strong> Site of the Week for January 9–15, 2000. This was thefirst site from Singapore to receive this recognition from LUGNET.In June 2000, Dr. Soh, in collaboration with P.A. Rikvold and S. J. Mitchell ofFlorida State University, participated in a poster presentation at the GordonConference. The presentation, entitled “Teaching Physics with <strong>LEGO</strong>: Fromvi
Steam Engines to Robots,” can be viewed at www.physics.fsu.edu/users/rikvold/info/gordon00a.html.Dr. Soh is the creator of Robot 5: Nessie, and Robot 6: Nellie.David Astolfo recalls that Lego first stimulated his imagination at about 4 yearsold. It was not long before he received my first Lego Technic set. As a personwho loves to take things apart, figure out how then work, and sometimes putthem all back together, Technic was the ideal toy,. he would spend hoursbuilding various Technic trucks, cranes and tractors, only to tear them apart andstart something new. One of his earliest Technic creations was a front wheeldrive steering-capable mechanism built from the parts of the 853 Technic AutoChassis set (1977).A few years ago, David discovered that Lego had been working with MIT toproduce a “smart brick”., he knew then, that his “dark period” was over and hewas going to have to dust off the bricks and start building again. Soon after, hepicked up his first MINDSTORMS Robotics Invention System set I could get myhands on. David now owns 5 RIS sets and a number of other Technic setstotaling a part inventory over 25000 pieces.David lives with his wife Rebecca in Burlington Ontario Canada. Currentlyemployed at ASI Technologies Inc. as Manager of Applications Systems, David’sspecialties include: Web application development and deployment, mapping withGIS software tools, database modeling & design and a variety of network infrastructuremanagement tasks. His educational background consists of a Bachelor ofScience Degree, as well as a Geographic Applications Specialist (GIS) Certificate.When not working, David’s hobbies consist of Karate, mountain biking,and creating robots with <strong>LEGO</strong> of course. He also occasionally attends roboticcompetitions that are held by the rtlToronto group in Toronto. This group offerssome great challenges and a friendly and fun environment to test ones robotbuildingskills against others. For information on David’s other Lego creations,visit his Web site at www.astolfo.com/bots.David is the creator of Robot 7: The DominoBot.Dr. Larry Whitman is an Assistant <strong>Profe</strong>ssor of Industrial and ManufacturingEngineering at Wichita State University. He teaches and performs research in theareas of supply chain management, lean manufacturing, virtual reality, and computerintegrated manufacturing. He uses <strong>LEGO</strong> to demonstrate production systemsconcepts to classes of college, high school, and middle school students. Hehas presented production system concepts using <strong>LEGO</strong> at industrial engineeringand resource management national conferences. He is a den leader for his son,Joshua's Cub Scout pack and works with his son to build new designs andvii
modify other <strong>LEGO</strong> designs. Larry spent ten years in the defense industry integratingfactory automation and also integrating engineering computer aideddesign with manufacturing.Dr. Whitman, in conjunction with Tonya and Alex Witherspoon, is the creatorof Robot 8: The Drawbridge.Tonya L. Witherspoon is an Educational Technology Instructor at Wichita StateUniversity (WSU) in Wichita, KS. She teaches clay animation, multimedia production,Web design, and several robotics and programming courses using the <strong>LEGO</strong>MINDSTORMS RIS, Logo, Handy Crickets, and Roamer robots. She has coauthoredseveral books on integrating technology into curriculum, speaks atstate and national conferences on the subject, and teaches workshops and in-servicefor many schools in Kansas.Tonya’s interest in robotics peaked during Mindfest, a forum hosted by theMassachusetts Institute of Technology (MIT) in October 1999. She was inspiredwhen Dr. Seymour Papert spoke about his work with MINDSTORMS and challengedeveryone to encourage learning and find ways to spread knowledge innew and exciting ways. Since then, Tonya has received two grants that allowedher to give teachers in Kansas a MINDSTORMS RIS kit upon completion of arobotics workshop at Wichita State University. To date, she’s given away over 75RIS kits and helped many teachers find funding for complete classroom sets. Shehosted a robotics summer camp this past summer for over 65 middle-school students;the camp also served as a practicum for teachers to learn how to use theMINDSTORMS RIS in their classrooms. In collaboration with WSU’s College ofEngineering, she has hosted two annual MINDSTORMS Robotics Challenges,events in which over 200 middle-school students from Kansas have competed inrobotic challenges. The third annual MINDSTORMS Robotics Challenge will behosted in March 2003 (http://education.wichita.edu/mindstorms).Tonya’s family consists of her husband, Steve, who is a teacher, and fiveschool-age children: Andrew, Alex, Adam, Austin, and Madeline. She resides inWichita, but lives in cyberspace.Tonya Witherspoon, in collaboration with her son, Alex, contributed Robot9: The Wrapper Compactor. Tonya was also a special collaborator with Dr. LarryWhitman on Robot 8: The Drawbridge.Alex Witherspoon is a middle-school student in Wichita, KS. His brain is hardwiredfor innovation; he has designed numerous creations on notebook papersince preschool. One of his first creations was a practical Midwestern solution:an explosive that would counteract and diffuse a tornado. Alex also designed amultilevel clubhouse, complete with a bed, television, computer, and aviii
McDonalds on the lower level. He has made that clubhouse a reality in his backyard(minus the McDonalds). Alex presented his robot “Catapult Mania” at MIT’sMindfest when he was nine and broke the code to unlock the <strong>LEGO</strong> Knight’schain, which was a challenge posed to all Mindfest participants. His reward wasto take home the four-foot <strong>LEGO</strong> Knight. Upon returning from Mindfest, Alexand his mother started a school-funded robotics club, at the invitation of Alex’selementary school principal.The journey to MIT showed Alex that his type of creativity has ample applicationin our world, and has spawned different inventions using <strong>LEGO</strong>s andother materials to consummate the tenuous relationship between idea andreality. Alex has participated on robotics teams that have received the top prizefor two years in a row at WSU’s MINDSTORMS Robotics Challenge. Thissummer, he sent for a free patent attorney’s kit.Alex Witherspoon, in collaboration with his mother, Tonya, contributedRobot 9: The Wrapper Compactor. Alex was also a special collaborator withDr. Larry Whitman on Robot 8: The Drawbridge.Kevin Clague graduated in 1983 from Iowa State University with a bachelor’s ofScience degree in Computer Engineering. For the past 18 years, Kevin has workedas a Diagnostic Engineer at the Amdahl Corporation. For the last two years, he hasalso acted as a Senior Staff Engineer doing verification work at Sun Microsystemson their Ultra-Sparc V RISC processor. Kevin has two major hobbies: theatricallighting and <strong>LEGO</strong> MINDSTORMS. Kevin has been playing with the RIS 1.5 forseveral years now and is currently working on LPub, an application to revolutionizethe world of creating online <strong>LEGO</strong> building instructions.Kevin Clague contributed Robot <strong>10</strong>: Robo-Hominid.ix
Technical ReviewersMario Ferrari received his first <strong>LEGO</strong> box around 1964, when he was fouryears-old.<strong>LEGO</strong> was his favorite toy for many years, until he thought he was tooold to play with it. In 1998, the <strong>LEGO</strong> MINDSTORMS RIS set gave him reasonto again have <strong>LEGO</strong> become his main addiction. Mario believes <strong>LEGO</strong> is theclosest thing to the perfect toy. He is Managing Director at EDIS, a leader in finishingand packaging solutions and promotional packaging. The advent of theMINDSTORMS product line represented for him the perfect opportunity to combinehis interest in IT and robotics with his passion for <strong>LEGO</strong> bricks. Mario hasbeen an active member of the online MINDSTORMS community from thebeginning and has pushed <strong>LEGO</strong> robotics to its limits. Mario holds a bachelor’sdegree in Business Administration from the University of Turin and has alwaysnourished a strong interest for physics, mathematics, and computer science. He isfluent in many programming languages and his background includes positionsas an IT Manager and as a Project Supervisor. With his brother Giulio Ferrari,Mario is the co-author of the highly successful book Building Robots with <strong>LEGO</strong>MINDSTORMS (Syngress Publishing, ISBN: 1-928994-67-9). Mario estimates heowns over 60,000 <strong>LEGO</strong> pieces. Mario works in Modena, Italy, where he liveswith his wife, Anna, and his children, Sebastiano and Camilla.Giulio Ferrari is a student in economics at the University of Modena and ReggioEmilia, where he also studied engineering. He is fond of computers and hasdeveloped utilities, entertainment software, and Web applications for severalcompanies. Giulio discovered robotics in 1998, with the arrival of MIND-STORMS, and held an important place in the creation of the Italian <strong>LEGO</strong> community.He shares a love for <strong>LEGO</strong> bricks with his oldest brother, Mario, and astrong curiosity for the physical and mathematical sciences. Giulio also has acollection of 1200 dice, including odd-faced dice and game dice. Giulio has contributedto two other books for Syngress Publishing, Building Robots with <strong>LEGO</strong>MINDSTORMS (ISBN: 1-928994-67-9) and Programming <strong>LEGO</strong> MINDSTORMSwith Java (ISBN: 1-928994-55-5). Guilio studies, works, and lives in Modena,Italy.x
About This BookEach of the ten cool robots in this book is presented using a method that makes its constructionas easy and intuitive as possible. Each chapter begins with a picture of the completedrobot, accompanied by a brief introduction to the robot’s history, its unique challengesand characteristics, as well as any concerns that the robot’s creator wants you to be aware ofduring construction.The instructions for building each robot are broken down into several sub-assemblies,which each consist of an integral structural component of the finished robot. (For example,the first robot presented in this book, WideBot, is broken down into four sub-assemblies: theChassis, the Right Drive, the Left Drive, and the Head.) You will see a picture of each finishedsub-assembly before you begin its construction.You will be guided through the construction of each sub-assembly by following the individualbuilding steps, beginning with Step 0. Each step shows you two important things—what parts you need, and what to do with them—by using two pictures. The parts list pictureshows you which <strong>LEGO</strong> bricks you will need for that particular step, as well as the quantityof parts required, and the color of the parts (if necessary). Since this book is printed in blackand white, we have used the following key to represent the colors:■■■■■■■■B BlueG GreenM MagentaLB Light BlueY YellowPpl PurpleTLG Transparent Light GreenTY Transparent YellowThe instructional picture next to the parts list shows how those parts connect to oneanother. As the robot’s construction progresses, it gets harder to see where parts get added,so you’ll see we have made the parts that you add in each particular step darker than thoseadded in previous steps. Many of the steps also have a few brief lines of text to more fullyexplain building procedures that may not be obvious from the pictures alone, or to discusswhat role this step plays in the larger scheme of the robot’s construction.Once you have finished building all of the separate sub-assemblies, it’s time to put themall together to complete the robot. The set of steps at the end of each chapter titled “PuttingIt All Together” walks you through the process of attaching together the sub-assemblies.xi
Throughout the chapters you will see three types of sidebars:■■■Bricks & Chips… These sidebars explain key <strong>LEGO</strong> building concepts and terminology.Developing & Deploying… These sidebars explain why certain building techniqueswere used with a particular robot and what purpose they serve.Inventing… These sidebars offer suggestions for customizing the robots. Buildingrobots with <strong>LEGO</strong> MINDSTORMS is all about creativity, so we encourage you toexperiment with these suggestions, and try different building techniques of yourown.Building your robots is, or course, only half the fun! Getting them to run using the RCXbrick is what distinguishes MINDSTORMS robots from ordinary models created with <strong>LEGO</strong>bricks. Some of the robots in this book will use the programs that come hard-wired into theRCX brick. Many of them will use unique programs that the authors have written specificallyfor their robots. Keep an eye out for the black and white syngress.com icons scatteredthroughout the book.These icons alert you to the fact that there is code for this particular robot available fordownload from the Syngress Solutions Web site (www.syngress.com/solutions). The programsfor the robots in this book are written in two of the most common programming languagesused for <strong>LEGO</strong> MINDSTORMS:■■RCX <strong>LEGO</strong>’s official programming language.NQC Standing for “Not Quite C,” NQC is a programming language created byDave Baum. Very similar in many ways to the C computer programming language,NQC is a text-based language that is more powerful and flexible than RCX.For instruction on uploading these programs to your RCX brick, refer to the documentationthat came with your <strong>LEGO</strong> MINDSTORMS RIS 2.0 kit.The Syngress Solutions Web site (www.syngress.com/solutions) contains the code files forthe robots found in <strong>10</strong> <strong>Cool</strong> <strong>LEGO</strong> <strong>Mindstorms</strong> <strong>Ultimate</strong> <strong>Builders</strong> Set <strong>Projects</strong>: Amazing<strong>Projects</strong> You Can Build in Under an Hour. The code files are located in a BotXX directory.For example, the files for Robot 5 are located in folder Bot05. Any further directory structuredepends upon the specific files included for the robot in that particular chapter.xii
ContentsHunterBot, Robot 4About This BookxiForewordxvRobot 1 WideBot 1Robot 2 SumoBug 29Robot 3 Hopper 51Robot 4 HunterBot 65Robot 5 Nessie 91Robot 6 Nellie <strong>10</strong>5Robot 7 The DominoBot 123Robot 8 The Drawbridge 181Robot 9 Candy Wrapper Compactor 205Robot <strong>10</strong> Robo-Hominid 223xiii
ForewordMy contribution to this book is the result of a series of accidents. First, my parentsaccidentally started me on the road to <strong>LEGO</strong> addiction by giving mecountless <strong>LEGO</strong> kits as a child, which I played with obsessively. Later in mylife, my little brother accidentally left his <strong>LEGO</strong> kits unguarded, and I rediscovered<strong>LEGO</strong> even though I was obviously older than the implied “9+” age categoryon the package. The final accident that led to my involvement with thisbook occurred in March 2001 when a co-worker—a programmer—told me aboutthe <strong>LEGO</strong> MINDSTORMS Droid Developer Kit he had recently purchased. Thattriggered my relapse into <strong>LEGO</strong> addiction, and I had to buy the <strong>LEGO</strong> MIND-STORMS Robotics Invention System. Since then, I have been happily designing,building, and programming dozens of robots.From time to time, I browse the web to check out the latest inventions byother MINDSTORMS builders, and I’m often impressed with the creativity andmechanical complexity that I find. I’m also amazed—and oddly reassured—byhow many MINDSTORMS fanatics are adults who have picked up a fascinatingnew hobby.In my first weeks working with the Robotics Invention System, I was a bitdaunted by the robotic masterpieces that I saw on the web: mechanical arms,climbers, quadrupeds, bipeds, insects, cars, and even kitchen appliances. I wonderedif I could ever begin to invent such things.The key, I think, is to start slowly and innovate on existing models.Imitation is the sincerest form of flattery, but it also helps you learn the ropes.Spend some time browsing the web for ideas and see if you can innovate onthem. The projects presented in the <strong>LEGO</strong> MINDSTORMS <strong>Ultimate</strong> <strong>Builders</strong>Set are an excellent way to pick up new building techniques and learn theprinciples of reinforced structures and reduction gearing. With dedication,anyone can learn to invent robots like a <strong>LEGO</strong> Master Builder.xv
ForewordWhen I was approached by Jonathan Babcock at Syngress to design robotsfor this book, I was thrilled to have the opportunity to contribute some of myideas. An important aspect of the MINDSTORMS community, I feel, is thesharing of ideas and knowledge for the sake of fun and innovation. This bookcontributes to that community in the same spirit. I hope that you enjoy the cooland easy-to-build robots in this book, and use them as a springboard todesigning your own innovative MINDSTORMS creations.—Stephen Caverswww.cavers.caxvi
Robot 1WideBot1
Robot 1 • WideBotWideBot is a wide-bodied robot designed to pursue light sources. When Ibought my second RIS kit, I tried to think up ways to get two robots to interactwith each other. After a bit of experimentation, I put together a game of robotictag called Cat and Mouse.In this game, two robots sit still most of the time, but at random intervals,the “cat” robot sends a message asking if the “mouse” robot wants to play. If itdoes, the mouse wanders around the floor, evading the cat.The mouse robot has a bright tail light that shows up very well to the catrobot’s light sensor. The cat scans left and right, searching for the brightestpoint in the room, which it pursues. When the cat tags the mouse, it sends aninfrared message to shut down the mouse. Then they wait quietly until theyfeel like playing again.The WideBot is based upon my design for the cat. Your “mouse” equivalentcan be a flashlight or other source of bright illumination that you can direct.There are several strategies to programming a light-seeking robot. You mightwish to explore some of these as you experiment with WideBot’s abilities. Onestrategy is to rotate the sensor (or the entire robot) from side to side in a sensorsweep, while recording the brightness values at several points across the sweep.The robot then determines the brightest direction and moves in that directionfor a distance before performing the sensor sweep again. While this techniqueis probably an accurate way to locate the brightest point in a room, it’s difficultto program properly.A simpler way to seek for a light source is for the robot to turn steadily inone direction until the light level exceeds a specified threshold. This behavior ismuch easier to program, but doesn’t take variable lighting conditions intoaccount (if a room is too dark, for example, the robot may never register a lightsource bright enough to pursue).2
Robot 1 • WideBotWideBot uses the latter method, the same principle as the cat in the robotictag game. By rotating on its wide wheelbase, WideBot can carefully scan aroom for the light source. WideBot’s width isn’t just for looks: The wide turningcircle makes a side-to-side scanning motion that is slow and easily controlled.You can find the program for WideBot on the Syngress Solution Web site(www.syngress.com/solutions). It is a simple light-seeking program. The robotwill keep turning in one direction until either the light exceeds theLIGHT_THRESHOLD value or until one of the bumpers is hit. The directionthe robot turns is determined by which bumper is hit (if the left bumper is hit,the robot seeks to the right and vice-versa). The robot moves straight aheadwhile the light is above the threshold.3
Robot 1 • WideBotThe ChassisThe chassis sub-assembly is the frame on which WideBot is built. It supports the RCX brick and providesa solid connection for the other parts. Using the open-centered transparent bricks, you canquickly build WideBot’s sturdy frame.Chassis Step 0Add the pins to the 6x8 opencenteredtransparent brick.4
Robot 1 • WideBotChassis Step 1Add the two 4x6 open-centeredbricks. The transparent blueconnector block will ultimatelysupport WideBot’s head.5
Robot 1 • WideBotChassis Step 2Attach the two 1x16 TECHNIC beams,which reinforce the chassis andprovide attachment points for the leftand right drive sub-assemblies.Chassis Step 3Assemble and attach theskids. Because WideBot isa two-wheeled robot, itneeds skids in orderto turn freely.6
Robot 1 • WideBotInventing…Casters, Skids, or Sliding?Because WideBot uses skids it runs best on a smooth surface. Ifa smooth surface is not available you could try to adapt thecaster wheel that appears in Robot 5, Nessie, or the slidingwheel that appears in Robot 6, Nellie.Chassis Step 4Attach the RCXbrick to complete thechassis sub-assembly.7
Robot 1 • WideBotThe Right DriveThe right drive sub-assembly is a complete drive unit that includes the motor, gearbox, and rightwheel. The gearbox turns the rotation angle 90 degrees and reduces the rotation speed by a ratioof 5:1. In other words, for every five revolutions of the motor, the wheel turns only once.WideBot has two drive sub-assemblies, the right and the left, which include connectors andsupports for the chassis.Right Drive Step 0Attach the 1x12 TECHNIC beam to themotor using the 1x2 plates, and slidethe 12t beveled gear onto the motor.1x2 plate1x2 plate8
Robot 1 • WideBotRight Drive Step 1Slide the pieces onto the #6 axle inthis order: half bushing, 20tgear, full bushing, halfbushing, 8t gear. The12t gear on themotor shouldmesh withthe 20tgear.Bricks & Chips…Beveled GearsThe <strong>Ultimate</strong> <strong>Builders</strong> Set includes three kinds of beveled gears,which allow you to turn the angle of rotation 90 degrees.Right Drive Step 2Slide the 24t gear and bushings onto thesecond axle, and place the axle so that the 24tgear meshes with the 8t gear on the first axle.These gears further reduce the rotation speed.9
Right Drive Step 3Slide the second 1x12 TECHNIC beamonto the axles, and secure it to themotor using the 1x2 plate.Robot 1 • WideBotRight Drive Step 4Add the various platesand bushings as shown.The 1x4 TECHNIC brickprovides more strength tothe assembly.<strong>10</strong>
Robot 1 • WideBotRight Drive Step 5Bricks & Chips…Using 1x1 Round Plates as SpacersModels in many MINDSTORMS and TECHNIC kits stack two1x1 plates to separate beams. This ensures that the holes lineup when you add a vertical beam, and is a lighter and moreattractive solution than filling the gap with long plates.11
Robot 1 • WideBotRight Drive Step 6Add the 1x3liftarm topins on thefar side of therobot. The liftarmsecures the upperbeam to the lower beam.Then add the pins to the sideof the assembly opposite ofthe liftarm as shown.Right Drive Step 7Attach the remainingliftarms, pins, and the wire.Make sure that the wire isoriented so that it hangsover the back of the motor.In the final assembly, thethree-quarter-length pinswill attach to the RCX brick.12
Robot 1 • WideBotRight Drive Step 8Finally, slide the wheel onto the forwardaxle and fix it in place with a bushing.Now you’re ready to build the left drivesub-assembly.The Left DriveThe left drive sub-assembly is a mirror image of the right drive sub-assembly, with the exception ofthe gearbox. To ensure that the wheels drive in the same direction, the gearbox setup is identical inboth motor assemblies (that is, it is not a mirror of the right drive, but is exactly the same).13
Robot 1 • WideBotLeft Drive Step 01x2 plateBegin assemblingthe left drive subassemblyas you didfor the right drivesub-assembly.1x2 plateLeft Drive Step 114
Robot 1 • WideBotLeft Drive Step 2Here is the first difference betweenthe two drive sub-assemblies: Theaxle extends out to the left insteadof the right.Left Drive Step 315
Robot 1 • WideBotLeft Drive Step 4Left Drive Step 516
Robot 1 • WideBotLeft Drive Step 6Insert the pins and attach the liftarmsso that they are the opposite of theright drive sub-assembly.Left Drive Step 717
Robot 1 • WideBotLeft Drive Step 8Complete the sub-assembly by sliding the leftwheel onto the axle with a bushing. Now thatthe drive sub-assemblies are done, you can goahead and build WideBot’s head.The HeadThe head sub-assembly provides WideBot with two senses: touch and sensitivity to light. With touchsensors behind the left and right bumpers, WideBot can respond appropriately when it bumps intoan object. The light sensor measures brightness directly ahead.18
Robot 1 • WideBotDeveloping & Deploying…Using a Light Sensor as a Proximity SensorA forward-pointing light sensor can be used as a proximity detector.As the sensor approaches an object, the red light from the sensorreflects back to the sensor, much like radar.Head Step 0Head Step 1Assemble the parts onthe transparent blueconnector block. Thegreen bricks withaxle holes arethe attachment pointfor the light sensor.Slide the 3L liftarms and halfbushingsonto the upper axle.Inventing…Heads Up or Heads Down?If you want to build a line-following robot instead of a light-followingrobot, rotate the bricks with axle holes 90 degrees forward. The lightsensor can then point downward instead of forward.19
Robot 1 • WideBotHead Step 3Head Step 2Slide the axles into the liftarms.Insert the#4 axlesinto theangleconnectorsand slidethem onto theassembly. Make sure that thehalf-bushings don’t squeeze the angleconnectors—they should pivot freely.Head Step 4Slide the 1x3liftarms ontothe axles.Head Step 5Slide thetwo touchsensorsonto theaxles, andattach thelight sensorto the green bricks so thatit faces forward.20
Robot 1 • WideBotHead Step 6Secure the touch sensors withthe 1x2 liftarms, and slide the1x4 liftarm ontothe axle pins atthe back of theassembly.Head Step 7The blue and yellow liftarms act as bumpers:When the robot encounters an object, theleft or right bumper will push the yellowbutton on the touch sensor. Inthis way, the robot cantell which side theobstacle is on.Inventing…Customizing the BumpersWideBot uses the blue and yellow liftarms as bumpers, but you canuse other parts, such as flexible tubes or a combination of axles andconnectors.21
Robot 1 • WideBotHead Step 8To provide a place to attachWideBot’s eyes, add the notched#2 axles to the liftarms at theback of the headsub-assembly.Eyes arepurelydecorative, butthey can make anyrobot endearing tofriends and family!Head Step 922
Robot 1 • WideBotHead Step <strong>10</strong>Head Step 11Complete the head subassemblyby attaching theeyes.23
Robot 1 • WideBotPutting It All TogetherYou’re almost there. Now that you’ve built the chassis, head, and left and right drive sub-assemblies,you can put them together to complete WideBot.Final Step 0To begin the final assembly,start with the chassis subassembly.Attach theright drivesub-assemblyto the rightside of thechassis asshown.24
Robot 1 • WideBotFinal Step 1Now, attach the left drive subassemblythe same way to theleft side of the chassis.Bricks & Chips…Changing the BatteriesTo change the batteries, remove both drive sub-assemblies andseparate the RCX brick from the chassis.Final Step 2Snap the head sub-assemblyonto the yellow double pin atthe front of the chassis.25
Robot 1 • WideBotFinal Step 3Light Sensor toInput Port 2Left TouchSensor toInput Port 1Right TouchSensor toInput Ports 3Left Motor Wireto Output Port ARight Motor Wireto Output Port CNow attach the wires.Connect the left and right touch sensors to Input Ports 1and 3, and connect the light sensor to Input Port 2.Connect the left motor wire to Output Port A and theright motor wire to Output Port C. Be sure to orient the motorwires as shown: The wires should hang over the back of theRCX brick. WideBot should move forward when both motorsrun in the forward direction.WideBot is now complete! Load the program and havesome light-detecting, obstacle-bumping fun.26
Robot 1 • WideBotDeveloping & Deploying…A Light-following ProgramYou can download the program for WideBot from the SyngressSolutions Web site (www.syngress.com/solutions).27
Robot 2SumoBug29
Robot 2 • SumoBugOne of the popular pastimes of <strong>LEGO</strong> MINDSTORMS builders is a challengecalled Robotic Sumo, which emulates Sumo wrestling. In these challenges, tworobots face each other in a ring and employ a combination of cunning andbrute force in a bid to shove their opponent out of the ring. With the RoboticsInvention System (RIS) Test Pad, you can stage your own Sumo matches withinthe Test Pad’s large, black, oval “ring.”SumoBug is designed with the strategies of Sumo in mind. Although it’s abit of a lightweight in Sumo terms, SumoBug keeps its weight over the frontaxles for greater traction. The slow-turning tractor treads keep it stuck to theground and moving forward.SumoBug gets its power from a 24:1 gear ratio, which means that it movesslowly but has lots of torque. Although some Sumo robots try to crash headlonginto an opponent, SumoBug’s strategy is to stay low to the ground andpush slowly and steadily to win the match.SumoBug is versatile, too. If there are no opponents handy (or if you don’twant to buy a second RIS just yet), you can program SumoBug to detect andfollow lines on the floor and navigate obstacles—it works with almost any programfor a robot with two bumpers and a light sensor, such as the programsthat come with the RIS 2.0 software.Here’s how you can set up a Sumo match on your RIS Test Pad. Build twoSumoBugs and download the SumoBug program from the Syngress SolutionsWeb site (www.syngress.com/solutions). The program is available in both NQCand RCX. The two versions are very similar, so you can use either version in aSumo match. These programs allow two dueling Sumo robots to attempt toforce each other out of the black oval on the <strong>LEGO</strong> MINDSTORMS Test Pad.30
Robot 2 • SumoBugThe SumoBug program requires that both opponents have the following characteristics:■■■Left and right front bumpers with touch sensors attached to InputPorts 1 and 3A downward-pointing light sensor attached to Input Port 2 andmounted on the rear of the robotLeft and right motors connected to Output Ports A and C, respectivelyPlace the two robots so that they are facing each other across the length ofthe Test Pad. Run the program to start the match. If your SumoBug is forcedbackward over the black line, it loses the match and sends a “you win” messageto the victor. If your SumoBug receives a “you win” message beforecrossing the black line, it does a little victory dance and plays a tune.Bricks & Chips…SumoBug Is All Torque and No ActionBy reducing the rotation speed, you increase the torque, which makesfor a slow but very powerful robot. Finding the right gear ratio meansbalancing the need for power and the need for speed.31
Robot 2 • SumoBugThe Right DriveTo begin, you will build the right drive sub-assembly, which includes the motor, gearbox, and righttractor tread. The gearbox uses a worm gear and a 24t gear to reduce the rotation speed by a ratioof 24:1. In other words, for every 24 revolutions of the motor, the wheel inside the tractor treadturns only once.SumoBug’s two drive sub-assemblies, the left and right drives, include connectors and supportsfor the RCX brick.Right Drive Step 0Slide the axles through theholes in the 1x16 TECHNICbrick. Add the bushings andthe 24t gear to hold theaxles in place. The 24t gearis secured on the axle withthe half-bushings.32
Robot 2 • SumoBugRight Drive Step 1Add the second1x16 TECHNICbrick, and secure itwith the bushings.Right Drive Step 2Slide the wormgear, bushing, andaxle joiner onto the#5 axle and attach the axleto the motor shaft before mounting themotor on the TECHNIC bricks.Right Drive Step 3Add the 1x1 roundplates, TECHNICbricks, and pins, asshown. The 1x1round plates act as spacersto ensure that the holes line upwhen vertical beams are added.33
Robot 2 • SumoBugRight Drive Step 4Slide the 16t gear onto the front axle.Mount the sprocket wheels on to theaxles with a bushing on each to holdthem in place.When you connect the wire to themotor, make sure that the orientation iscorrect: The wire should hang off theback of the motor.The liftarms on each side strengthenthe drive unit and provide theconnection point for the RCX brick.Right Drive Step 516t gear goes ontoaxle before wheel.Slide the tread over thesprocket wheels.34
Robot 2 • SumoBugRight Drive Step 6To complete the right drivesub-assembly, add theconnector blocks and pinsas shown.The Left DriveThe left drive sub-assembly is almost a mirror image of the right drive sub-assembly, and includesthe motor, gearbox, and tractor tread.35
Robot 2 • SumoBugBricks & Chips…Saving Your Good DesignsIt’s a good idea to design self-contained drive sub-assemblies—you can easily reuse them in your future robot designs.Left Drive Step 0Slide thethree axles thoughthe 1x16 TECHNIC brickand secure them with thebushings and the 24t gear.36
Robot 2 • SumoBugLeft Drive Step 1Secure the second TECHNIC brick with the bushingsand add the pins on either side, as shown.Left Drive Step 2Slide the axle joiner, worm gear, andbushing onto the #5 axle and attach theaxle to the motor shaft before mountingthe motor on the TECHNIC bricks.37
Robot 2 • SumoBugLeft Drive Step 3Add the spacers and TECHNICbricks, which comprise theframe of the drive sub-assembly.Left Drive Step 4Attach the blue liftarms to each side ofthe left drive sub-assembly. Slide the16t gear onto the rearaxle. Then attach theyellow liftarmfor support.38
Robot 2 • SumoBugLeft Drive Step 5Attach thesprocket wheelsto the three axles using thebushings, and slide the tractortread onto the sprocket wheels.Left Drive Step 6Slide the tractor tread onto the sprocketwheels. Both drive sub-assemblies arenow complete, and you’re readyto build SumoBug’s head.39
Robot 2 • SumoBugThe HeadSumoBug’s head is more than just a pretty face. It holds the light sensor and two bumpers equippedwith touch sensors. During a match, SumoBug uses the light sensor to see the black line on the RISTest Pad. Separate bumpers let SumoBug know which side the opponent is on.Head Step 0First, attach the pins to thetransparent blue connector box.Then connect the liftarm. Slide the#<strong>10</strong> axle through the center holeon the liftarm, and the #12 axlethrough the top hole. Next, addthe green bricks with axle holes.40
Robot 2 • SumoBugBricks & Chips…Keeping a Low ProfileAn important strategy of Robotic Sumo is to stay close to the ground. Ifan opponent’s robot gets underneath yours, it’s game over. SumoBug’shead is mounted close to the floor.Head Step 1Slidethe remainingliftarms and bushings ontothe axles.Head Step 2Slide the#4 axlesthrough theliftarmsadded inHead Step 1as shown.Next, using the angleconnectors with the #5stamped on the side, add these to bothends of each axle. The angle connectors allowthe front bumpers to pivot freely on the axles. Finally,add the pins to the exterior axle connectors on eachside and the #2 axles to the interior axle connectorson each side.41
Robot 2 • SumoBugHead Step 3Use thehalf-bushings tosecure the angle connectors.Head Step 4Connect a wire to each of the twotouch sensors, and slide them ontothe axle under the black liftarms.Once the bumpers are attached,the pivoting angle connectors willcause the bumper to push the touchsensor’s yellow button when SumoBugencounters an obstacle.Head Step 5Use the 1x3 greyliftarms to secure thetouch sensors on eachside, and add the threequarter-lengthpins.42
Robot 2 • SumoBugHead Step 6First, slide the bushingsand 1x7 black liftarmsonto the #<strong>10</strong> axle.Then connect the axleto the head subassemblyusing theyellow bent liftarms asshown. The blackliftarms helpsecure the head tothe rest of theSumoBug.43
Robot 2 • SumoBugHead Step 7Attach thelight sensor to thegreen bricks with axleholes so that the end of thelight sensor extends slightly below thebottom of the touch sensors.44
Robot 2 • SumoBugHead Step 8Complete SumoBug’s headby attaching the eyes.Inventing…Customizing SumoBug’s HeadAlthough SumoBug’s big, googly eyes are cute, not everyone will likethem on their wrestler robot! Play around with different decorations,like antennae or smaller eyes to give your robot a different expression—or none at all!45
Robot 2 • SumoBugThe RCXNext, you’ll be attaching yellow liftarms to the RCX brick.RCX Step 0Insert three-quarter-lengthpins into each of the fourholes on the RCX brick.Bricks & Chips…Looking Forward or BackwardMany MINDSTORMS builders orient the RCX brick so that theinfrared window faces backward. Although partly an aestheticissue, the important thing is to ensure that communication withthe infrared tower is unobstructed.46
Robot 2 • SumoBugRCX Step 1Snap theyellow liftarmsonto the pins oneach side of the RCX, asshown. You’re now ready tobegin the final assembly!Putting It All TogetherNow that you’ve completed all four major components—the left and right drive sub-assemblies,the head sub-assembly, and the RCX sub-assembly—you can go ahead and begin the final constructionsteps.Bricks & Chips…Where Is Your COG?When traction is important, try to keep your robot’scenter of gravity (COG) over the drive wheels.47
Robot 2 • SumoBugFinal Step 0To begin the final assembly, take theright and left drive sub-assembliesand attach them together usingthe black pins in thetransparent blueconnector block.Bricks & Chips…Keeping Your Eyes on the RoadNotice how close the light sensor is to theground. This lets the robot detect thebrightness of the surface more accuratelythan if it were higher up.Final Step 1Mount SumoBug’s head ontothe yellow double-length pin inthe blue connector block. Thethree-quarter-length pins connectthe black liftarms to the drive sub-assembliesto reinforce SumoBug’s head.48
Robot 2 • SumoBugFinal Step 2Using four long, blue pinswith stop bushings, attachthe RCX sub-assembly to thevertical liftarms on the drivesub-assemblies.Bricks & Chips…Changing the BatteriesTo change SumoBug’s batteries, disconnect Output Ports A and C,then pull out the blue pins halfway to release the RCX brick.49
Robot 2 • SumoBugFinal Step 3Light Sensor toInput Port 2Left Touch Sensorsto Input Ports 1Right touch Sensorsto Input Ports 1Left Motor toOutput Port ARight Motor toOutput Port CNow it’s time to connect the wires to the RCXbrick. Connect the left and right touch sensorsto Input Ports 1 and 3, and connect the lightsensor to Input Port 2. Connect the left motorto Output Port A and the right motor toOutput Port C, making sure that the wires areoriented as shown.Developing & Deploying…Programming SumoBugThe programs for SumoBugare located on the SyngressSolutions Web site(www.syngress.com/solutions). Inaddition to competing in robotic Sumochallenges, SumoBug can also be programmedas a line-following robot.Either type of program works withthe RIS Test Pad.50
Robot 3Hopper51
Robot 3 • HopperHopper is a four-legged robot designed to move in a loping, hopping motion.Unlike most robots with legs, Hopper’s design is extremely simple, whichmakes it an excellent starter project, and its unique gait makes it a fun robot toplay with and program.I spent quite a while trying to select an appropriate name for this robot.Having rejected such names as FleaBot, Skipper, and even Dennis (the Hopper),simplicity won out. Sometimes naming a robot can be the most difficult part ofthe invention process.Hopper’s hopping action is generated by the spinning action of the largepulley wheels, which drive the legs down and back, then retract them quickly.Although Hopper doesn’t actually leave the ground on each hop, it does driveitself forward, and even has the ability to turn left and right. Positioning theweight correctly is crucial to achieve the desired hopping motion: Place theheavy RCX brick too far forward and there is too much weight on the frontlegs for Hopper to move; place it too far to the rear and the robot will fliponto its back.Programming Hopper poses an interesting challenge. In order to hop forward,the legs need to move synchronously despite the fact that the motors runindependently. You can synchronize the legs by simply allowing a small resttime between movements, during which the robot’s own weight will return thelegs to the resting state before starting movement again. If you’re programmingusing the NQC (Not Quite C) programming language, use the Float commandin place of the Off command. Float allows the motors to turn freely when theyare turned off, which lets the legs return to the resting state in about half asecond. If you program using the <strong>LEGO</strong> RCX language, allow at least a secondor so between movements because the motors tend to resist turning.The program for Hopper is designed to let it hop around the RIS Test Pad,following the black oval and hopping on the green rectangles. Due to the waythe legs move, Hopper will only work on a smooth surface, so the Test Pad isan excellent place to let it roam. You can download the Hopper program fromthe Syngress Solutions Web site (www.solutions.com/syngress).52
Robot 3 • HopperThe Left DriveThe left drive and right drive sub-assemblies are used to rotate the large pulley wheels which providethe hopping action for the legs. The beveled gears turn the angle of rotation 90 degrees andreduce the speed.Left Drive Step 0On the 1x8 TECHNIC brick, beginassembling the parts asshown. Make sure that youleave a small space(about 1/16 of aninch, or 1.5 mm)between the largepulley wheel and thebeam. This prevents the pulley frombecoming stuck on the beam.53
Robot 3 • HopperInventing…Choosing the GearsYour choice of gears determines speed and torque. You shouldexperiment with different gear ratios—for example, if you replaceHopper’s gears with an 8t gear and a 24t crown gear, Hopper willmove more slowly.Left Drive Step 1Attach the 12t gear to themotor’s drive axle, then slidethe motor into place, so thatthe 12t gear meshes with the20t gear. Attach the 1x16 beam.Make sure that the wire isoriented correctly, as shown.54
Robot 3 • HopperThe Right DriveThe right drive sub-assembly is a mirror image of the left drive sub-assembly.Right Drive Step 0Assemble the parts for the right drivesub-assembly as you did forthe left drive subassembly.Notice thatthe arrangement ofgears is identical to thatof the left drive subassembly.This ensures that themotors turn in the same direction.55
Robot 3 • HopperRight Drive Step 1With the two motor subassembliescompleted, you’reready to begin Hopper’s chassis.Add the remaining parts.Again, make sure that thewire is oriented as shown.56
Robot 3 • HopperThe ChassisHopper’s chassis is a simple frame onto which of all of the other parts are added.Chassis Step 0Add the various pins andplates onto the three1x16 TECHNIC bricks asshown.57
Robot 3 • HopperChassis Step 1Flip the chassis overand add thefollowing parts asshown. First, add the plates and the 1x6 TECHNICbricks, then add a bushing to each #4 axle beforesliding them into place.Chassis Step 2Add the blue axle connectorto each of the axles, andattach the liftarms. Theyellow liftarms areHopper’s front legs.58
Robot 3 • HopperBricks & Chips…Using Skids Instead of WheelsHopper’s front legs act as skids, which let the front end slide forwardand side-to-side. When you use skids on a robot, avoid using rubberparts, such as tires, because they won’t slide easily.The RCXBefore the RCX can be mounted onto Hopper’s chassis, you need to add liftarms, which provide theattachment points.RCX Step 0Insert the three-quarterlengthpins into the fourholes on the RCX brick.59
Robot 3 • HopperRCX Step 1Add the four 1x7 blackliftarms and pins as shown.RCX Step 2Attach the blue 1x5liftarms onto thepins you added inRCX Step 1. Makesure you mount theseparts correctly. If they areout of position by even asingle hole, Hopper’s balance willbe altered, causing it to wobblearound or even keel overbackwards when it moves.Inventing…Choosing Part ColorsYour choice of part colors can influence the overall look of your robot.If you prefer, you can use the blue 1x7 liftarms that came with the<strong>Ultimate</strong> <strong>Builders</strong> Set. I chose the black ones simply for looks.60
Robot 3 • HopperPutting It All TogetherNow that you’ve built the left and right drive, chassis, and RCX sub-assemblies, you’re ready to startHopper’s final assembly.Final Step 0Final Step 1To begin, locate the leftdrive sub-assembly andorient it as shown here.Locate the right drive sub-assemblyand attach it to the left drive subassemblyas shown.Final Step 2Attach the chassissub-assembly tothe underside ofthe drive subassembliesandfasten it in placewith the blue 1x5 liftarms.61
Robot 3 • HopperFinal Step 3Final Step 4Add the yellowbent liftarms onto thepins on the sides of therobot. These will attach tothe RCX brick later on.Attach the black 3Lliftarm as shown, and slide the#4 axle into it.BuildHopper’s head byadding the slopedbricks before sliding thetwo green bricks with axleholes onto the axle underneath.To make the right eye,slide a wheel on to one end of a#6 axle and slide it through the first hole in the beamas shown.Using the #<strong>10</strong> axles and bushings, build the legs onboth sides of the robot.62
Robot 3 • HopperFinal Step 5Complete the head byadding the left eye, 3Lliftarm, and light sensor asshown. Slide the small pulleys and the blue liftarmswith quarter ovals onto the legs as shown.Inventing…Starting Off on the Right FootYour choice of parts for the feet can changehow Hopper moves. Try different parts in placeof the ones shown to see what happens.Final Step 6Using the long bluepins with friction,fasten the RCX subassemblyto the yellowliftarms as shown.63
Robot 3 • HopperBricks & Chips…Changing the BatteriesTo change the batteries, disconnect the wirefrom Input Port 2 and remove the blue pins.Final Step 7Finally, connect the light sensor toInput Port 2, and connect the leftand right motors to Output PortsA and C.You’re done! Once you downloadthe program, you’reready get hopping.Light Sensorto Input Port 2Left Motor toOutput Port ARight Motor toOutput Port CDeveloping & Deploying…Programming HopperYou can download Hopper’s programfrom the Syngress Solutions Web site(www.syngress.com/solutions).64
Robot 4HunterBot65
Robot 4 • HunterBotHunterBot is a treaded robot designed to locate and grab objects. It’s based onone of my favorite robots—a wheeled robot with a claw, two RCX bricks, threetouch sensors, two light sensors, and a rotation sensor. All of this hardwareworks towards the single objective of gathering pop cans.Here’s how it works. I wrapped a piece of blank, white paper around a fewempty cola cans. I then placed the white cans in strategic spots on the floor.Using only the patterns on the floor to navigate, the robot would locate thecans, grab them, and check to see if its claws held something white. If theobject wasn’t a white can, the robot opened its claws and continued the search.Several schools have set up similar challenges in which the robots have tolocate the cans and move them to a specified location. This is an excellent wayto test your skills at building and programming with MINDSTORMS.I designed HunterBot with this challenge in mind. The HunterBot’s mainfeatures are the grabber arms, which can close firmly on objects, and the powerfultractor treads, which help the robot drag cans to another location. Thebumpers play an important role, too. As HunterBot wanders around the floor, itwill eventually bump into something—like a pop can, for example. When thishappens, it turns and grabs the object.A robot, of course, is only as good as its programming. Using the HunterBotprogram, which is an NQC program that you can download from the SyngressSolutions Web site (www.syngress.com/solutions), this robot can successfully graband move cans or other small objects, should it happen to bump into them.Given an efficient search pattern, HunterBot should be able to bump into severalcans. Consider this a starting point for a more sophisticated search strategy.Your challenge is to observe HunterBot in action, think up ways to improveits ability to find cans, and modify the HunterBot program accordingly. Tryaltering the search pattern so that it’s more efficient. If you fill the RIS Test Padwith objects, how long will it take HunterBot to remove them?66
Robot 4 • HunterBotThe Right DriveThe right drive sub-assembly includes the motor, gearbox, and right tractor tread. The gearboxreduces the rotation speed to a one–fifth of the motor’s speed.Right Drive Step 0On the two 1x16 TECHNIC beams,assemble the axles and other parts,as shown. This is the frame onwhich you build the rest of the rightdrive sub-assembly.67
Robot 4 • HunterBotRight Drive Step 1Attach the 12t beveled gear to themotor. Then, attach the motoronto the motor mounts andsecure it with the 1x6 plate. Next,attach the other axles, bushings,pins, and connectors as shown.68
Robot 4 • HunterBotRight Drive Step 2Slide a #6 axle through the firsthole of the 1x8 TECHNIC brick andsecure the axle with a half-bushing.Then, slide the gears and bushingsonto the axle as shown. The 8tgear should mesh with the 24tgear added in Right Drive Step 0, whilethe 20t beveled gear should mesh with the12t beveled gear on the motor.Right Drive Step 3Continue building on the drive’sframe by adding TECHNIC beams.69
Robot 4 • HunterBotRight Drive Step 4The blue liftarms serve two purposes: They holdthe beams together securely, and they will act asspacers between the left and right drive subassembliesin the final assembly. The black 3Lliftarm will support HunterBot’s head.Right Drive Step 5Add the sprocket wheels and thetractor tread as shown. Securesprocket wheels with bushings.When you connect the wire tothe motor, make sure that thewire points toward the back ofthe motor.Now you can start the leftdrive sub-assembly.70
Robot 4 • HunterBotInventing...Wheels or Treads?HunterBot is designed to run on treads, but you could adaptit to run on wheels with very little modification.The Left DriveThe left drive sub-assembly mirrors the right drive sub-assembly, but notice that the gears areexactly the same in both modules. This ensures that the wheels drive in the same direction whenthe motors run forward.71
Robot 4 • HunterBotLeft Drive Step 0Begin assembling the leftdrive sub-assembly asyou did the right one.72
Robot 4 • HunterBotLeft Drive Step 173
Robot 4 • HunterBotLeft Drive Step 2Just as with the right drivesub-assembly, the blueliftarms secure the module’sbeams, and the black 3L liftarm willsupport HunterBot’s head.74
Robot 4 • HunterBotLeft Drive Step 3Complete the subassemblyby adding thesprocket wheels, bushings,tractor tread, and connecting thewire to the motor. Make sure that the wirepoints towards the back of the motor.Bricks & Chips...Do You Have Clearance for That?The <strong>LEGO</strong> treads look pretty cool, but they put your robot’s bodyquite close to the ground. Consequently, HunterBot and othertreaded robots may not have enough ground clearance to moveeasily on deep carpet.75
Robot 4 • HunterBotThe Grabber ArmsNow you begin the interesting part of HunterBot: the grabber arms. The business end of the grabber“claw” is a simple assembly of four angled liftarms on a series of axles. When the 24t gears rotate,the grabber arms open or close.Inventing...Arming Your RobotFor HunterBot’s arms, I chose the black, angled liftarms. Youmay prefer the brightly-colored ones that came with the<strong>Ultimate</strong> <strong>Builders</strong> Set.76
Robot 4 • HunterBotGrabber Arms Step 0This may look like a dauntingstep, but it’s really not difficult.Simply slide each part onto theaxles, as shown, starting fromthe bottom.77
Robot 4 • HunterBotGrabber Arms Step 1Starting at the bottom, add twoof the liftarms to the gray axlepin. To that, add the blueaxle connector. Then finishwith the upper blackliftarms and the second axlepin.Grabber Arms Step 2Slide the axles through the black axlejoiners, then add the halfbushings.The axles provide theconnection points for thegrabber’s motor sub-assembly,which you will build next.78
Robot 4 • HunterBotThe Grabber MotorThe grabber motor sub-assembly powers the grabber arms using a worm gear.Grabber Motor Step 0Assemble the parts on themotor, as shown.79
Robot 4 • HunterBotGrabber Motor Step 1Slide the white clutchgear and the bushingonto the #8 axle, thenattach it to the motorthrough the black 1x4beam. A half-bushingholds the axle in placeon the other side ofthe beam.Bricks & Chips...Using the Clutch GearA very important feature of this sub-assembly is the clutchgear. Without the clutch gear, the assembly simply wouldn’t work—or worse, the motor could jam and become damaged. Make sure thatyou use the clutch gear and not a regular 24t gear.Grabber Motor Step 2Slide the bushings and worm gear onto theaxle. Ad the remaining bricks, plates, andlong pins with stop-bushings to theunderside of the motor.80
Robot 4 • HunterBotGrabber Motor Step 3Attach the 1x<strong>10</strong> TECHNIC beams to thesides of the module to hold ittogether. Now set this sub-assemblyaside for a moment while you buildHunterBot’s left and right bumpers.The BumpersThese are probably the simplest bumpers you will ever build. While they aren’t pretty, they workreliably, and they’re very easy to put together. You will need to build two of these.81
Robot 4 • HunterBotBumper Step 0AttachtheTECHNIC bricksand touch sensor tothe two 2x4 plates withholes, as shown.Bumper Step 1Slide the #4 axle throughuntil it is almost touchingthe touch sensor’s yellowbutton, and secure it with a bushing on the interior of the frame. Slide the grayaxle joiner onto the front end of the axle, leaving enough space for the axle toslide in and out freely. If the axle can’t push the button, your bumper won’t work!Bumper Step 2Finally,completethe bumper withthe #8 axle andbushings, and connect thewire to the sensor. Rememberto build two of thesebumper sub-assemblies!82
Robot 4 • HunterBotThe RCXThe RCX brick needs a beam on either side so that it can be attached to the body of the robot.RCX Step 0Insert the three-quarterlengthpins into theholes on the RCX.RCX Step 1Snap the 1x8 TECHNIC beamsonto the pins you justattached.83
Robot 4 • HunterBotPutting It All TogetherThis is the moment you’ve been working towards—the final assembly! This is the easiest yet themost satisfying part of building a robot.First you’ll create the HunterBot’s head, which includes the grabber motor, grabber arms, andbumper sub-assemblies you built earlier, plus a light sensor. The various angled liftarms will connectthe head to the body later in the final assembly.Final Step 0Locate the grabberarms sub-assemblythat you builtearlier.84
Robot 4 • HunterBotFinal Step 1This step may be a little tricky. Locate thegrabber motor sub-assembly that youbuilt earlier, and slip the motor’s axle withthe worm gear between the two 24tgears. The axle should fit securely insidethe blue axle connector on the front ofthe grabbers. The worm screw shouldmesh with the gray gears.As you do this, makesure that the left and rightarms are open about thesame distance.Final Step 2Using yellow L-shapedliftarms, secure the grabbermotor sub-assembly to the grabber arms, asshown. The yellow double-bent liftarm alsoadds stability to the assembly.85
Robot 4 • HunterBotFinal Step 3Now add the blue bent liftarms and pins.Final Step 4Attach two more of the doublebentyellow liftarms onto theblue liftarms, as shown.Attach the eyes to theprotruding axles of the grabbersub-assembly.86
Robot 4 • HunterBotFinal Step 5Finally, locate the two bumpersthat you built earlier and snapthem onto either side of thehead. On the left bumper,attach the light sensor.Developing & Deploying…Using the Light SensorHunterBot uses the light sensor to prevent the arms fromopening too far: The light sensor detects when the blackgrabber arm is near.87
Final Step 6Robot 4 • HunterBotPut the head you just builtaside for a moment. Locatethe right drive sub-assembly.Final Step 7Connect the two drivesub-assemblies togetheras shown.Inventing...Space AvailableConnector blocks, like the transparent blue ones that holdHunterBot’s drive modules together, are often used to attachother accessories. Have a look at the RIS 2.0 Constructopediafor some ideas for things to attach to HunterBot.88
Robot 4 • HunterBotFinal Step 8Position the headyou finished inFinal Step 5 onto theblack L-shapedliftarms, as shown.Secure it with fourblue, long pins withstop-bushings.Final Step 9Position the RCX subassemblyas shown, andinsert the four bluepins with stopbushingsto hold itin place.89
Robot 4 • HunterBotBricks & Chips...Using Long Pins with Stop BushingsLong pins with stop bushings are excellent for attaching sub-assembliesin a way that makes it easy for you to remove them later. If youwant to remove a sub-assembly—like the head, for example—simplypull out the pins.Final Step <strong>10</strong>Left TouchSensor toInput Port 1Light Sensor toInput Port 2Right Touch Sensorto Input Port 3Grabber Motorto Output Port BLeft Motor toOutput Port ARight Motor toOutput Port CConnect the wires to the RCX brick as shown.Connect the left and right touch sensorsto Input Ports 1 and 3, and the light sensor toInput Port 2.Connect the left motor to Output Port Aand the right motor to Output Port C.Connect the grabber motor to Output Port B.Make sure that the motor wires areoriented on the RCX as shown, with the wirespointing forward.You’re done! HunterBot can’t wait to getout there and start grabbing things!Developing & Deploying...Programming HunterBotYou can download the NQC programfor HunterBot from the SyngressSolutions Web site (www.syngress.com/solutions).90
Robot 5Nessie91
Robot 5 • NessieNessie was built as a simpler yet versatile alternative to the RoverBot that canbe found in the RIS 2.0 Constructopedia. Nessie is a small robot base that canbe configured for a variety of functions. It makes a good beginner’s modelbecause it uses few parts and can be built within half an hour. In this implementation,Nessie is equipped with a dual light sensor for line following, forwhich it is eminently suitable. The two light sensors enable Nessie to negotiatea sharp 90-degree bend in both a clockwise and counter-clockwise direction.The two light sensors also create a variety of programming options.Nessie is powered by two of the <strong>LEGO</strong> geared motors in a differential drivearrangement. The motors are placed in front, creating a sort of front-wheeldrive, for better traction and ease of turning. A gear reduction of 3:2 (or 1.5:1) isused to give Nessie a balance between speed and reliability when used as a linefollower. Nessie also features a trailing caster wheel, which gives it greatmaneuverability, which is an important factor for line following.As we said, Nessie’s base can be easily customized—we encourage you to trythe following changes, observing the effect on the robot’s performance:■■■■■Motor placement Move the motors back relative to the drivingwheels.Gear ratio Try different combinations of gears.Wheels Try different types of wheels.Trailing wheel Replace the trailing caster with other wheel arrangements,such as a sliding pulley wheel. We will show you how to buildthis type of wheel in Robot 6, Nellie. Nellie is a close cousin of Nessie.Sensors Attach bumpers that activate touch sensors, to turn the robotinto an obstacle avoidance vehicle. We will also show you how toincorporate a rotation sensor when building Nellie.92
Robot 5 • NessieThe Caster WheelThis is the caster wheel sub-assembly that gives Nessie its great maneuverability, which is so importantfor line following.Bricks & Chips…Building Caster WheelsThere are many ways to build a caster wheel. However, do not use acoupled caster wheel, as Mario Ferrari pointed out in his book BuildingRobots with <strong>LEGO</strong> MINDSTORMS. For this robot, it’s best to use only asingle, freely rotating wheel.Caster Wheel Step 0Caster Wheel Step 1Start by building thecaster wheel subassembly.93
Robot 5 • NessieCaster Wheel Step 2Caster Wheel Step 394
Robot 5 • NessieCaster Wheel Step 4Make sure the wheel rotatesfreely on its axle. The casterwheel must also turn a full360 degrees freely on itsvertical pivot.Caster Wheel Step 5Caster Wheel Step 6The 1x4 green TECHNIC bricks will beused to attach the caster wheel subassemblyto the main robot base.95
Robot 5 • NessieThe BaseThis is the main robot base, which can be customized for various functions.Base Step 0Start by building the side frames of the robotBase Step 1Double upeach of the sideframes with the longbeams. Attach thelong plates to thebottom of the beams, then passthe axles through the beams.96
Robot 5 • NessieBase Step 2Make sure the axles withthe gears turn freely.Base Step 3Theplatesin frontform a well, whichwill accommodatethe roundedbottom of themotors.Base Step 4The motor has been raised one platehigh to allow the 16t gear to meshwith the 24t gear.Note that the gear meshing is not perfect,but it is close enough for our purposes.97
Robot 5 • NessieBase Step 5Bricks & Chips…Using Wheel VariationsYou may want to try other types of wheels,in particular the ones with the big wide tires.Base Step 6Use the green beams of the casterwheel sub-assembly to mountthe sub-assembly ontothe main robot base.Note that the mountingof the caster wheel isnot rigid, but allows it adegree of springiness,thus acting like ashock absorber.98
Robot 5 • NessieBase Step 7In this step, you willconnect the electriccables to themotors. Thewires to the leftsidemotorshould pointbackward. The wiresto the right-side motorshould point forward.Base Step 899
Robot 5 • NessieBase Step 9Brace theback of therobot basein order tokeep the casterwheel sub-assemblyfirmly in place.Base Step <strong>10</strong>The wires for the rightsidemotor connect toPort C on the RCX.Connect the leftsidemotor wires toPort A on the RCX.To attach the RCX, first separatethe two sections. Put the topsection aside. Place the bottomsection on top of the greenplates, and press down firmly.Replace the top section of theRCX (with the batteries),making sure the IR port facesforward.Make sure the electriccables are oriented asshown.<strong>10</strong>0
Robot 5 • NessieBase Step 11These pins areused for bracing.Base Step 12The yellow liftarm helps tokeep the RCX in place. Thiscompletes the constructionof the main robot base. Youmay want to add somedecorative parts such as eyes or wings.<strong>10</strong>1
Robot 5 • NessieBricks & Chips…Testing Your RobotTest the movements of Nessie using RCX built-in program #1. Therobot should go forward at quite a fast speed. Next, test Nessie outusing built-in program #4. Nessie should move in random directions,and should be able to turn freely on its caster wheel.Adding the Light SensorsWith two light sensors, line following is a cinch. Nessie will negotiate a sharp 90-degree bend inboth a clockwise and counter-clockwise direction. Furthermore, Nessie can be programmed to detecta T-junction on the line, where she can be made to stop, change direction, or carry out a specifiedtask such as dumping a cargo into a receptacle.Light Sensors Step 0Start with the base subassembly.Insert an axle pin intothe front most hole ofthe beam extension.Place a 1x3 liftarm ontoit. Do the same for theother side.<strong>10</strong>2
Robot 5 • NessieLight Sensors Step 1Pass a #12 axle throughthe beams and the liftarms.Secure it with two bushings on the outside.Light Sensors Step 2Attach a pair of green1x2 bricks with axle holeto the axle. Place a blue2x2 plate on the bottomsurface of the bricks. Repeatthis on the other side.<strong>10</strong>3
Robot 5 • NessieLight Sensors Step 3Attach a light sensor tothe bottom of each of theblue 2x2 plates. Attach thewires from the lightsensors to Output Ports 1and 3. The direction ofthe wires at the InputPorts is immaterial.This method of attachingthe light sensors makes for avery strong mount.Developing & Deploying…Ready for More?In Robot 6, Nellie, we will explore different building techniques toenhance line following. In Nellie, you will replace the caster wheel subassemblywith a sliding wheel sub-assembly and add a rotation sensor.Not sure what this means? Have a friend build Nellie, and compare howNessie and Nellie measure up in a line-following competition!<strong>10</strong>4
Robot 6Nellie<strong>10</strong>5
Robot 6 • NellieAt first glance, Nellie closely resembles Robot 5, Nessie. However, as you buildthis robot you will see that Nellie employs a significant change in how it movesby replacing the caster wheel with a sliding rear wheel. Nessie used a freelymovable caster to give it great maneuverability for turning, which is advantageousfor line following. However, as you may have already realized, followinga straight line offers results that could be considered poor.Nellie differs from Nessie by using a sliding rear wheel and an additionalrotation sensor. The wheel rotates freely when the robot is going straight. Thesliding wheel receives it name from the turning action of the robot. WhenNellie makes a turn, the wheel doesn’t rotate but instead slides (or skids) overthe surface of the floor. Thus, for the sliding wheel to work there should bevery little friction between the wheel and the floor. To achieve this minimalfriction we will use a wheel without a tire. The addition of the rotation sensor,and a rear-sliding wheel will allow you to program your robot to travel a givendistance. Nellie uses a rotation sensor paired with a light sensor, and can beprogrammed to follow a line until it reaches a designated point where it canthen carry out a specified task.<strong>10</strong>6
Robot 6 • NellieThe SliderThe sliding wheel and rotation sensor are incorporated in this sub-assembly, which is then attachedto the main robot base.Slider Step 0Slider Step 1Insert a long pin with frictioninto a 1x12 TECHNIC beam.Attacha 2x2 plate with holes tothe bottom of the rotationsensor. Be sure to position the rotationsensor with the wires pointing upward.Push the plate onto the free end of thelong pin with friction. Align the axle hole ofthe rotation sensor with the holes in theTECHNIC beam.<strong>10</strong>7
Robot 6 • NellieSlider Step 2Pass a #8 axle through the axlehole of the rotation sensor. Slide a bushingonto the axle until it is flush with the side of therotation sensor.Slider Step 3Slide a medium pulley onto theaxle until it meets the bushing.The medium pulley will act asthe sliding wheel. Slideanother bushing onto theaxle, leaving a space asshown.<strong>10</strong>8
Robot 6 • NellieSlider Step 4Add a 1x12 TECHNIC beam to form theother side of the slider sub-assembly.Attach a 2x8 plate with holes tothe bottom of the beams asa cross brace.Developing & Deploying…Increasing the Reliability of the Rotation SensorFor the rotation sensor to track accurately, the wheel must stay in contactwith the floor at all times. This requires a wheel with a tire. However, addinga tire will degrade the turning ability of the robot.There is a trade off between maneuverability and accuracy of the rotationsensor tracking.Normally, the rotation sensor will track properly with a plain wedge beltwheel (or medium pulley) as the sliding wheel. To increase the reliability ofrotation sensor tracking, a white band can be fixed around the groove of thewedge belt wheel. If slipping of the wheel is a problem, then an O-ring tireshould be fitted to the wedge belt wheel.Try using Nellie with and without the white band as a tire on the pulley.See which assembly suits your needs best.<strong>10</strong>9
Robot 6 • NellieThe BaseThis is the main robot base of Nellie. This is similar to the base that was built in Robot 5, Nessie. Besure to follow these steps closely as there are minor variations between the two.Base Step 0Insert a pair of pins with frictioninto each of two 1x16 TECHNICbeams. This will form the sideframes of the robot base.1<strong>10</strong>
Robot 6 • NellieBase Step 1Snap another pair of 1x16 TECHNICbeams to the frame. Doubling thebeams like this allows forbetter purchase for thedriving axles.The beam extension at thefront will be used for mounting thelight sensors. The extension at therear is to provide clearance for theslider sub-assembly.Base Step 2Attach a 2x8 plate withholes to the bottom of thebeams.Pass the #8 axles througheach side of the frame. This willprovide the cross bracing for theframe.111
Robot 6 • NellieBase Step 3Slide one bushing onto the end of each axlelocated in the interior of the base frame.Then, moving to the ends of the axles onthe outside of the frame, slide a 24t gear ontoeach of the axles and secure the gears withthe remaining bushings.Base Step 4Attach two 2x8 plates with holes fourstuds from the end of the rear TECHNIC beamsas shown.Next, attach the two 1x8 plates and two2x2 plates to form the support frame for themotors.112
Robot 6 • NellieBase Step 5Attach a motor to eachside of the chassis andattach a 16t gear to the motorshaft. The 16t gear will mesh withthe 24t gear on each side.The meshing of the gears is not exact <strong>LEGO</strong>geometry; however, for practical purposes it isclose enough.Base Step 6Fit a pairof yellow wheel hubs with thelarge notched tires. Slide the wheels onto the axleson each side of the base with the concave sides ofthe tires facing outwards.Then, attach a pair of 1x4 TECHNIC beams oneach side at the rear of the chassis. This will formthe rear support for the RCX.113
Robot 6 • NellieBase Step 7Attach the slider sub-assembly tothe base. Check that the slidingwheel is able to rotate freely.Base Step 8Add another 1x4 TECHNIC beamto each of the stacks of 1x4beams attached in Base Step 6.Attach a short connector wire toeach of the motors.The wire for the leftmotor should pointtowards the backand will connect toInput Port A on the RCX.The wire for the rightmotor should pointforwards and willconnect to InputPort C on the RCX.114
Robot 6 • NellieBase Step 9Place four 2x8 green plates toform the support for theRCX. Insert a pair of darkgray three-quarter length pins toeach side of the vertically stacked1x4 beams.Base Step <strong>10</strong>Attach a 1x5liftarm on each sideof the stack of 1x4 beams.These liftarms providevertical bracing for the base.115
Robot 6 • NellieBase Step 11Attach the RCX to the top supporting platesof the robot base. To do so, separate thetwo sections of the RCX. Position thebottom section over the supporting platesand press down firmly. Replace the topsection of the RCX (with the batteries)carefully over the bottom section.Connect the free ends of the electriccables from the left motor to Input Port A,and attach the wire for the right motor toInput Port C.The wire from the rotation sensor isconnected to Input Port 2 on the RCX. Thedirection of this wire is immaterial.116
Robot 6 • NellieBricks & Chips…Mounting the RCXIt is not good practice to simply press the whole body of theRCX onto the chassis mount as it may damage the insides.Base Step 12Insert an axle pin into theside frame and a dark graythree-quarter length pininto the RCX on each side.117
Robot 6 • NellieBase Step 13Use the pins to attach a double bent liftarmto brace the sides of the robot.Check out the robot base using the built-in RCXProgram #1. Nellie should move forward in a reasonablystraight line. You can also use the built-in RCX Program #4 to seehow the robot turns with the sliding wheel.The robot can be used as it is, or you can attach a light sensoror even two light sensors. We show how to attach dual lightsensors in the next sub-assembly. With two light sensors and therotation sensor, this robot can be used in competitive challenges.Bricks & Chips…Benefits of BracingIt is always good practice to brace your robot as much aspossible, so that if you pick up your robot by holding theRCX, the rest of the robot will not come off.118
Robot 6 • NellieThe Light SensorsThe dual light sensors are identical to those found on Nessie.Light Sensors Step 0Start with the main robot base withrear sliding wheel and rotationsensor.Insert an axle pin into the frontmost hole of the beam extension.Place a 1x3 liftarm onto it. Do thesame for the other side.119
Robot 6 • NellieLight Sensors Step 1Pass a #12 axle through the beams andthe liftarms. Secure it with two bushingson the outside.Light Sensors Step 2Fix a pair of green1x2bricks with axle holes to thefree end of the axle. Place a blue2x2 plate on the bottom surface ofthe 1x2 bricks to hold themtogether. Repeat for the other side.120
Robot 6 • NellieLight Sensors Step 3Attach a light sensorto the bottom ofeach of the blue 2x2plates. For some reason, the lightsensors are more stable when theyare attached with the stud surface ofthe sensor adjoining the bottom surfaceof another brick.Attach the wires from the light sensors to InputPorts 1 and 3 respectively. The direction of the wiresat the input ports is immaterial.This method of attaching the light sensors givesa very strong mount121
Robot 7The DominoBot123
Robot 7 • The DominoBotThe process of laying dominoes by hand takes a great deal of time, accuracy,and patience. I was interested in seeing what it would take for a robot to dothe same. The idea behind DominoBot was to create a robot that could beloaded with dominoes and program it to follow a black line on a white backgroundwhile laying dominos at a preset distance along the path. This provedto be more of a challenge than I imagined!In order to build this robot, you will require a set of dominos. The dominoesused for this design are Double Nine Color Dot Dominoes. These dominoesare approximately four <strong>LEGO</strong> studs in width by seven studs in height. It ispossible that other dominoes of similar size will work as well.To perform this task, some important details had to be worked out. Thereare three major components to the DominoBot that enable it to accomplish itsmany simultaneous actions. First, there is the drive mechanism, which consistsof left and right track drive units that serve the purpose of moving theDominoBot in any direction. The drive also contains the second major component,the distance sensor. The distance sensor uses a differential connectedbetween the two drive units. This component detects the distance theDominoBot has traveled by way of registering clicks to a touch sensor (set upas a PULSE touch sensor in NQC). The differential allows for clicks to be registeredonly when both drive tracks are moving forward; it does not registerclicks if the DominoBot is turning. This was an important feature since I didnot want the dominos being placed too closely or too far apart.The third major components are the loader and loader arm. These parts areresponsible for the main domino-placement action. The loader takes a stackof dominoes and places each one. It does this by use of a touch sensor to124
Robot 7 • The DominoBotdetermine when a domino has been ejected out of the loader and also whenthe loader arm has reset itself. The loader arm proved to be the greatest challengein designing this robot. Since the dominoes did not fit snugly in any partof the loader mechanism, I had to find a way to accurately and carefully placeeach domino as it slid out of the loader. Some patient experimenting revealedthat the <strong>LEGO</strong> flexible hoses would do the trick for the placement process. Theloader arm consists mostly of these flexible hoses arranged in such a way thatthey form a path for the domino to slide down and stand up on the ground.The ability of the hoses to flex allows for the orientation of each domino to becorrected if it does not come out of the loader smoothly.Another challenge was the limited number of available motors for thisproject. I had to find a way to make all this work with one motor (the twoothers are used to drive the robot). The design that I came up with allows forall domino-placement actions to be done with one motor and touch sensor. Theloader and loader arm both run in sync with each other from the motor, whilethe touch sensor is used to inform the RCX when a domino has been releasedand when the loader mechanism has reset itself.The NQC program for the DominoBot is available for your use and modificationon the Syngress Solutions Web site (www.syngress.com/solutions).Programming DominoBot consists of a few core routines. When DominoBotfirst begins, its will move left to right in a sweeping patter while it calibrateslight sensor values. Since the <strong>LEGO</strong> light sensor reads light values based onsurrounding light, it is hard to use specific values to identify black and white.Once it has calibrated light, it begins moving forward along the black line.This action is monitored by the checklight() task. While doing this the distancesensor is incremented each time it is tripped by the cam gear. Testing revealedthat three clicks would be an adequate distance for placing each domino. Thecheckdistance() task is responsible for this.Once the checkdistance() task counts three clicks, it calls on thedodomino() task. This task stops all other tasks while it proceeds to place adomino. It makes sure that the loader arm has reset itself so that it does notclip the just-placed domino when beginning to move forward again.All the above tasks are repeated for each domino in the loader. You willhave to keep the loader full of dominos while DominoBot is navigating thecourse. You will also have to stop DominoBot once the dominos have all beenplaced.125
Robot 7 • The DominoBotThe LoaderThe loader sub-assembly delivers a domino from the stack to the loader arm by using a push mechanism.It also uses a touch sensor to alert the program that a domino has been delivered.Loader Step 0Take note of thesetwo friction pins. InFinal Step 1, thesewill be the joining pointfor the two flexible hosesused to deliver each dominoto the loader arm.126
Robot 7 • The DominoBotLoader Step 1Loader Step 2127
Robot 7 • The DominoBotLoader Step 3Loader Step 4128
Robot 7 • The DominoBotLoader Step 5129
Robot 7 • The DominoBotLoader Step 6The 1x3 plate that you insert into theinner wall helps keep the dominosomewhat straight in the loaderand prevents it from beingdispensed at an angle.Loader Step 7130
Robot 7 • The DominoBotLoader Step 8Loader Step 9131
Robot 7 • The DominoBotLoader Step <strong>10</strong>This part of the loader serves an important role.The two arms that are mounted to the 40t gear createthe upper and lower limit used to trigger the loader sensor.Loader Step 11This part of the loader is responsible for pushingeach domino out. Insert the #2 axle into thebottom of the blue quarter-oval TECHNIC liftarm.The liftarm is connected to the #3 axle that inturn is connected to the 40t gear. Make sure thatthe liftarm rotates freely.132
Robot 7 • The DominoBotBricks & Chips..Loader Sensors & LimitsBy using this approach, a single sensor is all that is needed to detectwhen a domino has been dispensed, as well as when the loader hasreset itself and is ready to dispense the next domino.Loader Step 12Loader Step 13Similar toLoader Step12, createanother layer. Notethe additional 1x2 grayplates attached to the 1x8TECHNIC beam.133
Robot 7 • The DominoBotLoader Step 14134
Loader Step 15Robot 7 • The DominoBot135
Robot 7 • The DominoBotLoader Step 16136
Robot 7 • The DominoBotLoader Step 17137
Robot 7 • The DominoBotLoader Step 18Liftarm138
Robot 7 • The DominoBotThe Right DriveThe right drive sub-assembly provides motion to the DominoBot. Tracks provide the ability to turnon a tight radius.Right Drive Step 0Right Drive Step 1139
Robot 7 • The DominoBotRight Drive Step 2Right Drive Step 3140
Robot 7 • The DominoBotRight Drive Step 4141
Robot 7 • The DominoBotRight Drive Step 5142
Robot 7 • The DominoBotRight Drive Step 6Right Drive Step 7143
Robot 7 • The DominoBotRight Drive Step 8144
Robot 7 • The DominoBotRight Drive Step 9145
Robot 7 • The DominoBotRight Drive Step <strong>10</strong>146
Robot 7 • The DominoBotRight Drive Step 11Right Drive Step 12Adding the 1x7liftarm ensures thatthe motor has a solidmount to the drive subassembly.This reduces thepossibility of gear slippage.147
Robot 7 • The DominoBotRight Drive Step 13Designing & Planning…Planning Mobile RobotsWhen planning a robot that requires mobility, it is important to determine thetype of movement needed. Will the robot need to turn quickly? Will it need tohave traction? Will it need to move fast? The mobility needs of the DominoBotrequired that it turn on a center rotation point like a tank. For this type of turn,tracks are used. Tracks are also useful because they allow a single hub to drivethe whole unit. This is an important feature for DominoBot since the hub at theother end is used to drive the distance sensor.148
Robot 7 • The DominoBotThe Distance SensorThe distance sensor allows the DominoBot to track how far forward it has moved. The program willneed this information in order to place the dominoes an equal distance from each other.The differential enables the mechanism to register a click only when both the left and rightdrive units are moving forward. If either drive is in reverse (when steering or turning), the differentialwill keep the cam gear idle.Distance Sensor Step 0149
Distance Sensor Step 1The touch sensor plays a role in theDominoBot NQC program. It is set upas a pulse sensor and registers a pulseeach time the cam touches it. Thesepulses are counted, and a domino isplaced for every third pulse.Robot 7 • The DominoBotDistance Sensor Step 2150
Robot 7 • The DominoBotDistance Sensor Step 3The Left DriveThe left drive sub-assembly connects to the right drive sub-assembly to form the driving base of theDominoBot. Or course, its purpose is to give it mobility.151
Robot 7 • The DominoBotLeft Drive Step 0Left Drive Step 1Left Drive Step 2152
Robot 7 • The DominoBotLeft Drive Step 3Left Drive Step 4153
Robot 7 • The DominoBotLeft Drive Step 5Left Drive Step 6154
Robot 7 • The DominoBotLeft Drive Step 7Insert pins here.Designing & Planning…Building to Take Things ApartIn the DominoBot, the long blue pegs with friction are usedfrequently in key areas. They allow for the builder to disassemblethe DominoBot into its key sub-assemblies quickly.This is done for the purpose of modularity.Left Drive Step 8155
Robot 7 • The DominoBotLeft Drive Step 9Left Drive Step <strong>10</strong>156
Robot 7 • The DominoBotLeft Drive Step 11Left Drive Step 12157
Robot 7 • The DominoBotLeft Drive Step 13Place the blue light sensor in the middleof the rear axle. It should be able torotate around the axle. Later, whentesting your DominoBot, you can rotateit to help calibrate the sensor.158
Robot 7 • The DominoBotLeft Drive Step 14159
Robot 7 • The DominoBotLeft Drive Step 15160
Robot 7 • The DominoBotLeft Drive Step 16161
Robot 7 • The DominoBotThe BaseThe base sub-assembly consists of the left drive sub-assembly, the right Drive sub-assembly, and thedistance sensor sub-assembly. You will connect them together in the following series of steps.Base Step 0Locate the right drive subassemblyand the distancesensor sub-assembly builtpreviously, and connect themas shown. The axles should allline up. Connect the wire tothe top of the touch sensor.162
Robot 7 • The DominoBotBase Step 1Connect the left drive sub-assembly tothe structure. The order of connectingthe parts is a bit complex. Start byhooking up the differential, and theninserting the 12t bevel gear.163
Robot 7 • The DominoBotBase Step 2The Loader SensorThe loader sensor sub-assembly completes the essential function of identifying to the RCX when theloader mechanism has dispensed a domino, and when the loader has reset and is ready for the nextdomino.164
Robot 7 • The DominoBotLoader Sensor Step 0 Loader Sensor Step 1Loader Sensor Step 2The white circular platehas an importantfunction. In Final Step 6,you will insert a yellowflex tube from the loaderto this plate. This willprovide spring to thesensor unit to allow it toconsistently maintainaccurate readings whiledominoes are beingdispensed.The Loader Arm165
Robot 7 • The DominoBotDesigning & Planning…Domino Play for <strong>LEGO</strong>Because the DomnioBot uses standard dominoes rather than <strong>LEGO</strong> bricks,the sizes are not to <strong>LEGO</strong> specifications. In order to mimic the actions of ahuman hand placing a domino, an unconventional approach must be taken.The flex hoses allow for some “play” (or movement) when a domino slidesinto the loader arm. This play ensures that while each domino might notfollow the same path down to the base of the arm, the flex tubes canstraighten the placement.Loader Arm Step 0 Loader Arm Step 1Mount the blueperpendicularaxle joiners sothat one end isinserted into theyellow liftarm,while the otherend floats freely.166
Robot 7 • The DominoBotLoader Arm Step 2Loader Arm Step 3Loader Arm Step 4167
Robot 7 • The DominoBotLoader Arm Step 5 Loader Arm Step 6Loader Arm Step 7When inserting thegreen flex hoses,make sure that theyrest on the black axlejoiners, as shown.This is important forthe guidance of thedomino to workcorrectly.168
Robot 7 • The DominoBotLoader Arm Step 8Insert the parts as shown, leavingthe yellow elastic band for last. Theelastic goes between the green andpurple flex hoses and wraps aroundthe black friction pegs (below) thatare inserted in the yellow doublebentliftarm. Its purpose is to holdthe purple hoses against the frontof the loader mechanism. This isimportant, so study the imagecarefully.169
Robot 7 • The DominoBotLoader Arm Step 9Loader Arm Step <strong>10</strong>170
Loader Arm Step 11Robot 7 • The DominoBotPutting It All TogetherFinally, put the entire DominoBot together. Here you will take all the components that you havebuilt and put them together to complete the DominoBot!171
Robot 7 • The DominoBotFinal Step 0Locate the loader andbase sub-assembliesbuilt earlier. Connectthe loader sub-assemblyto the base subassemblyusing four,long, blue frictionpegs. Take note ofthe location wherethe pegs areinserted. It is thesame on bothsides.Final Step 1Remember when you wereasked to take note of the frictionpins when creating theloader and the base subassemblies?This is whereyou insert the two purpleflex hoses. These hoses willbe the path that eachdomino follows when beingdispensed.172
Robot 7 • The DominoBotFinal Step 2These parts will makeup the RCX holder.173
Robot 7 • The DominoBotFinal Step 3Insert the RCX. Using thediagram, match the numbersand letters. For example, RCXsensor Port 2 should go to theloader sensor Port 2 (at thetop left). The light sensor has ashort cable. In order for it toconnect to sensor Port 1, useone of the provided mediumlength cables to extend itslength. Connect RCX motorPort B to the loader main drivemotor (below the RCX).174
Robot 7 • The DominoBotFinal Step 4Insert the loader sensor subassemblyby sliding it ontothe double-length blackTECHNIC pin withfriction.Final Step 5Insert the loader arm subassemblyby connectingthe yellow arms to theTECHNIC axle pinson each side of theloader.175
Robot 7 • The DominoBotFinal Step 6For Final Step 6 and Final Step 7, takethe two yellow TECHNIC flex hoses andinsert them into the grey half-lengthpegs on the top of the loader (upperright). For the first hose (the side visibleas shown here), insert the other end ofthe hose into the TECHNIC perpendiculardouble-axle joiner.176
Robot 7 • The DominoBotFinal Step 7177
Robot 7 • The DominoBotFinal Step 8You will notice that there aresome beam extensions and pegswith friction on either side ofDominoBot. These pieces are themounting points for the flexiblehoses in this step. Hook up theTECHNIC flex hoses as shownhere. Do the same on theopposite side, and you’re done!178
Robot 7 • The DominoBot179
Robot 8The Drawbridge181
Robot 8 • The DrawbridgeWhen you think of a drawbridge, you might see an image of a castle’s drawbridgespanning a moat, ready to be drawn up at a moment’s notice when enemiesappear on the horizon. Modern Drawbridges use motors to lift and lowerthe bridge, instead of the chains, ropes, counterweights, and pulleys that wereused in the past. These days, most drawbridges are used to lift a section of roador railway so that ships can travel into a bay or down a river.Frequently, modern drawbridges do not span an entire waterway. Instead,they connect two extension bridges to one another. The portion of the bridgethat is actually “drawn up” is typically located over the deepest (and thereforemost navigable) portion of the waterway. You might want to make yourDrawbridge the middle section of a series of extension bridges that span awide channel.The gear box of the drawbridge is created by using a worm gear to create alarge gear reduction so that the power from the motor is increased and thespeed is decreased. This allows the motor to slowly move the heavy bridge outof the way.The Island Footbridge is an additional bridge for pedestrians. The footbridgeis not attached to one side of the waterway but rather anchored out inthe middle like an island. The footbridge rotates around on a turntable clearingthe waterway so that objects may pass down the river.The Drawbridge is programmed to use the light sensor to detect when aship or boat is approaching. The RCX beeps a tone and lifts the movable portion,or bascule or balance. When the light sensor detects that the ship haspassed by, the RCX beeps another tone and begins to lower the bascule. Whenthe bascule is completely lowered it will press against the touch sensor, causingthe motor to stop lowering the bascule and sounding another tone so that carswill know it is safe to pass over the Drawbridge. The program for theDrawbridge can be downloaded from the Syngress Solutions Web site(www.syngress.com/solutions).182
Robot 8 • The DrawbridgeBridge BaseThe bridge base sub-assembly supports the bridge as it moves up and down. The base of the bridgemust be sturdy enough to support the weight of cars and trucks passing over it.Base Step 0Attach the plates to thebricks as shown.183
Robot 8 • The DrawbridgeBase Step 1Thissideof the basesub-assemblyprovides support forthe “geared” side ofthe Drawbridge.Base Step 2This side of thebase sub-assemblyprovides supportfor the opposite“ungeared” side ofthe Drawbridge.184
Robot 8 • The DrawbridgeBase Step 3This step provides the base forthe sensors. The 1x2 TECHNICbrick is attached to the undersideof the 2x8 plate. Use the long pinwith the stop bushing to connectthe 1x2 brick and the frame.Base Step 4The light sensor will detect a ship, car,or train as it begins to pass under thebridge, causing the bridge to lift the bascule.Attach the green 1x2 bricks with axle holes tothe top of the light sensor. The light sensor wires shouldpoint towards the center of the frame. Layer the 2x4 brick ontop of these bricks. Next, slide the #4 axle through the bricks.Attach the blue liftarms to the axle as shown.185
Robot 8 • The DrawbridgeInventing…Adding Warning LightsProgram the light sensor to detect a flashlightthat acts as a warning to lift the bridge.Base Step 5The touch sensor is placed directlyunder the bridge so that thebridge will stop lowering when thetouch sensor is pressed. Run theaxle through the bottom of thetouch sensor and blue liftarms youadded in the previous step.Inventing…Touch Sensor PlacementTry placing the touch sensor on the end of the bridge to stopthe motor when the bridge contacts the far support.186
Robot 8 • The DrawbridgeMotor AssemblyThe motor assembly includes a gearbox with two worm gears that provide low speed and hightorque, which is exactly what is needed to lift the heavy bascule.Bricks & Chips…Worm Gears: How Do They Work?Worm gears are used when large gear reductions are needed. Gearingdown provides high power at low speed. The worm gear drives thegear, but the gear cannot drive the worm. This locking feature can actlike a brake.187
Robot 8 • The DrawbridgeMotor Assembly Step 0This step begins by building a stableframe for the gearbox. Arrange thebricks and plates as shown, buildingfrom the bottom up.Motor Assembly Step 1Slide the gears and bushingsonto the axle and attach thisto the frame as shown.188
Robot 8 • The DrawbridgeMotor Assembly Step 2Make sure the bevel gear isfacing with the teethtowards the other gear.Motor Assembly Step 3This assembly is similar toMotor Assembly Step 1;however, in this step you willattach the axle and gears to theunderside of the model.189
Robot 8 • The DrawbridgeMotor Assembly Step 4Firmly attach the motor.Motor Assembly Step 5Adding the axleextender lengthensthe short axle leadingfrom the motor.190
Robot 8 • The DrawbridgeMotor Assembly Step 6The position of the pinsenables the movementfrom the gearbox to betranslated to the bridge.The BasculeThe Bascule sub-assembly is the moveable part of the bridge that will lift or draw. It is often alsocalled a balance.Inventing…Lengthening the BasculeThis same pattern can be used to extend the bascule even further(be careful, as the gears can only lift so much weight!).191
Robot 8 • The DrawbridgeBascule Step 0One of the bottombeams of the bascule islonger so it will push thetouch sensor on the waydown.This is the 1x7TECHNIC brick.Bricks & Chips…Adding Personal TouchesYou can add flags or suspension wires to the bascule as desired.192
Robot 8 • The DrawbridgeBascule Step 1193
The Island FootbridgeRobot 8 • The DrawbridgeThe island footbridge sub-assembly is anchored in the middle of the waterway like an island.The island footbridge rotates on a turntable to move out of the way to let even larger types ofboats pass.Island Footbridge Step 0Island Footbridge Step 1Place three connectors in the holesof each of the beams as shown.Connect the turntable to the beams.194
Robot 8 • The DrawbridgeIsland Footbridge Step 2Place the gear directly on the motor axle.The gear will mesh with the turntable.Island Footbridge Step 3195
Robot 8 • The DrawbridgeIsland Footbridge Step 4These parts will createthe supports for theisland footbridge onthe turntable.Island Footbridge Step 5Island Footbridge Step 6Although not visible in this step,add an electrical wire to connectthe motor to the RCX. The motorwill turn on when the light sensorsees a boat passing. This willcause the turntableto rotate and clearthe waterway.196
Robot 8 • The DrawbridgeBricks & Chips…Long Electrical WiresAdd a long motor wire to connect to the RCX. This will allowthe Island Footbridge to be placed far enough away from thedrawbridge so that they don’t collide.Island Footbridge Step 7Attach the beams that formthe sides of the footbridge.197
Island Footbridge Step 8Robot 8 • The DrawbridgeAdd the beams to formthe floor of the footbridge.198
Robot 8 • The DrawbridgeIsland Footbridge Step 9199
Robot 8 • The DrawbridgeIsland Footbridge Step <strong>10</strong>Continue addingbeams to build upthe footbridge.200
Robot 8 • The DrawbridgeIsland Footbridge Step 11Run a #6 axlethrough the bridgeand secure it with thebushings as shown.201
Robot 8 • The DrawbridgeIsland Footbridge Step 12Inventing…Building a Bigger BridgeAnother way to lengthen the bridge is to build a non-moveableextension bridge segment on either side of the movable bascule.202
Putting It All TogetherRobot 8 • The DrawbridgeThe final steps include addition of the RCX, and snapping together of all of the previously built subassemblies.The RCX controls the movement of the Drawbridge and Island Footbridge, and soundswarning tones to let others know when the Drawbridge is lifting, lowering, and when it is safeagain for traffic to cross.Developing & Deploying…Lengthening Electric WiresAttach a short wire to the end of the light sensor wire. This willlengthen the electrical wire so that it will reach the RCX. All of theelectrical wires can be attached end to end to continue the electricalconnection.203
Robot 8 • The DrawbridgeFinal Step 0Attach the wires leading from thelight sensor to Input Port 1. Attach thewires leading from the touch sensor to InputPort 3. Attach the wires leading from the motorsto Output Port A and B.Final Step 1Snap all of the sub-assemblies of theDrawbridge and footbridge togetherfirmly, as shown.Program the RCX and thedrawbridge and footbridge will beready for the tallest ship!204
Robot 9Candy Wrapper Compactor205
Robot 9 • Candy Wrapper CompactorUnlike the trash compactor you may have in your home, the Candy WrapperCompactor is made for small pieces of trash—like candy wrappers.Compactors compress waste so that two to three times as much trash fits inthe same size space. This saves storage space, removal time, and disposal labor.Special compactors called balers are used to bale or bundle recyclable materialsuch as cardboard, paper, plastics, metal, and so on for resale to a recyclingcompany. Compactors and balers are especially helpful in compacting waste onairplanes, ships, and restaurants. Compactors are also used to pack hazardousmaterials into drums for safer removal.The Candy Wrapper Compactor is made so that you can eat a bag ofHershey’s kisses at your desk, or in your room, and compact all of the wrappersinto one small and neat bale that can easily be recycled or tossed into thewastebasket. This will take care of the problem of little wrappers collectingeverywhere during snack time.This is how the Candy Wrapper Compactor works:■■■■The compactor will start when the touch sensor (start button) ispressed.The compressor motor will start and move the pump up and downpushing air through the tubing.The RCX Compressor Control motor will turn on and move the valveallowing the air to move through the tubing engaging the piston.The piston will fire, which will push the ram plate down.206
Robot 9 • Candy Wrapper Compactor■■When the ram plate descends, it compresses the candy wrappers.The RCX Compressor Control motor then reverses direction causingthe axle to hit the valve changing the airflow from the compressor sothat the piston pulls the ram plate back up and ends the compactingprocess.The pneumatic compressor system can be used to supply pressurized air tosupply power for other robots or projects. As the pump begins to move, thepressure builds and provides power. Air tanks can be added to the system tostore the air so there is no delay in the supply of air power. For projects thatrequire more than one or two pumps to power additional movements, airpower can be supplied by adding a duplicate compressor on the other side ofthe RCX.207
Robot 9 • Candy Wrapper CompactorThe BinThe bin holds items to be compacted. The sides contain the waste so that the ram can compressthe waste.Bin Step 0Attach the turntable tothe beams to create thebase of the bin.208
Robot 9 • Candy Wrapper CompactorBin Step 1Attachthe large platefirst, and thenconnect the beams tobegin the frame of the bin.Bin Step 2Add beams to buildup the frame.209
Robot 9 • Candy Wrapper CompactorBin Step 3Attach the last beams inthe frame and adddecorative pieces.2<strong>10</strong>
Robot 9 • Candy Wrapper CompactorBin Step 4Add the corner pieces to guidethe ram as it moves up anddown. These corner pieceswork with the 2x2 bricks thatyou have the option of addingin Pneumatic Ram Step 0.Bin Step 5Connect the yellow liftarmsto create the structure thatholds the pneumatic ramsub-assembly. Add the 1x2bricks for additional support.211
The Pneumatic RamRobot 9 • Candy Wrapper CompactorThe pneumatic ram sub-assembly consists of a plate and a pneumatic piston that moves up anddown to compress waste. In our case the “waste” will be our candy wrappers.Pneumatic Ram Step 0Thread the axle through the top of thepiston and add the bushings to eachside to hold the piston in place. Next, slidethe long pin through the bottom of the piston.Slide the 2x2 plates with connectors onto each endof the long pin. And, connect the piston to the baseplate as shown.An additional way to ensure that the ram moves straight up and down is to add acolumn of five 2x2 bricks to each corner of the ram plate. These columns should be flushwith the corners of the plates, this is completed by attaching the columns directly into thecircles on the plates, rather than using the spaces between the circles as you typically would.212
Robot 9 • Candy Wrapper CompactorBricks & Chips…Pneumatic Ram StabilityThe addition of the four columns of 2x2 bricks to each corner of theplate is a suggestion for stability and is not shown in the step image.However, we urge you to try both methods to determine which oneworks best for you and the types of wrappers you like to crush.Bricks & Chips…Having Trouble?You might find it easier to attach the base plate inthis step to the bin prior to attaching the piston.The RCX Air Compressor ControlThe RCX Air Compressor Control sub-assembly controls the flow of air. The RCX is programmed topower the motor when the touch sensor is pressed.Inventing…Programming IdeasProgram the touch sensor to turn the compressor motor on to start theCandy Wrapper Compactor. Make sure to write the program to havethe start action of the touch sensor correspond with the Input Port 1.213
RCX Air Compressor Step 0Robot 9 • Candy Wrapper CompactorConnect the 2x4 plate to the RCX first to create a levelplatform for the motor. Next, connect the motor andthe electrical wire to RCX Input Port 1. This wire will beattached to the touch sensor in a later step. Finish thisstep by attaching the 1x2 plate which will provide alevel surface to attach the 1x4 TECHNIC brick.RCX Air Compressor Step 1Slide the 1x2 door rails into themotor slots located on the sidesas shown.214
RCX Air Compressor Step 2Robot 9 • Candy Wrapper CompactorSlide the axle into the axleconnector and then attachboth pieces to the motor. Addplates to secure the motor.RCX Air Compressor Step 3Place the valve underthe two 2x4 plates added inAir Compressor Step 2. Add theconnectors that will hold thecompressor.Bricks & Chips…The PneumaticsThe axle in RCX Air Compressor Step 2 will be the mechanism thatstrikes the pneumatic valve. The axle on the motor will shift the valveand airflow which is needed to lift the pneumatic ram sub- assembly upor push the sub-assembly down.215
Robot 9 • Candy Wrapper CompactorThe CompressorThe compressor sub-assembly consists of a motor with a gear. This will move the pump in and outto create air pressure; the air will then be pushed through the tubing to move the piston.Compressor Step 0Connect the beams to thebricks to build the frame.Add a pin to holdthe pump. You willconnect the pumpto this pin inCompressor Step 2.216
Robot 9 • Candy Wrapper CompactorCompressor Step 1Connect a beam to the side ofthe frame. This beam will holdthe motor you are going to addin Compressor Step 1.Compressor Step 2Slide the 1x2 flat platewith a door rail into theside of the motor andattach the motor to theframe. Next, add the 24tgear to the axle of themotor. Insert a pin intothe holes in the gear.Then, slide a connectoronto the thepump. Finally,connect the pumpto the pin on thegear added in thisstep, and the pin inthe frame added inCompressor Step 0.You may have to slightlybend the pump to maneuver thepit into the compressor assembly.Be careful not to break the pump.217
Putting it All TogetherRobot 9 • Candy Wrapper CompactorConnect the pneumatic tubing, electrical wires and all of the finished assemblies to complete theCandy Wrapper Compactor.Final Step 0Connect the compressor sub-assembly to the RCX aircompressor control sub-assembly. The compressor fits intothe connectors on the side of the RCX.You will also connect the axle on the pneumatic ram subassemblyinto the front most holes of the yellow liftarms inthe bin sub-assembly.218
Robot 9 • Candy Wrapper CompactorFinal Step 1Connect one end of a pneumatictube to the middle of the compressorsub-assembly and the other end tomiddle input of the valve on the RCXair compression control sub-assembly.In this step we have used acustomized short tube.Bricks & Chips…Tubing LengthMany builders find usually find that long tubes in some assembliesare cumbersome. It is quite simple to snip a piece of tubing to thelength that you need. However, if you do not want to cut yourtubing, a longer tube will work just as well.219
Robot 9 • Candy Wrapper CompactorFinal Step 2Using a long piece of tubing, connect one end of thetubing to the top output connection on the valve of theRCX air compressor sub-assembly, and the other end of thetubing to the top of the piston on the pneumatic ram subassemblyas shown.Final Step 3Using another long tube,connect one end to thebottom outputconnection on thevalve of the RCXair compressioncontrol sub-assemblyand other tend to thebottom of the piston onthe pneumatic ram.220
Robot 9 • Candy Wrapper CompactorFinal Step 4Run a second electricalwire to the motor on the RCX CompressorControl Assembly to Output Port C.Final Step 5Run a second electricalwire from the motor on the compressorsub-assembly to Output Port A.221
The Start ButtonRobot 9 • Candy Wrapper CompactorRemember that wire that you added to your robot in RCX Air CompressorStep 0? At this point your robot should have that free hanging wire.The Touch SensorAttach the end of the electrical wire connected to Input Port 1 to a touchsensor.The touch sensor is the start button for the Candy Wrapper Compactor. Thetouch sensor can be placed anywhere on the bin sub-assembly or even held inyour hand as a wired remote control. The touch sensor is the start button thatwill begin the wrapper compression process.Place the candy wrappers into the trash container bin sub-assembly andpress the touch sensor start button. The motor starts the pneumatic compressorsystem that slowly lowers the pneumatic ram sub-assembly. The pneumaticram sub-assembly exerts pressure on the trash, which flattens it. When thepneumatic ram pressure reaches its setpoint, the motor reverses and raises thepneumatic ram back up to the top of the compactor. Additional wrappers maybe added and the compactor can be started again, and the process can berepeated until the bin is full. The bottom plate in the trash container bin maybe removed for easy cleaning. The turntable allows the bin to be rotated asneeded.222
Robot <strong>10</strong>Robo-Hominid223
Robot <strong>10</strong> • Robo-HominidRobo-Hominid is a biped, or two legged walker. He moves by shifting hisweight from side to side. Robo-Hominid is very compact for a weight shiftingbiped. I invented him before I was aware of the large <strong>LEGO</strong> community ofadult fans. Most MINDSTORMS bipeds use a series of lift arms to build thelegs; Robo-Hominid’s legs are instead constructed of a number of bricks. I’venot seen any designs like him in all my <strong>LEGO</strong> biped Web searching. Robo-Hominid can walk forwards, backwards and turn right and left. He has twomotors, one for leaning left and right, and the other for leg striding.Robo-Hominid uses one motor in conjunction with the rotation sensor tolean onto his left foot. He then uses the other motor to drive the right leg forward.The touch sensors on the front of the legs tell the RCX when the rightleg is completely forward. The RCX then leans Robo-Hominid on his right leg,and drives the left leg forward.You can find the program for Robo-Hominid on the Syngress Solution Website (www.syngress.com/solutions). Robo-Hominid’s program allows him to walkforward a given distance, turn himself around 180 degrees, walk back to wherehe started, then turn himself around again.Bicks & Chips…Extra Parts Needed For Robo-HominidRobo-Hominid uses three parts that are not found in the RIS 2.0 or the<strong>Ultimate</strong> <strong>Builders</strong> Set. The first part is a rotation sensor that comes aspart of the <strong>LEGO</strong> MINDSTORMS <strong>Ultimate</strong> Accessories Kit. The other twoparts are worm gears that can be found in many of the Slizer kits.224
Robot <strong>10</strong> • Robo-HominidLeft LegBegin by putting together the left leg sub-assembly.Left Leg Step 0Left Leg Step 1225
Robot <strong>10</strong> • Robo-HominidLeft Leg Step 2Left Leg Step 3Left Leg Step 4226
Robot <strong>10</strong> • Robo-HominidLeft Leg Step 5Left Leg Step 6Left Leg Step 7227
Robot <strong>10</strong> • Robo-HominidLeft Leg Step 8Bricks & Chips…Movement PatternsTry programming other patterns for Robo-Hominid to walk in, asopposed to the simple back and forth program available for him onthe Syngress Solutions web site (www.syngress.com/solutions). Settingup a pre-arranged obstacle course and having Robo-Hominid try tonavigate around it is a good starting point for this.Left Leg Step 9228
Robot <strong>10</strong> • Robo-HominidLeft Leg Step <strong>10</strong>Left Leg Step 11Connect an electrical cable tothe touch sensor with the wirepointing to the inside of theleg. Leave the other endunconnected for now.229
Robot <strong>10</strong> • Robo-HominidLeft Leg Step 12Left Leg Step 13230
Robot <strong>10</strong> • Robo-HominidLeft Leg Step 14Left Leg Step 15231
Left Leg Step 16Robot <strong>10</strong> • Robo-HominidThe Right LegNow begin construction of the right leg sub-assembly, which is a mirror of the left leg sub-assembly.232
Robot <strong>10</strong> • Robo-HominidRight Leg Step 0Right Leg Step 1Right Leg Step 2Right Leg Step 3233
Right Leg Step 4Robot <strong>10</strong> • Robo-HominidRight Leg Step 5Right Leg Step 6234
Robot <strong>10</strong> • Robo-HominidRight Leg Step 7Right Leg Step 8Right Leg Step 9235
Right Leg Step <strong>10</strong>Robot <strong>10</strong> • Robo-HominidRight Leg Step 11236
Right Leg Step 12Robot <strong>10</strong> • Robo-HominidConnect one end of theelectrical cable to the touchsensor with the wirepointing to the inside ofthe leg. Leave the otherend unconnectedfor now.Right Leg Step 13237
Robot <strong>10</strong> • Robo-HominidRight Leg Step 14Right Leg Step 15238
Right Leg Step 16Robot <strong>10</strong> • Robo-HominidThe HipsNow begin building the hips sub-assembly.239
Robot <strong>10</strong> • Robo-HominidHips Step 0Hips Step 1240
Robot <strong>10</strong> • Robo-HominidHips Step 2Hips Step 3Hips Step 4241
Robot <strong>10</strong> • Robo-HominidHips Step 5Hips Step 6242
Robot <strong>10</strong> • Robo-HominidHips Step 7Hips Step 8The DriveNow begin constructing the drive sub-assembly.243
Robot <strong>10</strong> • Robo-HominidDrive Step 0Developing & Deploying…The Drive sub-assemblyThe Drive sub-assembly translates powerfrom the RCX brick to the legs.Drive Step 1Drive Step 2Connect an electricalcable to the top of themotor, with the wirepointing towards theback of the motor asshown. Leave the otherend of the cableunconnected for now.244
Robot <strong>10</strong> • Robo-HominidDrive Step 3Drive Step 4Drive Step 5245
Robot <strong>10</strong> • Robo-HominidDrive Step 6246
Robot <strong>10</strong> • Robo-HominidDrive Step 7Drive Step 8247
Robot <strong>10</strong> • Robo-HominidDrive Step 9248
Robot <strong>10</strong> • Robo-HominidDrive Step <strong>10</strong>249
Robot <strong>10</strong> • Robo-HominidDrive Step 11250
Robot <strong>10</strong> • Robo-HominidDrive Step 12251
Robot <strong>10</strong> • Robo-HominidDrive Step 13252
Robot <strong>10</strong> • Robo-HominidDrive Step 14Connect an electrical cable to thetop of the motor with the wirepointing towards the back of themotor. Leave the other end ofthe cable unconnected for now.253
Robot <strong>10</strong> • Robo-HominidDrive Step 15Drive Step 16254
Robot <strong>10</strong> • Robo-HominidDrive Step 17255
Robot <strong>10</strong> • Robo-HominidDrive Step 18256
Robot <strong>10</strong> • Robo-HominidDrive Step 19Drive Step 20257
Putting It All TogetherRobot <strong>10</strong> • Robo-HominidIt’s now time to put all of the sub-assemblies you have constructed together to complete the finishedRobo-Hominid.Final Step 0Final Step 1Connect the left and right leg subassembliesto the hips sub-assembly.258
Robot <strong>10</strong> • Robo-HominidFinal Step 2Final Step 3Attach the drive sub-assembly tothe hips sub-assembly, as shown.259
Robot <strong>10</strong> • Robo-HominidFinal Step 4Attach the RCXbrick, as shown.Final Step 5260
Robot <strong>10</strong> • Robo-HominidFinal Step 6Hook theleft legsubassembly’stouch sensor cableto the Input Port 1.Final Step 7Hook theright leg subassembly’stouch sensorcable to the InputPort 1.261
Robot <strong>10</strong> • Robo-HominidFinal Step 8Hookthe rotationsensor’s cable tothe Input Port 3.Final Step 9Hook the leftmotor’s cableto the OutputPort C.262
Robot <strong>10</strong> • Robo-HominidFinal Step <strong>10</strong>Hook the rightmotor’scable tothe Output Port A.263
SYNGRESS SOLUTIONS…AVAILABLE NOWORDER atwww.syngress.comBuilding Robots with <strong>LEGO</strong> MINDSTORMSThe <strong>LEGO</strong> MINDSTORMS Robotics Invention System (RIS) has been called“the most creative play system ever developed.” This book unleashes thefull power and potential of the tools, bricks, and components that make up<strong>LEGO</strong> MINDSTORMS. Some of the world's leading <strong>LEGO</strong> MINDSTORMSinventors share their knowledge and development secrets. You will discoveran incredible range of ideas to inspire your next invention. This is the ultimateinsider's look at <strong>LEGO</strong> MINDSTORMS and is the perfect bookwhether you build world-class competitive robots or just like to messaround for the fun of it.ISBN: 1-928994-67-9Price: $29.95 US, $46.95 CANMore Great Books in the Syngress <strong>10</strong> <strong>Cool</strong> Series!The <strong>10</strong> <strong>Cool</strong> Series covers the most popular MINDSTORMS kits from <strong>LEGO</strong> and these books giveyou everything you need to create cool robotics projects in under one hour.AVAILABLE NOWORDER atwww.syngress.com<strong>10</strong> <strong>Cool</strong> <strong>LEGO</strong> MINDSTORMSDark Side Robots,Transports, and CreaturesISBN: 1-931836-59-0Price: $24.95 US, $38.95 CANAVAILABLE NOWORDER atwww.syngress.com<strong>10</strong> <strong>Cool</strong> <strong>LEGO</strong> MINDSTORMSRobotics InventionSystems 2 <strong>Projects</strong>ISBN: 1-931836-61-2Price: $24.95 US, $38.95 CANsolutions@syngress.com