A9900329 Rocket 3 Touring Aux & Fog Lamp Kit EN - Pro Italia Online
A9900329 Rocket 3 Touring Aux & Fog Lamp Kit EN - Pro Italia Online
A9900329 Rocket 3 Touring Aux & Fog Lamp Kit EN - Pro Italia Online

Create successful ePaper yourself
Turn your PDF publications into a flip-book with our unique Google optimized e-Paper software.
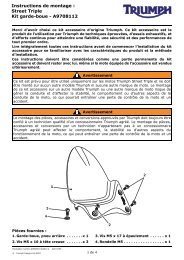
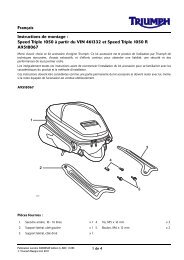
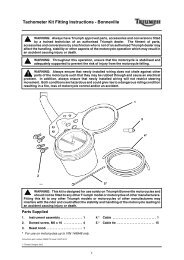
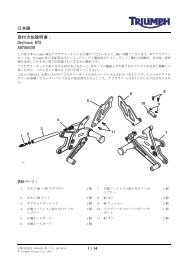
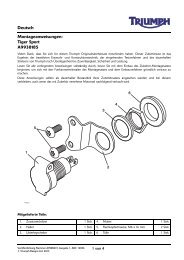
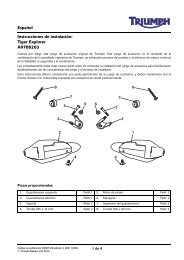
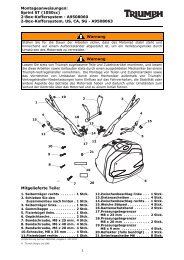
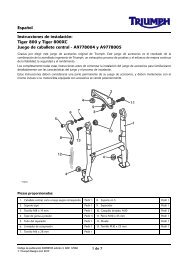
33. Position the lamp bowl onto the mounting bar lampbracket and secure with the M8 x 35 screw, spacerand nut as shown below. Do not fully tighten thefixings at this stage.37. Locate the new mounting bar assembly in positionon the lower yoke and secure with two of the newM6 x 20 screws at the front right hand and rear lefthand mounting points.1. <strong>Lamp</strong> bowl2. <strong>Lamp</strong> bracket3. Screw, M8 x 354. Spacer5. Nut34. For kit A9938085: Connect the white lead on thelamp harness to the white lead on the lens assembly,black lead on the harness to black lead on the lensassembly.For kit A9938095: Connect the white lead on thelamp harness to the white lead on the lens assembly,black lead on the harness to black lead on the insideof the lamp bowl.1. Mounting bar2. Screw, front right hand3. Screw, rear left hand38. Fit the remaining M6 fixing at the rear right handmounting point ensuring it also retains the brakehose clip.1. Lens assembly (A9938095 shown)2. <strong>Lamp</strong> bowl (A9938095 shown)3. White lead4. Black lead35. Refit the lamp lens assembly and secure with thefixing screw.36. Repeat steps 28 - 34 for the right hand lampassembly.1. Mounting bar2. Screw, rear right hand3. Brake hose clip39. Tighten the mounting bar fixings to 9 Nm.40. Feed the indicator harnesses following the routingnoted on removal, through the cable guide and intothe headlamp bowl.6 of 10