A9900329 Rocket 3 Touring Aux & Fog Lamp Kit EN - Pro Italia Online
A9900329 Rocket 3 Touring Aux & Fog Lamp Kit EN - Pro Italia Online
A9900329 Rocket 3 Touring Aux & Fog Lamp Kit EN - Pro Italia Online

Create successful ePaper yourself
Turn your PDF publications into a flip-book with our unique Google optimized e-Paper software.
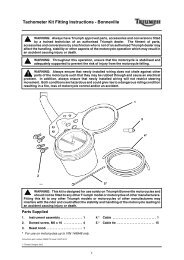
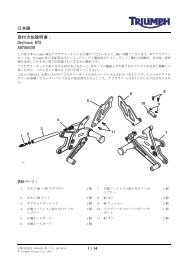
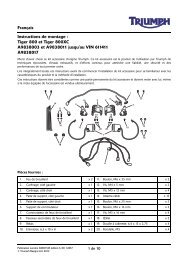
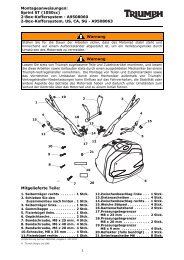
16. Feed one of the new lamp wiring harnesses throughthe slot in the new mounting bar until it emergesfrom the left hand end of the mounting bar.WarningEnsure the wiring harness does not become trappedwhen fitting the indicator assemblies to the mountingbar. A trapped harness could result in damage to thewiring which could lead to a motorcycle electrical failureresulting in loss of motorcycle control and an accident.22. Position the left hand indicator mounting spacer ontothe left hand indicator as shown.1. <strong>Lamp</strong> harness2. Slot, mounting bar17. Feed the second lamp harness through the slot, inthe opposite direction, until it emerges from the righthand side of the mounting bar.18. Carefully feed the right hand indicator harness,identified with the section of red tape, through theright hand end of the new lamp mounting bar.1. Indicator, left hand2. Mounting spacer, left hand23. Adjust the harness length to allow the indicator to bepositioned correctly on the mounting bar.24. Fit the lamp mounting bracket, as shown. Secure thebracket and left hand indicator to the mounting barwith a M8 x 25 screw.1. Indicator harness, RH2. Mounting bar, right hand side19. Retrieve the harness through the centre slot in themounting bar.20. Carefully feed the left hand indicator harnessthrough the left hand end of the new lampmounting bar.21. Retrieve the harness through the centre slot in themounting bar.1. <strong>Lamp</strong> mounting bracket2. Indicator, left hand3. Screw, M8 x 254 of 10